Today I’ve got a SUPER EASY project you are going to love!
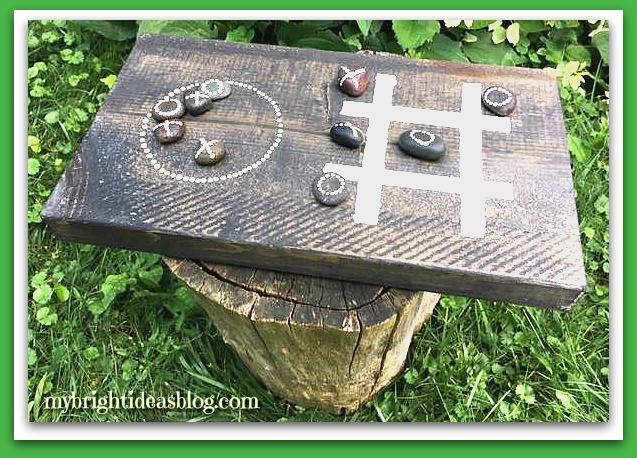
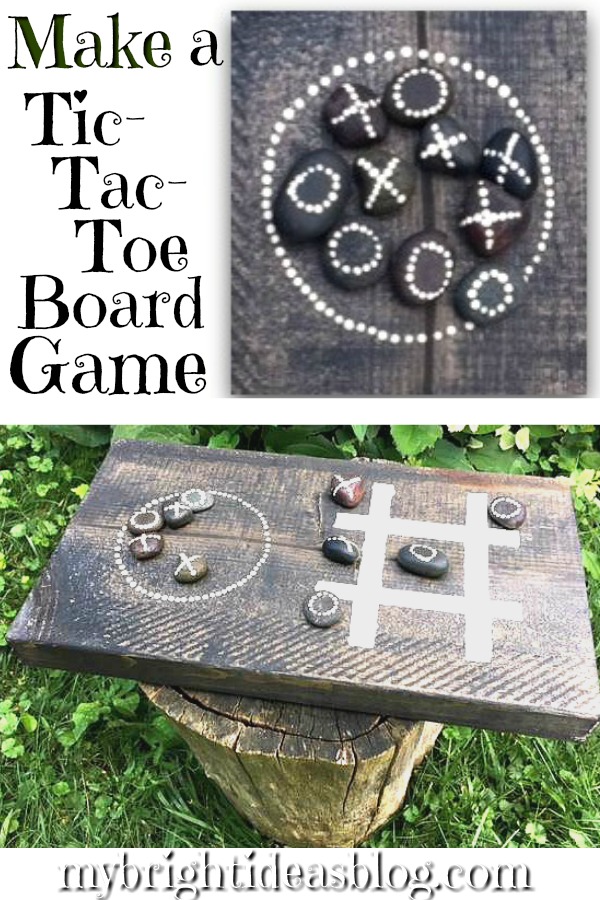
Outdoor Tic Tac Toe Board Game
I’ve been working on some of my wooden projects this week but every day we’ve had sun then clouds and then raining cats and dogs. One of my projects (a wooden sundial) to do with the kids requires a full day of full sun. So there, once again, we are running into the house to dodge raindrops with our sundial. What can you do but be patient and find another project to do. What funny summer weather!
I want to give credit to this bright idea….it was inspired by https://tarynwhiteaker.com/outdoor-tic-tac-toe-game/?m. When I saw her blog post, I immediately put it on my to do list. Outdoor games….hmmm it’s got me thinking about other giant outdoor games for summer family fun.
What you will need:
-
- 10 flat rocks (I used the bagged ones from the dollar store)
- a rectangle block of scrap wood
- wood stain and rag to apply it
- white/cream craft paint
- craft paint brush
- painters tape
- (optional) clear varnish (clear spray paint is handy for the rocks)
Lets Get Started!
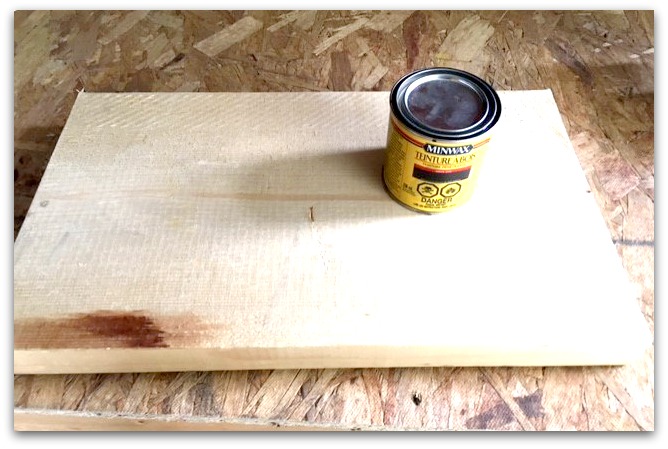 I hope you have a piece of wood left over from another project that you can use. The thickness and width and length is completely up to you. I had this piece of pine left over from a mirror project I made in the early spring. I will put a link to it at the bottom of this post.
The the scrap of wood was…9×16 (23cm x 41cm) and 2 inches thick.
![]() If there is any rough edges give the corners a bit of a sanding. We don’t want slivers. If you want it to be a smooth tic tac toe board, then you will need to put some more time into sanding it.
If there is any rough edges give the corners a bit of a sanding. We don’t want slivers. If you want it to be a smooth tic tac toe board, then you will need to put some more time into sanding it.
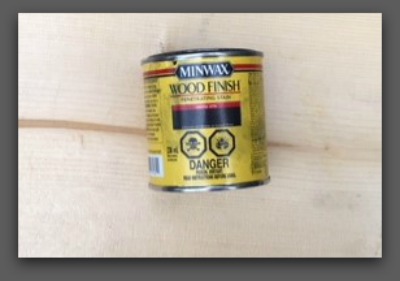
The stain I used is by MINIWAX called “Ebony”. If you put a thin layer on you get a grey/black effect. If you put on 2 heavy coats it will be nearly black. I used one coat for this project. I really like!
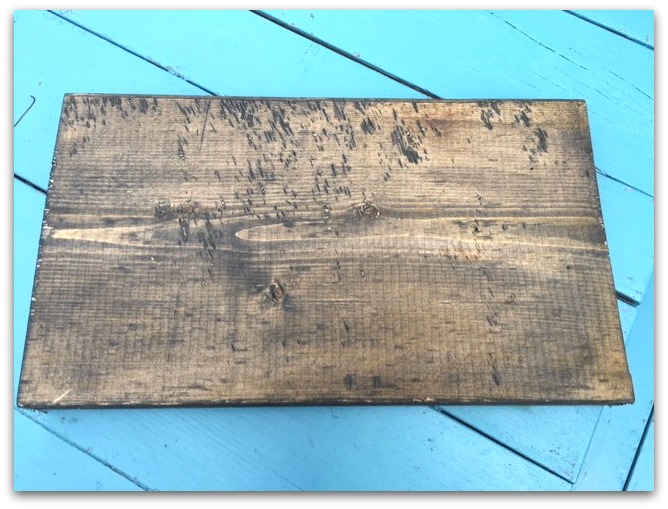
After the board is stained you will see that it’s quite banged up. I really like the rough, distressed lumber look.
You should give the stain plenty of time to dry before moving on to the next step. It started to rain so I abandoned this project until the next day.
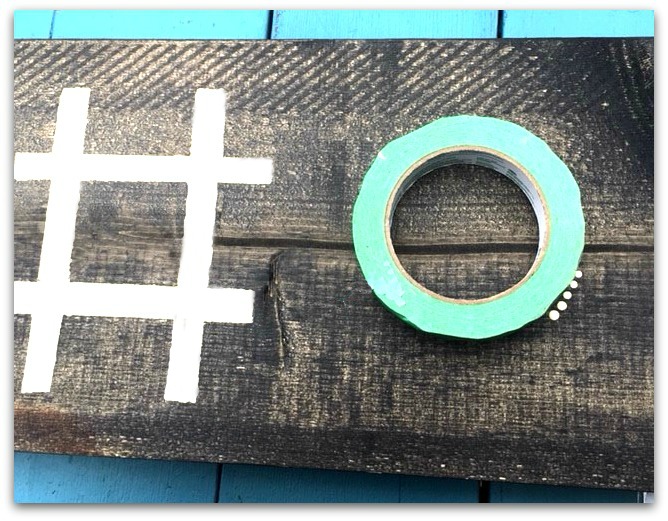
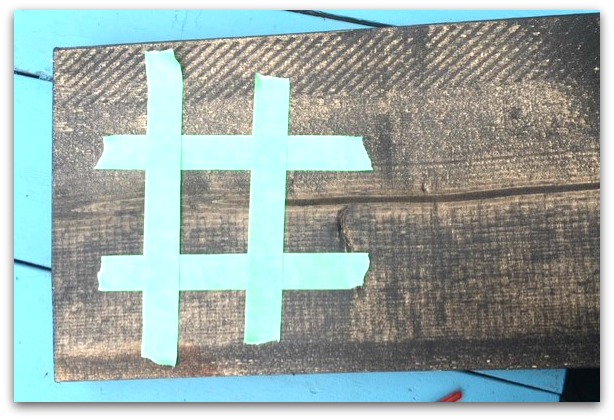 This photo shows me using painters tape to show me where I would want to paint the lines.
Grab Your Paint Brush!
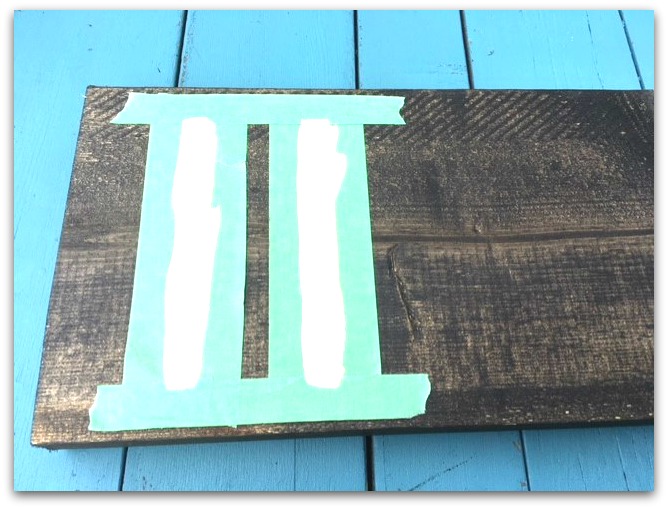 Using painters tape, mask out where to have the first two lines. Apply a coat of paint and wait 10 mins. It may need another coat of paint. Craft paint dries fairly quick but I gave it 45 mins and then was able to remove the tape and put in the opposite direction. Have a ruler handy to check the distance from the sides is equal.
If all of this is too tedious, you could just paint the lines on free hand. If you were doing your tic tac toe on paper or sand it would look more like the tape in the previous photo. Maybe I’ll try that next time. If you make a mistake you can wipe it off quickly with a wet cloth.
I was looking at the painters tape and thought hmmm…..why not paint a spot for the stones to rest. I love this technique for perfect dots. Dip your paintbrush handle into the paint and dab it on the surface 1-3 times and then reapply with paint and carry on.
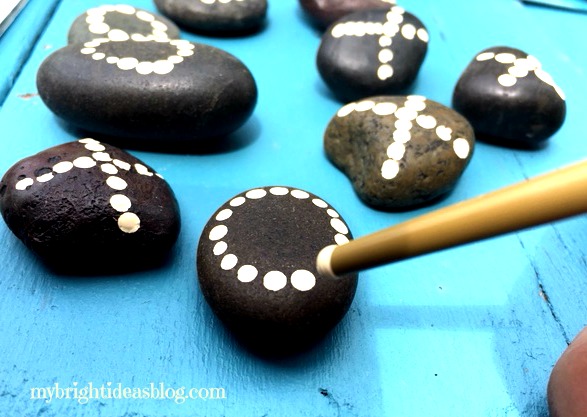
Originally I was going to use a stencil on the stones…..but that was not a success. Then I was going to free hand paint the X’s and O’s and that turned out ugly too. So my solution was to do the dabbed-dots again.
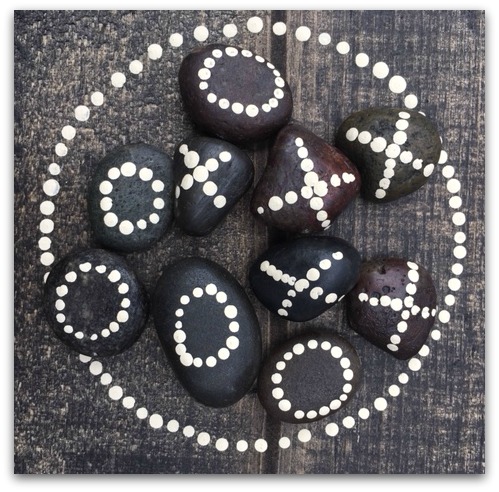
This looks so much better than the ones I hand painted. LOL!
 This is so easy I wonder if I should make some more for housewarming gifts….or maybe sell them at my work craft table. Several of my recent posts have made it to the craft table at work. Fridge magnets, wind spinners, the memory wire bracelets and all those items add some sparkle to the other fabric and knitted items.
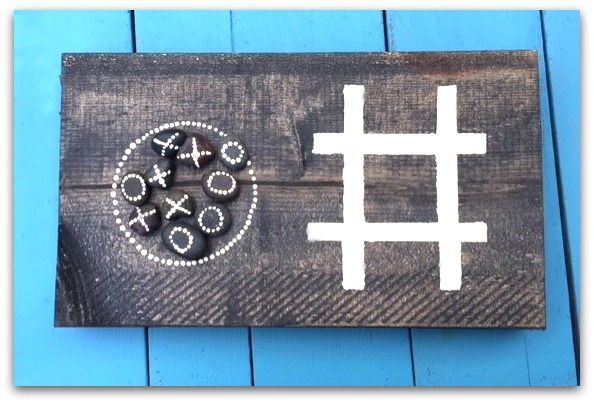
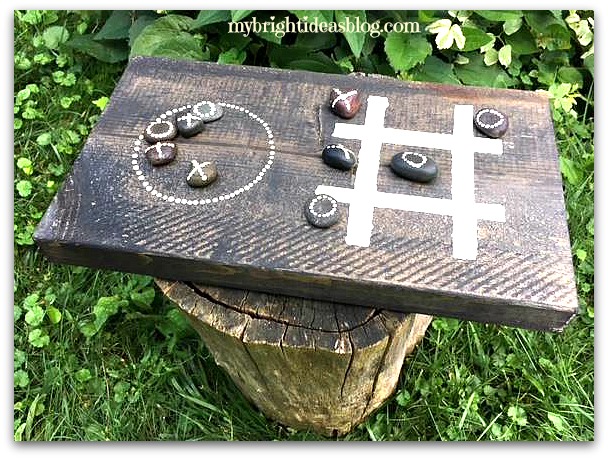 If you put a clear coat of varnish on the wood it will be ready to stay out doors all summer long come rain or shine. It adds an activity and rustic charm to the deck or patio.
(As an after thought, the rain lifted some of the dots off the stones so they should get a clear coat of spray paint.)
Thanks for reading! Enjoy your Sunday and get outside its going to be a beautiful day!


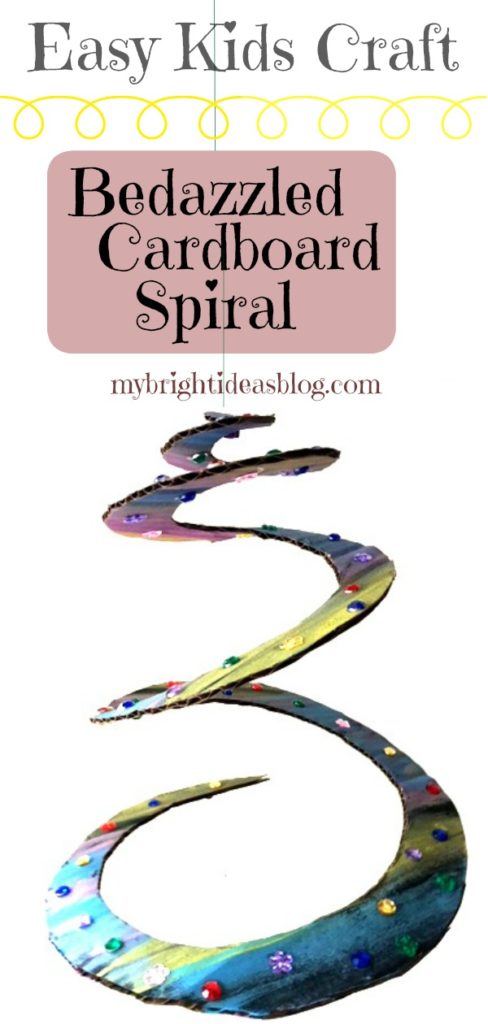
Cardboard Spiral Craft – Easy Kids Project
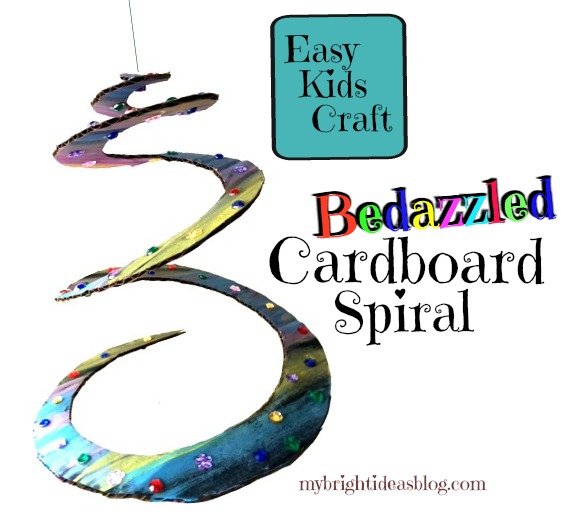
How to Make a Spinning Cardboard Spiral-Easy Craft!
This idea will be a hit with kids as young as toddlers to pre-teen. It’s likely you already have all the craft supplies in your cupboard which makes it the perfect anytime craft.
 You will need:
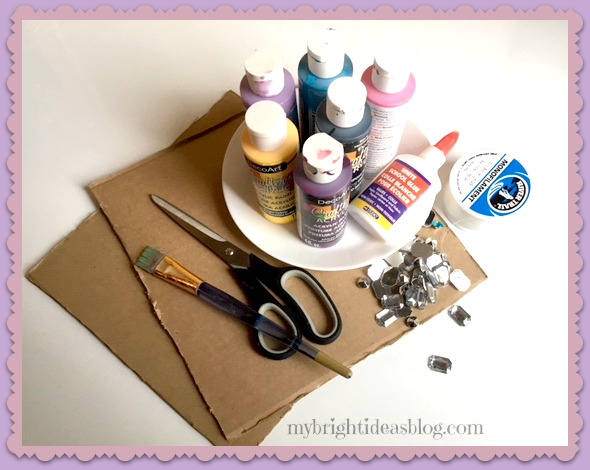
- cardboard
- scissors
- glue
- paint
- paintbrush
- gems or stickers
- yarn or fishing line
- one pony bead or small bell
- pencil
- plate to trace the circle
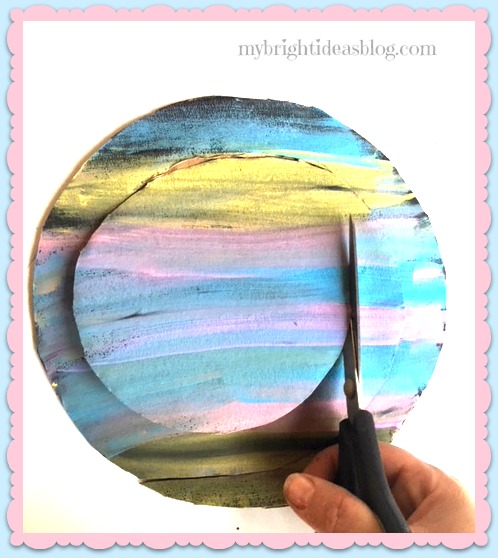
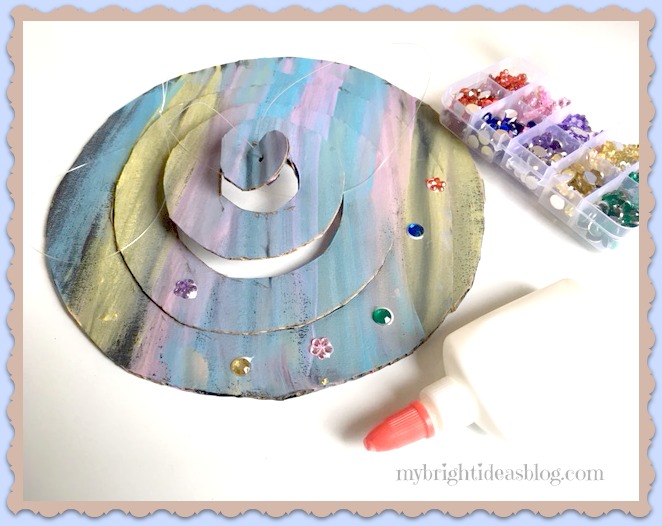
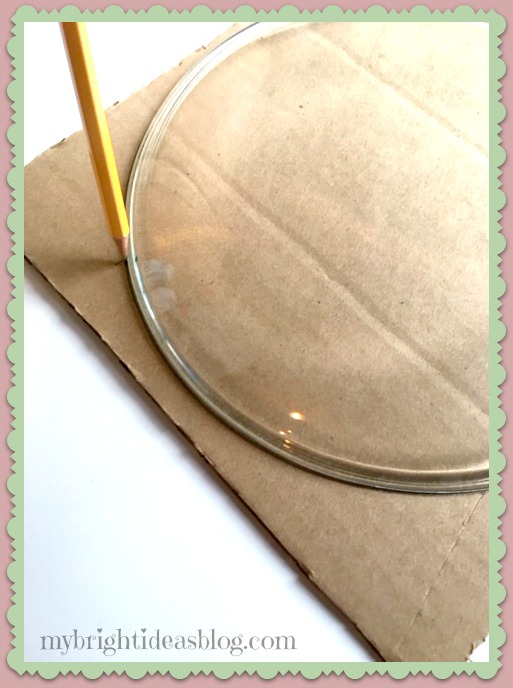 I started with a square piece of cardboard about 11 inches x 11 inches (27cm x 27cm) wide. Trace a 9 or 10 inch plate (20cm wide plate) on the cardboard for a perfect circle.
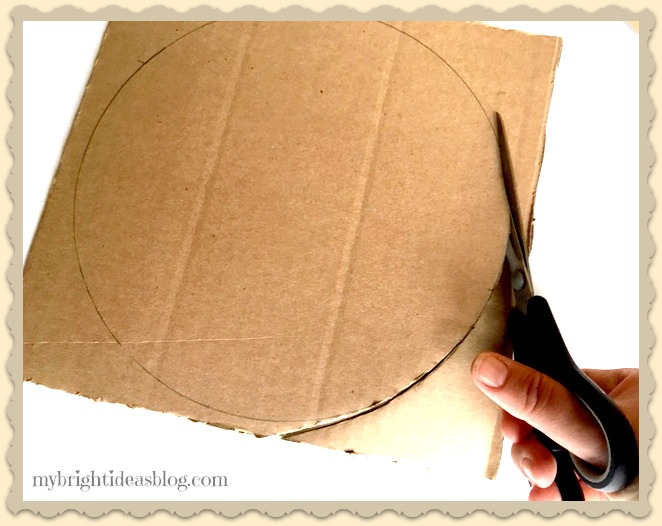 Cut the circle from the cardboard. This is not a job for the little kids. Big scissors and strong hands are needed for this part of the project.
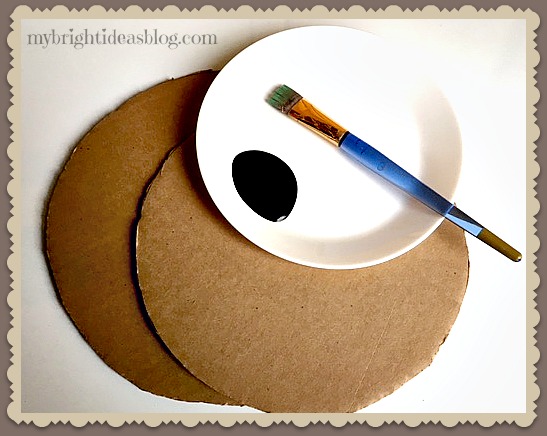 So that the brown cardboard doesn’t show through the I painted a black base coat.
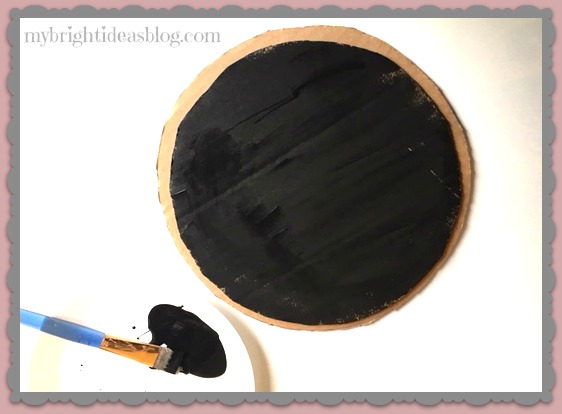
Paint both sides of cardboard and allow a few minutes for this to dry.
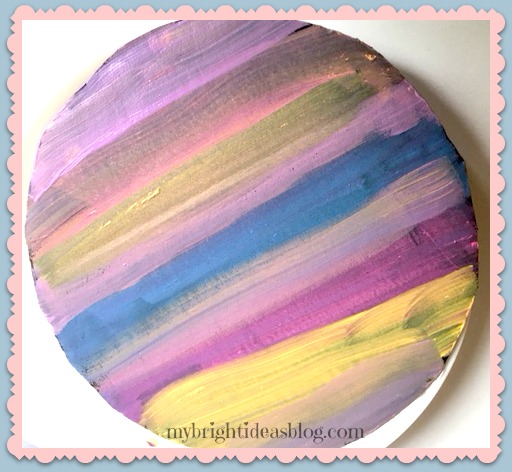
Now paint over the base coat with what ever design or colors you want. You will need to paint both sides again. Allow a good 10 minutes for this paint to dry before moving on to the next step.
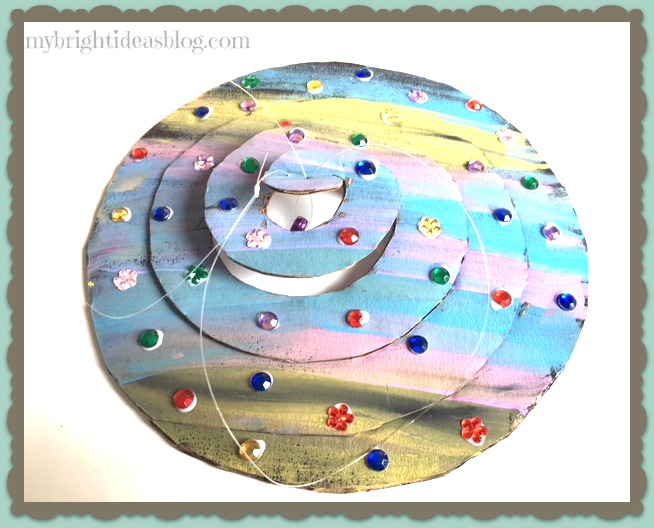
 Again, the strong hands and big scissors are needed to cut a consistent spiral in the cardboard. Begin cutting around the circle 1/2 inch (1 cm) wide.
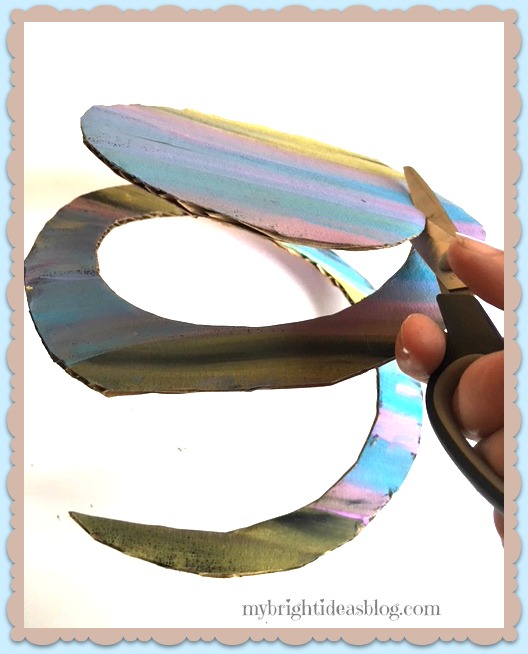
Keep on cutting in a circle until you get to the middle.
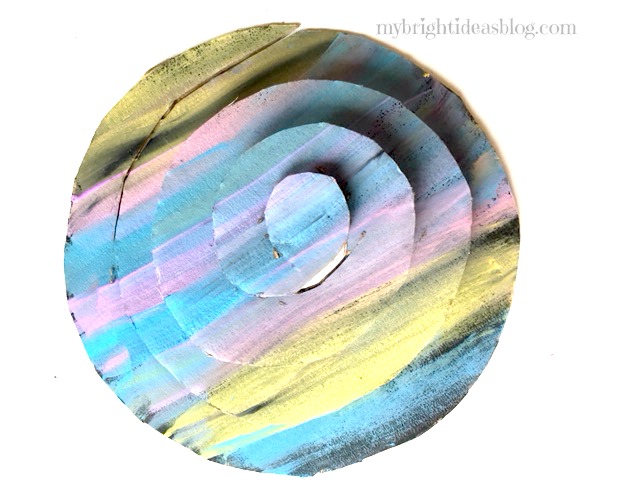 Voila! The spiral is complete.
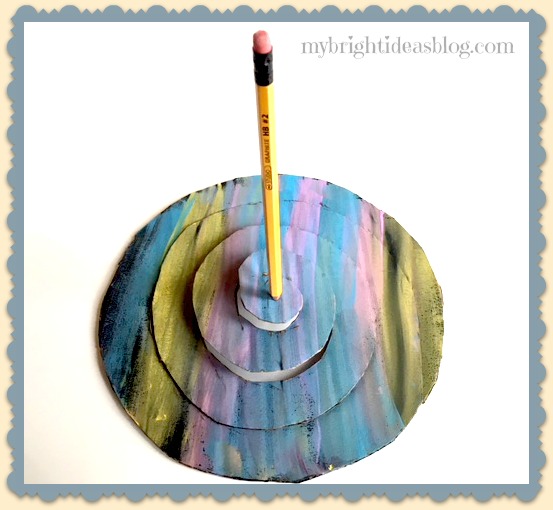 Use a pencil to poke a hole in the centre of the cardboard.
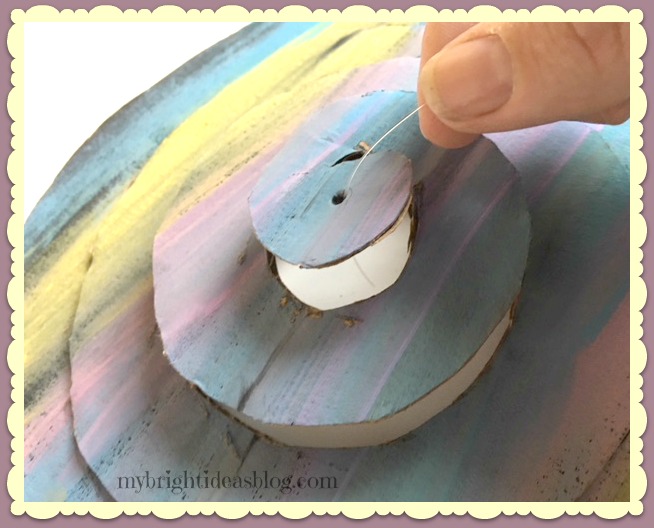
Loop some yarn or fishing line through the end. To make it spin the key is to loop a pony bead or a tiny bell under the hole and then pull the line back up through the hole.
I didn’t take a photo of this step so here it is afterward to show the pony bead. The fishing line is simply looped through the cardboard and then the bead and back out through the hole again.
This step allows for it to spin better than if you just tied a knot in the cardboard.
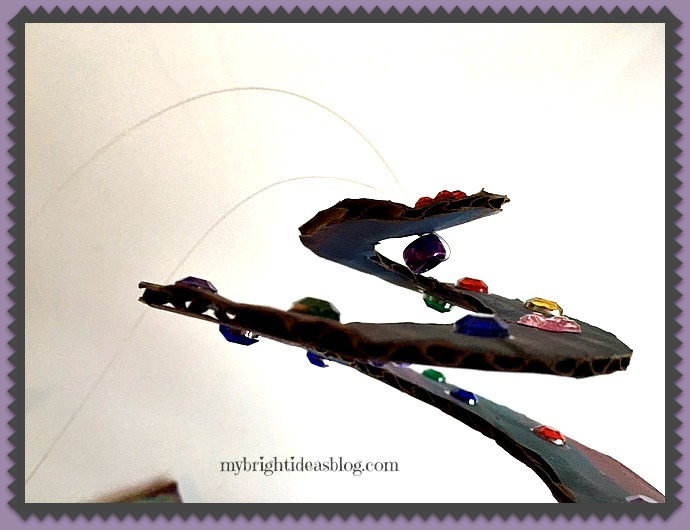
BEDAZZLE TIME!
Bedazzle: (verb) The art of taking ordinary things and making them EXTRAORDINARY by adding sparkles, rhinestones, glitter, stars, beads, etc.
This is the fun part!
Gather your gems, rhinestones and glue to decorate the spiral. The little box of gems in the photo above is from Dollar Tree for $1.25 – it looks small but there is enough to last a lot more projects! I love a cheap craft!
For toddlers you could use shiny stickers instead. Glitter glue would also jazz this up and hide some of the unintentional globs of glue that may end up drying on the project.
After the first side is dry, flip it over and repeat on the bottom side. This spiral is going to look great no matter what angle you are looking at it.
Allow it to fully dry.
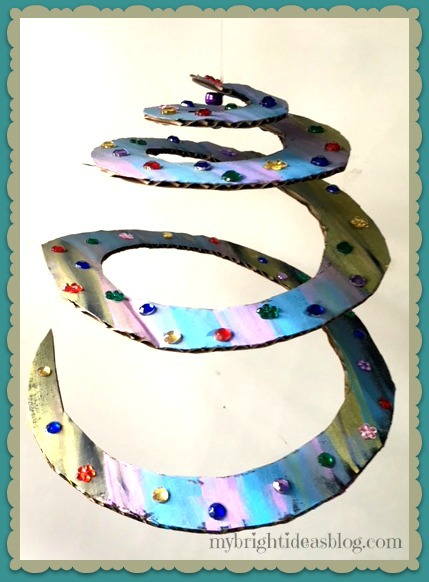
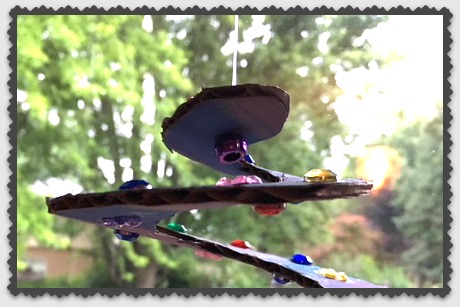
And you are done! Hang the spiral by taping the end of the string or line to the ceiling so it can spin. I used an S hook to hang it from a curtain rod.
Remember to Pin this on Pinterest!
Toilet Paper Roll Crafts-Use your loo roll tube for easy Crafts!
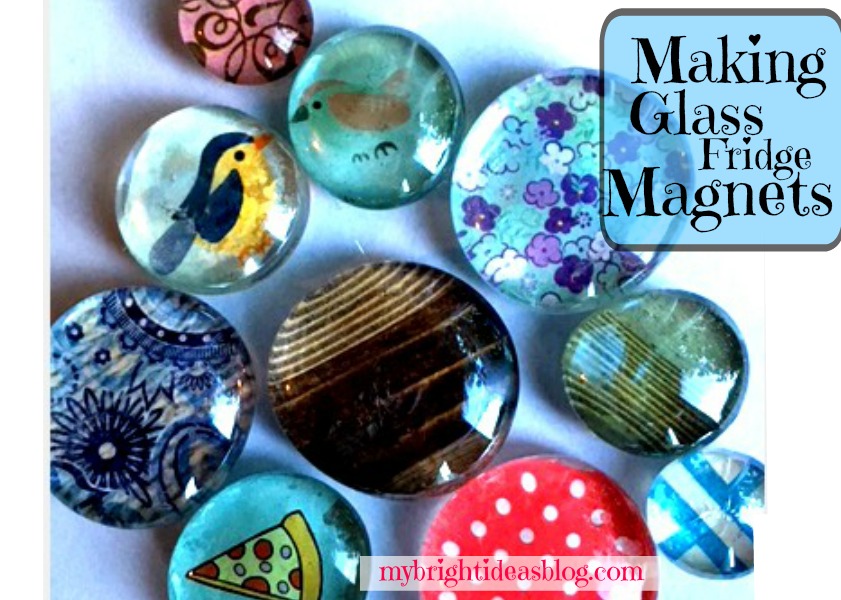
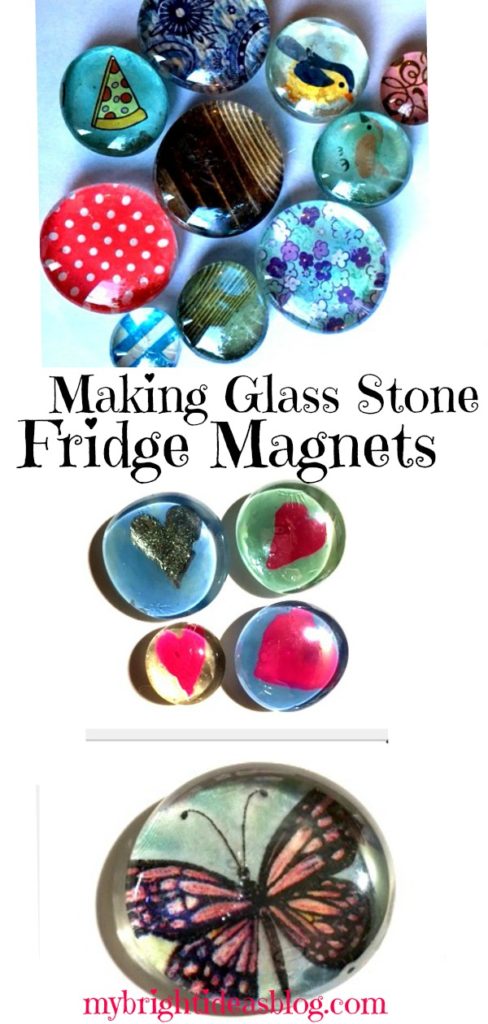
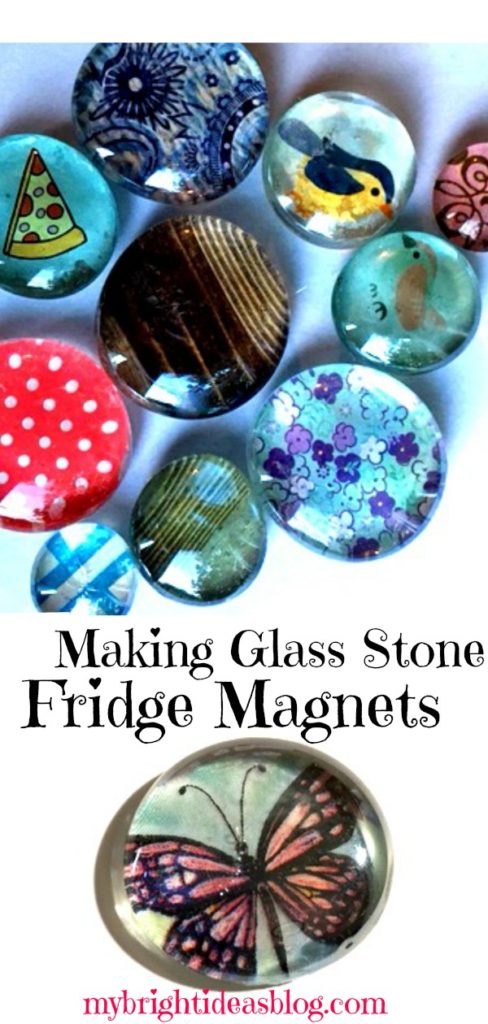
Make Glass Stone Gems into Gorgeous Magnets
Make Glass Stone Gems into Gorgeous Magnets
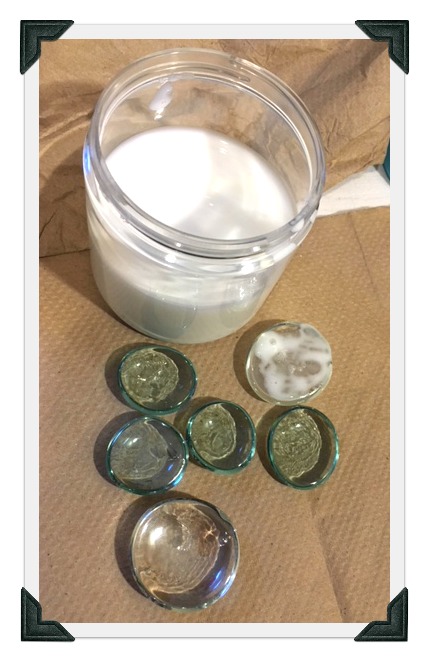
This craft is so crazy easy I can’t believe I didn’t make it sooner! Glass gems have a wonderful magnifying effect if you paint or glue a picture to the back of it. Then add a magnet to the back of it and you have a really cool fridge magnet gift or item to sell!
As I mentioned a week or two ago…the craft table at my work office is pretty empty so this is another project the kids and I have been working on to sell.
We will look at 2 ways to make a big impact with Glass Gem Fridge Magnets
Nail Polish Technique
 You will need:
- Clear Glass Gems (flat on one side)
- Nail Polish
- Tooth Picks
- E6000 Glue or Hot Glue Gun
- Magnets
I have worked with 3 sizes (3/4 of an inch, 1 inch and 1 1/2 inches) of clear glass gems for this project. The small and medium sizes I purchased from the dollar tree. The largest size is from Michaels. Both stores also sell the magnets in various sizes also.
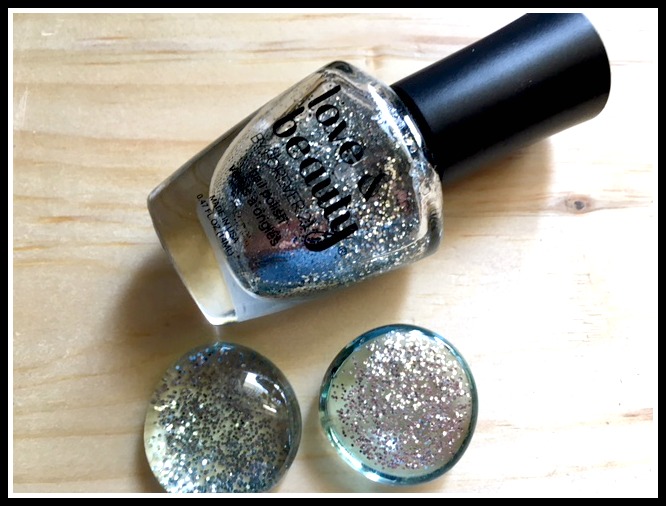
We really enjoyed using our sparkly nail polishes. Paint the bottom flat side of the stone with sparkle nail polish. If it seems sparkly but clear…allow to dry and put another solid cover over the sparkle layer.
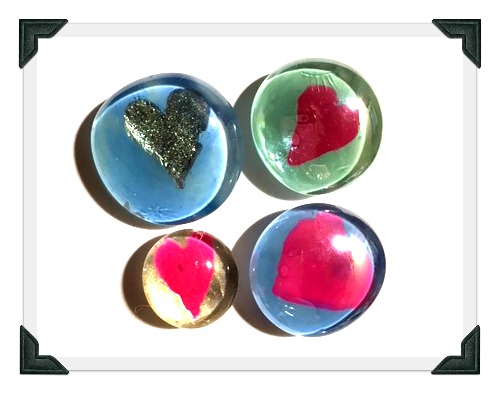
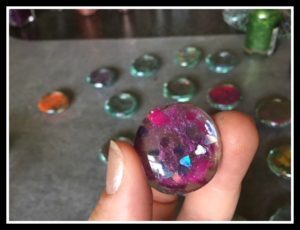
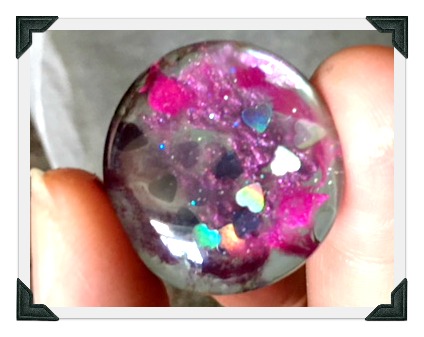 This is a pink love heart sparkle nail polish with clear and solid pink polish over top. When its dry it looks like its magnified.
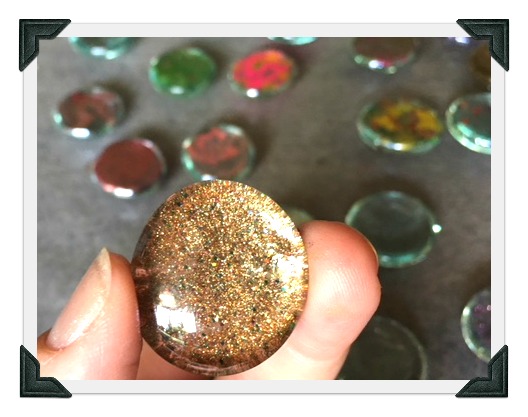
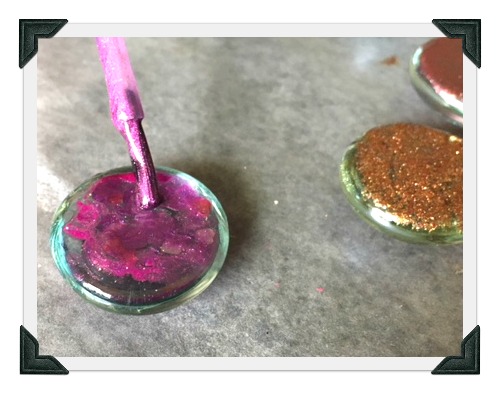
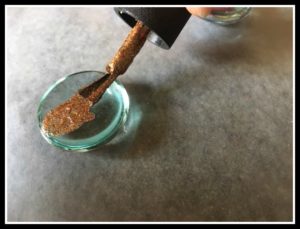
This glass gem has one thick coat of copper/gold nail polish. I love it! What a fabulous nail polish for these glass stone magnets!
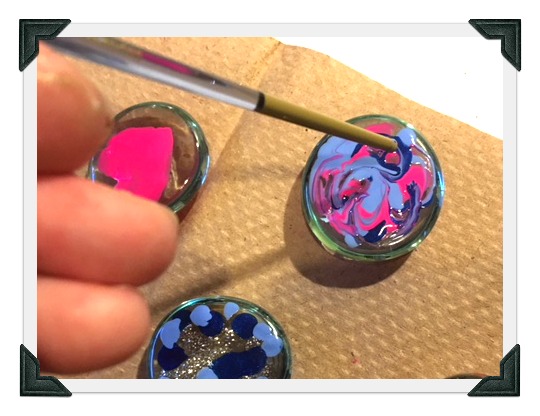
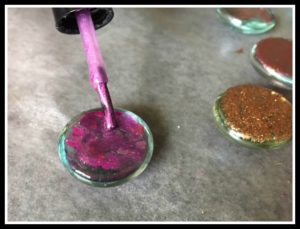
In the above photo you can see we put several dots on the glass stone and took a tooth pick (or end of a paint brush) and simply swirled the nail polish. The kids loved trying this!
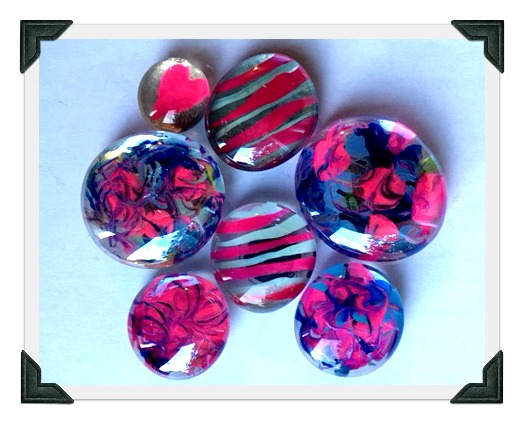
Swirls, stripes and love hearts…
To make the hearts, I took a pink bottle of nail polish and made a love heart on it. After it had fully dried I painted over it with silver sparkle, blue and turquoise for a really sweet gift magnet.
 Allow all nail polish to dry fully and then glue the magnet on the back of the glass stone. For my nail polish magnets I used the E6000 glue which is very durable and very smelly. If you choose to do the same, open the windows and allow ventilation. It’s very smelly stuff. It also is slower to dry so watch that the magnets don’t shift while drying. I found that I needed to space the magnets apart during this process. If placed too close together the magnets would pull towards each other and not dry in the middle of the glass stone. Do not touch for several hours or leave to dry overnight. Using a hot glue gun instead will fix the stinky and shifty problems. But watch your fingers. Neither glue option is great for the kids, so I would recommend the grown ups do the gluing.
Seriously though, open the window. Between the smells of all the nail polish bottles and the E6000 glue you are sure to have a headache and get grouchy. Not allowed! This project is too awesome to get grouchy!
Now lets move on to another lovely option….
Paper Technique
You will need:
- Patterned Paper or Napkins
- Scissors or hole punch
- Glue or Mod Podge
- Paint Brush or Sponge Brush
- E6000 or Hot Glue Gun
- Magnets
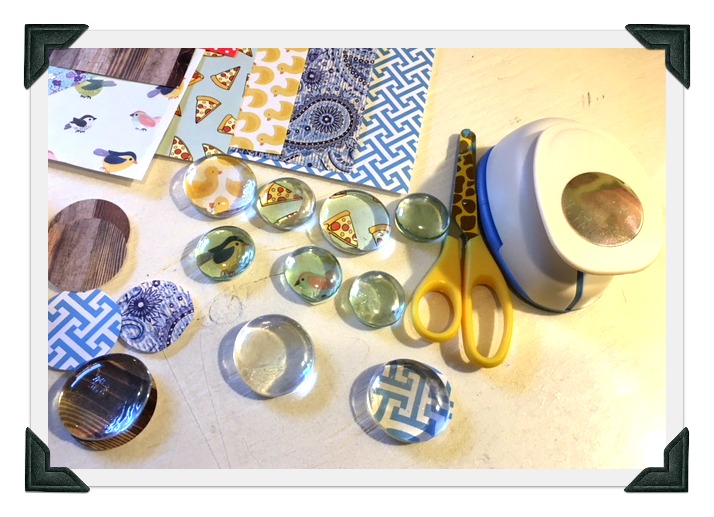 The variety of designs of scrapbooking paper is perfect for this project. But you could also use colorful napkins, tissue paper, photos, something special you draw or you print off. You just need to cut it to size and glue it on.
If you have a hole punch the right size by all means use it for a perfect circle. If not just use scissors and cut it slightly smaller than the stone.
 Brush mod podge or glue on the flat side of the glass stone. Add the paper circle with design facing down. When you are finished and flip it over it will show the beautiful paper through the glass.
Press the paper down. Brush on another coat of glue.
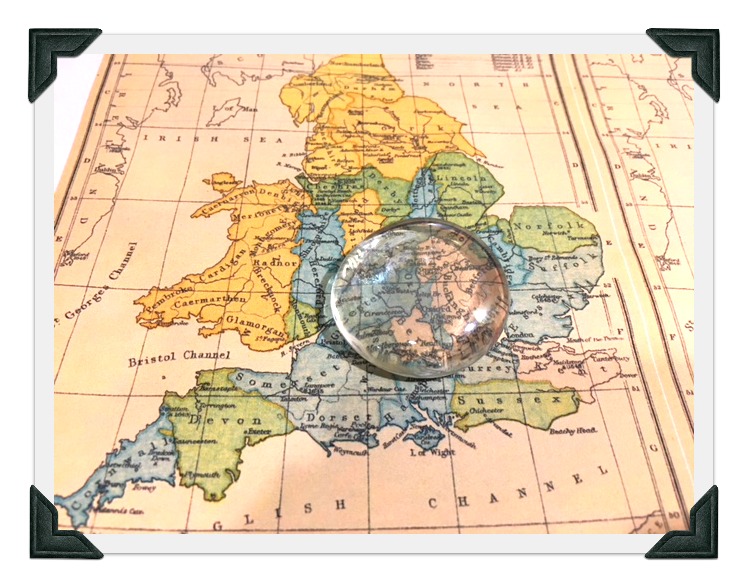 One of my favorite things was using a map. What a fantastic souvenir of a trip! Use the maps and train tickets or even concert tickets for your fridge magnets.
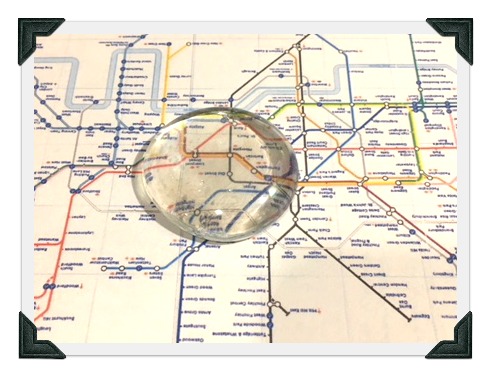
This is a map of the London underground. I wonder if it’s upside down in this picture. LOL!

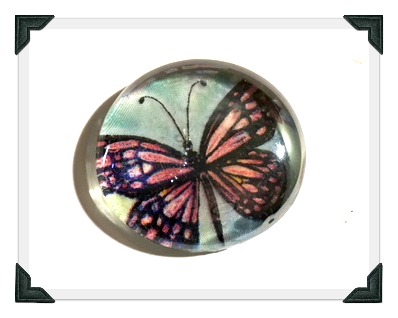
Dinner napkins come in beautiful patterns and I’ve just discovered you can glue/mod podge them to decorate all sorts of crafty projects. Hip hip hurray! Check out the butterfly magnets I made from napkins.
I cut down the napkin to size and removed all the layers of paper except the top one. This is like gluing tissue paper so handle with care.
 I recommend putting a layer of glue on the stone gem and add the tissue or napkin on top. Then after it is fairly dry, I would put another coat of glue on top of the paper to seal it from this side. If you put it on too soon it could shift or tear the tissue.
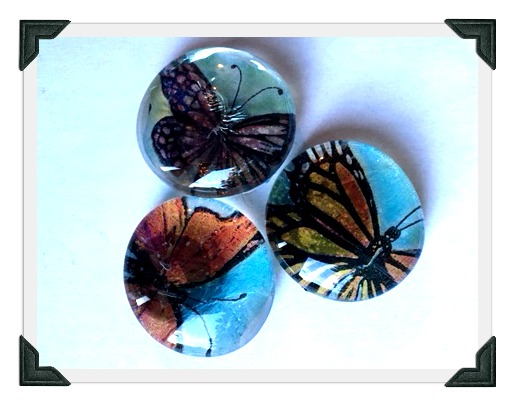 When it is all dry glue the magnet to the back. As you can see from the butterfly on the bottom left of this photo-the magnet may show through the finished design. This is because the tissue was so thin it made it a bit transparent. I could have prevented this by putting a bit of paper on the back or even adding a coat of opaque paint or nail polish.
This project is a bit addictive! So its a good thing we are taking them to the craft table at work and sharing their beauty with others. To display these for sale we are using an inexpensive cookie sheet.
As we have invitations to parties and BBQ’s this summer this is a great hostess gift for the kids to show their gratitude.
Check out this previous blog post where I also used the nail polish gems with wire for a suncatcher for the garden.
…
Make Memory Wire Bead Bracelets
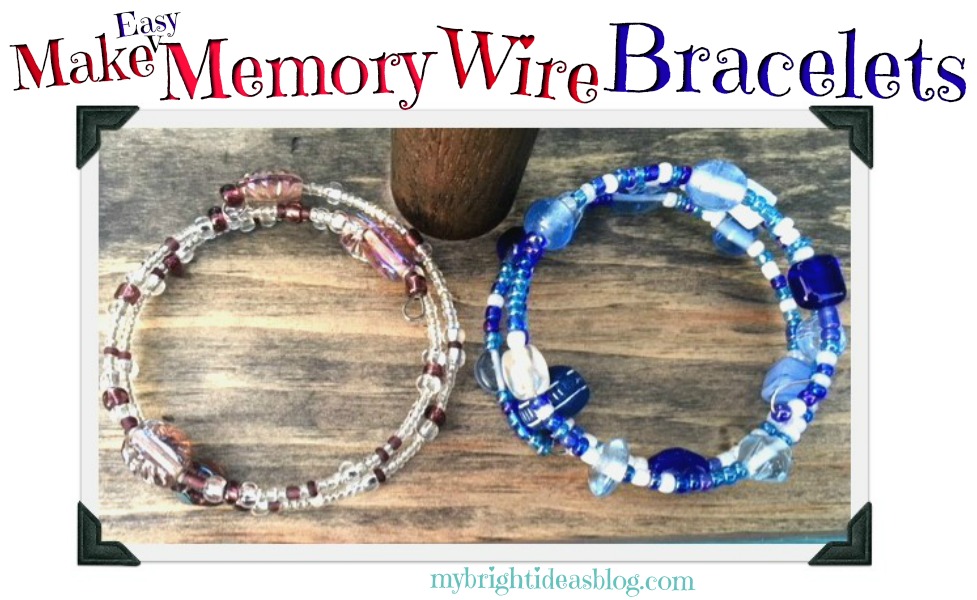 Making Memory Wire Bracelets
Do you need a GREAT gift idea that is easy enough for a child to make? Want to make a craft you could sell? This post is for you!
What got me started on this idea is the craft table at my work (I work in an office at a financial institution). We have a table that any staff member can put out crafty items and a price tag and see if anyone in the building wants to purchase it. For some reason everyone else has taken their stuff off the table and now its just things I have made. Its a little embarrassing. Seriously, besides a few crocheted baby items everything else is mine! So what can I do to make it less empty and pitiful? Hmmm think think think… Add more stuff silly!
Its summer so I have done is enlisted my kids to make a few items. I pay for the supplies and they get crafting and then they get added to the table. The kids will get a bit of money if things sell. I was thinking of asking $5.00 for these. Everybody loves bracelets right?!
You will need:
- various small beads (check out the dollar store or upcycle old costume jewelry)
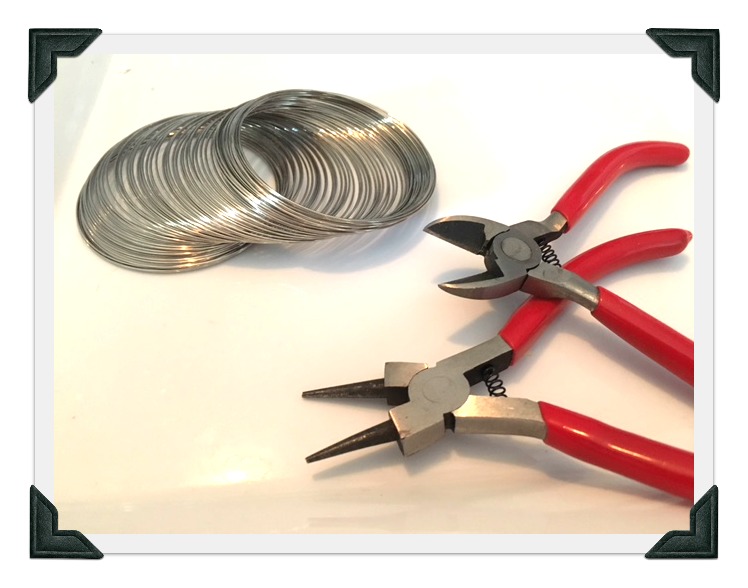
- memory wire (bracelet size)
- rounded pliers that twist the wire
- pliers that will cut the wire (if you only have a pair of needle nose pliers you can still do this project)
 What is Memory Wire?
Memory wire is coiled stainless steel wire. Do you remember the child’s toy SLINKY? Its just like that but meant for jewelry making. The fairly fine wire holds its coiled shape. This makes it, hands down, the easiest product to string beads onto.
For this project I would suggest two pairs of pliers. One to cut the wire and a round nose pair of pliers for a loop at the end. If all you have is a pair of needle nose pliers you will be able to make it work.
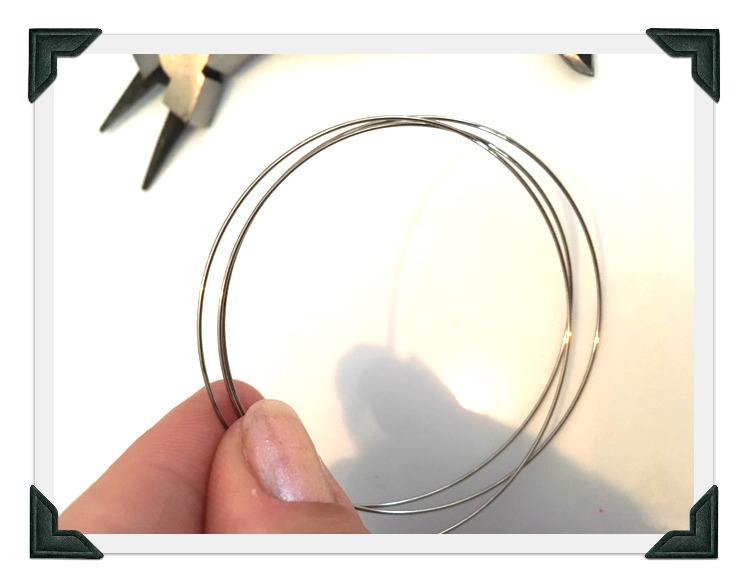 Measure 3 to 5 rings of memory wire and cut the wire.
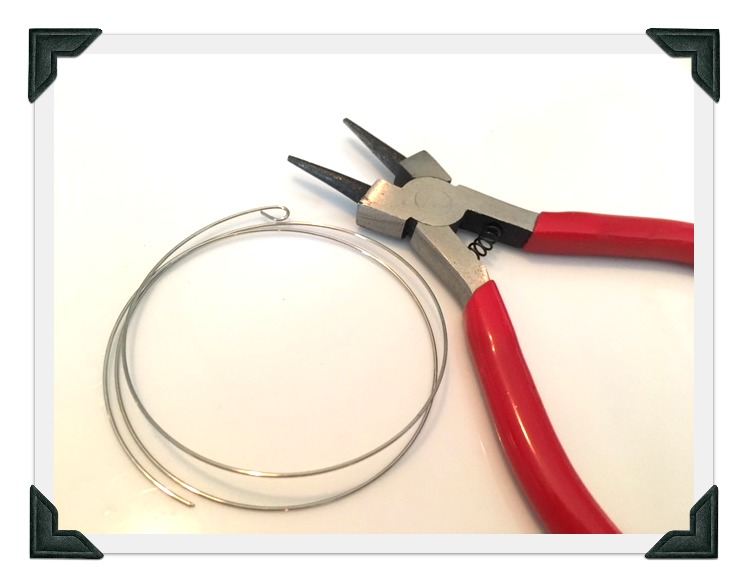 Use the round pliers to bend the end of the wire to make a small loop. This is so that the beads won’t fall off the other end. Now your are ready to begin adding beads!
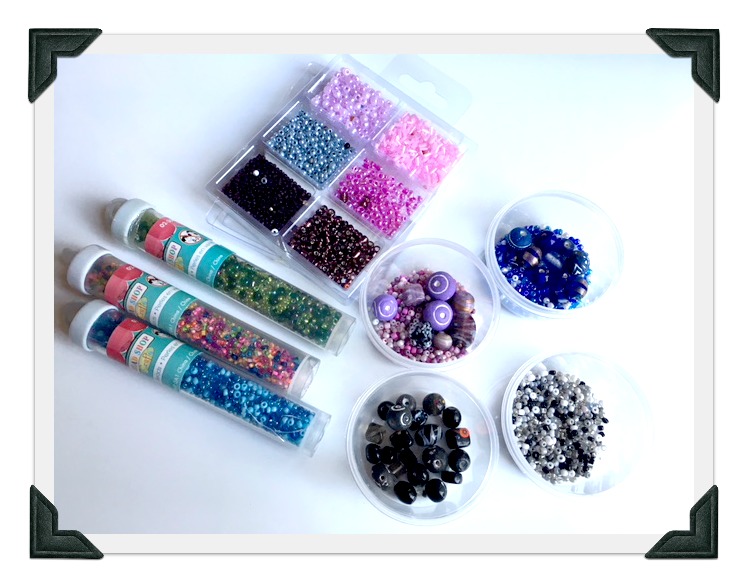 These beads were all $1.25 from the Dollar Tree. I was quite impressed with their glass bead options. Of course, the big craft stores will have a lot more…aisles and aisles of beads in fact. But they will cost more….so look for coupons.
Another option is to go to thrift stores (or your old jewelry drawer) and find old necklaces and bracelets that are wanting to be upcycled. I have lots of necklaces that I made years ago and I love the glass beads but I’m not into them as necklaces any more. Snip the wire or string and empty them into a bowl and reinvent it into a new memory wire bracelet.
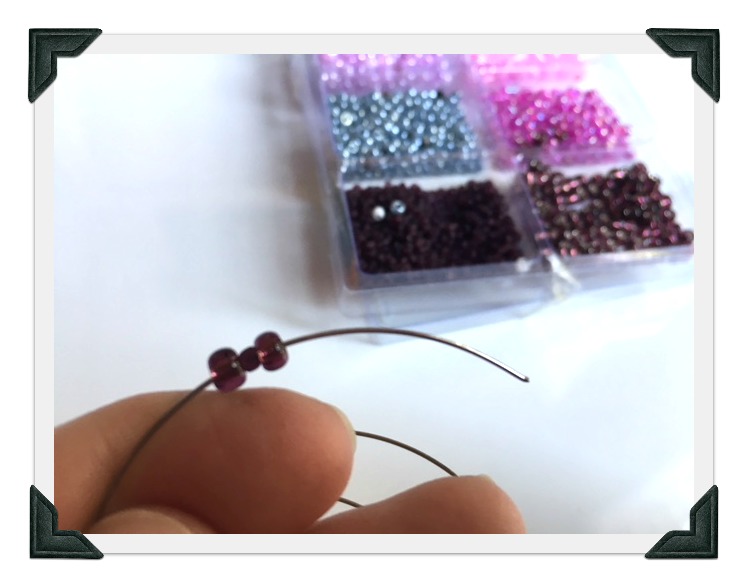 Start with a few beads and slide them around to the bottom. Double check that they are secure with the loop to stop them at the bottom of the coil.
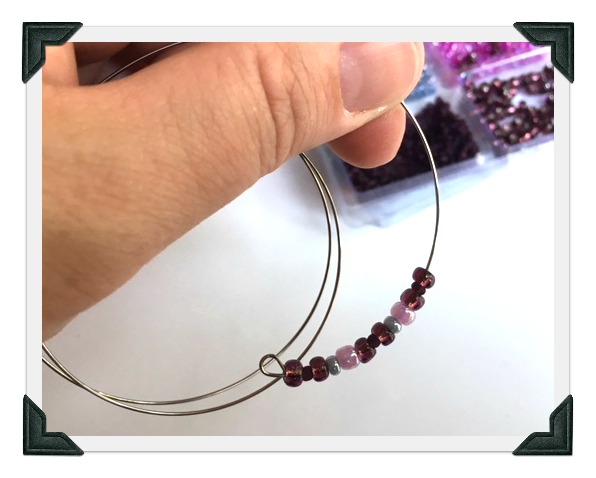 Use a pattern or just go freestyle and grab whatever beads come out of the jar.
 This one is was all small seed beads. It has a nice dainty look to it. These were from a Dollar Tree package so probably all in all this one cost about $.30 to make. We are going to bring it to a play date tomorrow for my 8 year old’s little friend Lilly. Cool gift made by a kid!
Is that one a little too dainty or boring?
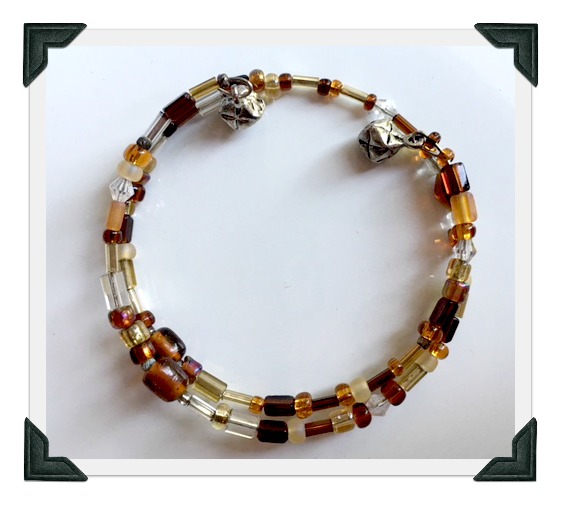 This one has a mixture of brown and clear glass beads all random and mixed up. Notice the dangle beads on the end?
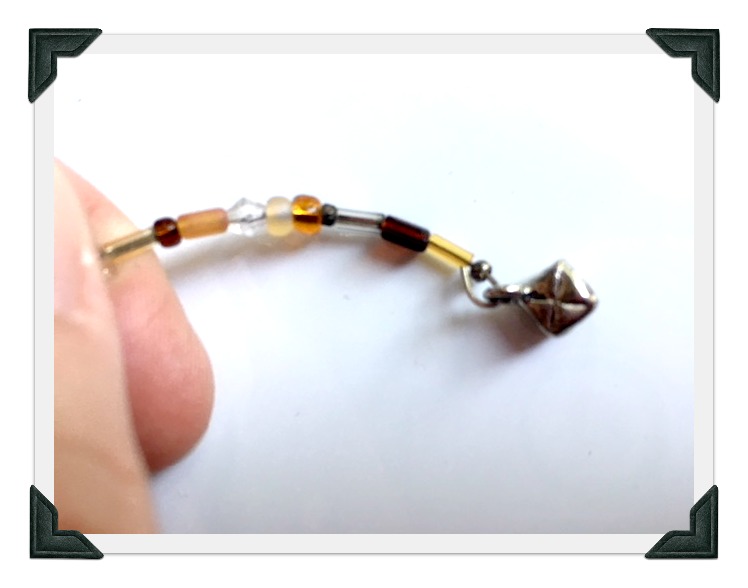 Its so easy to pop a charm or fancy bead on the end of the bracelet.
Every single bracelet will be different. You decide what size and shape. Glass beads, plastic beads, wood beads.
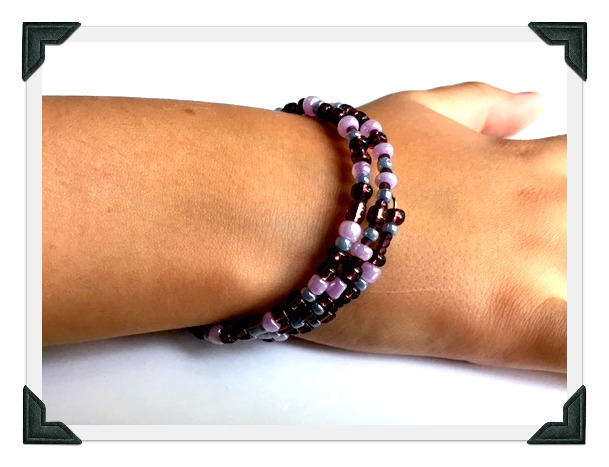
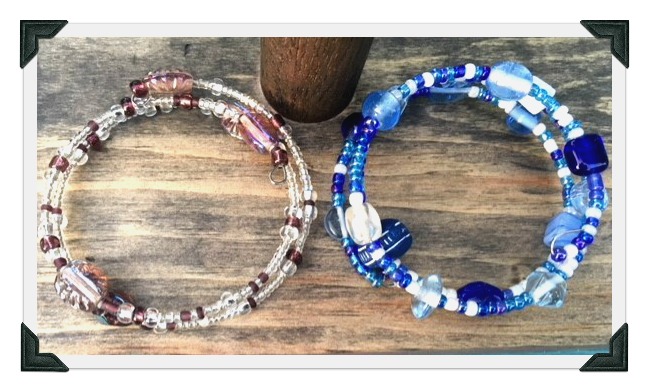
 As you can see from this picture of the completed bracelets….sometimes we used a pattern and sometimes we just pinched up a bunch of beads and just put them on the wire randomly.
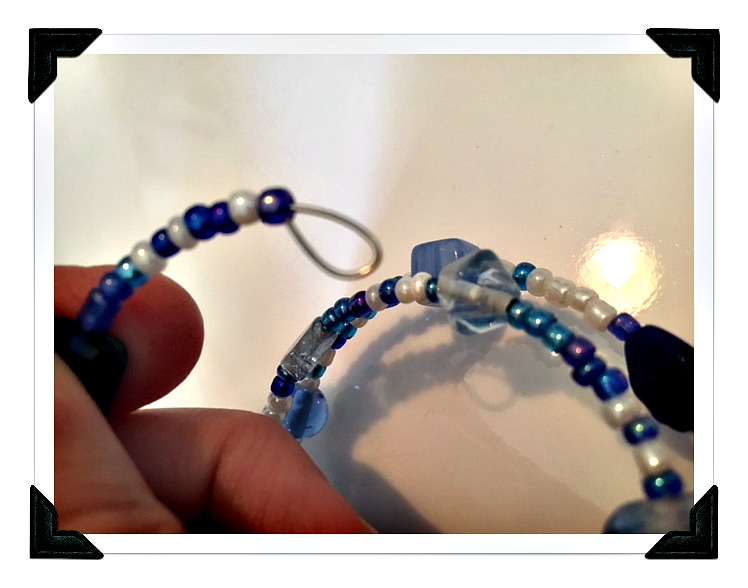
 As you are nearing the end of the wire leave an 1/2 inch or 1 cm at the end.
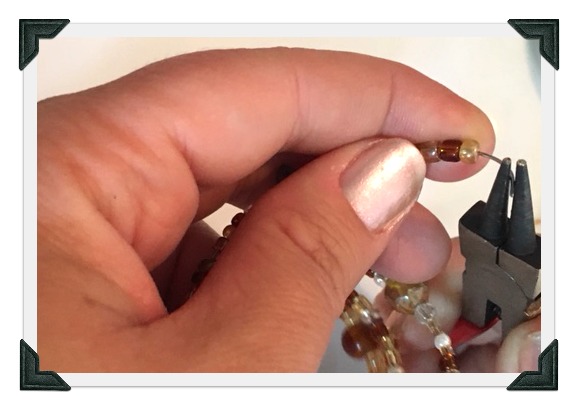 Using the round-nose pliers pinch the end of the wire and bend it around to form a loop.
Bend it closed. The example below still shows a gap. Pinch it closed tightly-you may need to do the final squeeze with another style of pliers.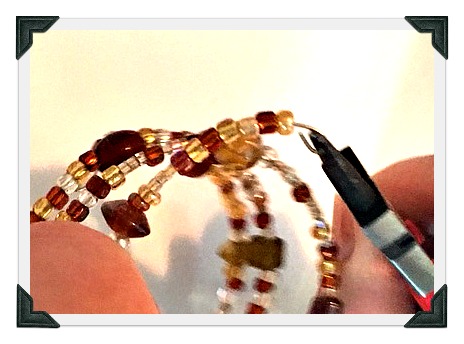 Here is a picture of my 11 year old working on a blue bracelet. I’m telling you this is a great gift project for kids to do.
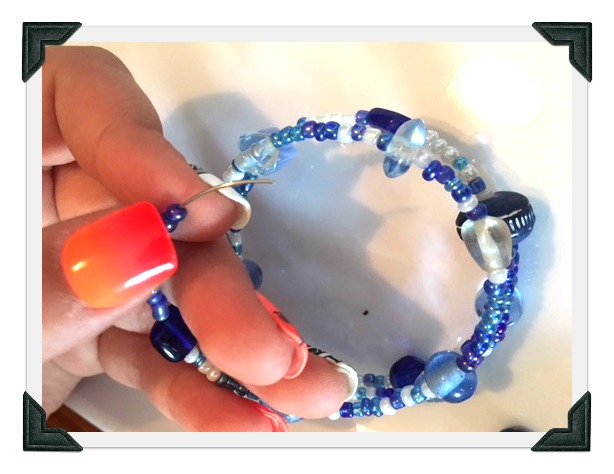 Summertime means stick-on fake nails. Try not be distracted by my daughter’s orange nails. My girls are obsessed with fake nails. But then they quickly want them off. This means they will leave scattered plastic nails on the coffee table or their bedside table. This makes their mother CRAZY-CRACKERS!
 Its that easy! Now the 8 and 11 year old’s can sell or gift their beautiful bracelets. Even younger children could do this if you help with bending the wire at the beginning and end of the project.
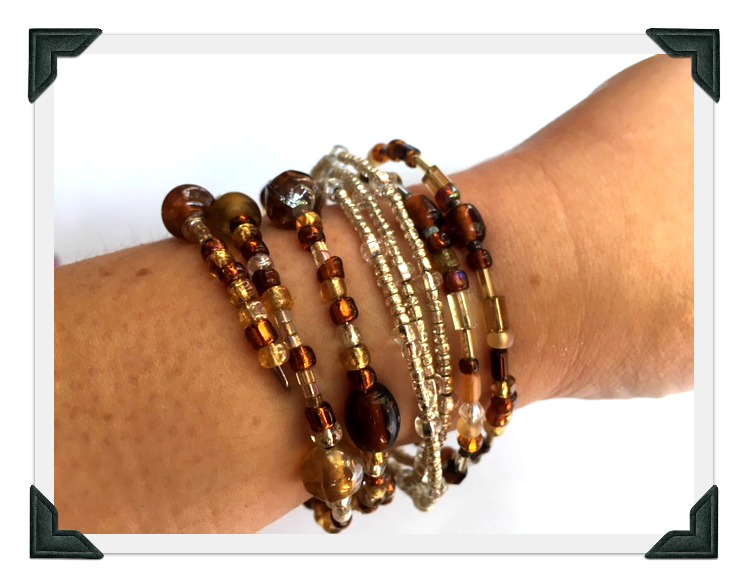
Forget about the kids I love making these! I put 3 together for this photo.
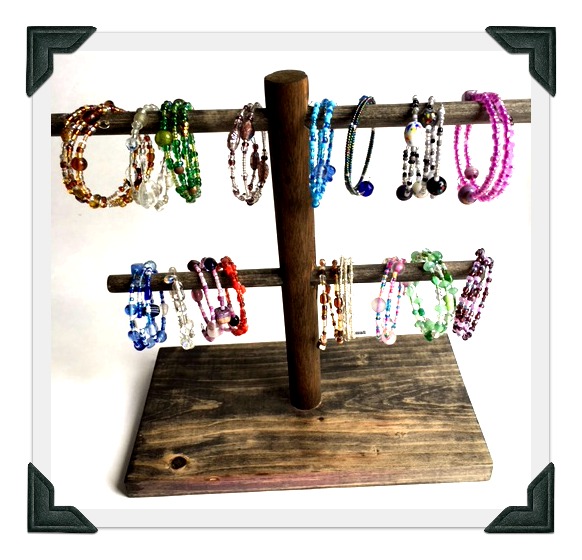
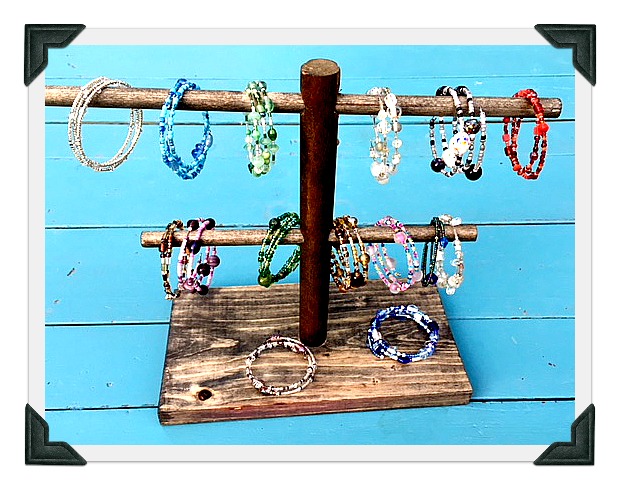 Check out the jewelry stand I made out of scraps of dowel and wood. Its perfect for displaying the finished bracelets on the craft table.

 I hope you enjoy making this super easy project. Its rather addictive!

…
…


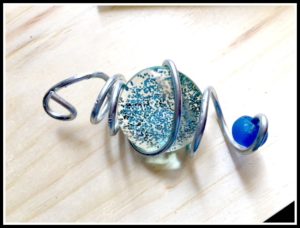
Make an EASY Garden Decoration From Wire, Marbles and Beads
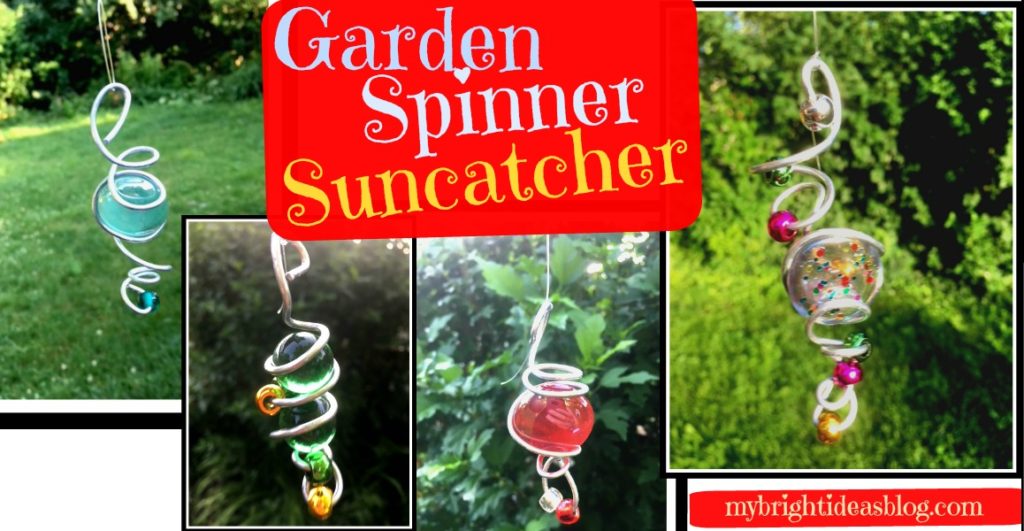
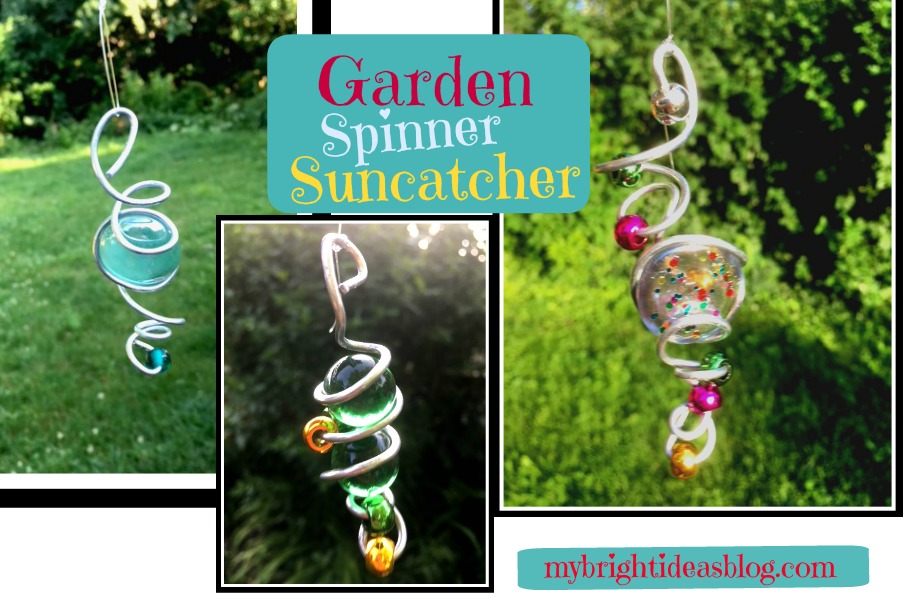 Wire Art – Suncatcher / Wind Spinner
This gorgeous craft will make you feel like an artist and is easily made in just 15 mins! Make it in the summer for the outdoors to spin in the breeze or in the winter hang it in the window as a sun catcher.
You will need:
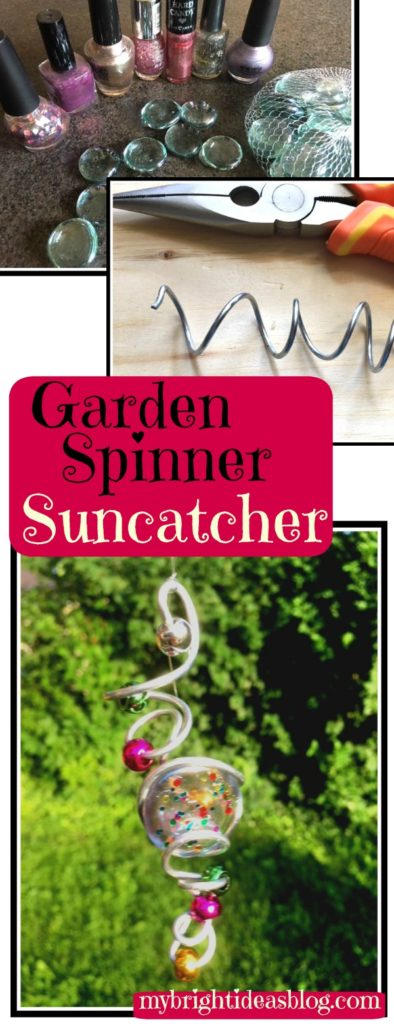
- marbles, beads, glass stones
- sparkly nail polish
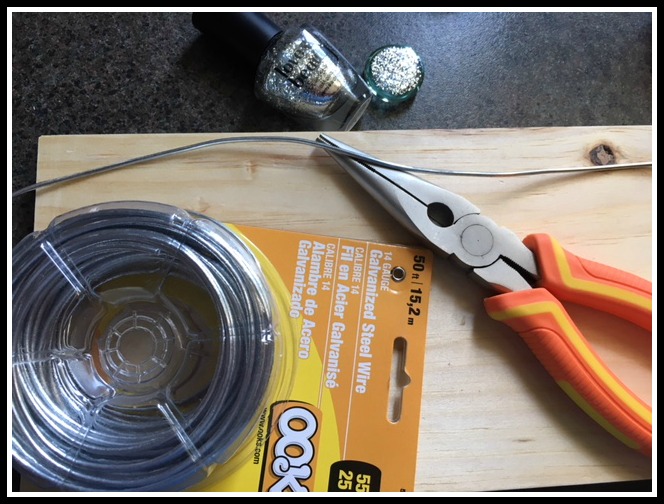
- Galvanized Steel Wire 14 Gauge
- 2 pairs of pliers, one with wire cutting edge or wire cutters
- clear fishing line
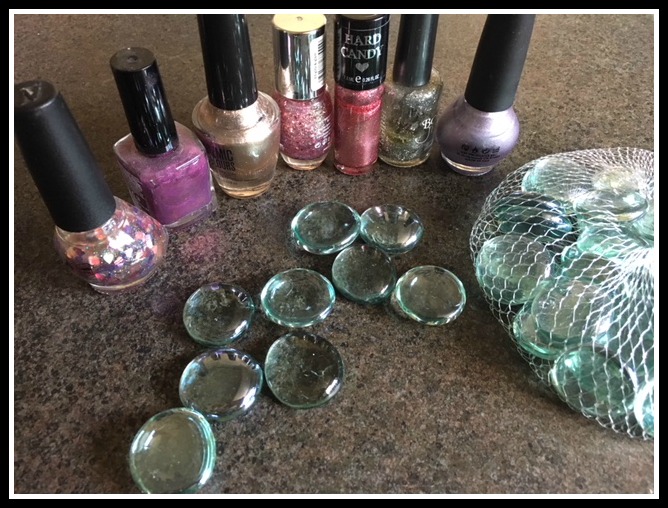
Simply get started with a bag of medium sized flat glass stones from the dollar store. Put a piece of newspaper or wax paper down to protect your work space.
Paint one side of the stone with sparkly nail polish. Allow to dry.
If you paint the flat bottom side of the stone the glitter shines through so you only need to paint one side. You could do a similar effect by putting glue on the stone and dipping it in a bowl of glitter. We went with nail polish which dries so quickly and we have lots!
After your stones or marbles are ready, cut a 12 inch length of wire. We used 14 Gauge Galvanized Steel Wire. You can cut your sizes longer or shorter depending on your own preference. At times the ends can be a bit sharp so protect your surface by using a scrap of wood or a cutting board.
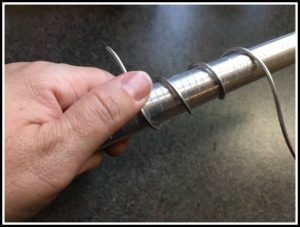
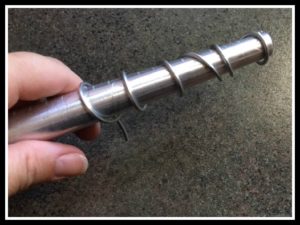
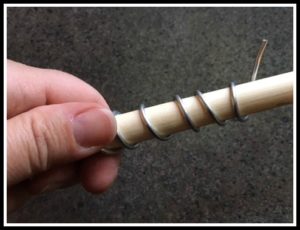
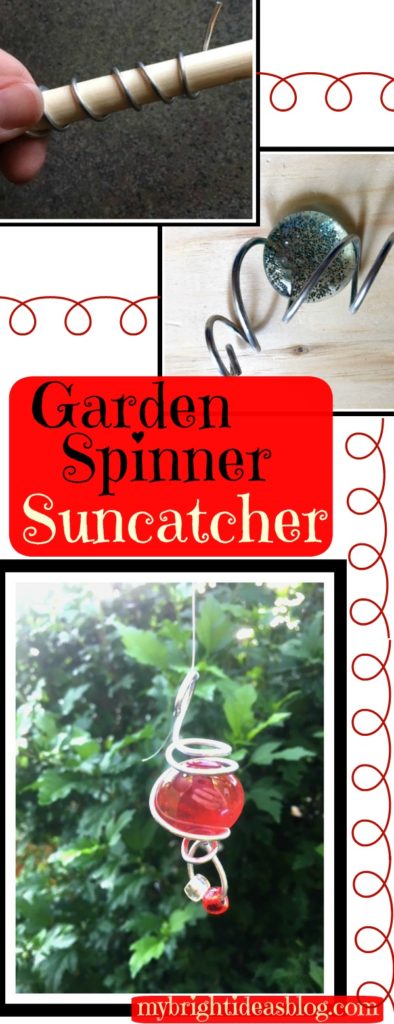
If you don’t have a jewellers mandrel you can look around the house for something similar. I had a wooden dowel that looks just like the handle of a wooden spoon. Find something to wrap the wire around and use the pliers to further twist and squeeze the wire into the desired shape.
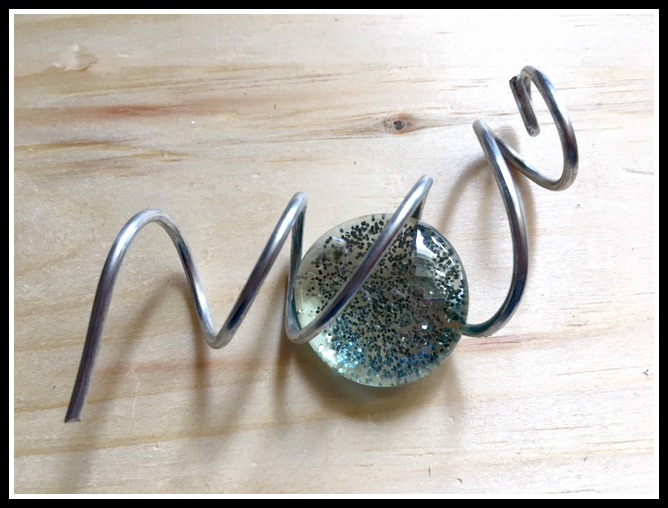
Using flat glass decorative stones will require you to flatten the wire slightly to hold it in place. If you are using marbles the twists will be nearly perfect for sliding the marble in and pinch the wire slightly to hold it in place.
 My first attempt at this was a bit frustrating. As I pulled one part of the wire the shape would change and the stone would fall out. But then I got the hang of things. Once you see how cool it looks as the spiral gets a bit crazy it feels like your making a real piece of wire art!
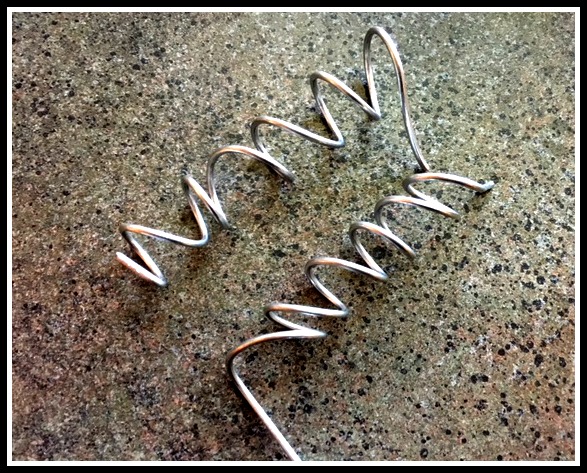
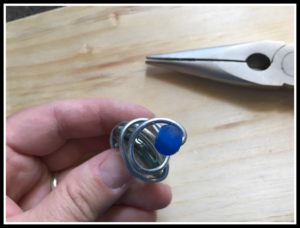
You may need to use a use both of your pliers to twist the wire how you want it. This will help to focus bending a particular section of the wire without affecting another part of it that you are already happy with.
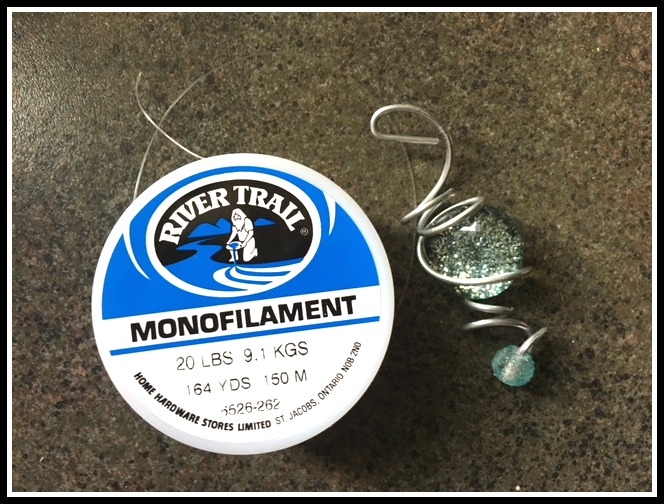
Cut a length of clear fishing line. This is a must have for your craft supplies if you don’t already have it. You can get fishing line from the hardware store, craft store and dollar store. It has many uses including bracelet making or hanging decorations from the ceiling when your having a party.
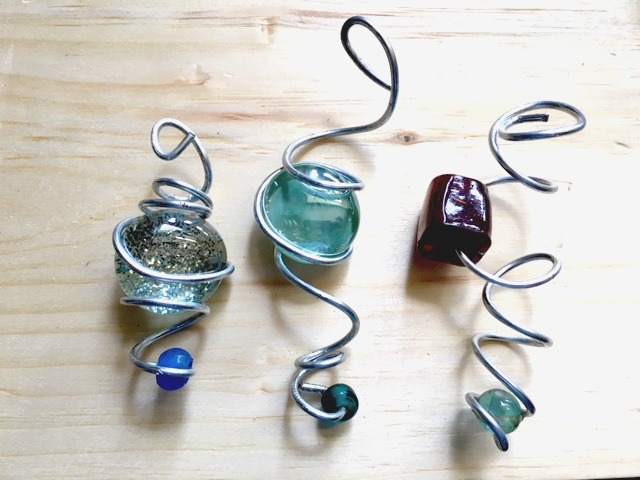
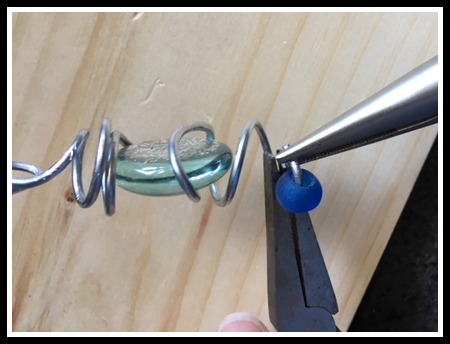
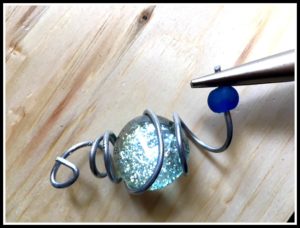
I like how each one turns out completely different. Shape the wire in a tight spiral or loose and whimsical. Add a bead on the end. Or several beads throughout the wire. Use a giant bead instead of a flat stone. Or use marbles!
These are dollar store marbles that you might put in the bottom of a vase. I need to locate some play marbles and see if we can find some cool ones.
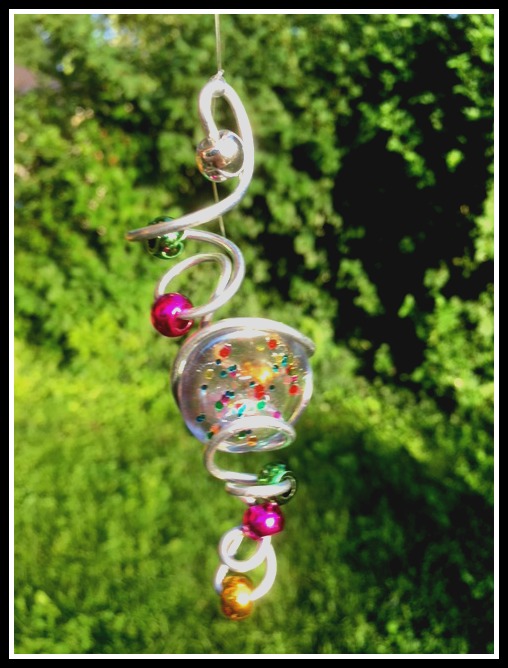
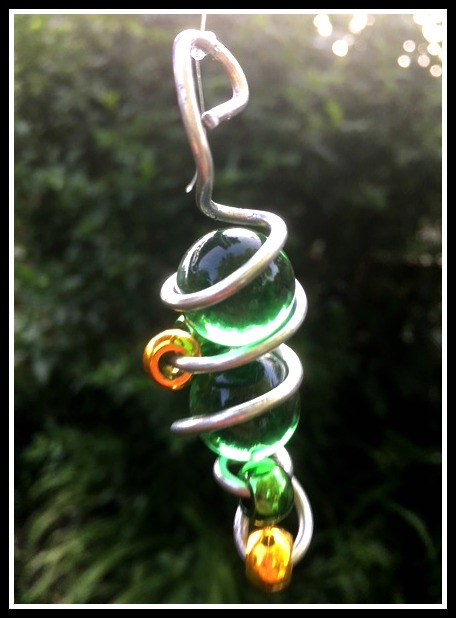
These shiny beads are metallic pony beads and very inexpensive (around $3 from Walmart if I remember correctly)For this wire project the hole needs to be fairly wide. Choose beads with big holes if you are using glass beads. I had these left over from a previous bracelet making project. The nail polish used here is a speckled multi coloured one. It looks fantastic in the sun!
So there you have it! Every one of these turns into a unique bit of wire art. Hung from a branch with fishing line will have it spinning in the breeze.
I hope this inspires you to make some wire art suncatchers/wind spinners for yourself. I just made 10 and I’m so pleased with these I think I will keep on making them and try selling them at the craft table at work.
Don’t you love it when a craft exceeds your expectations! You really should try this!
…
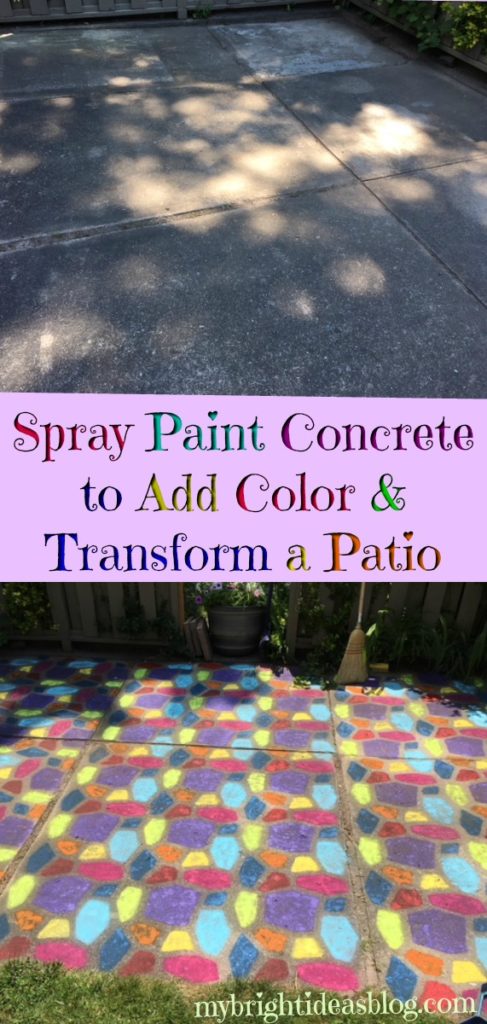
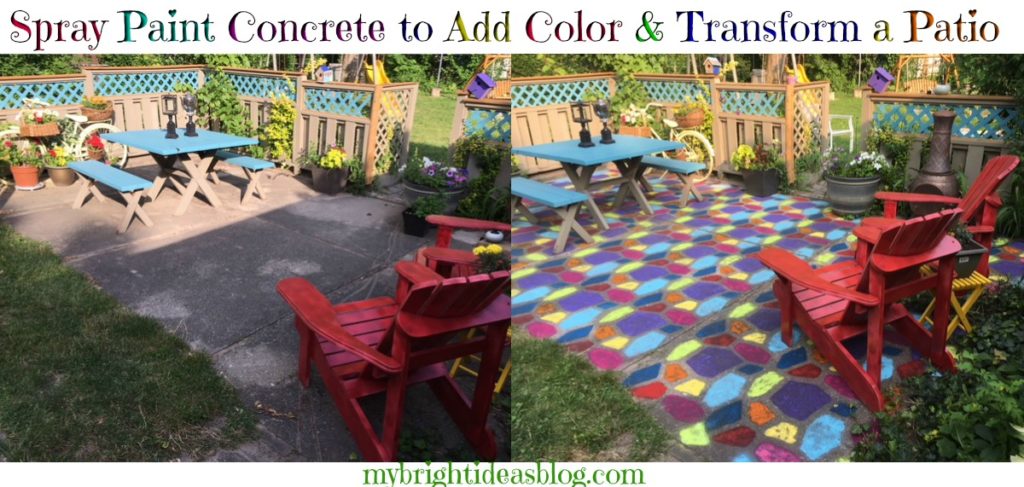
Paint Old Concrete for a Colorful Patio Makeover

I may have taken things a little too far this time! I have been adding color to a very beige and grey backyard bit by bit. This weekend I went hog wild and I literally spray painted my tired old cement pad.
Our house is rather old built in the 1950’s. Its a mystery at what point they would have added this concrete pad and privacy fence but its safe to say it was a long, long time ago.
Our patio is approximately 232 inches by 135 inches or 3.5 meters by 5.9 meters.
It has 4 sections at various widths 51 inches 52 inches 67 inches 62 inches. I worked in sections. I was done three sections when the spray paints started running out.
You will need:
- brooms, dust pans
- power nozzle on your garden hose or power washer
- a concrete mold
- 9 or 10 colors of spray paint (expect to pay approx.$7.50 per can of paint)
- clear concrete sealer
Before you get started you need to clean every bit of your concrete…
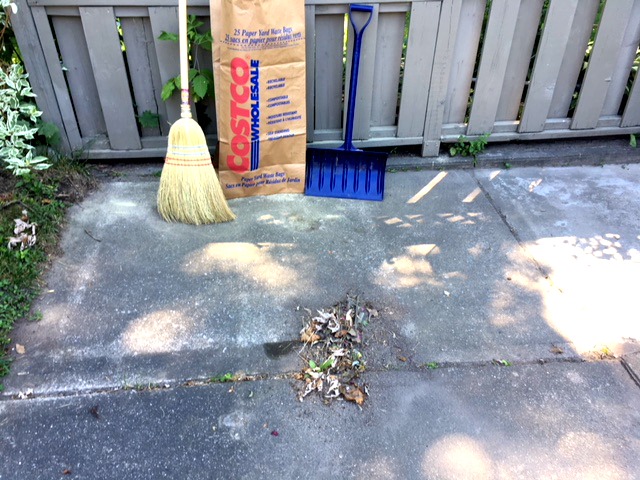
In order to successfully paint concrete you must clean and prep the area properly. This means going over the surface to remove all dirt and debris. Our patio had lots of that!
All the credit goes to my father in law for digging all the grass and weeds out from the cracks in the concrete slabs. New bits of nature are constantly blowing through the air so even during the process you may need to re-sweep. So keep a dust pan and broom or whisk handy through the entire process.
Plan on spending at least an hour on the clean up process. First I used the corn broom and a kids sized snow shovel for my dustpan. Then I used an old kitchen broom for finer bits of dirt. Then I used a flat broom for a final run over to see if I had gotten it all. To be thorough now consider if any areas need to be scrubbed. I had two areas where there were potted plants with thick mud caked onto the ground under the flower pots-it would not budge. Scrubbing with soapy water will tackle this…or use a power washer. Then you will need to wait for it to completely dry.
If you leave dirt on the concrete the paint will stick to it and likely wash away the next time it rains so don’t skip the cleaning stage.
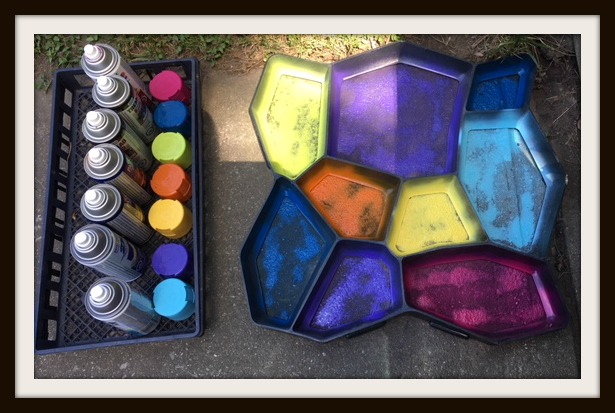
Gather the Supplies: Concrete Mold and Paint
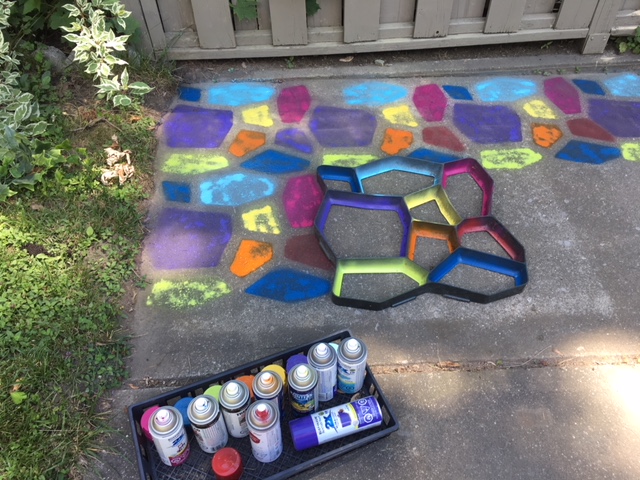
What is a concrete mold?
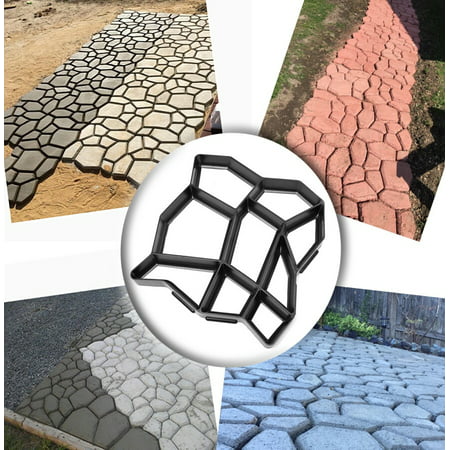
A concrete mold is typically used with quick-setting concrete pre-mix to create cobblestone walkways or patios of any size.
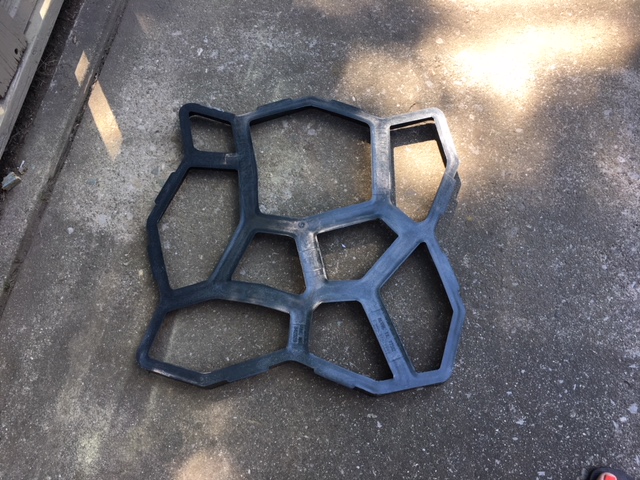
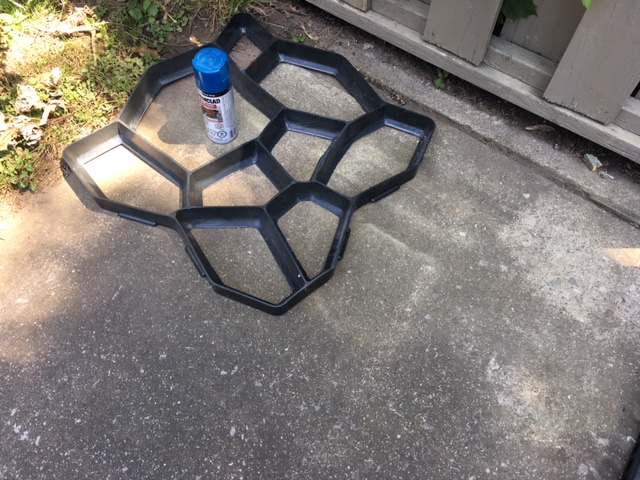
If you were pouring concrete into this mold you would want to have it as pictured above (wide edges upwards) but for spray painting we want to have the wide part on the bottom of the mold. This will create a tiled grout effect.
Where does one buy a concrete mold?
I have had this mold stored for the last 5 years! I bought it from Lee Valley with the idea of making a concrete path in a section of my backyard. However, I took one look at the bags of concrete that I would have to haul home and mix and thought it was best to put it off for a bit….lol. That sounds back breaking!
I have looked at the website and Lee Valley does still sell this mold for $34.50. Its 20×20 and very sturdy. Here is the link. http://www.leevalley.com/en/garden/page.aspx?p=10339&cat=2,2180,33222
If you aren’t near a Lee Valley store, you may need to investigate if your closest hardware store does carry it. It looks easy enough to purchase online but harder to find in actual stores.
Here is a similar one at Walmart.com. https://www.walmart.com/ip/17×17-Inch-Pavement-Mold-Irregular-Concrete-Stepping-Stone-Patio-Paver-Mold/163739522
Possibly a cheaper alternative would be to take a piece of plastic and cut a pattern out with an exacto knife. This would be like creating a stencil. At my local dollar store they have thick pieces of sturdy plastic in the craft section that looks like a big placemat. This is meant for a work surface for crafting kids so they don’t wreck your table. I could see this being cut up as a stencil. Just a thought!
Next you’ll need to choose the paint!
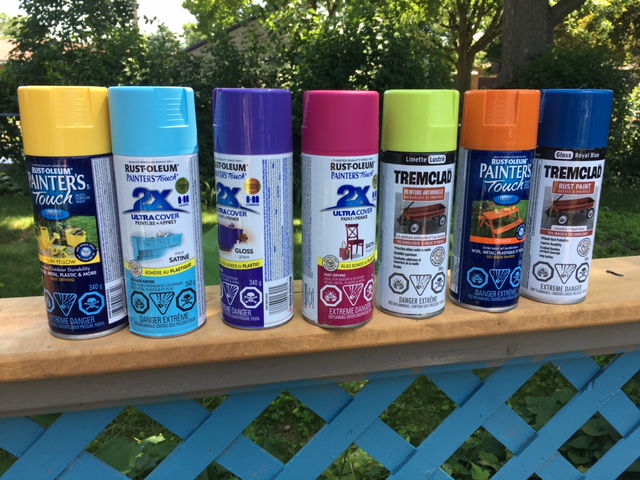
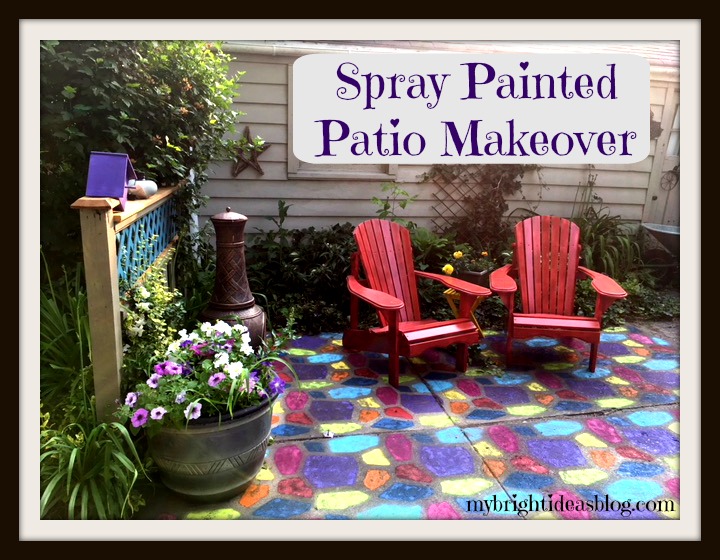
I started out with these 7 colors but after the first section decided to add a red spray paint that I recently used to paint my Muskoka chairs an awesome red.
As you can see the lime green and sunshine yellow colors did not have the impact that awesome royal blue did. Lets give a shout out to Tremclad Royal Blue for its awesome job covering concrete on the first try. Yellow and lime did get a second coat once everything was dry. I didn’t actually mind the faded effect it had since colored tiles or bricks are not perfect. But then I wondered if it will fade with the sun and snow so I thought that I would want to make it darker by going over just the yellow and lime the following day.
Here I am at the 3/4’s done mark and very pleased with myself…but running out of some of my spray paints.
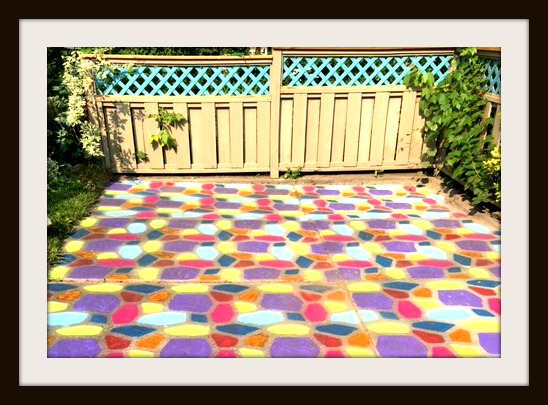
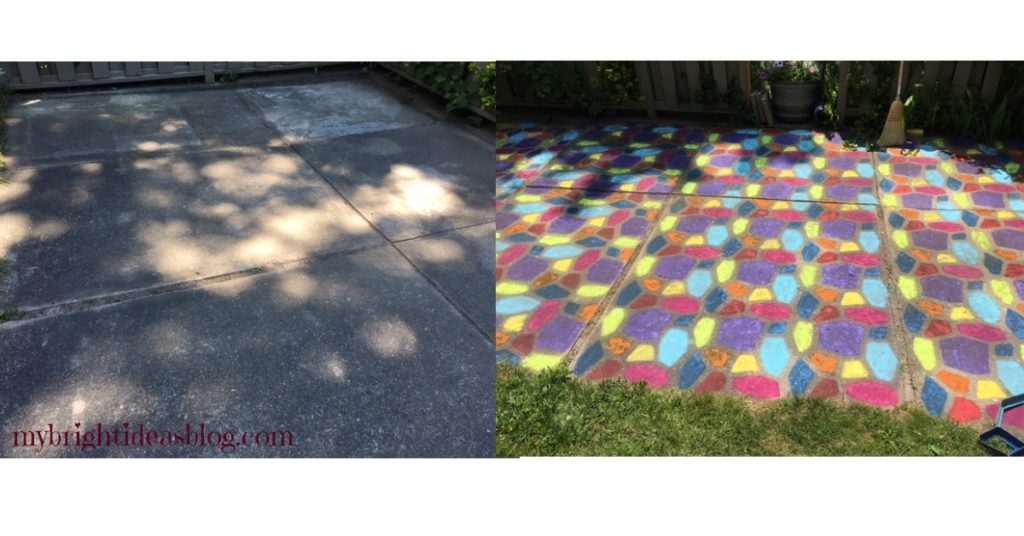 Here is a good picture from before and after the paint. Concrete doesn’t need to remain bland grey. The hardware store has several options for painting cement. If this is a bit too bright and busy for your space, you could do it in shades of green, brown, copper, charcoal etc. Pinterest also shows several techniques using a stencil effect. Or just painting a rectangle with a pattern on it so it looks like a carpet. So cool!
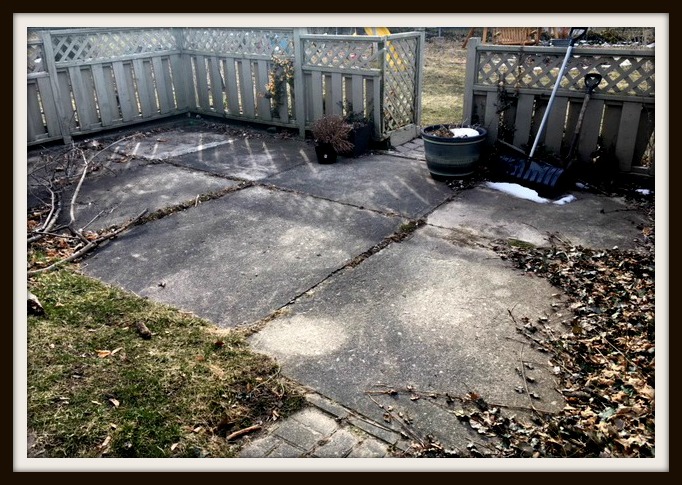
Here is the patio in the early spring with the last of snow melting. All the garden furniture packed away for the winter and the formerly-lush ivy looking creepy and brown.
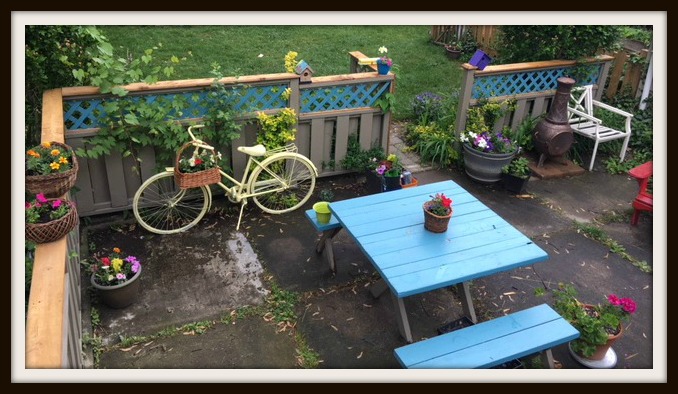
In May and June I was having a lot of fun adding color by painting a few things, but the patio concrete was pretty ugly grey and not cleaned up since the spring.
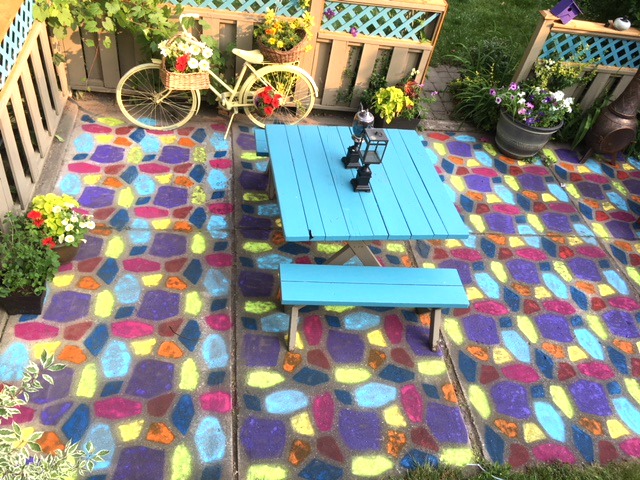
This is a cool angle from the deck! Now that I have put all the furniture in place….and I realized I forgot to put the clear sealer on top. Oh plumpers! I was so eager to see it all come together I completely forgot! Tomorrow is a holiday so…hubby is home to help me remove it all again. I will start early before the temperature gets too hot. I’m hoping that with the sealer on top this color will stay vibrant and last through the seasons. This is July 1st 2018. I’ll follow up with how it held up over the years.
…