This fleece hat project is so easy and fast! You’ll have a new winter hat done in 20 minutes. Then I will show you how to make a simple flower applique. The weather is getting chilly now so this is just the thing to make for yourself or a gift for someone else.
You will need:
- a small amount of polar fleece fabric (10 x 26 inches )
- scraps of fleece from other projects in co-ordinating colors (1-2 inch wide x 12 inches long)
- sewing machine
- scissors
- needle and thread
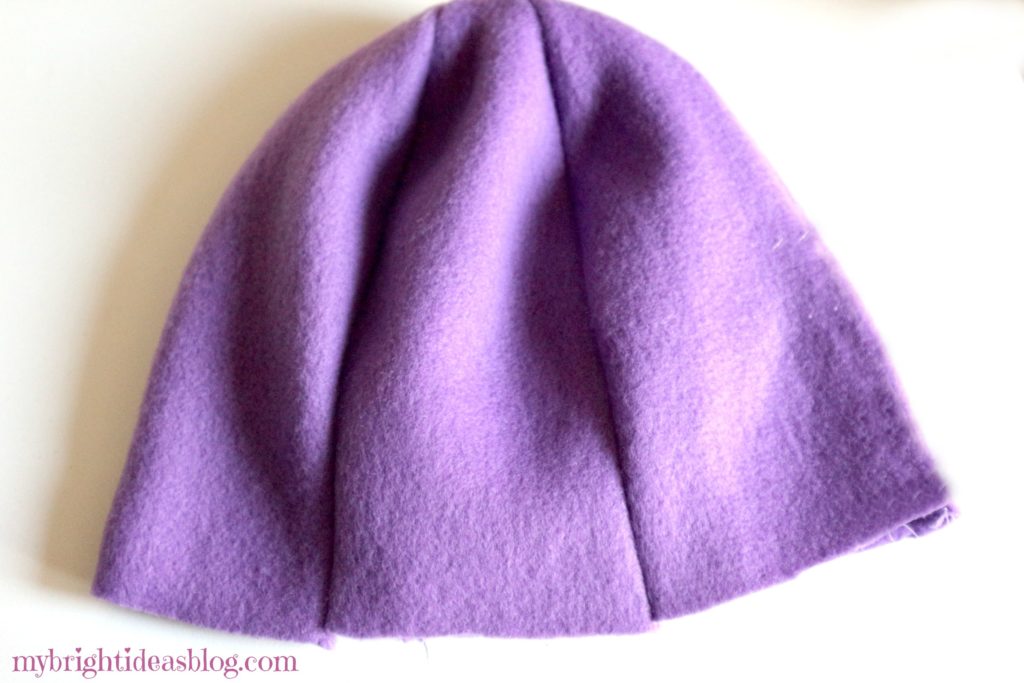
This hat is made up of 6 long triangle panels.
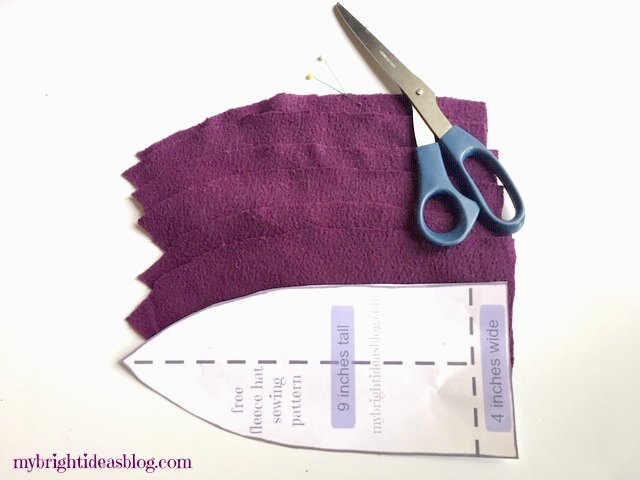
Cut 6 identical pieces from the template below out of fleece.
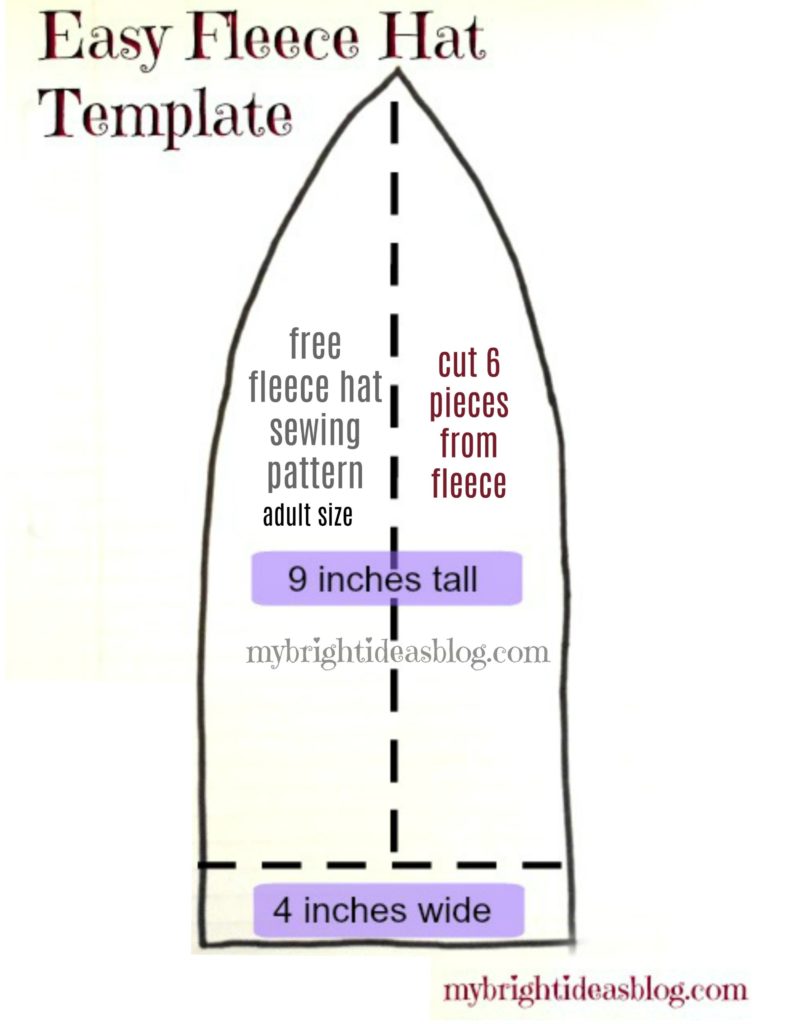
Right click on the photo above and save to your computer. This should print out to the right size on regular 8.5 x 11 computer paper.
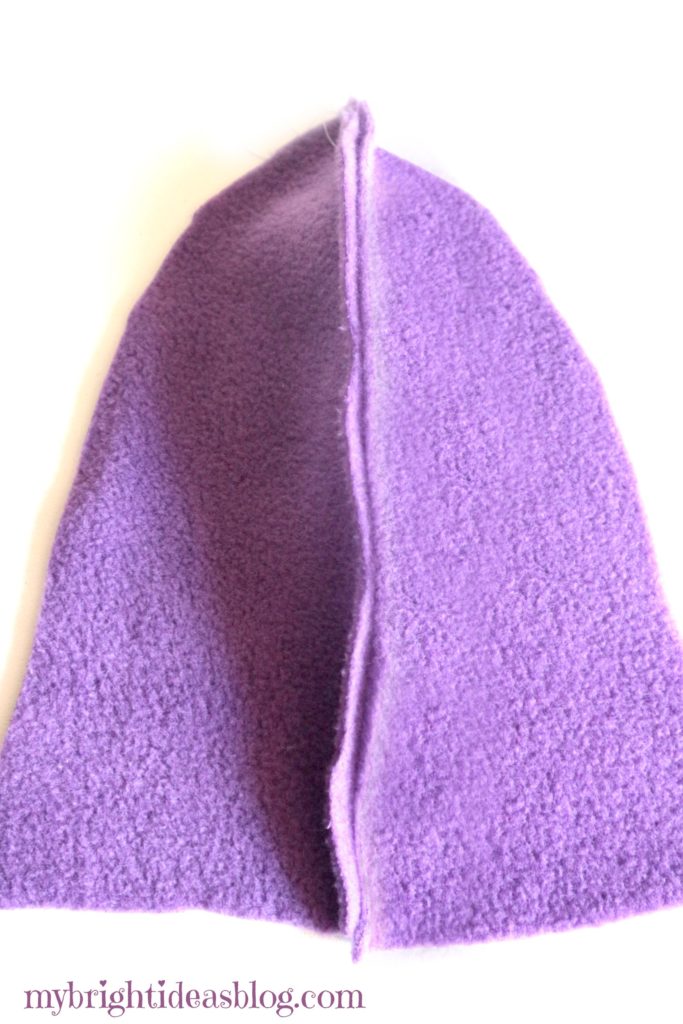
Sew the first 2 pieces together (with right sides together).
Pin the third section of the hat in place next to the first two pieces and sew it. After the three pieces are sewn together set this aside.
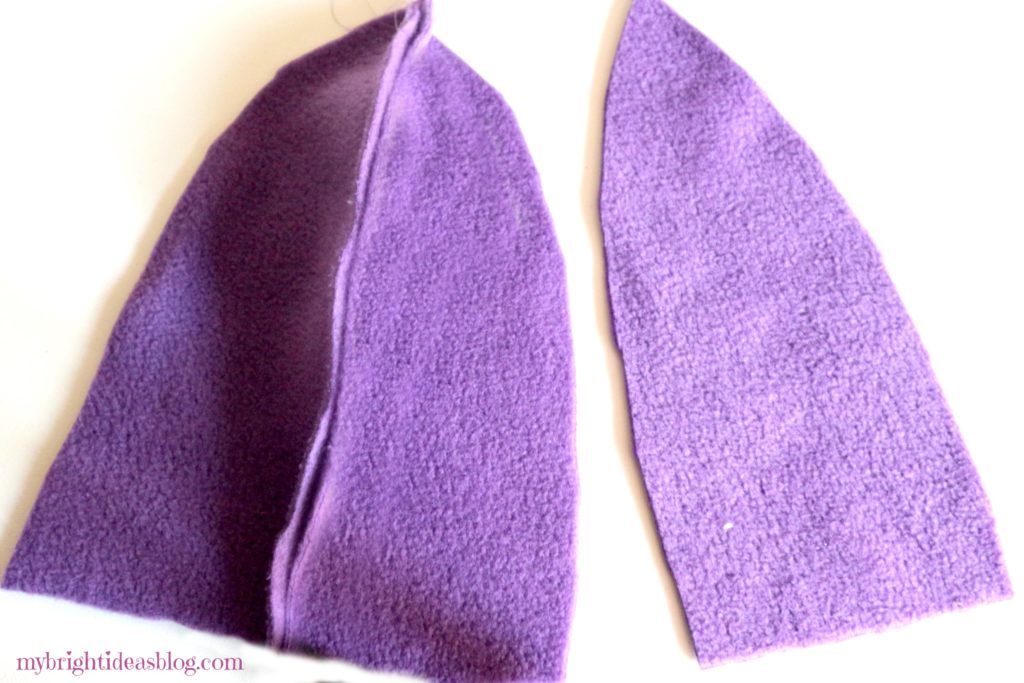
Repeat these steps with the other 3 sections.
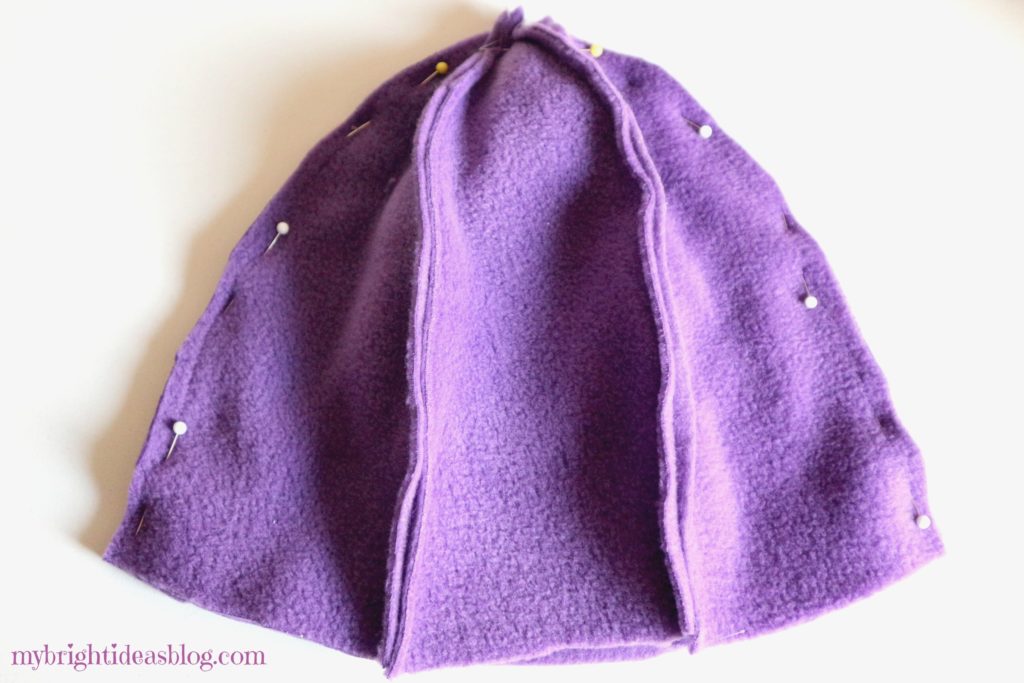
With the right sides together, pin these two halves together. Sew all the way around the top.
Turn the hat inside out and try it on. Determine how wide the hem should be. If the hat seems too long for you, simply cut 1/2 an inch off the hem and try it on again. Fold the bottom inwards to hem and pin in place.
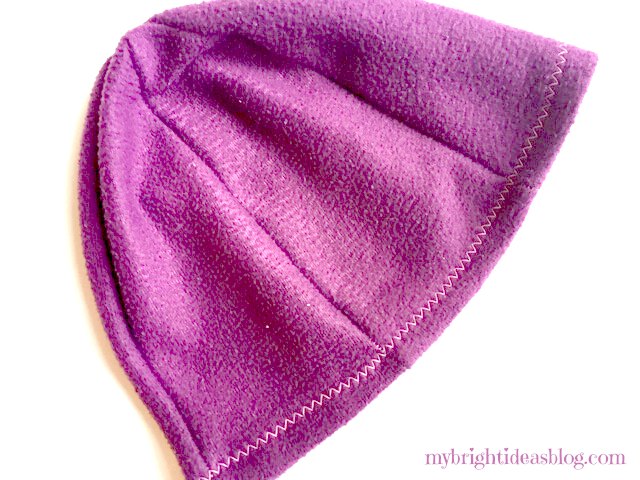
On this hat we folded the bottom over 1/2 inch and did a zig zag stitch all the way around. When your fold is wide, your zig zag hem lays flat. As the photo above shows.
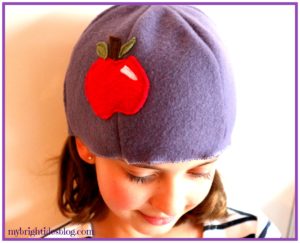

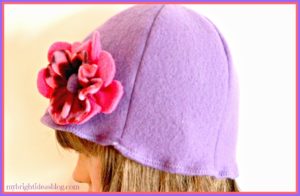
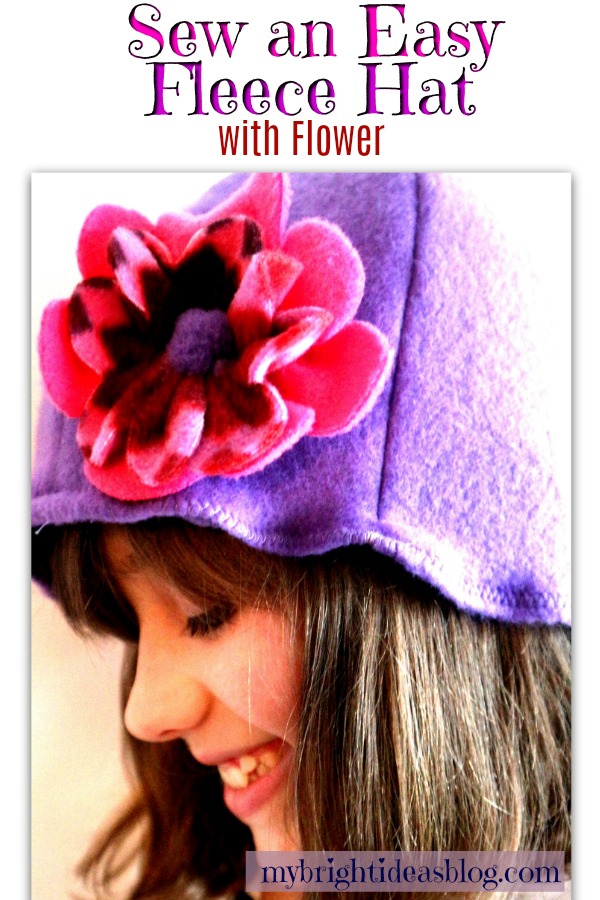
On these three photos of my daughter wearing different hats – the hem was shorter so the zig zag stitch was closer to the edge and it did look quite wavy. I like both ways.
The Flower Applique
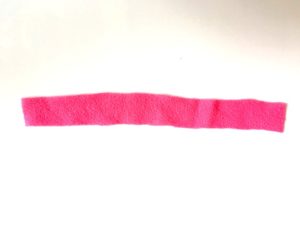
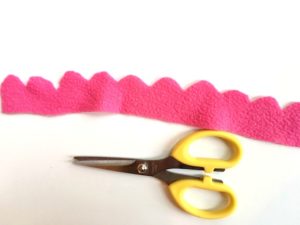
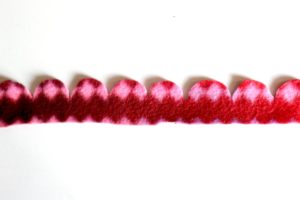
We cut a strip of fleece 1 and 1/2 inches wide by 12 inches long. Then carefully cut a rounded pattern to make the flower petals.
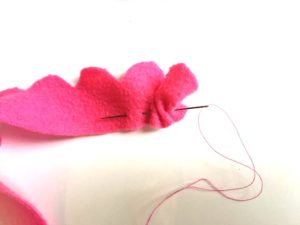
Thread a needle with a knotted length of thread and begin to do a loose baste stitch across the bottom of the petal strip of fleece.
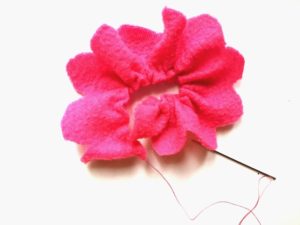
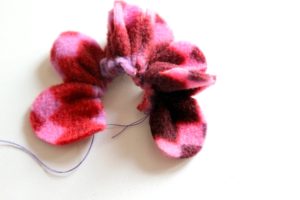
Gently pull the thread to gather the pleats. Set this part of the flower aside for now.
Cut another length of fabric 1 inch by 12 inches long. This will be an inner layer of petals so its a bit shorter than the first. Baste this as we did with the previous flower petal section. Pull the thread to gather the fabric and set this aside too.
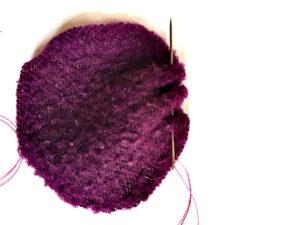

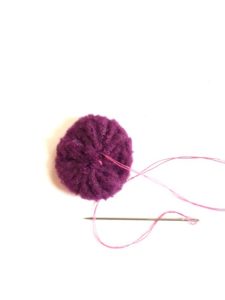
For the centre of the flower cut a circle 2 inches in diameter. I traced the vitamin bottle to make the circle. Baste around the circle and pull the thread to gather the edges. When it’s pull closed put a few stitches to keep it tight.
Adding the Flower Applique to the Hat
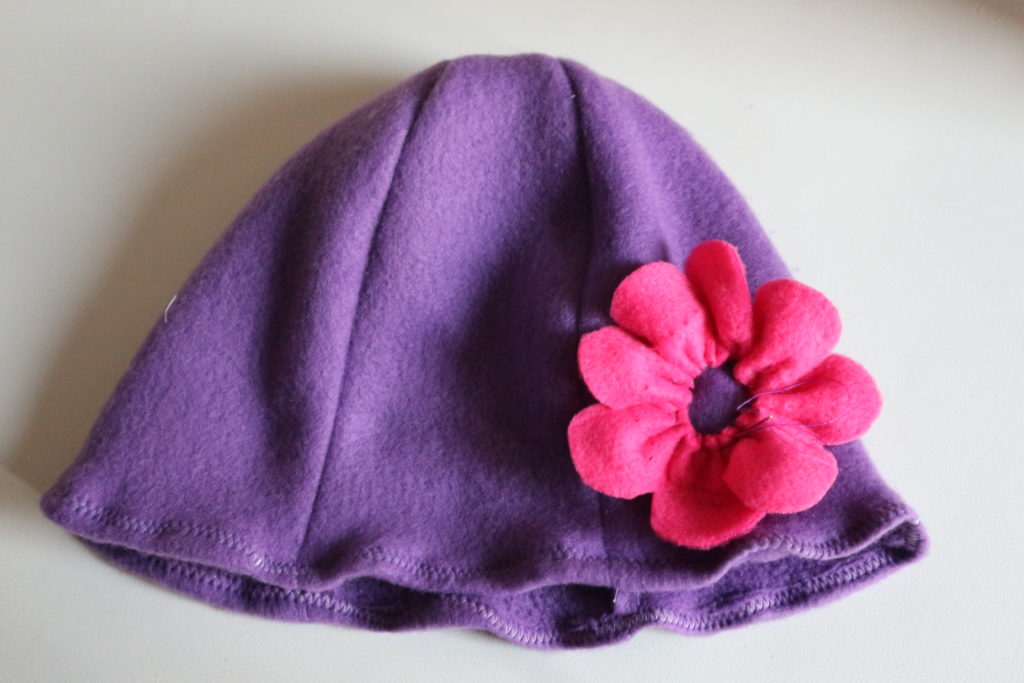
Attach the pink petals to the hat with a few stitches. As you sew this on you can adjust the petals to the desired size of the flower. Next add the inner layer of flower petals into place and stitch that into place. Lastly, sew in the centre piece, with the gathered part facing the hat. Secure this and your hat is done!
I hope you get a chance to try this easy sewing project. I’m working on making pattern sizes for children and babies. I hope to add these to the post too.
Pin or share this with your favorite social media!

Sew a Super Easy Fleece Poncho-Simple Starter Sewing Project
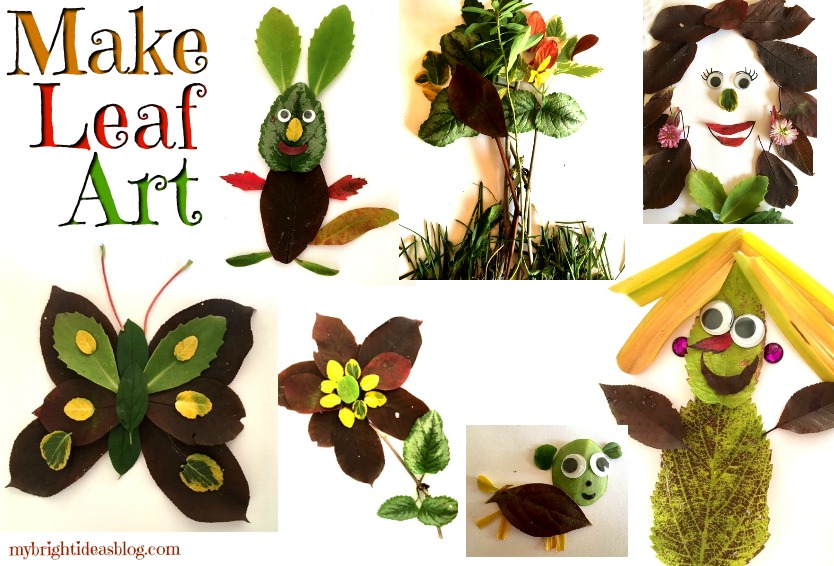
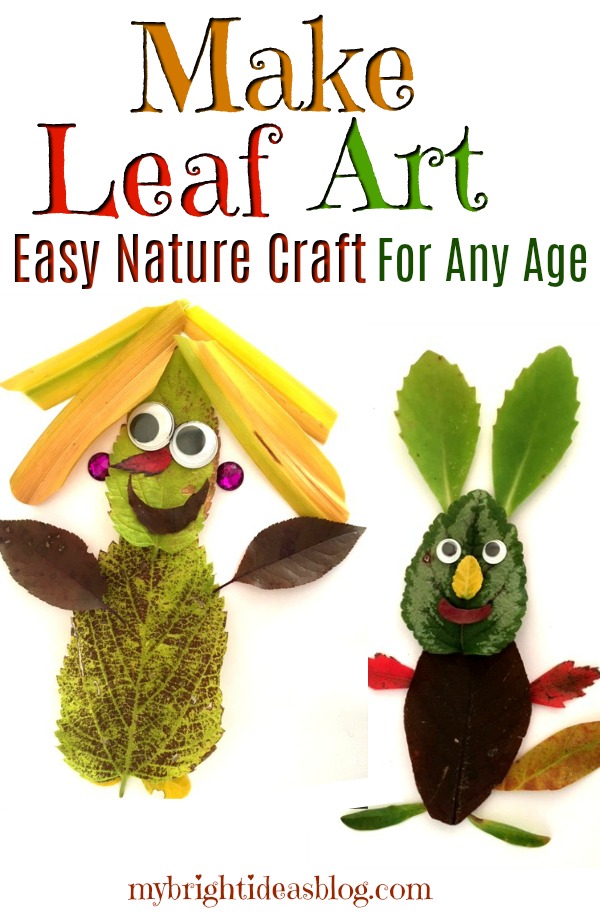
Make Leaf Art – Easy Nature Project!
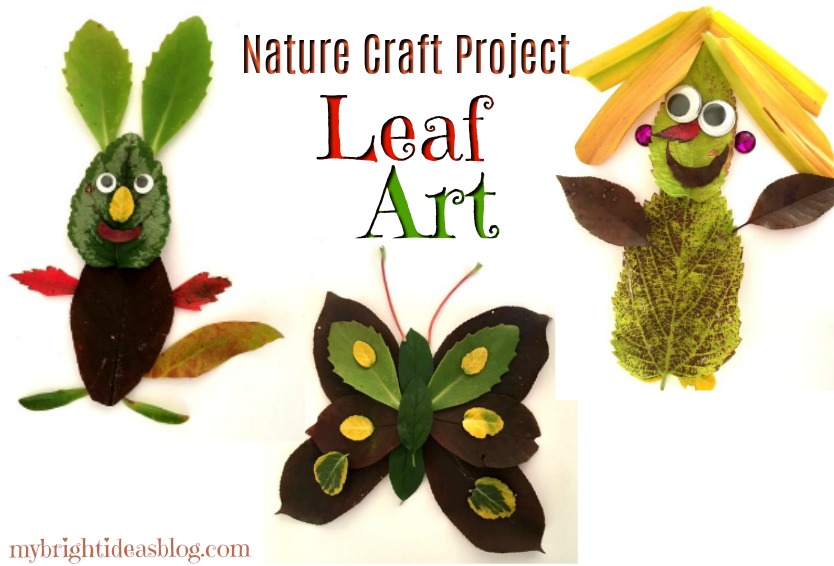
The Autumn season is here and the leaves are changing color and falling. This is a great time for a nature walk to collect and examine and reflect on the beauty of this season. Leaf Art!
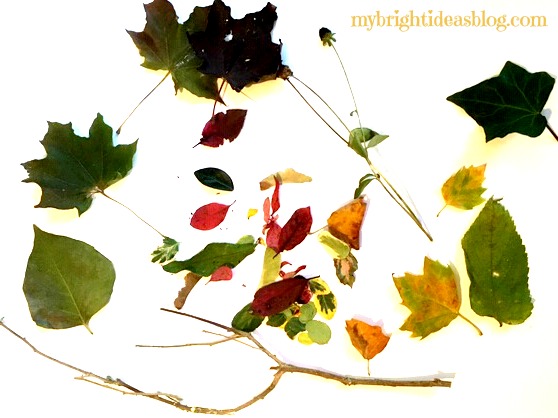
Start with some friends…any age will love this. Take a large clear bag and start to collect samples of nature.
What to look for:
- a variety of leaves
- pine cones
- pine needles
- acorns
- stones
- twigs
- a handful of grass
- small flowers
If your friends are little you might just want to use a piece of cardboard and glue your collection to the board. Puncture 2 holes near the top and add a string to hang it on the wall.
For Older Kids!
I think the older kids could do better. If you are over 5 you can make some really cool art from your nature walk.
Pressing the leaves in books: If the kiddies or you need a nap after the big nature hike-don’t feel bad its the fresh cool autumn air! If you want to work on the crafting stage on a different day….You could put the leaves between book pages for a couple of days to make them flat and a bit dryer. If you just leave them out til tomorrow they will begin to dry up and curl.
We decided to make our crafts immediately before they shrivelled. I took pictures of each leaf masterpiece to print out an autumn nature photo album later.
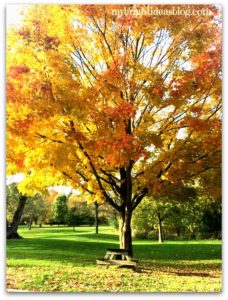
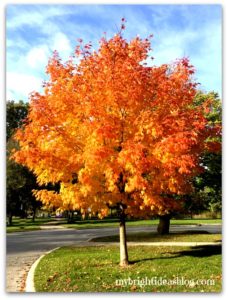
We took some great photos of vibrant orange and red leaves as the sun hit them.
I love this time of year! Now let’s make some leaf art!
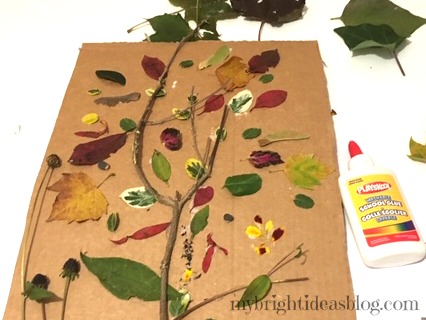
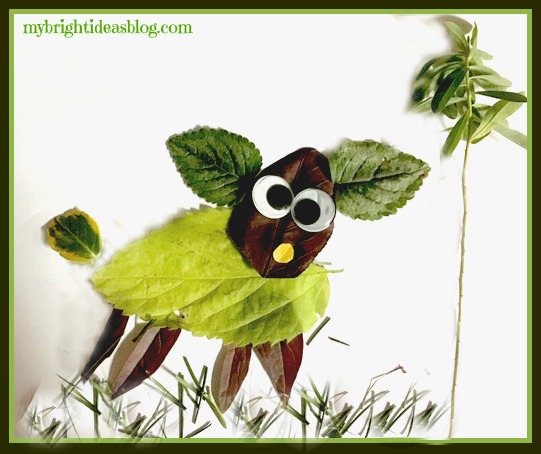
Making Trees!
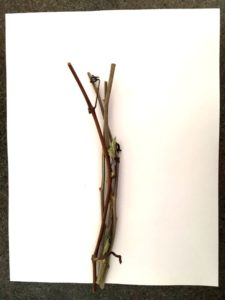
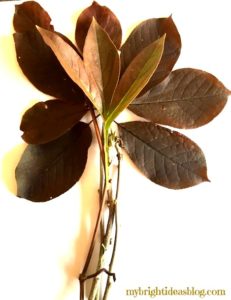
Put a few twigs as a trunk. Then add leaves to form a tree. You can glue the leaves or use double sided tape.
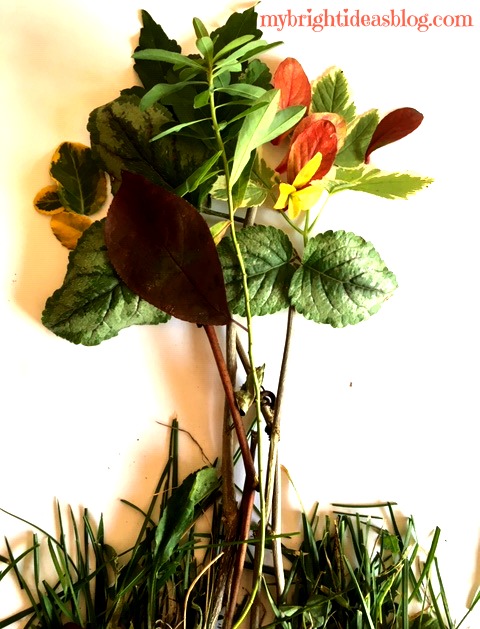
A collage of twigs and leaves make an easy tree picture. Change your leaves and your tree will look completely different.
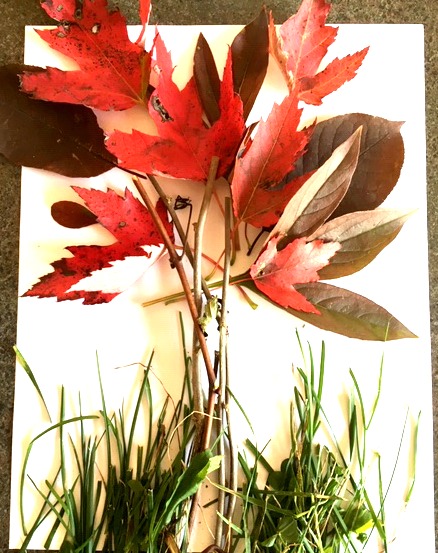
The grass can be trimmed with scissors.
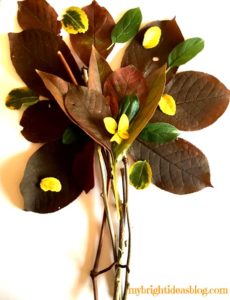
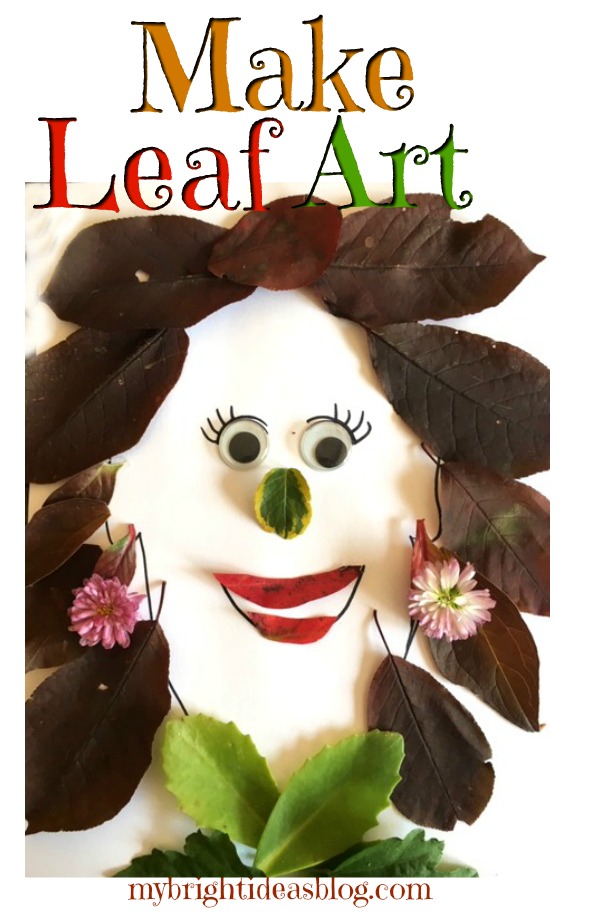
Making People!
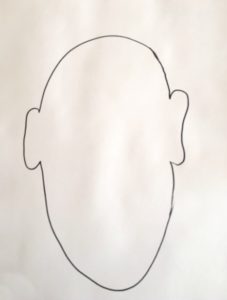
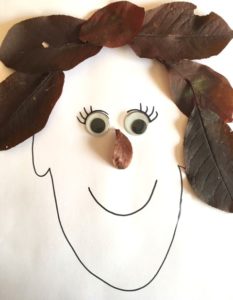
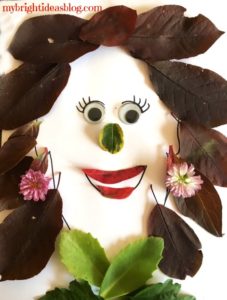
Draw a head on a page and then start making a self portrait. Huge googly eyes and flower earrings make this face stand out from the crowd.
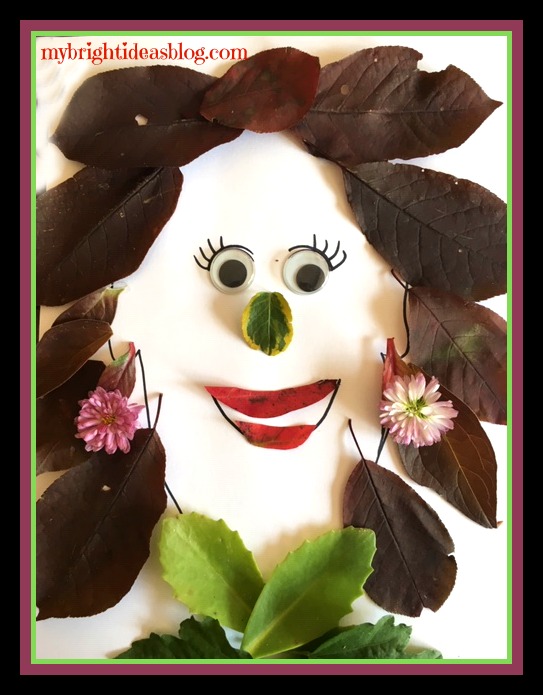
Oh my days! It’s like looking in the mirror!
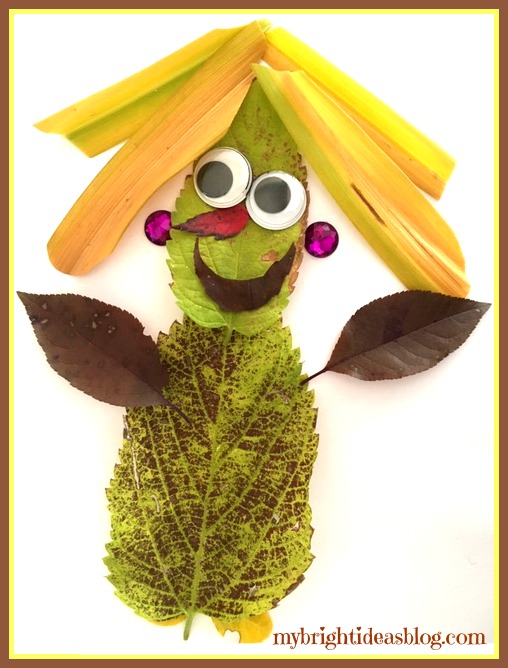
This one is for my 11 year older daughter who has lovely blonde hair and likes to have some sparkling earrings.
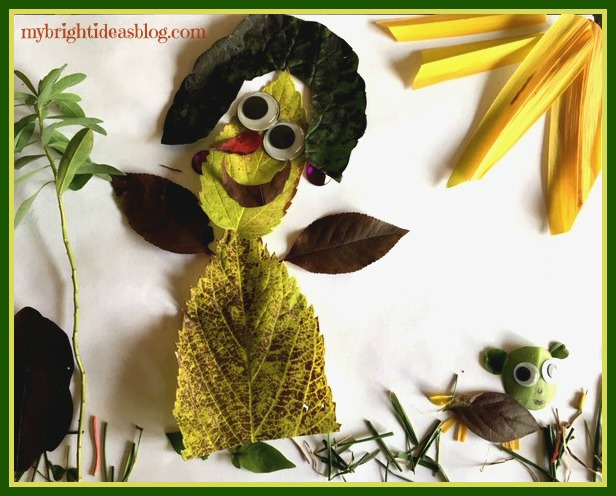
This one is for the youngest daughter. This is a picture of her and our little dog Gemma.
Making Animals!
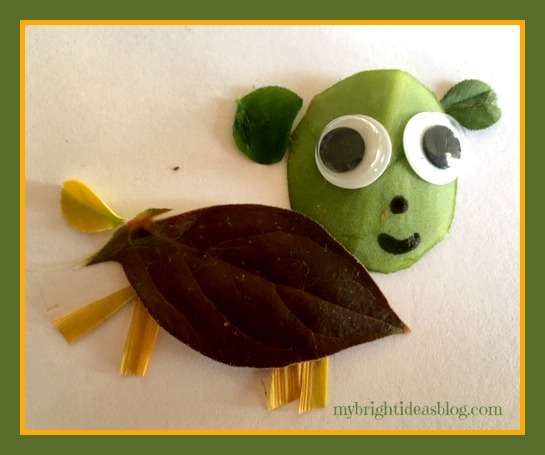
This is Gemma our little dog. Made by my younger daughter. I love the dog’s little round ears. That is made out of clover leaves. Notice that we used a sharpie (permanent marker) to make the mouth and nose. I also used scissors to make a the little legs.
Our 11 year old made up this bit of art. It’s Gus our other dog. He looks like a surprised sheep! LOL!
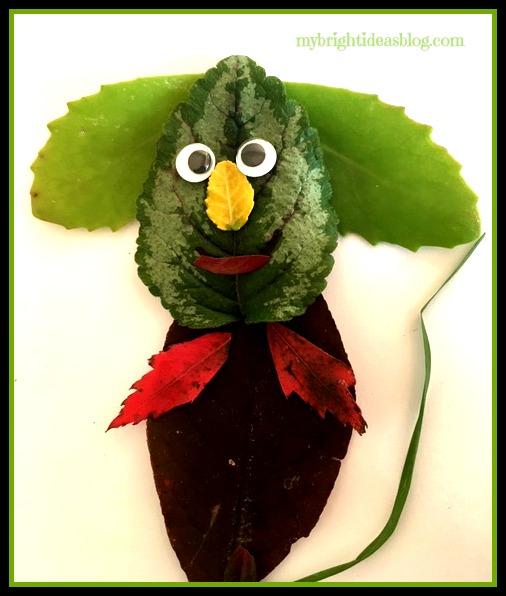
I think I thought this looked like a mouse but now he looks like a koala bear. Its the nose.
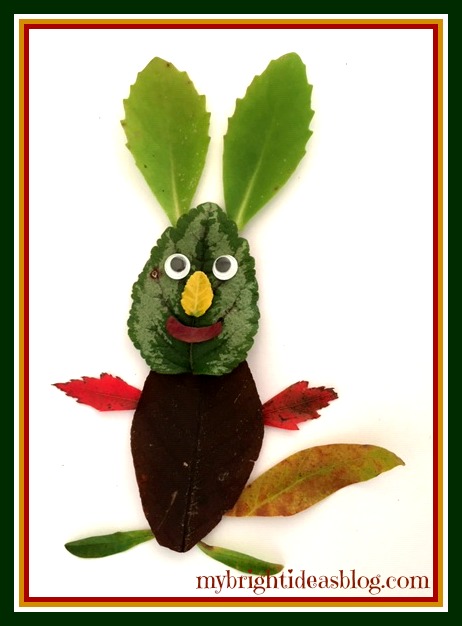
Turn the ears and it looks like a rabbit.
That is the highlights of today’s Leaf Art-Now to clear up the kitchen counter from these bits of nature so we can make lunch.
I hope you enjoyed this post. I had a great time making it.
If you are feeling stressed, get outside for a walk in nature and then craft with the leaves and twigs and grass you find. It’s my cure to melt away stress and have a blast with my family.
Have fun and see what you can make!
Here are some other NATURE craft projects!
Nature Craft – Perfect for Earth Day Activity – Clay Imprints with Plants and Flowers
…


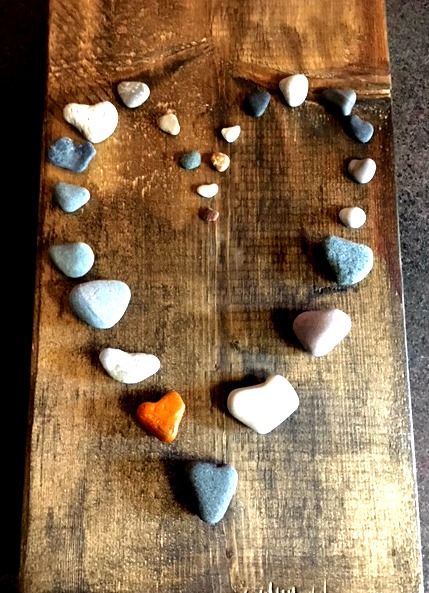
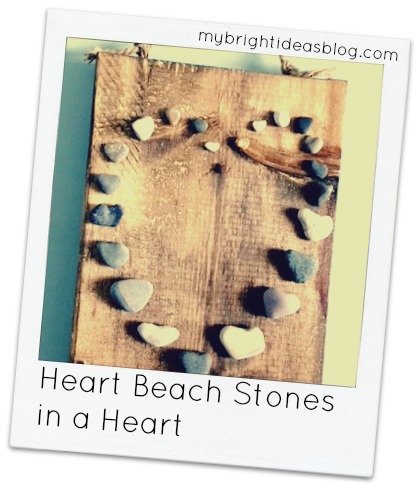
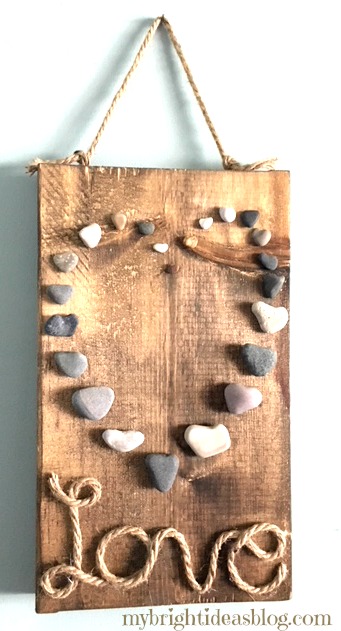
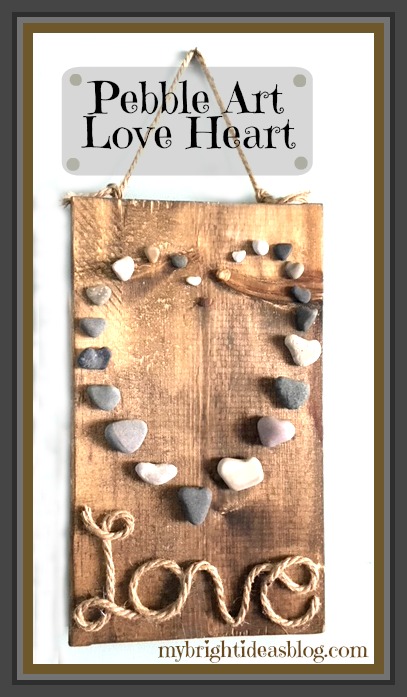
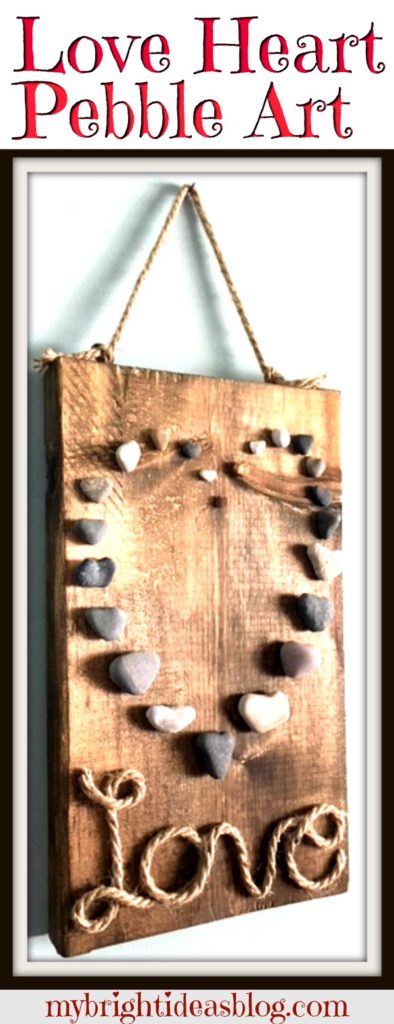
Heart Shaped Beach Stones – Pebble Art
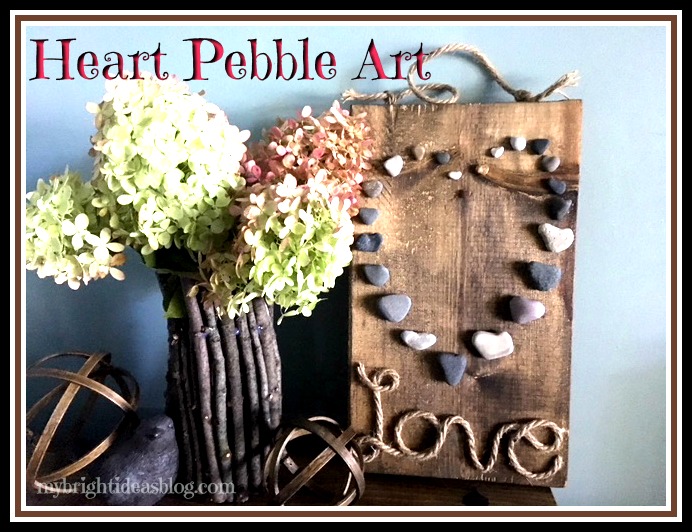
Make heart shaped pebble art with a collection of beach stones and natural rope on wood.
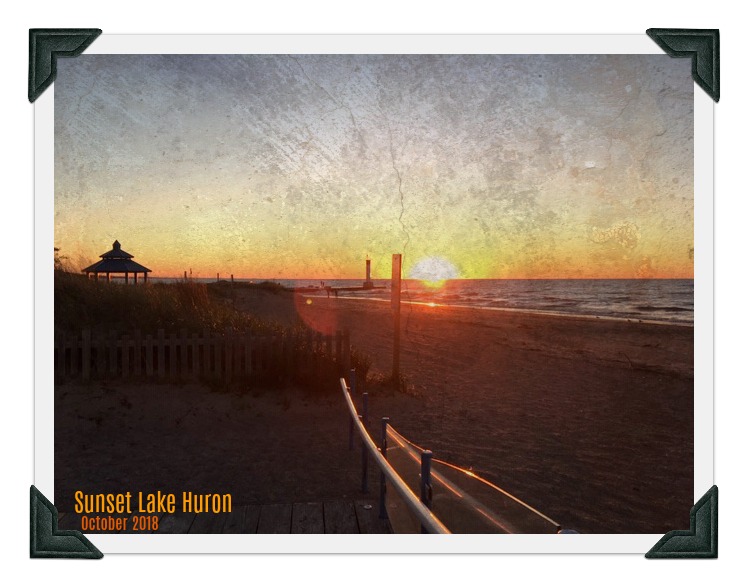
We have gone to the beach twice in October. The cool thing about going to the beach in the Fall is that no one else is there. The beach-that is typically packed with families with picnics and sunscreen….well….is empty. Have you ever had an entire beach to yourself? It’s amazing!
Our home is about an hour’s drive away from Lake Huron. If you aren’t familiar with the Great Lakes allow me to explain….
The Great Lakes
The Great Lakes aren’t your typical lakes. There are 5 and they are huge! Each looks like a sea, with rolling waves, winds, strong currents, great depths and distant horizons. According to Wikipedia if you put all 5 of the Great Lakes together the surface would be the size of the United Kingdom. Lake Huron is where we would head to see a gorgeous sunset.
If we drive an hour in the opposite direction from home, we will be at Lake Erie. If you are a morning person you can watch a beautiful sunrise on that side. Yawn…..
The Great Lakes are the largest group of freshwater lakes on Earth. 4 out of 5 are on US Canadian Borders (Superior, Ontario, Huron and Erie). Leaving Lake Michigan the only one that is located completely in the US. According to Wikipedia “they form a single, naturally interconnected body of fresh water”.
Well that is enough of our fun facts for today! Moving back to our craft project and a trip to the beach.
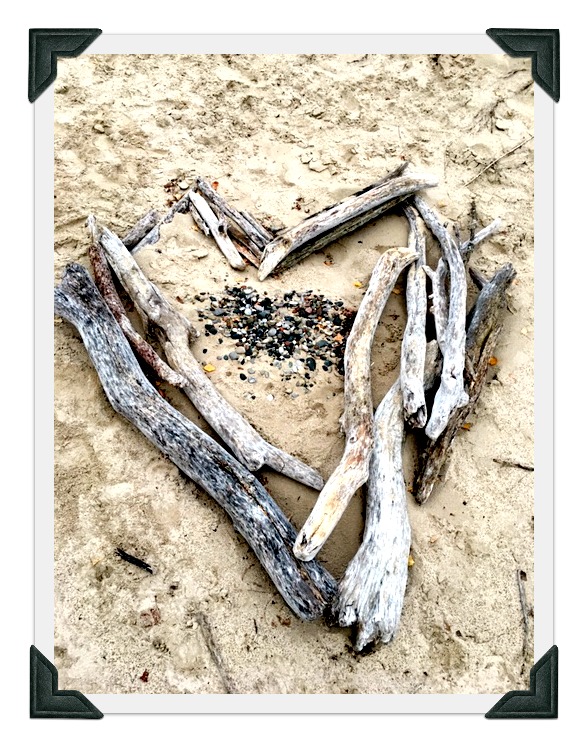
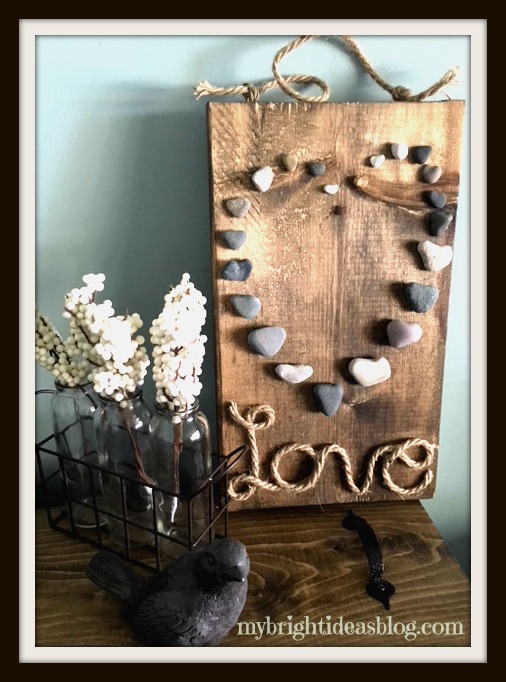
With my eyes on the ground looking for awesome rock treasures I always marvel at how beautiful the stones are wet, sparkling in the sunshine. As we walked along looking for interesting shapes-especially hearts! What did we find but this heart made out of drift wood. Awe isn’t it Lovely!
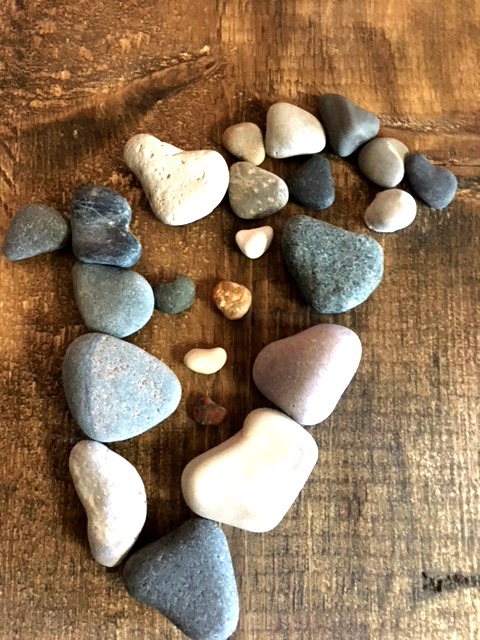
If you look at the beach for odd shaped stones, you suddenly see how very many there are in the shape of a heart.
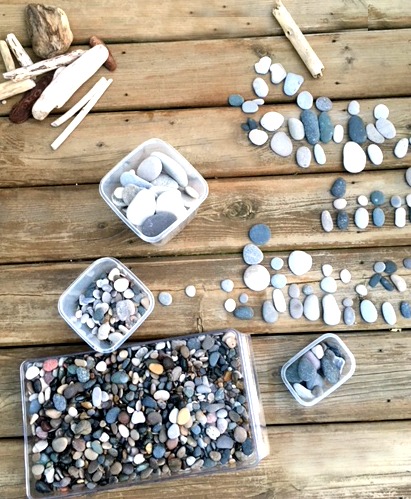
We came home with a nice collection of smooth stones that I sorted into a few containers for different crafts I have planned.
Circles, Oval, Hearts, Big Flat ones and some that were just wonky shapes.
If you are just buying a bag of stones from the dollar or craft store you probably won’t find heart shaped ones, but you can make a heart shape with any natural pebbles and it still looks great.
A month ago, I was spray painting things and I threw in some stones and painted them. If you have already my previous projects from the summer you will soon see that I love to spray paint things! My daughter noticed that I had painted a random stone orange but it was a really cool heart shape. This started my fixation on heart shaped stones.
On our next trip to the beach we specifically made a search for hearts, circles and long oval pebbles of any size. Bring on the rock projects!
To make this you will need:
- heart shaped stones (if you can’t find them smooth pebbles are fine)
- wooden board (I had already stained this 9 x 16 board with Miniwax Jacobean)
- jute natural rope
- hot glue gun
- 6 glue stick refills
- 2 eye hooks
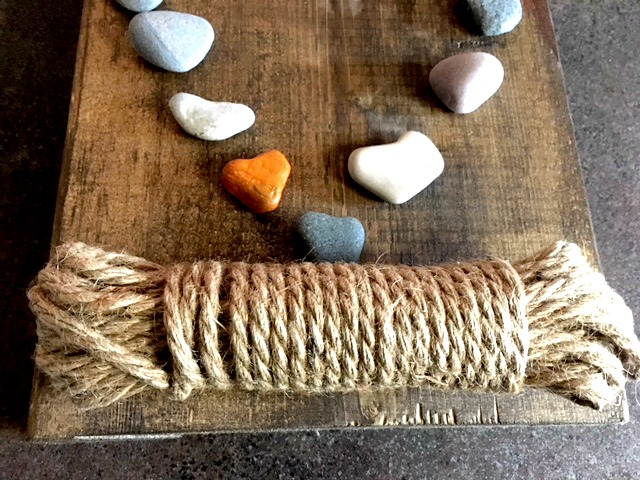
To get started, I organized my love heart shaped rocks to see how big it would be on my wooden board. I didn’t glue it to on yet. Instead, I took a photo of it on my phone in case I needed to refer to it. Then I got my jute natural rope.
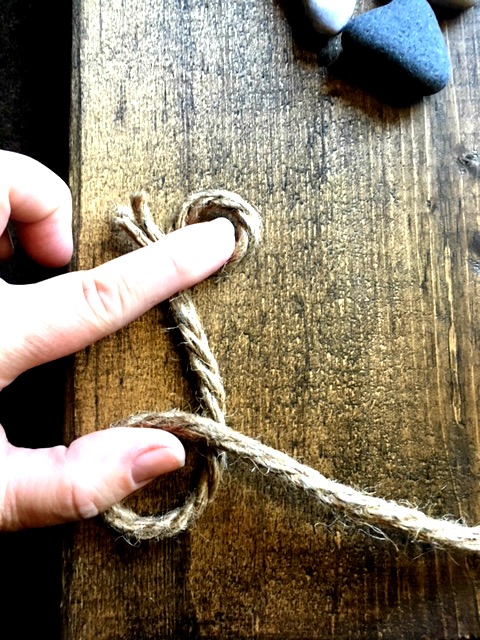
To decide on your letter size use your fingers to make the shape of the L. I usually “eyeball” my projects instead of measuring. Holding the rope down I wrote out the letters of the word Love on the wood.
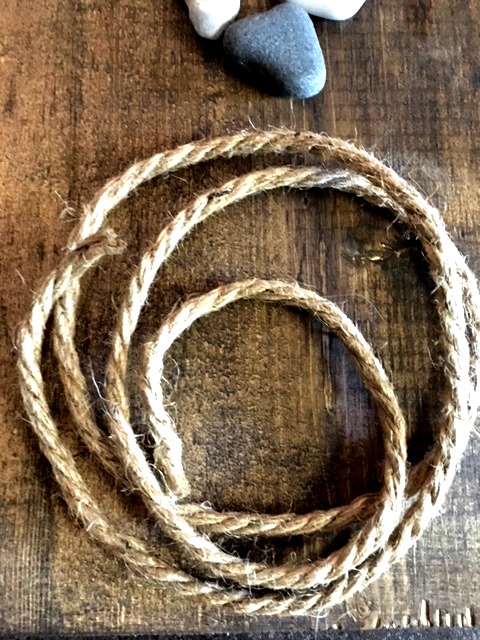
I cut the rope ahead of time because it was quite big to work with. You might choose to leave it on the spool until the end. That’s cool too!
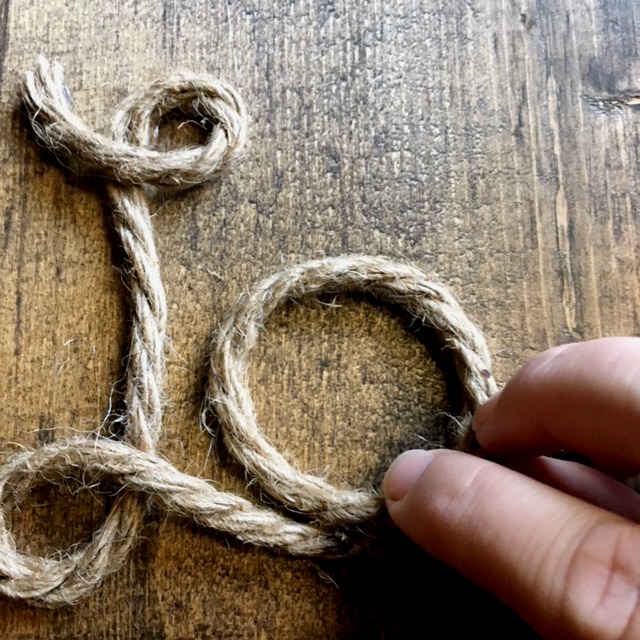
Using a hot glue gun put a few dabs at the top of the loop of your letter L and guide it into the shape of the letter using dabs of glue as you go along. Move on to the letter O and then join into a V and finally an E.
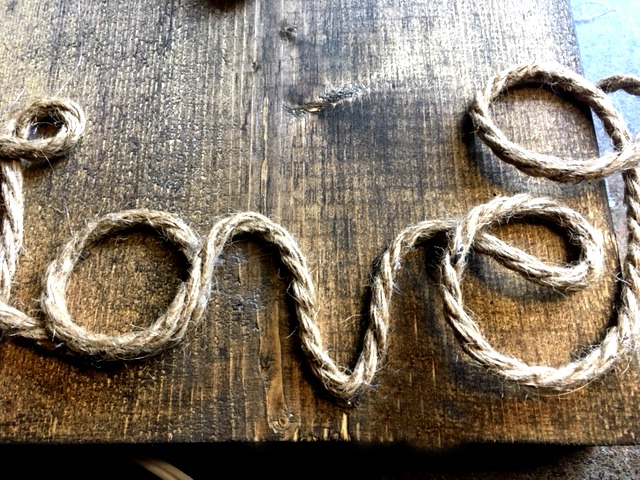
After the E is glued down trim the rope. Make sure the end of the E is secured so that the rope doesn’t fray and lift up.
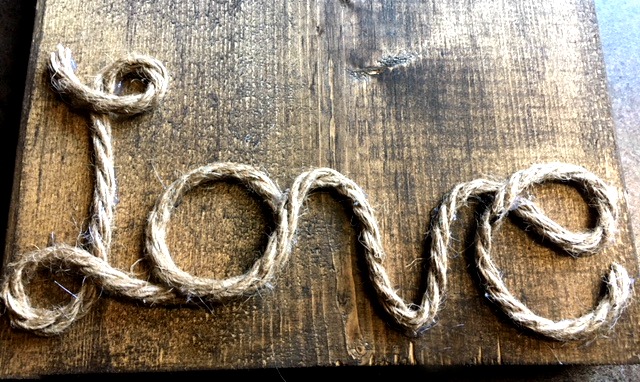
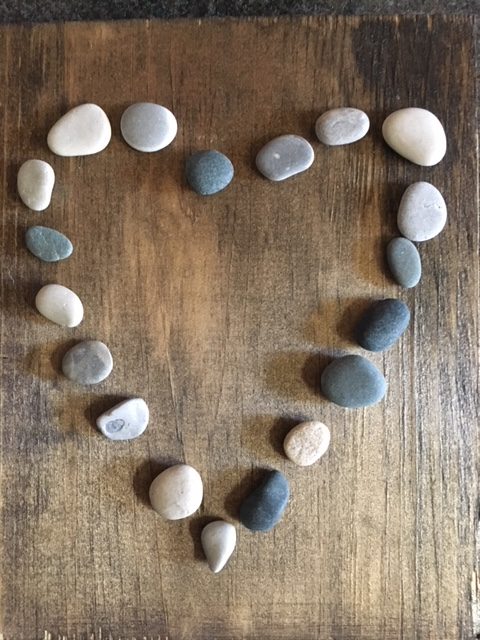
Perfect! Next lay out the rocks in the heart shape again.
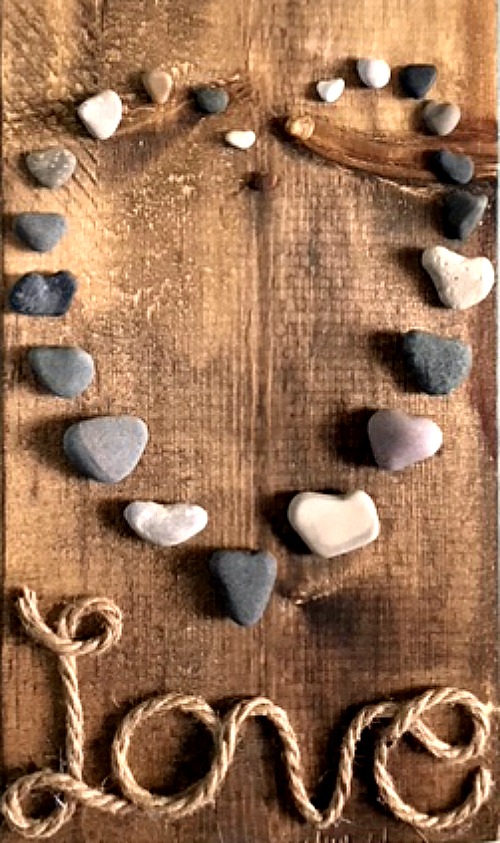
When you have the stones just where you want them. Remove each one and put a dab of hot glue on each pebble and then put in back in its place.
This craft would look good without the rope if just the stones on the wood appeals to you.
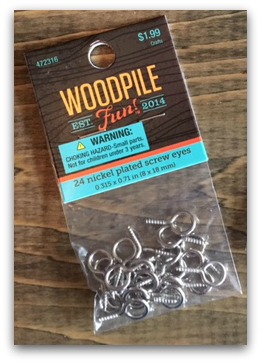
I picked up this package of screw eyes at a craft store but you can find them at the hardware store and dollar stores too. I chose the humble eye hooks so that I could have the rope on the top of the project match the “Love” at the bottom.
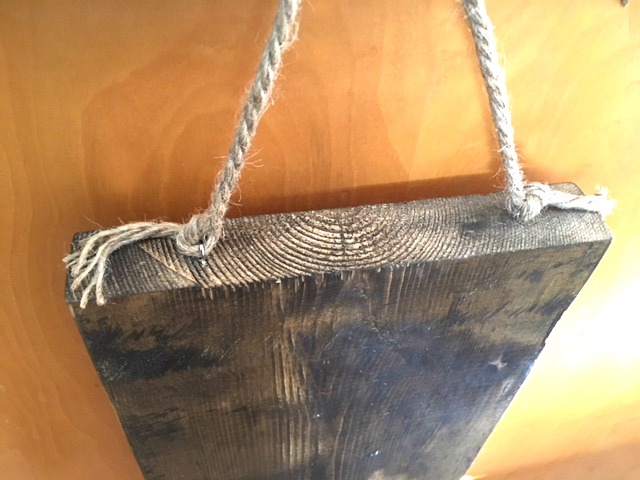
Simply screw these into the top of the board and tie jute rope in a knot. Now it can hang on the wall.
This is a super easy gift idea. You could really personalize it by writing your last name instead of love, or something else…maybe “faith”, “hope”, “smile”, “dream”….something that will inspire or make you smile. You could also make this any size or paint the wood board instead of staining it. Get creative!
Thanks for reading this post and checking out another one of my crafts. I have posted several rustic/wood home décor projects recently, so I’m linking them to this message for you to pop over and see too.
Please pin or share with your social network of friends.
…
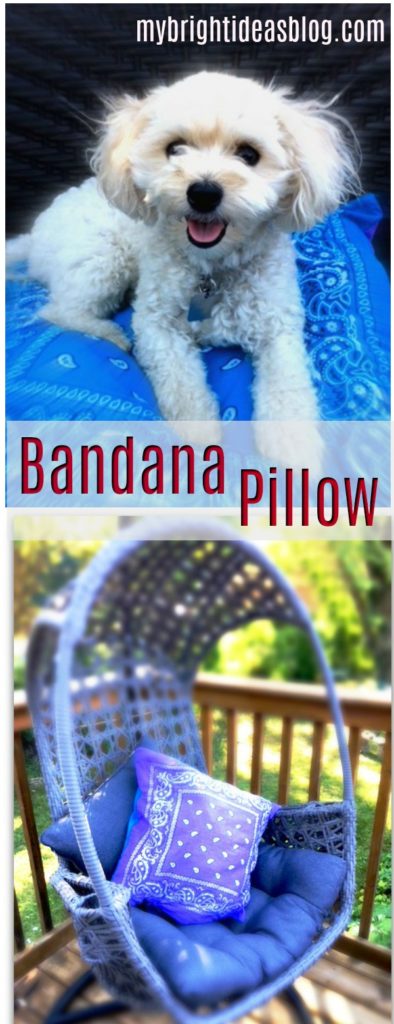
Make an Easy Bandana Pillow

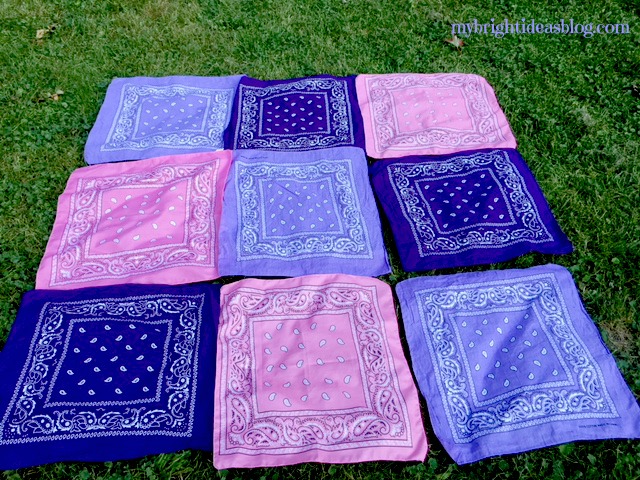
So a month or two ago I purchased way too many bandanas. Since then I’ve been looking for ideas to use some of them in projects. Today I’ll show you how to use 2 more! Let’s make a pillow for the bed, couch, or dog.
This is the beautiful Gemma. She is our 2 year old Yorkiepoo (Yorkshire Terrier mixed with Poodle). She loves to share my chair when I’m using the computer. Gemma stays up as late as I do and then sleeps in behind the bend in my legs. She is quite yappy to the squirrels but she is a dream dog at home. One of her favorite places to nap is in her crate. So let’s make her a new pillow.
You will need:
- 2 bandanas/handkerchiefs the same color or complimentary colors
- sewing machine
- needle and thread
- pins
- pillow or stuffing
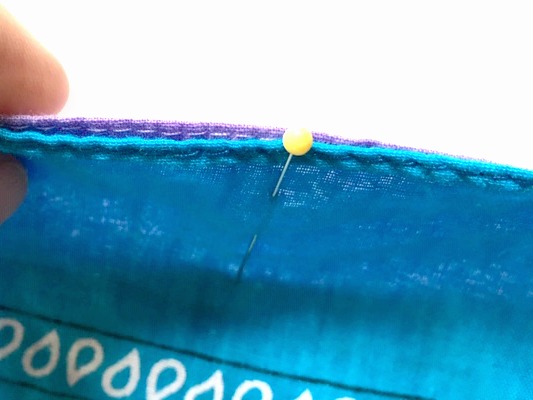
With right sides together, match up the corners and pin them. They don’t make handkerchief/bandanas all the exact same size. So don’t get frustrated. When you sew them together you will be able to correct their wonky sides.
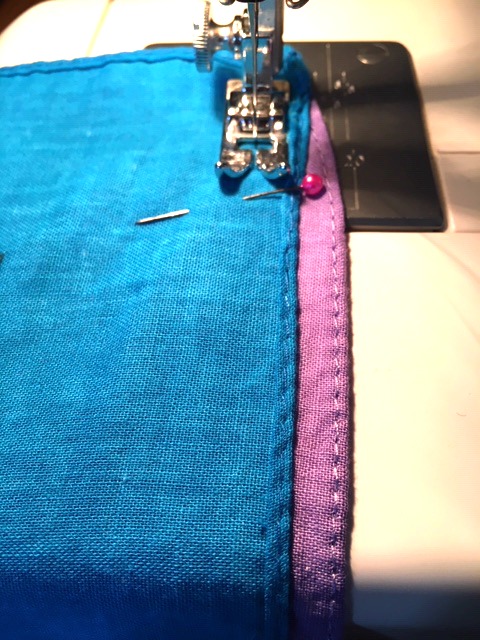
See what I mean. The purple one is not cut straight or is slightly bigger, so it’s sticking out. Sewing them together with a straight line will disguise the mismatch.
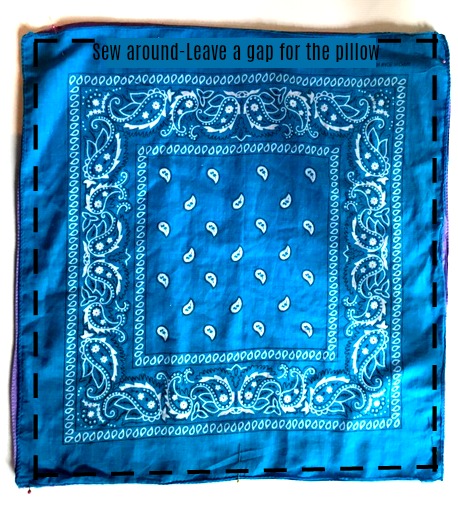
Sew almost all the way around leaving a wide gap on one side.
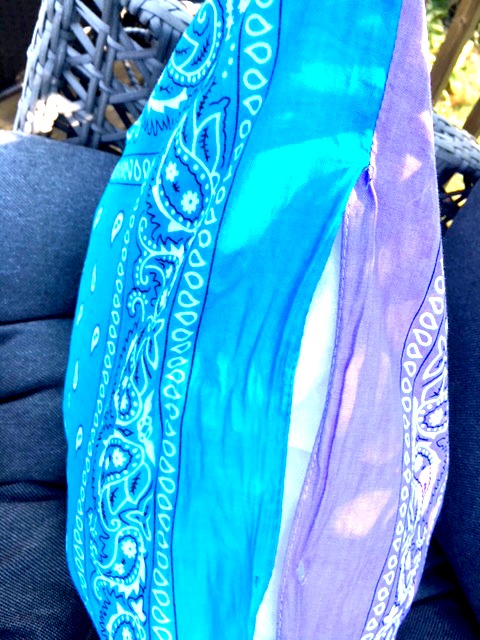
Turn the pillow case inside out and insert the pillow. Since this will be used for Gemma’s crate I didn’t buy a new pillow form. Instead, I used a cheap, old limp bedroom pillow that was wasn’t very fluffy anymore. It easily fit into this pillow case.
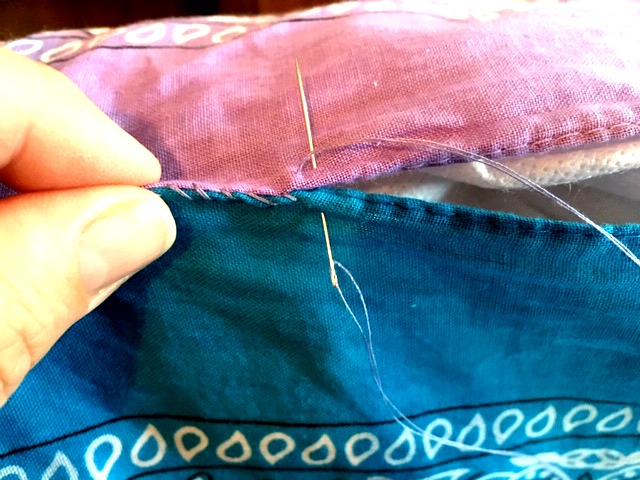
Next, take your needle and thread and hand sew this opening closed.
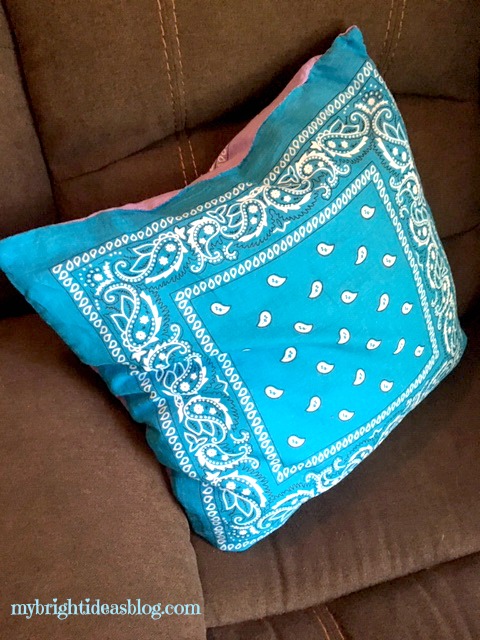
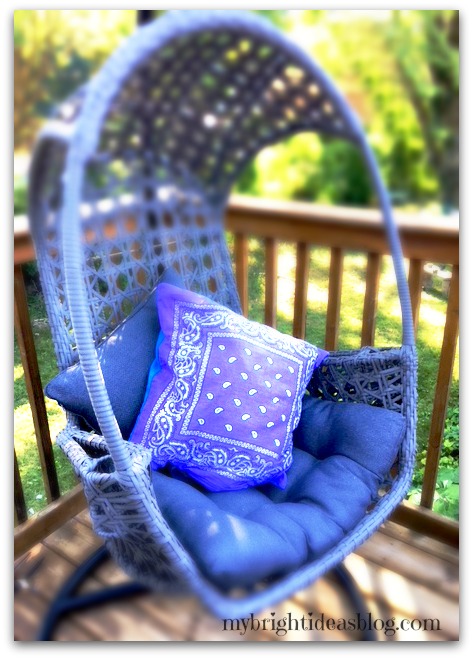
You could use this on the couch, on a bed, outdoor furniture, in the car or……
…..for your sweet puppy dog.
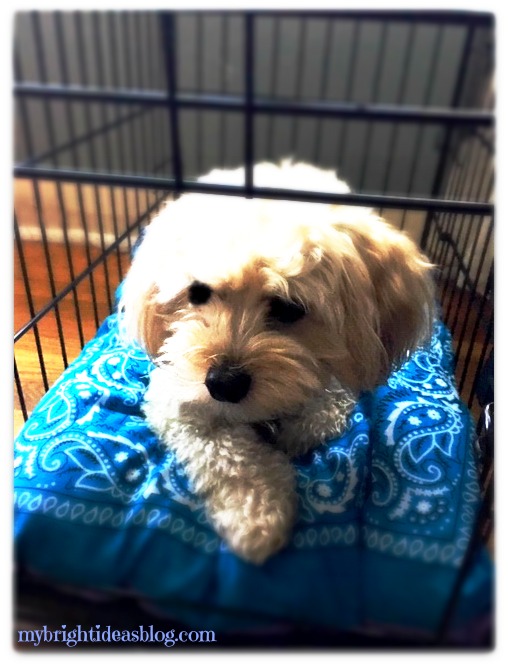
Thanks to Gemma for being a gorgeous model for this little photo shoot.
Feel free to comment with suggestions for what to do with the other 15 bandanas I still have left over. Did you see the Fall table cloth I made last month? Have a look.

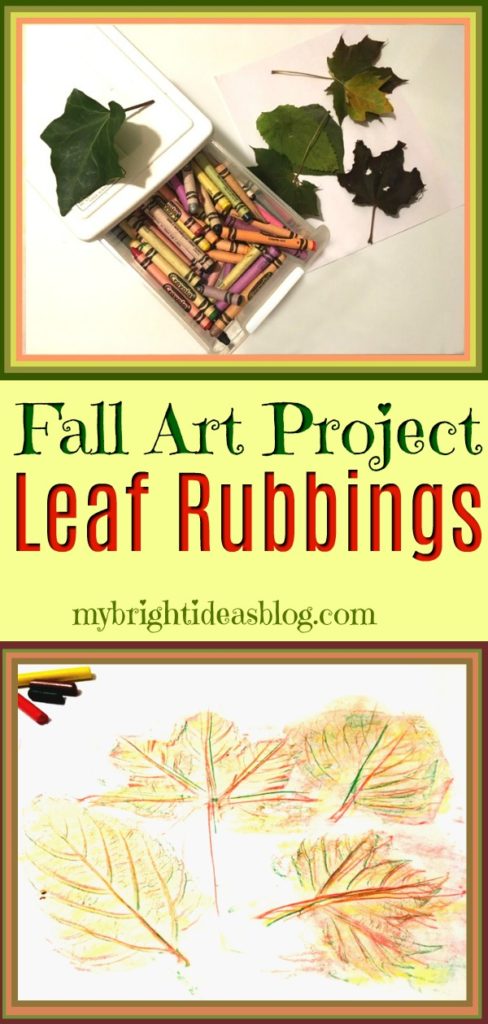
Fall Leaf Rubbing – Super Easy Kids Craft!
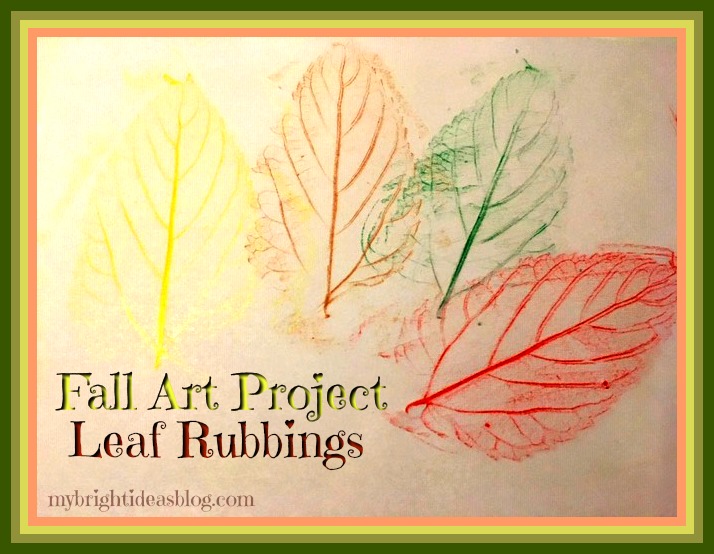
Remember doing Leaf Rubbings in the Fall when you were a kid? Well, Autumn is here again and its time for a nature walk to collect some leaves for this wonderful classic nature craft.
On your nature walk give the children (even young toddlers) a paper bag or large zip lock to collect their treasures.
Just in case they should ask the question…. Why do the leaves change color and fall off the trees?
Here is a quick answer….The leaves collect sunlight to feed the tree in the spring and summer. During the fall the tree goes into resting mode for the Winter. So the leaves turning color is the their way of getting ready for Winter.
There is much more to learn about it but that is the toddler explanation. If the kids are older why not do a research project to learn more. It’s quite interesting. For example, an oak tree’s leaves turn brown for a different reason then a maple tree’s leaves turning red. Chlorophyll and photosynthesis, glucose, oxygen and carbon dioxide-there is a whole factory in every tree we haven’t even noticed. Have a read through this website for a little lesson my 8 year old could handle..
https://www.sciencemadesimple.com/leaves.html
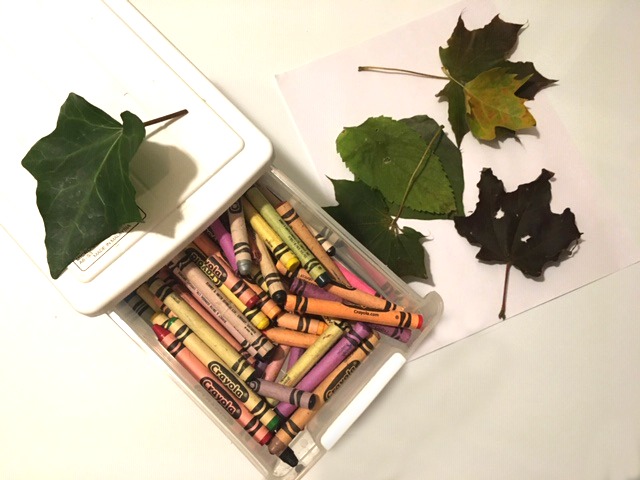
For this project you will need:
- Crayons…green, brown, orange, red, yellow
- Leaves
- Plain paper
Grab your crayons and paper and leaves. Peel the paper off your green, brown, orange and red crayons.
We have a nice collection of treasures from our nature hike-including stones, sticks and petals from my mums. For today’s project we just used the larger leaves. I’m setting the rest of the little treasures aside for another project.
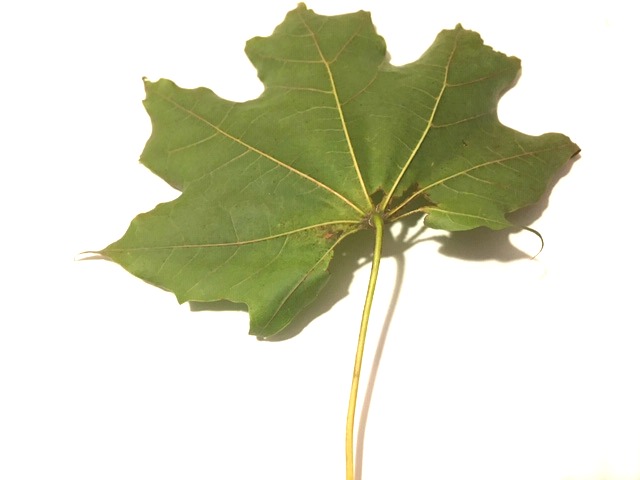
Take your leaf and turn it face down. Lay a blank page on top of the leaf. Turn your crayon on its side and rub on the leaf.
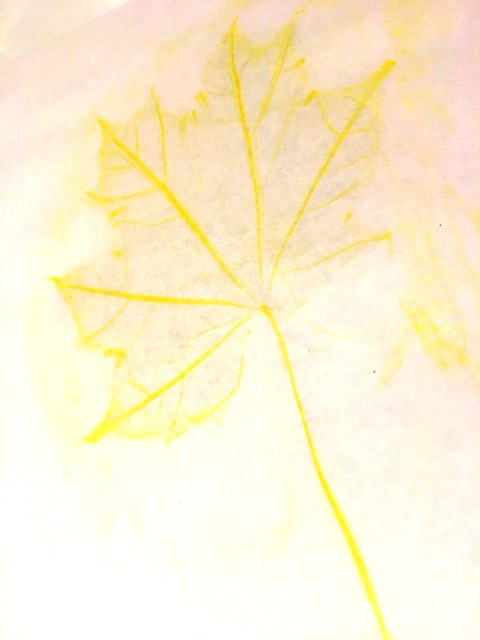
Yellow was one of my favorite colors to do rubbing but it doesn’t show up quite as well on photos.
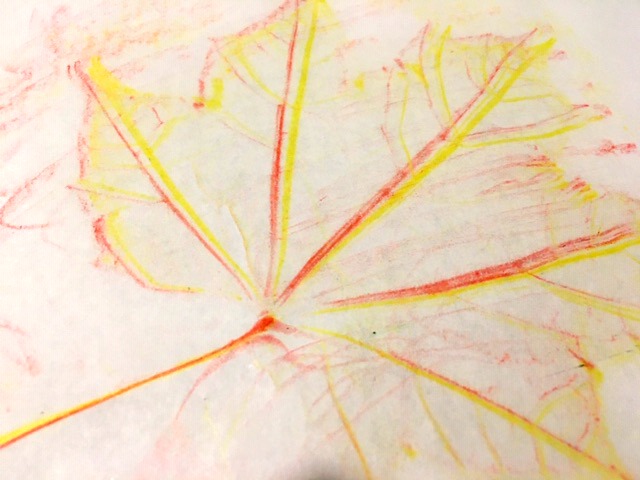
On this one we tried to layer red after the yellow but the leaf had moved a bit. It still looks cool though.
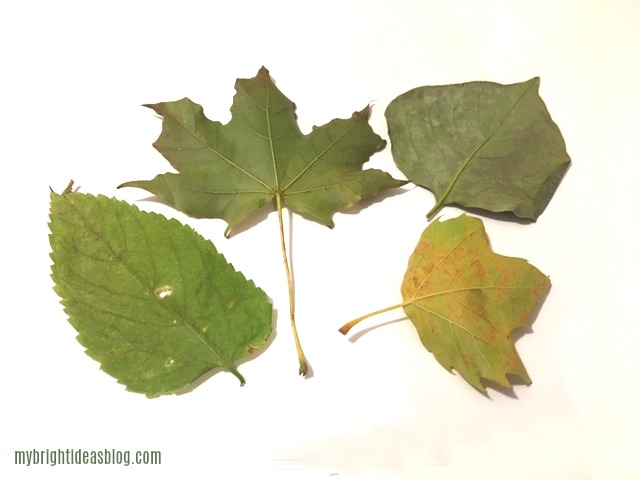
Were you able to collect a variety of leaves? If the weather didn’t work out for a proper nature hike in the woods, look around your yard and take a leaf sample of nearby shrubs and garden plants. They definitely have interesting leaves worth doing a leaf rubbing with too.
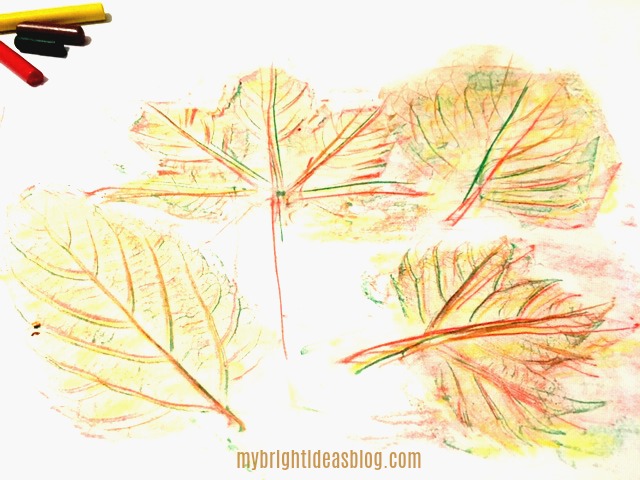
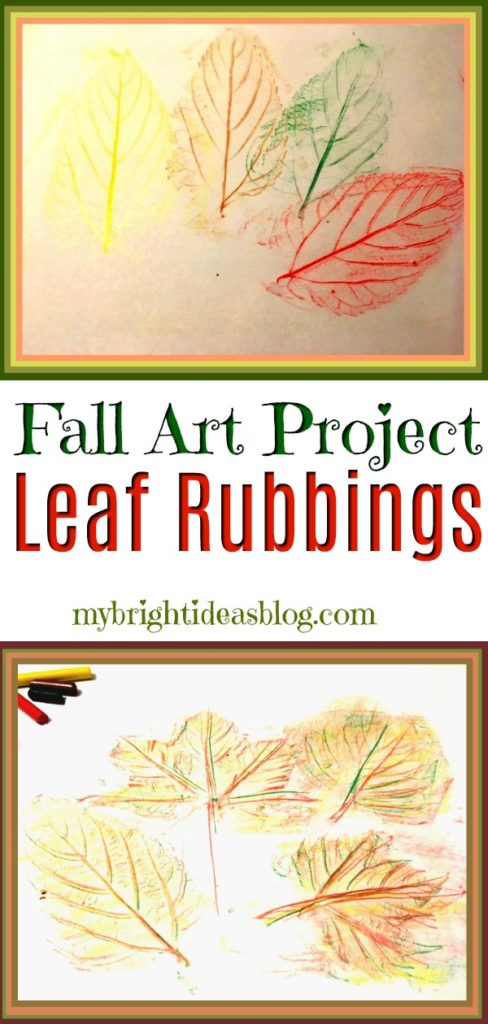
Here we tried all the crayon colors on each leaf.
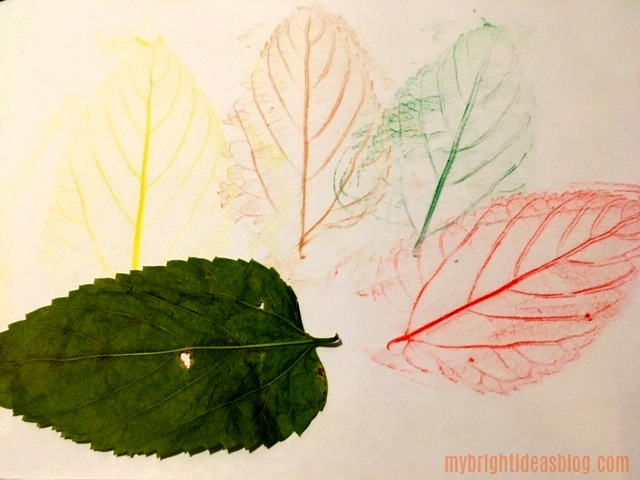
For this lovely art piece, we used only one colour on the leaf and then moved the leaf over and tried the next colour.
This is such a quick and easy autumn activity-it could be part of a yearly autumn tradition. If you have little ones in your life, I hope you can find a few moments to enjoy the Autumn changes of season and make some Fall art together.

Check out this post for a great nature craft using inexpensive clay!
Nature Craft – Perfect for Earth Day Activity – Clay Imprints with Plants and Flowers
…
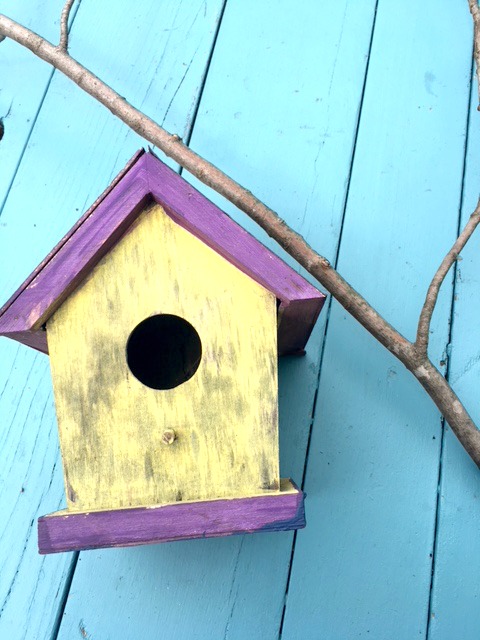
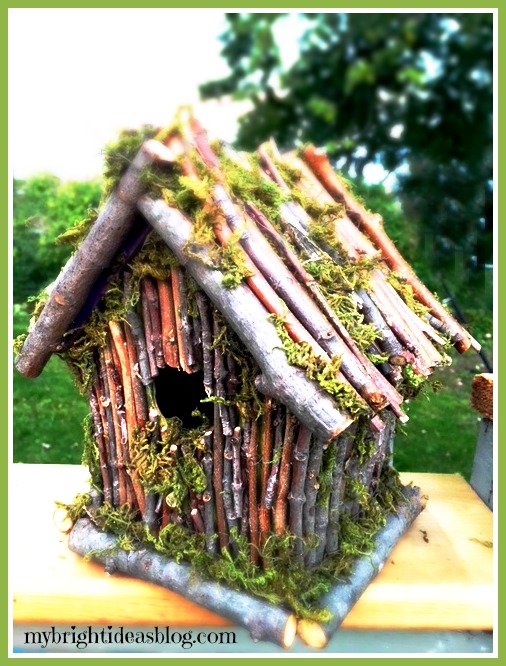
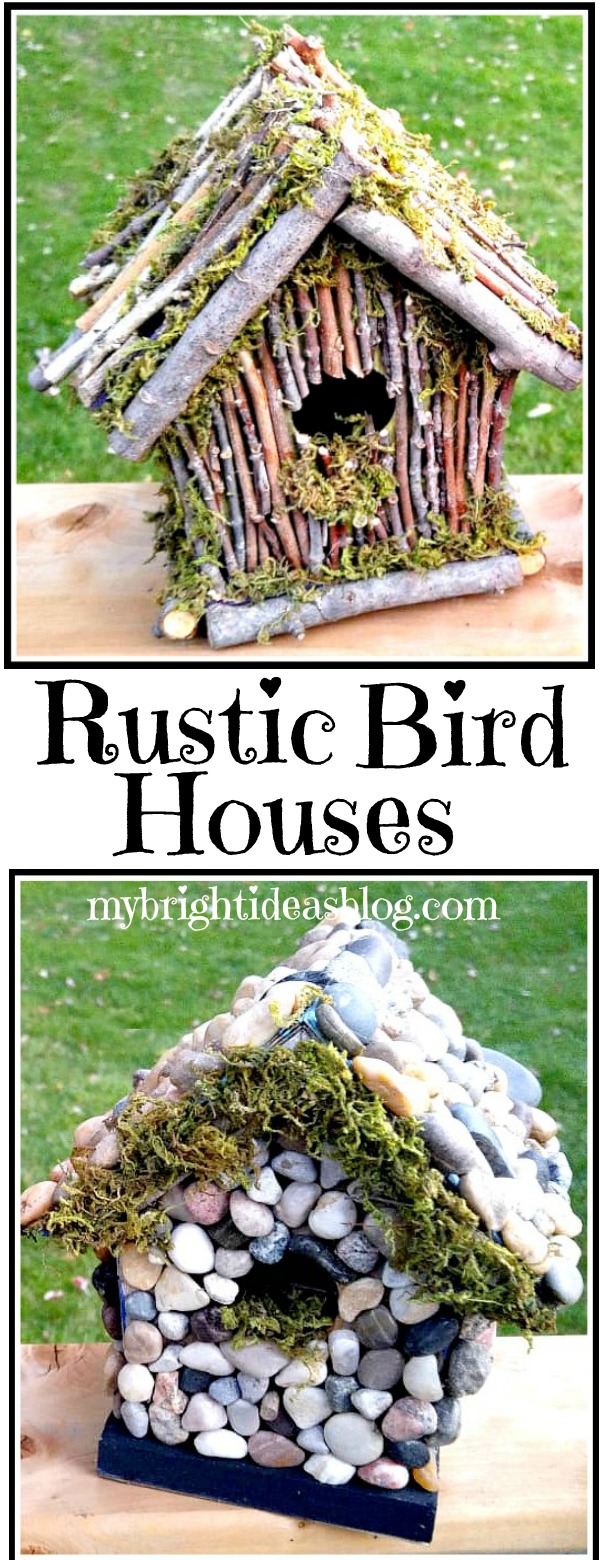
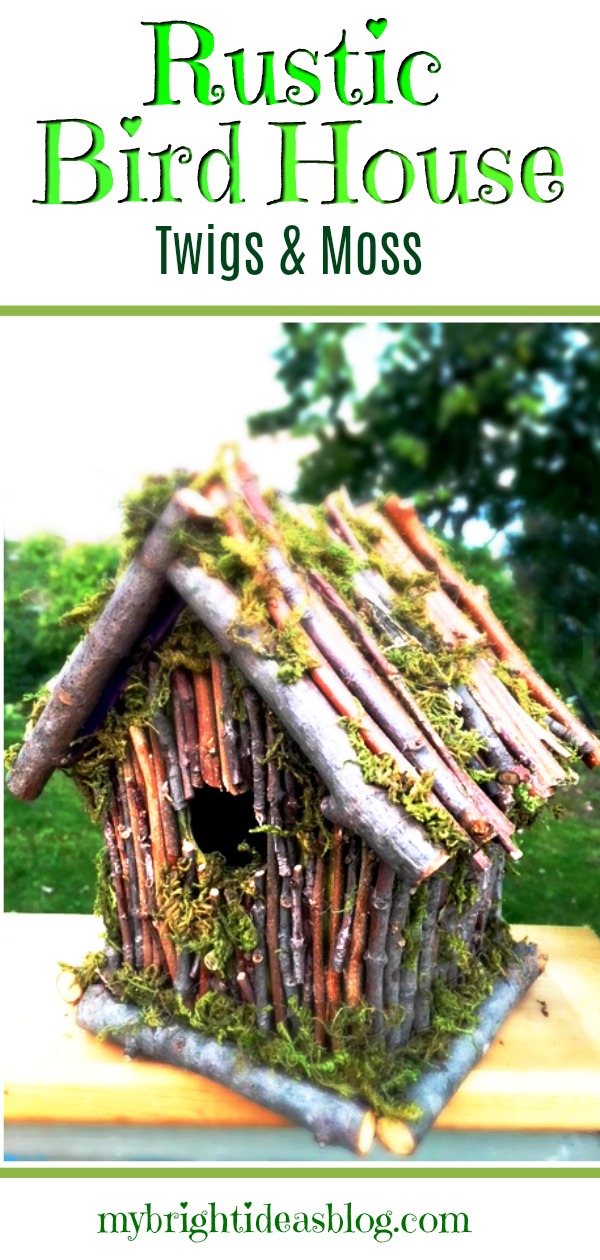
Rustic BirdHouse – Twigs and Moss
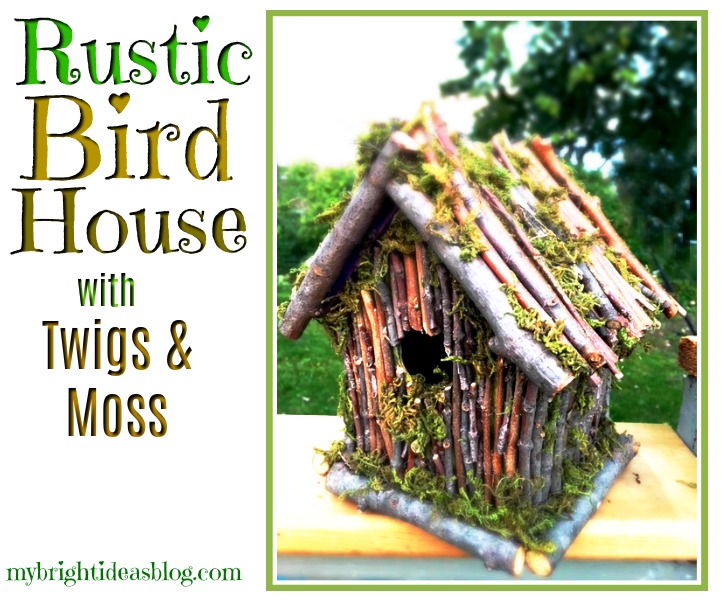
I’m loving sticks and twigs and rocks this year! So you’ll see a lot of these projects from this past summer and heading into the fall and winter. This is birdhouse project, I really enjoyed making and can’t wait to tell you about!
Two years ago my daughter and I painted a bunch of birdhouses and drilled them to the garage. It’s an old wooden garage with peeling paint so if we can distract your eyes from its sad, old, tired look we would! It should get knocked down and rebuilt but we would like it to last a few more years…so instead I’m decorating it.
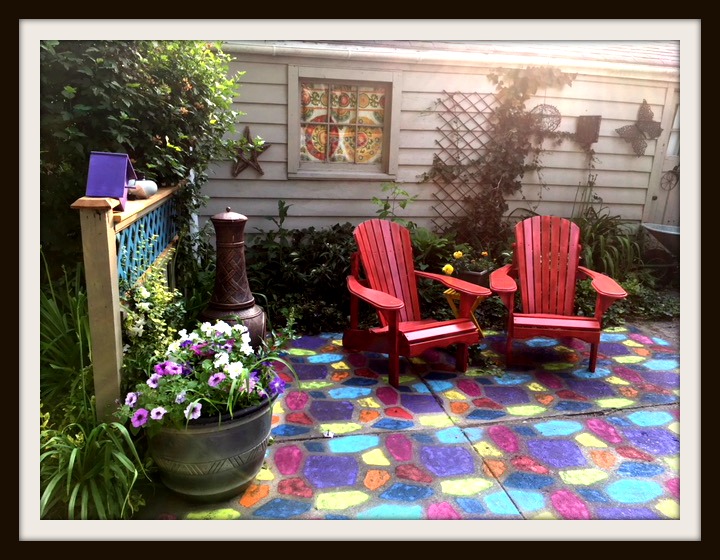
See what I mean…
I apologize we got a bit sidetracked there. Back to the twig birdhouse. After two winters the birdhouse collection had gotten worn out and weathered. They were just cheap wooden ones from the dollar store and we didn’t think ahead to put extra clear coats over the craft paint to make them water resistant. That would have been sensible.
If you would like to try this you will need:
- a birdhouse
- outdoor paint or varnish to water proof it
- branches
- garden snips
- E6000 or other industrial glue
- natural moss
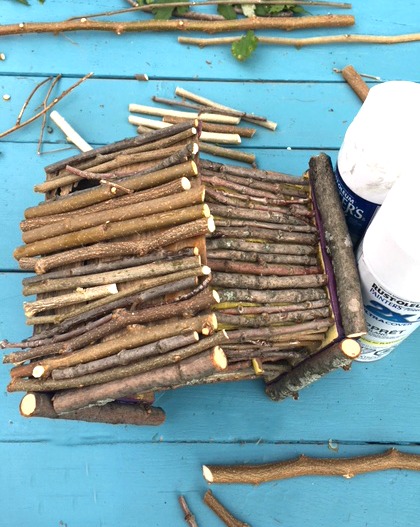
You can get inexpensive birdhouses at the dollar store but if you would like it last for years and years get the sturdy ones from the hardware store or make your own. Paint it or put a protective clear varnish so it will last a long, long time. I opted to use the old weather worn ones to try and upcycle it instead of throwing it out.
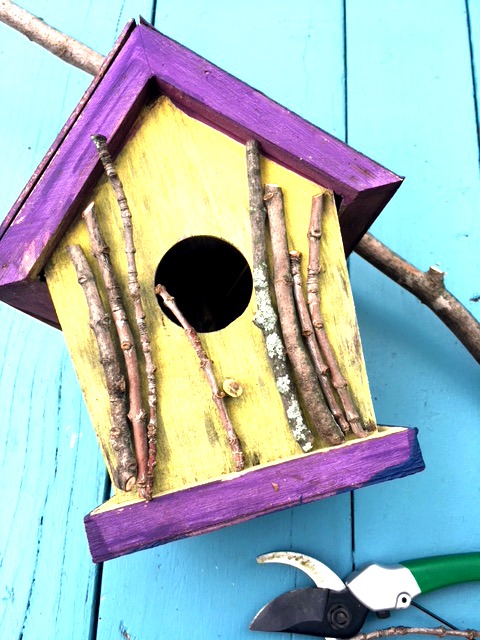
We needed to trim some out of control shrubs and some branches so this project was perfect timing. There was no measuring of the length just line up the twig to the area you want to put it and snip! When I had the area planned out I went back to glue it.
Using E6000 Industrial glue is stinky so I try to use it only outdoors. It is slow to dry but very secure. I have used a hot glue gun to secure sticks and pebbles to things like this before and within a few days it had pieces falling off. If your project is going to be indoors you could get away with quick drying hot glue.
I attached the sticks all over one side of the birdhouse and left it to dry.
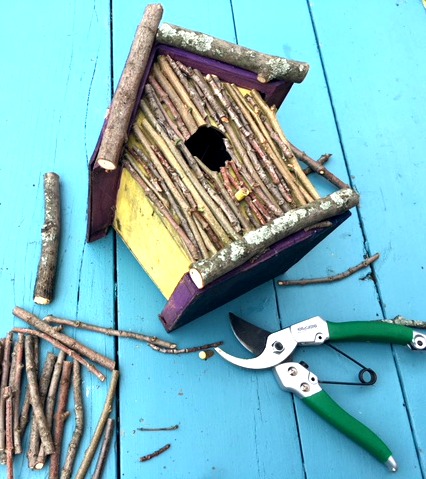
Each side needed several hours to dry. Then I came back to work on the next side. This really slowed down the process. It felt very relaxing making this natural project so I didn’t mind that it took me a few days.
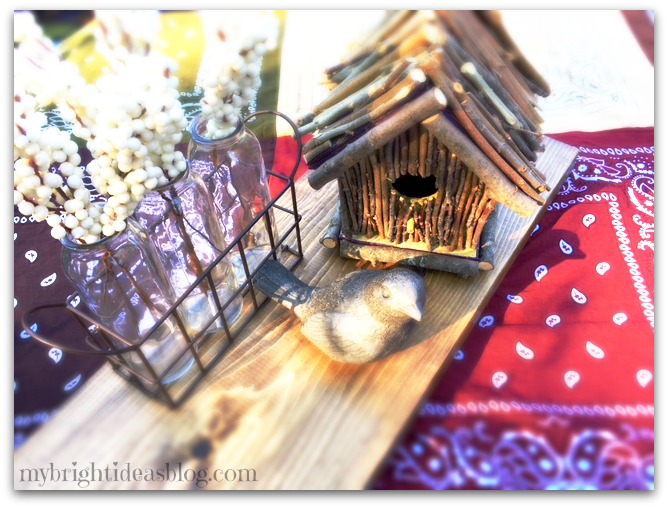
I was actually quite happy with it with just the sticks on the birdhouse. I took this picture a few weeks ago with my bandana table cloth post. It’s cute right!
But then….I had a vision of it with moss and the project took on its final stage….
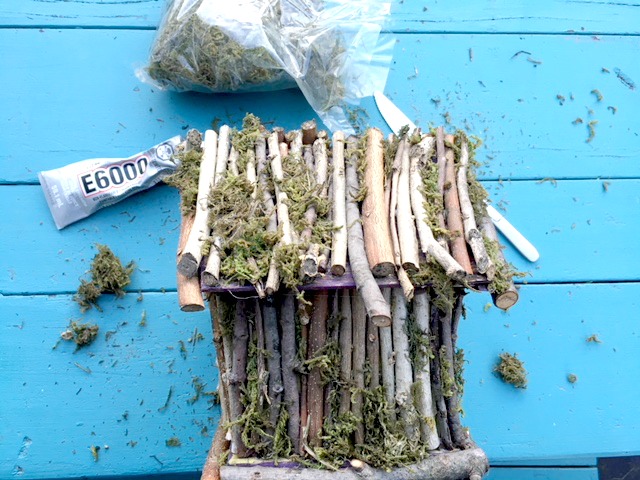
The moss is from the craft or dollar store and comes by the bag. It is quite loose and flakey so it will make a bit of a mess on your work space.
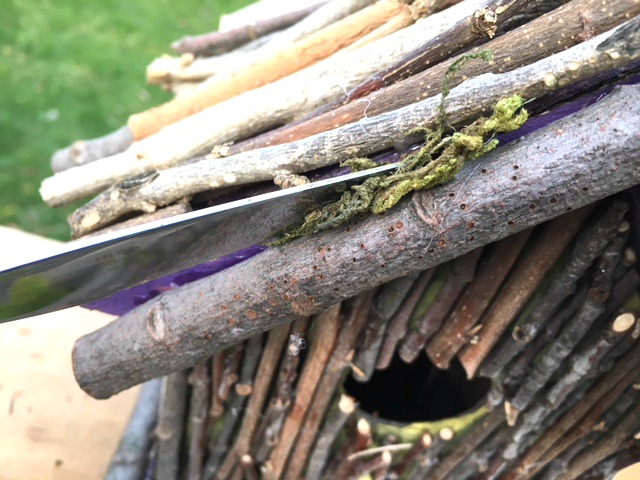
Anywhere I could see the old purple paint I put in some moss. This photo shows me sliding the moss in between each stick using a butter knife as a tool. I also used some dabs of glue plus jamming it in gaps between the twigs.
Heavy rains and wind may be hard on the moss. We will see how it lasts and maybe place it in a bit of a protected area of the garden. A covered porch would likely be ideal.

Isn’t that beautiful! I don’t know that any birds will actually want to use it but for a decorative addition to the garden I’m very pleased with it!
Thank you for reading to the end. I hope you enjoy your day. Before you go feel free to visit some of my other posts. Pin this to Pinterest or share it on your favorite social media.
…
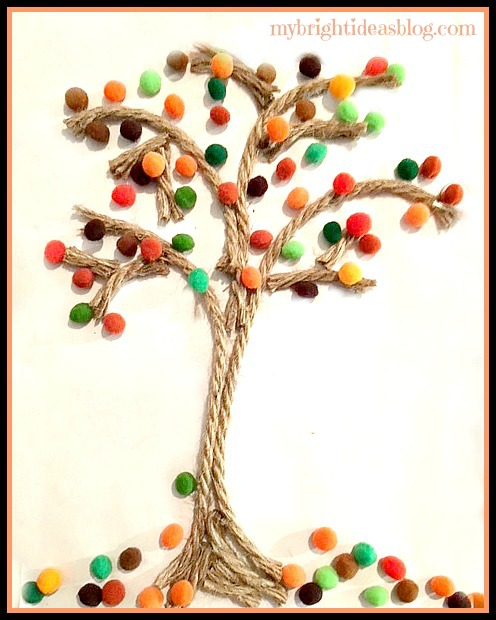
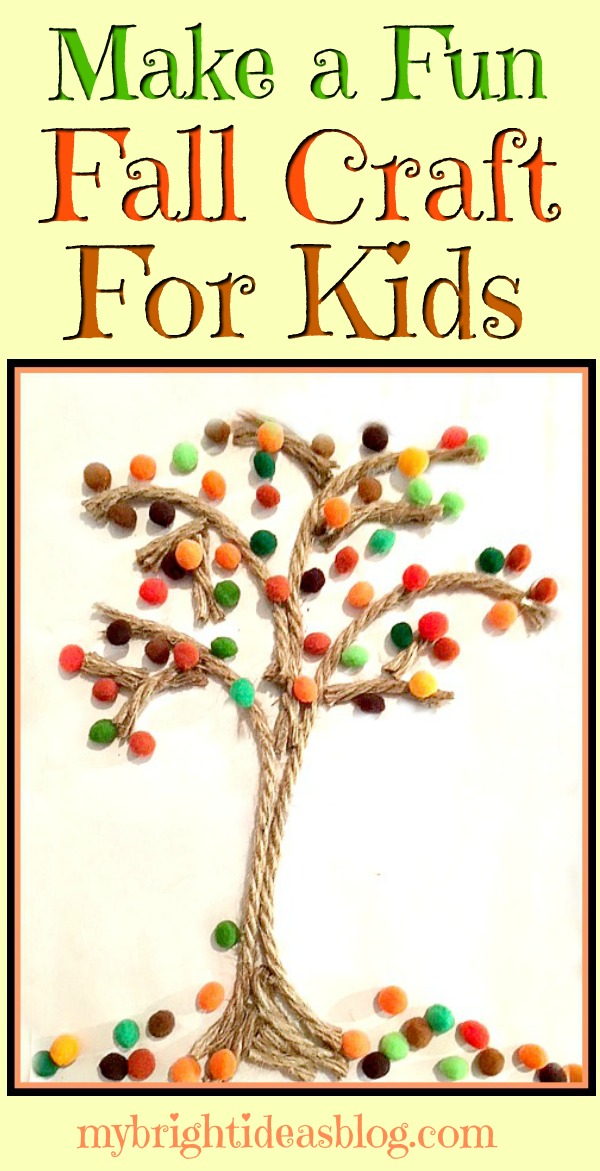
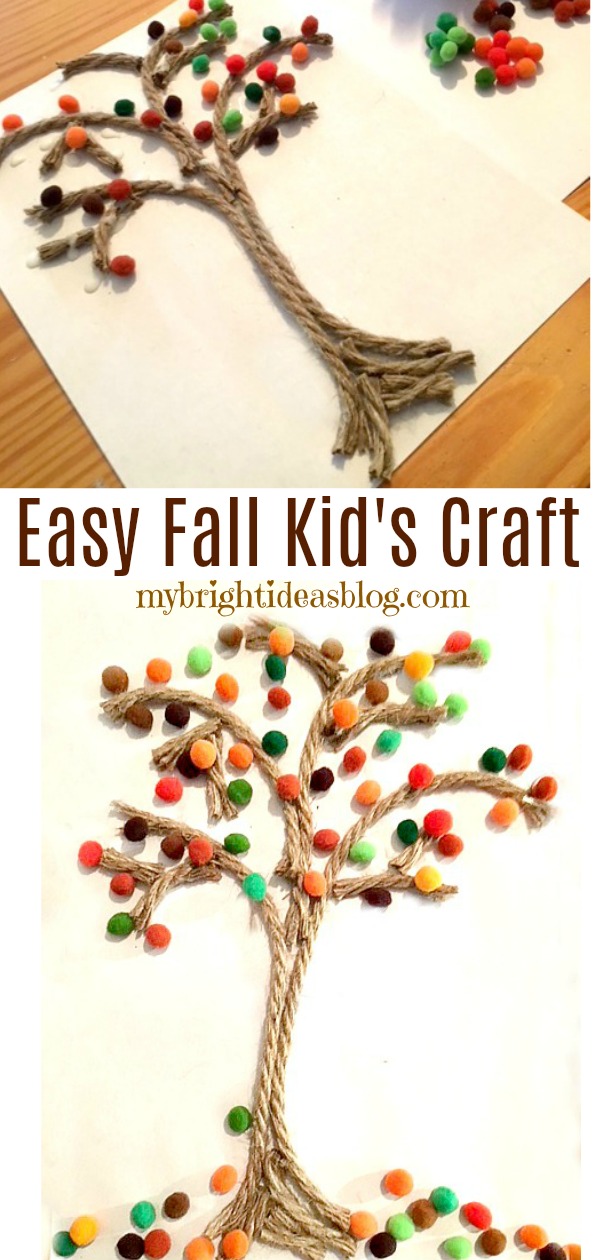
Easy Fall Kids Craft – Rope and Pompom Trees
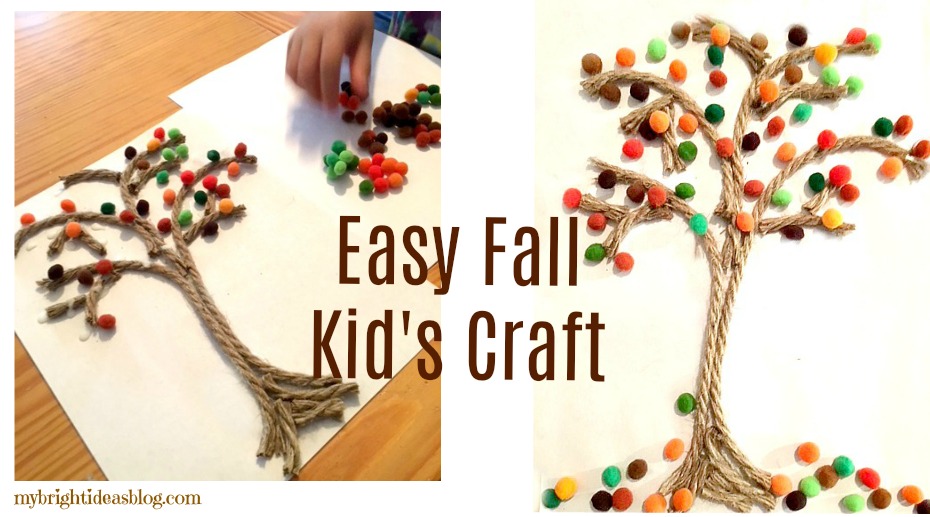
Today I was rolling through the dollar store….I only needed to pick up one item…but my shopping cart was full of crafts. As I perused the craft aisle, I stopped in my tracks when I saw the pompoms. Gasp! Packages of all sorts of colours! I got 6 packages…some for now and some for later. When I saw the package of multicoloured orange and yellow pompoms… I thought Fall Tree Craft! Whooohoo Start the Car!
I have neglected the kids crafts in favor of my DIY projects over the summer. So I’m brainstorming some kids projects for autumn before you know it winter will be here!
After my 8 year old got home from school we worked together on this easy kids craft. This is perfect for this time of year. Autumn colours of greens, browns, oranges and yellow.
You will need:
-
- rope or natural jute
- small pompoms in fall colours
- white glue
- cardstock or a blank white canvas
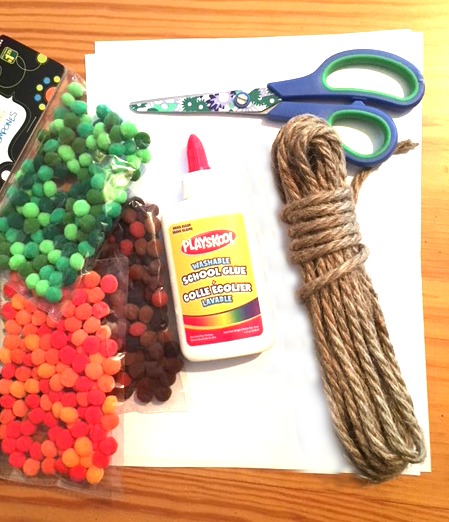
I mention using cardstock or a white canvas because this ends up being quite heavy and regular paper will be floppy from the weight.
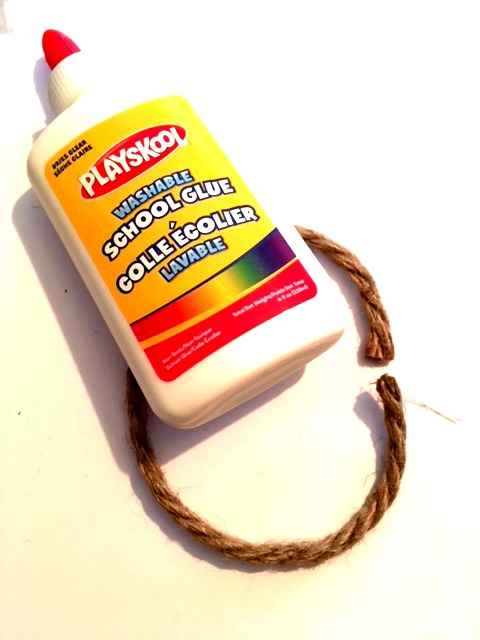
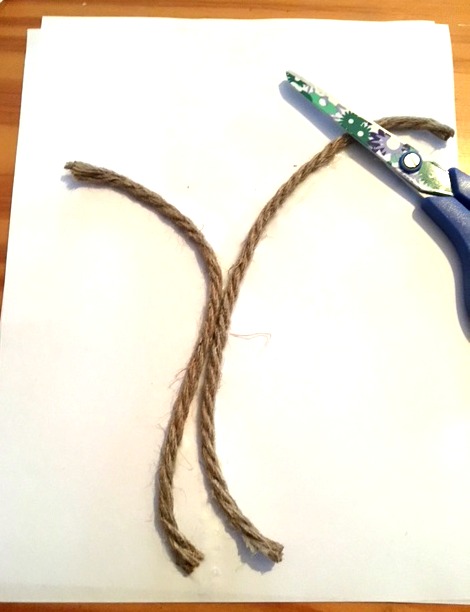
Start by cutting a piece of rope the length of your page or canvas.
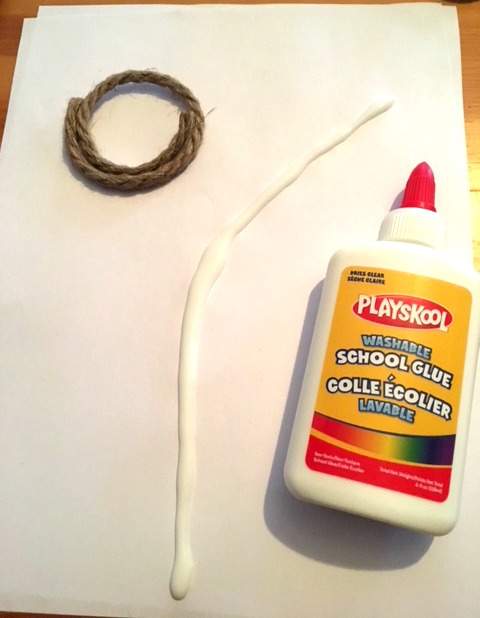
Make a line of glue starting from the middle bottom of your page or canvas running upwards and to the right to begin a branch.
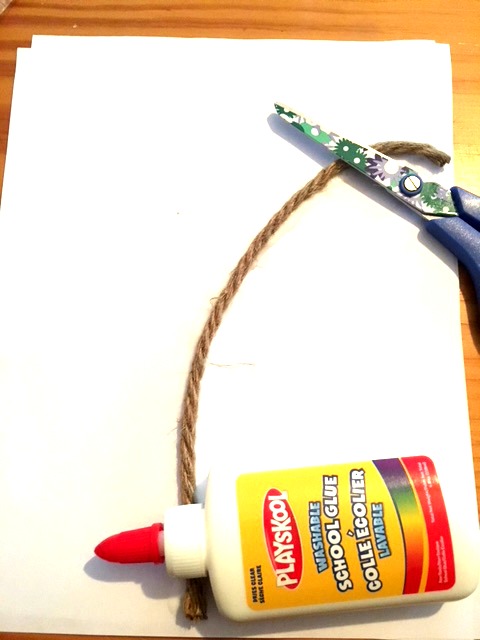
The ends of the rope seemed to pop up at first so I rested my glue and scissors for a few minutes until it began to stay flat.
Add a second piece of rope that is the same length. Have that one turn to the left for another branch.
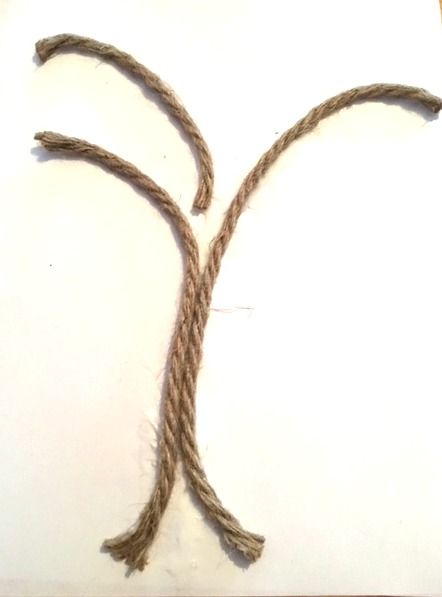
Begin cutting a few pieces to fill in some additional branches. Fill in the top of the tree by adding more 1 inch pieces of rope as smaller branches.
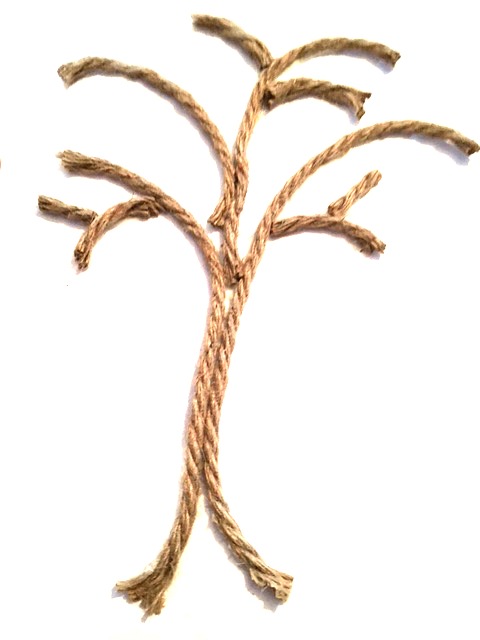
Next add small pieces of rope to thicken the bottom of the tree trunk.
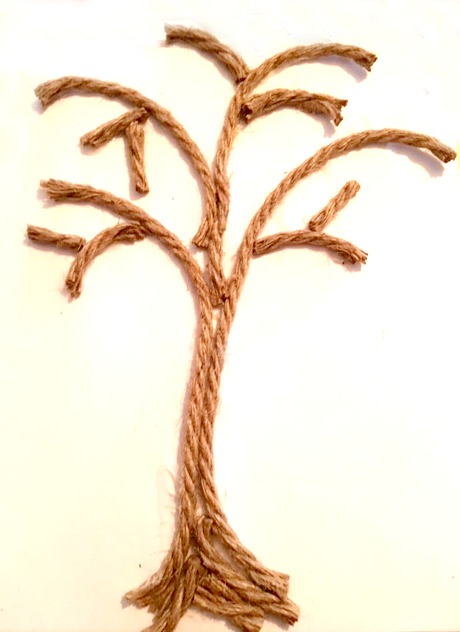
We were pretty happy with our tree trunk so we moved on to the pompoms.

Add a few dabs of glue on the rope and around the rope. Then add orange, yellow, brown and green pompoms.
Is it just me or do the colours of these pompoms make you think of Reese’s Pieces….is anyone else getting wondering if they have any chocolate hiding anywhere? Maybe its just me…focus on the craft…

I suggested we put some on the bottom of the trunk and on the ground. Miss M didn’t understand why we would want to do that. Um, darling look out the window. The wind has picked up and the leaves are swirling. By tomorrow the wind will have moved all the leaves from our lawn onto our neighbours lawn. Sorry about that sir.

Mother/Daughter craft time is good fun! This girl is always crafting something out of our recycling bin. She is just like me…always planning a project.
So there you have it! A super easy autumn craft perfect for this season. Beautiful fall colours in your tree art. Now maybe we should grab our rakes and head out to deal with the real leaves.
Thanks for popping by to see this fall craft! Pin it on Pinterest or share it with your favourite social media platform.
…
Plant Puns on Painted Potted Flower Pots – Adorable Gift Idea to Make Them Smile!
Nature Craft – Perfect for Earth Day Activity – Clay Imprints with Plants and Flowers
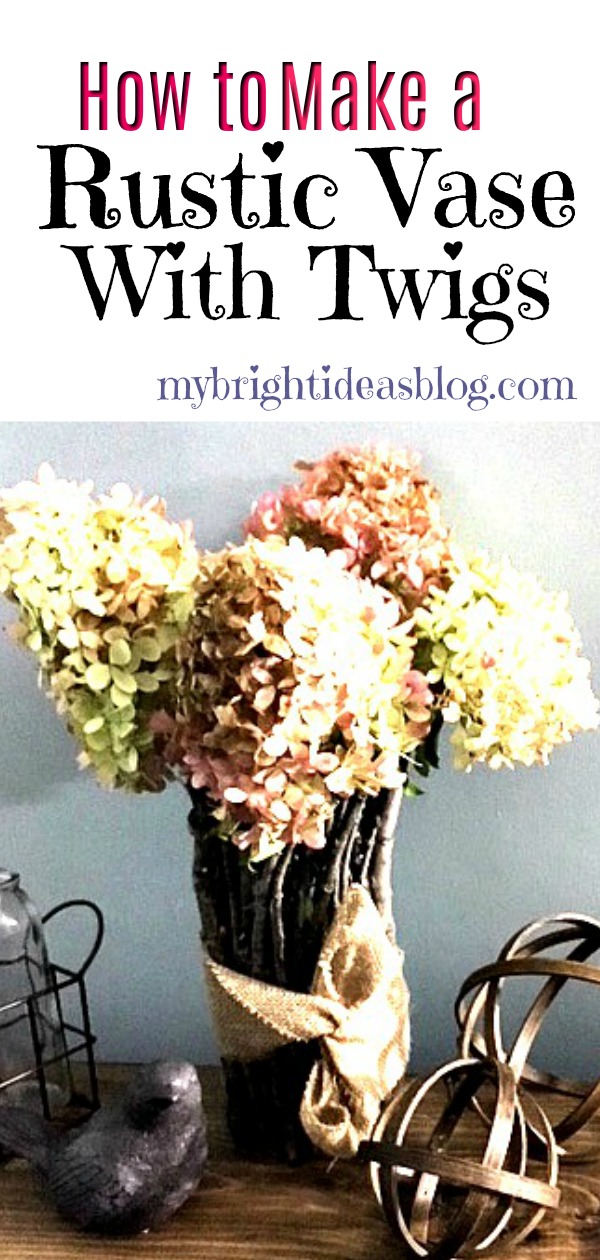
Make a Twig Vase – Super Easy DIY!
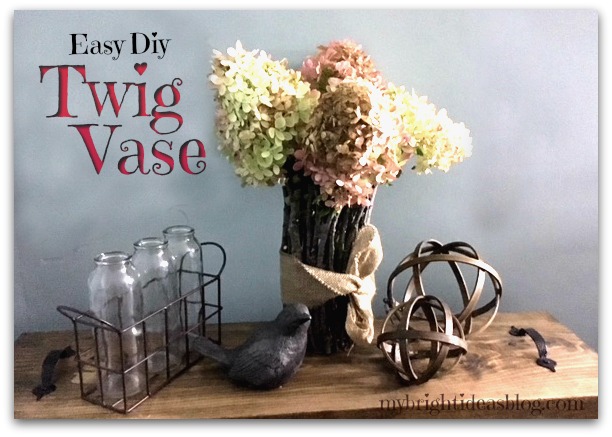
Here is a super easy, super rustic, super pretty twig vase! I am loving using twigs and sticks in crafts. It’s free! It’s also time to do some trimming in the backyard gardens so I get the job done and a craft project to do when the work is done!
You will need:
- an inexpensive straight vase
- twigs
- snips
- hot glue gun
- 6 or more hot glue sticks
- burlap or raffia
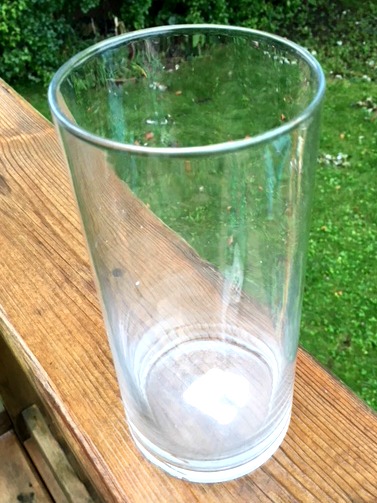
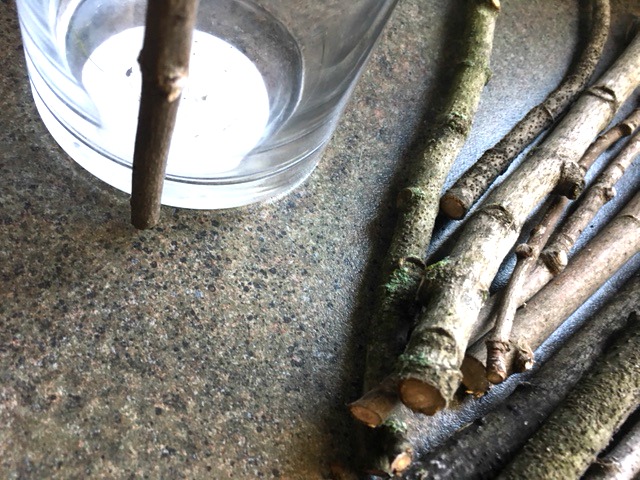
First, choose your vase. If you don’t have a tall straight vase already in the back of your cupboards then pop over to the dollar store, or a thrift store you will definitely find them there. I had this vase on hand. The Dollarama sticker was still on the bottom. $1.25. That is the total expenses on this craft if you already have the glue gun and glue supplies.
I love me a cheap craft!
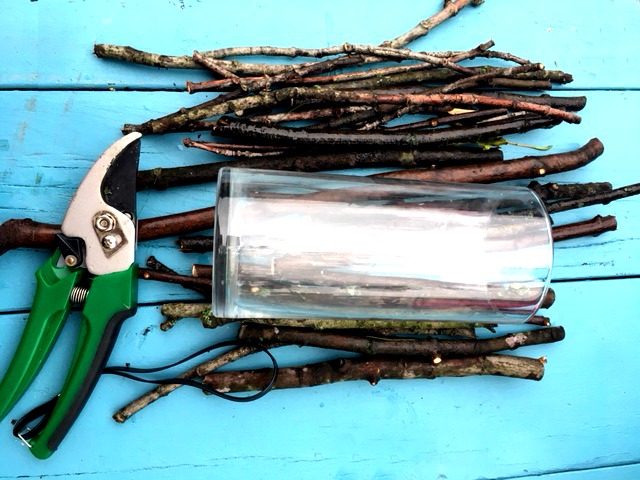
Using sharp shears, cut twigs in different lengths taller than your vase. Choose sticks that are as straight as possible. Trim off any side twigs as short as possible.
Plug in your glue gun. Set the twig in place and see where it will make contact with the glass of the vase. Add the glue in those contact places. I do this instead of running a line all the way down the stick. That is a lot of waste. Hold the twig in place 10 or 20 seconds while the glue cools. Mind your fingers!
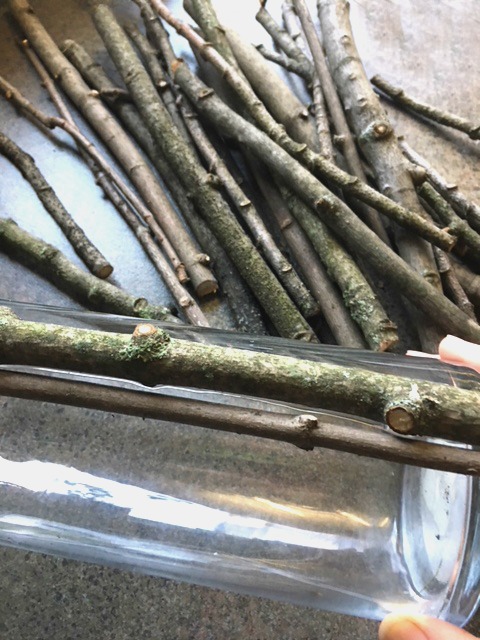
Work around the vase with each twig fitting tightly next to the previous twig. If there are spaces you can put a thin twig in later to fill in the gaps.
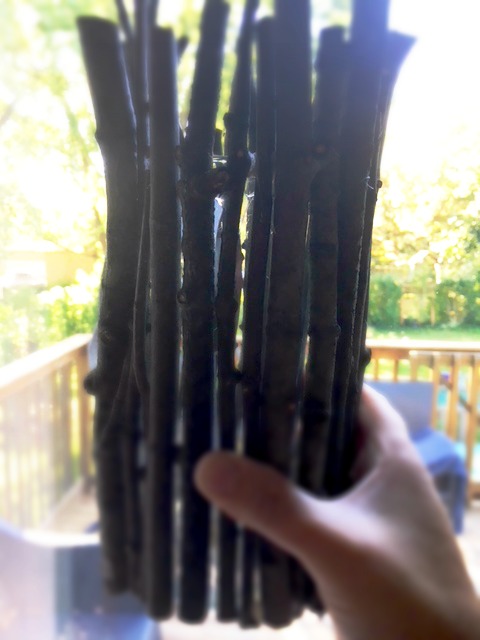
You will notice that the light does pass through the gaps. If that bothers you, cut a brown or black paper down to the vase size and slide it inside.
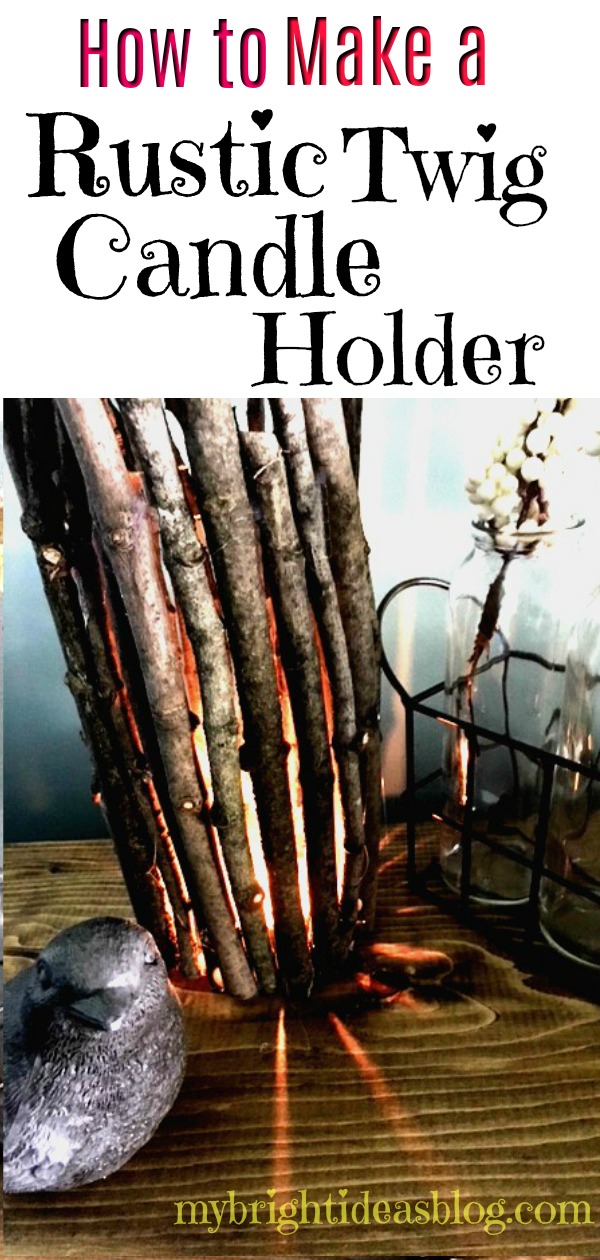
OR…you could embrace these gaps and use it as a candle holder. If you go this route please do not put paper in your vase. You will surely start a fire. Eek!
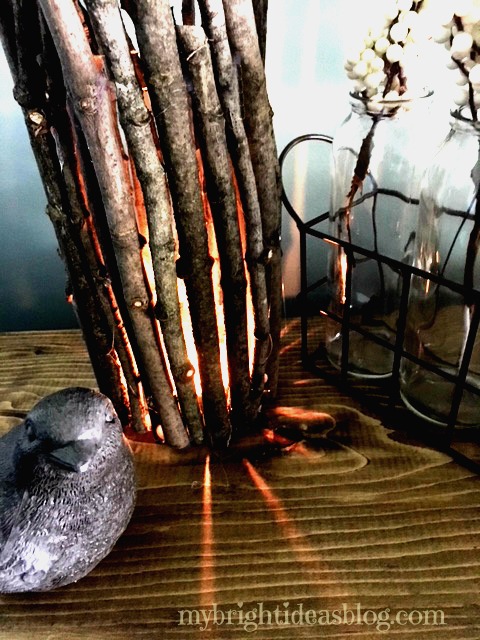
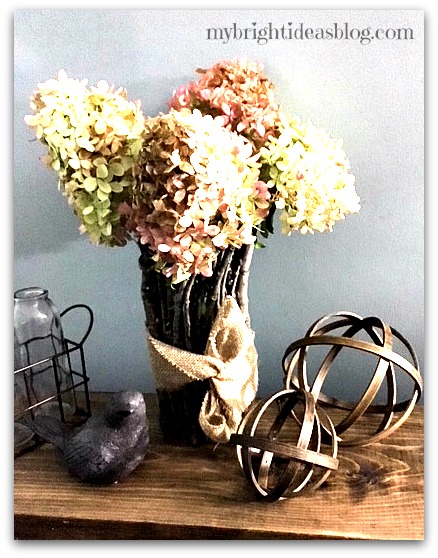
I didn’t mind the gaps in the vase so I skipped the paper and can use it with a tea light or with dried or artificial flowers.
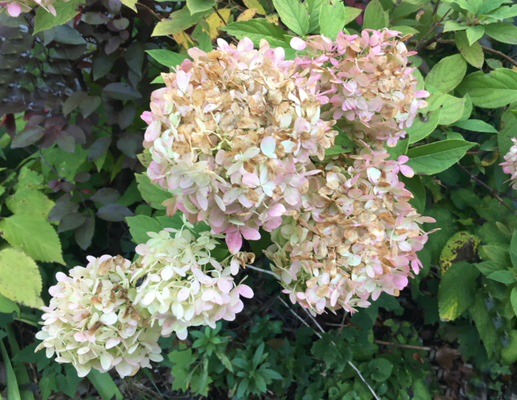
So to the garden we go for some flowers. I cut these hydrangeas. These are going to dry nicely in the vase and look the same for months and months.
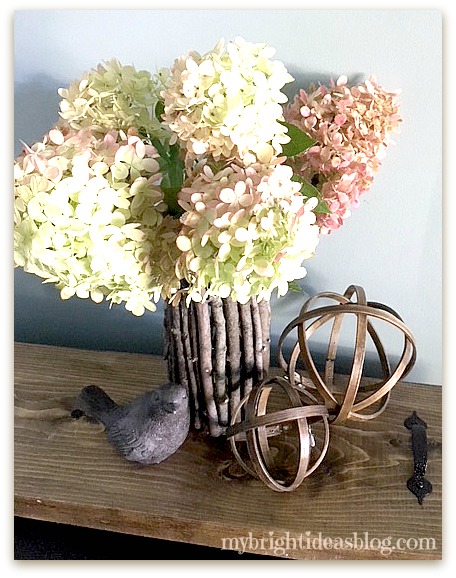
Isn’t that lovely? I hope you enjoyed this rustic twig/stick project. I really love making things with twigs.
Wait! Oh my days!!!! I forgot to put on the bow!
Cancel the photo shoot and back to the craft counter….
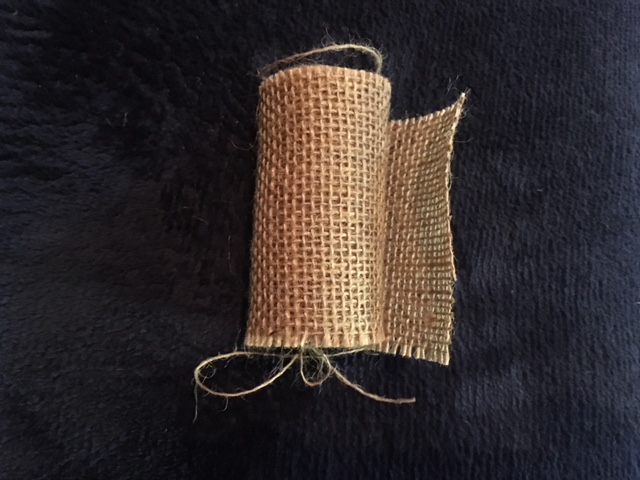
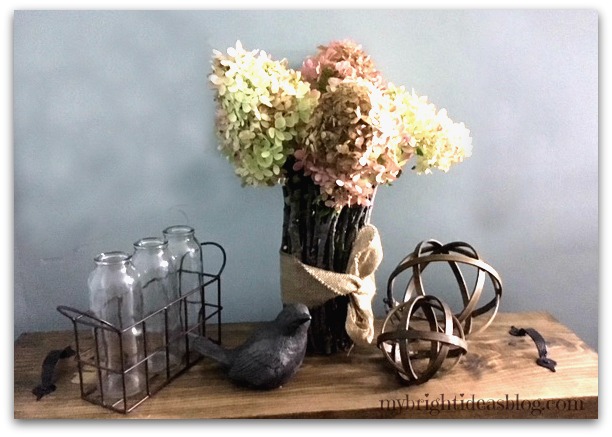
I know I have raffia somewhere but I can’t remember which craft bin I put it in. So instead I used this 3 inch wide burlap roll from the dollar store and wrapped it around the vase.
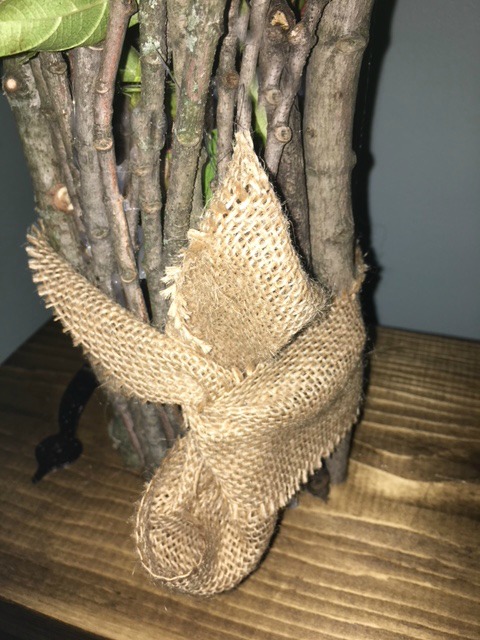
After tying it in a knot I tucked the ends under the centre. It looks like a bow but less bulky.
There now that is better! Its a lovely rustic vase perfect for this time of year!
I really appreciate you reading to the end and hope you will remember to pin this or share it on your favorite social media site.
If you would like to see how I made the orbs or wood tray in the photo above, click the links below.
Till next time!
…
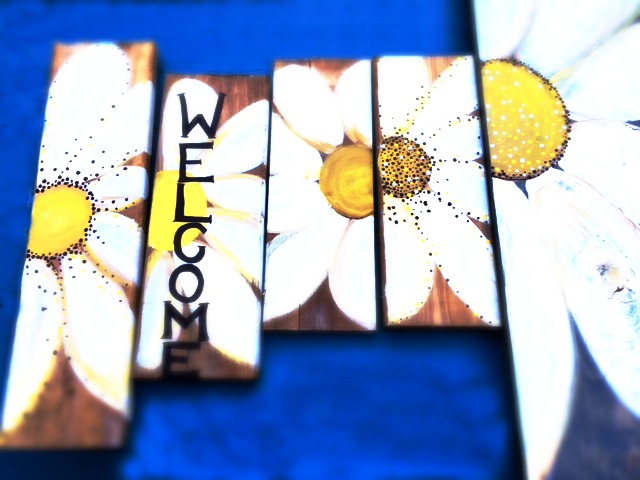
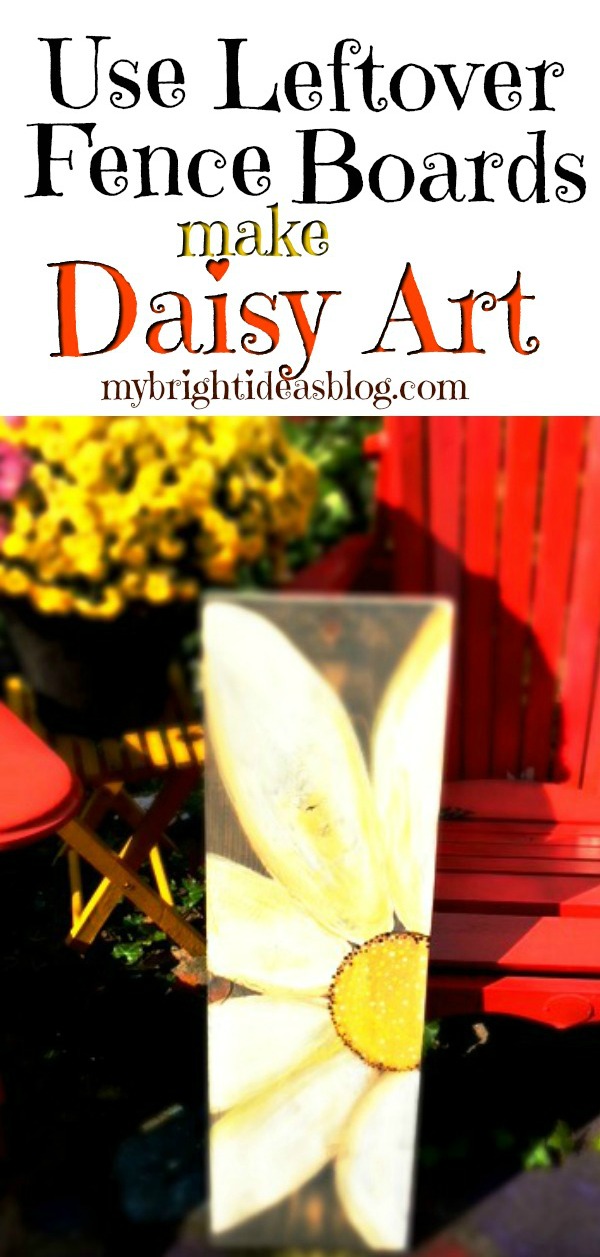
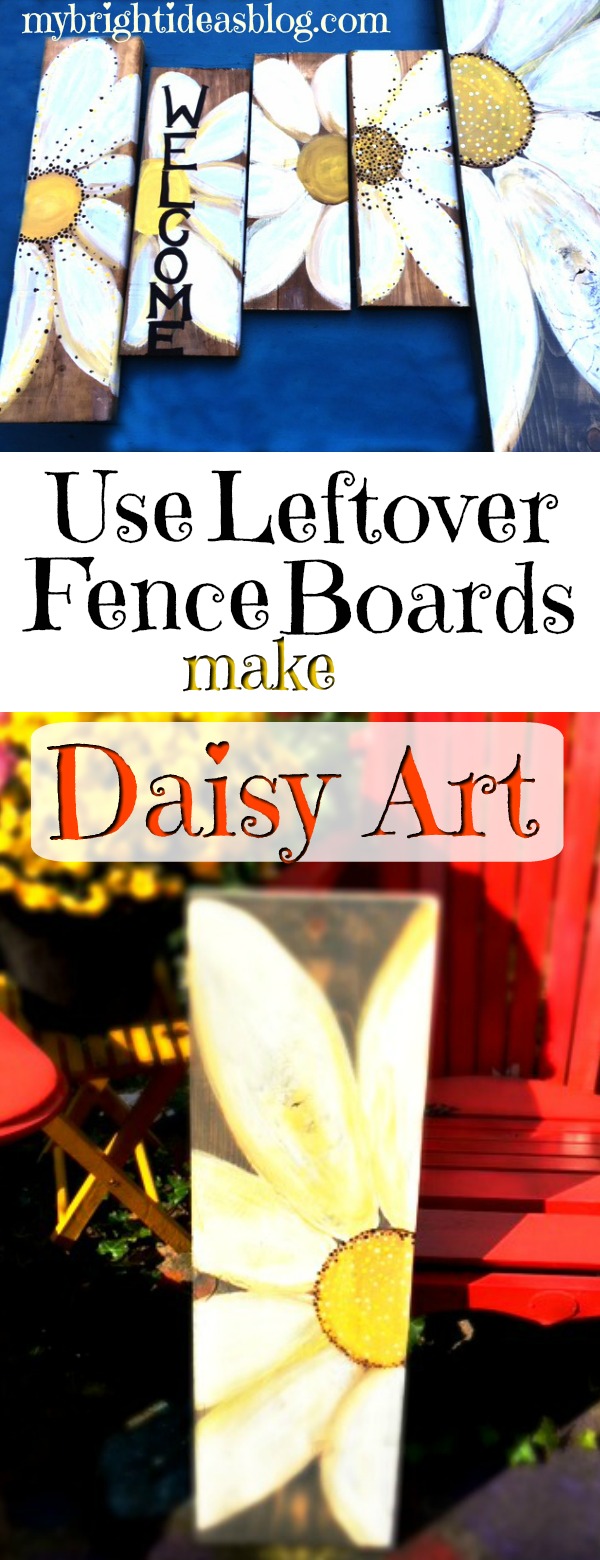
Outdoor Daisy Art – From Lumber Scraps!
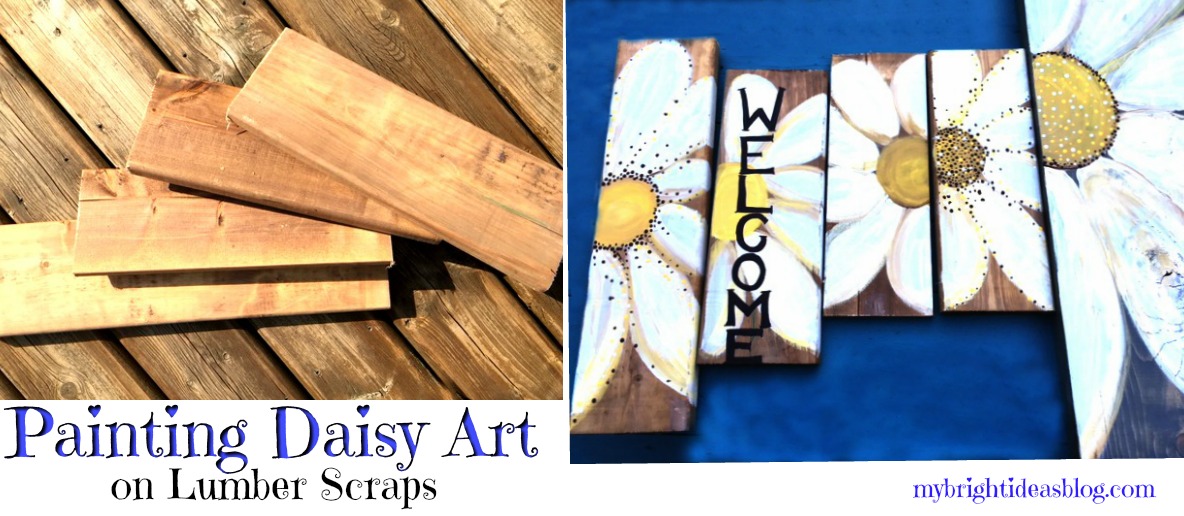
We have done a lot of wood projects this summer and the scrap pile is getting bigger. I am going to show you how to turn your left over wood scraps into painted daisy art that you can use indoor or outdoors. Grab your paint and brushes – lets get started!
You will need:
- lumber or fence boards
- sandpaper
- small and medium art paintbrushes
- craft paint-yellow, white, beige, black
- polyurethane (clear varnish)
- large brush (that you might throw out)
- hammer
- needle nose pliers (optional)
- picture hanging kit
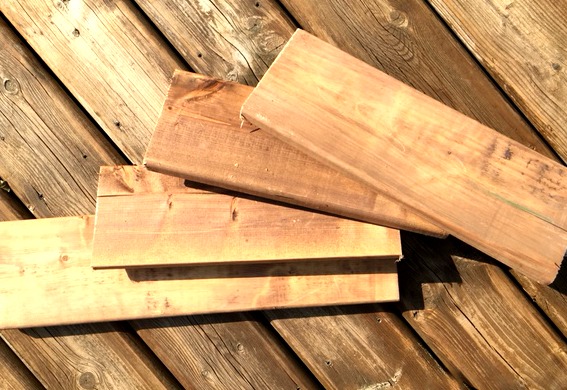
The wood in the photo above is scraps of pressure treated fence or deck boards. The size doesn’t matter-just work with what you have. Mine were approx. 5 1/2 inches x 14 inches (14cms x 36cms). They don’t need to all be the exact same.
Have a quick look at the ends of the boards to see if you have any jagged edges. If yes a quick swipe with your sand paper should remove the frayed bits. No splinters!
If you don’t have treated fence boards you can use bare lumber but put a bit of stain on to make it darker.
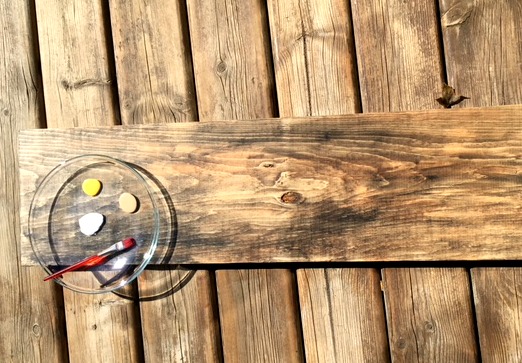
This board was not a fence board but rather a this piece of wood I was going to make another tray out of. It’s 9 1/4 inches wide and 35 inches long (or 24 cms x 89 cms). I had already put my favorite Jacobeen Miniwax on it. So it was ready to be used for something else but instead I put daisy on it for a much bigger version of the fence boards.
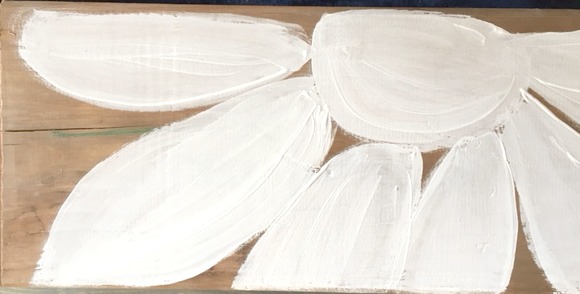
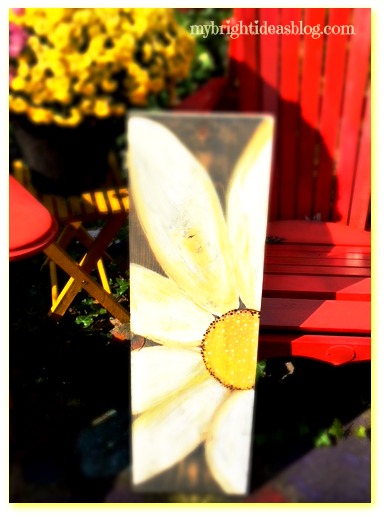
Start with white and paint the shape of the daisy. On this one I painted the centre white also.
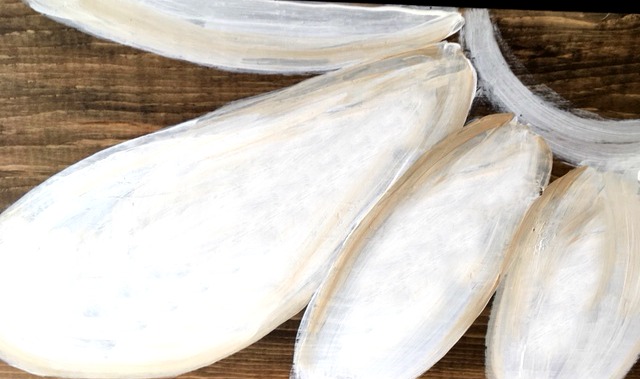
For this board I didn’t paint the centre till later. I double loaded my paint brush with white on the left and dipped a bit of the beige paint on the right side. I went along the edge of the petal to add some depth.
The centre part of the daisy was painted yellow. It doesn’t have to be perfect no one will look at it this close up. The brush strokes look great from a few feet away. If you turn it into a Welcome sign at your entry way or a backyard garden sign, it’s going to look great!
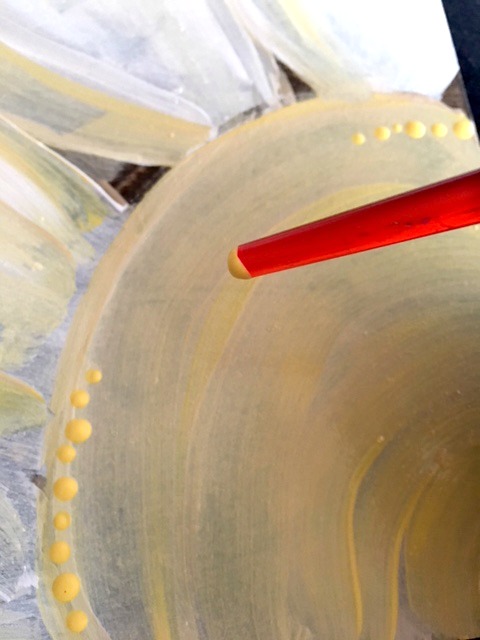
Using the end of the paint brush add dots around the edge of the circle. Some of the boards I didn’t put any highlight dots. The next photo shows I used brown and black dots to make it really stand out. Every board turned out differently.
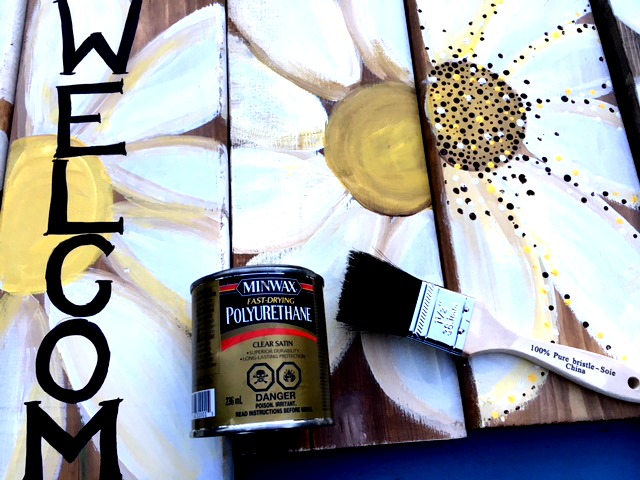
After the craft glue has time to be thoroughly dry, I painted on a clear coat of satin polyurethane. If this is going to be used outside it should have this protection on the front and back and edges. The fence board scraps will be weather resistant but the craft paint might crack in the rain. So this protection over the front and sides is worth the effort.
Oh and I hate cleaning polyurethane out of paint brushes so I just use the cheap brushes so I can toss them out. I have been known to wrap it in a baggy or cling wrap with an elastic band if I am going to need it again in the same day. I also store it that way in the freezer if I will need it again in a few days. If the paintbrush dries it’s hard not usable again.
If you get it on your hands. Make your way to the kitchen-without touching anything. Find a bottle of cooking oil (vegetable or olive have both worked for me). Put it on your hands and massage the oil in and watch the varnish come off your skin. Add hand soap and rinse off. Hands are clean and silky soft! Cool trick!
I made enough to give some away as gifts or put on the office craft table for sale. Since these were scraps and I had all of the supplies in my craft and diy corner…this would be a great item to make some money to sell….gotta support my craft addiction ssomehow!
To hang it or lean it…..mmmm.
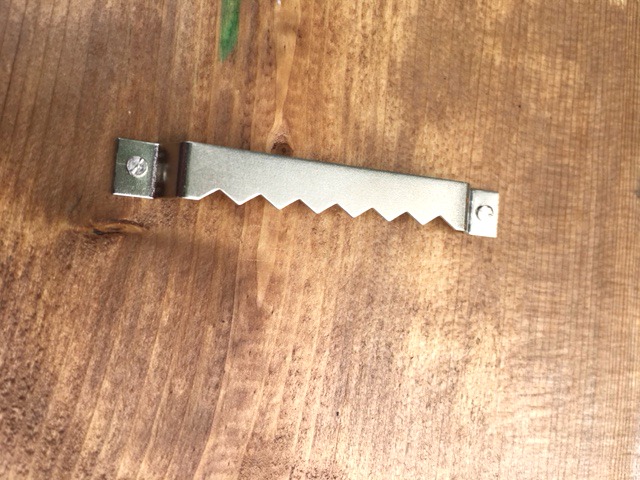
I used these inexpensive picture hangers and just hammered them into the back. The nails are the tiniest nails I’ve ever seen so I hit my fingers with the hammer about 5 times trying to get this nail tapped into the wood. I suggest getting some needle nose plyers to hold the nail while you get it started. Save your poor fingers!
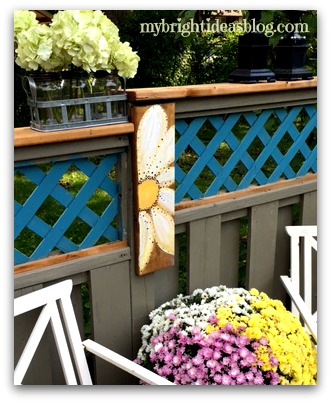
Around the patio we have a very old privacy fence. It has some ugly seams and badly matched up corners. Putting this as a plaque on the fence is a rather awesome solution!
This was super easy to make and looks great! Painting is so therapeutic. I highly recommend it!
Thanks for reading to the end folks! I hope you have a chance to pin this to Pinterest or share it with your favorite social media.
…
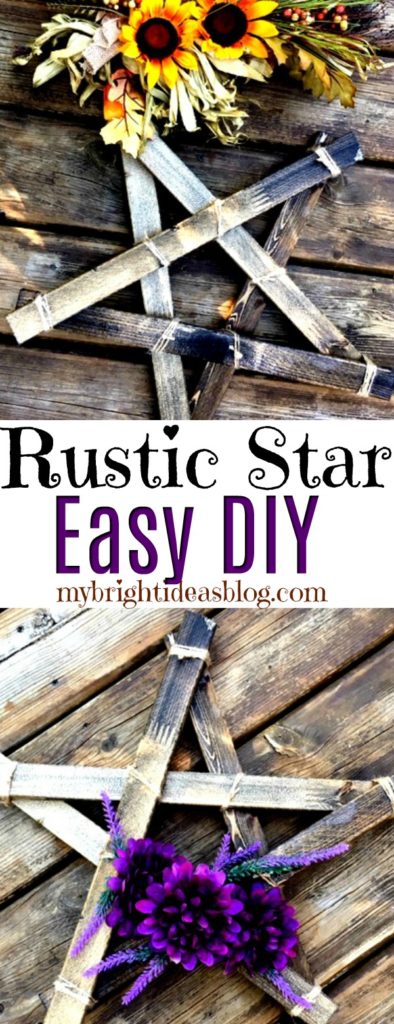
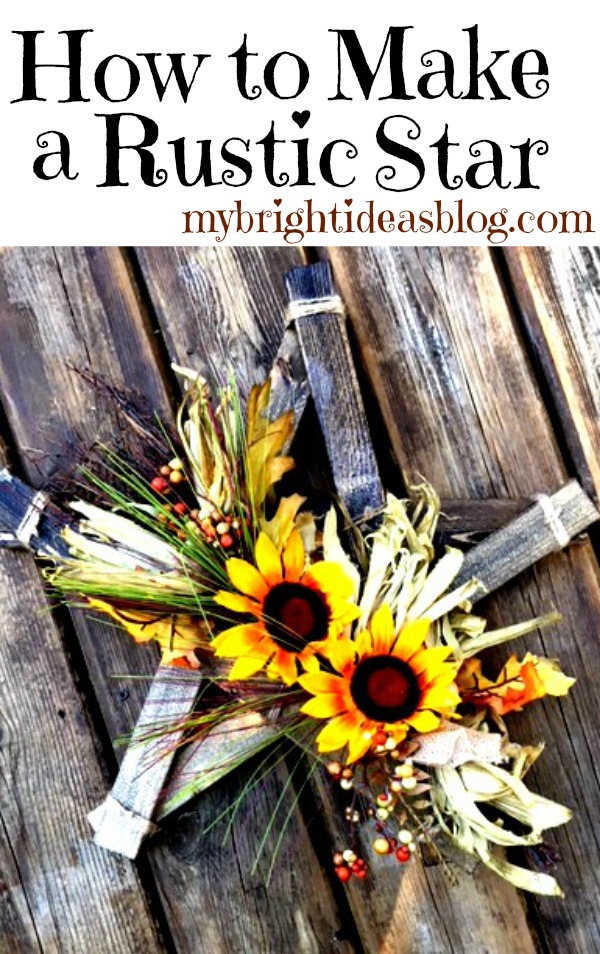
How to Make a Rustic Wooden Star
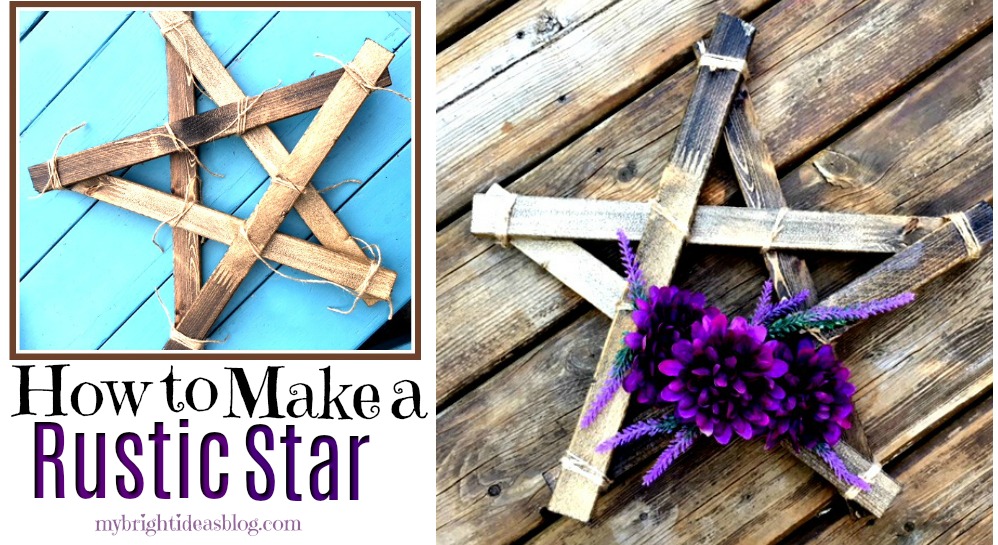
Have you seen these lovely rustic wooden stars and wondered, how hard can that be to make? Well let me tell you it’s ridiculous how easy it is to make this wood star.
Did I mention the wood cost is around $2.50? Say what….?!?!
You will need:
- 1×2 Board $2.50
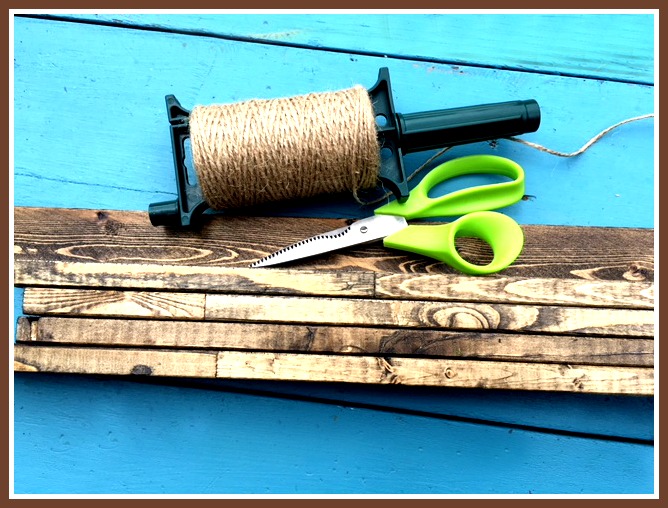
- twine
- scissors
- stain or paint
- rag
- varnish
- paint brush
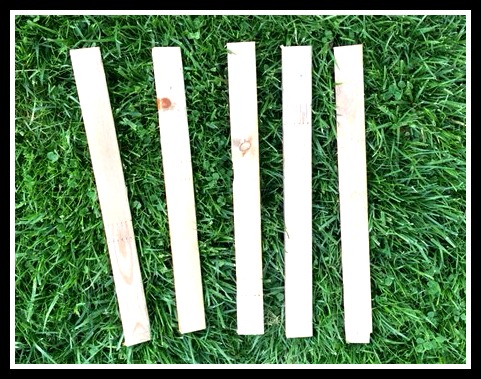
Cut the 1×2 lumber into 5 pieces 18 inches long. No wasted wood. Awesome!
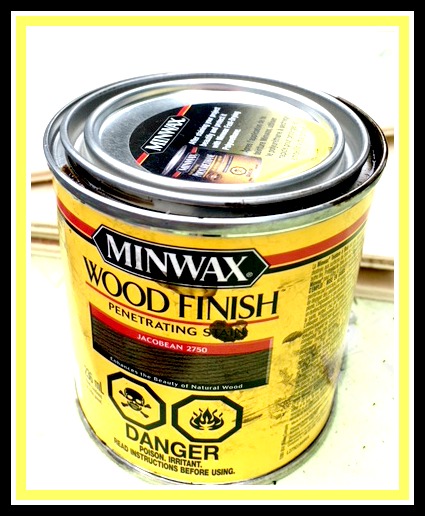
I used my FAVORITE wood stain Miniwax Jacobean – it has a dark walnut look to it that I just love! You could use paint instead. Dip a rag into the stain and rub it into the wood. Follow the instructions on the tin to leave it for the right amount of time to dry.
![]()
After allowing the stain to dry, I put on a coat of polyurethane. This adds a clear coat of protection if you plan to use it outdoors. If you intend to use it indoors like on a mantel you could skip it.
Gather your finished pieces, scissors and twine….
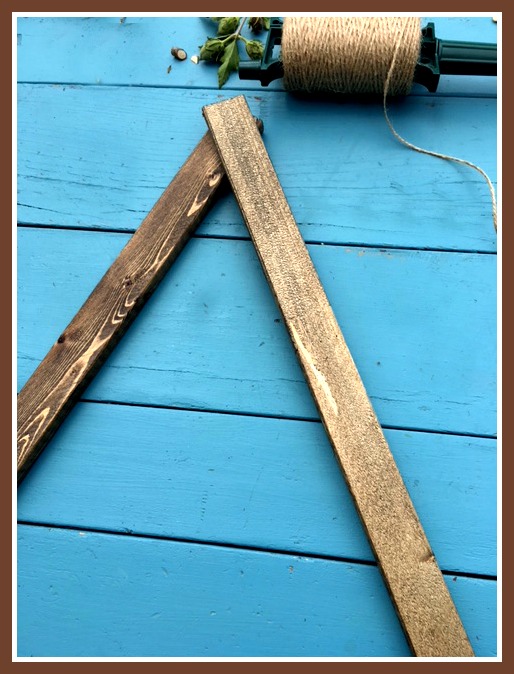
Place one piece on an angle to the left. Lean the second piece on top,angled to the right.
Add the third piece to the bottom right corner angled up.
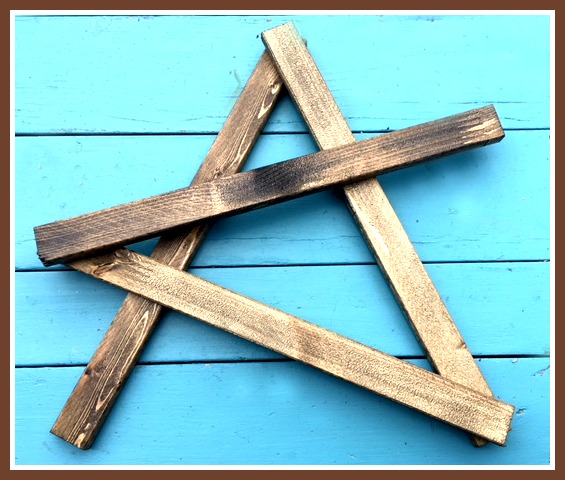
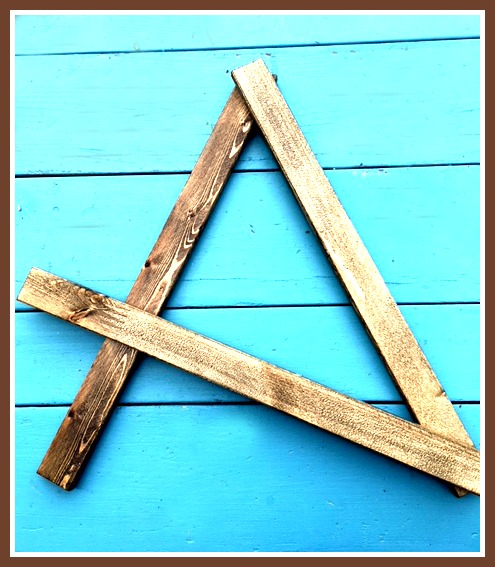
Next add the forth piece across….
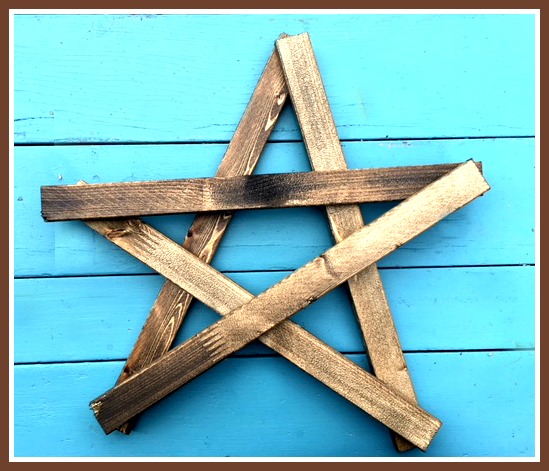
And lastly add the fifth piece of wood. If it doesn’t look exactly the way you meant it to, shift the corners a bit.
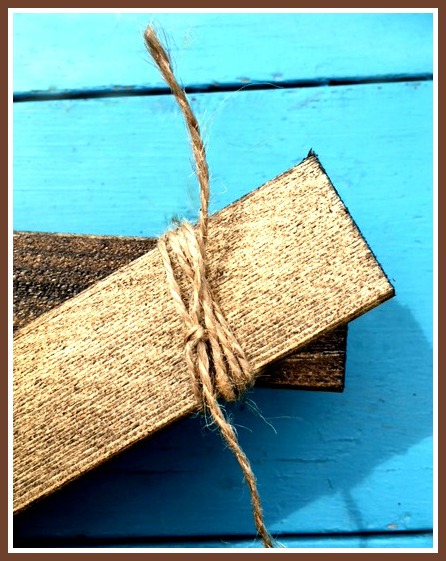
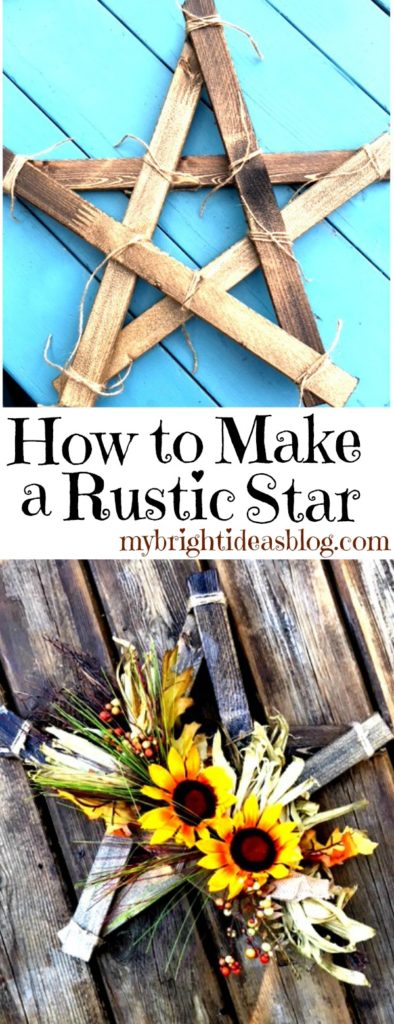
Tie twine around each end. You could also use industrial strength glue like E6000 with the twine, or skip the twine and use nails. I like the rustic look of twine.
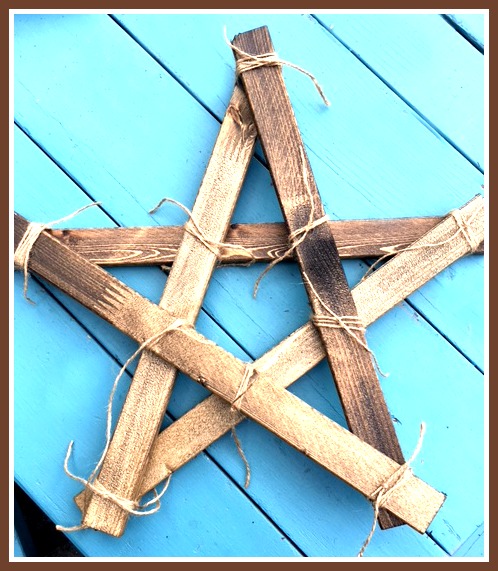
For extra reinforcement I tied more twine on the middle parts of the star. This extra twine made it very sturdy. Next use the scissors to snip the scraggly bits of twine close to the star.

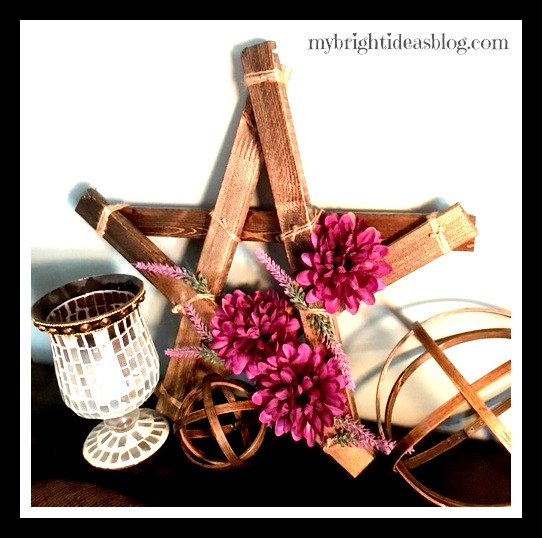
I adore hydrangeas so I popped a few out of another arrangement and put it in on the star to test it out. Lovely, these are my favourite flowers.
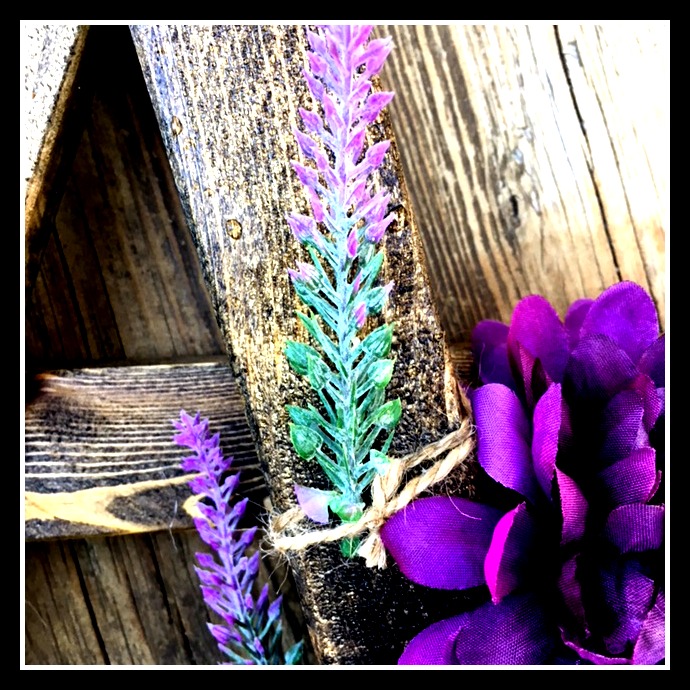
One nice thing about the twine is you can tuck your flowers into it and pull them out if you want to change flowers for the next season.
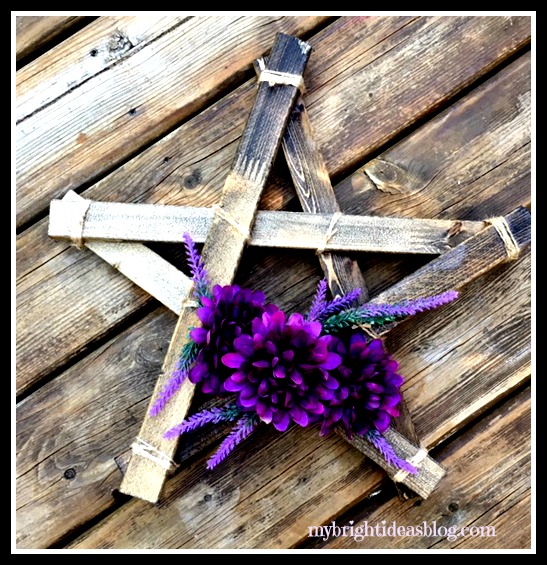
I picked up a bunch of purple flowers at Michael’s and took 3 flowers from the bunch and a few little wispy bits off to use for this one. This turned out to be the one I stuck on my living room wall.

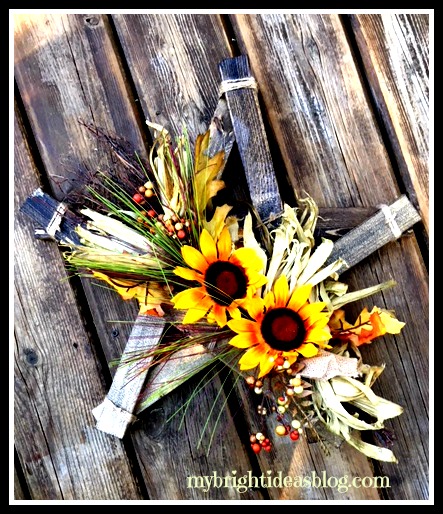
This is a dollarstore ($4) autumn decoration I just tied on for fall.
This is so easy! The only thing that takes any time is waiting for your paint or stain to dry. The lumber cost is $2.50. The only thing cheaper than that is the wreath I made for my neigbour out of twigs!
Thanks for reading to the end! I hope you’ll pin this on Pinterest or where every you network with friends.
…