
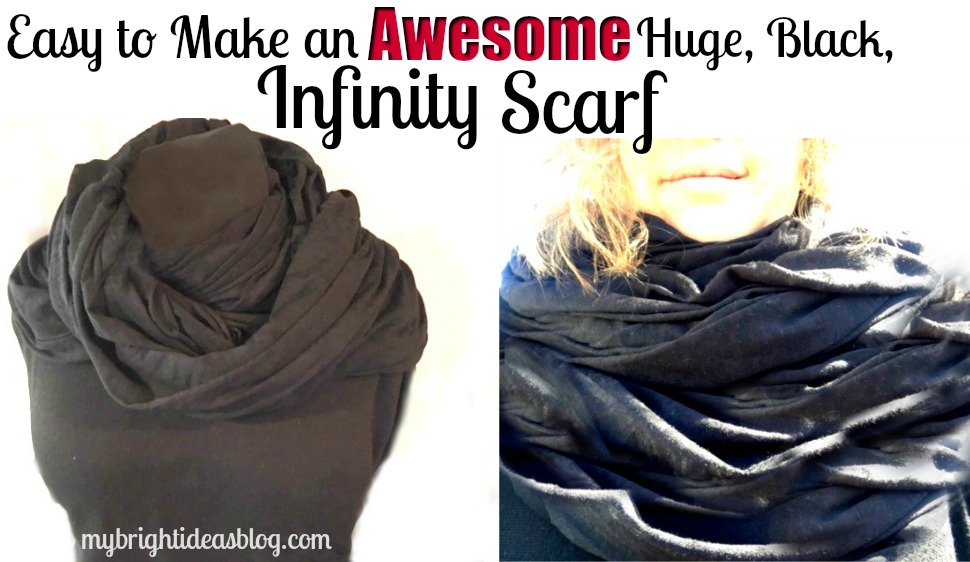

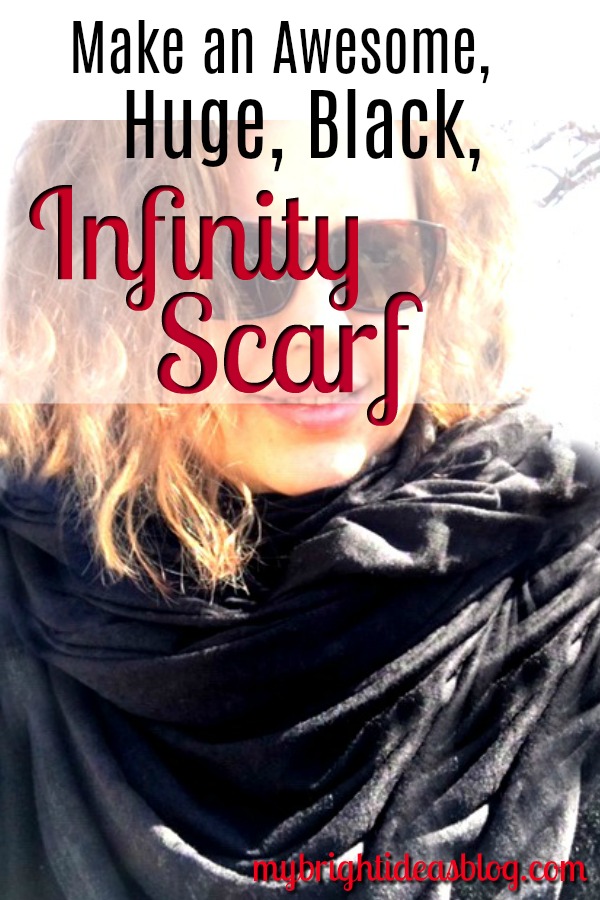
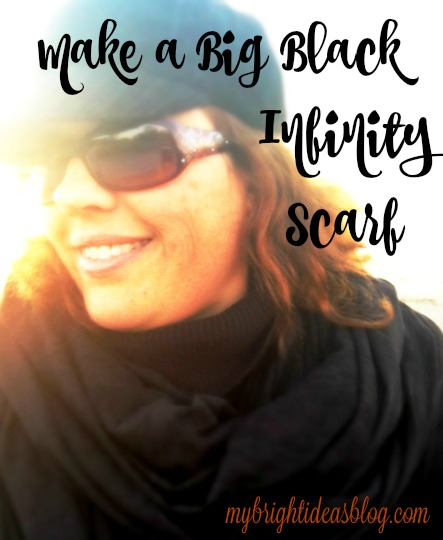
Make an Awesome, Huge, Black Infinity Scarf for $10 in 10 minutes!
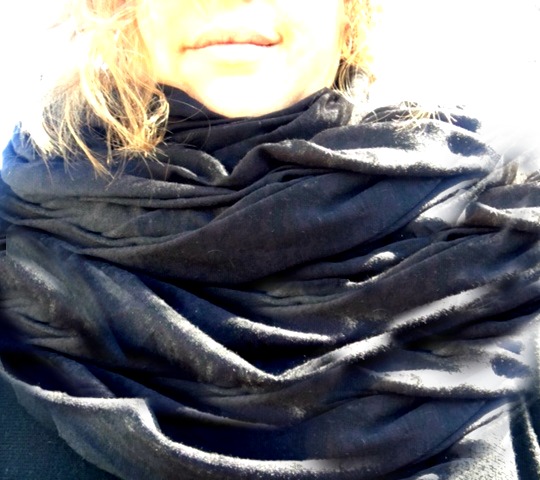
I love scarves and I am almost always wearing black. So I was inspired to make a big, black infinity scarf from a photo I found on Pinterest. Unfortunately, I can’t find the original source.
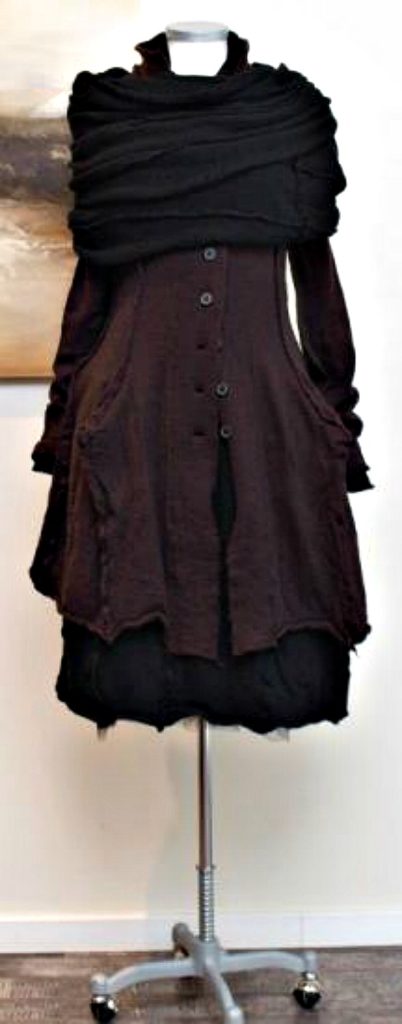
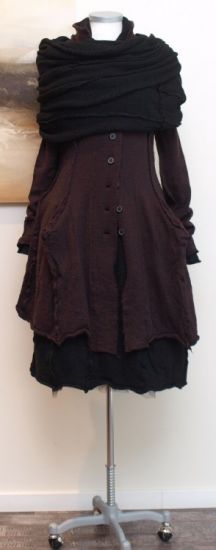
They have done some fancy stitching on this scarf. That is a bit advanced for us. We are just going to make a really wide and long scarf for a similar effect.
 https://www.stilechtonline.de/index.php?cPath=2
I want to give credit to the right folks if I include their photo….so correct me if I’m wrong. It appears to have come from a European website called…. www.stilechtonline.de, from a clothing line called Rundholz Black Label. Possibly from the Winter of 2014. I don’t understand it but I think the website language is German. They make very original styles of clothing and a lot of BLACK.
This inspired me to make a big black infinity scarf for myself. It turns out infinity scarves are super easy and take very little sewing.
You will need:
- black jersey stretch fabric (60×70 inches or 152x178cm)
- sewing machine
- pins
Fabric
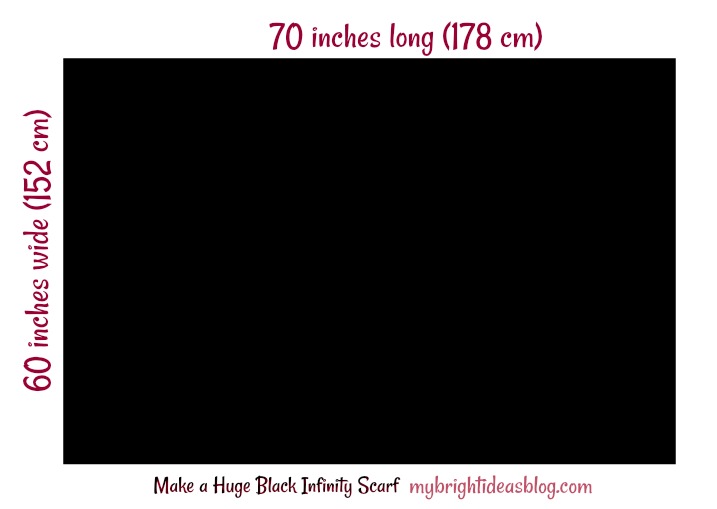
Find jersey stretch fabric 60 inches wide (150cm) and have measured 70 inches (180 cm). I found my thin jersey fabric on a clearance shelf at my fabric store for $5 per meter. So this project cost around $10. It’s usually recommended to prewash the fabric.
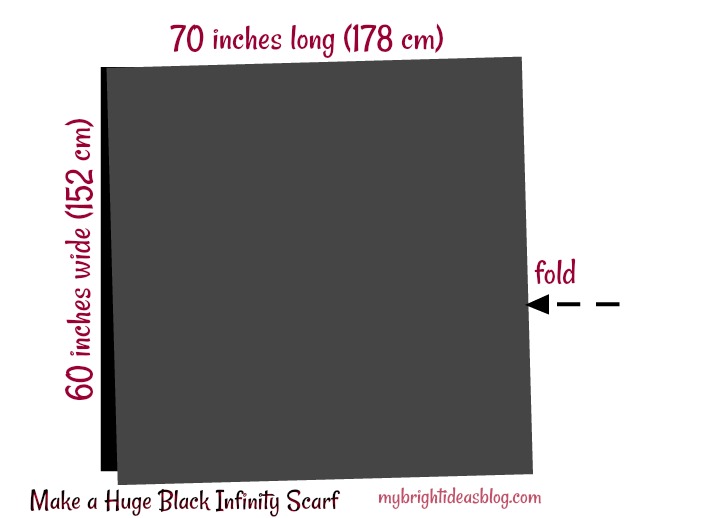
Open the fabric up. Fold the side of the fabric that is 70 inches long in half.
Pin the ends together and sew down the seam. This is all the sewing that you need to do. If you don’t have a sewing machine you could hand sew it with a needle and black thread.
 Fold the fabric in half again, sliding the top portion inside to make a tube. I chose not to sew up the bottom the way a lot of infinity scarves are. This makes it so you can adjust the shape of the scarf. I like to pull it over my shoulders a bit.

So for the cost of 2 yards or less than 2 meters of fabric you have an awesome, huge infinity scarf.
How to Make an Easy Infinity Scarf with Zipper Hidden Pocket
Easy to Make Fleece Hat with Flowers – Simple Sewing Project
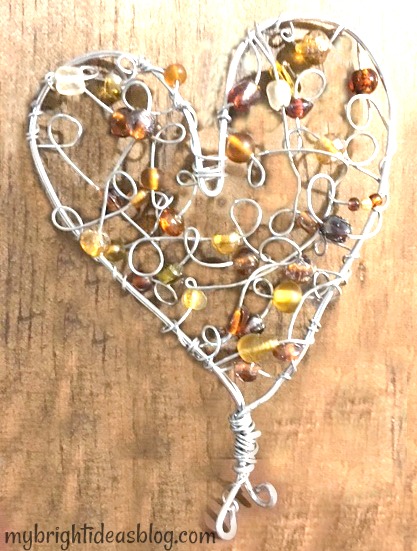
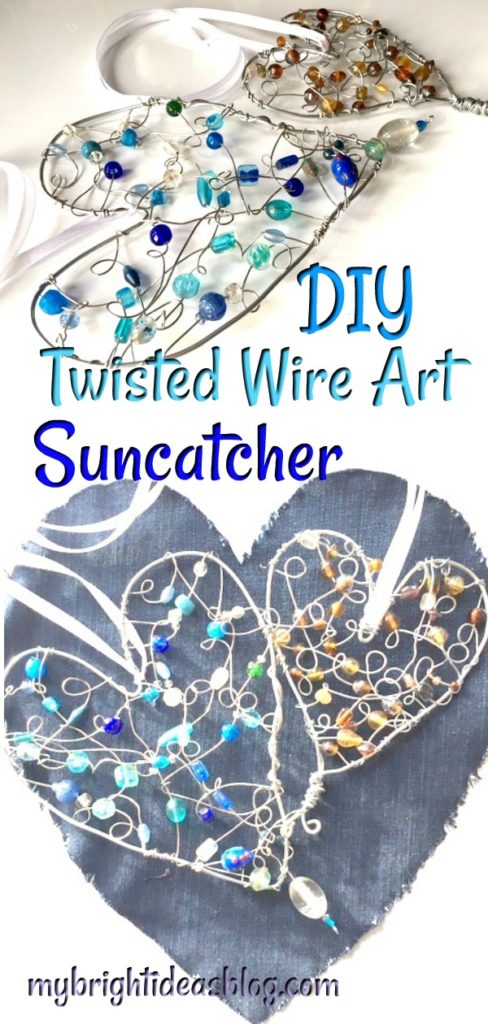
Twisted Wire Art – Love Heart SunCatchers

I have been excitedly pinning all sorts of “Wire Art Crafts” on Pinterest – But for some reason I’ve been nervous to get started….until now! This is my first attempt and I hope there will be many more to come! So let me show you how I made a beaded suncatcher!
You will need:
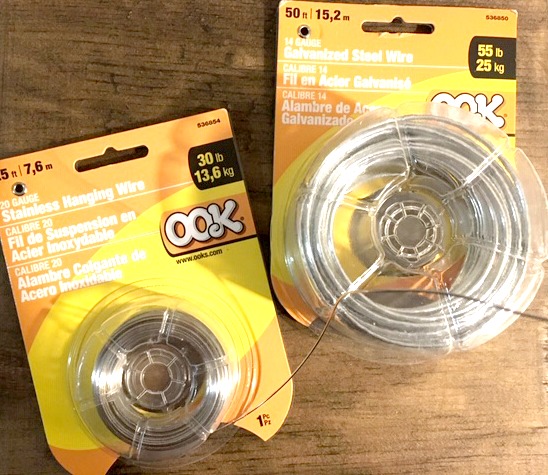
- wire (14 and 20 gauge wire)
- wire cutters
- wire plyers
- beads
- a cutting board or other desktop protection
- ribbon
I recommend a cutting board because I don’t want you to scratch up your dining room table or kitchen counter or any other surface you craft on. Wire projects can leave sharp ends-which can do some damage.
For wire: I bought 14 and 20 gauge galvanized stainless steel. This is much cheaper at the hardware store than the craft store.
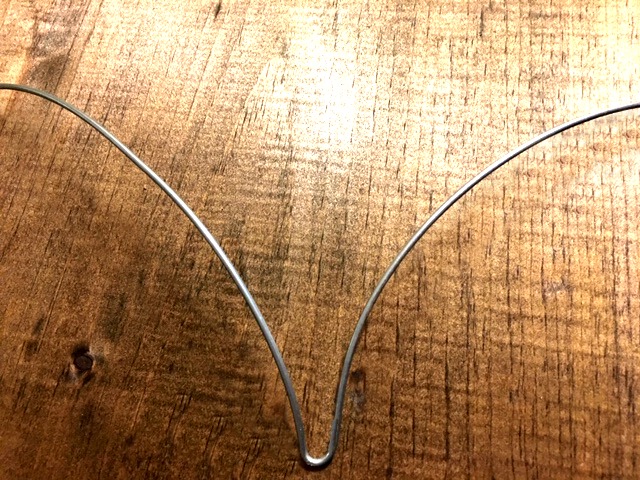
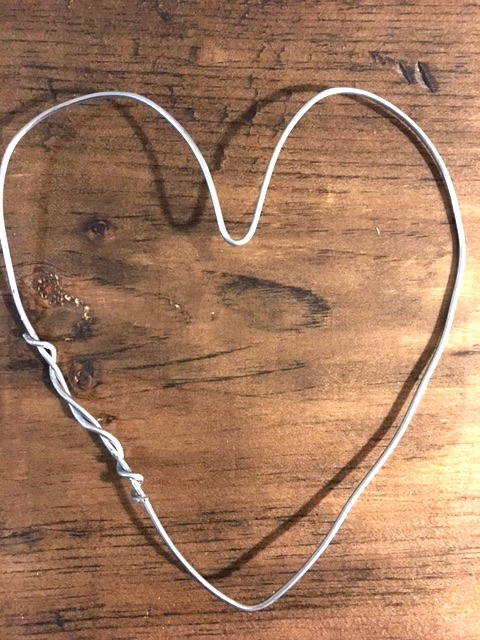
Cut a length of 20 gauge wire approx. 27 inches long (69cm). Use big wire cutters from your DIY tool box rather than jewelry making plyers. 20 gauge wire is thick!
Bend it in half so the heart shape begins to form the point in the top middle of the heart.
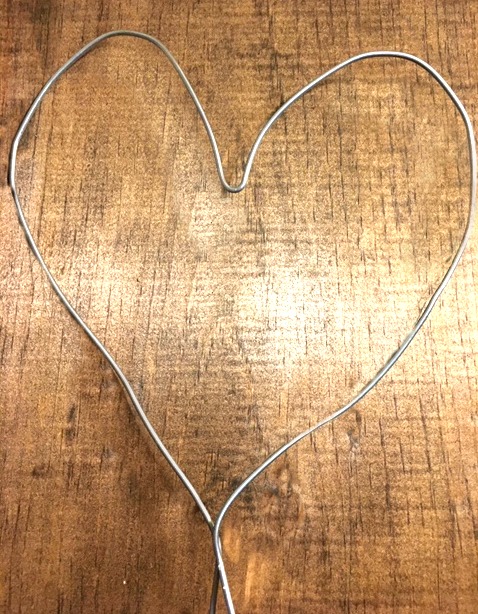
Gently manipulate the wire (with your hands not tools) to make the shape of a heart. Bring the bottoms together and twist.
Keep twisting the bottom and rounding the ends.
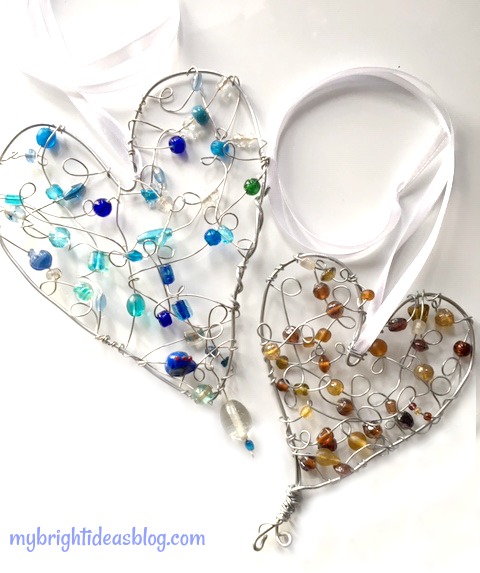
Fast forward to see how the amber one turned out….
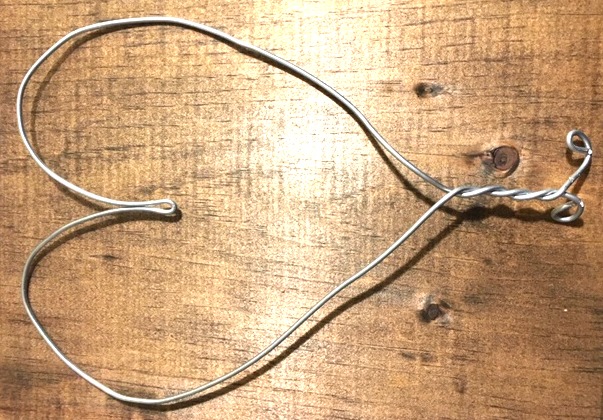
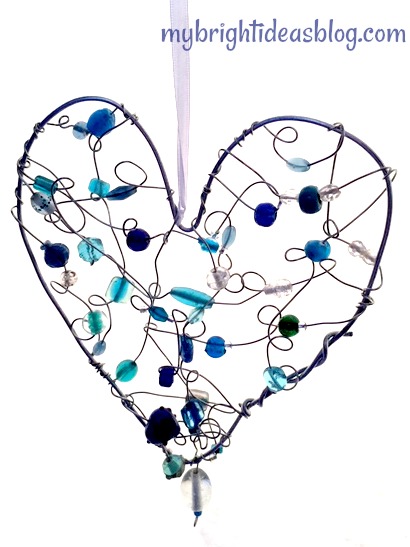
For the blue suncatcher I formed the wire into a heart and wrapped the excess on the side.
This is actually really hard on your hand muscles. Take breaks if you are getting achy muscles in your arms or hands. I think this looks a bit sloppy so I prefer the first option.
Now cut a piece of fine 14 gauge wire 30-40 inches long (90cm).
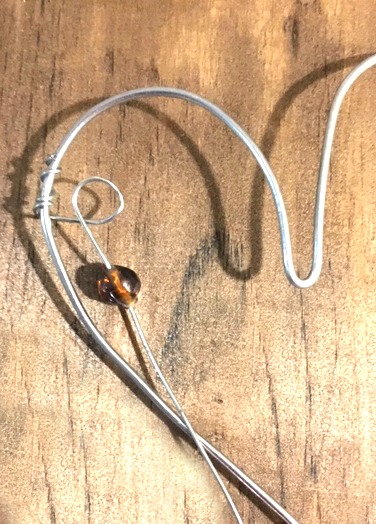
Start by twisting the fine wire around the side of the heart a few times and then wrap the wire around a round pen to make a loop. Slide the bead onto the wire and then make another loop around a pen. Have this loop face opposite direction.
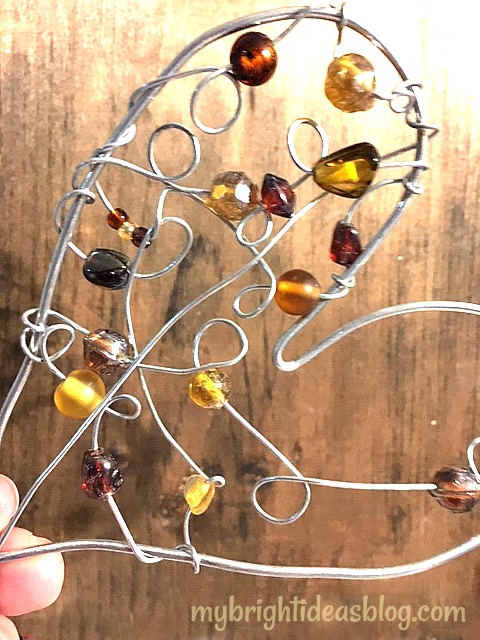
Continue wrapping the wire to make a loop and then bead it and next loop in the opposite direction. Wrap it around the side a few times and repeat making loops and adding beads, zig zagging over the heart. You may need up 3 yards (2.5 m) of wire for this part. This takes a bit of time.
When I finished this one off, I just wrapped the excess wire around the bottom of the suncatcher.
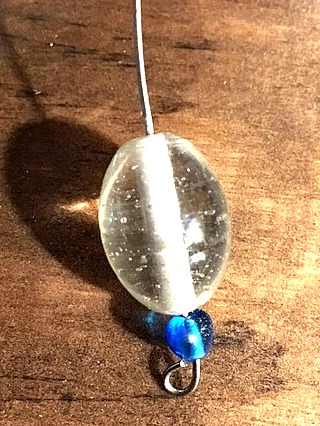
For the blue one I added a drop bead on the bottom. Cut a piece of 14 gauge wire 3 inches long. Twist the end around to anchor a few beads on. Wrap this at the end bottom of the heart.
This is a great project for someone who doesn’t follow patterns well and likes to free style (Like Moi). It’s a random, twisting, original piece of wire art.
Finish the project by putting a bit of ribbon (or clear fishing line) through the top and tying it in a bow. Hang in your window!
I’m pretty pleased with my first attempts at wire art. I am eager to try it again soon!
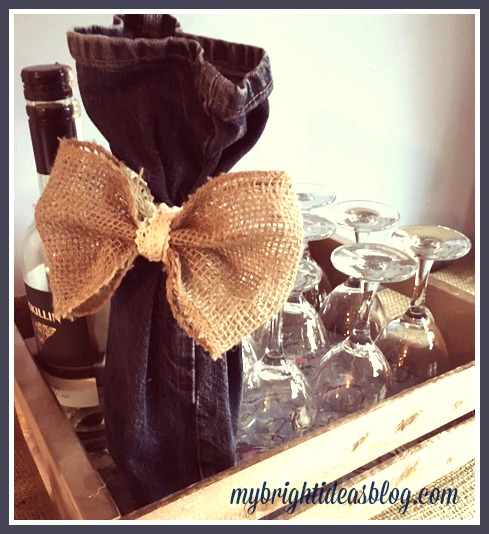
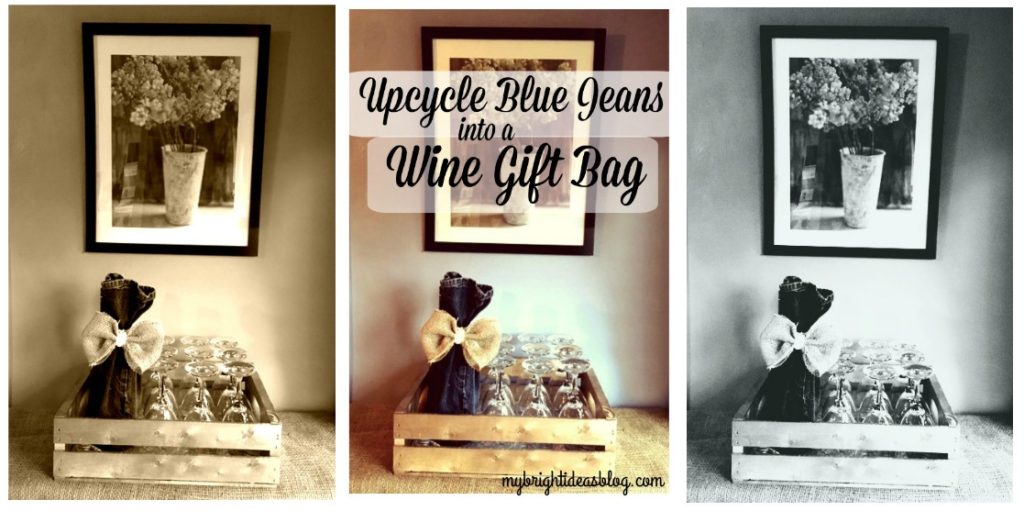
Upcycle Jeans into Wine Gift Bags!
Repurpose Jean Pant Legs Into Wine Bags!
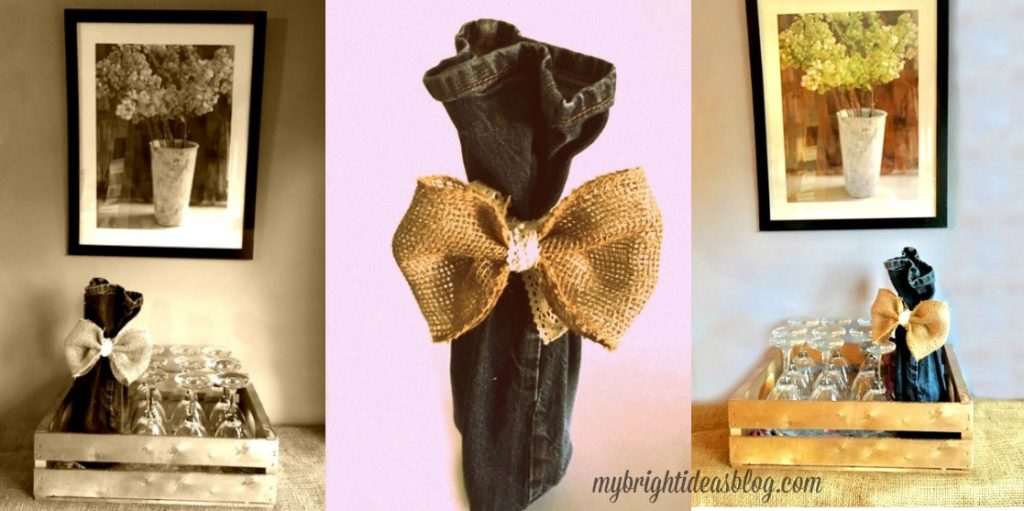
Want to bring an original hostess gift to a casual dinner party? Dress up your wine bottle with a pair of old blue jeans!
This will get your mind inspired for other upcycling and gift wrapping ideas too!
You will need:
- Blue jeans you don’t mind cutting up (child’s size would be ideal)
- Sewing machine or needle and thread
- Ribbon/String/Twine
- Burlap for bow or something else you can add to embellish
As long as the jeans are freshly washed it doesn’t matter if there is fraying on the cuff. We want the bottom of the jeans to be at the top so it can add character.
The pant leg opening should be around 6 inches (15cm) wide. So skinny jeans or children’s jeans are perfect. I picked up 4 pairs of kids jeans from my goodwill for around $3 each. I will be making more blog posts out of the scraps and pockets too. Save any decent leftovers when you are done.
If your jeans are adult size, no problem you can trim the pant leg width and make a seam.
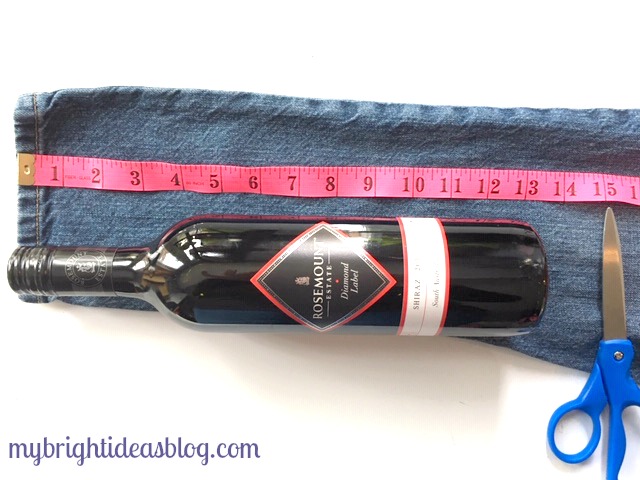
Cut the pant leg approximately 15 inches (or 38 cm). This will give you a bit extra for the seam on an average 13 inch bottle.
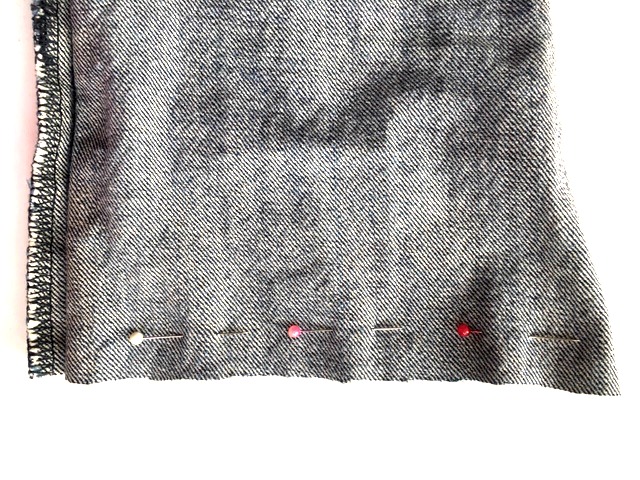
Turn the pant leg inside out and pin closed.
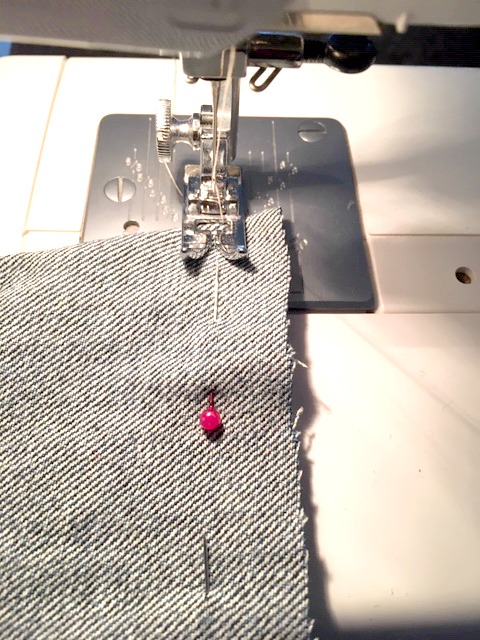
Sew straight across the bottom 1/2 inch or 1 cm from the edge. You could hand sew this if you don’t have a sewing machine.
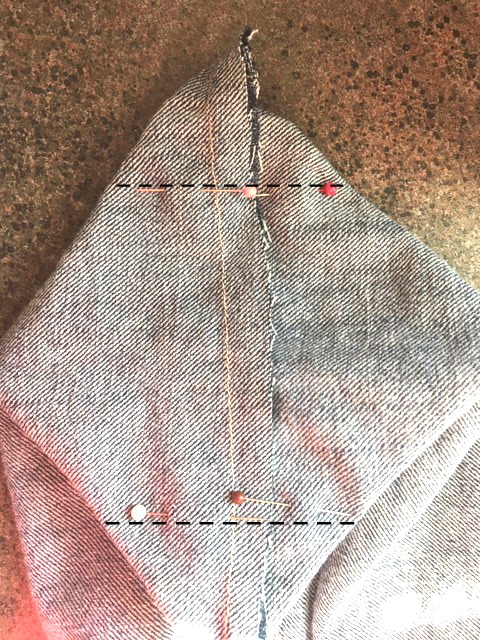
Now flatten the bottom of the bag and pin 1 inch (2.5 cms) from each corner. This will make your bag more boxy at the bottom and easier to stand up. Stitch across this line.
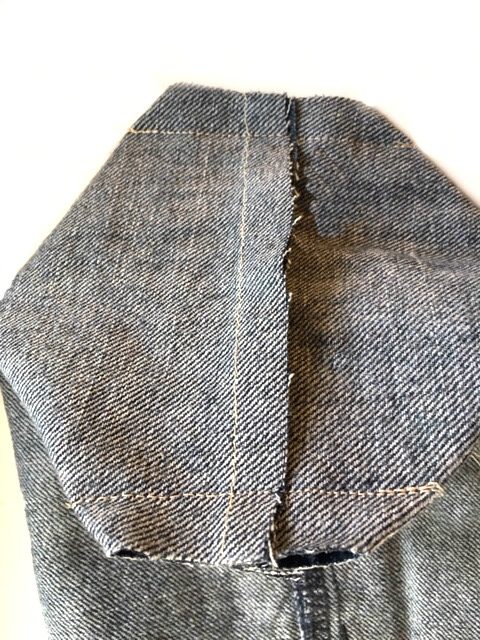
Cut off the triangles on the outside of your last stitch. Turn it right side out again.
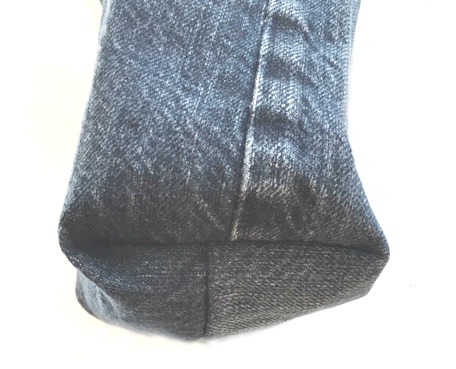 See what I mean? Boxy on the bottom to help it stand up.
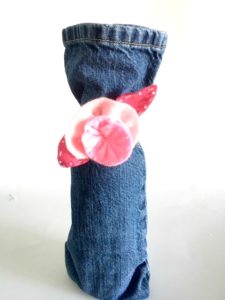
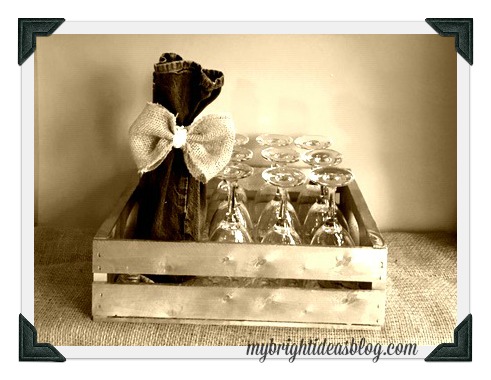
Now decide how you would like to decorate it. Put the bottle of wine in the bag and tie a ribbon or piece of twine.
If you like the felt pink flower in the photo on the left have a look at my cup cozy project link at the bottom of this post. http://mybrightideasblog.com/easy-to-make-felt-coffee-cup-cozy/
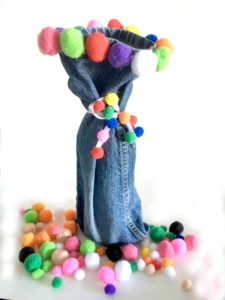
I also went a bit nuts with hot glue gun and pompoms in the photo on the right. Maybe you should save that for friends with a great sense of humour. Your accountant friends might think its a bit ridiculous! (no offence to the accountants)
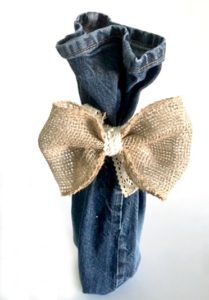
This bow is so easy to make and versatile for other project too!
I hope this has inspired you to dazzle up a hostess gift of wine!
….
Easy to Make Fleece Hat with Flowers – Simple Sewing Project

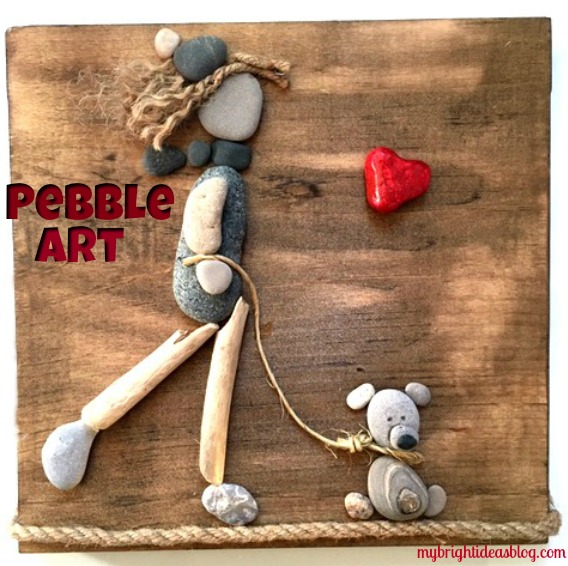
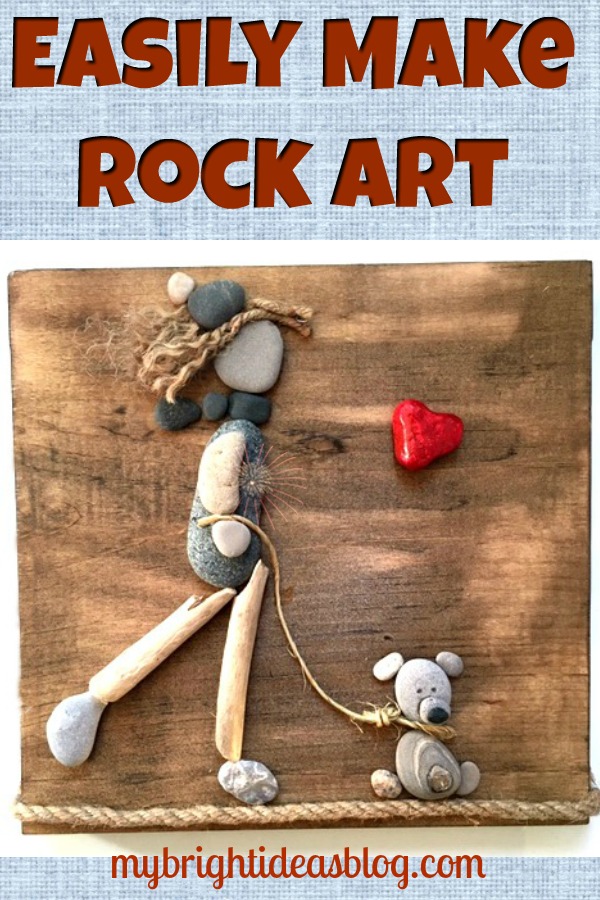
Pebble Art – A Girl and her Dog
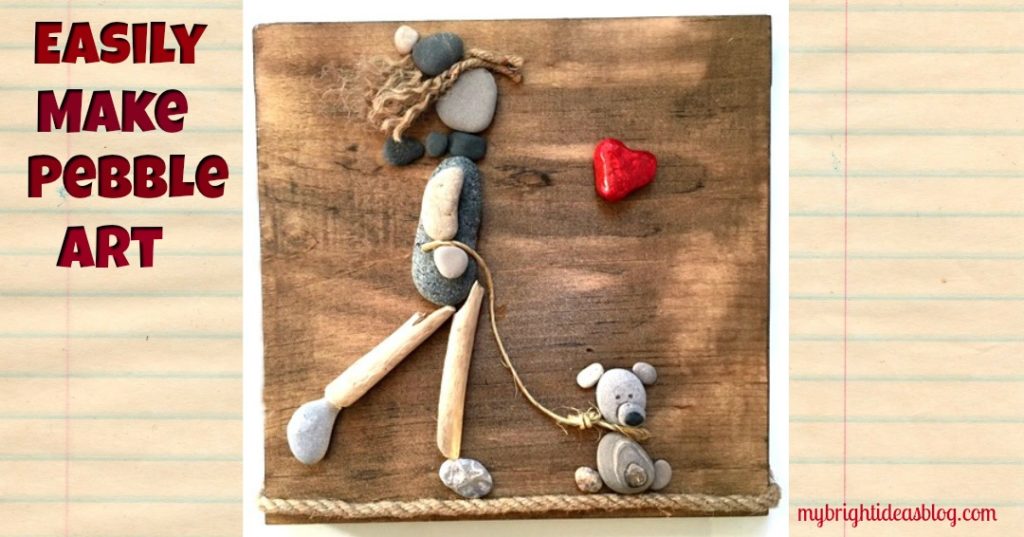
I have been wanting to make pebble art for months but I’ve been nervous to get started. How silly is that? It’s just rocks glued to a board for heavens sake?! Well today I finally went for my first of many (hopefully) attempts to make pebble art.
You will need:
- a wood board
- sand paper
- paint or stain
- rag
- rubber gloves
- pebbles
- industrial glue or hot glue gun
- twine
- jute rope
- red craft paint and red glitter paint
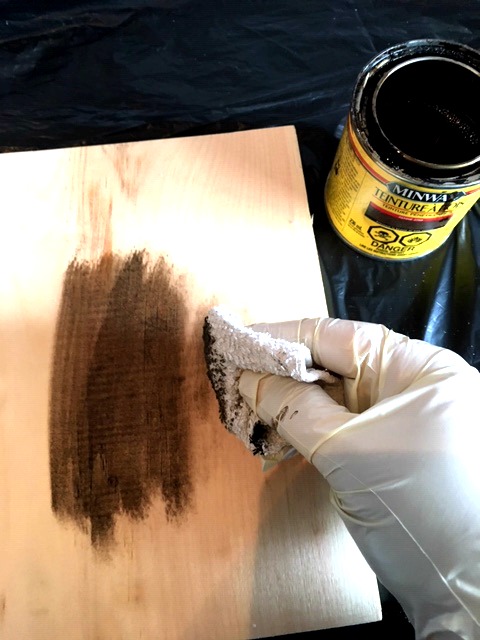
Start by preparing the board. Use sand paper to smooth out rough edges. It doesn’t have to be perfect just make sure the rough corners are smooth.
Apply stain, wearing gloves, use a rag to wipe stain onto the wood. In this project I used my favorite. Minwax “Jacobean”. I waited 12 hours for this to dry.
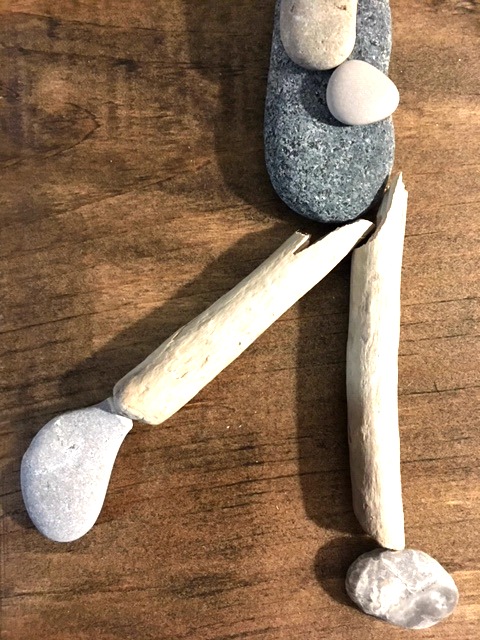
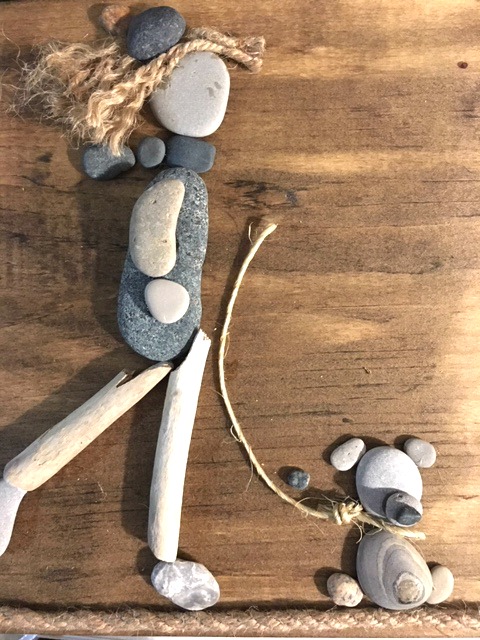
Next, lay out your stones to create your artwork. I broke a little piece of drift wood to become her legs. Rummaging through my treasured pebble collection I found a funny shaped rock for her foot.
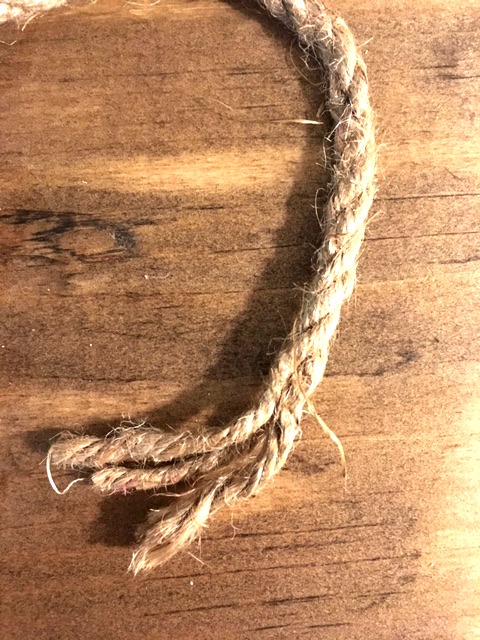
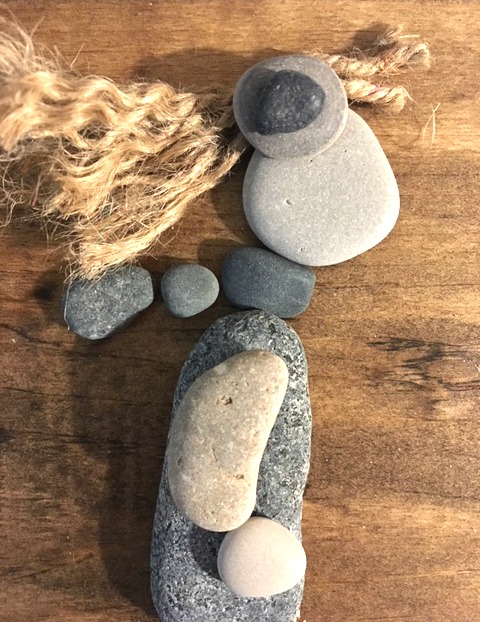
This piece of jute rope was a perfect scrap so I unravelled it to make hair for her.
I used industrial strength glue “E6000”. It’s so much stronger than a hot glue gun. But it is stinky and dries slowly. Use in a well ventilated area.
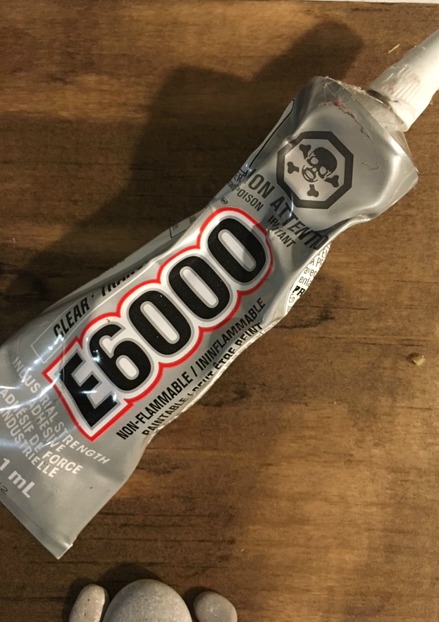
Did you crack a window?

I needed to put some other pebbles on and around the hair to hold it down while the glue dried.
I tied a knot in a piece of twine and made it into the dog leash. At the bottom of the wood I glued a piece of jute rope to make a path for my girl and her dog to walk on. The ends were then tucked around the sides and glued down. (Okay, I confess, for this one part of the project I used the glue gun) I also added tiny dots for the dog’s eyes with a sharpie.
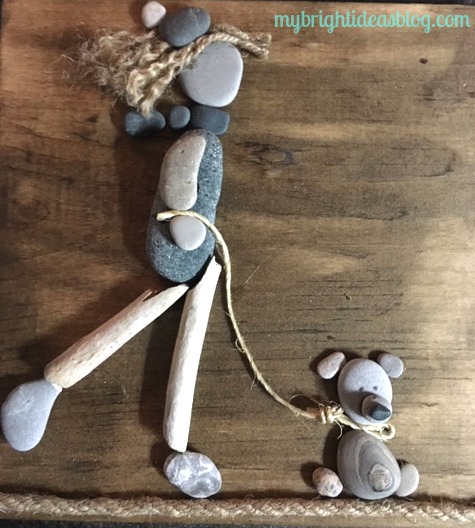
Notice how I just tucked the end of the twine in between the two pebbles to have her holding the leash.
I like the natural colors on this so far, so I found it hard to decide if I should leave it natural….or add a splash of colour.
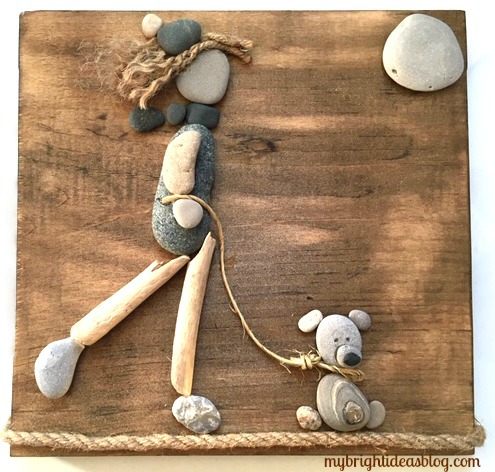
Here I tried out a natural big round stone for the sun or moon.
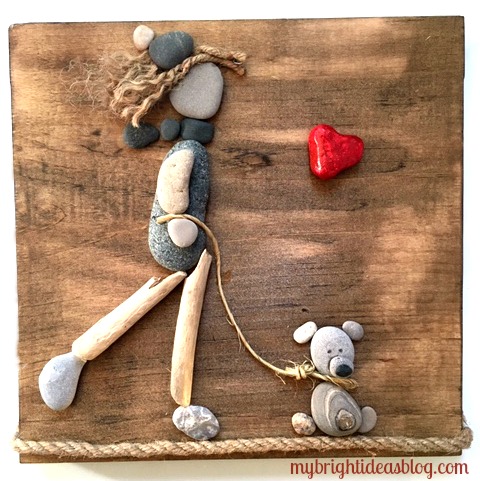
I love this red heart shaped stone that I had previously painted with red craft paint and a sparkly top coat. You could also use nail polish. Since I wanted to make this a gift for my daughter who loves her pooches I think this is a nice touch.
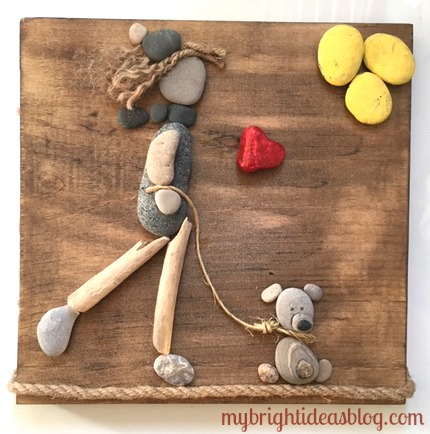
For this one I put in some yellow pebbles for the sun. Nothing is permanent until you glue it on, so you can tinker around with your design while you try out different options.
I loved making this and plan to make a lot more. It becomes a mixed medium art piece. It’s really exciting to try something new and see it turn out great! Since every stone is different it will be impossible to make a duplicate. This is a one of a kind gift idea!!

…..
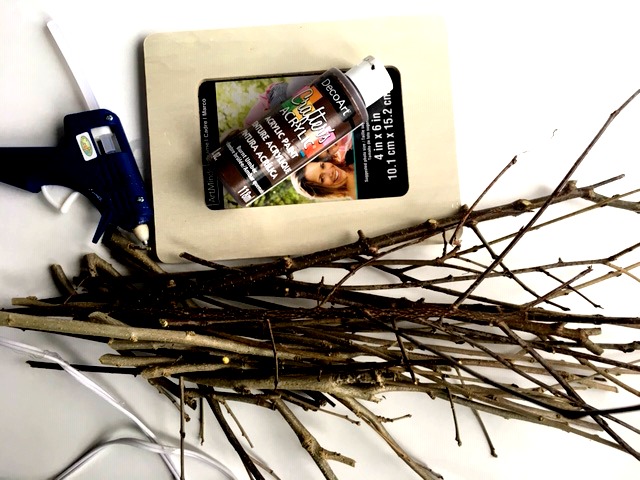
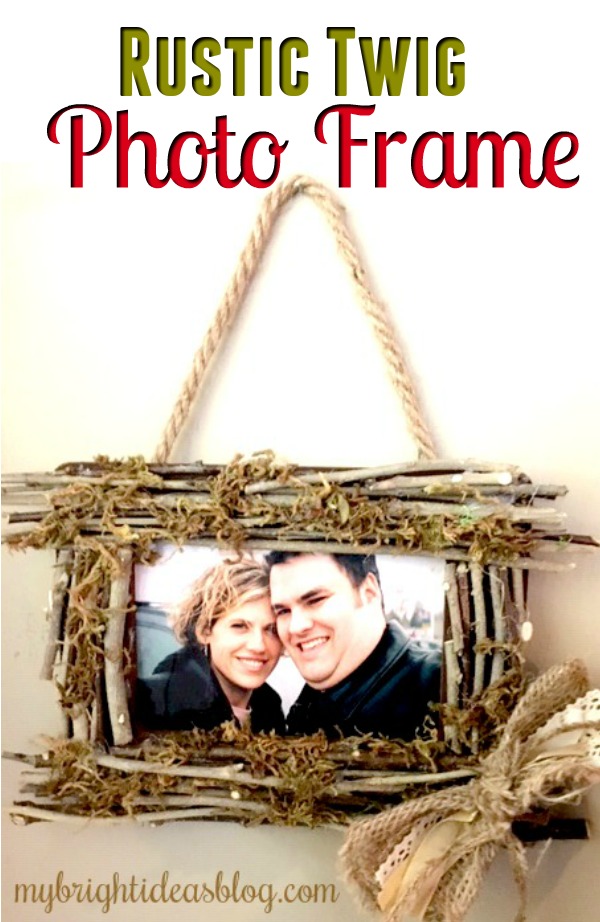
Make a Twig Photo Frame Gift

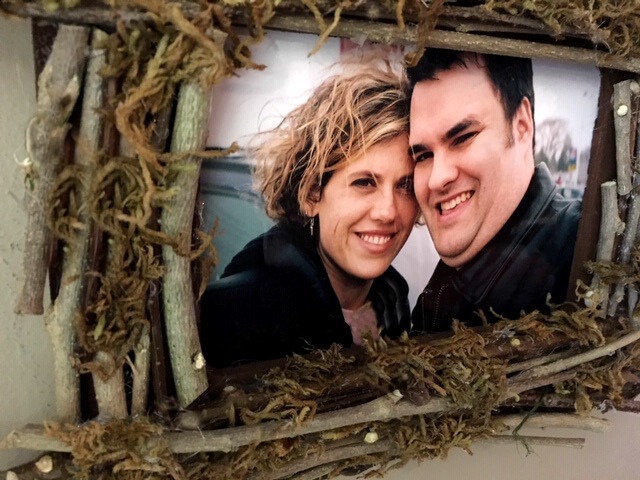
My hubby and I took this picture the day we bought a car together. We had been married a few years by then. It was before kids and a mortgage and grey hair and bags under the eyes. We were so young and dewy. Sigh….
Well that’s nostalgic for days gone by…simpler times. But now we have a home and family and dogs…with our 18th anniversary only a few weeks away we are putting this photo into a home-made twig picture frame.
I have 2 or 3 more twig plans before the winter hits. I love twig crafts because they are natural, rustic and free! I have a slew of shrubs and trees that are needing trimming or after a windy night have left twigs all over the lawn so I have an endless amount of free craft supplies within a few steps of our front or back door.
You will need:
- straight sticks/twigs
- gardening snips
- hot glue gun
- inexpensive photo frame
- brown paint
- paint brush
- ribbon/lace/burlap ribbon
- moss
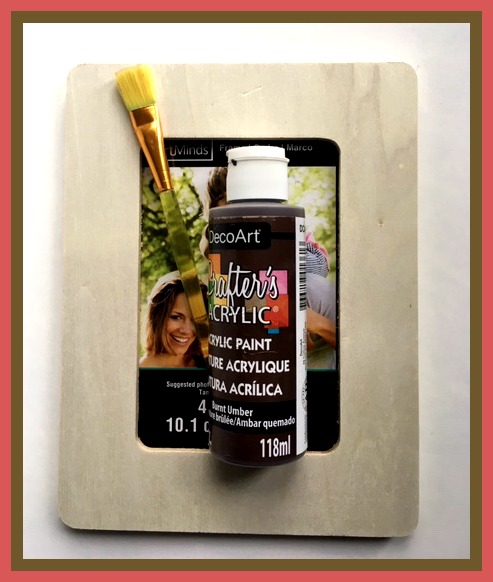
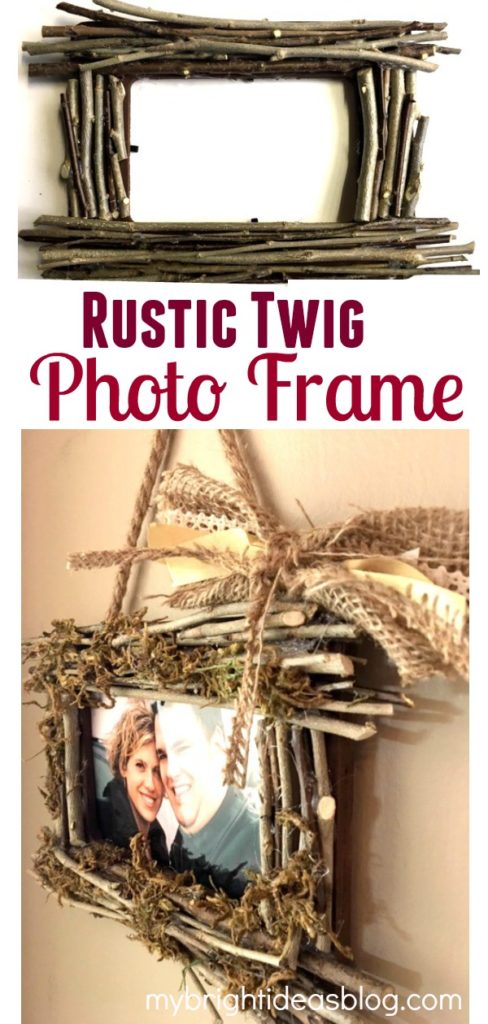
Start by painting the frame with dark brown craft paint. The frame and paint is from my local dollar store, add on the cost of 8 glue sticks and this might cost around $4 dollars….more if you add moss and a burlap bow. This would be a great snow day craft for your older kids (my girls are 8 and 11 and can use a hot glue gun without hurting themselves).

Choose branches that are relatively straight. Snip off the little twiggy parts sticking out. Trim your sticks down to the size just past your frame edge. They don’t have to be exactly the same length-the variation is what makes it rustic. I also didn’t use branches from the same shrubs so the color and texture of the twigs are different.
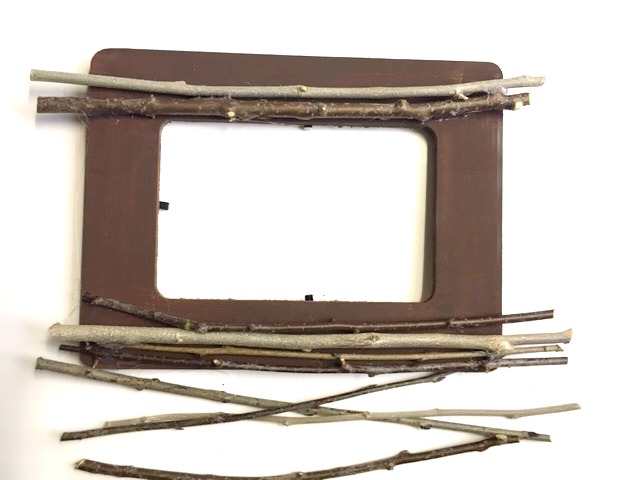
Using your hot glue gun, begin securing twigs to the frame. Start with the long ones on the top and bottom of the frame.
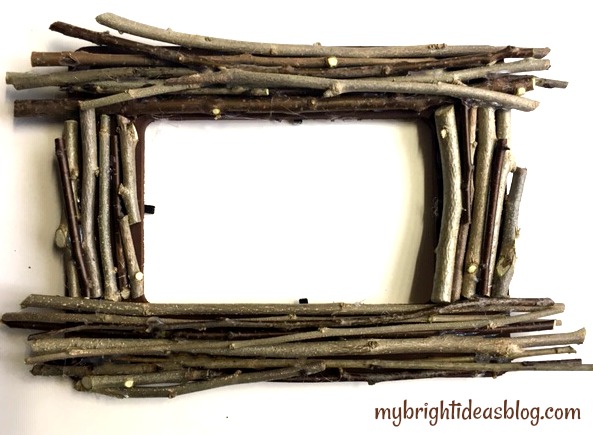
Add smaller twigs to the vertical part of the frame that is bare. Save the skinny twigs until the end to fill in gaps.
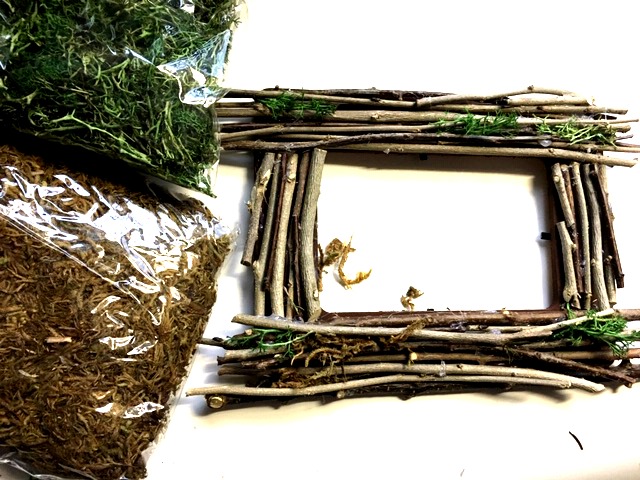
I liked the frame as it was with just twigs…so you might want to stop the project there. But when I added moss to my birdhouse project a few months ago. I really loved it.
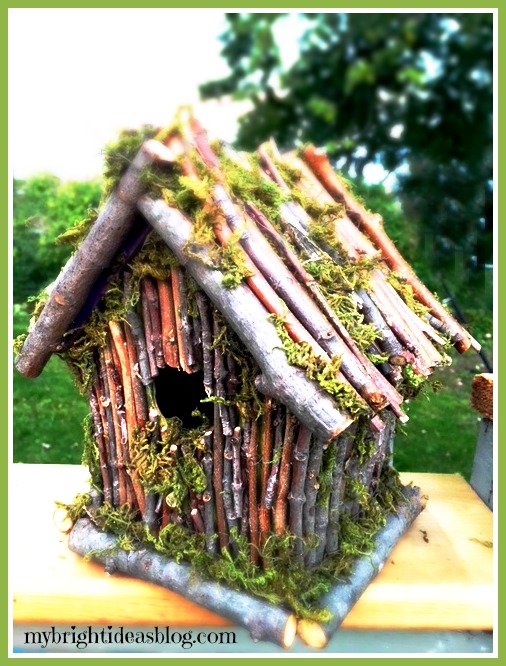
The moss I used on the birdhouse is my favorite but I seem to have run out of it. The one I used on this project is a bit duller. But it looks very natural.
I added some hot glue and pushed the moss into the grooves. It was a bit tricky and my hot glue gun also ended up with rustic coat of moss stuck to it. After the project was done and the glue gun cooled I was able to peel off the mess.
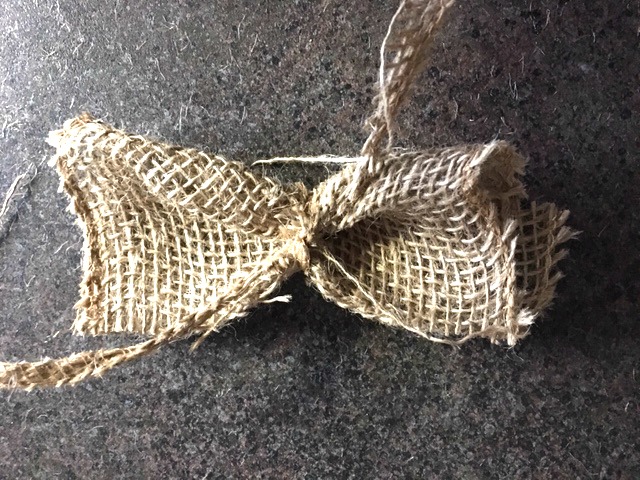
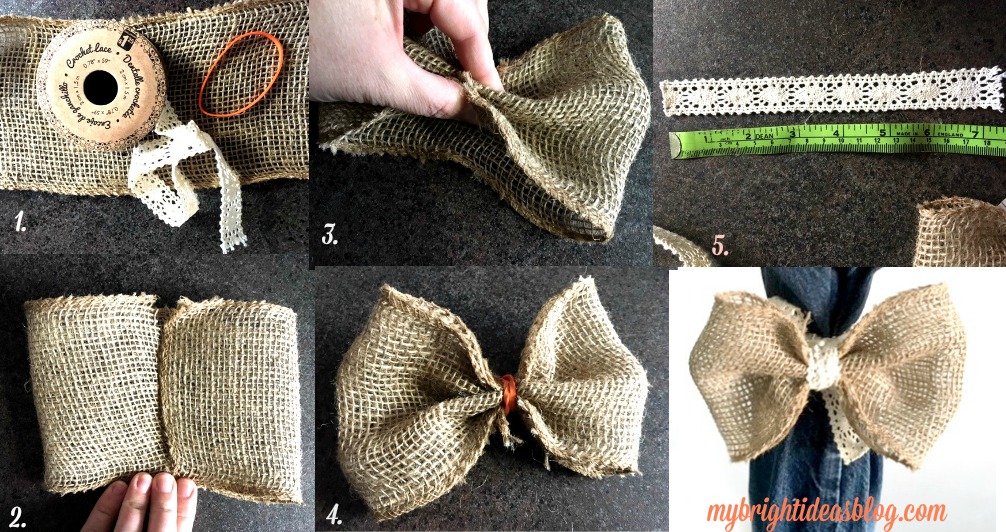
Next I made a few bows out of burlap. This one I just folded a small square of burlap into thirds and used a long thin scrap of the burlap to make a tie in the middle. I had some scraps of ribbons and lace and inserted them under the tie.
You could try out some different bows and where you would place them on the frame.
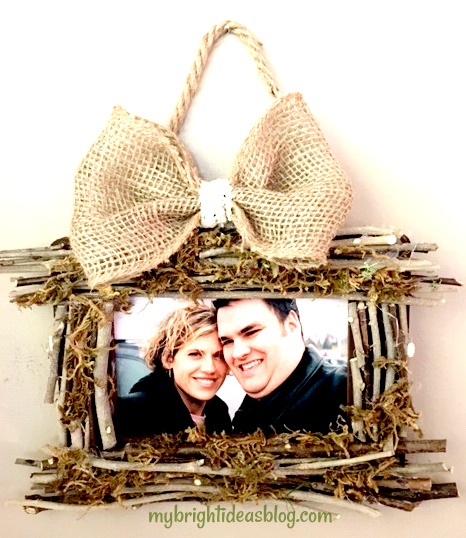
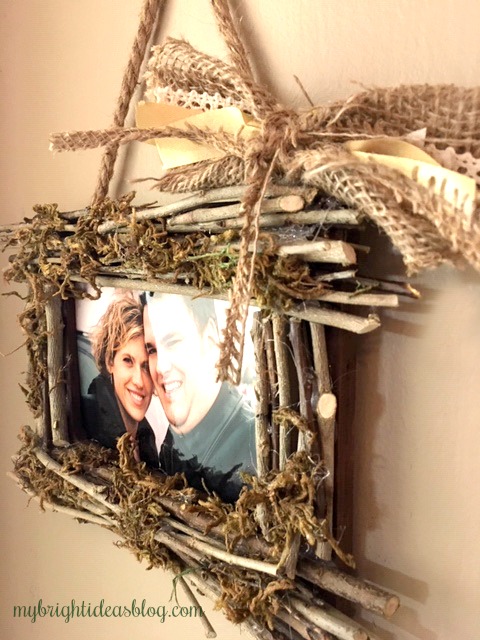
This big bow reminded me of some hair clips I wore as a kid. Maybe if the photo we chose to put in the frame was of children or the dogs….but not over top of hubby’s head. I decided to stick with the previous bow but I didn’t hot glue it on in case I want to replace it later. Using a straight pin, I poked it into the twigs but you could get creative with a straightened paper clip or twist tie or pipe cleaner. Maybe in the spring I will pull off the bow and attach a butterfly or flowers. I’m leaving my options open.
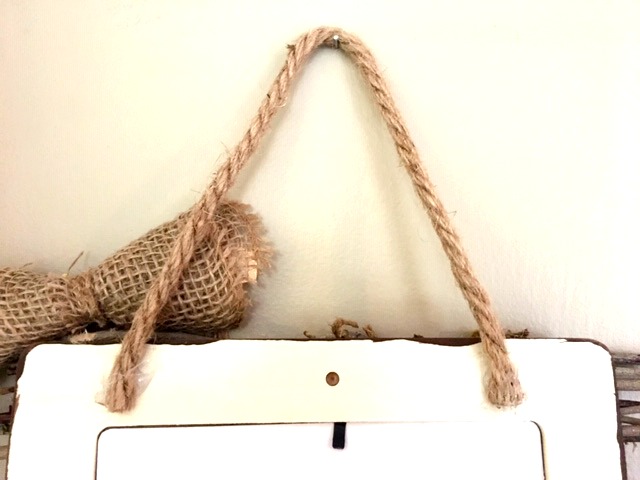
I almost forgot to say that to hang it I cut a piece of jute rope 12 inches long and hot glued the ends to the frame.
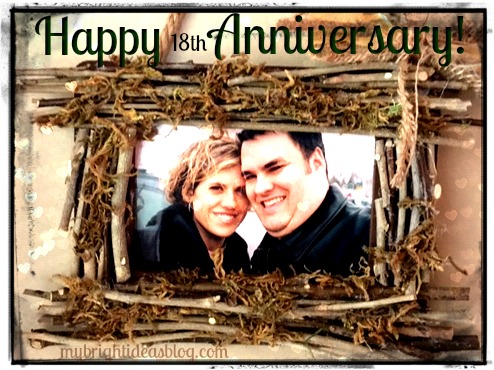
Happy Anniversary to my Hubby!
xoxo
Have a look at the other twig projects below. See you again soon!
…
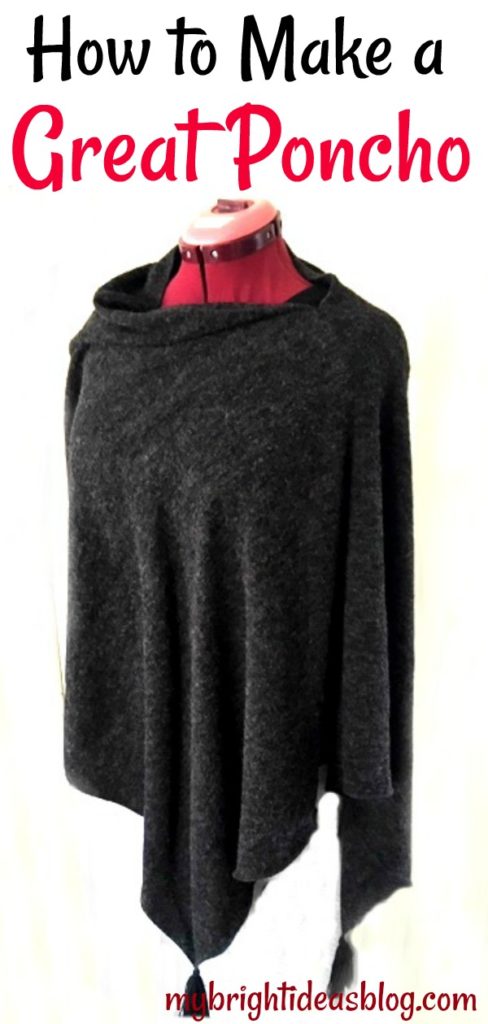
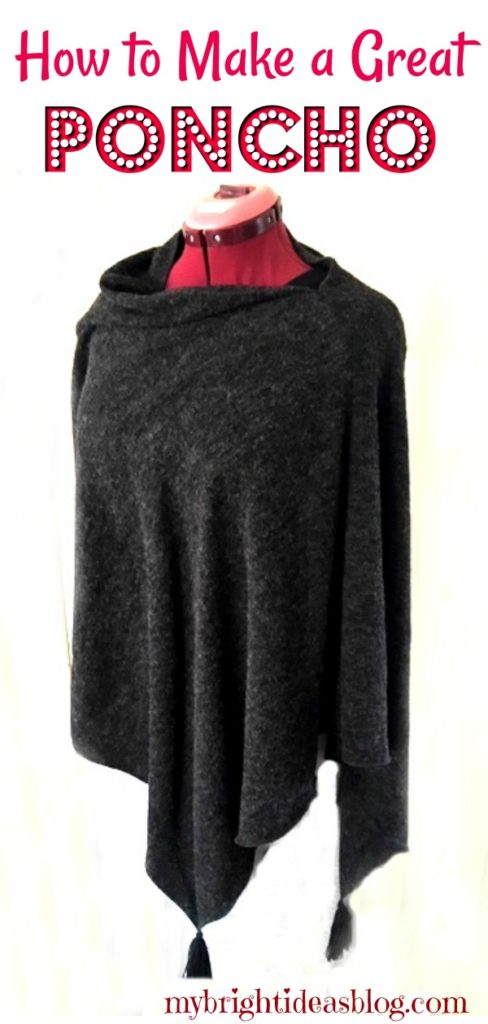
Make a Super Easy Poncho!
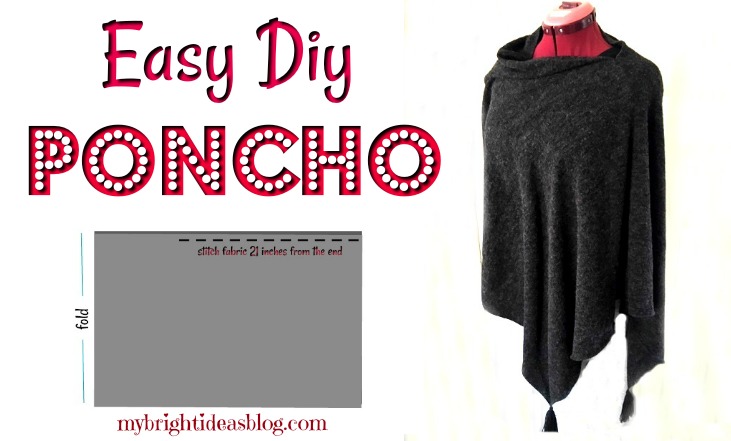
This has got to be the easiest poncho plans ever! Using fleece or another stretch fabric means that you don’t need to hem it. So all it takes is one simple seam and you have a gorgeous poncho you will love to wear!
You will need:
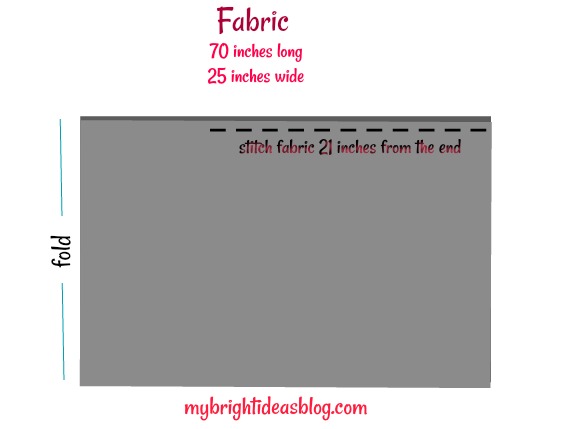
- t-shirt, sweatshirt or fleece fabric 25 inches wide by 70 inches long (64 cms x 178 cms long)
- sewing machine
- 2 purchased tassels (I’ll get working on a DIY for making a tassel soon)
- needle and co-ordinating thread
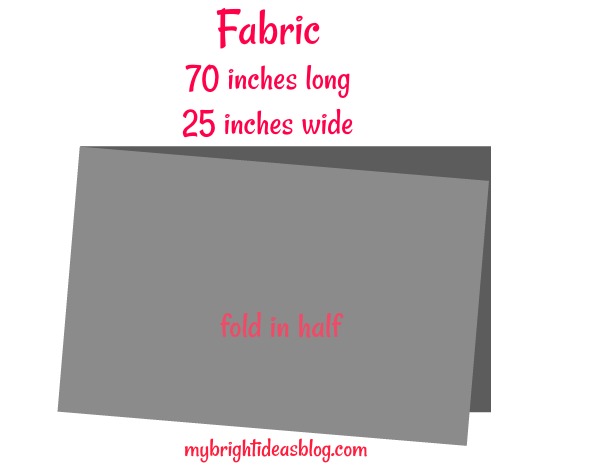
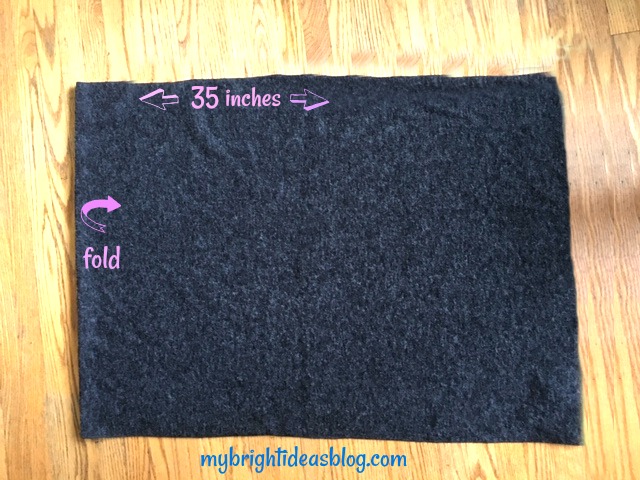
Start by cutting your fabric to size. Cut it carefully to be completely straight. We aren’t planning to hem the fabric so take your time to make the cut as perfect as possible.
Then fold it in half.
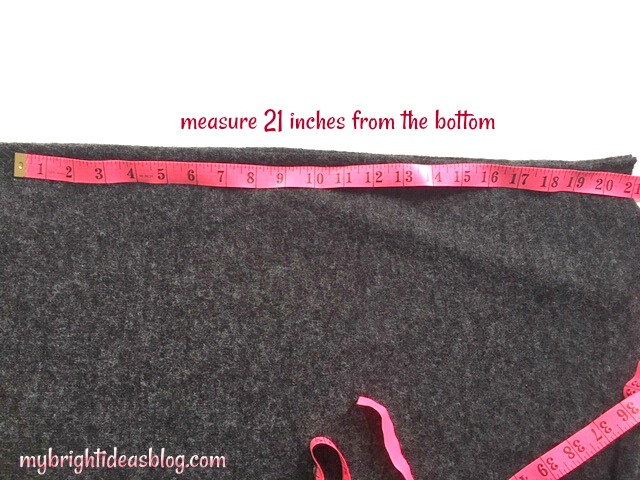
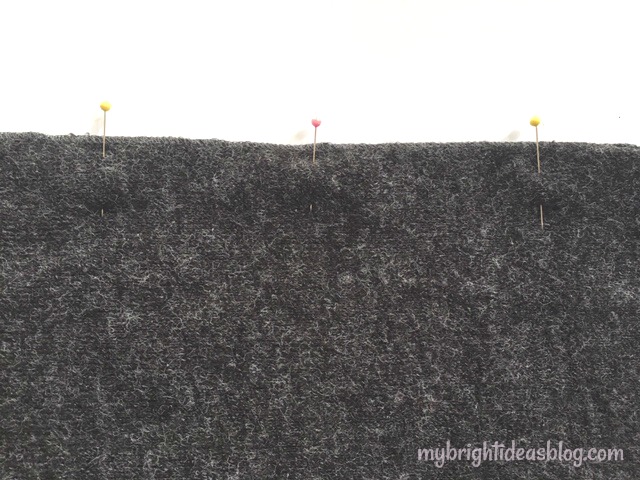
With the fold on the left, measure 21 inches from the right edge of the fabric and pin it together along the top edge.
Leaving 14 inches for your neck hole, sew the remaining 21 inches. This is the one seam that you need to sew for this awesome poncho.
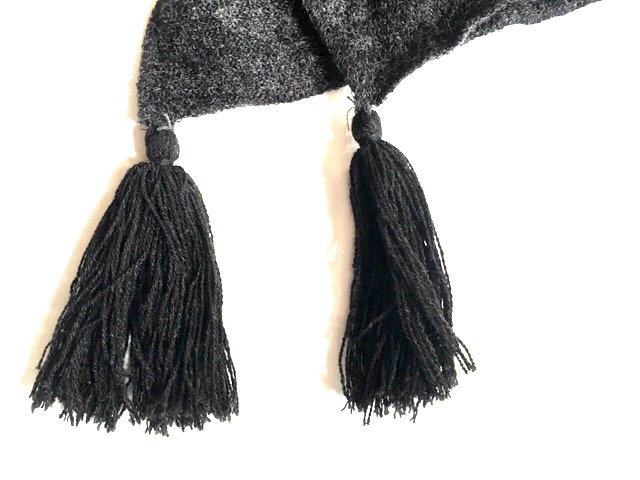
Now add on the tassels-by hand stitching them onto the bottom right corners. This is completely optional. If you don’t have purchased tassels you can skip it. I will make a post about making a tassel soon and link it to this post.
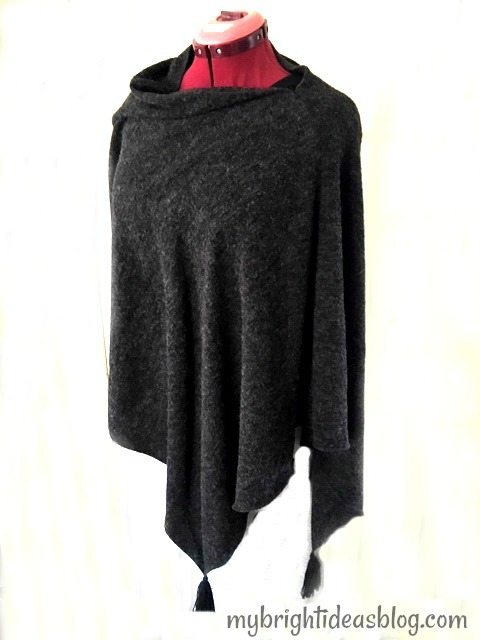
That is all there is to it! This poncho will look great with jeans and boots or dress it up for fancy occasions. If your office is chilly you could have one of these in your desk drawer. You should make a few!
Thanks for reading this post and I hope you will share it with your friends by social media or Pinterest.
Sew a Super Easy Fleece Poncho-Simple Starter Sewing Project

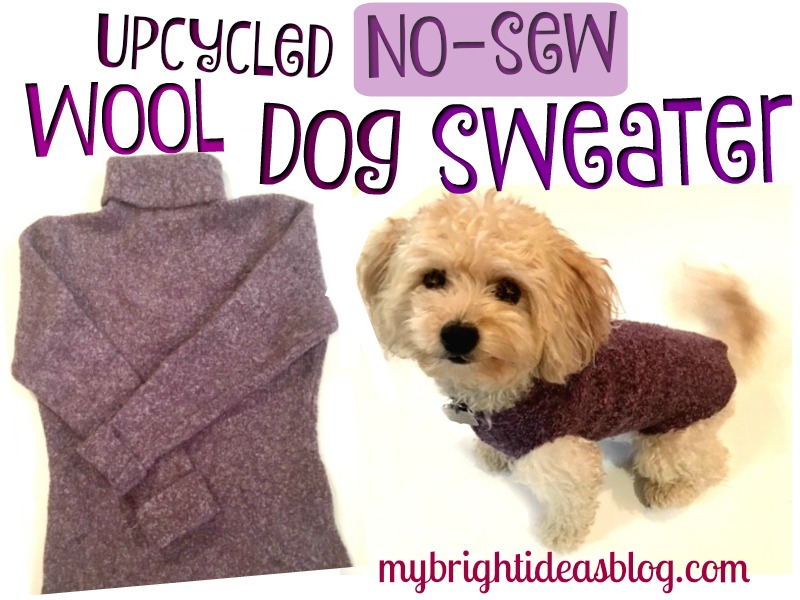
Easy Dog Coat from an Upcycled Sweater
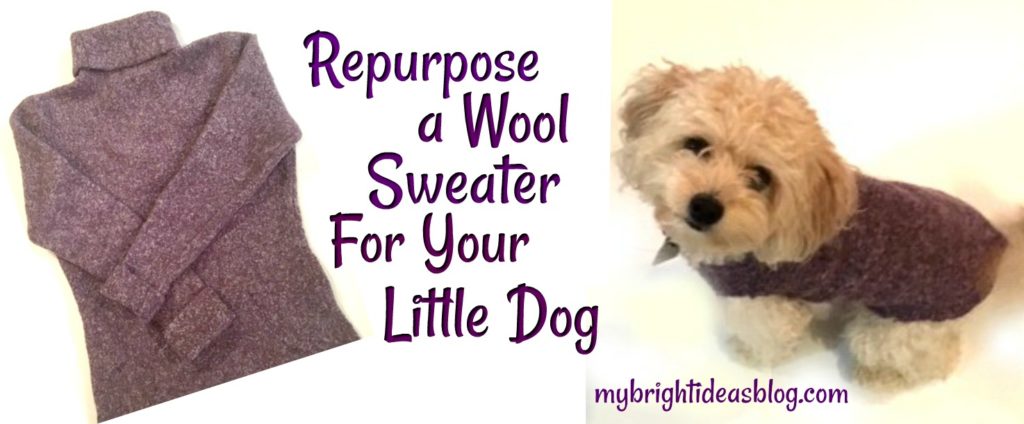
Make your little dog an easy winter sweater by repurposing one of your own!
You know how you should never, ever wash a wool sweater in hot water or put it in the dryer? Well that is exactly what you need to do today to make a little dog a wool coat.
We have a little girl named Gemma who is a Yorkie/Poodle mix. This is the perfect size for her. She is 9 lbs and loves to share your toast. She gets chilled easily so she loves it when her momma makes her a new coat or sweater.
You will need:
- a wool sweater (or wool blend with at least 50% wool)
- scissors
- tape measure or ruler

Start by washing your wool sweater in hot water and machine dry it. This will shrink the wool and “felt” the stitches of the sweater so that it will not unravel when we cut it. You could wash and dry the sweater a few times to further shrink it.
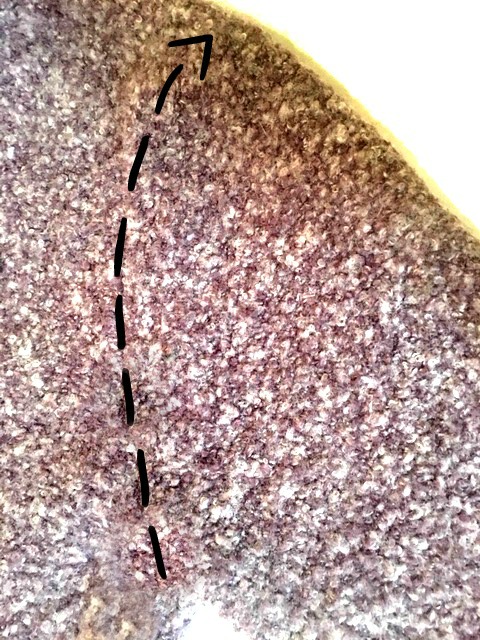
Lay the sweater on a flat surface and cut the sleeve off at the shoulder seam.
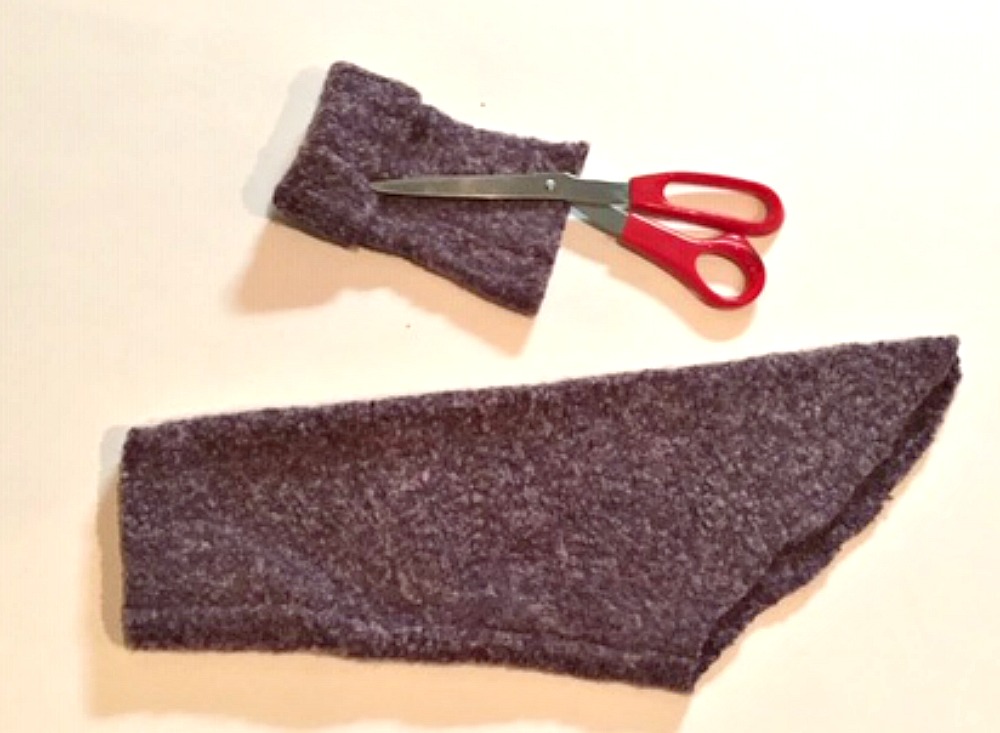
Also cut off the cuff.
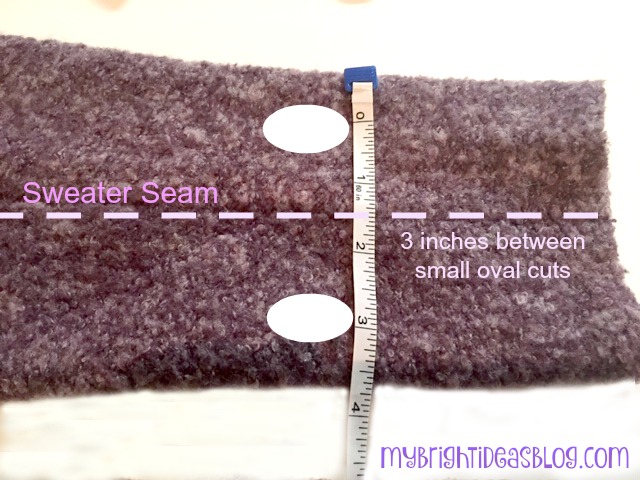
Lay the sleeve flat with the seam in the middle facing upwards. I cut 2 small leg holes 3 inches apart.
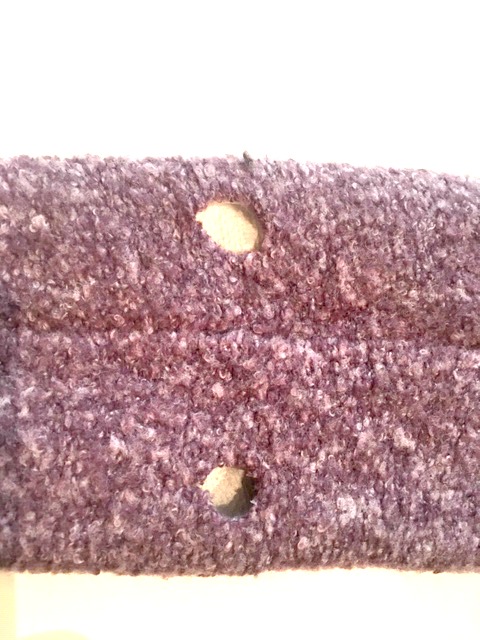
Cut the holes small because the sweater will stretch after a day or two of wearing it.
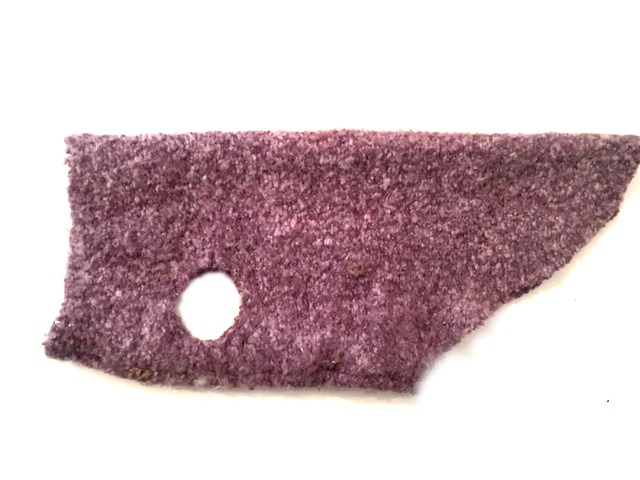
This photo shows a much bigger hole after Gemma wore it for 3 days. She gets cold with the weather changing so she sleeps in it at night too.
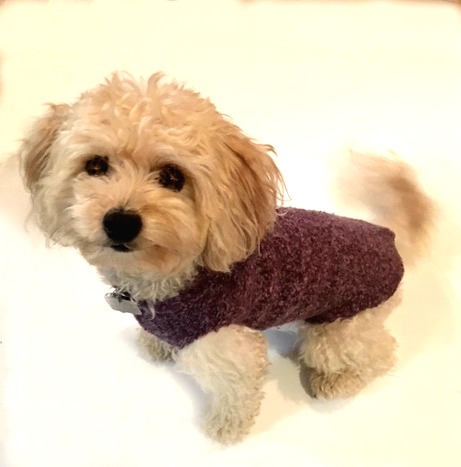 This photo shows her right after I made it. Her fur is very scruffy and adorable….but matted. So we took her to the groomer.


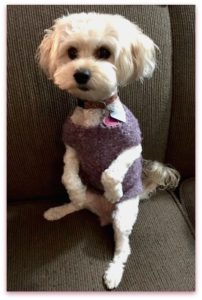
And here she is after grooming and smelling like cookie shampoo. She is so darling. The sweater size looks bigger because of her haircut and because of stretching. When we toss it into the washer and dryer it shrinks back to perfect size again.
That sweater had two arms, of course, so we can make a second one for her to wear on laundry day! Hurray!
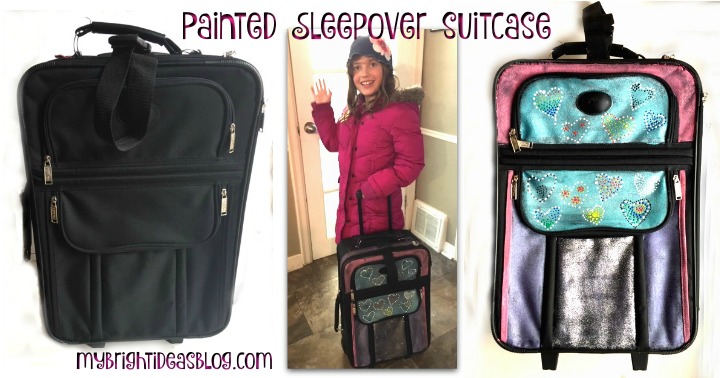
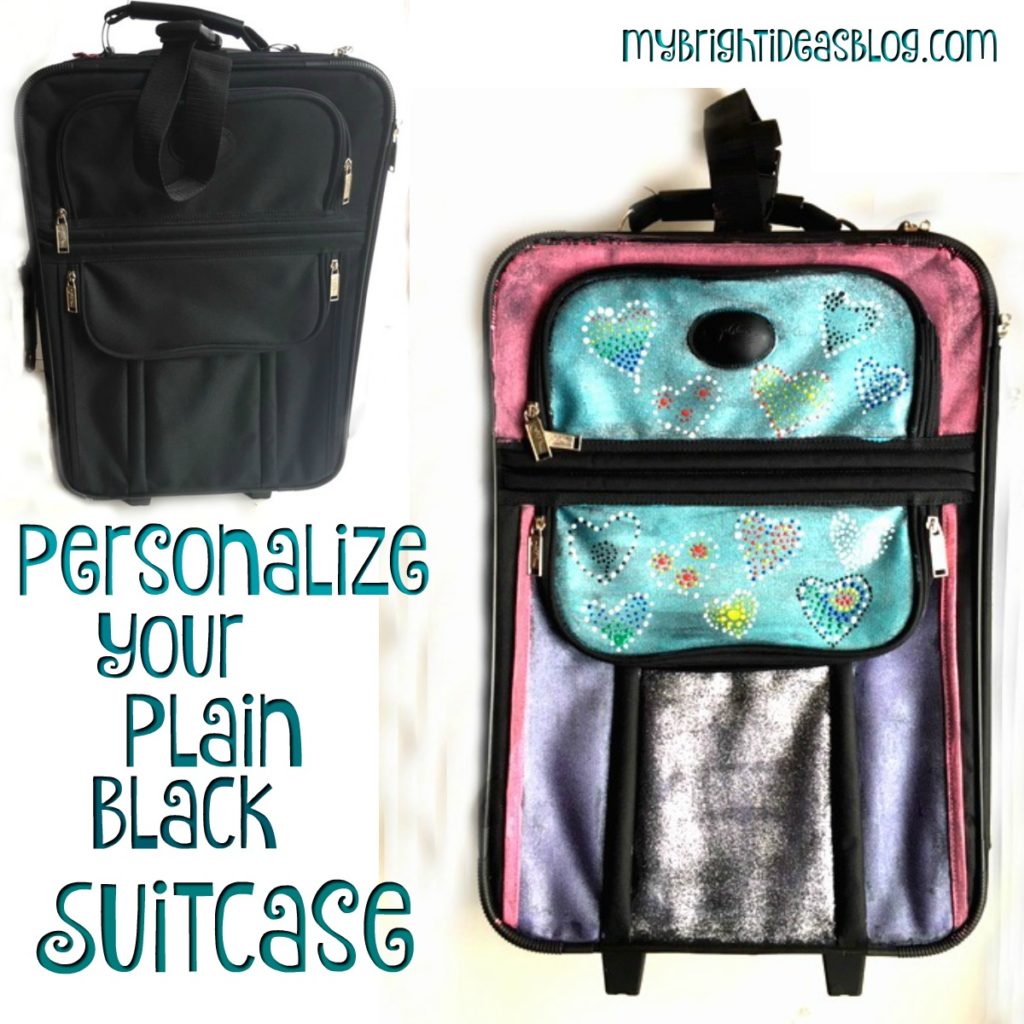
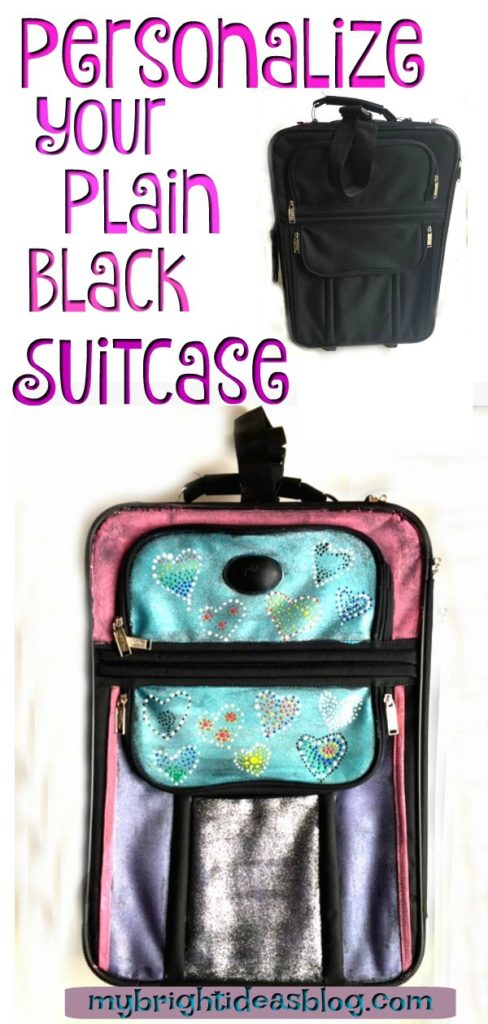
Personalize Your Suitcase or Craft Bag with Paint
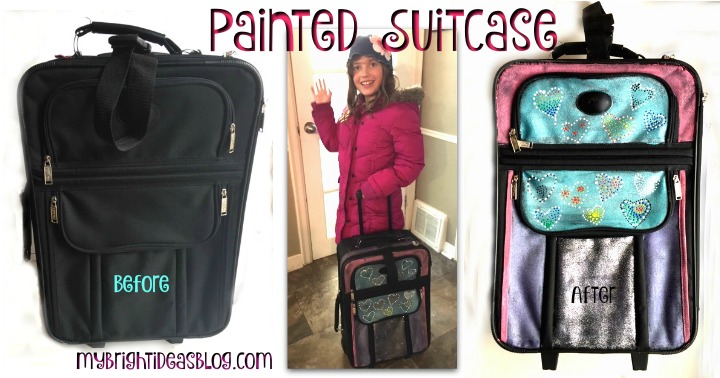
Today we personalized a boring black suitcase with craft and fabric paint! It turned out amazing.
If you have ever been to the airport you will know that the classic black suitcase is still the most popular. This makes it difficult to determine which suitcase is yours, there could be dozens of black suitcases on the carousel. If all you have on it, to identify your bag is your address, you are going to be there a while.
Let’s save you some time and make your bag stand out from the crowd and get you on your way.
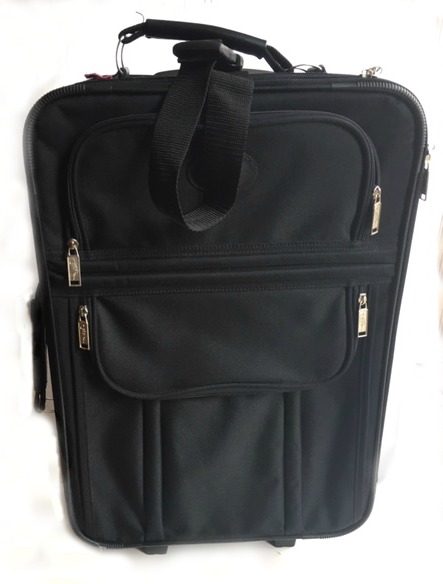 Introducing the black suitcase. Zzzzz boring…. Zero personality. Why not turn it into something really special. Your own work of art.
If its your tween’s bag maybe its shouting for some glitter. I’ve even seen some funny messages painted on it like…”Going to Gramma’s, Where Life is Good!!” Sleep over at the grandparents house? or “Oh the places you’ll go” or “I love you to the moon and back” which I could totally see on a bag for a child going to camp. There are some really great ideas for vintage suitcases too.
 You will need:
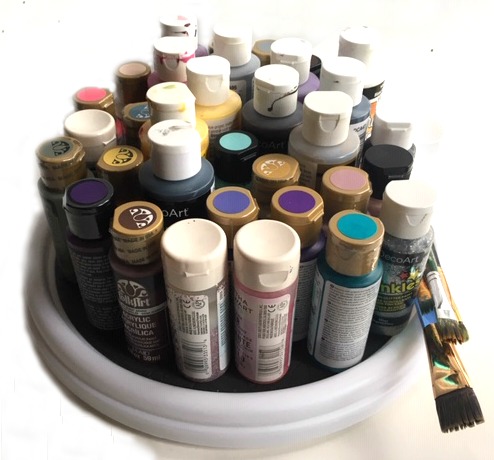
- multi-surface craft paint
- paint brushes
- fabric dimensional paint (optional for details)
- clear spray sealer (optional for extra protection)
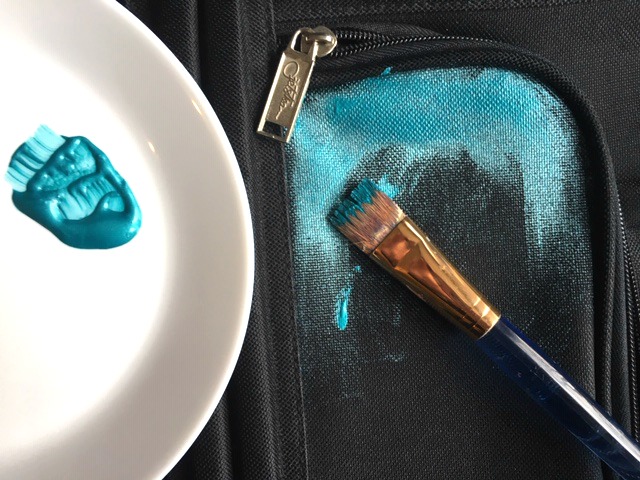
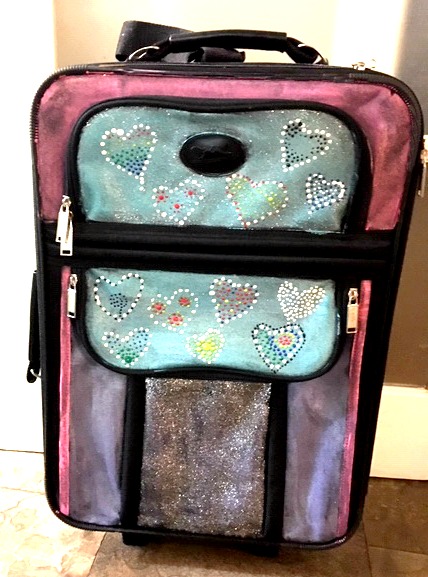
I started with metallic paint from Deco-Art in Teal. Its just a multi-surface craft paint from the craft store. Treat your suitcase like a canvas and start with your base colours for your design.
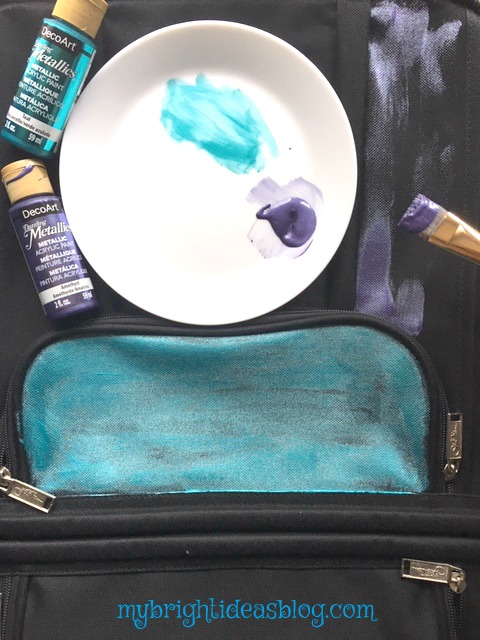
After I finished painting a pocket with “Metallic Teal” I moved on to painting the side panels with “Metallic Amethyst” purple from Deco-Art. I did go back and do another coat of these colours as needed.
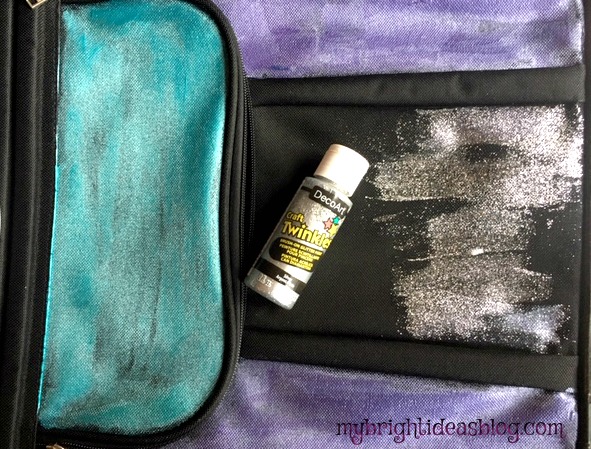
For the centre panel I used Deco-Art Silver Twinkles. The silver glitter paint really added some wow factor. Now my 8 year old would like it in her room to hold her stuffed animals.
The edge was done with Martha Stewart Glitter paint by itself.
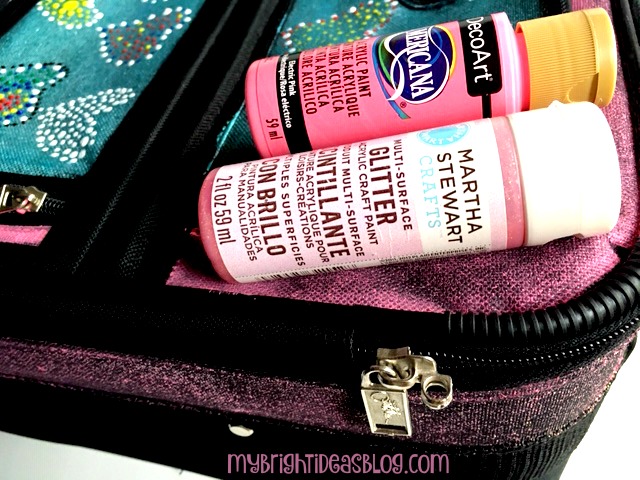
The front pink areas were done with a mixture of Martha Stewart Glitter paint mixed with DecoArt Electric Pink.
I should mention that if you get paint on the plastic parts of the suitcase you can wait until it dries and scrape it off with a finger nail. Having a damp piece of paper towel handy is good idea too.
![]() Now, it looks fabulous without going onto the next step. Already its a one of a kind suitcase that is unmistakably my own.
Now, it looks fabulous without going onto the next step. Already its a one of a kind suitcase that is unmistakably my own.
It’s at this point that you have to decide whether to keep going with embellishments or stop while your ahead.
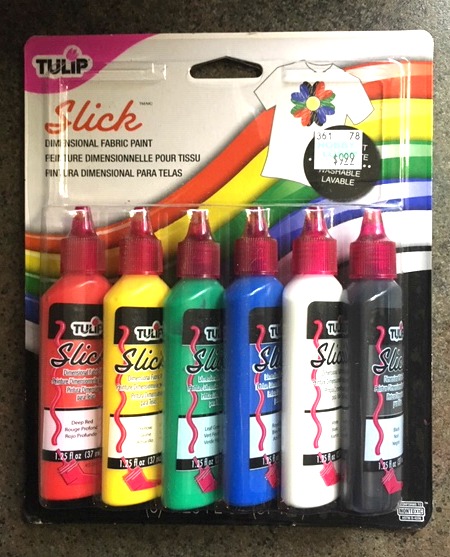
I carried on with some Tulip Slick fabric paint. This was $9.99 at Hobby Lobby but I had a coupon. This package has black, white, green, red, blue and yellow. You can purchase individual colours if you don’t need 6. I wish I had some metallic colours on hand for this but I used what I had.
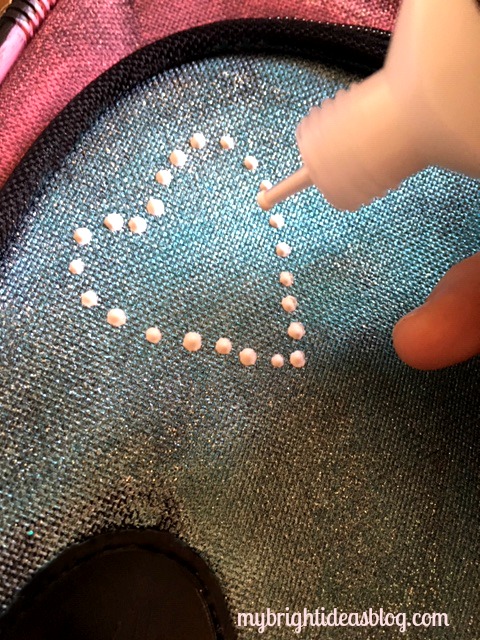
These fabric paint bottles are great for writing because of the fine tip. I like doing dots with them.
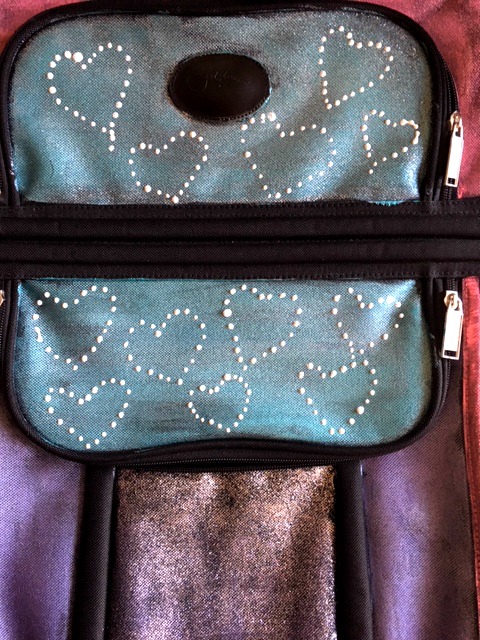
Should we stop with just white hearts or keep going? Decisions, decisions….
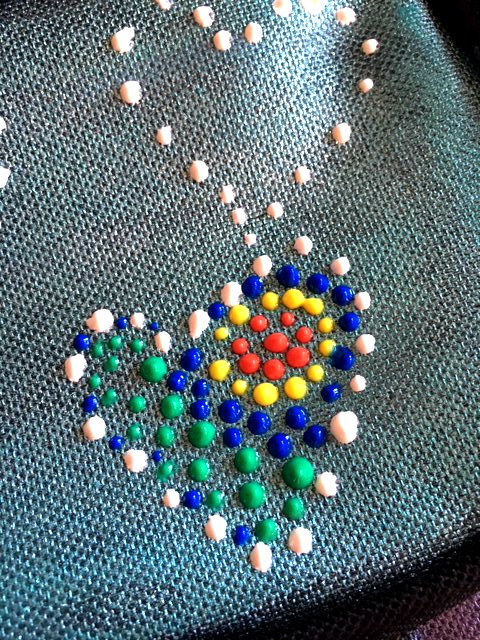
So of course, I kept going and filled in the hearts with more dot designs.
When you are finished, you may want to spray with a clear protective coat if you are going to using it a lot and its going to be tossed around in the airports.
The carry-on size suitcase would be perfect if you take your craft supplies with you to work with friends or classes.
I have seen where sewing pros have embroidered something onto fabric and then mod-podged the fabric onto their bags. Why not! If your using this for crafts you could put your name on it. But I wouldn’t write a name or phone number on it if you use it for travelling just for safety sake. Maybe a monogram though.
…
This goes to show you how you can make art out of anything.
Happy Crafting Friends! See you again soon!
Easy to Make Felt Coffee Cup Cozy
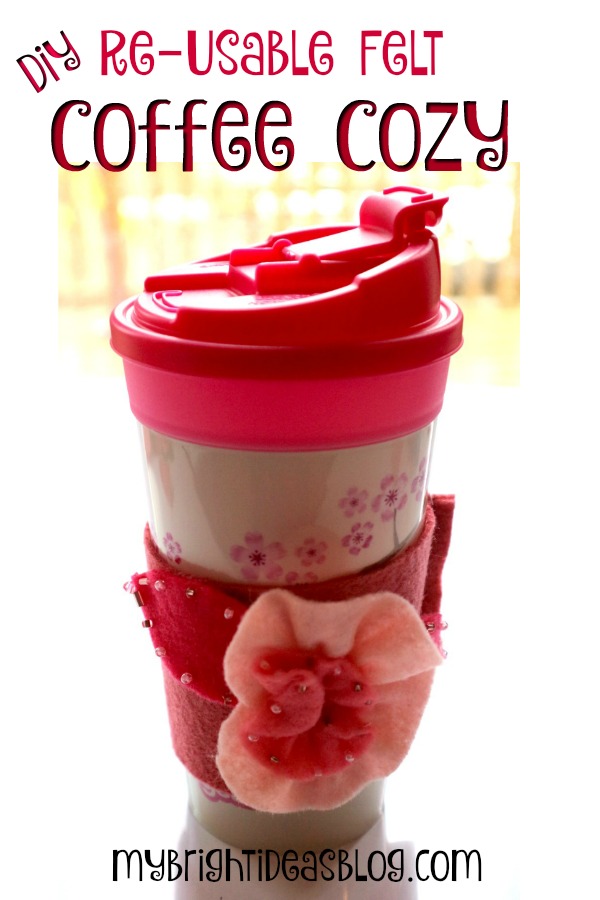
Have you heard of a coffee cup cozy? It’s an adorable name for a glamorous coffee cup sleeve. Often used to protect your fingertips from the hot beverage take out cup.
Today I will show you how to make a felt coffee cozy for either cups from home or a take-out cup. As the weather gets chilly that means ice skating and winter sports (or standing still watching other people do winter sports tee hee…) that will have you warming up with a nice hot chocolate, tea or coffee. You need a coffee cozy to keep the hot inside and protect your hands. They look cute too!
You will need:
- felt (3 inch strip plus scraps for the applique)
- scissors
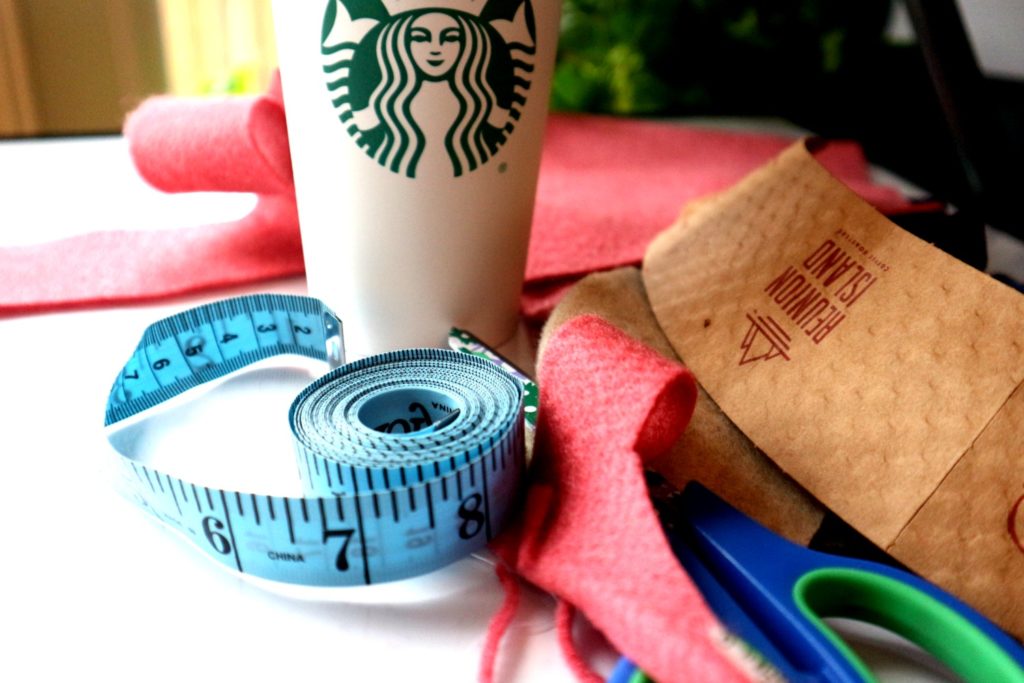
- measuring tape or ruler
- take away coffee cup
- needle and thread or sewing machine
Every cup is different so I recommend that you start by cutting a strip of fleece 3 inches wide and wrap it around your cup. Pin your felt in place to gauge the size you will need.
My favorite take away cup is a Grande Decaf Coffee from Starbucks (with cream and sugar and cinnamon and chocolate sprinkled on top…mmmm). That is also the size of the cups that they made into reusable plastic cups. Yeah! For my friends who live near Tim Horton’s, it fits their medium cups.
Read on to see details to make it this size.
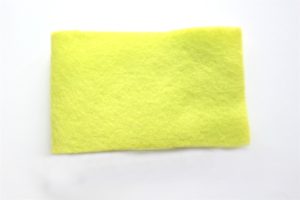
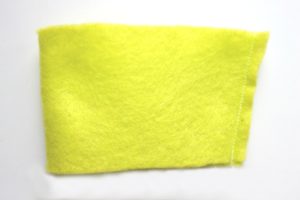
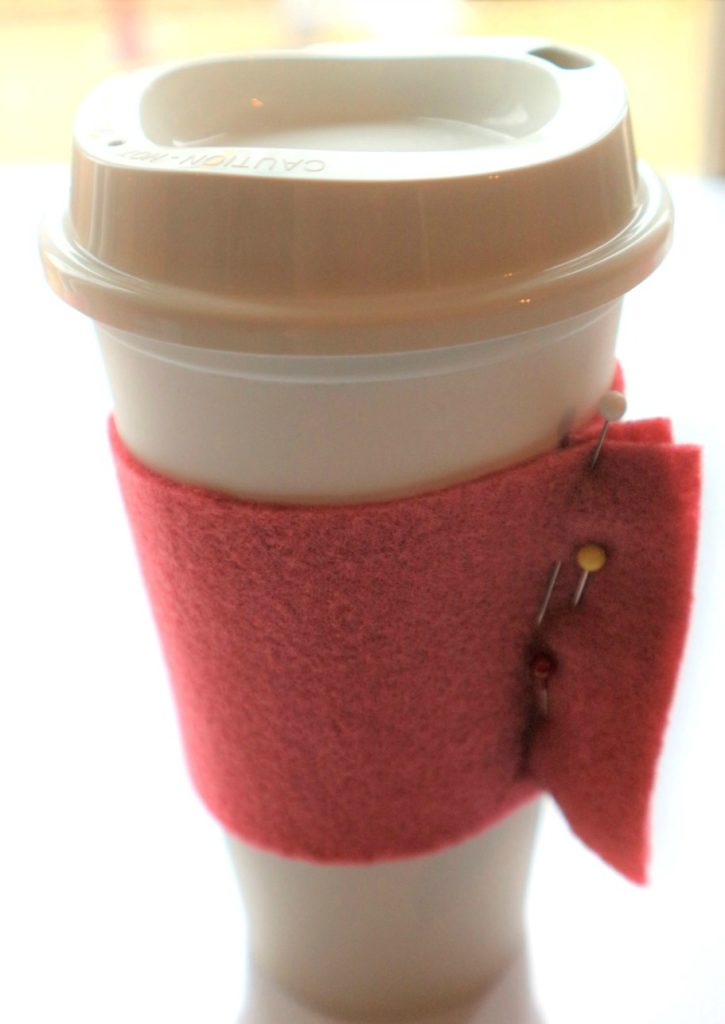
Measure your felt and cut a piece 9 inches long and 3 inches wide. (23cms by 7.5cms) Fold the strip of felt in half.
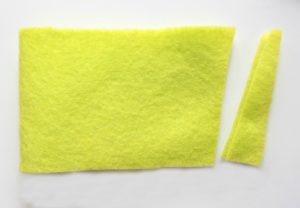
Wrap the strip of fabric around the cup to see how it fits. Trim a small amount of felt on an angle to adjust for the shape of the cup.
Hand sew or machine sew the edge. Stitch close to the edge…approx. 1/4 inch (or 1/2cm). Fortunately, felt does stretch a bit so if it fits snuggly at first, it will soon be fitting comfortably.
Making the Flower Applique
Sorry there is no pattern made for this. I “eyeball” most of the time instead of using patterns. Sometimes that makes my project a bit crooked but I don’t want it to look like its a perfect cookie cutter project that you can buy at Walmart.
So every project is an original!

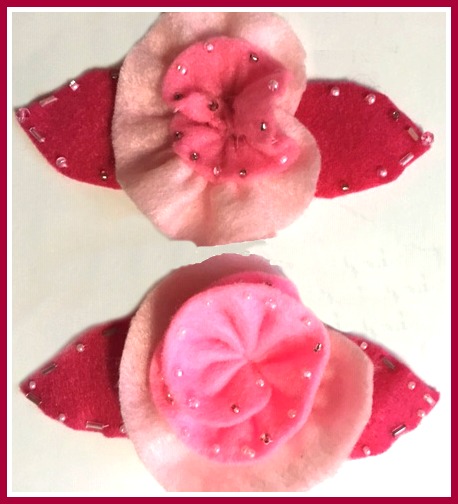
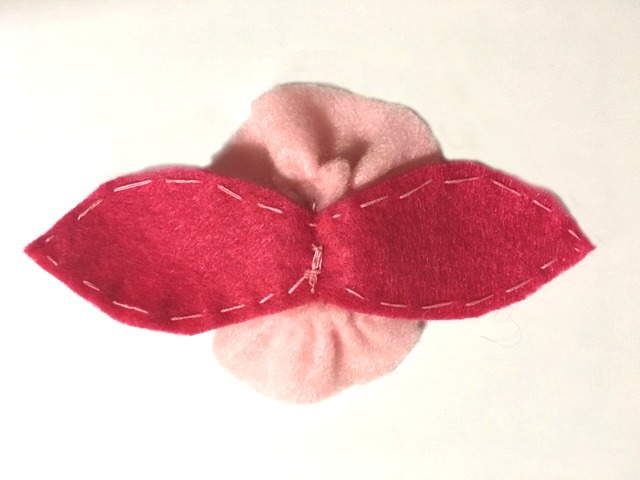
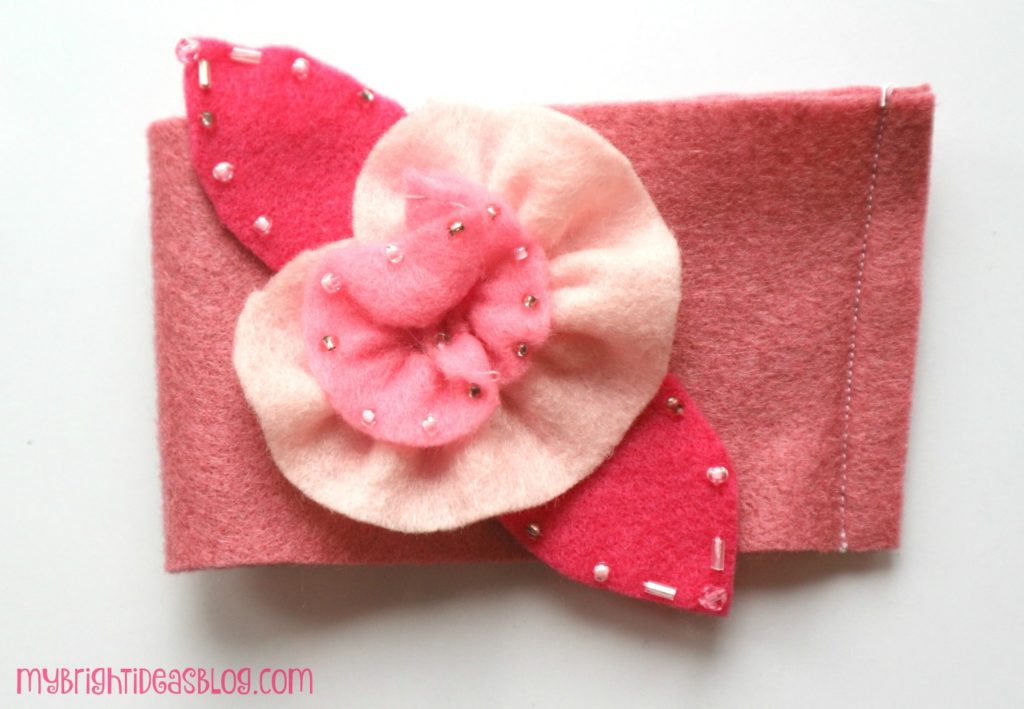
Cut 2 long strips with rounded corners. I used 3 shades of pink. The darkest is for behind the flower and cut into the shape of two leaves. The lightest pink is what I put for the middle of the flower. Cut 3/4 of an inch wide by 9 inches long. The centre pink was 1 1/4 inches by 8 inches. If you would like it to be fuller add another inch or two in the length to this piece.
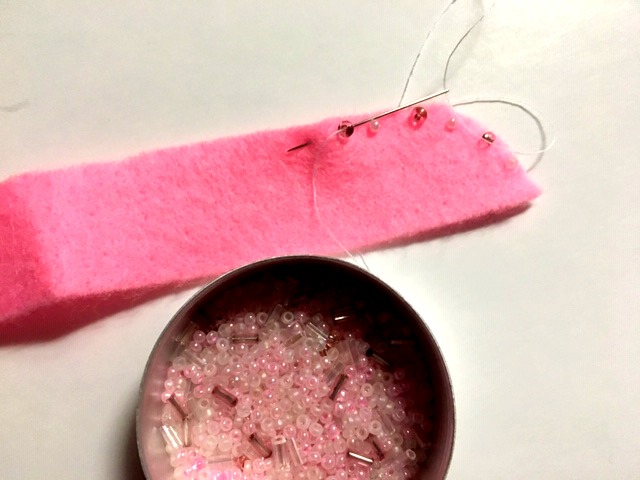
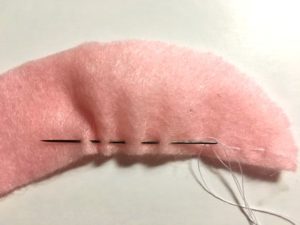
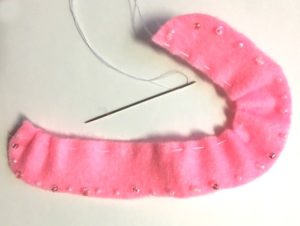
If you are going to add beads to the edges – do it first. Using seed beads add a bead to each stitch as the needle is up on the right side of the felt. Its so easy, we should sew beads onto everything! I added beads to the centre piece and the outside layer but left the middle layer without beads.
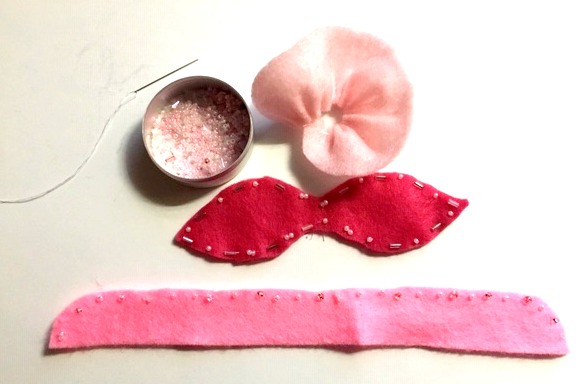
To begin putting the flower together. Slide the needle through the felt with a loose baste stitch. Gently pull the thread at the end to begin gathering.
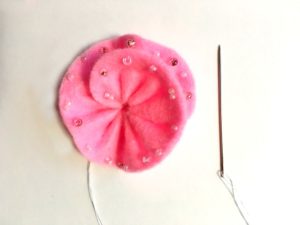
As the final step I put the flower together and sew them in pace. Then attached the entire flower to the sleeve.
 Here is the back side. Now I attached the flower to the cup sleeve.
OR
You could put the flower together by sewing the layers directly onto the sleeve. Which ever makes more sense to you.
TA DA! Don’t you just want to show it off.
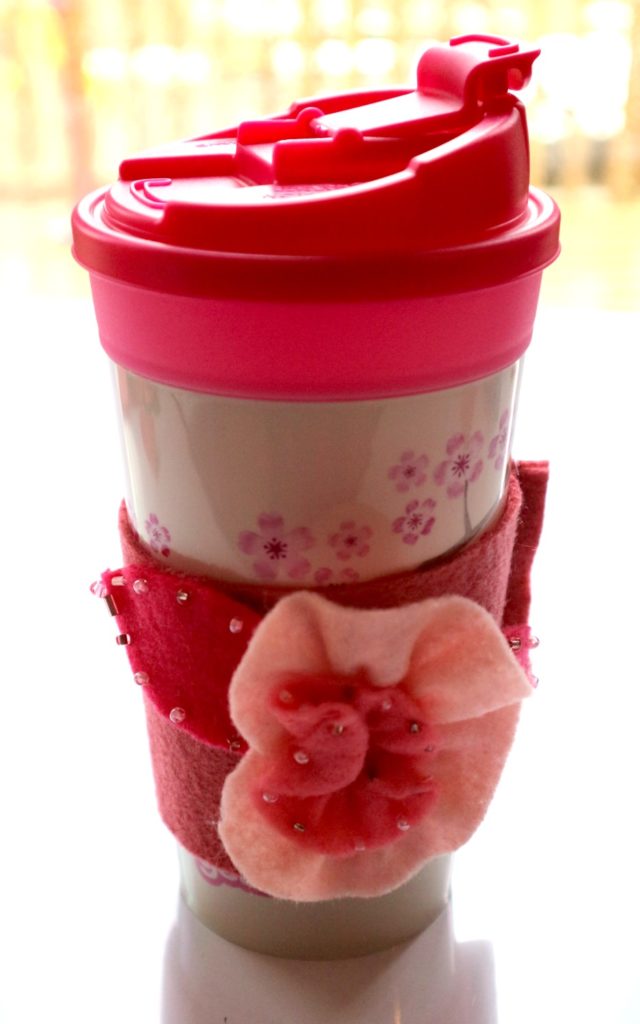
Felt is so easy to work with it will get your creative juices flowing! Now that you see how easy it is you will be designing more for a friend who loves dogs and another flower one for the babysitter, the mailman, workmates….spreading them all over the kitchen table like me making more….and more….
…or is it just me who does this?
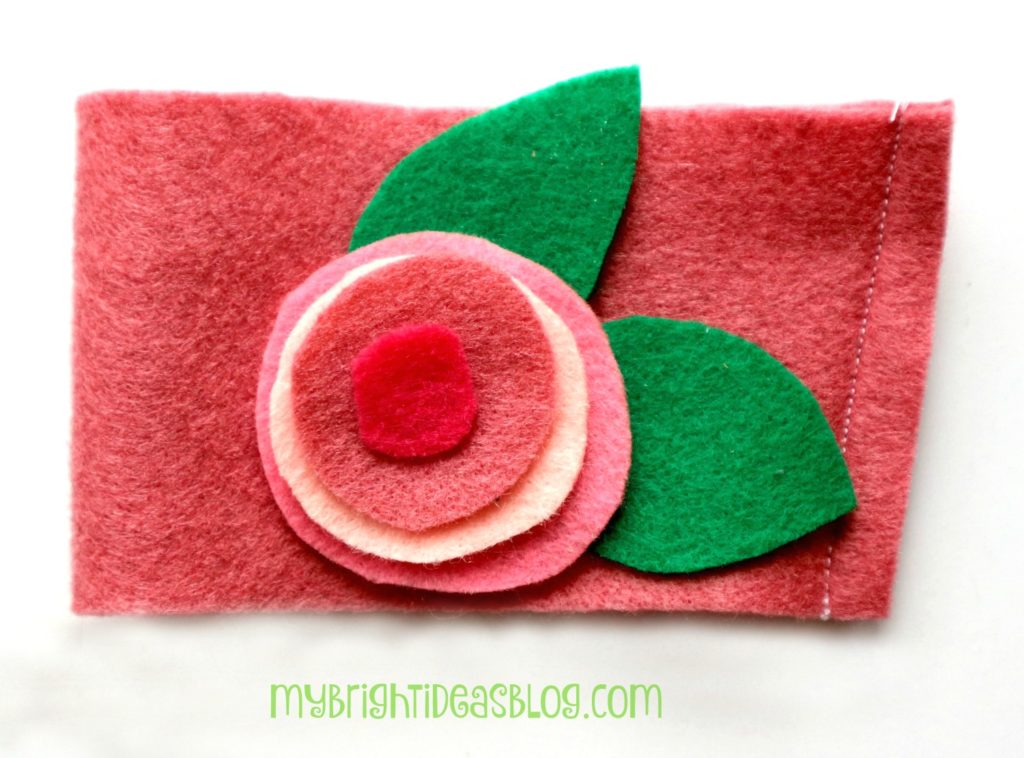
This flower is simply just stacking circles. If you don’t want to sew you could glue it on.
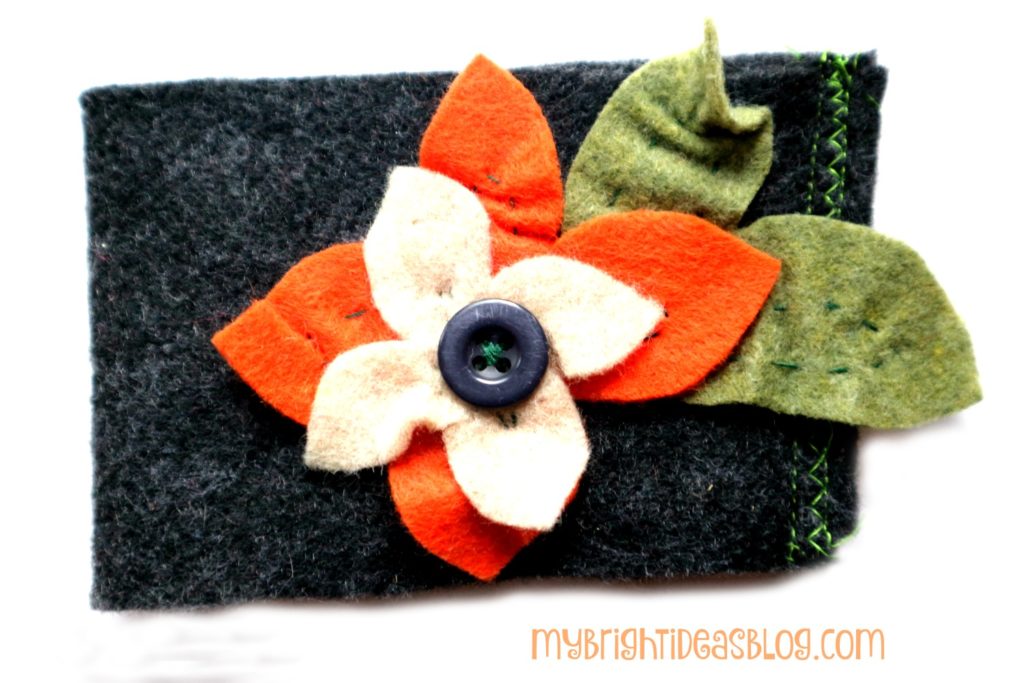
This one is nice for the autumn. I did a few stitches on this seam of this one in green and put a button on as the centre.
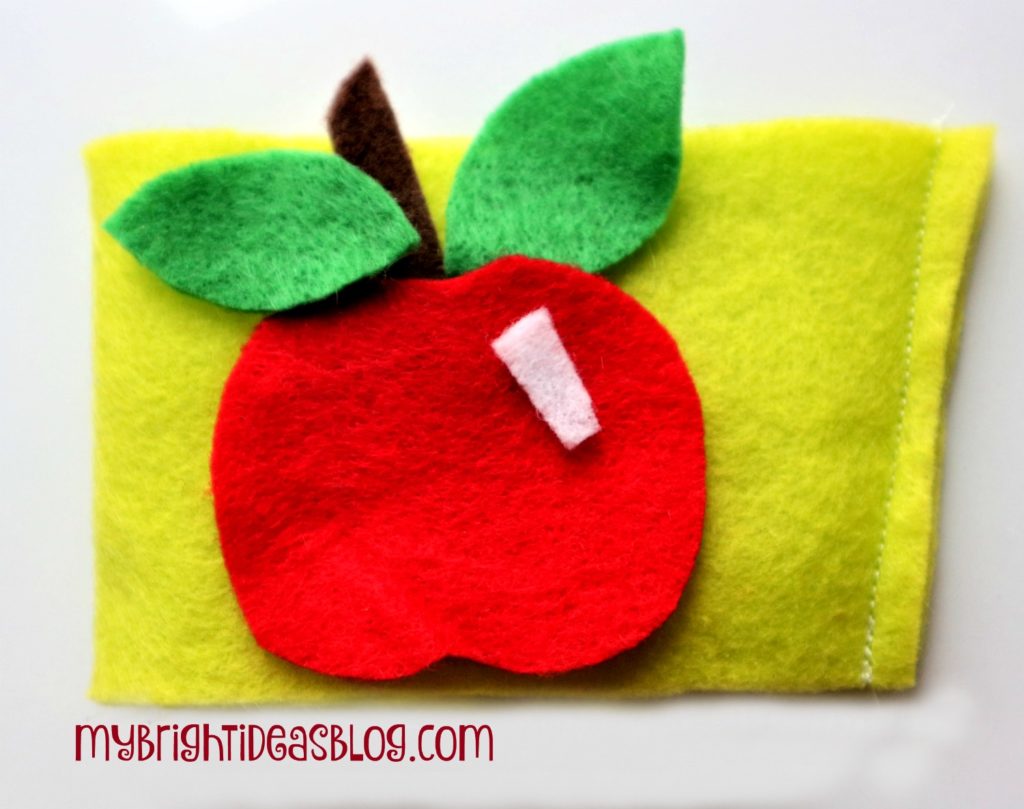
The apple coffee cozy would be great for a teacher gift! If the kids did their own hand sewing I think the teacher would love the personal touch of a child’s efforts to stitch it. Ask your kiddos if their teacher likes coffee and put a gift card with it. I read an article about giving teacher gifts and it is the hand written cards of thanks from the child that really touch their hearts.
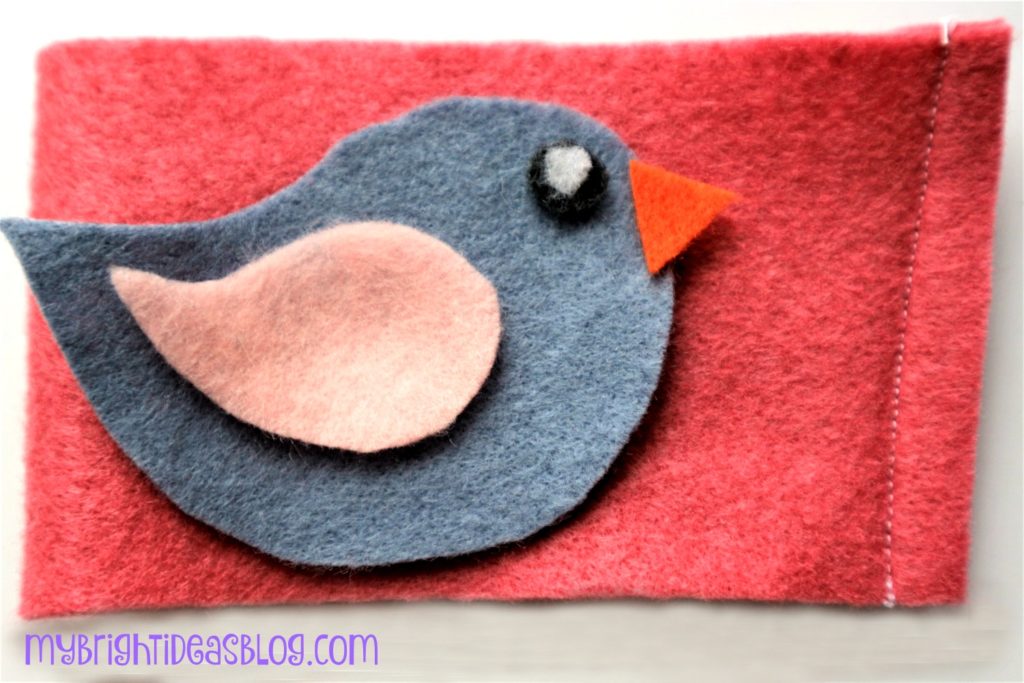
What about a sweet little bird. I had put some birds just like these on the knees of my daughters pants-to cover a hole. I’ll put the link below.
I hope you get a chance to make a coffee cozy! With felt costing around a dollar a piece you could make 3 from one piece and then personalize it with your scrap pieces. Now that is an inexpensive gift!
Felt is so easy to work with. Get your kids learning some hand sewing skills and give gifts they feel proud to give!
Here are a few more projects that we have tried to make with FELT!
Sew a Super Easy to Make Felt Crown – Add to your dress up clothes!
Make a Fleece Tied Blanket – Easy No Sewing
The No Sew Fleece Blanket

My daughter loves dogs so when I saw this fleece at Joann Fabrics-I grabbed it. It’s so cute wish I had gotten more to make a dog pillow or bed.
I prefer my fleece blankets to have a pattern on one side of the blanket and a co-ordinating color on the back. I chose a bright red to be the second color to match this awesome dog fabric.
To make this project you will need:
- fleece fabric in 2 co-ordinating colors. I had mine cut to 55 inches long
- scissors or rotary cutter and mat
- ruler or tape measure
![]()
Fleece fabric often has one side with writing and the other side will be curled. Start by trimming off these rough edges.
![]()
Lay the fabric on the floor-you need a huge workspace. Stack the two layers of fabric on top of each other and make sure it is a perfect match. If one piece is slightly longer, trim it.
When it’s as close to perfect as you can get it, trim off 4 inch squares off of each corner.
![]()
Without moving the fabric, cut the edge of the fleece into strips 1/2 wide, 3 inches long. Cut each strip through both layers of fabric.
![]()
Take the fabric strip from the top layer and the bottom layer and tie them together to make knots. Do this on every single strip. Make sure you match the top to the bottom to catch every single ribbon.
This is a slow process so turn on a movie if you get bored.
![]()
Cutting and knotting is a long and slow process but that is literally all there is to it. It’s so crazy easy to make, the kids could do it.
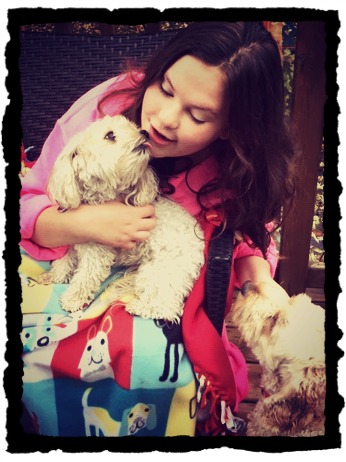
This girl loves her furry siblings so much! Look at these pooches, the feelings are definitely mutual!
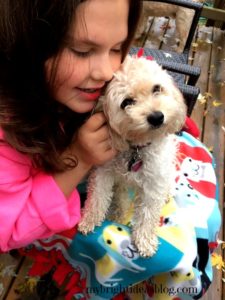
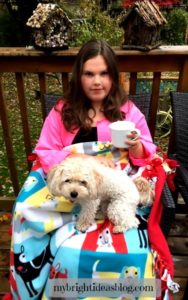
Gemma is always up for a photo shoot for momma’s blog posts.
Now you have a cozy blanket to take in the car, campfire, couch, bed, deck chair or beach….you should have a few of these as the weather gets chilly.
![]()
Thanks for visiting my website! I’d love it if you would Pin this on Pinterest or share it with your Facebook friends or other social media.
See you again soon!
More cozy fleece projects below!
Easy to Make Fleece Hat with Flowers – Simple Sewing Project
Sew a Super Easy Fleece Poncho-Simple Starter Sewing Project