
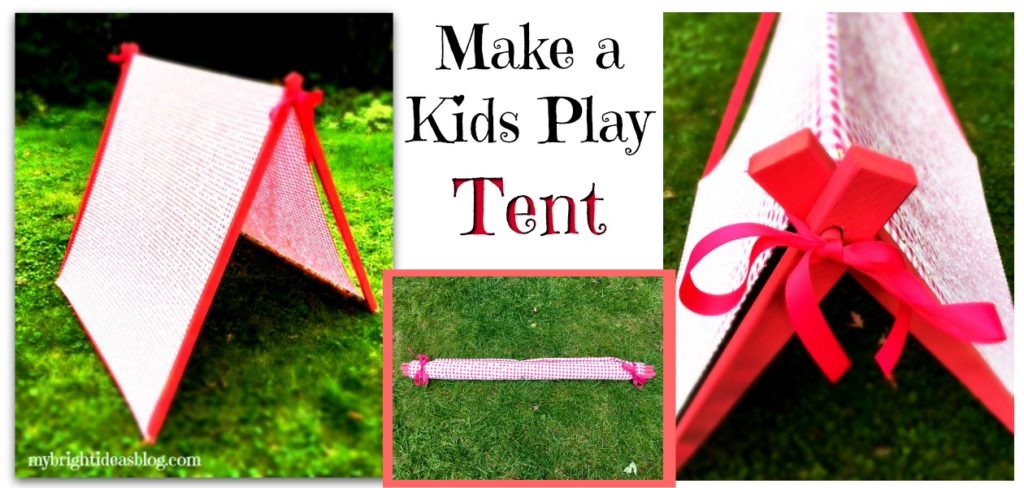
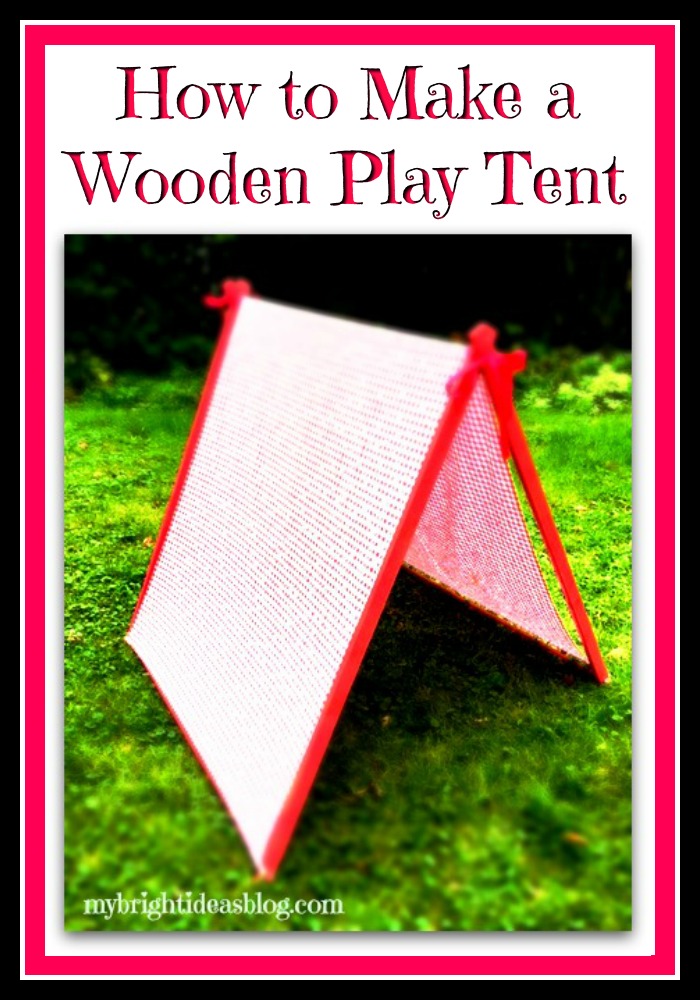
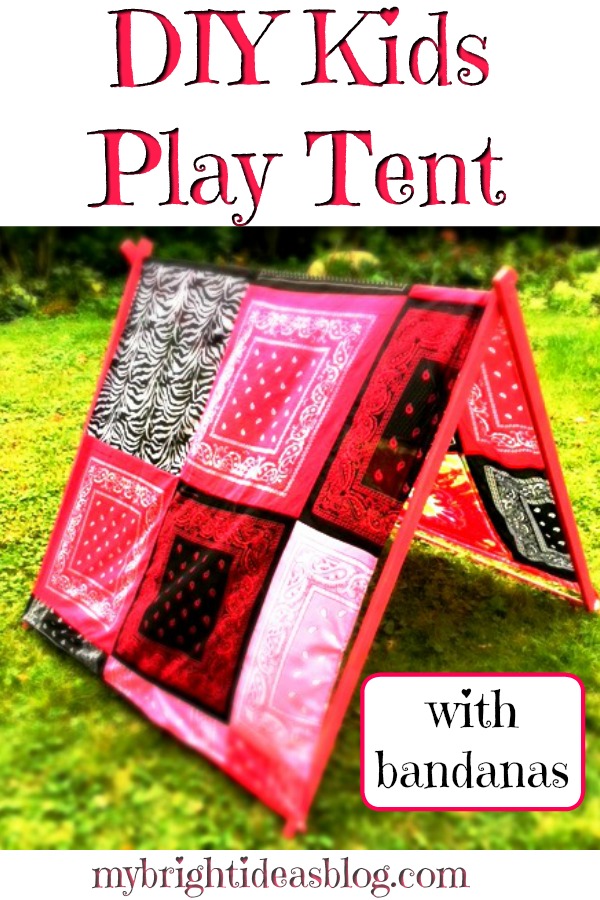
Here is a tutorial for a DIY Kids Play Tent! This won’t take much time or money to build. It would be an easy woodworking and sewing project for kids to help with. Why did I wait so long to make this!?!? The kids love it!
My daughters have always loved building tents. It’s fun for kids to steal the cushions and blankets and chairs to build a tent….sometimes even begging to fall asleep in it. I just wish they would put the cushions and blankets back when they are done….but that’s another story.
For the tent frame, you will need:
- 3 – 1/2 inch wide dowel (4 ft long) (approx. $8)
- 2 1x2x8 wood boards (cut in half) (approx. $5)
- power drill
- 1/2 inch drill bit
- tape measure
- pencil
- paint (optional)
For the tent fabric, you will need:
- fabric 45 inches wide x 90 inches long (115 cms wide by 230cms)
- scissors
- ribbon (2 pieces 30-40 inches/75-100cms long)
- thin elastic (4 pieces 5 inches/13cms long)
- safety pins (6)
- needle and thread or sewing machine (optional)
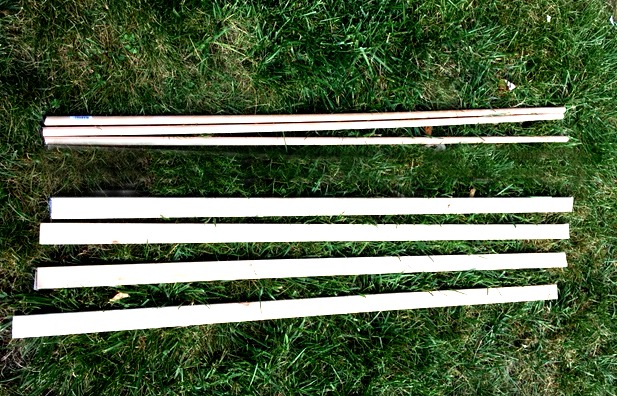
This is literally all you need, 3 x 1/2 inch dowels. They come from the store 4 feet long so there is no cutting here. Also, 2 boards 1×2 cut in half-so you have 4 pieces of 1×2. You can ask them to make this cut at the hardware store if you don’t have a handsaw or mitre saw.
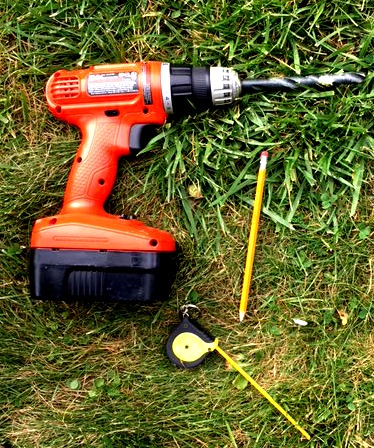
Gather your drill, tape measure and pencil.
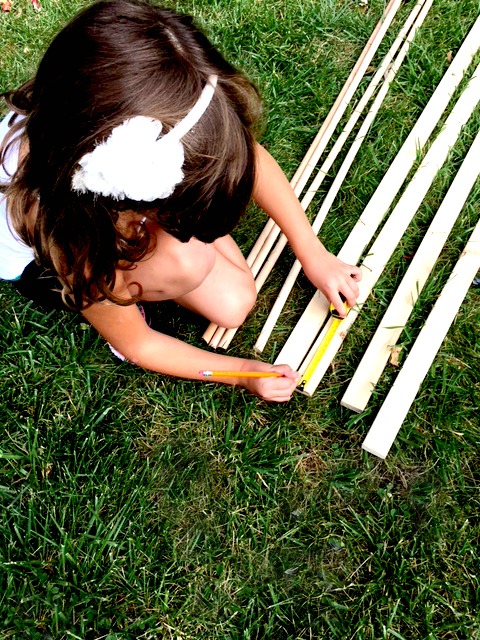
Measure and mark 2 inches from one end and 1 inch from the other end.
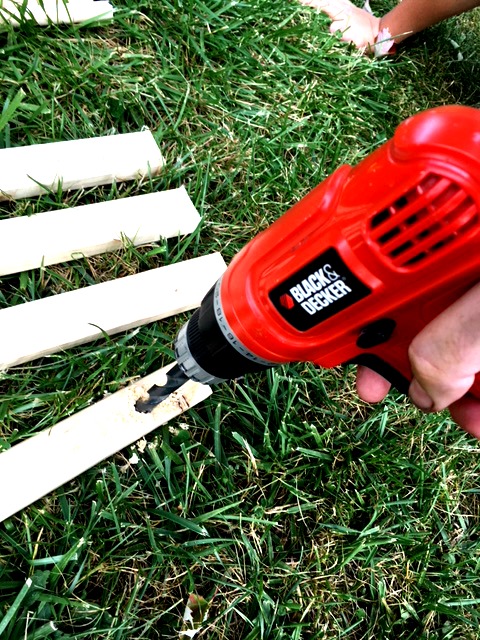
Drill the hole with a 1/2 inch drill bit. Test to see if your dowel will fit through the hole. You need it to be able to slide in fairly easily. I found it too tight and frustrating to put together when tight fitting so I ran the drill through the hole again in and out, in and out, to make it slightly bigger.
The top is the end that has a hole 2 inches from the top. The bottom has a hole 1 inch from the end.

Slide the first piece of dowel through the top holes of two of the 1×2’s The second piece of dowel can be inserted into the bottom holes.
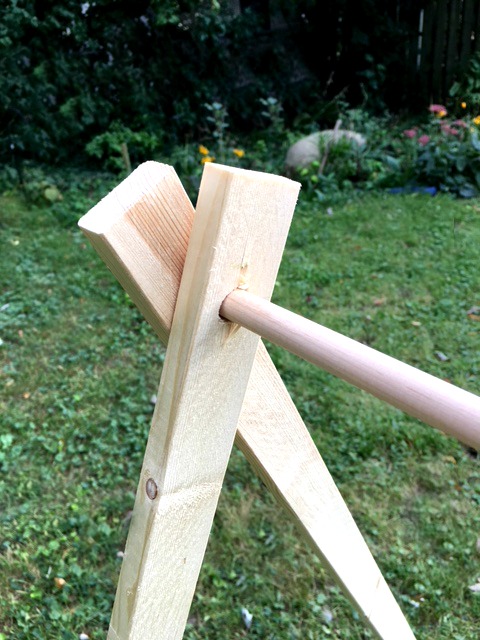
Add the next piece of 1×2 onto the top dowels to make an A.
Slide the third dowel into the bottom end of the 1×2’s.

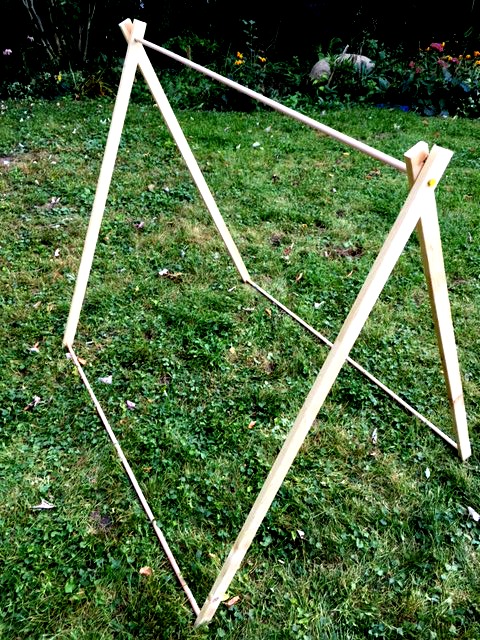
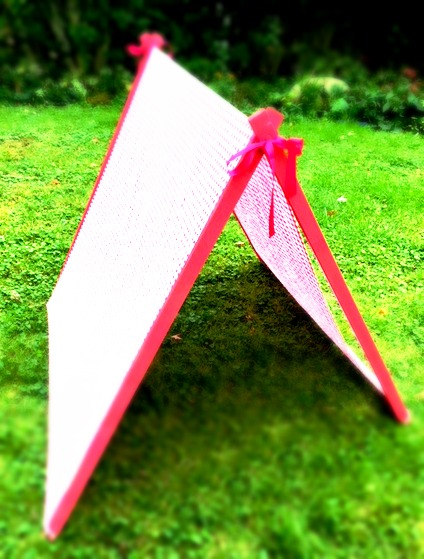
That’s it for the tent frame. Now for the tent fabric.…
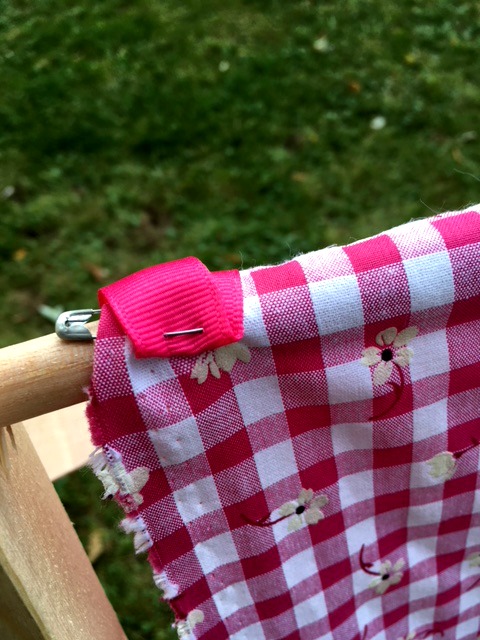
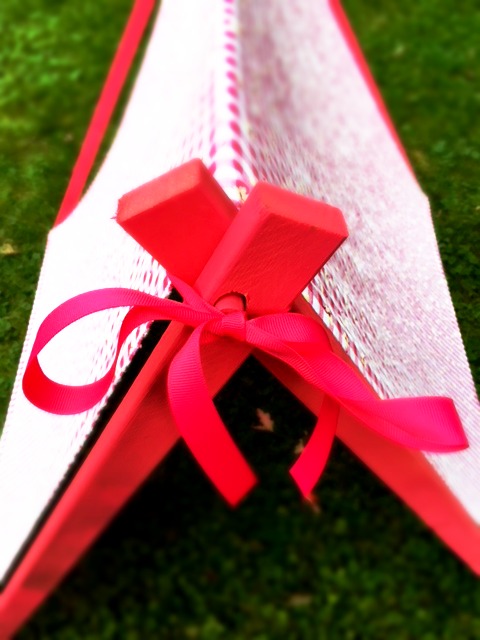
Slide your fabric over the top of the A frame. Pin a ribbon to the front and back ends.
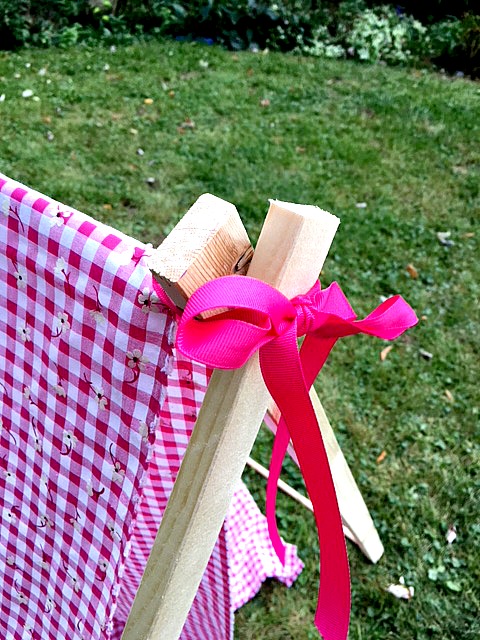
This ribbon isn’t essential but it does look nice and it will be helpful ties when you are storing the tent away.
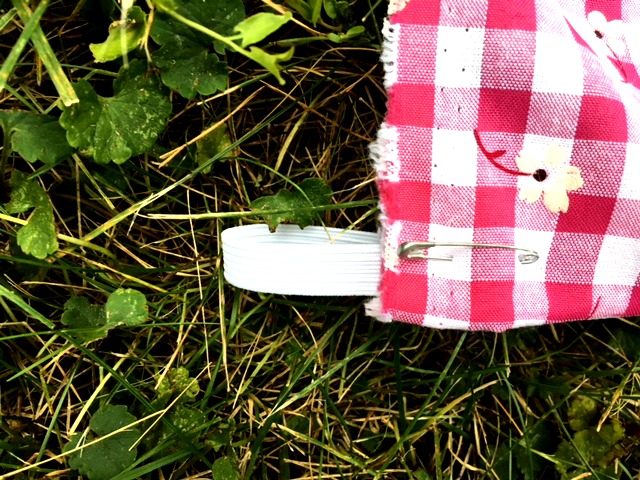
Pin a small piece of folded elastic onto all 4 of the bottom corners of the tent fabric.
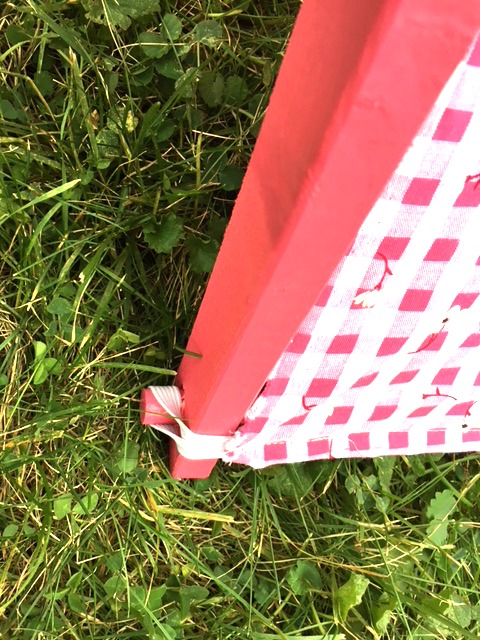
Hook the elastics over the ends of the bottom dowels.
It looks fine with just pins holding everything in place. You may want to hand or machine sew the ribbon and elastics in place. I did sew those in permanently and also hemmed the bottom of the fabric. It’s looking good enough to give away as a gift!
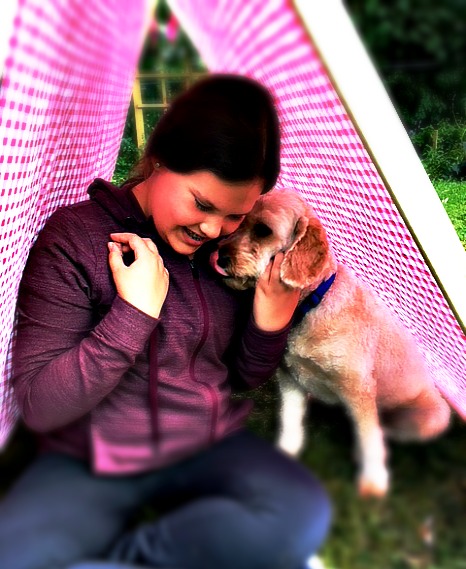
After this sweet picture was taken we decided the only thing to make it better is to paint it pink.
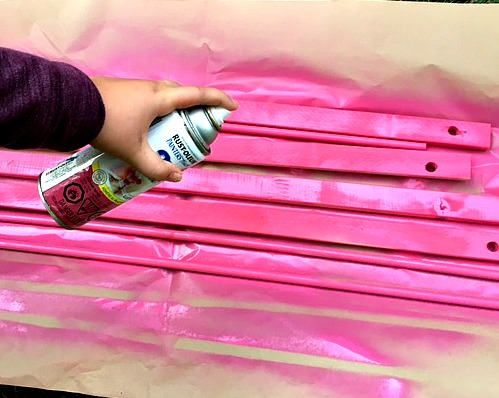
I already have loads of spray paint….because I love to change the color of things. See my previous posts and you will find I used a lot of spray paint this summer. This project doesn’t take much paint so its a great way to use up leftovers.
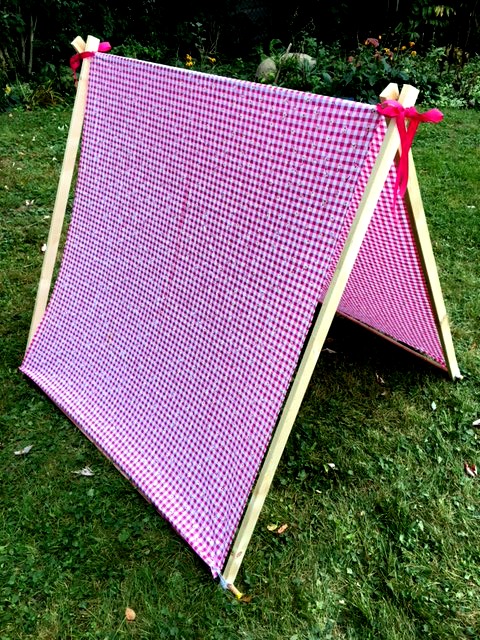
After allowing it to dry put it all together. Admire your handy work!
Did I mention that this is super easy to pack up?
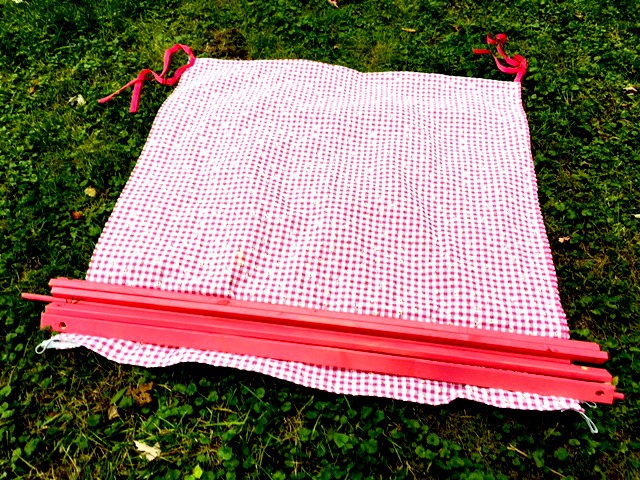
Fold the tent fabric in half. Next, place all the wooden tent parts on the end of the fabric.
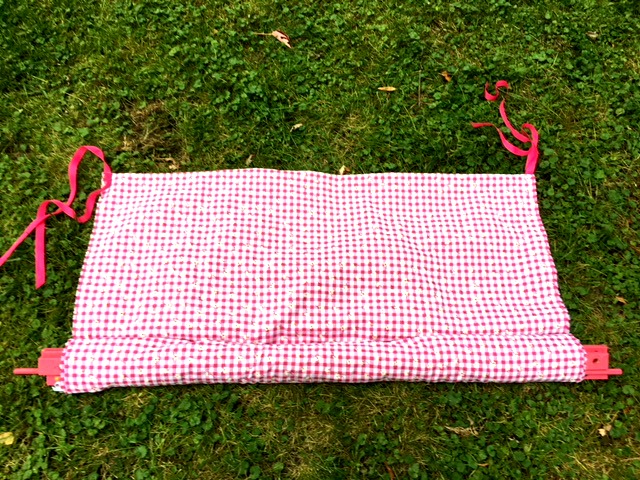
Roll up the fabric into a tube to hold the wood pieces together.
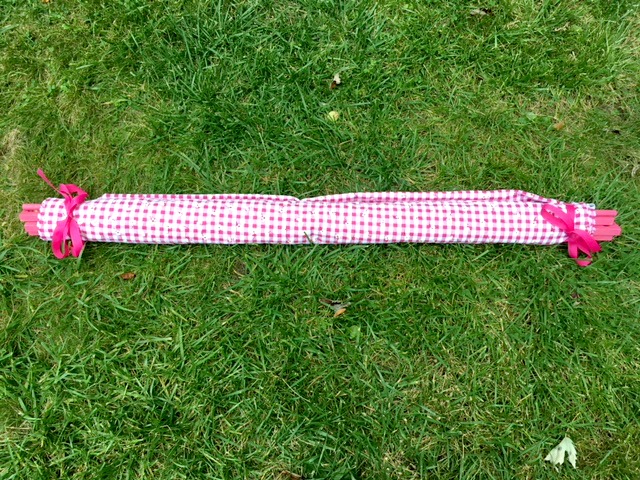
Lastly, tie the ribbons to keep it compact for storing or travelling. Remember when the babies were tiny and you wanted a place for them to nap that was in the shade at the park or beach? This would have solved the problem!
This was so easy to make. I can’t believe I didn’t do it when my kids were smaller.
Please pin or post this to facebook and share this easy DIY with your friends!

This is so cute, I love it so much! I especially love how it collapses and can be stored easily!
What an easy and practical idea! I’ve never met a child that didn’t love being in a tent.
This is adorable and I love that it folds for easy storage! Thanks for sharing at Vintage Charm!