
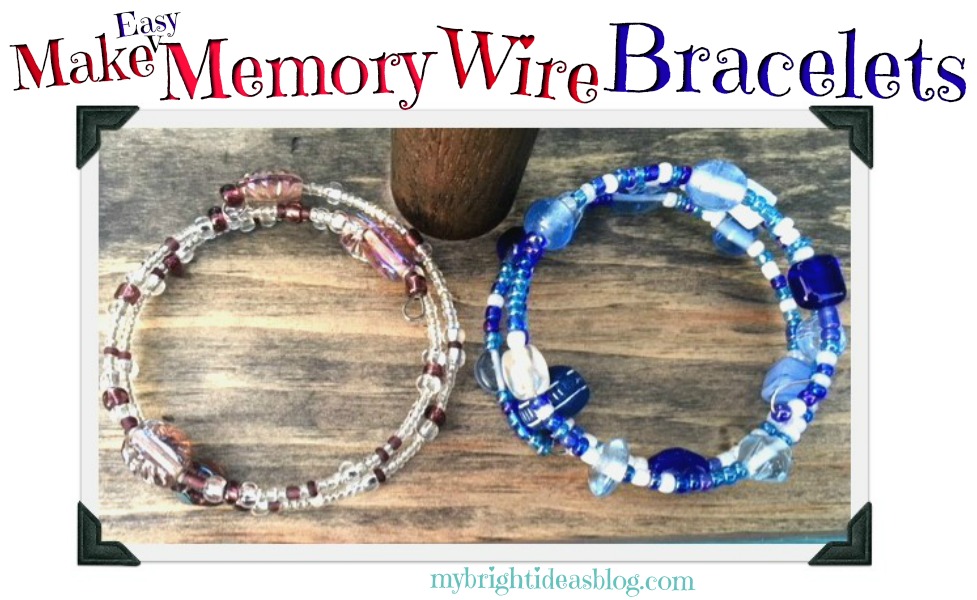
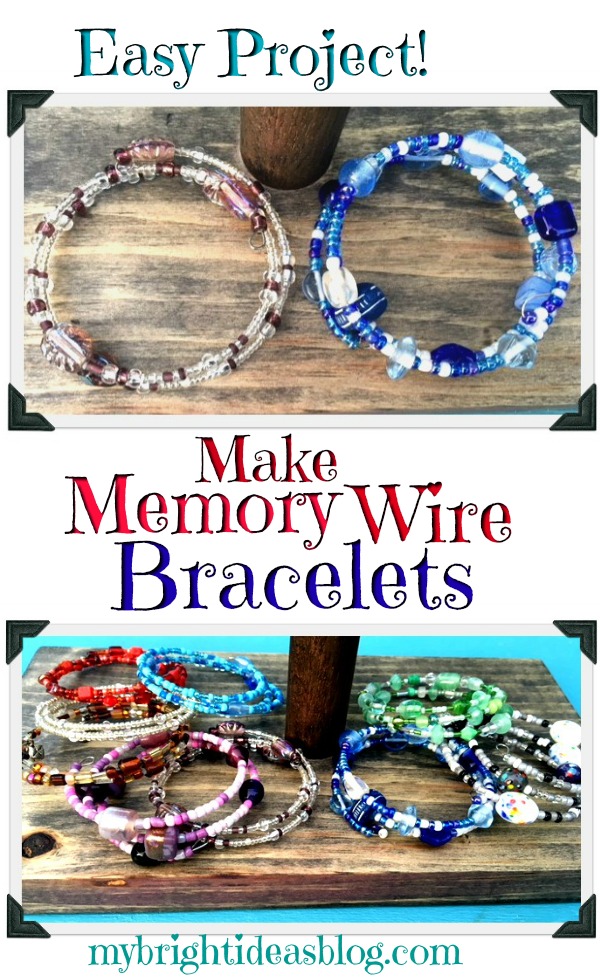
 Making Memory Wire Bracelets
Do you need a GREAT gift idea that is easy enough for a child to make? Want to make a craft you could sell? This post is for you!
What got me started on this idea is the craft table at my work (I work in an office at a financial institution). We have a table that any staff member can put out crafty items and a price tag and see if anyone in the building wants to purchase it. For some reason everyone else has taken their stuff off the table and now its just things I have made. Its a little embarrassing. Seriously, besides a few crocheted baby items everything else is mine! So what can I do to make it less empty and pitiful? Hmmm think think think… Add more stuff silly!
Its summer so I have done is enlisted my kids to make a few items. I pay for the supplies and they get crafting and then they get added to the table. The kids will get a bit of money if things sell. I was thinking of asking $5.00 for these. Everybody loves bracelets right?!
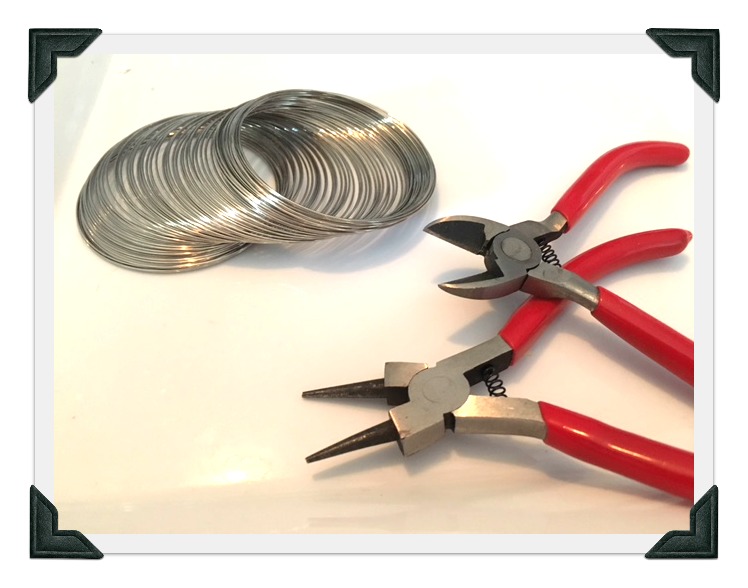
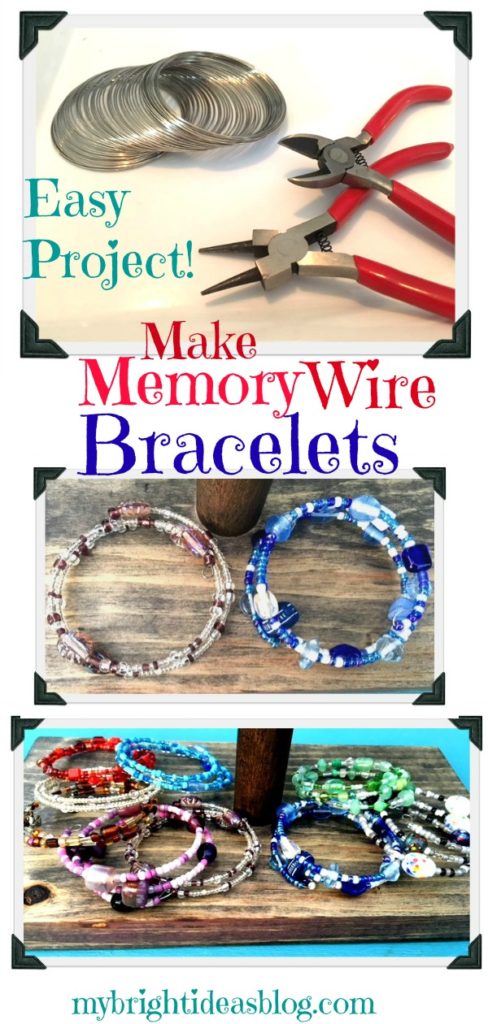
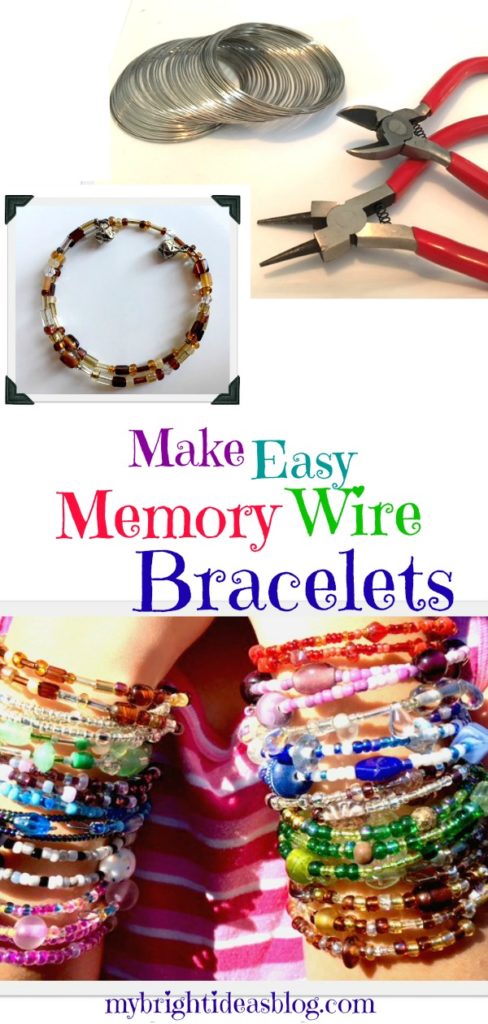
You will need:
- various small beads (check out the dollar store or upcycle old costume jewelry)
- memory wire (bracelet size)
- rounded pliers that twist the wire
- pliers that will cut the wire (if you only have a pair of needle nose pliers you can still do this project)
 What is Memory Wire?
Memory wire is coiled stainless steel wire. Do you remember the child’s toy SLINKY? Its just like that but meant for jewelry making. The fairly fine wire holds its coiled shape. This makes it, hands down, the easiest product to string beads onto.
For this project I would suggest two pairs of pliers. One to cut the wire and a round nose pair of pliers for a loop at the end. If all you have is a pair of needle nose pliers you will be able to make it work.
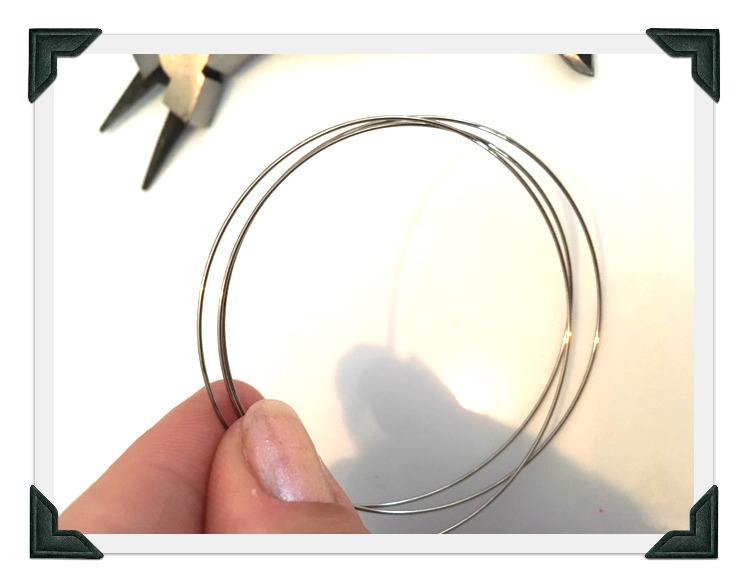 Measure 3 to 5 rings of memory wire and cut the wire.
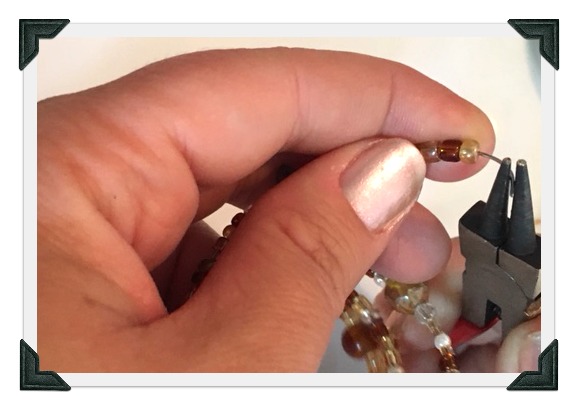
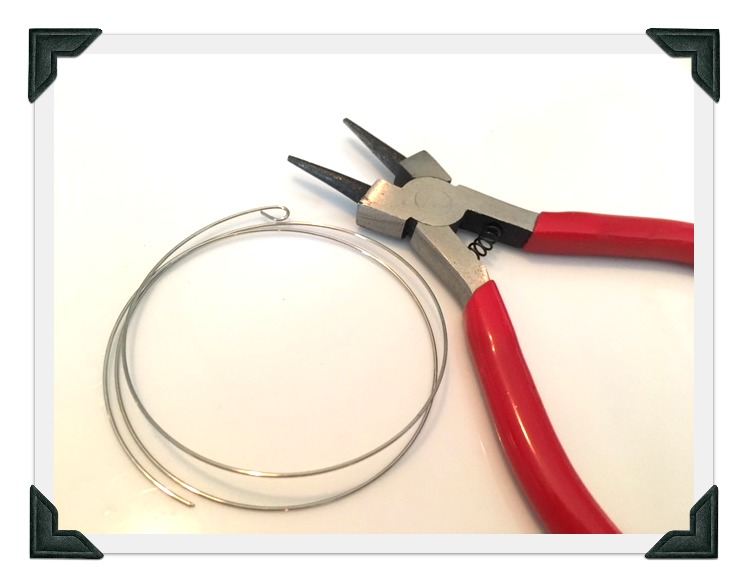 Use the round pliers to bend the end of the wire to make a small loop. This is so that the beads won’t fall off the other end. Now your are ready to begin adding beads!
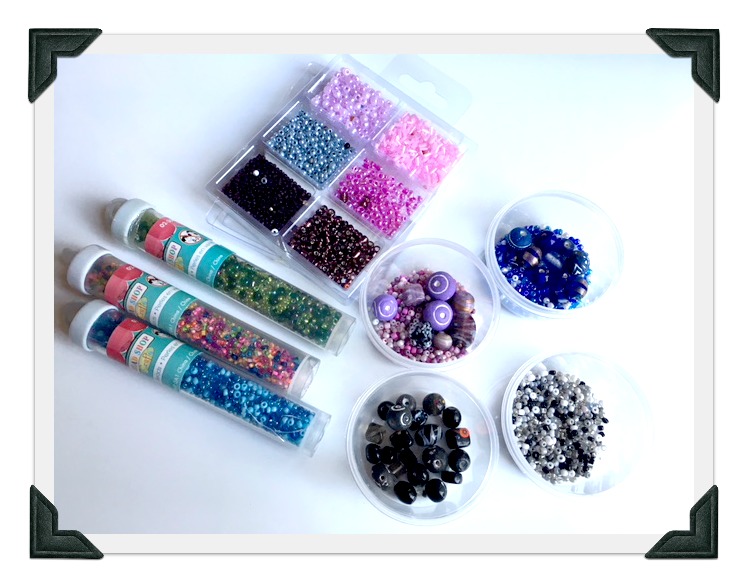 These beads were all $1.25 from the Dollar Tree. I was quite impressed with their glass bead options. Of course, the big craft stores will have a lot more…aisles and aisles of beads in fact. But they will cost more….so look for coupons.
Another option is to go to thrift stores (or your old jewelry drawer) and find old necklaces and bracelets that are wanting to be upcycled. I have lots of necklaces that I made years ago and I love the glass beads but I’m not into them as necklaces any more. Snip the wire or string and empty them into a bowl and reinvent it into a new memory wire bracelet.
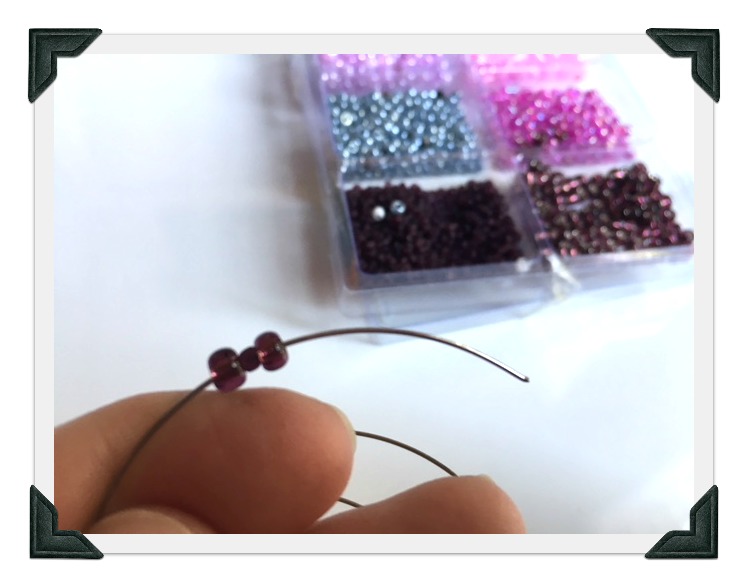 Start with a few beads and slide them around to the bottom. Double check that they are secure with the loop to stop them at the bottom of the coil.
 Use a pattern or just go freestyle and grab whatever beads come out of the jar.
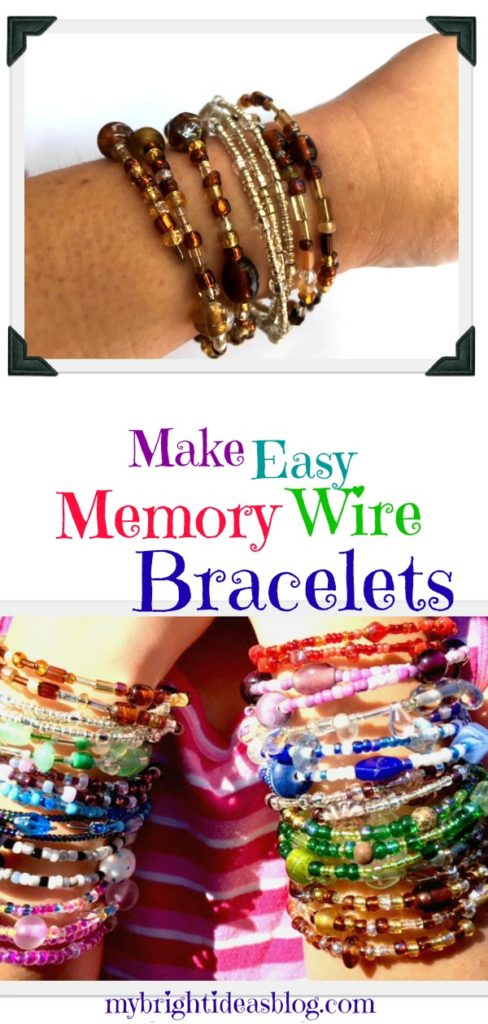
 This one is was all small seed beads. It has a nice dainty look to it. These were from a Dollar Tree package so probably all in all this one cost about $.30 to make. We are going to bring it to a play date tomorrow for my 8 year old’s little friend Lilly. Cool gift made by a kid!
Is that one a little too dainty or boring?
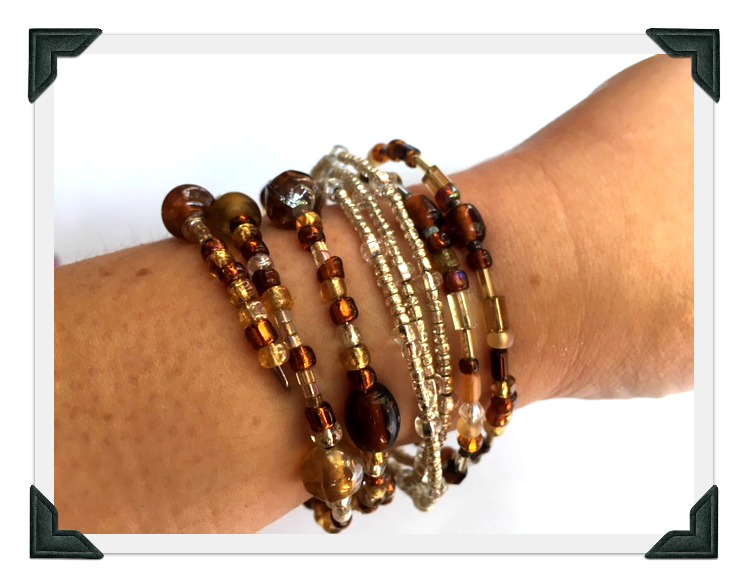
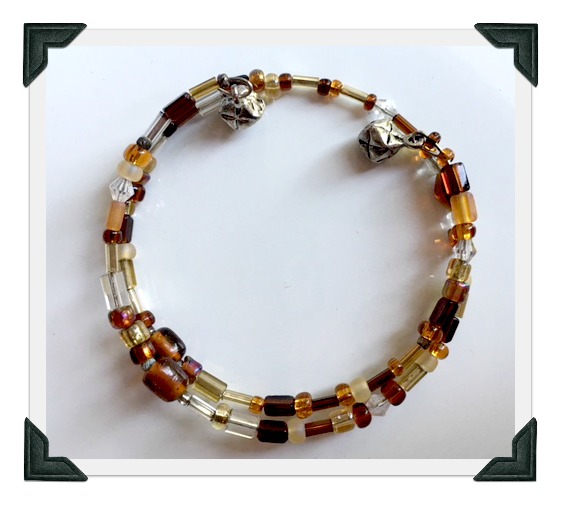 This one has a mixture of brown and clear glass beads all random and mixed up. Notice the dangle beads on the end?
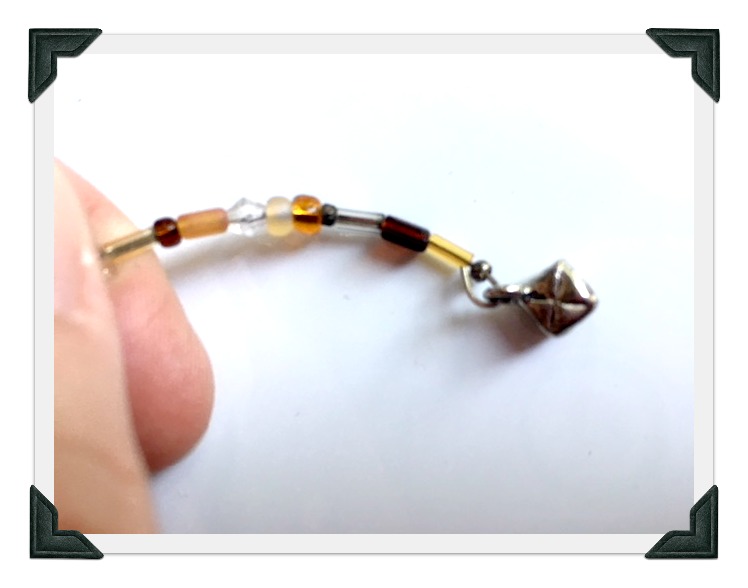 Its so easy to pop a charm or fancy bead on the end of the bracelet.
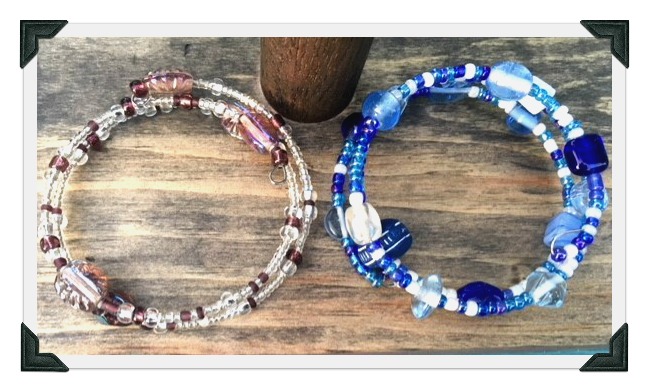
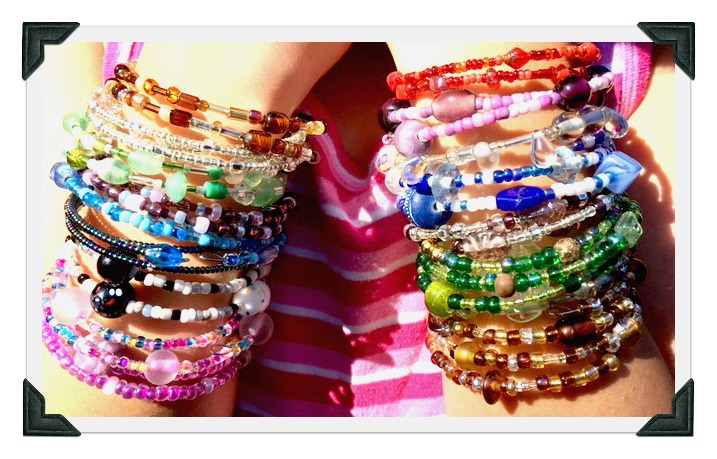
Every single bracelet will be different. You decide what size and shape. Glass beads, plastic beads, wood beads.
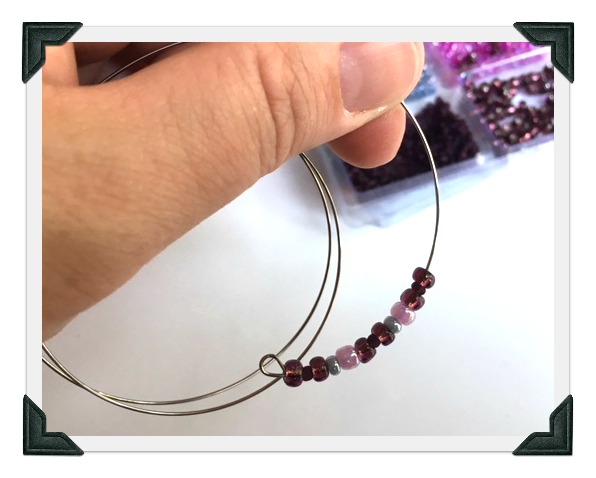
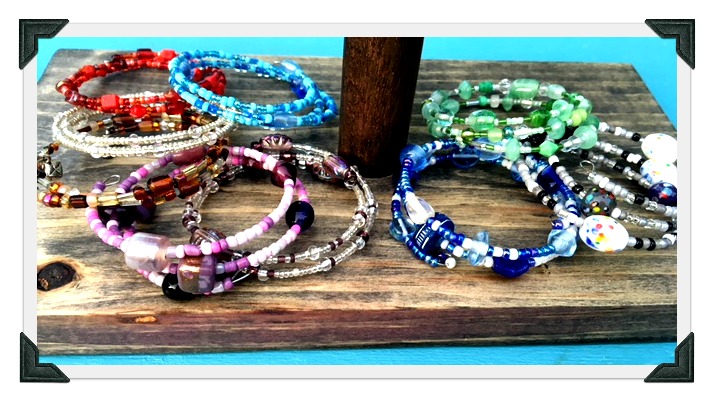 As you can see from this picture of the completed bracelets….sometimes we used a pattern and sometimes we just pinched up a bunch of beads and just put them on the wire randomly.
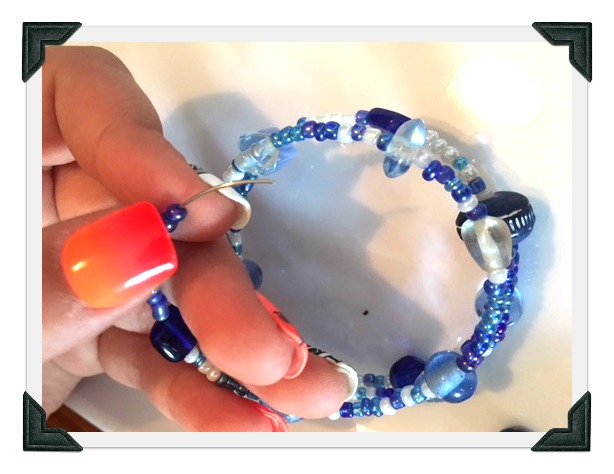
 As you are nearing the end of the wire leave an 1/2 inch or 1 cm at the end.
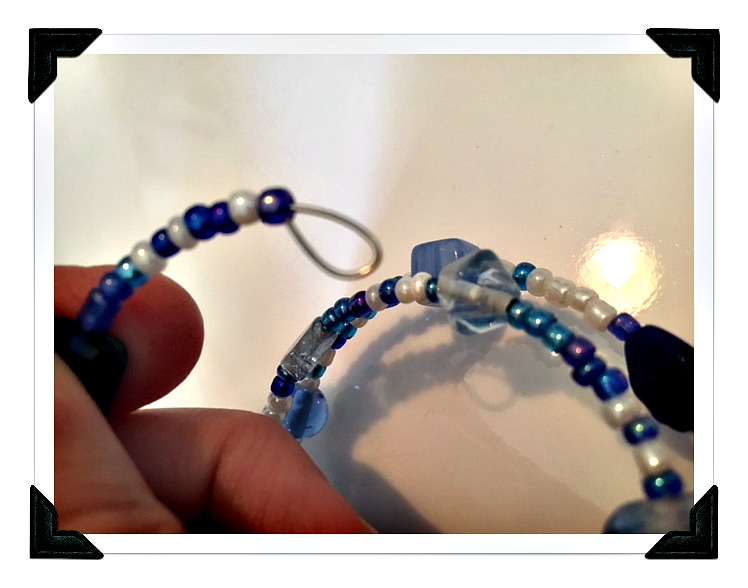
 Using the round-nose pliers pinch the end of the wire and bend it around to form a loop.
Bend it closed. The example below still shows a gap. Pinch it closed tightly-you may need to do the final squeeze with another style of pliers.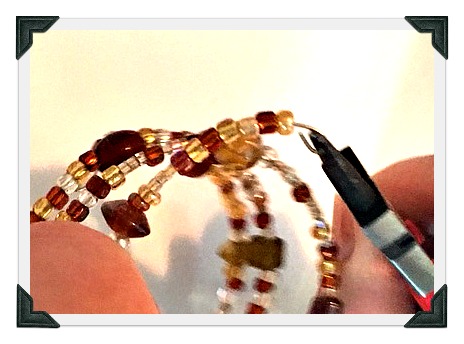 Here is a picture of my 11 year old working on a blue bracelet. I’m telling you this is a great gift project for kids to do.
 Summertime means stick-on fake nails. Try not be distracted by my daughter’s orange nails. My girls are obsessed with fake nails. But then they quickly want them off. This means they will leave scattered plastic nails on the coffee table or their bedside table. This makes their mother CRAZY-CRACKERS!
 Its that easy! Now the 8 and 11 year old’s can sell or gift their beautiful bracelets. Even younger children could do this if you help with bending the wire at the beginning and end of the project.
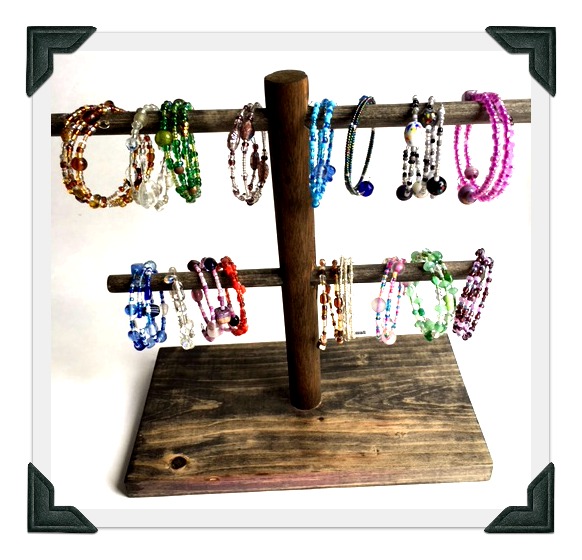
Forget about the kids I love making these! I put 3 together for this photo.
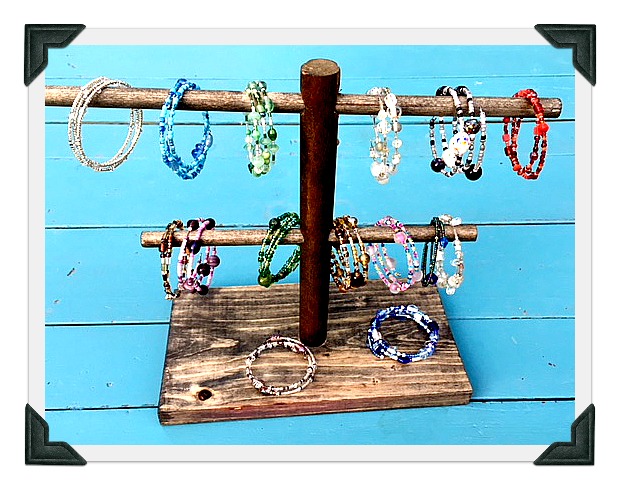 Check out the jewelry stand I made out of scraps of dowel and wood. Its perfect for displaying the finished bracelets on the craft table.
 I hope you enjoy making this super easy project. Its rather addictive!

…
…

So pretty – saving these as a craft idea for my daughter’s birthday party.
These bracelets are so pretty. Looks like fun too!
How do you cut the wire using only needlenose pliers? I thought you needed special memory wire shears, since cutting tempered steel wire can damage regular wire cutters.
On all of my needle-nose pliers there is a sharp area that is meant to clip wires. Memory wire is going to require a strong hand to clip it-I help my kids with this step. But I have never damaged my plyers with any projects. They are made for this sort of job.
Hi what size memory wire did you use. I bought a 6cm. It looks a bit small for bracelet making or am I wrong
Hi, I tossed out the packaging for my memory wire but when I search on amazon for memory wire….there is ring size, bracelet size, large bracelet size and necklace size. You may have gotten the smaller bracelet size which will still work on the larger wrist it just sits close to your skin. The large bracelet size is going to move on your wrist more. Give the one you bought a try it will likely be fine. If its snug give it away and try the bigger bracelet size.
I’ll going to this beach for a week and the family I go with have a craft night. I’m going to send them your pintrest page.
Cottage week with a craft night?!?! Love that idea! This would travel well!