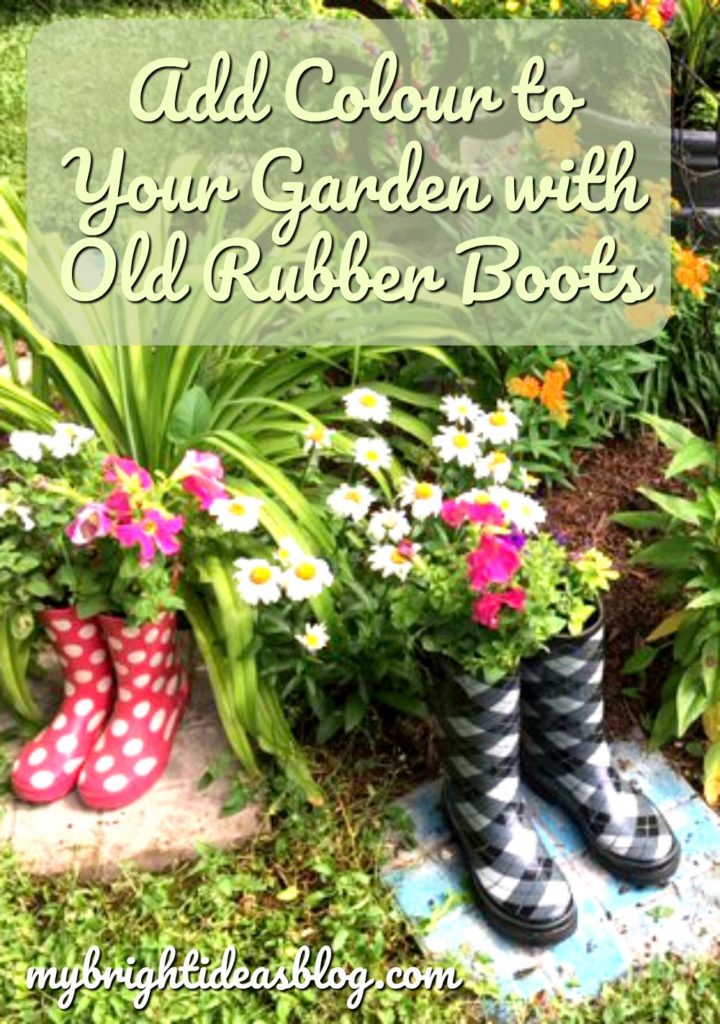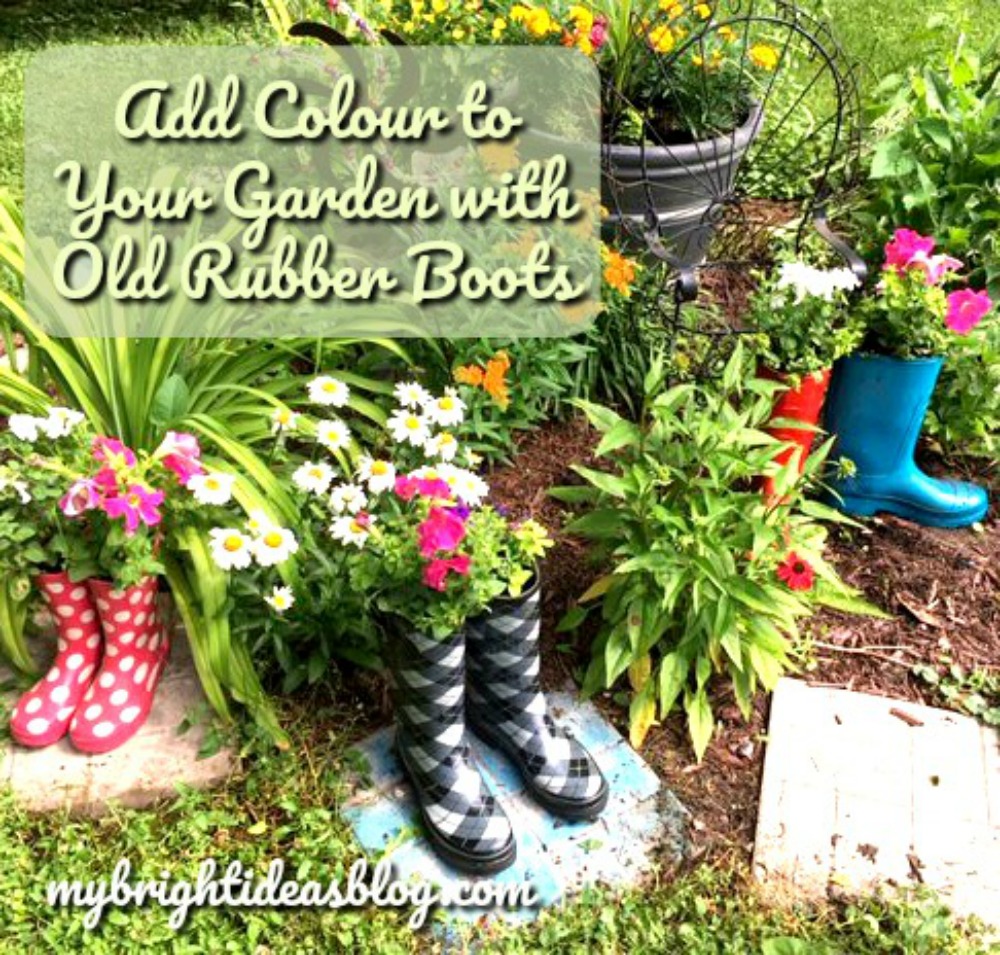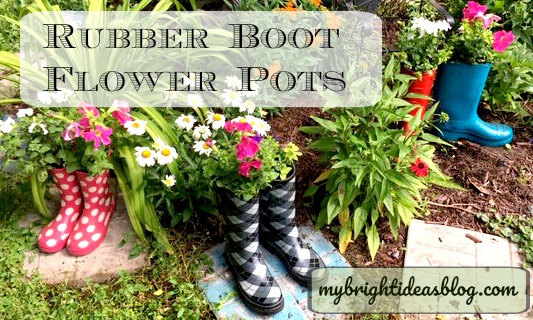
Check out the colour added to my garden by turning old rubber rain boots into flower planters!
In an effort to declutter (an impossible goal for me I’m affraid). We found some rubber boots that we no longer needed. Three pairs of wellies we don’t use because the kids outgrew them or we just realized even in the rain we have other footwear options we would rather wear. The patterns on two pairs were really cute and the third pair was a classic old black pair. Why not turn them into something fun!
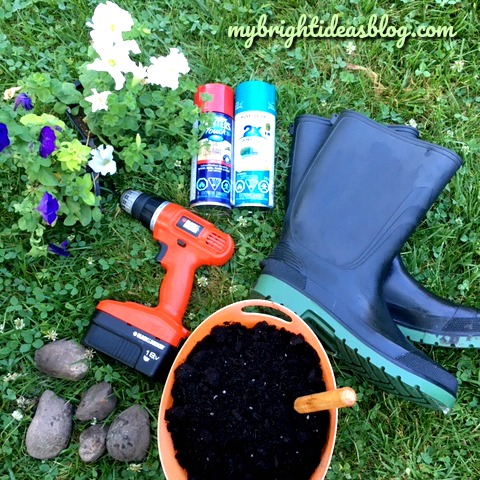
For this project you will need:
- old boots
- rocks
- sand/dirt mixture
- soil
- flowers (real or artificial)
- drill or screw driver
- spray paint (optional)

Don’t buy new boots for this project. If you don’t have any to upcycle go to the thrift store and look for a pair. They make rain boots in adorable colours and patterns, especially the children’s sizes. Even plain toddler yellow rain boots would look fantastic in the garden. I wish I had saved the girls smallest sizes. They were so adorable and small!
Before you get started, use a wet rag and wipe them clean…especially if you are spray painting them.
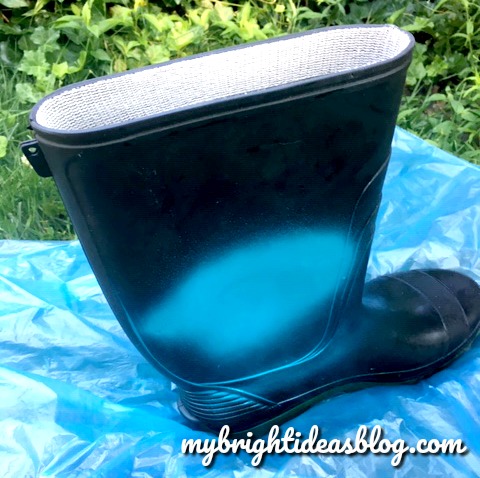
If you need to spray paint the boot, of course, do that next. Outdoors on a drop cloth or plastic. Don’t wait to start this project on the hottest day of the year. Our temperature yesterday was rising past 38 degrees Celsius (100.4 degrees Fahrenheit) and the spray paint would not dry! I have never had that happen before…and I have been spray painting things for years!
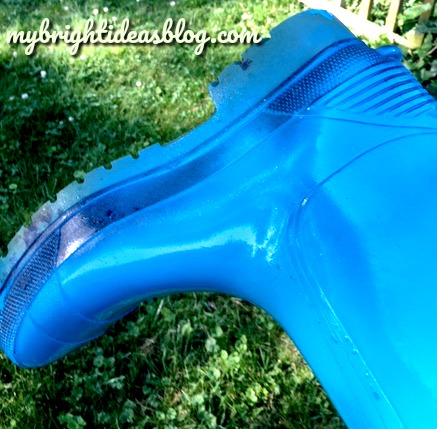
To get the bottom edge and toe of the boot put your hand right inside and turn it upside down for the second coat of spray paint. Allow to dry completely.

I painted one red and one turquoise. It doesn’t take much spray paint so you can use a colour in a leftover can from another project.
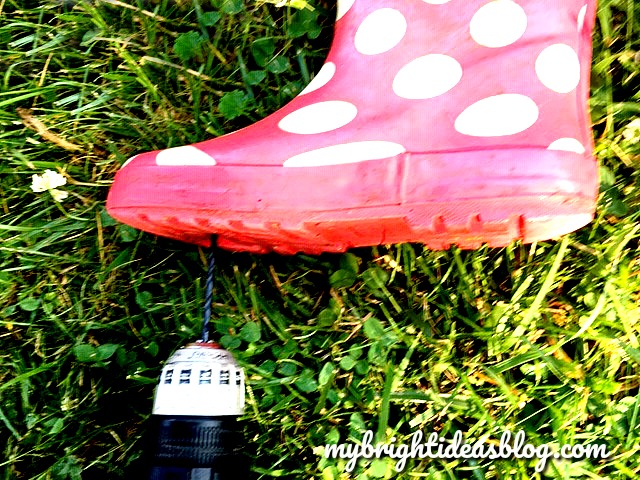
To prepare the boot for some drainage first remove any insoles and then put 3 or 4 holes in the bottom with a drill or screw driver.
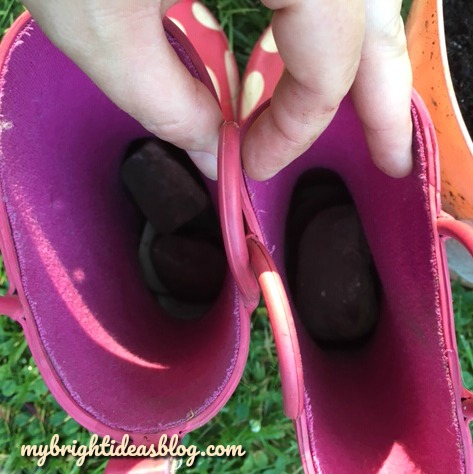
The next step is to put a few rocks in the bottom. This will help excess water drain away from the roots and to make it bottom heavy. If you happen to have sand or a mixture of soil and sand add a few inches of that over the rocks.
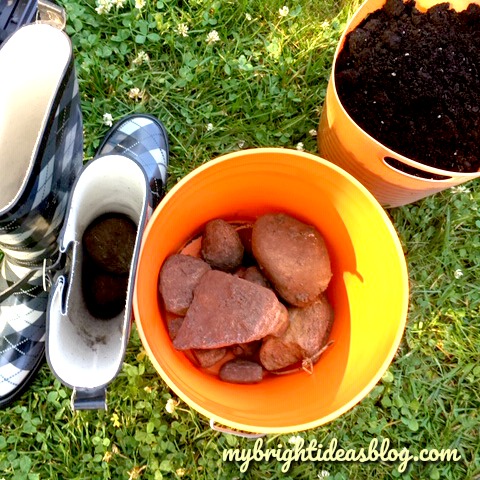
Then add the soil on top leaving several inches from the top of the boot.
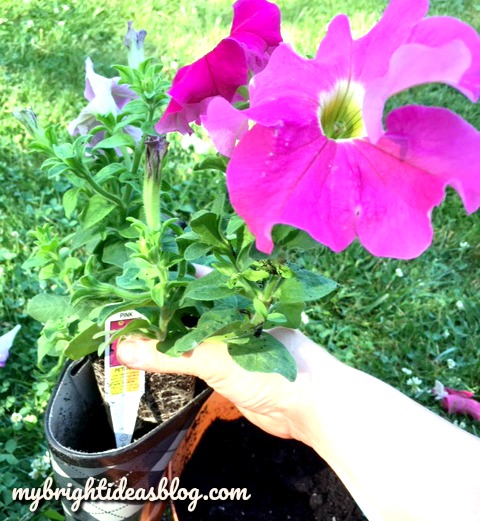
Next add some flowers. I chose petunias because they are so easy to care for and they will fill out the container nicely.
Place the flowers in the top of boot and add soil in any spaces around the plants.
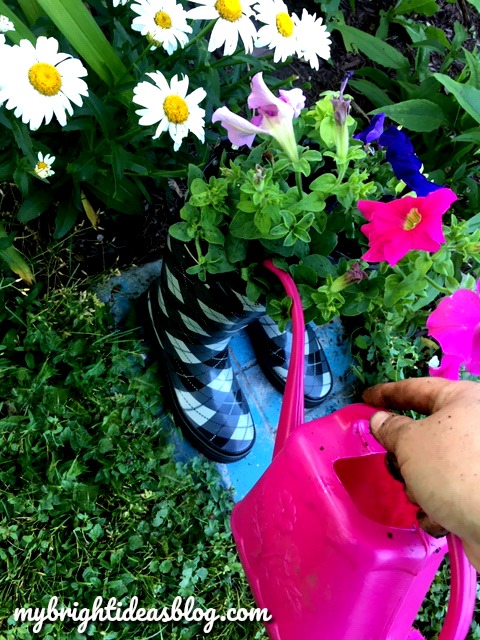
Thoroughly water! Every time you water it, have a look to see if the soil settled. You might need to add more soil. These are unusually tall planters.
Once every other week, add a bit of fertilizer.
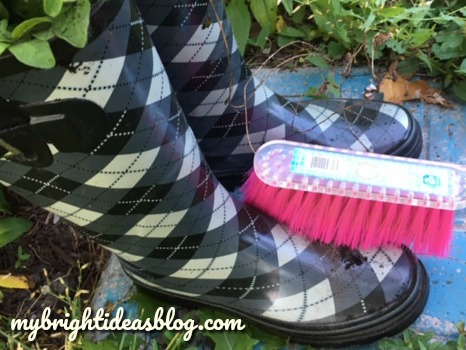
Get a whisk or small broom and clean up the boots.
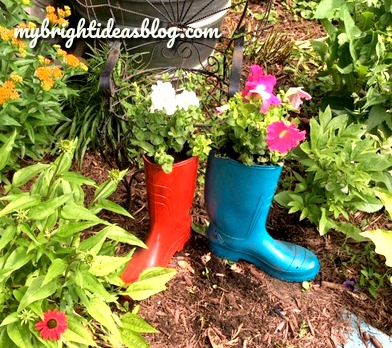
These would look great anywhere in the garden or next to a fence or on the front porch. Wherever you need some colour. I have a bare patch in a garden that looks like it needs a bit of colour.
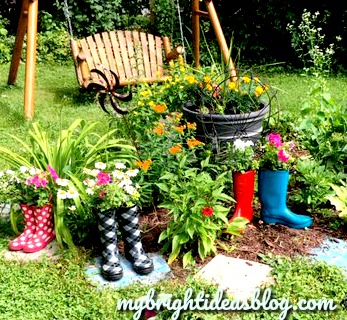
By dinner time, my daughter looked out the window and said, “what are all those rainboots doing in the garden?” Tee hee hee!
I love to add colour to the garden. Have a look at some of the other posts I have shared to show more ideas for colourful summer projects.
Create a Flower Shop Play Centre
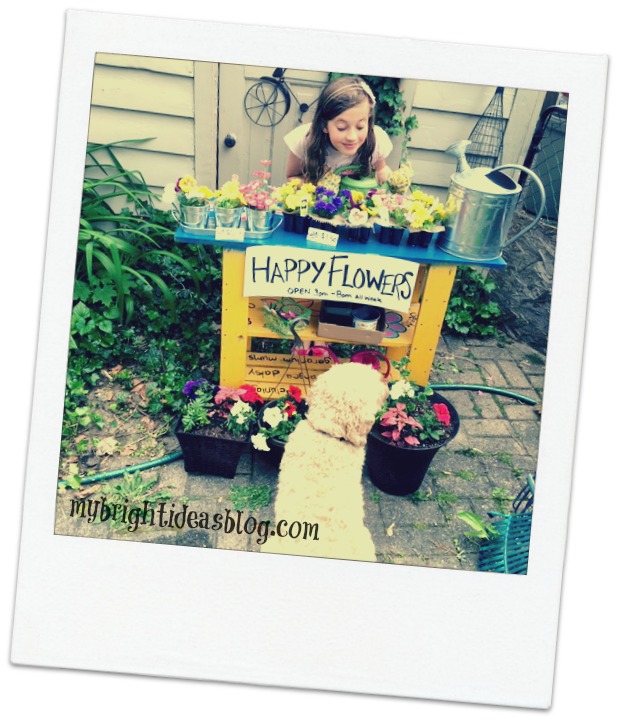
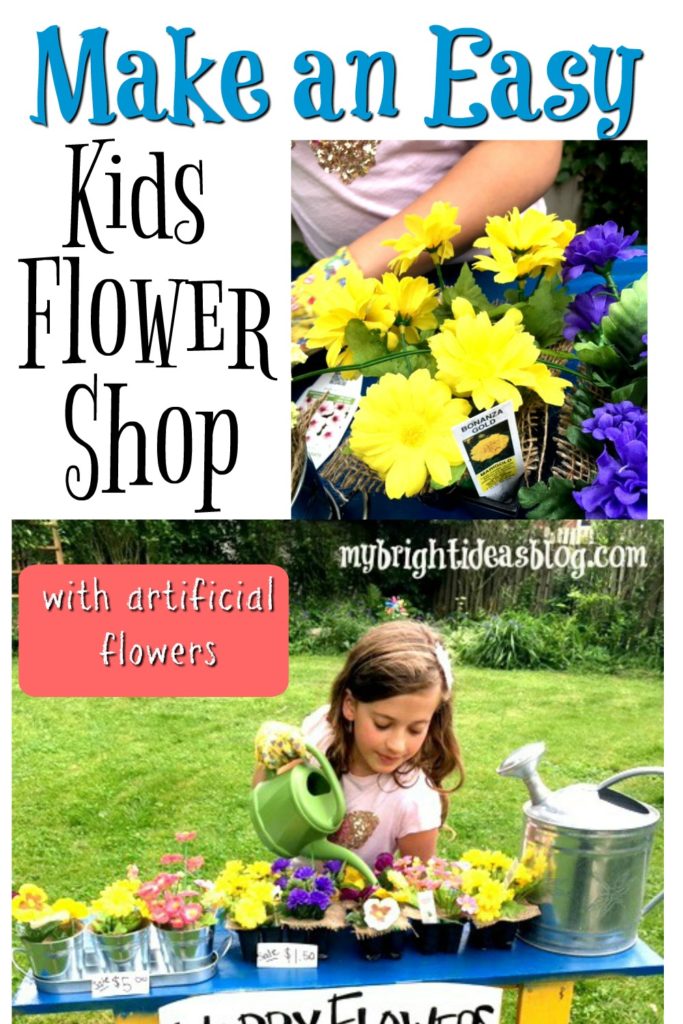
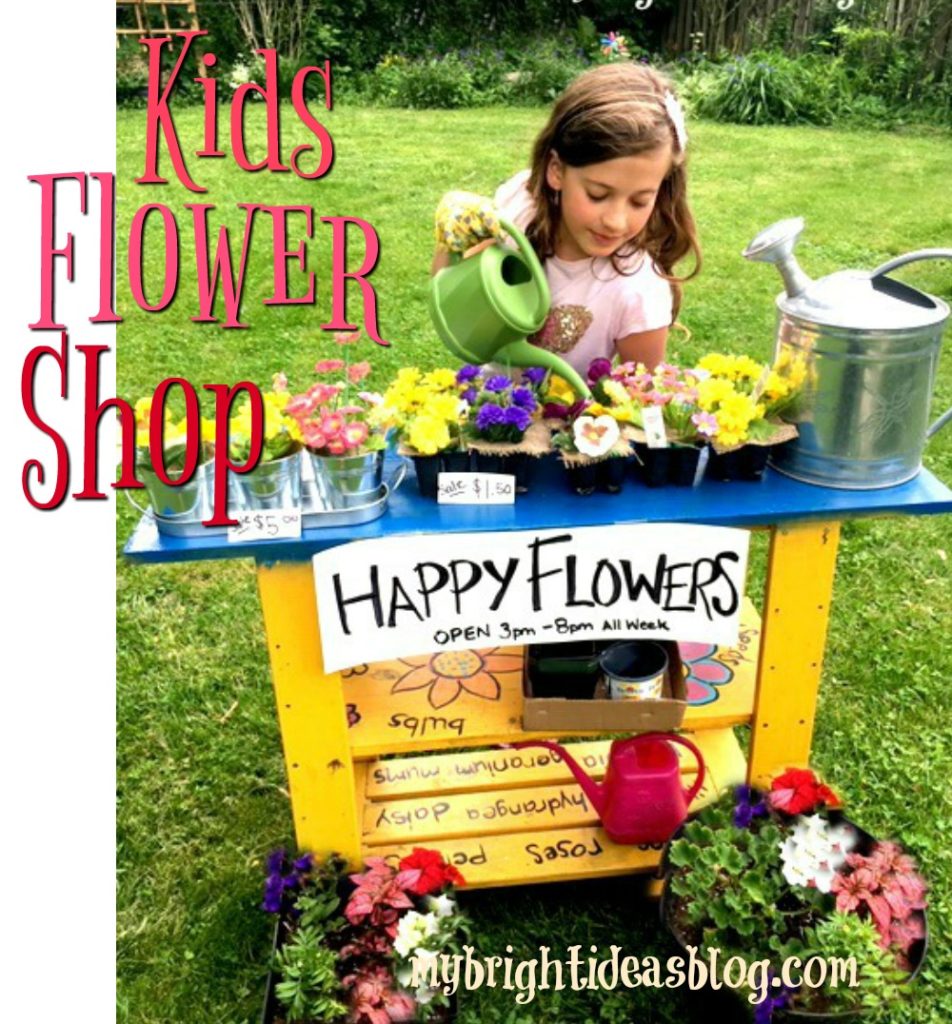
Watching my girls play in the backyard from my kitchen window sparked a great idea this week! Create a garden centre or flower shop for the kids. Using artificial flowers from the dollar store and a few other gardening things we can create a little centre for themselves. You can use real flowers too but this set up should last me a few years!
Several years ago I made a potting table out of a simple wooden shelf I wasn’t using anymore. Click on the link below to see how that was created.
Next we need some flowers! I went to the dollar store for a few bunches of flowers that looked like something I actually have in my garden.

For this project you will need:
- several bunches of artificial flowers
- empty plant containers
- foam knee pad or pool noodle
- scissors
- wire cutter snips
- burlap (optional)
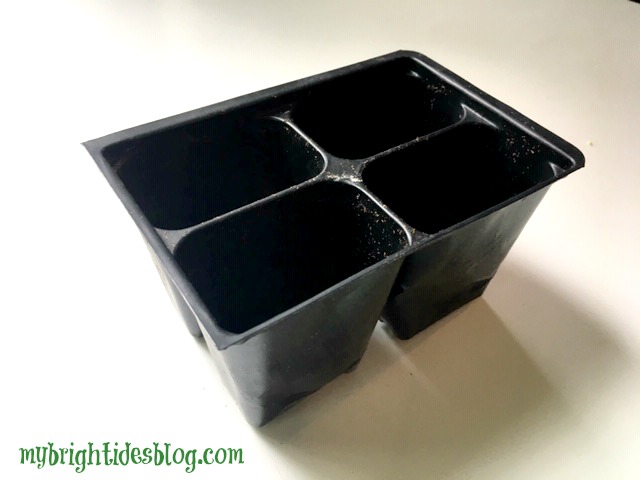
These are called 4 cell planter trays but you can use other sizes.
Every year the girls don’t want me to throw out the plastic containers that come with the little flower and vegetable plants we buy at the garden centre. They want all the little tags that come with them too so they imagine they are selling the flowers. After seeing them rearrange the empty containers imagining they had flowers in them-I thought why not get some dollar store fake flowers and make it more realistic for them.
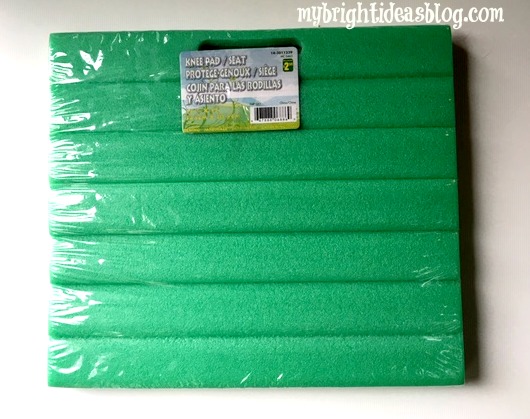 As I wandered around the dollar store I considered how I could get the flowers to stand up in the plant trays. I came up with this! A foam knee pad/seat pad.
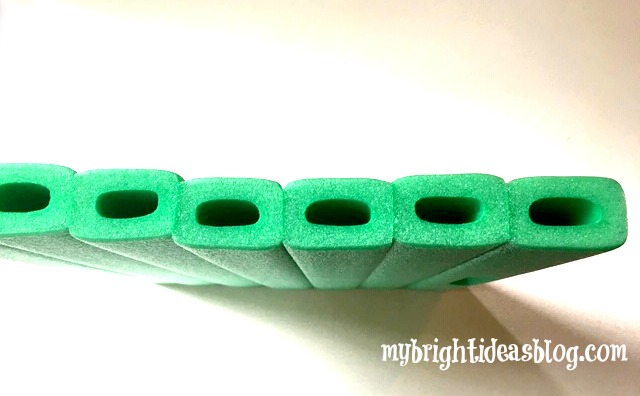
It’s similar to a pool noodle but I thought this size would fit really well into my plant trays and I was right!
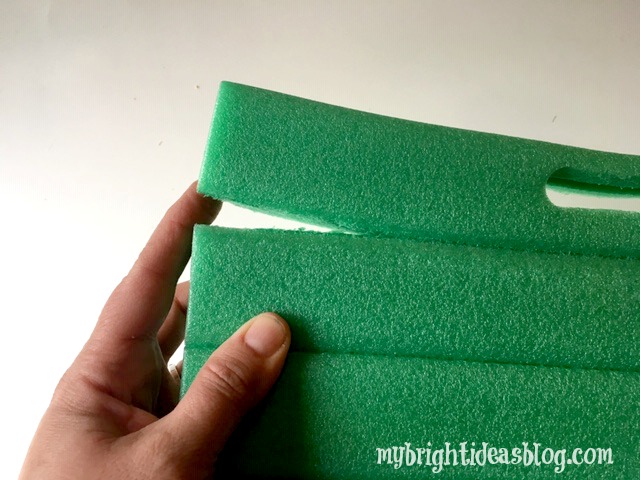
First of all, pull the sections of foam apart.
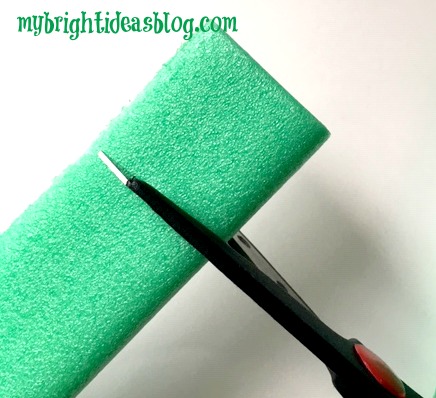
Then get your scissors and snip it 1 and 1/2 inches or 3cm long.
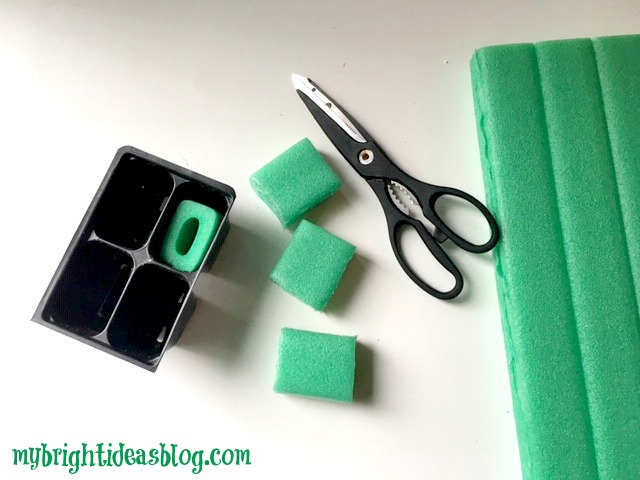
Test out the height and cut some more.
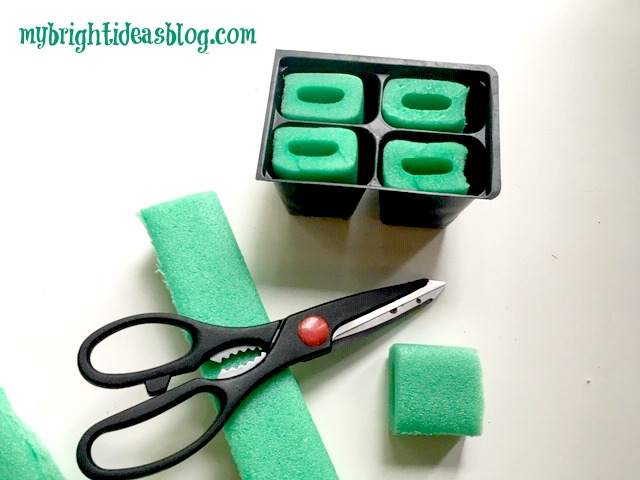
This is so easy. Just keep cutting off more. I wanted to give the at least 5 of these for their store. I might make even more…
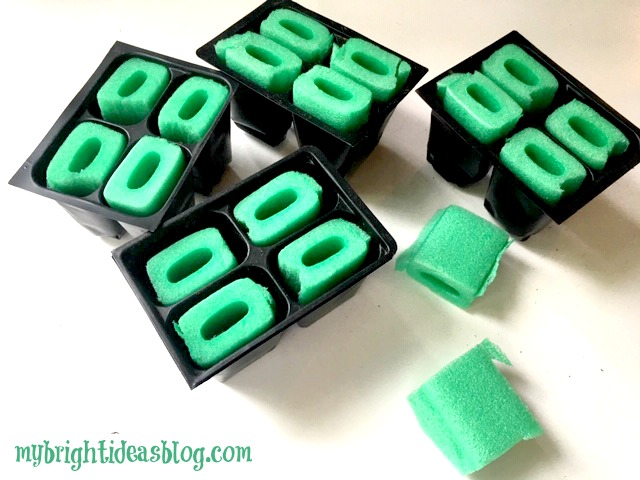
Now for the flowers!
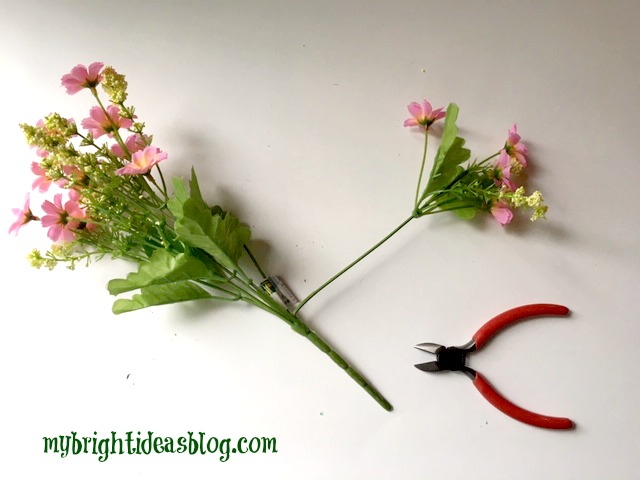
I started by bending out the branch of the flowers.
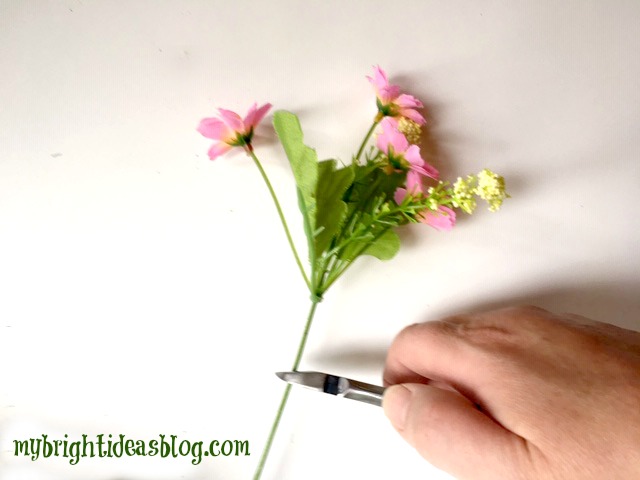
Snip it off several inches below the flowers. If you cut it too long, you can always bend the ends. I would rather they are too long than too short so the girls could make a little bouquet later or use them for something else.
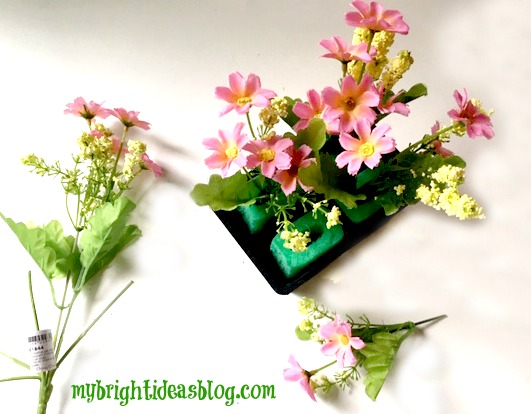
Now test it in the container and see how it looks.

This looked pretty good but I thought since I have a huge scrap of burlap waiting to be used. Why not add burlap to the top.
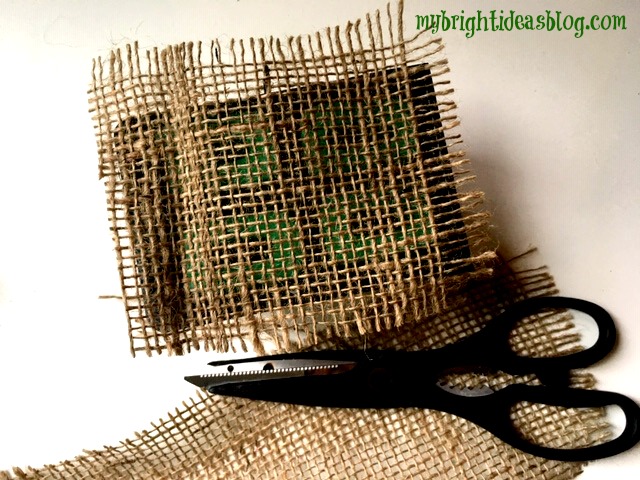
Cut that to size. It doesn’t have to be perfect.
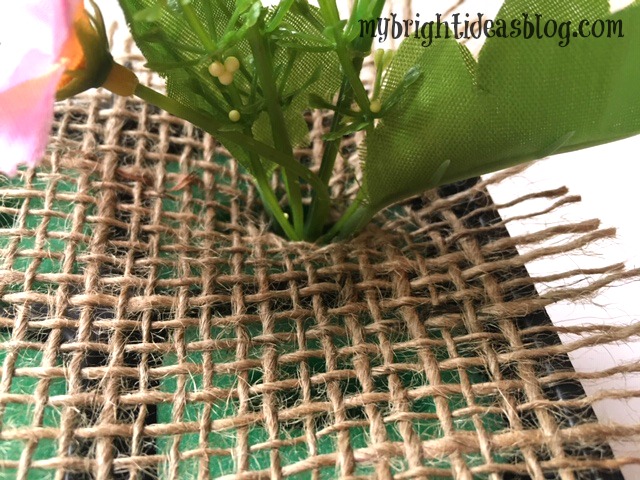
Next poke the flowers through the burlap.
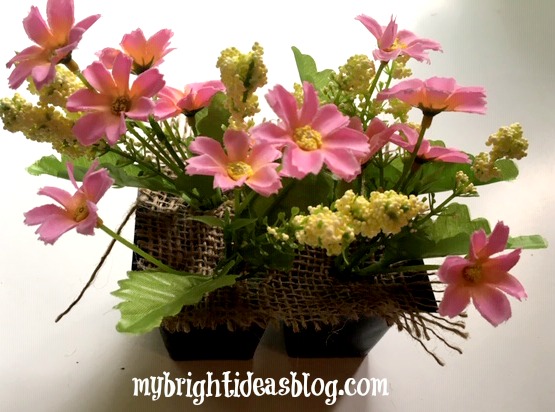
Voila!
You could hot glue all of it in place or you could just leave it so the kids can rearrange it and tend to their flowers.
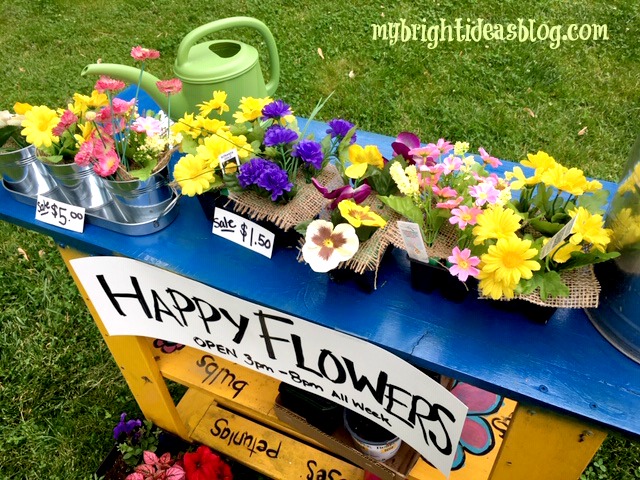
Next we set up shop on the table and added some signs.
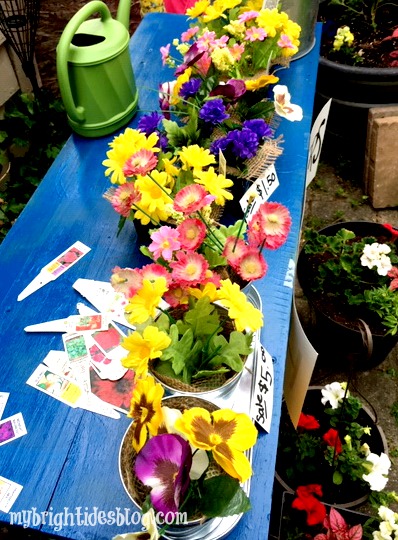
My kids also save all of the flower tags that come with every plant to tell you how much sun or shade it should get.
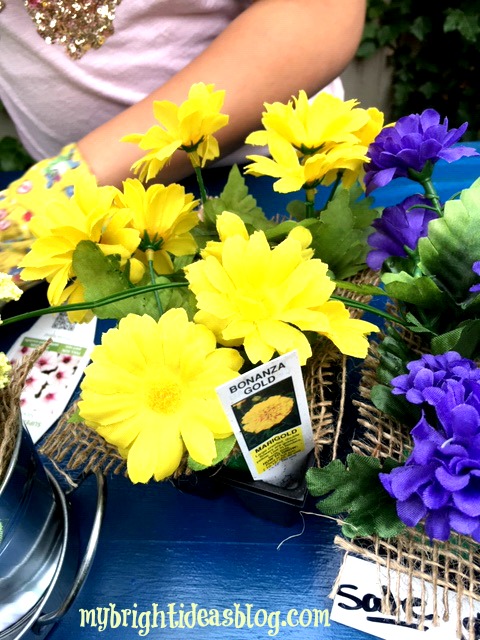
…So we tried to match up some to the colors of the flowers we had for our imaginary store.
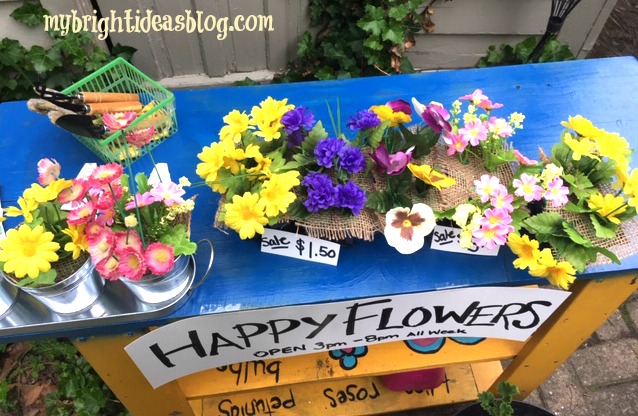
If you don’t have the 4 cell-planters you can use any small containers. You could use a pool noodle or Styrofoam from packaging in a bigger one or several small pieces of foam to fill a bigger pot.
Also, look around for other gardening items you have for the store. We had gloves, a mini shovel and rakes and watering cans.
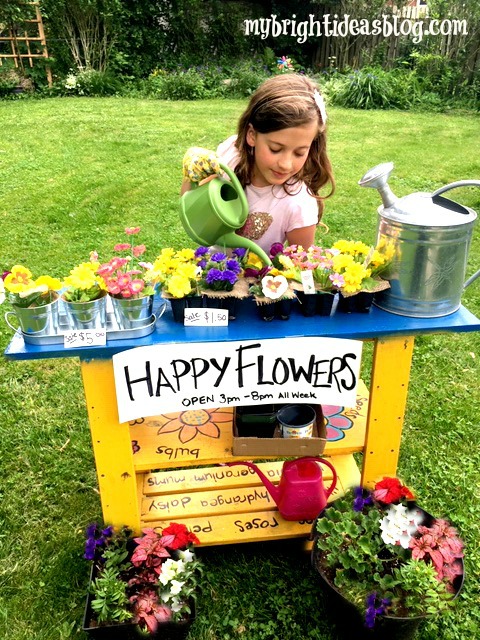
Hopefully, this inspired you to get the kids out playing with their imaginations.
…
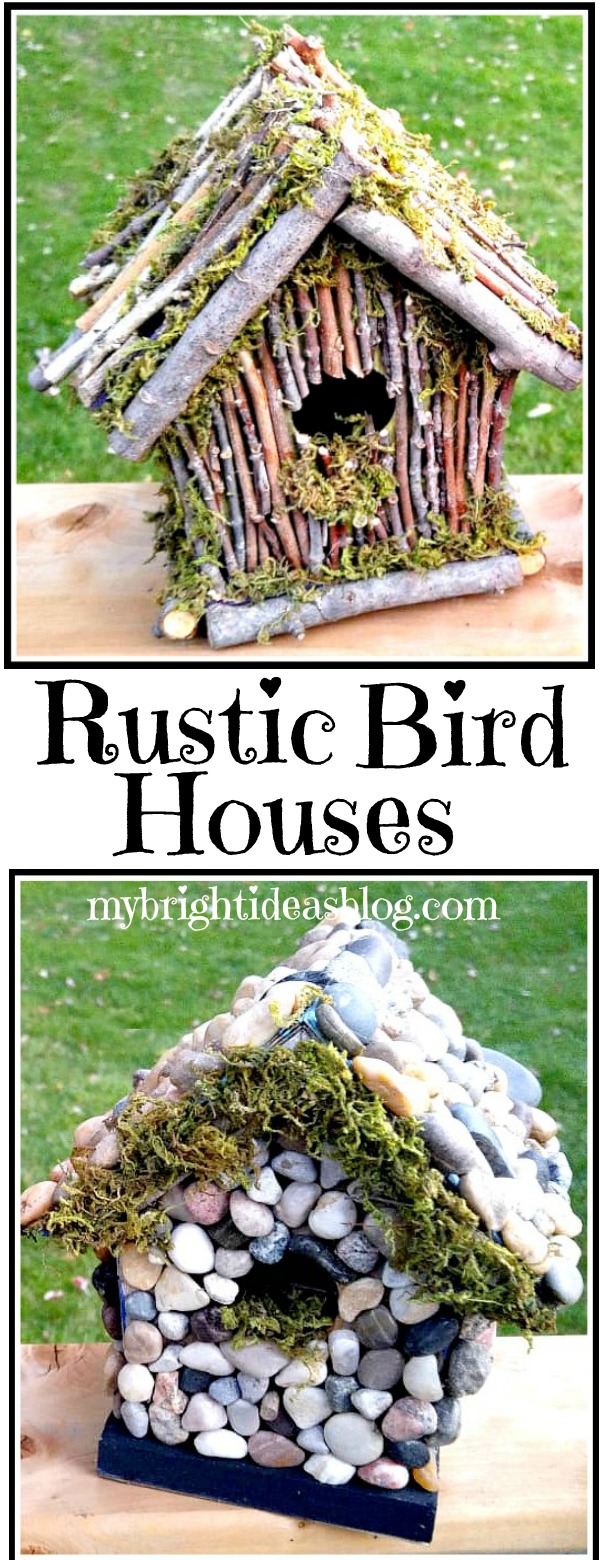
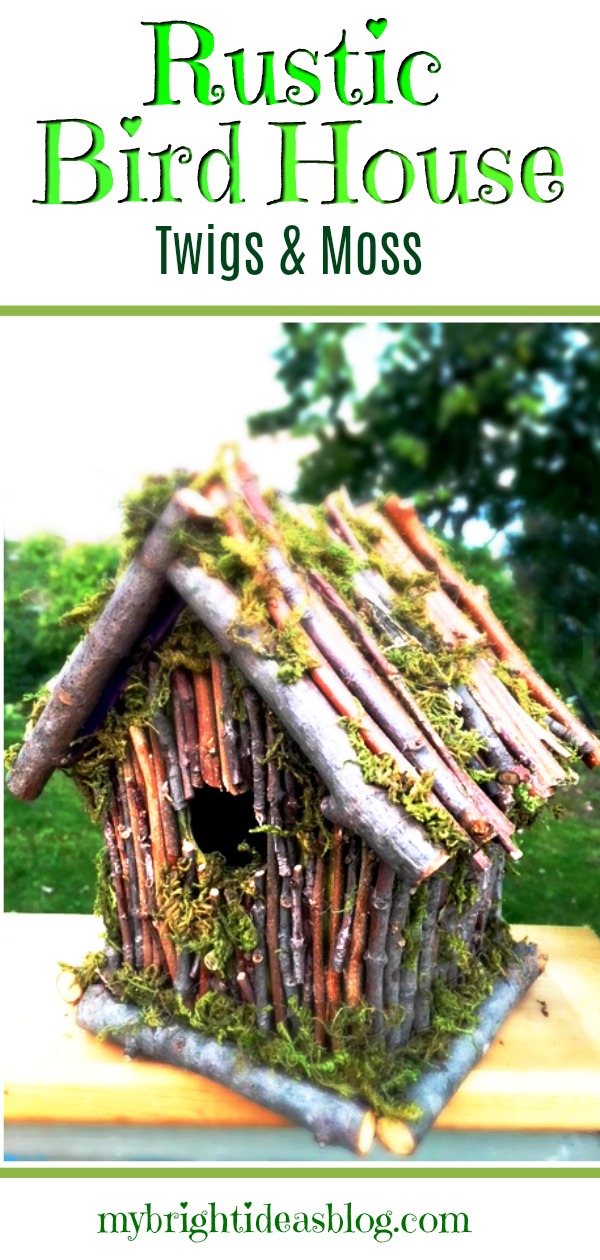
Rustic BirdHouse – Twigs and Moss
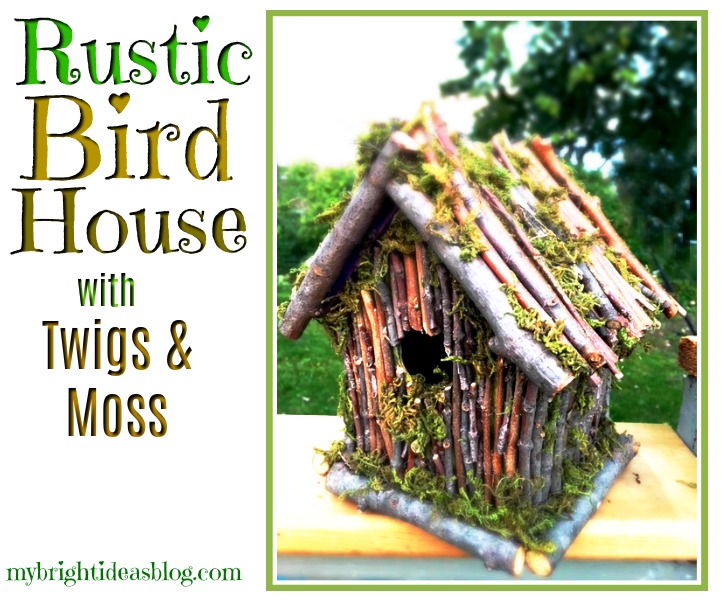
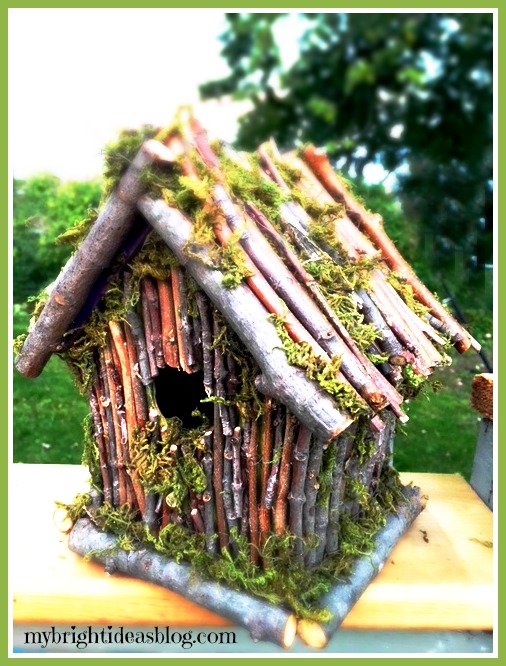
I’m loving sticks and twigs and rocks this year! So you’ll see a lot of these projects from this past summer and heading into the fall and winter. This is birdhouse project, I really enjoyed making and can’t wait to tell you about!
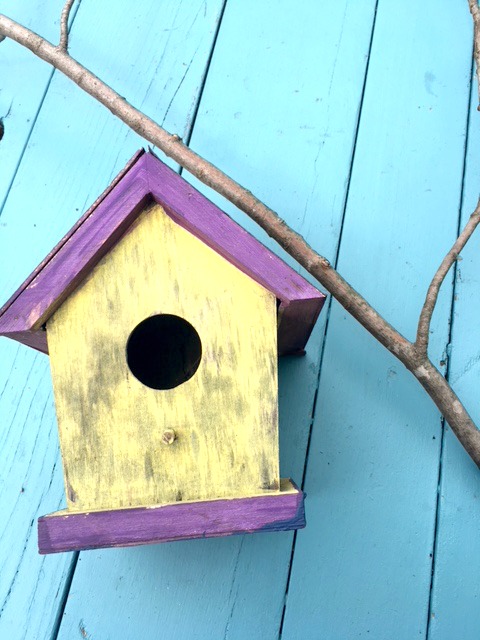
Two years ago my daughter and I painted a bunch of birdhouses and drilled them to the garage. It’s an old wooden garage with peeling paint so if we can distract your eyes from its sad, old, tired look we would! It should get knocked down and rebuilt but we would like it to last a few more years…so instead I’m decorating it.
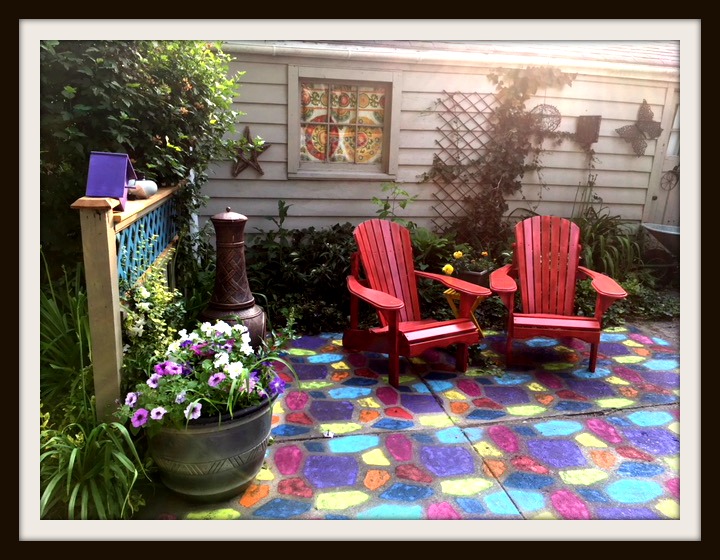
See what I mean…
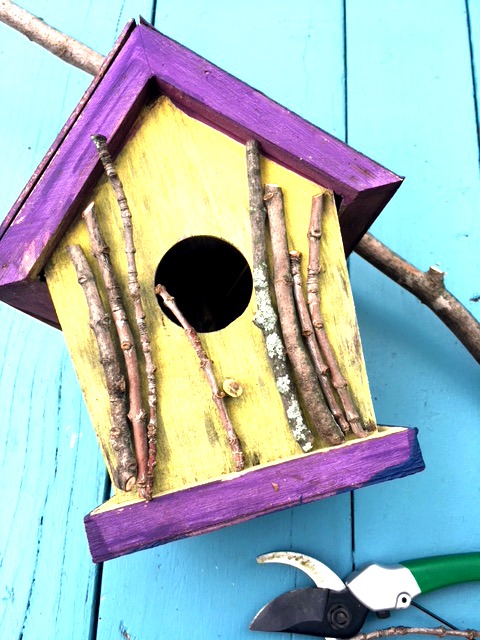
I apologize we got a bit sidetracked there. Back to the twig birdhouse. After two winters the birdhouse collection had gotten worn out and weathered. They were just cheap wooden ones from the dollar store and we didn’t think ahead to put extra clear coats over the craft paint to make them water resistant. That would have been sensible.
If you would like to try this you will need:
- a birdhouse
- outdoor paint or varnish to water proof it
- branches
- garden snips
- E6000 or other industrial glue
- natural moss
You can get inexpensive birdhouses at the dollar store but if you would like it last for years and years get the sturdy ones from the hardware store or make your own. Paint it or put a protective clear varnish so it will last a long, long time. I opted to use the old weather worn ones to try and upcycle it instead of throwing it out.
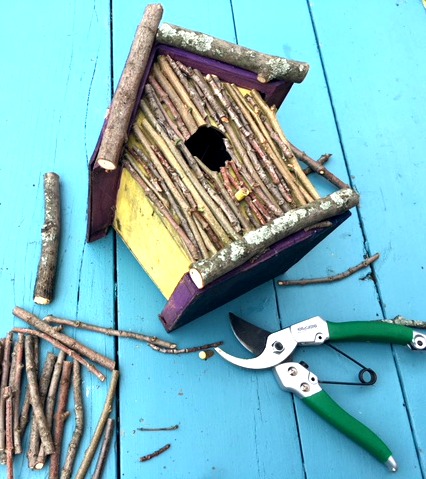
We needed to trim some out of control shrubs and some branches so this project was perfect timing. There was no measuring of the length just line up the twig to the area you want to put it and snip! When I had the area planned out I went back to glue it.
Using E6000 Industrial glue is stinky so I try to use it only outdoors. It is slow to dry but very secure. I have used a hot glue gun to secure sticks and pebbles to things like this before and within a few days it had pieces falling off. If your project is going to be indoors you could get away with quick drying hot glue.
I attached the sticks all over one side of the birdhouse and left it to dry.
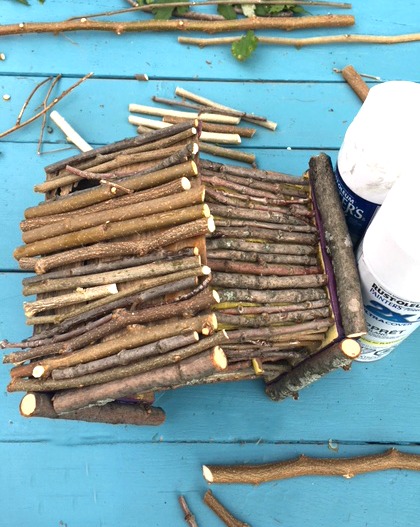
Each side needed several hours to dry. Then I came back to work on the next side. This really slowed down the process. It felt very relaxing making this natural project so I didn’t mind that it took me a few days.
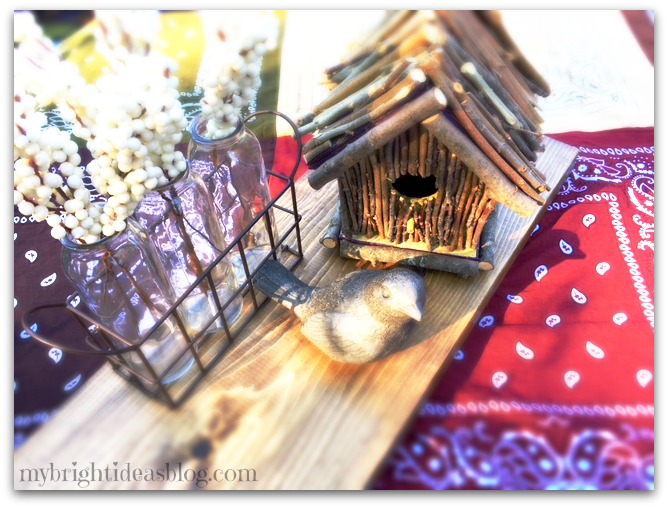
I was actually quite happy with it with just the sticks on the birdhouse. I took this picture a few weeks ago with my bandana table cloth post. It’s cute right!
But then….I had a vision of it with moss and the project took on its final stage….
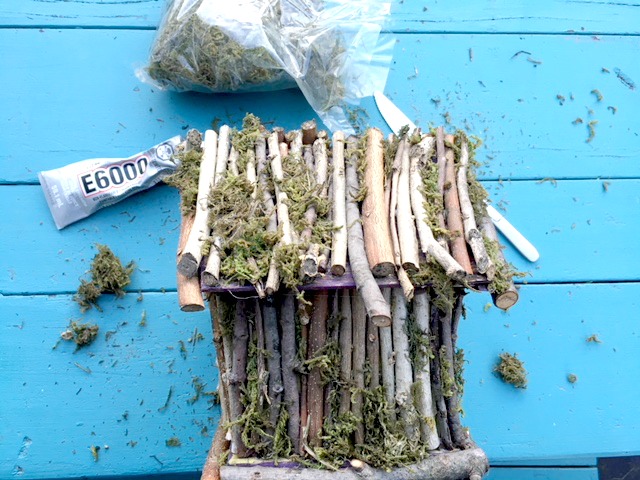
The moss is from the craft or dollar store and comes by the bag. It is quite loose and flakey so it will make a bit of a mess on your work space.
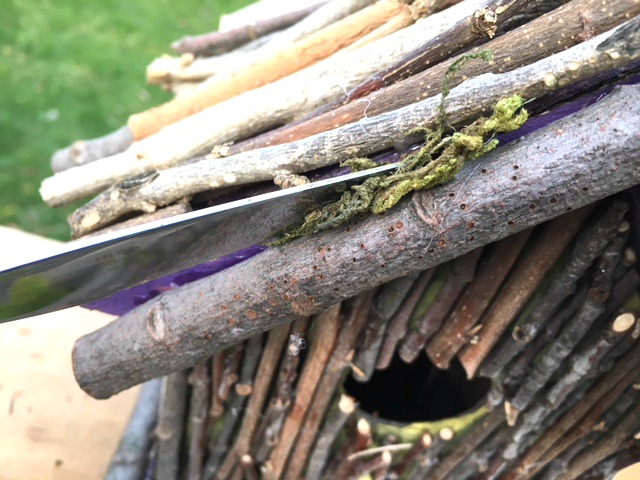
Anywhere I could see the old purple paint I put in some moss. This photo shows me sliding the moss in between each stick using a butter knife as a tool. I also used some dabs of glue plus jamming it in gaps between the twigs.
Heavy rains and wind may be hard on the moss. We will see how it lasts and maybe place it in a bit of a protected area of the garden. A covered porch would likely be ideal.
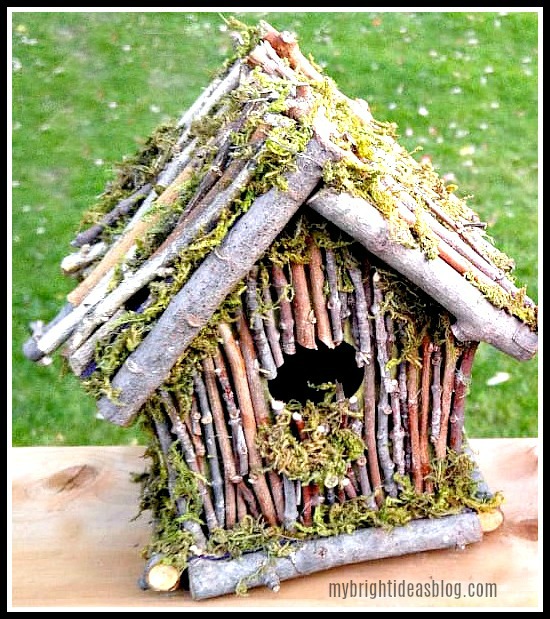
Isn’t that beautiful! I don’t know that any birds will actually want to use it but for a decorative addition to the garden I’m very pleased with it!
Thank you for reading to the end. I hope you enjoy your day. Before you go feel free to visit some of my other posts. Pin this to Pinterest or share it on your favorite social media.
…
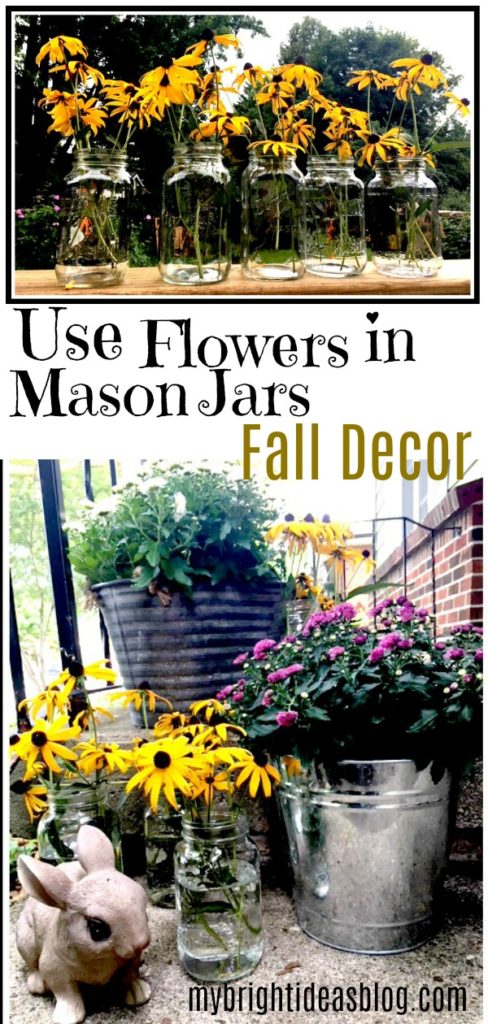
Use Flowers in Mason Jars for Fall Decor
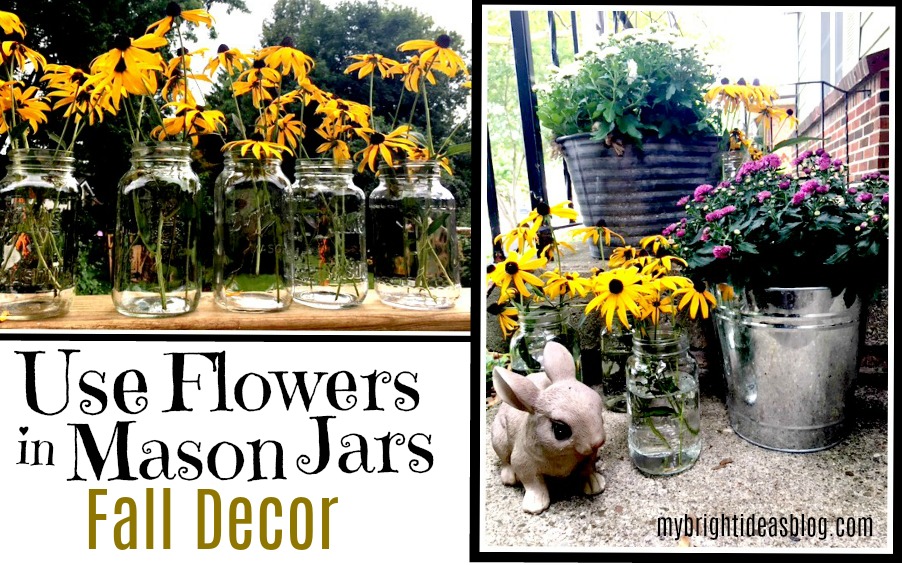
It’s early September and the summer is over. Even if the weather is still hot in your area like it is in mine-the garden is showing that its winding up for this year. Even when everything looks overgrown and scraggly you can count on your Black-eyed Susan’s for their bright cheery flash of yellow.
Have you got a porch, deck or entranceway that could use dash of colour? I recommend snipping some Black-eyed Susan’s and grabbing some mason jars. I’ll show you what I mean.
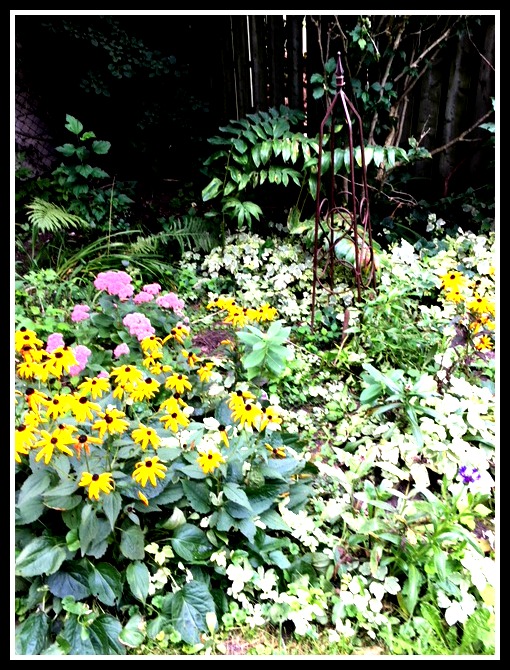
After a week away we came home to the garden that looks like this. It’s supposed to look like an English Garden. Ha ha hahaha! Sorry if you fell off your chair laughing hard while looking at my “English Garden”.
It’s gotten overgrown with weeds and plants choking out other plants. But because of those cheery yellow flowers, I don’t despair with this jungle garden!
I know, I’m a terrible gardener aren’t I? Well there are only so many hours in the day…maybe next year…
You will need:
- Mason Jars (or any other jars -empty jam and pasta sauce jars- you might have)
- Garden Snips
- Flowers
- Water
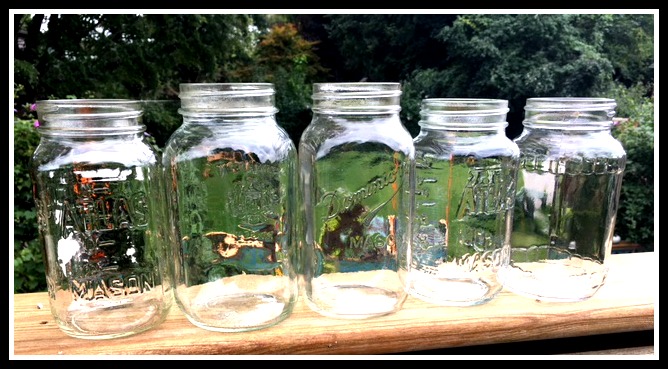
I have had this collection of mason jars for a while in a cupboard….. that I think they belong to my mom. Over time she has shared a lot of pickles and chutneys that she preserved and I have been a naughty daughter and not returned her lovely jars.
So I went to my overgrown garden with some garden snips (sharp scissors will do) and clipped a bit of the Black-eyed Susan’s.
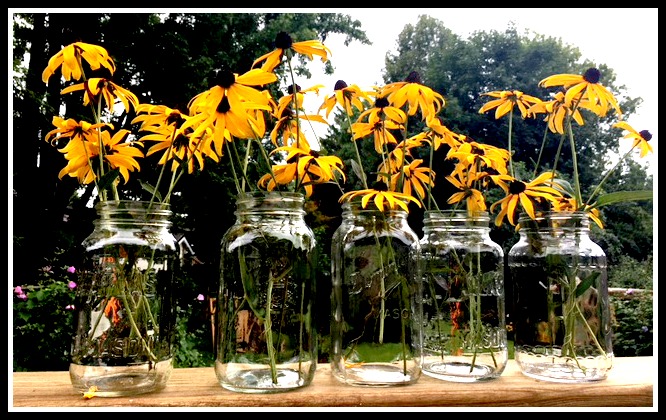
When company is coming this is a nice way for the kids to help roll out the red carpet-or rather the yellow carpet. Get them arranging some jars, add water and add flowers.
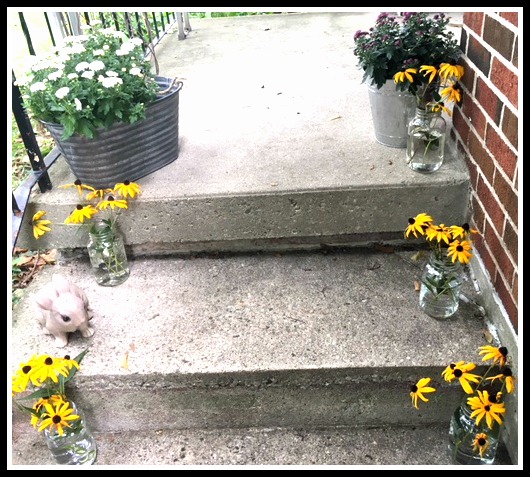
These could last for 2 weeks and if the Black-eyed Susan’s are still doing well you could cut more flowers and top these jars up with fresh cuttings.
It’s sad to see the summer close and flowers get scraggly-we need to face it, it’s the end of the season. 🙁
Using mason jars as vases is a great way to keep their cheerfulness and move that colour to other areas-indoors and outdoors.
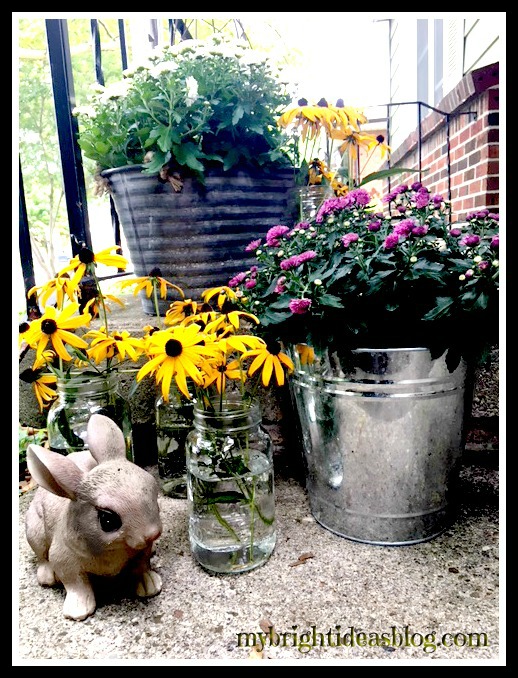
Here is another Autumn Project!
Here are more Mason Jar Projects!
How to make an Autumn Wreath from Branches!
The other day, I was having a visit with my neighbour Tanya, and I looked at her door with a wreath that was way over due for a change. I think it she put it up in April….now its September…She mentioned that she should go shopping for an autumn wreath. I said Whoah! Don’t buy anything. Leave it with your buddy ol’ pal to make one.
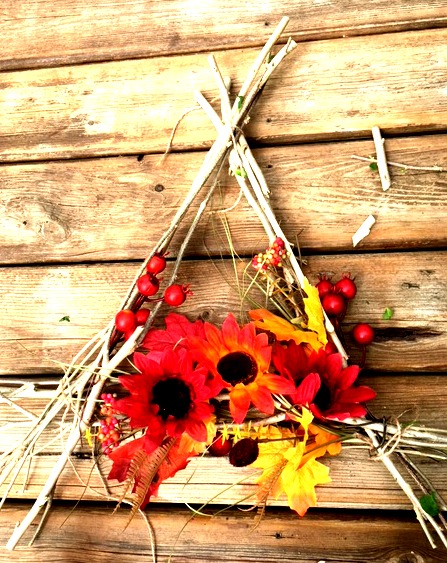
I didn’t want to make it a typical round wreath but what could I do to make it different…but in-expensive….mmmm.
Meanwhile….my garden looks like a jungle. We have had lots of rain and sun and this means everything had big gnarly growth spurts.
When we purchased the house we were surprised that we had 25 Rose of Sharon bushes around the backyard. That is a lot of purple Rose of Sharons. They are pretty when they are in bloom and get quite full adding to privacy along the chain link fence. However, they do attract bees and the pods open and drop seeds and grow more and more and more.
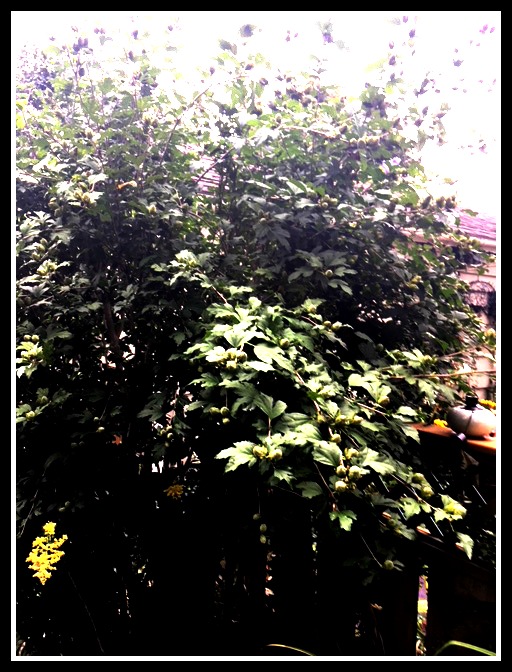
There is a lot of trimming to do….and did I mention there is 25 of these shrubs? Momma Mia that’s a lot of trimming to do this week.
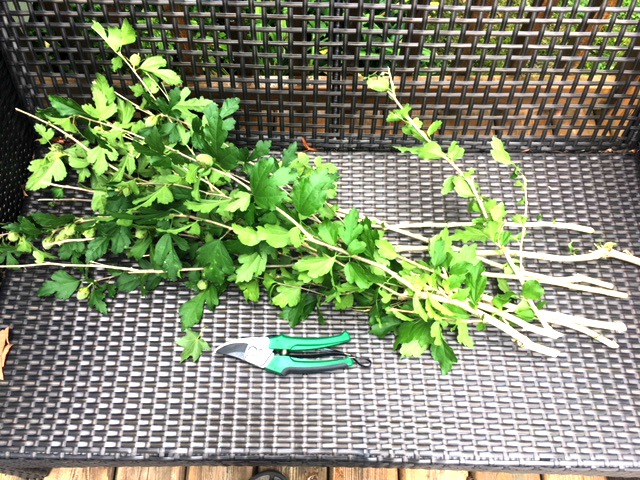
I was thinking about the promised wreath I wanted to make for Tanya. But I was looking at the trimming to do…wreath….trimming….and then it hit me!! Use the branches from the shrubs to make Tanya’s autumn wreath!
Supplies I used:
- Shrubs or Trees branches
- Garden Snips
- Twine or Rope
- Wire Cutters
- Autumn Flowers
- Glue Gun (I didn’t need it but I had it handy)
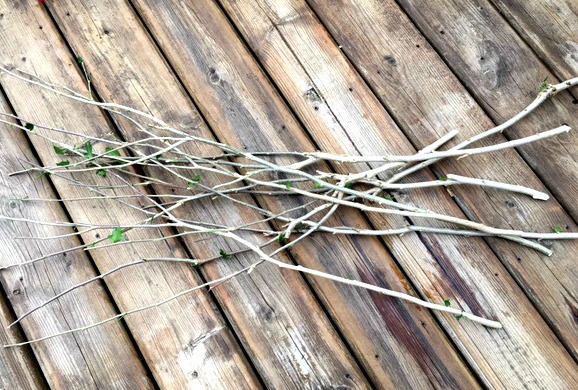
I pulled off the little branches and the leaves on 9 longish branches.
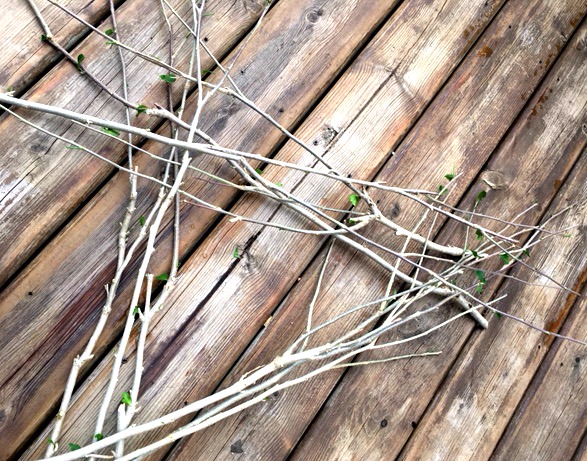
I put 3 twigs in a triangle shape and located some twine.
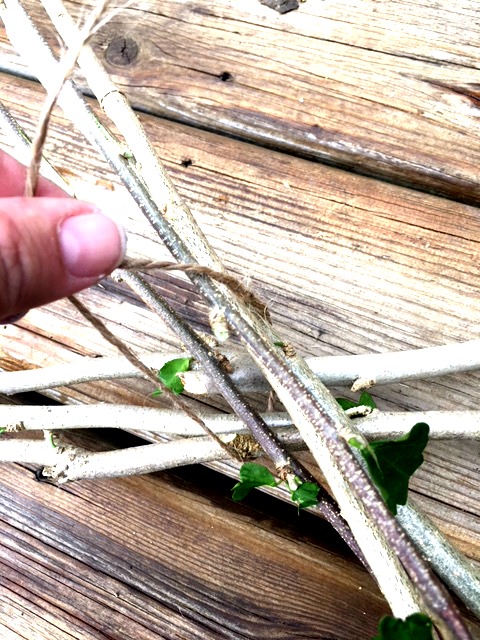
Twine is great for tying your sticks together. I better keep it handy for the rest of the trimming that is still waiting for me.
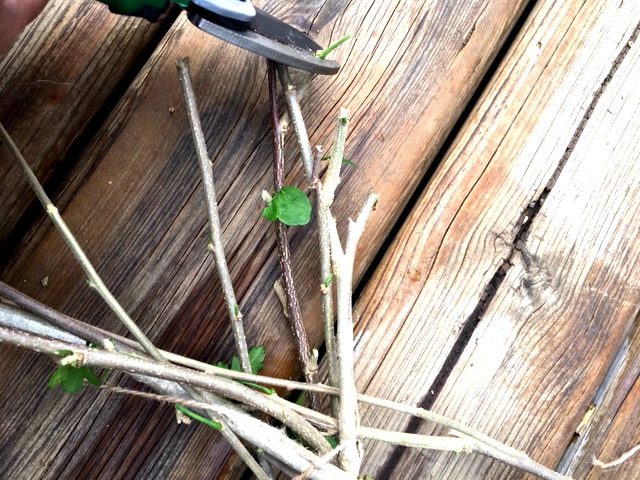
At first, I was going to keep the ends long and staggered but I decided to trim the ends down further.
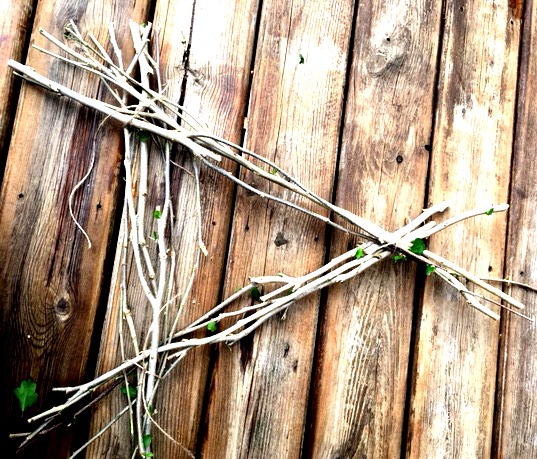
I like the rough ends but we don’t want to poke out Tanya’s family’s eyes!
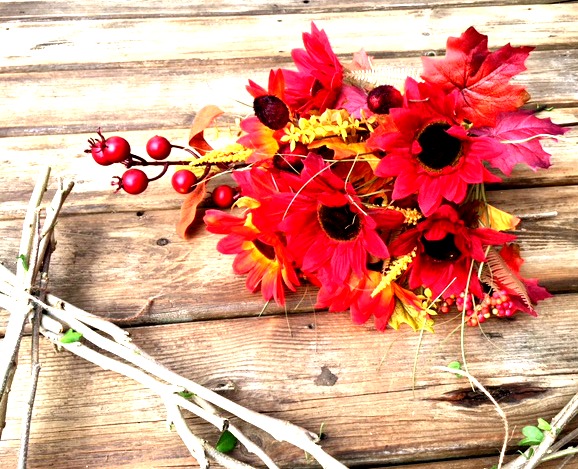
Time to add the flowers. I picked up a few bunches of autumn flowers from the dollar store. I only used a few sprigs from this lovely bouquet. I could easily make a few more of these as gifts (or to put on the craft table at work…of course). I spent about $10 on the flowers and twine so if I made another 3 or 4 that would make them each costing only $3 each. Cha-ching!
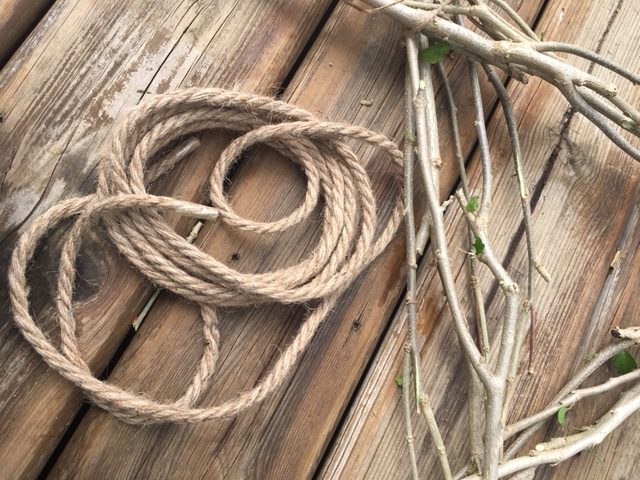
I had some thick twine that I used to reinforce the corners. Ribbon or lace would look cool too. Use what ever scraps you have.
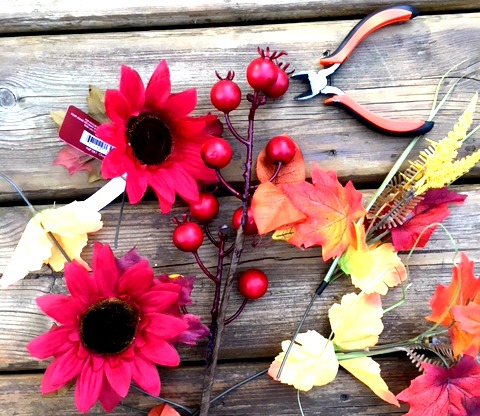
I didn’t need to use a hot glue gun because I wove the ends into the twigs and wrapped the wire of artificial flowers around the twigs. You might want to use a hot glue gun to secure short pieces to the twigs.
Since the sticks make up the base and they are free-from my backyard-this is quite inexpensive. I’ve got enough flowers left to make another 4 of these! Cool…any other neighbours with a bare front door?
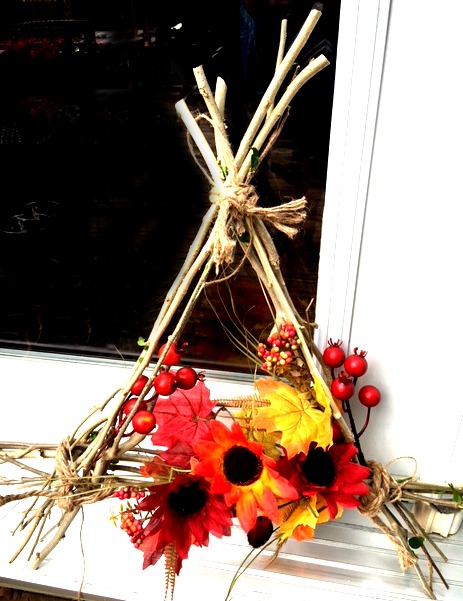
So rustic and woodsy.
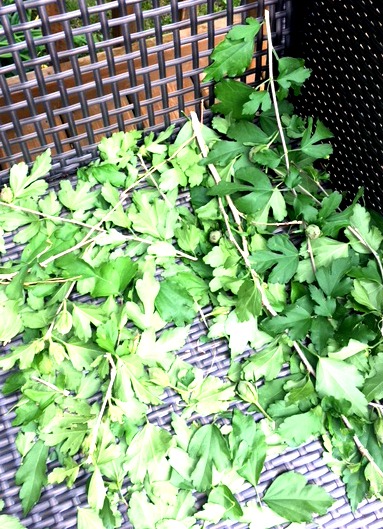
Now who is going to clean up the left overs and finish the trimming….sigh…better get back to work.
See you again soon!

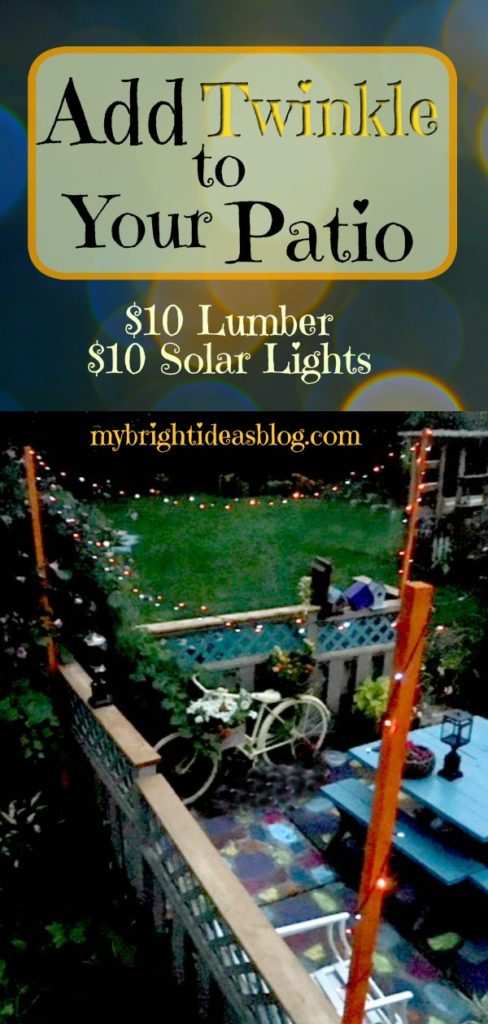
Add Twinkle to Your Patio with a String of Solar Lights
$20 Solar Twinkle Light Project – No Tools Needed
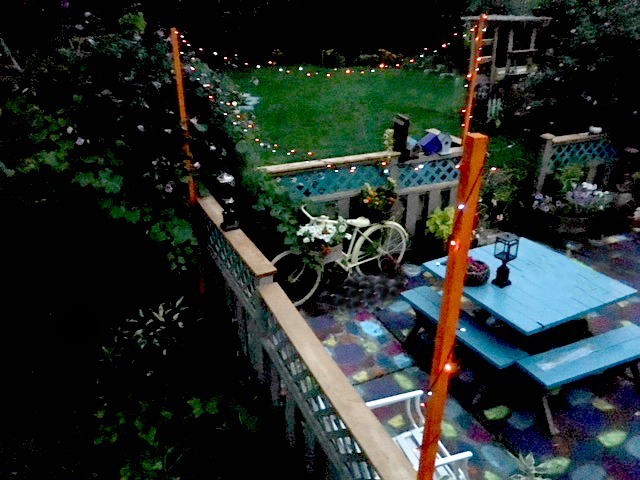
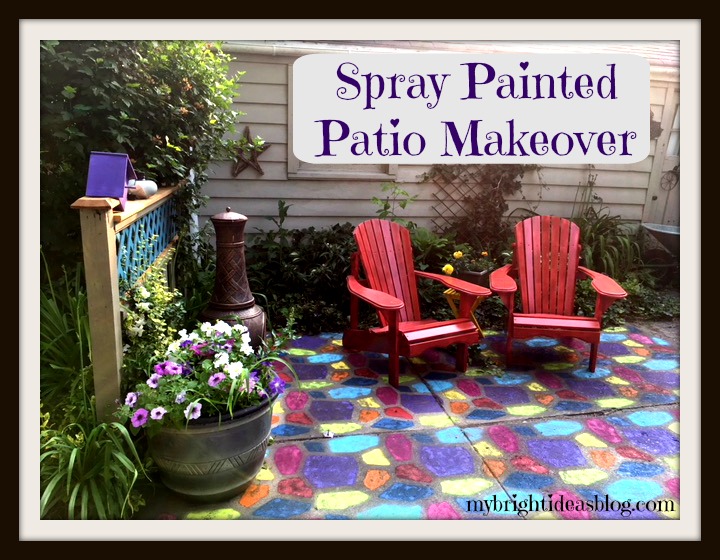
Usually by this time of the summer I have had enough of the heat and let the weeds take over and the vegetable garden dry up. But this year has been different! This year I have been adding colour to the backyard patio. I have painted the old picnic table and parts of the fence turquoise, the white Muskoka chairs are now red, an old bike is now yellow with plants attached and the entire patio a multi color design.
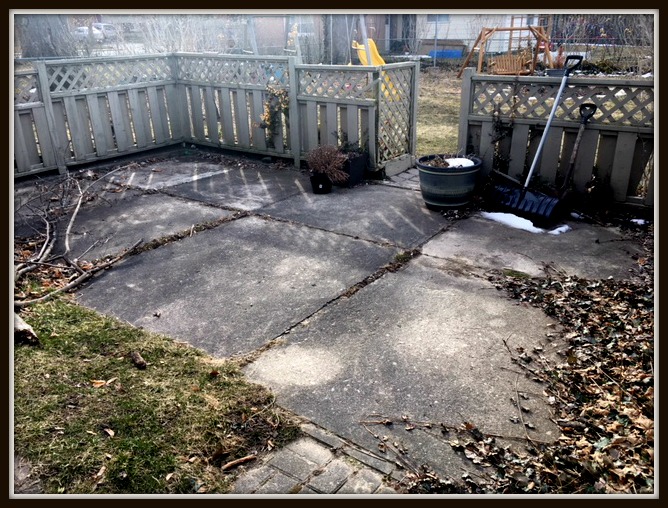
This is what it looked like as the final bit of winter melted away. So dismal! In the summer our garden is lush and private but everything is bare naked in the winter. Grey and bleak….
We have a lattice privacy fence around the patio area that needed a bit of repair and some paint touch ups battered by the winter. This is the going to be the support for the 2×2 pieces of lumber.
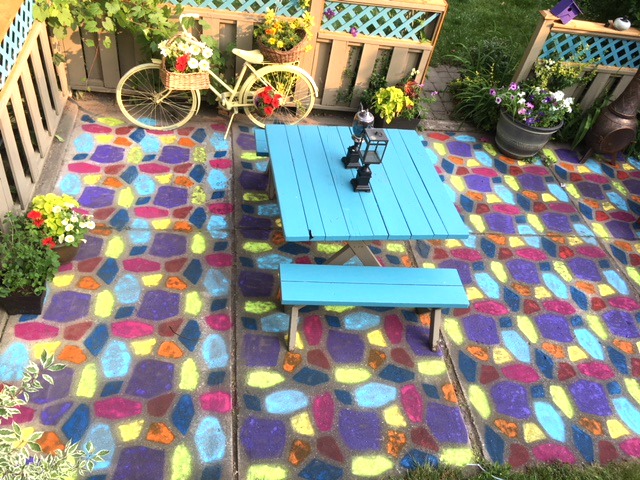
Below is a pic of the other half of the patio and garage area after I finished painting the patio.

Have a look at the painted patio blog post from July.
So the next logical step for this backyard makeover is to add some twinkle lights. Being the frugal person that I am-I must brag that I did this project for $20!
First stop – the hardware store….
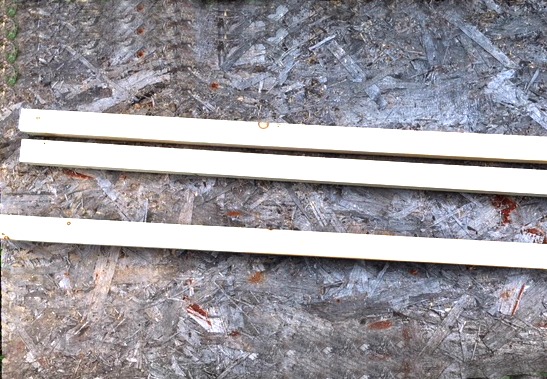 You will need:
- 2×2 lumber (3 for $2.70 each)
- string of solar power lights (sale $9.99)
- left over deck stain or spray paint (it costs $6.99 usually but I had this left over from the patio project)
- zip ties (dollar store)
- cup hooks (dollar store)
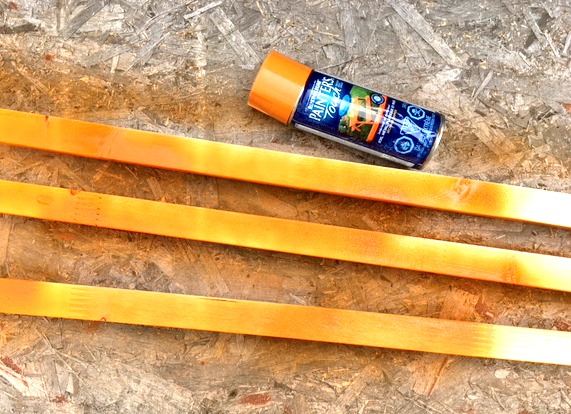
Step 1 Spray Paint The Boards
The great news is we use the full pieces so no power tools are needed. Just choose a paint color and get started.
I wanted to make a splash of color so I chose to use my bright orange. I could have used a dark green or left over deck stain or fence paint if I was feeling subtle. But I wasn’t….
Spray the 3 2×2 boards on two sides then allow to dry before flipping them over and doing the other two sides.
Step 2 Add The Hooks
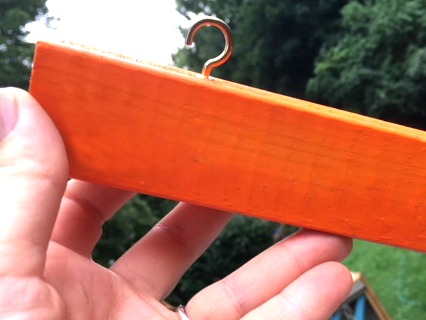
I used mug hooks because you simply screw it into the wood. The hook is twisted into the wood a few inches from the top.
Step 3 Tie The Supports To The Fence
Securing the 2×2 to the fence was easy with zip ties. When we are putting everything away before the snow comes these zip ties will be cut off and my orange light supports will be put away in the garage.
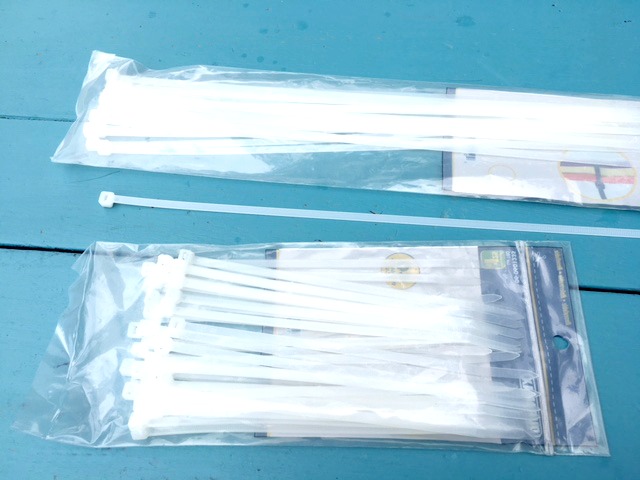
The dollar store or hardware stores have these for super cheep I used the 14 inch zip ties.
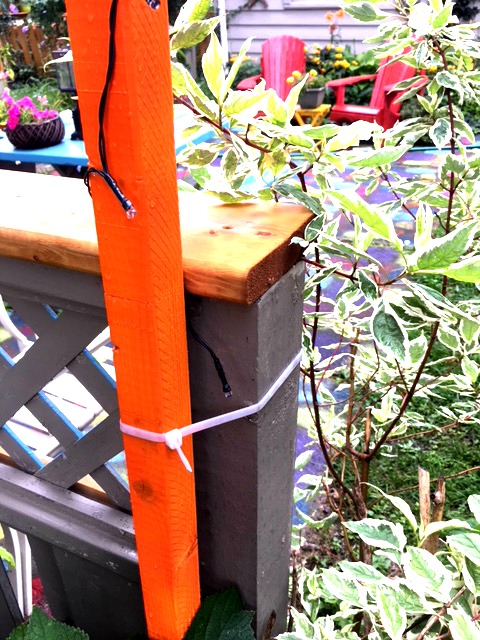
If you don’t have a handy fence or deck to secure the wood to, you can find others who have put them in cement in a bucket to create a portable pole. Some use 2×2’s or 2×4’s and even 4×4’s.
Check out this link to a tutorial using barrels and concrete and then turning it into a planter. Its great if you have no walls, deck or fence to secure it to. https://www.diynetwork.com/how-to/outdoors/patios-and-decks/how-to-make-planter-posts-for-string-lights

Step 4 Adding The Lights
It’s August, so now is the perfect time to find clearance solar powered lights. Lets give a shout out to solar lights! What a wonderful invention this solar power is. No extension cords to plug it in. No batteries. Just leave the little solar panel out facing the sky.
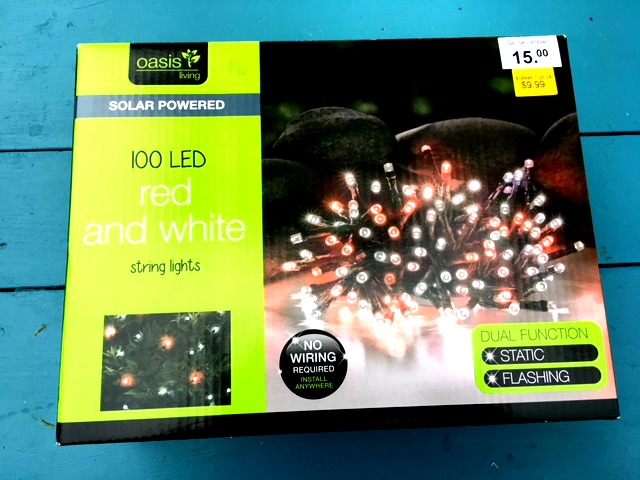
Turn the light on so it has a chance to charge up with solar energy before sunset. F means flashing, S means static so the lights will be still.
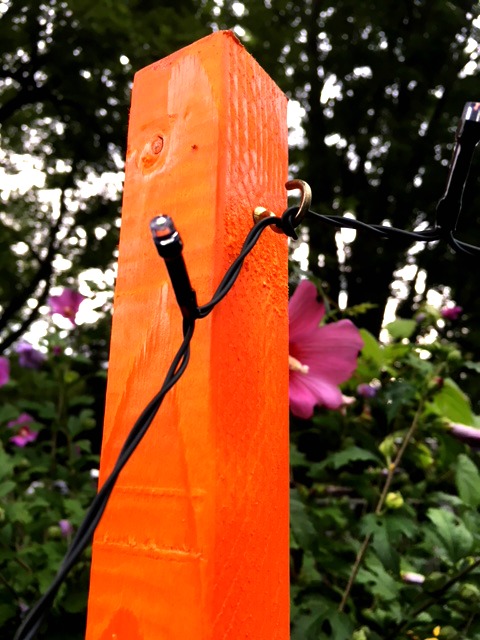
Wrap the solar light cord around the 2×2 support. At the top wrap it around the hook a few times. Next drape it over to the next support. We simply wrapped it around that hook and over to the third hook. Finally wrap it down the third pole and its done.
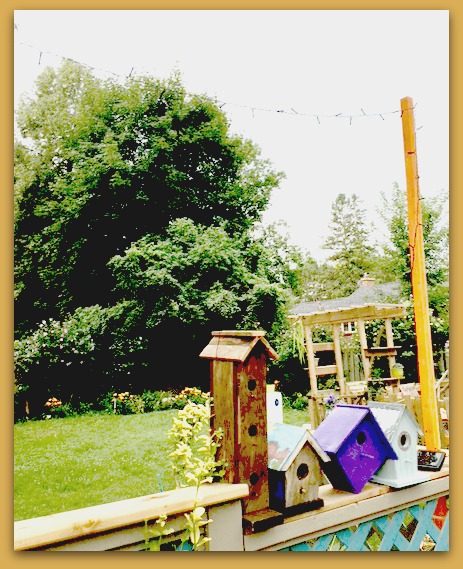
Next to the bird houses you can see the solar power part. I need to think of how to put it more out of sight since it does need the sunlight to charge it for after the sun sets.
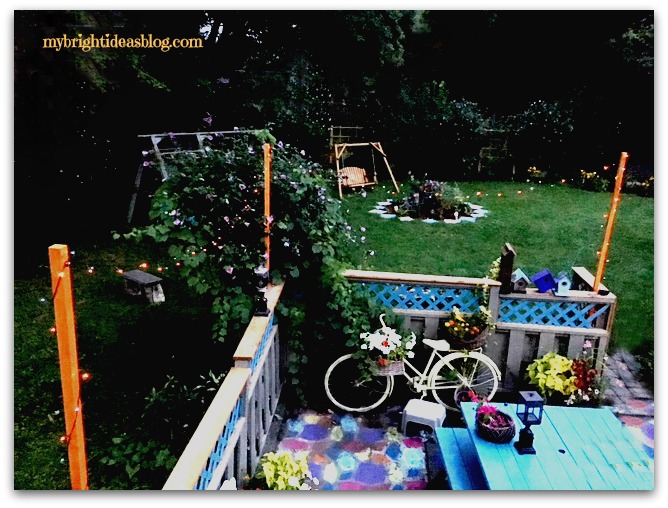 As the sun begins to set, I can see they are lighting up perfectly. Twinkle lights are such a simple pleasure!
Now I feel like calling some friends to come over for a root beer float and having a little party under the lights!
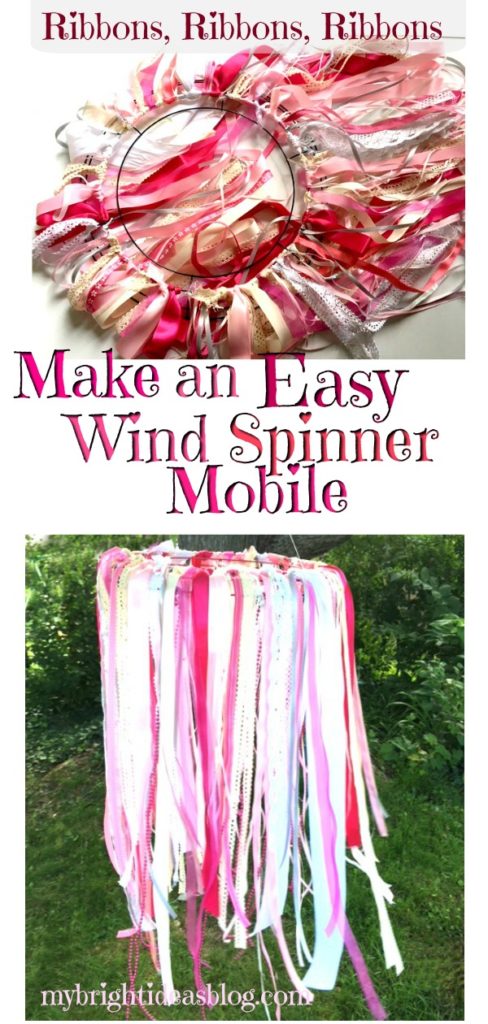
Make a Ribbon Mobile – Windsock
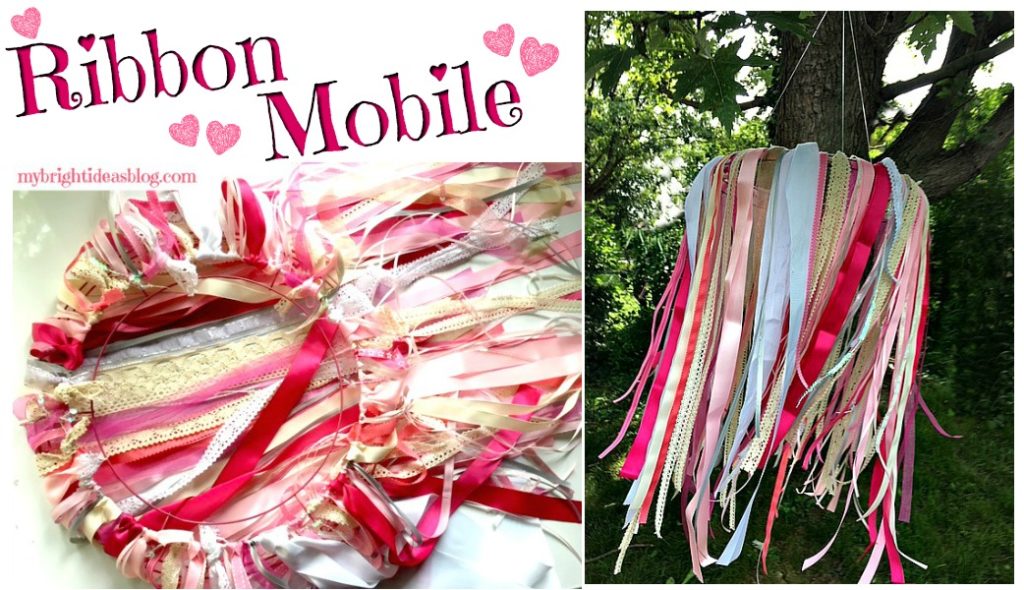 The other day I came across a ribbon party mobile on a porch and I loved! It was bright colors and looked so easy! So off I went to get supplies for my own.
New word of the day: Windsock
If you put these outside it might be called a windsock, so you can tell when its windy. Like they have at the airport to tell wind direction and speed. I did not know this word until I went looking on Pinterest to see how others had made them and that is what they called it. Isn’t that a fun fact!
This could survive the summer outdoors because it is made out of a metal wreath-as opposed to the smaller ones that people do with an embroidery hoop. However, the embroidery hoop would be good for an indoor mobile and it’s smaller so you would need less ribbon.
This is my version of it!
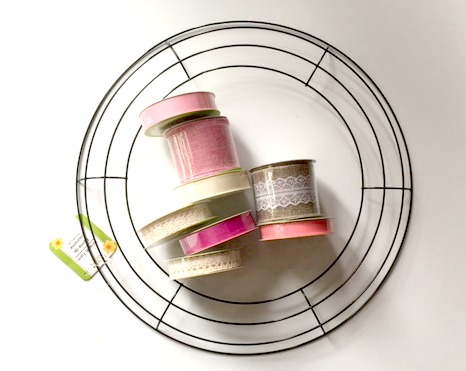
You will need:
- wire wreath (Dollar Tree $1.25)
- spray paint (optional)
- ribbon (variety of widths and textures) you need a lot!
- iron (if your ribbons have creases)
- scissors
- tape measure
- binder clip
- fishing line
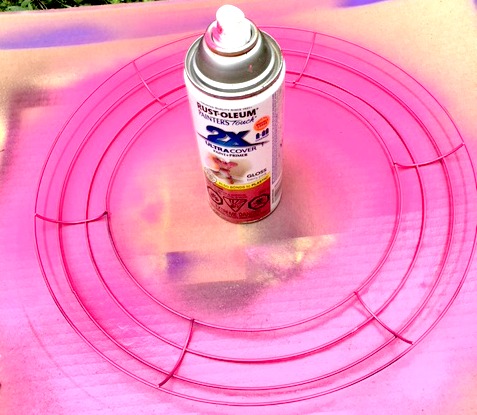
Start out by spray painting the wire wreath. This is optional but I did originally leave mine black and it was nagging at me that I should have painted it white or pink to blend in. It doesn’t take much paint a quick spray on one side. Wait an hour and flip it over and paint the other side.
Bric a Brac and Haberdashery!
Here are 2 more definitions to make this a super educational tutorial:
Bric a Brac: Noun
-
miscellaneous objects and ornaments of little value.
- synonyms: ornaments, knickknacks, trinkets, baubles, bits and pieces, bits and bobs, odds and ends
- small items used in sewing, such as buttons, zippers, and thread; notions.
- a shop or a department within a larger store that sells items used in sewing.
More to the point – Ribbon
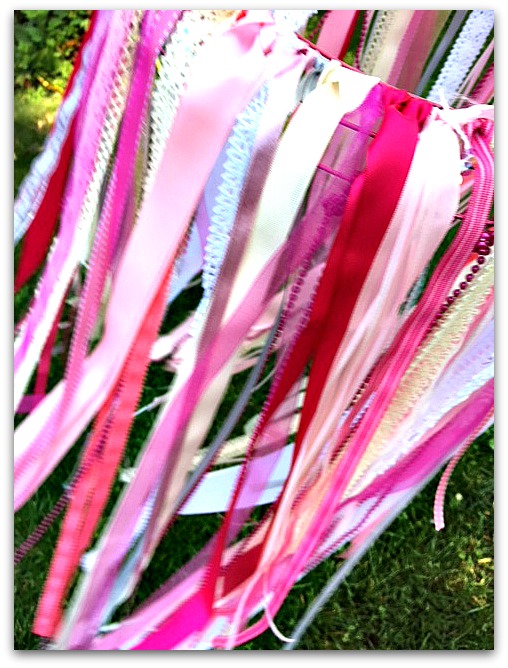
You will need a lot of ribbon! It would be great if you have a craft outlet store or a source for cheep ribbon with a lot of yards on the spool. You should plan to spend at least $25 on this. Wider ribbon will fill up the space quickly but the skinny ribbon is nice intermingled. It’s a great way to use up old scraps too. Lace, ribbon, ric rac, sequin strips, cheap lengths of beads. Variety is the key!
Start by cutting the ribbon into lengths between 20 and 24 inches or 50 cm to 60 cm. I like the ribbons to be staggered in lengths. Do not use ribbon with wire in it.
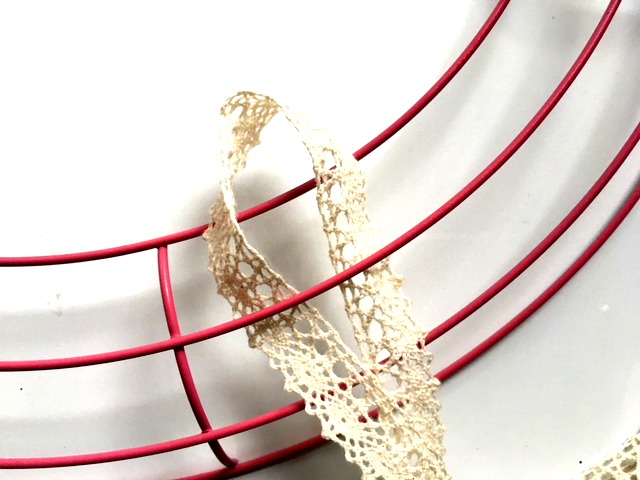 Slide the ribbon through the wire wreath.
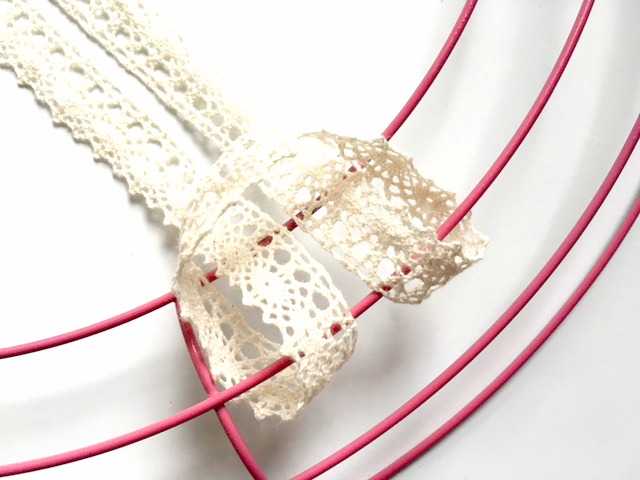
Pull the ribbon through the loop to form a gentle knot.
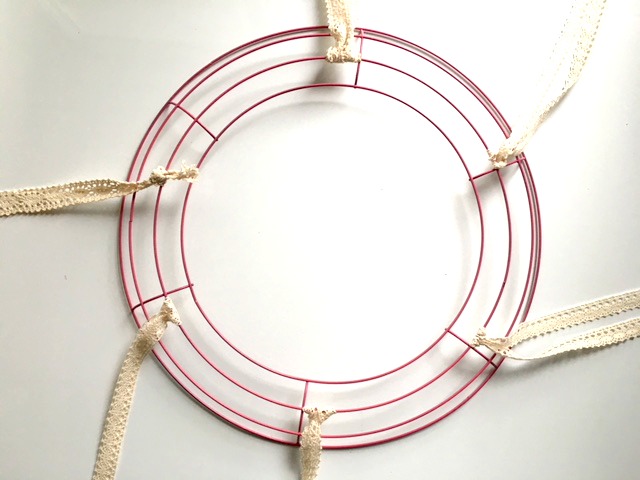
Spread the ribbon around the wreath and then add another color. If it’s too short to tie the gentle knot you can put a single strand on the wreath by just knotting it.
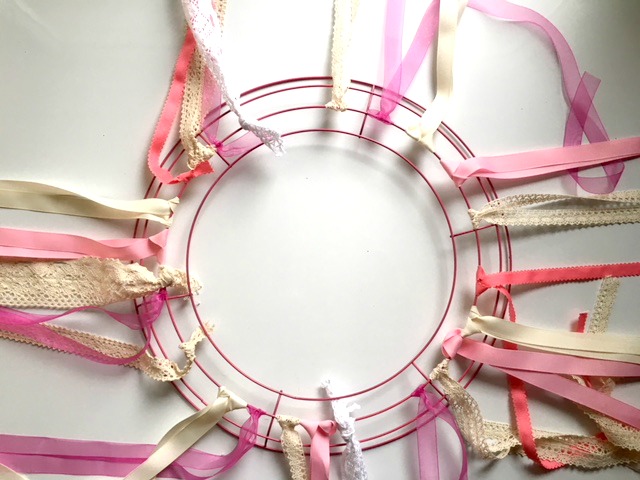
Ribbons, Ribbons, Ribbons!
At this point I ran out of my new ribbon and it looks really sparse. So I head down to my sewing area and dig out all my old ribbons and lace and cut up any gray, silver, white, cream and any shade of pink in any width of ribbon.
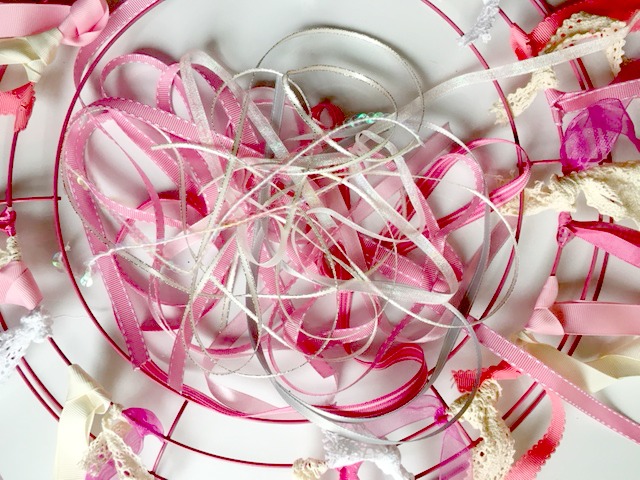
If some of your ribbons have been folded you will want to iron them. Some of my best photos have ribbon with bends and folds and it really bugged me. So off they came and I ironed them flat. Make sure the iron is set to gentle.
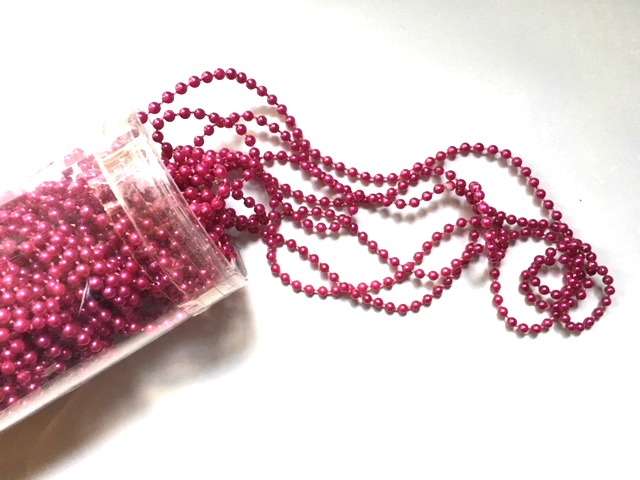
A friend gave me this bottle of beads. The strand of beads is really long so there is plenty to add several lengths on this project. I also had a spool of sequined ribbon and that adds a nice bit of sparkle.
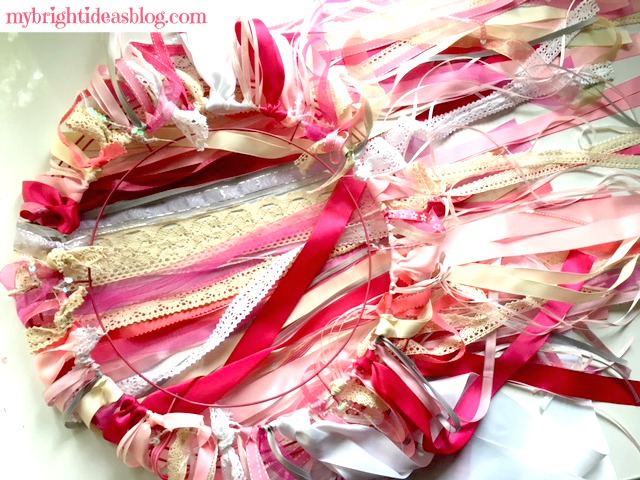
It’s actually quite beautiful now. When I lift it up there is very little wire showing.
Time to Hang it up!
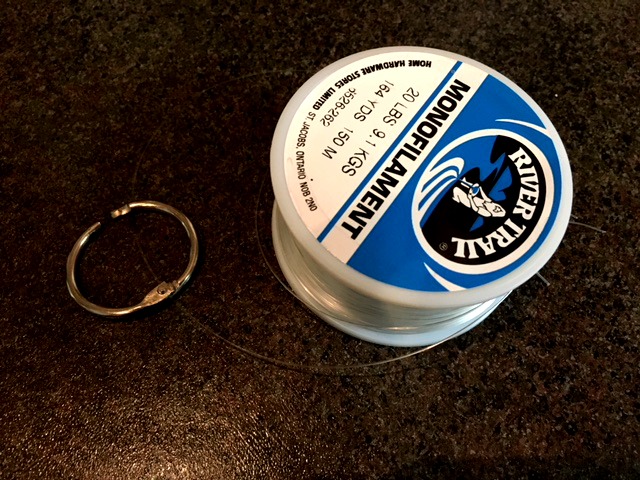
Now you will need to string it up. I could have used ribbon but there is literally none. It’s all used up on this mobile. So use fishing line…its very inexpensive and clear. I used a binder loop as the connection and it will help with movement if you are using it outdoors in the breeze.
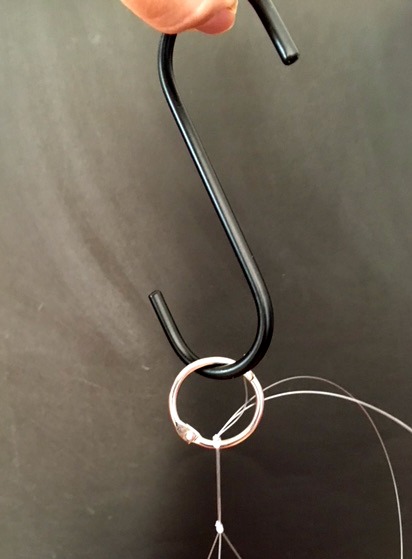
Knot it on the wreath in three places and then pull the three strands together and upwards. Tie it in a knot twice leaving 1/2 an inch (1 cm) between the knots to hook the binder clip. Then use the S hook to hang it from a tree branch.
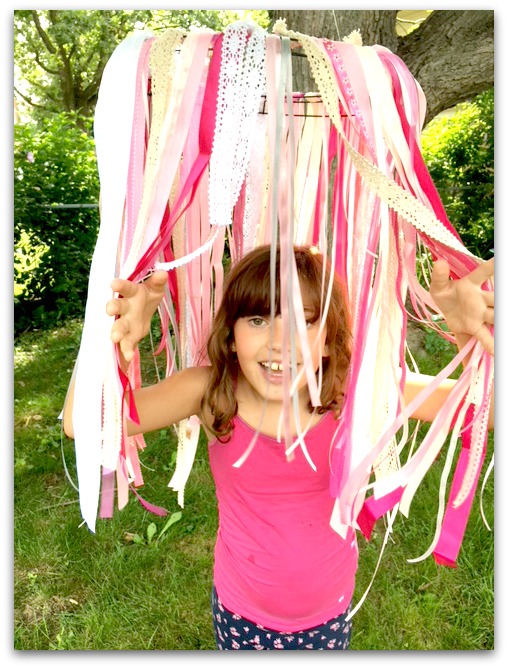
If you hang it on a very low branch you will find your children in it. You’ve been warned…LOL
 The photo above is the mobile I did before I spray painted it. You can see some of the black wire. It’s up to you – if you want to skip the spray painting step. In the end I took the ribbons off and spray painted it pink and then started again.
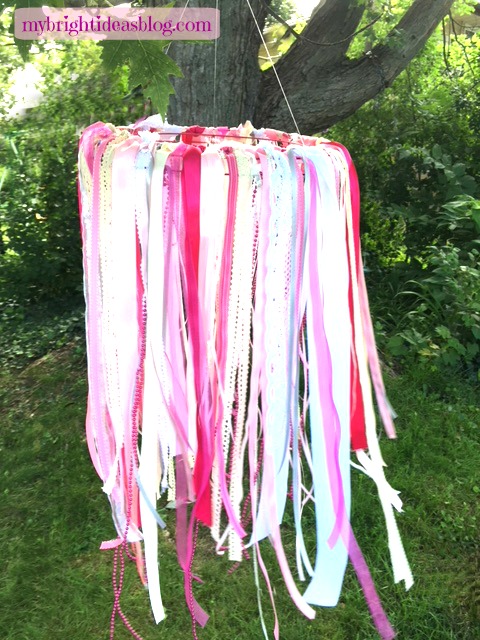
This would be really fun hanging over an outdoor tea party!
I choose my projects based on things I actually want to have around my house and I’m excited to make. This project is both! It turned out lovely and my daughter is happy to have it as an addition to her pink room.
Happy crafting – til next time!
Here are two ribbon and lace mobiles that I found in a store in a neighbouring town.
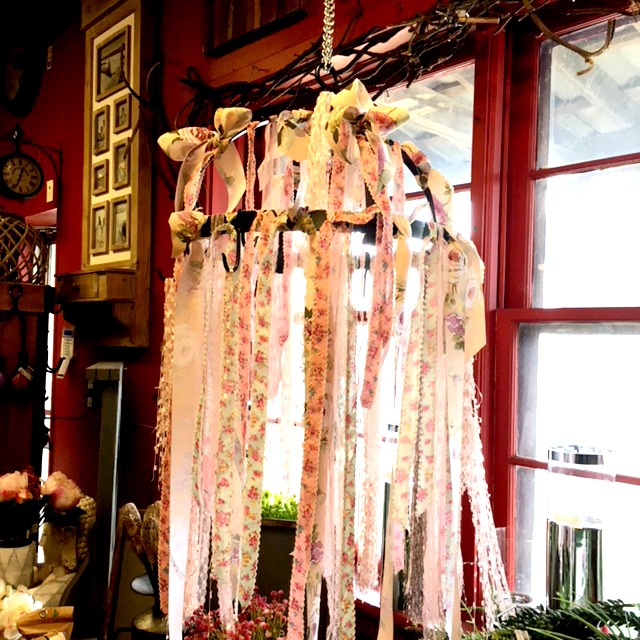
The one above is using a kitchen pot holder rack.
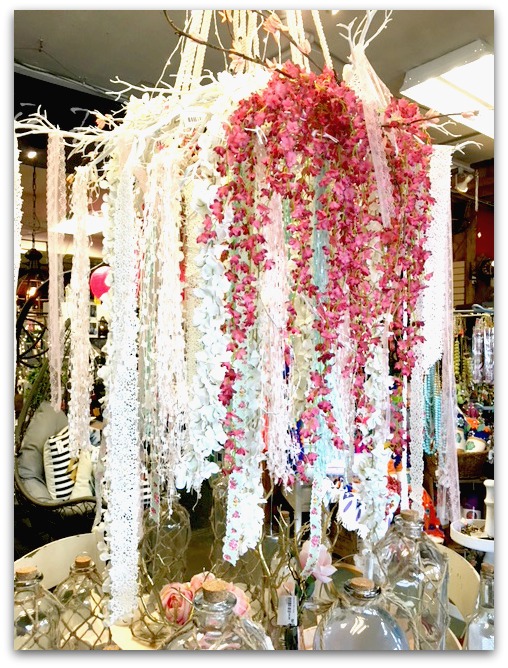 The one above is using a big white willow wreath. They had such a nice impact that I immediately pulled my phone out to take a photo. Add some twinkle lights and it would be absolutely wonderful!

Make an EASY Garden Decoration From Wire, Marbles and Beads
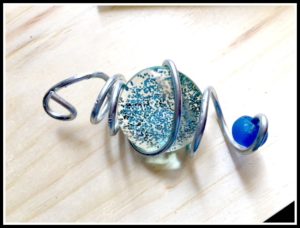
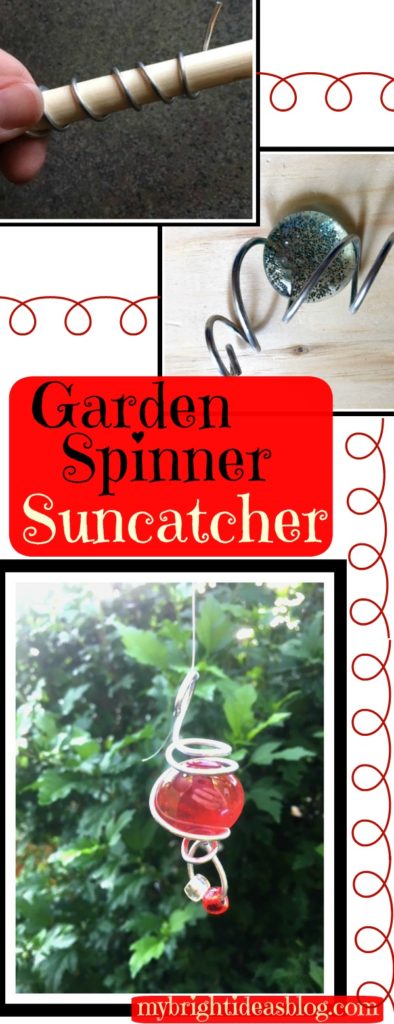
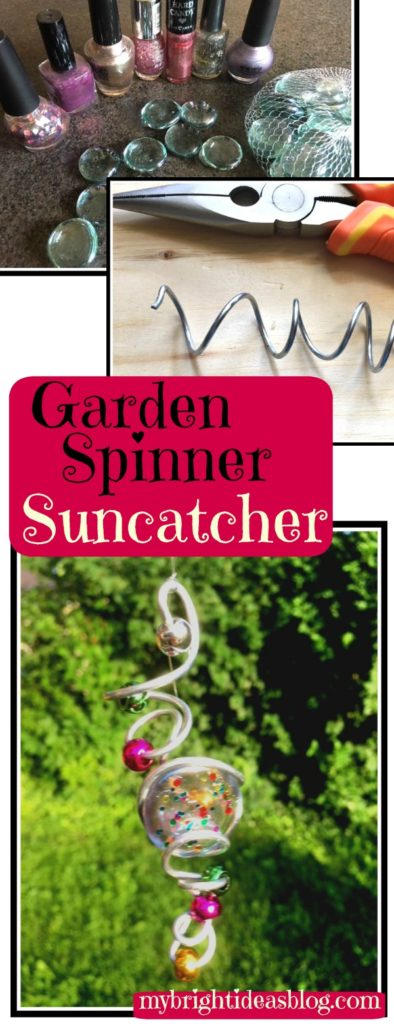
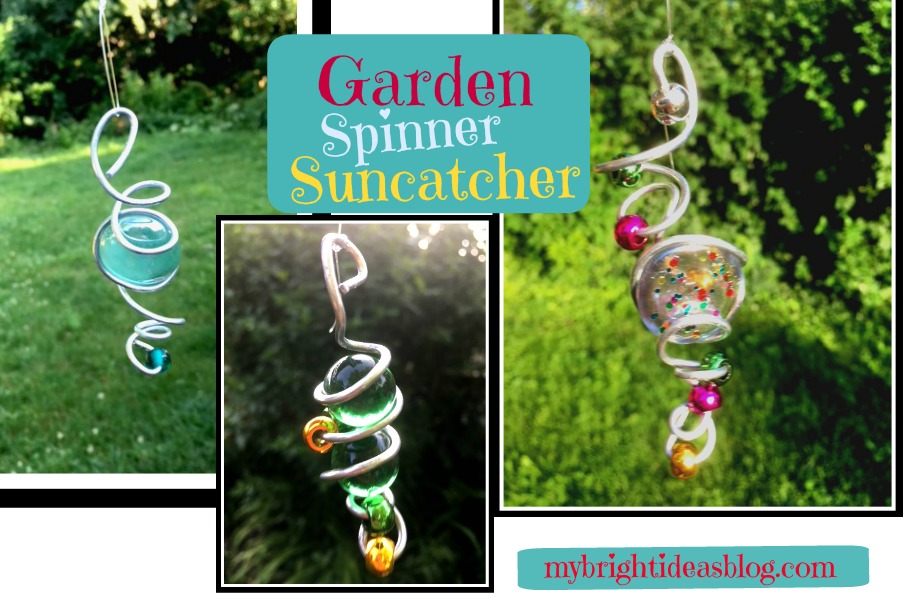 Wire Art – Suncatcher / Wind Spinner
This gorgeous craft will make you feel like an artist and is easily made in just 15 mins! Make it in the summer for the outdoors to spin in the breeze or in the winter hang it in the window as a sun catcher.
You will need:
- marbles, beads, glass stones
- sparkly nail polish
- Galvanized Steel Wire 14 Gauge
- 2 pairs of pliers, one with wire cutting edge or wire cutters
- clear fishing line
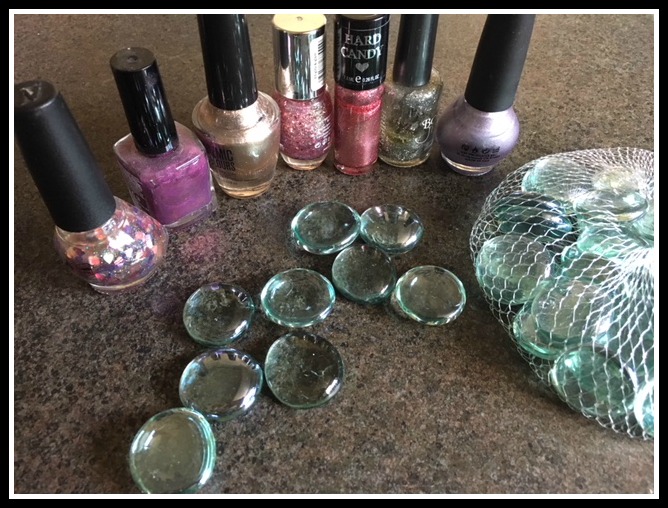
Simply get started with a bag of medium sized flat glass stones from the dollar store. Put a piece of newspaper or wax paper down to protect your work space.
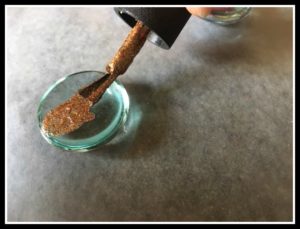
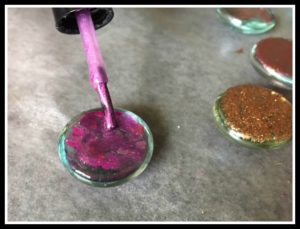
Paint one side of the stone with sparkly nail polish. Allow to dry.
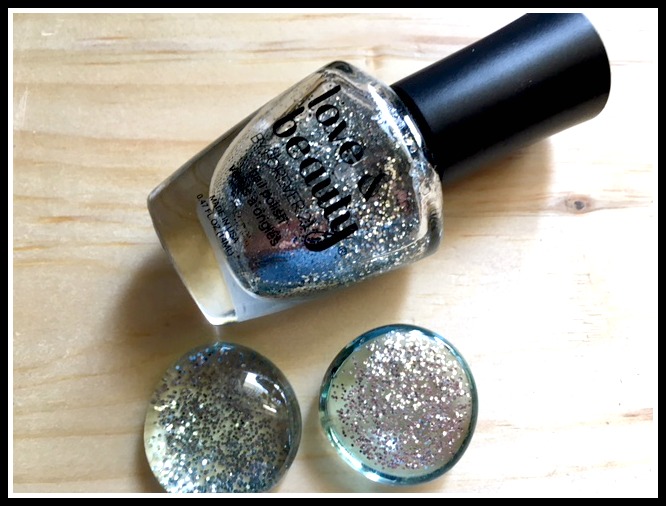
If you paint the flat bottom side of the stone the glitter shines through so you only need to paint one side. You could do a similar effect by putting glue on the stone and dipping it in a bowl of glitter. We went with nail polish which dries so quickly and we have lots!
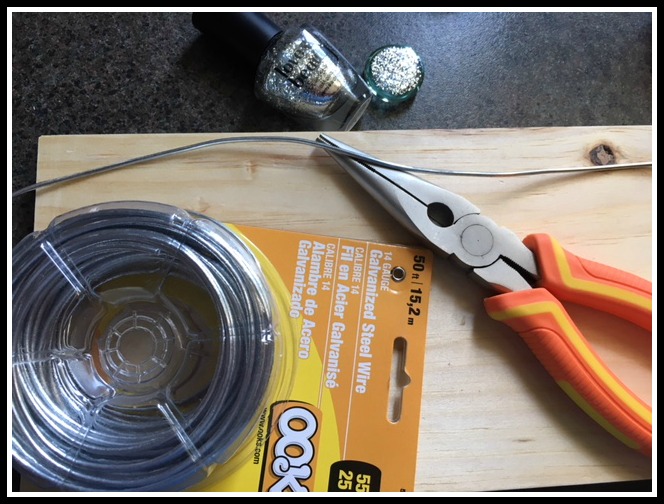
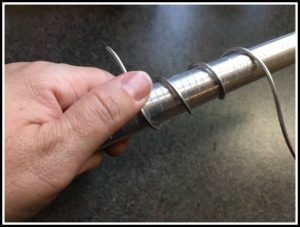
After your stones or marbles are ready, cut a 12 inch length of wire. We used 14 Gauge Galvanized Steel Wire. You can cut your sizes longer or shorter depending on your own preference. At times the ends can be a bit sharp so protect your surface by using a scrap of wood or a cutting board.
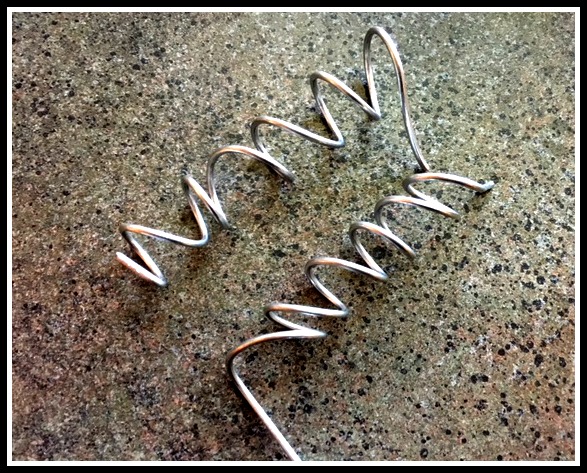
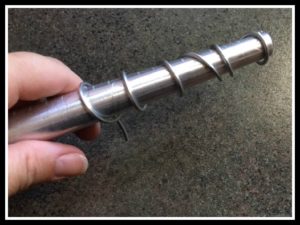
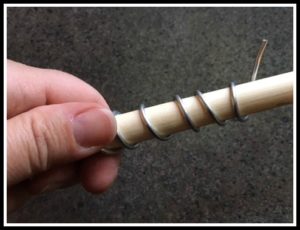
If you don’t have a jewellers mandrel you can look around the house for something similar. I had a wooden dowel that looks just like the handle of a wooden spoon. Find something to wrap the wire around and use the pliers to further twist and squeeze the wire into the desired shape.
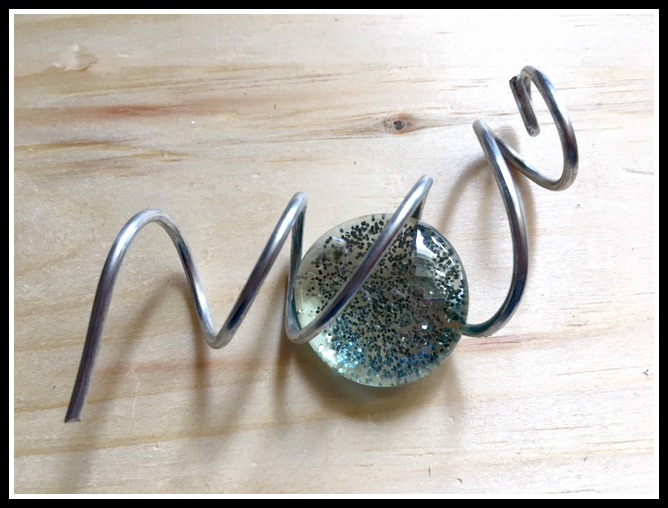
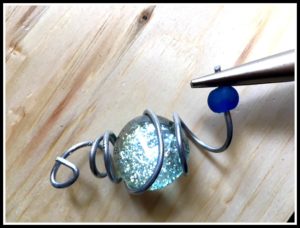
Using flat glass decorative stones will require you to flatten the wire slightly to hold it in place. If you are using marbles the twists will be nearly perfect for sliding the marble in and pinch the wire slightly to hold it in place.
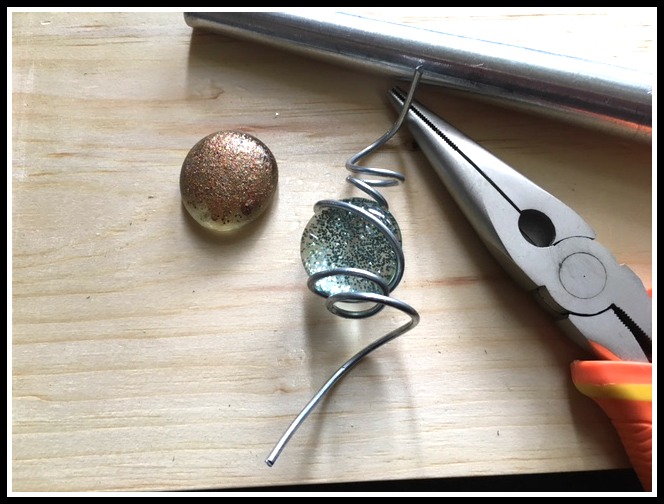 My first attempt at this was a bit frustrating. As I pulled one part of the wire the shape would change and the stone would fall out. But then I got the hang of things. Once you see how cool it looks as the spiral gets a bit crazy it feels like your making a real piece of wire art!
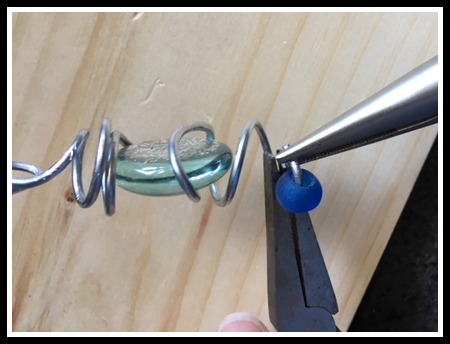
You may need to use a use both of your pliers to twist the wire how you want it. This will help to focus bending a particular section of the wire without affecting another part of it that you are already happy with.
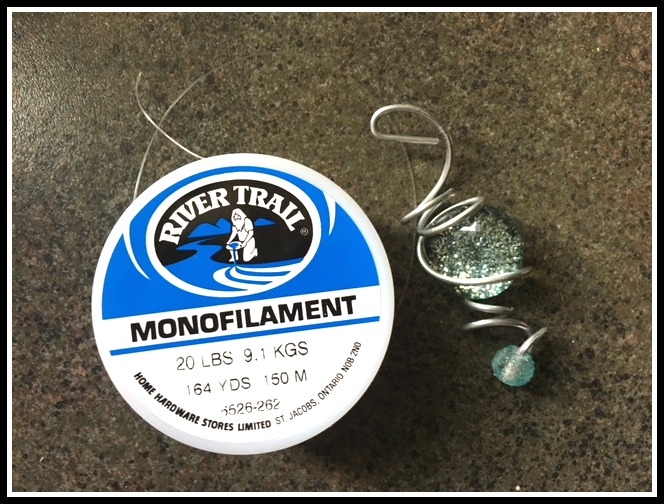
Cut a length of clear fishing line. This is a must have for your craft supplies if you don’t already have it. You can get fishing line from the hardware store, craft store and dollar store. It has many uses including bracelet making or hanging decorations from the ceiling when your having a party.
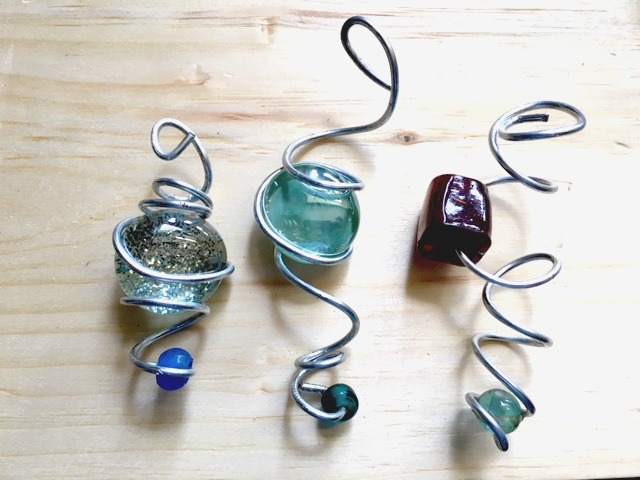
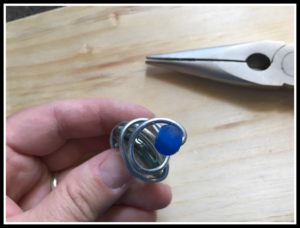
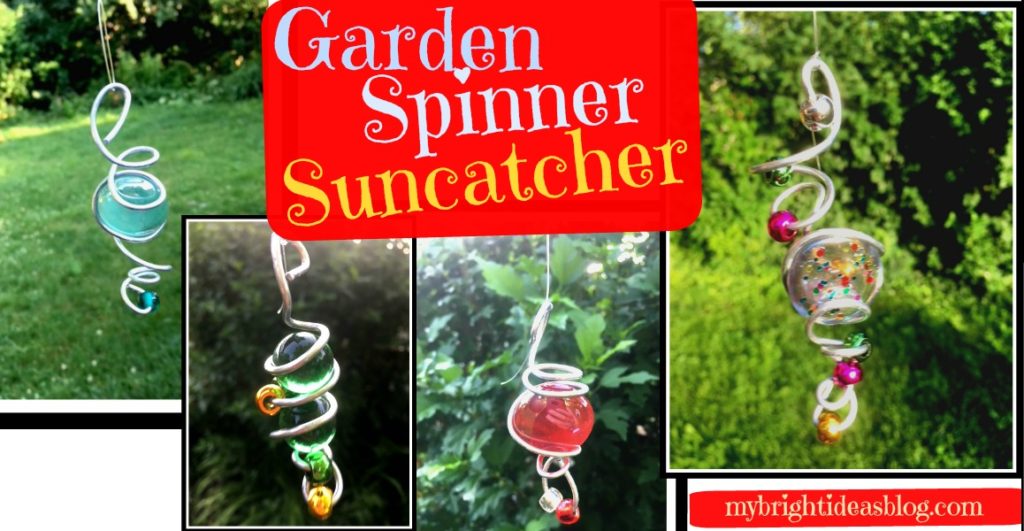
I like how each one turns out completely different. Shape the wire in a tight spiral or loose and whimsical. Add a bead on the end. Or several beads throughout the wire. Use a giant bead instead of a flat stone. Or use marbles!
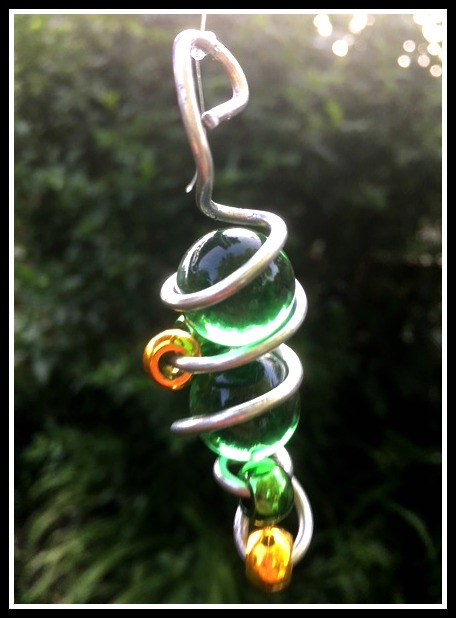
These are dollar store marbles that you might put in the bottom of a vase. I need to locate some play marbles and see if we can find some cool ones.
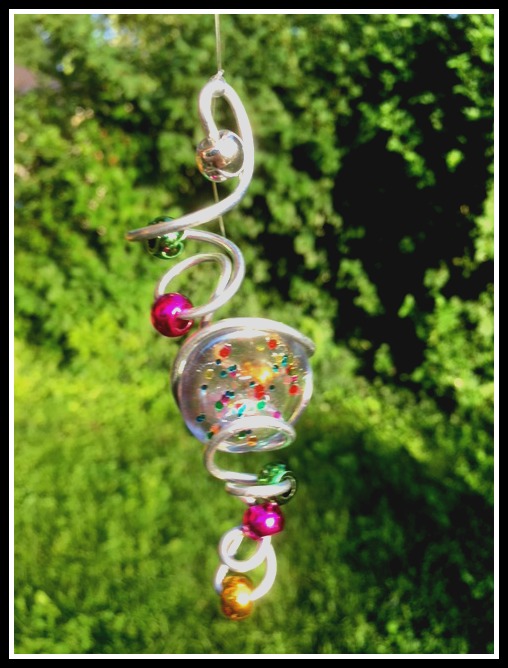
These shiny beads are metallic pony beads and very inexpensive (around $3 from Walmart if I remember correctly)For this wire project the hole needs to be fairly wide. Choose beads with big holes if you are using glass beads. I had these left over from a previous bracelet making project. The nail polish used here is a speckled multi coloured one. It looks fantastic in the sun!
So there you have it! Every one of these turns into a unique bit of wire art. Hung from a branch with fishing line will have it spinning in the breeze.
I hope this inspires you to make some wire art suncatchers/wind spinners for yourself. I just made 10 and I’m so pleased with these I think I will keep on making them and try selling them at the craft table at work.
Don’t you love it when a craft exceeds your expectations! You really should try this!
…
Paint Old Concrete for a Colorful Patio Makeover
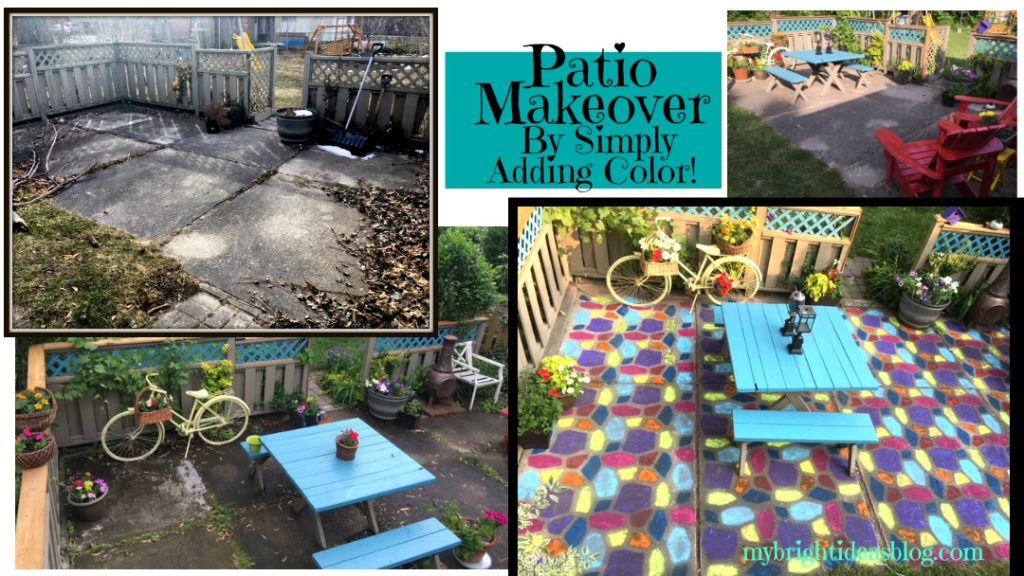
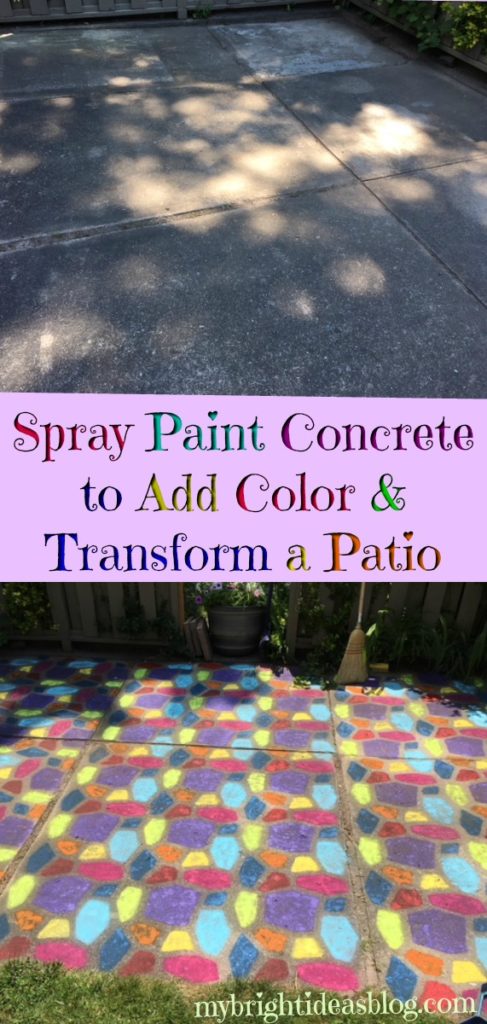
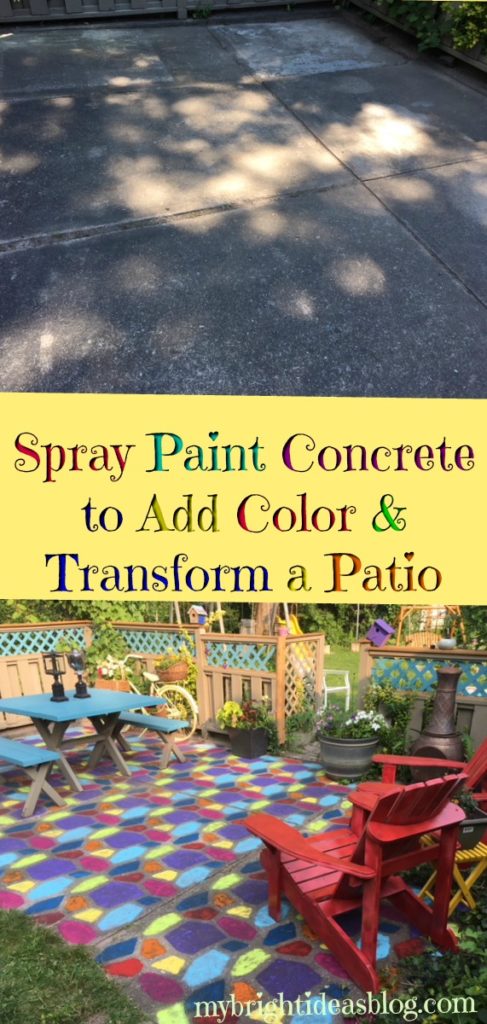
I may have taken things a little too far this time! I have been adding color to a very beige and grey backyard bit by bit. This weekend I went hog wild and I literally spray painted my tired old cement pad.
Our house is rather old built in the 1950’s. Its a mystery at what point they would have added this concrete pad and privacy fence but its safe to say it was a long, long time ago.
Our patio is approximately 232 inches by 135 inches or 3.5 meters by 5.9 meters.
It has 4 sections at various widths 51 inches 52 inches 67 inches 62 inches. I worked in sections. I was done three sections when the spray paints started running out.
You will need:
- brooms, dust pans
- power nozzle on your garden hose or power washer
- a concrete mold
- 9 or 10 colors of spray paint (expect to pay approx.$7.50 per can of paint)
- clear concrete sealer
Before you get started you need to clean every bit of your concrete…
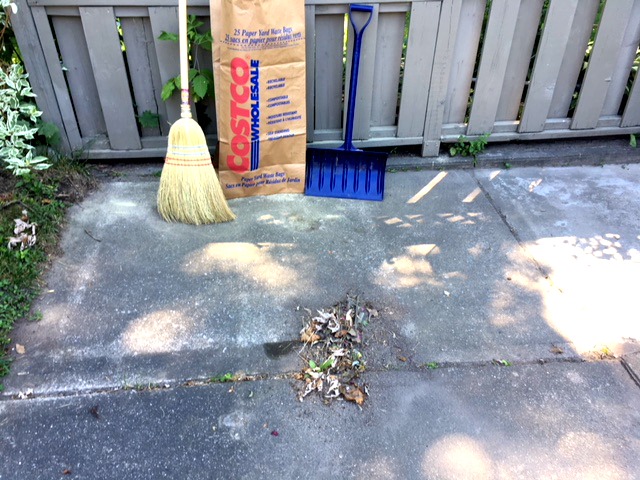
In order to successfully paint concrete you must clean and prep the area properly. This means going over the surface to remove all dirt and debris. Our patio had lots of that!
All the credit goes to my father in law for digging all the grass and weeds out from the cracks in the concrete slabs. New bits of nature are constantly blowing through the air so even during the process you may need to re-sweep. So keep a dust pan and broom or whisk handy through the entire process.
Plan on spending at least an hour on the clean up process. First I used the corn broom and a kids sized snow shovel for my dustpan. Then I used an old kitchen broom for finer bits of dirt. Then I used a flat broom for a final run over to see if I had gotten it all. To be thorough now consider if any areas need to be scrubbed. I had two areas where there were potted plants with thick mud caked onto the ground under the flower pots-it would not budge. Scrubbing with soapy water will tackle this…or use a power washer. Then you will need to wait for it to completely dry.
If you leave dirt on the concrete the paint will stick to it and likely wash away the next time it rains so don’t skip the cleaning stage.
Gather the Supplies: Concrete Mold and Paint
What is a concrete mold?
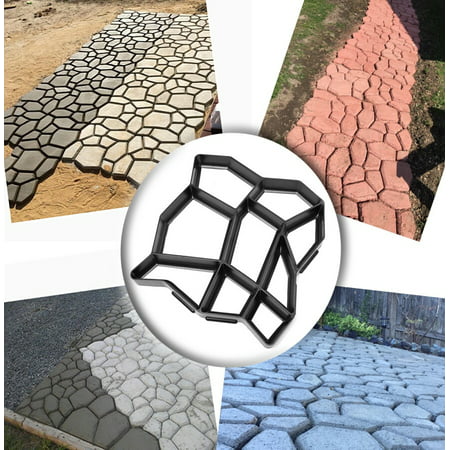
A concrete mold is typically used with quick-setting concrete pre-mix to create cobblestone walkways or patios of any size.
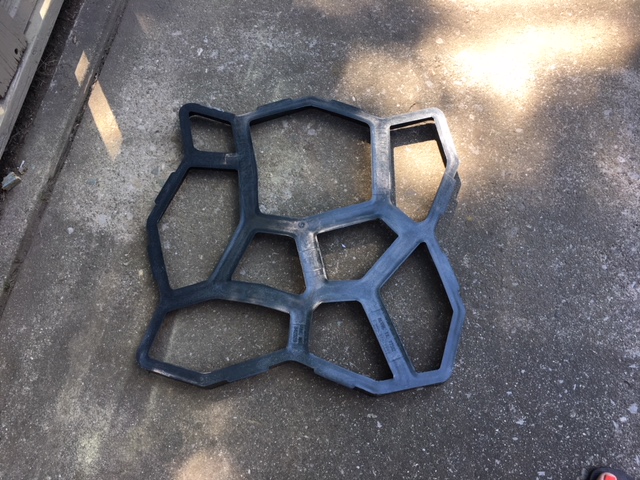
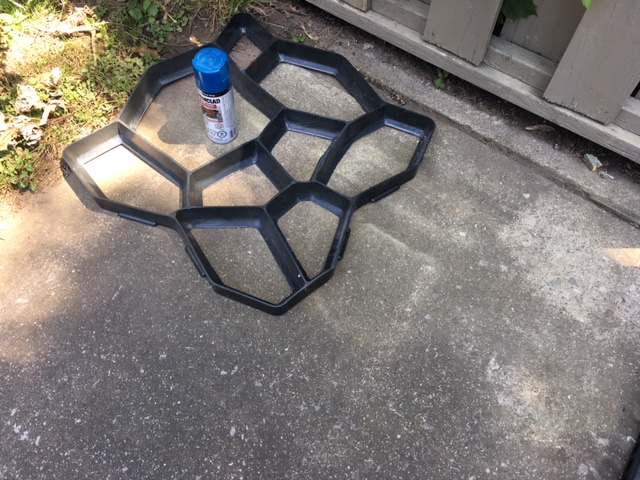
If you were pouring concrete into this mold you would want to have it as pictured above (wide edges upwards) but for spray painting we want to have the wide part on the bottom of the mold. This will create a tiled grout effect.
Where does one buy a concrete mold?
I have had this mold stored for the last 5 years! I bought it from Lee Valley with the idea of making a concrete path in a section of my backyard. However, I took one look at the bags of concrete that I would have to haul home and mix and thought it was best to put it off for a bit….lol. That sounds back breaking!
I have looked at the website and Lee Valley does still sell this mold for $34.50. Its 20×20 and very sturdy. Here is the link. http://www.leevalley.com/en/garden/page.aspx?p=10339&cat=2,2180,33222
If you aren’t near a Lee Valley store, you may need to investigate if your closest hardware store does carry it. It looks easy enough to purchase online but harder to find in actual stores.
Here is a similar one at Walmart.com. https://www.walmart.com/ip/17×17-Inch-Pavement-Mold-Irregular-Concrete-Stepping-Stone-Patio-Paver-Mold/163739522
Possibly a cheaper alternative would be to take a piece of plastic and cut a pattern out with an exacto knife. This would be like creating a stencil. At my local dollar store they have thick pieces of sturdy plastic in the craft section that looks like a big placemat. This is meant for a work surface for crafting kids so they don’t wreck your table. I could see this being cut up as a stencil. Just a thought!
Next you’ll need to choose the paint!
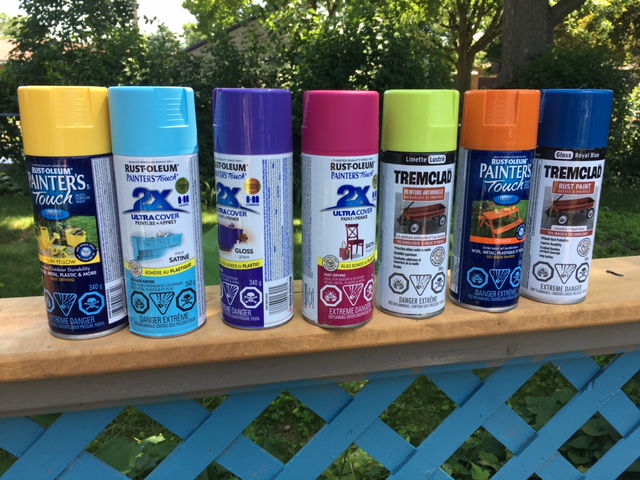
I started out with these 7 colors but after the first section decided to add a red spray paint that I recently used to paint my Muskoka chairs an awesome red.
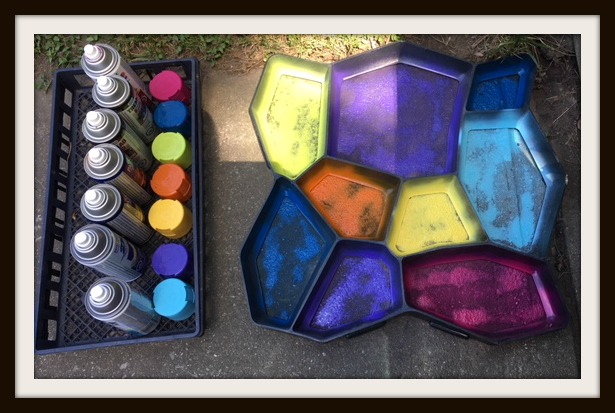
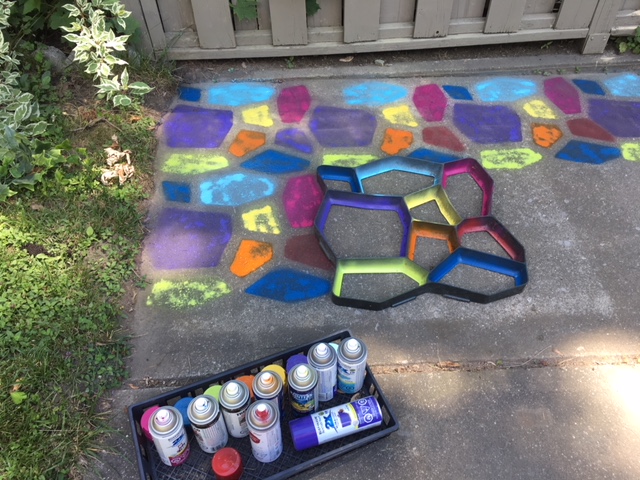
As you can see the lime green and sunshine yellow colors did not have the impact that awesome royal blue did. Lets give a shout out to Tremclad Royal Blue for its awesome job covering concrete on the first try. Yellow and lime did get a second coat once everything was dry. I didn’t actually mind the faded effect it had since colored tiles or bricks are not perfect. But then I wondered if it will fade with the sun and snow so I thought that I would want to make it darker by going over just the yellow and lime the following day.
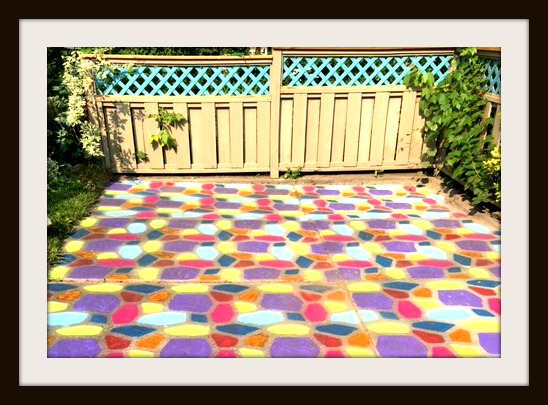
Here I am at the 3/4’s done mark and very pleased with myself…but running out of some of my spray paints.
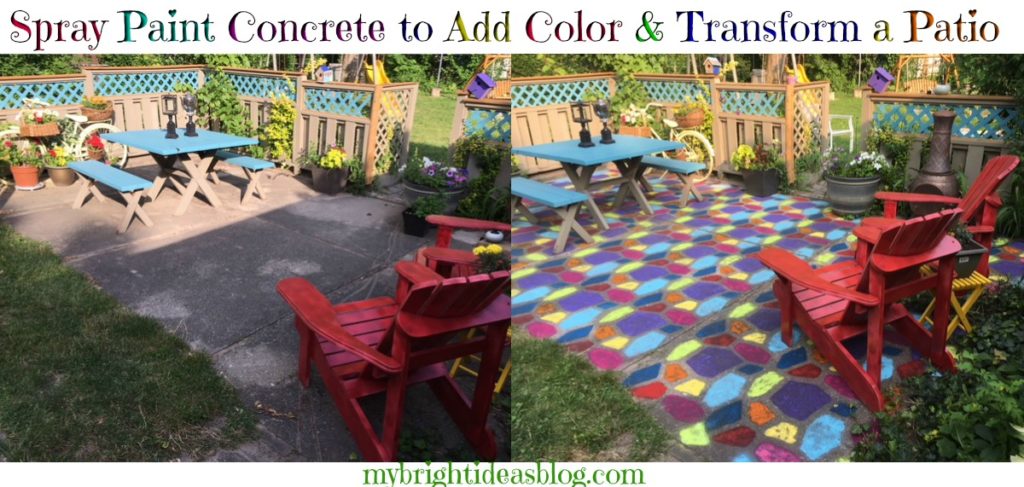
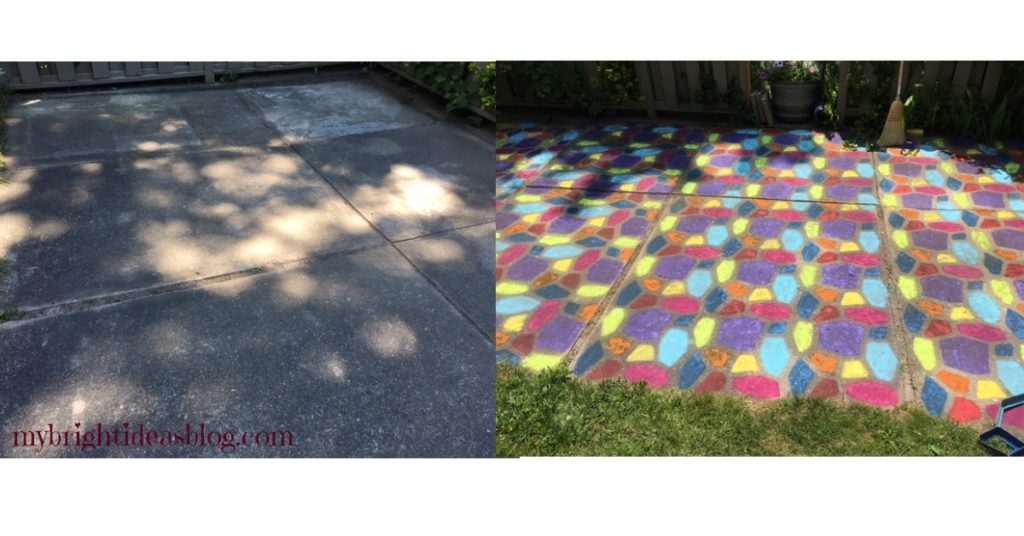 Here is a good picture from before and after the paint. Concrete doesn’t need to remain bland grey. The hardware store has several options for painting cement. If this is a bit too bright and busy for your space, you could do it in shades of green, brown, copper, charcoal etc. Pinterest also shows several techniques using a stencil effect. Or just painting a rectangle with a pattern on it so it looks like a carpet. So cool!
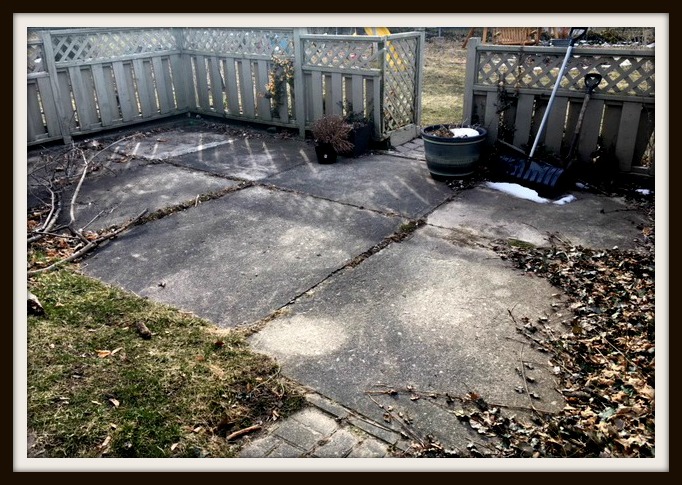
Here is the patio in the early spring with the last of snow melting. All the garden furniture packed away for the winter and the formerly-lush ivy looking creepy and brown.
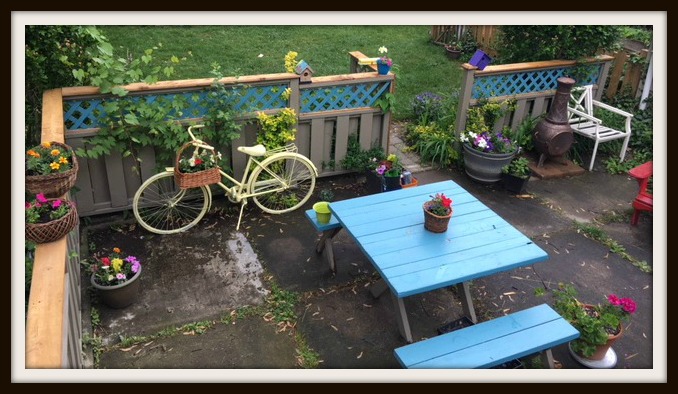
In May and June I was having a lot of fun adding color by painting a few things, but the patio concrete was pretty ugly grey and not cleaned up since the spring.

This is a cool angle from the deck! Now that I have put all the furniture in place….and I realized I forgot to put the clear sealer on top. Oh plumpers! I was so eager to see it all come together I completely forgot! Tomorrow is a holiday so…hubby is home to help me remove it all again. I will start early before the temperature gets too hot. I’m hoping that with the sealer on top this color will stay vibrant and last through the seasons. This is July 1st 2018. I’ll follow up with how it held up over the years.
…
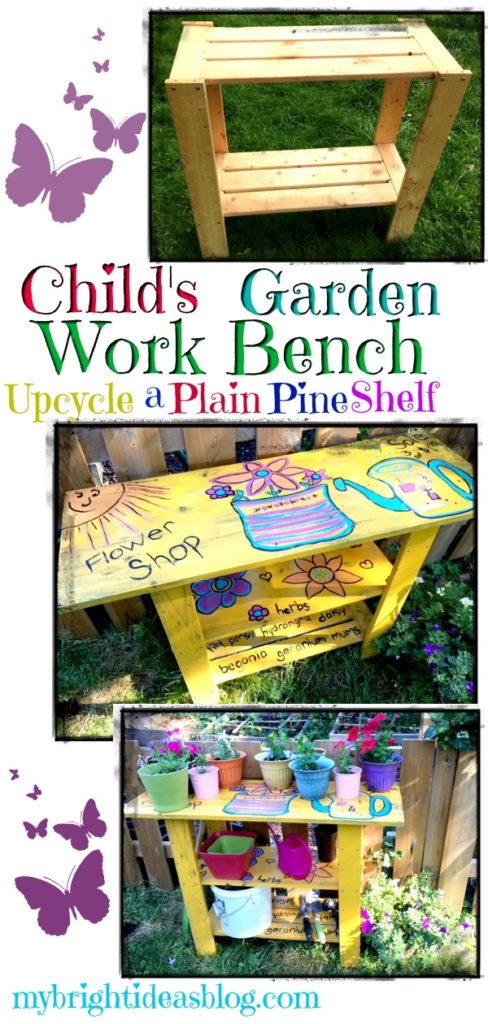
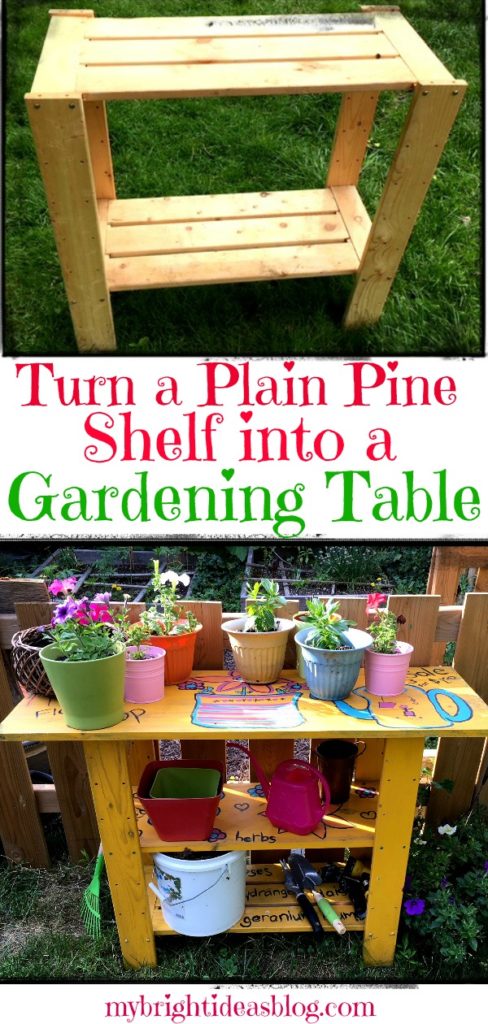
Make a Garden Work Bench / Potting Table
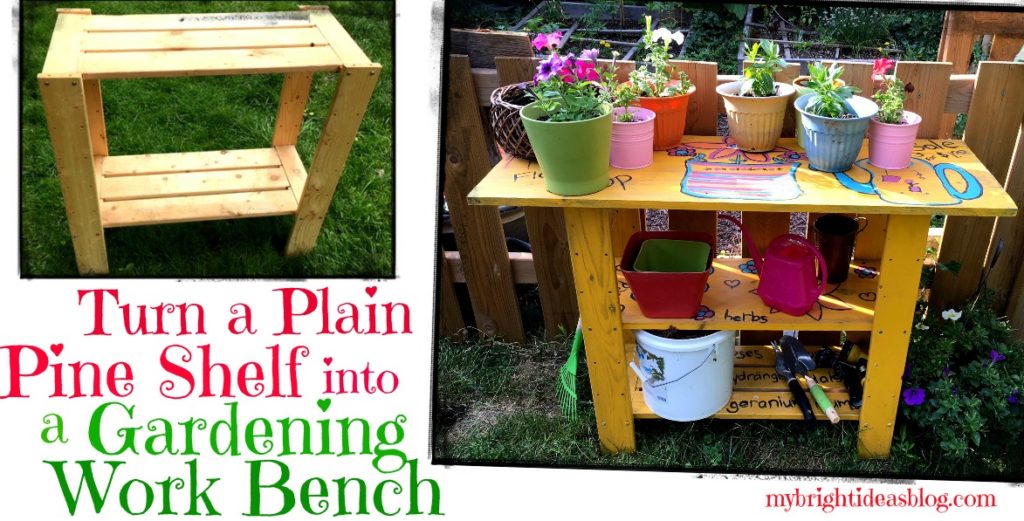
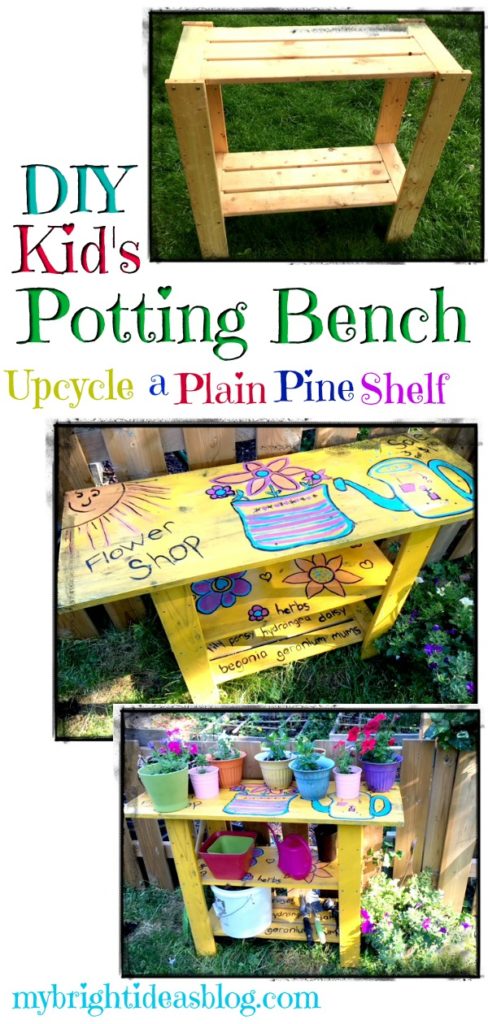
This is an easy DIY project for the inexpensive wooden pine shelves in the back of your closet that you’ve had for years. I was staring at mine thinking about getting rid of this plain old shelf and then I thought what if I added another shelf, made the top bigger and painted it a bright color and turn it into a garden potting station for the kids.
I have another one that I could turn into a lemonade stand using the same idea. I’ll let you know if that turns out!
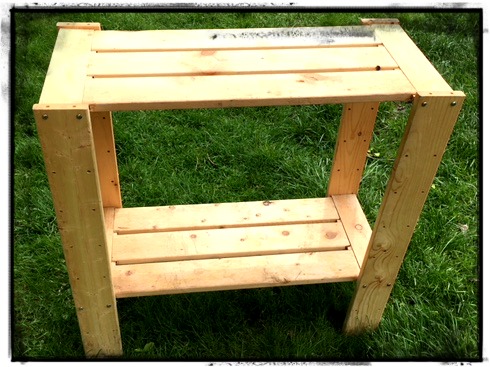
This is actually an old project I made years ago so some of the details are a bit foggy. This shelf was holding our camping gear. Its really only good to hold very large things on the bottom shelf because it doesn’t have a middle shelf. It turns out that its pretty easy to add a shelf by having a board cut to size.
You will need:
- a bare wood pine shelf
- pine cut down to 12 x 30 and 16 x 42
- 16 x 1 inch deck screws and a drill
- sandpaper
- outdoor paint
- paint brushes
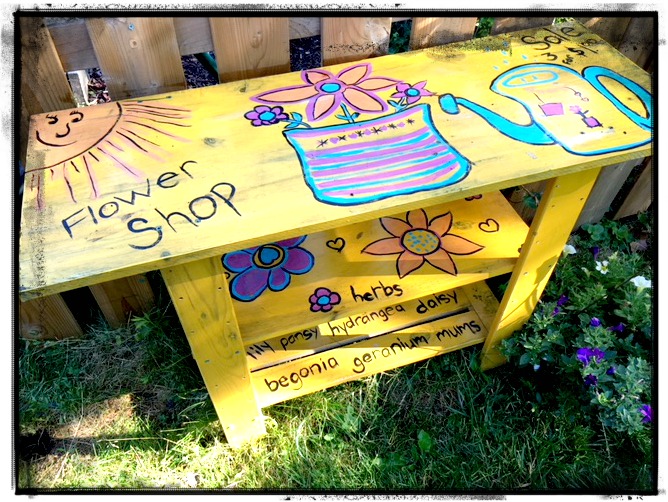
As I said this project was done 3 years ago so I’m going by memory on the details.
The middle shelf on mine measured 12 by 30 inches (30 by 76 cm’s) …. Your shelf may not be exactly the same so measure yours before having the shelf piece cut.
The piece on top is 16 by 42 inches (40 by 107 cm’s). Hopefully you have some wood scraps you can use in your garage left over from another project. If not they will cut the boards for you at the hardware/lumber store.
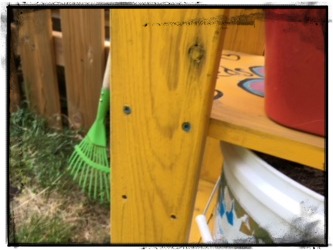
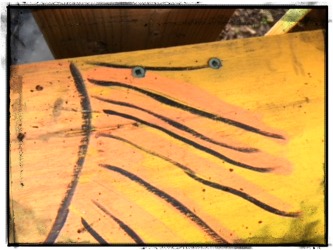
The boards will need to be drilled in place. I used the pre-drilled holes and attached the middle shelf with 2 deck screws on each corner. I put 8 deck screws in the top of the table to attach it to the vertical boards of the shelf. The nice thing about a work bench is it can be a bit rough-so I didn’t sink the screws and fill the holes.
Next the entire shelf will need to be painted. Our shelf is outdoors all summer and is stored in the garage for the winter. I used left over paints in my basement that were meant for other projects. The bright yellow paint was a miss-tint that I bought for $8.00, several years ago. It needed a lot of stirring before I could get started. Follow the instructions on the paint tin.
After I had done 2 coats of paint we were able to decorate it. The girls love to spend time playing flower store! When I purchase new flowers and vegetable plants at the garden centre they gather all the hand tools, seeds and the new plants and play at shop keepers for hours. I finally bought them some fake flowers from the dollarstore for their play store so I could get mine into the garden!
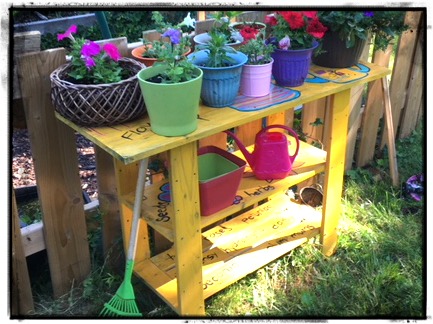
This year they were really involved in the planting of the newly purchased plants and not just pretending to sell them. Their planters are doing really well! We have to keep an eye on our potted plants since a few squirrels that are digging around
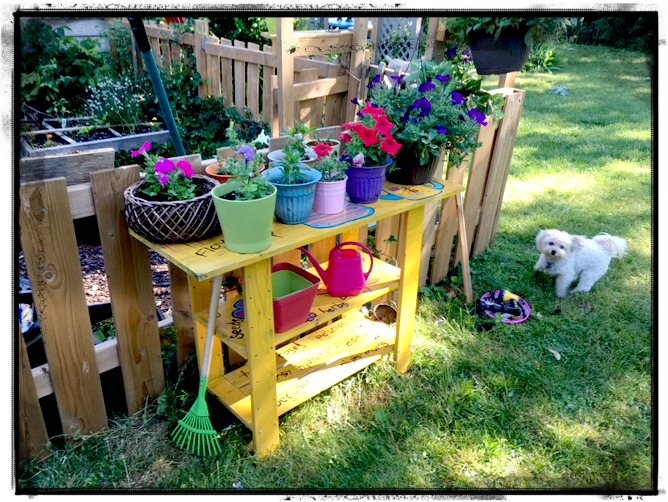
Gemma our Yorkie-Poo snuck into this photo. This photo shows the fence around our vegetable garden. This keeps the dogs from digging in the dirt. There are also some nice bunnies in there who nibble on the lettuce in the square foot gardens.
We have our own Floppsy, Mopsy and Cottontail!
Enjoy making yourselves a work bench. Come to think of there is lots we can do with these bare bones shelves. Next on my to do list might be a lemonade stand….
Enjoy your projects, til next time!

…
Plant Puns on Painted Potted Flower Pots – Adorable Gift Idea to Make Them Smile!


