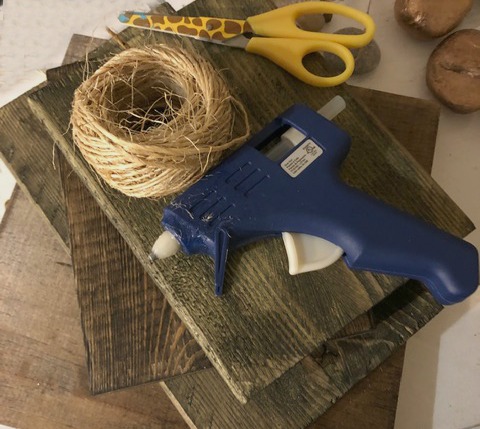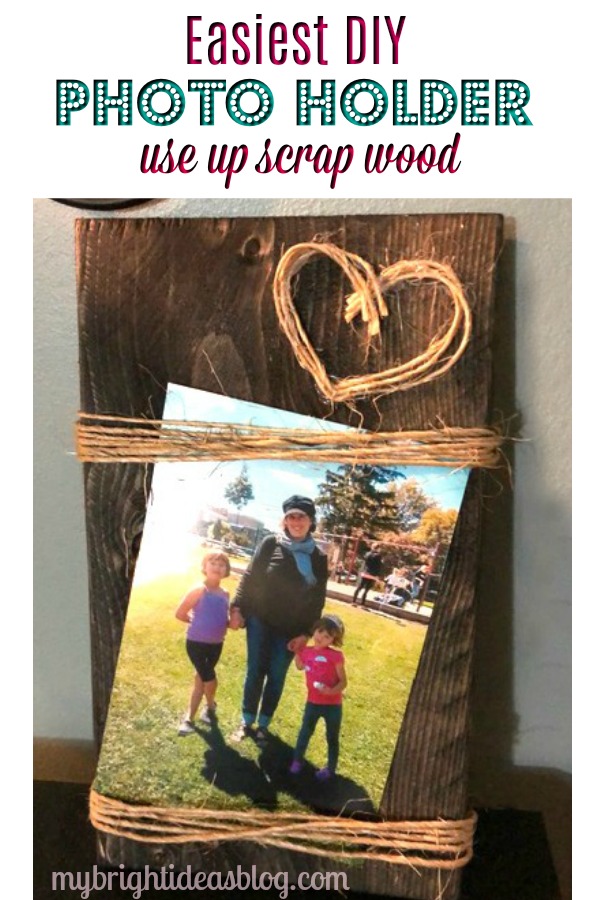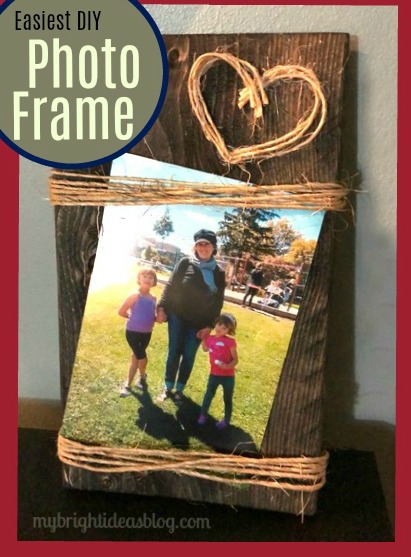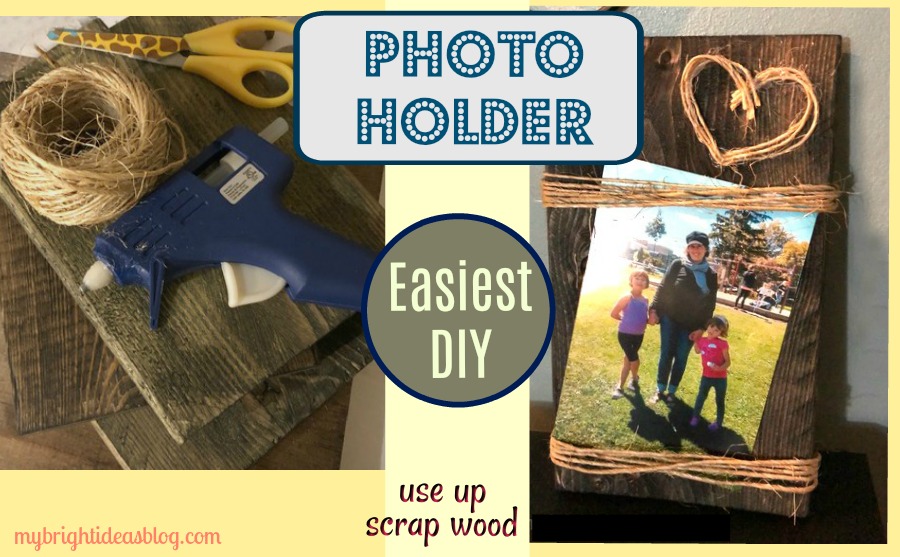
Let’s make a 5 minute craft that looks great-a rustic picture frame that holds a typical 4×6 photo.
Before the winter weather came in our direction I planned ahead for winter crafts by cutting up scraps of lumber and coating it with a bit of dark wood stain. You never know what sort of crafts could use a bit wood and hot glue gun. I’ll post some other wood scrap ideas at the bottom of the post.
Rustic Wood Photo Holder
You will need:
-
- a scrap of wood approx. 5 inches by 9 inches
- walnut wood stain
- rag
- basic twine
- hot glue gun
- ruler
- picture hook or eye screws
- 4×6 photo
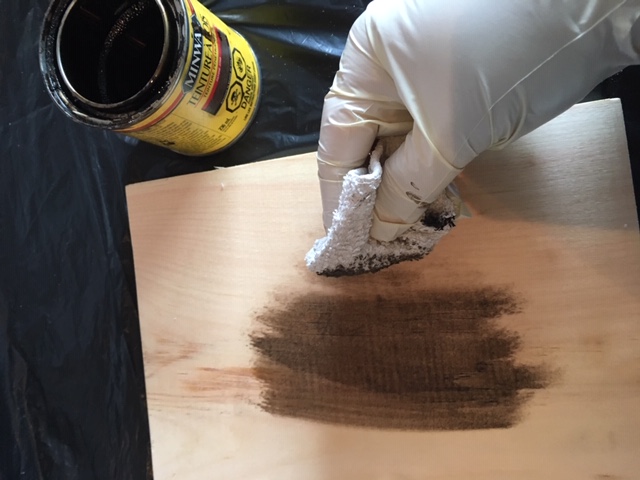
The piece of wood I used was a 1×6 board originally. In actuality its more like 5 1/4 inches wide and 9 1/4 inches long (13cm x 24cm). Use what ever you have this doesn’t need to be exactly the way I did it.
Stain the wood with a rag dipped into a dark brown stain such as Minwax Walnut or Jacobean.
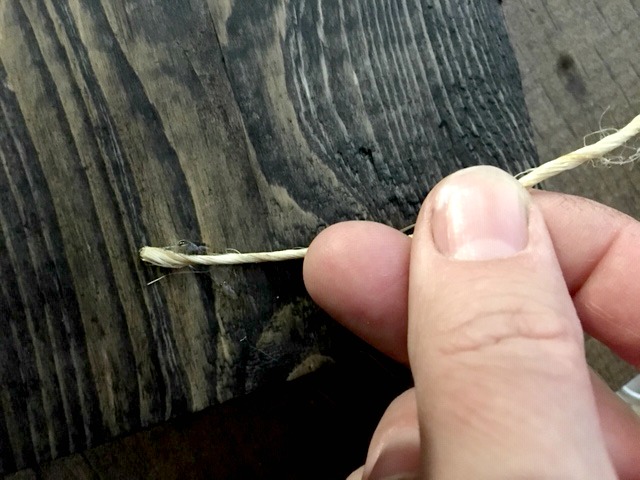
After the stain is dry, choose the better looking side to be the front. Turn it over and using a hot glue gun, glue the end of the twine to the back of the wooden board approx. 1 inch from the bottom.
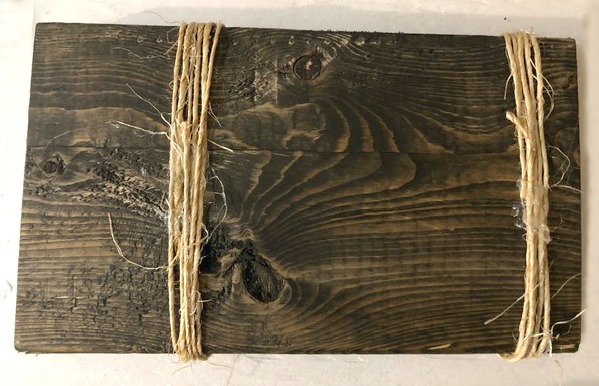
Wrap the twine around the board approximately 5 times keeping it fairly tight and adding more hot glue to secure each line of twine.
Repeat again 5 and 1/2 inches away from the first twine wrapped section. Have a 4×6 photo handy to test out the distance you would like the top and bottom of the photo.
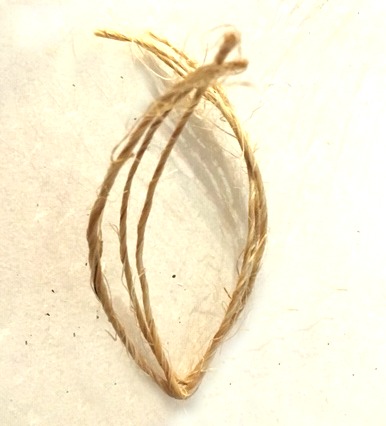
Take 2 or 3 strands of twine and cut to 7 inches long.
Bend the twine in half so there is a point for the bottom of your heart.
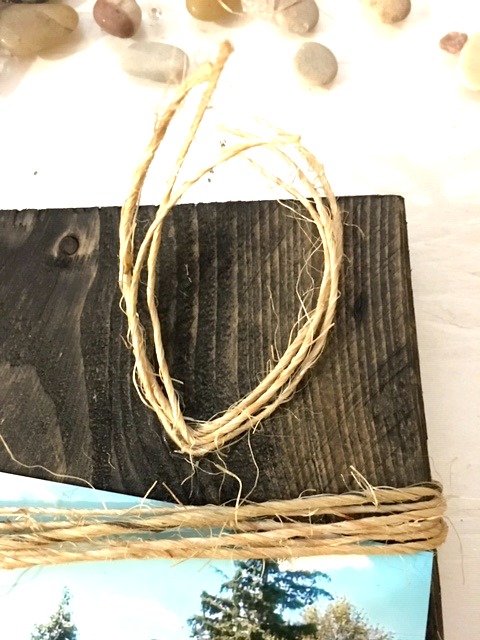
Add a dab of glue to the bent area of the twine and secure it onto the board. I added to the top right.
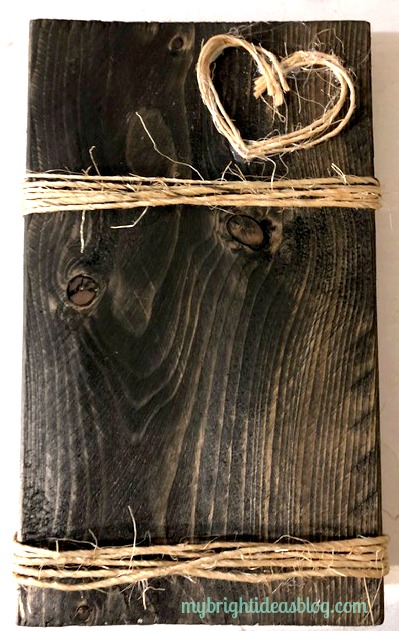
Add more small dabs of glue at the top of the heart. Use very little here because we don’t want it to dribble and show on the finished side.
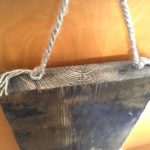
If you would like it to be able to hang up on the wall you could hammer in a picture hook. Another option is the screw in eye hooks and tie more twine or jute rope to hang it up.
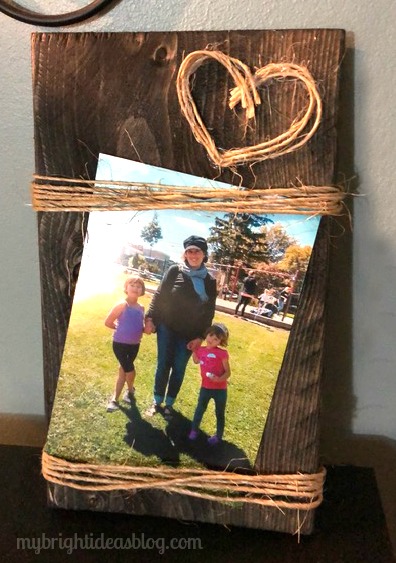
Add a special photo and give it as a gift.
I put this on the craft table at work and it sold right away! Fortunately, I have a stack of wood ready for more crafting. See the links below for more ideas for how to use up the little pieces of wood you have in your cut off scrap pile.
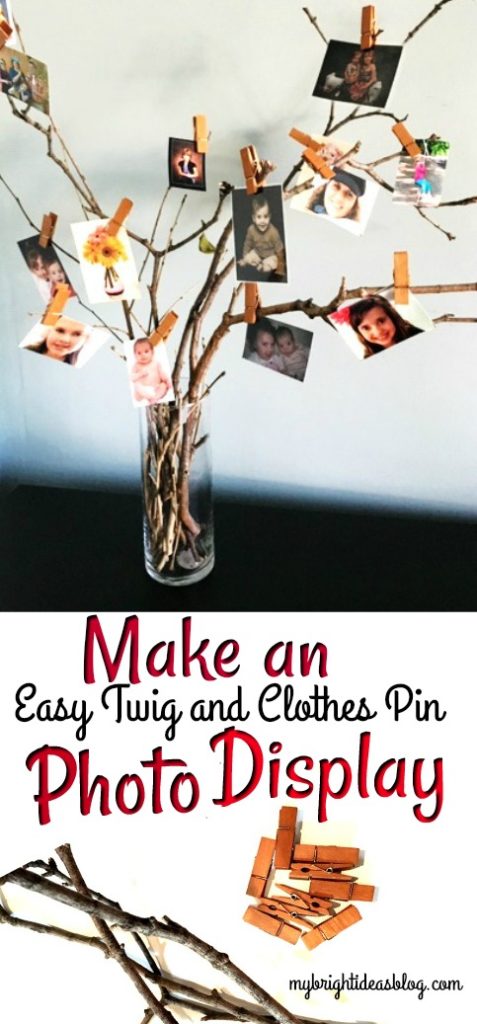
Make a Twig Photo Display
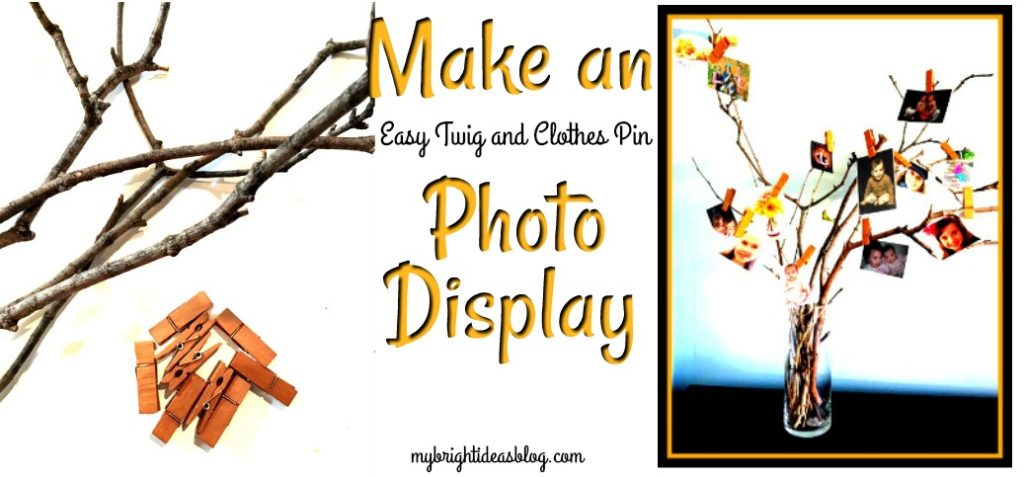
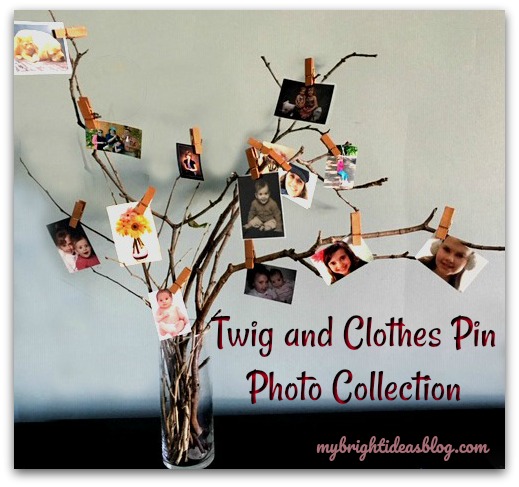
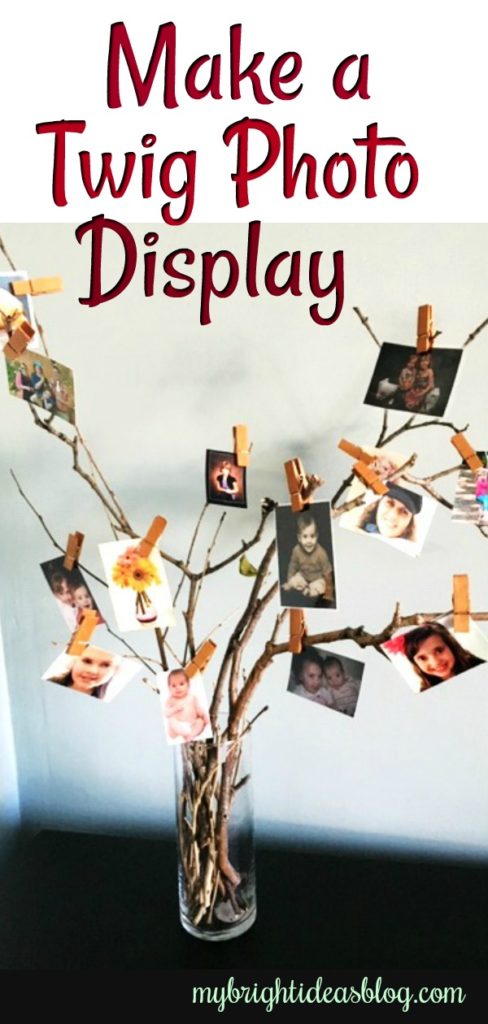
This is such an easy way to set up a quick photo display. It uses things you will already have at home.
I know this is my 4th twig project in the last 3 months but its such a fast, free and rustic product to work with. I have a particular tree that sheds sticks every time the wind blows. My last next door neighbour hated this tree. It made a sweet neighbour very bitter as it would litter those branches and bark all over their lawn too. She would say…that is a messy, messy tree!
What could I do but agree…..and make a craft with it! You know what they say….when life gives you lemons make lemonade.
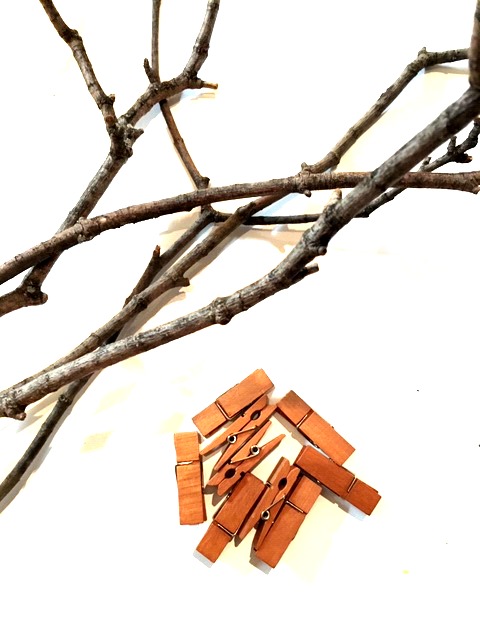
You will need:
- a vase
- sticks
- small photos
- clothes pegs
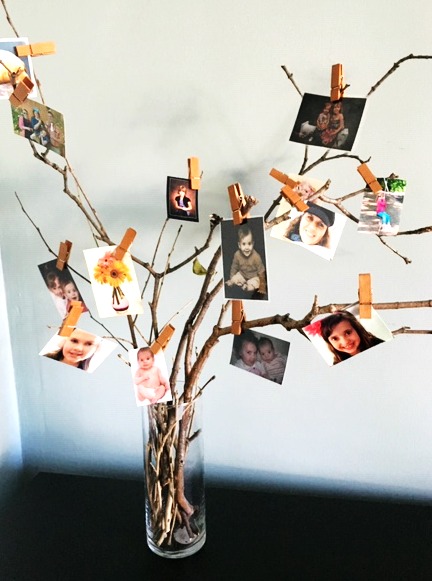
These clothes pins are from the craft store. They are a shorter version of a classic clothes pin with a coat of an orange stain. If you use regular clothes pins you could spray paint them or decorate the clothes pins to make them a little fancier.

Usually my posts are tutorials showing you how to do a project step by step. But I imagine most people can figure out that you put the sticks into the vase, clip the photos onto the sticks. Done.
If you have an open space on a table top-that looks bare, this could be a perfect solution.
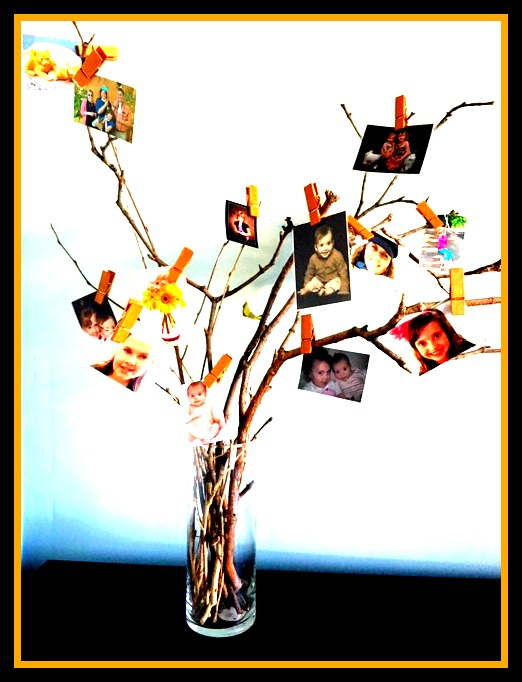
Thank you for taking a moment to pause by my twig-projects-filled blog! I hope you will check out the other posts I have done with twigs…or sewing…or…photo frames…
See you again soon!
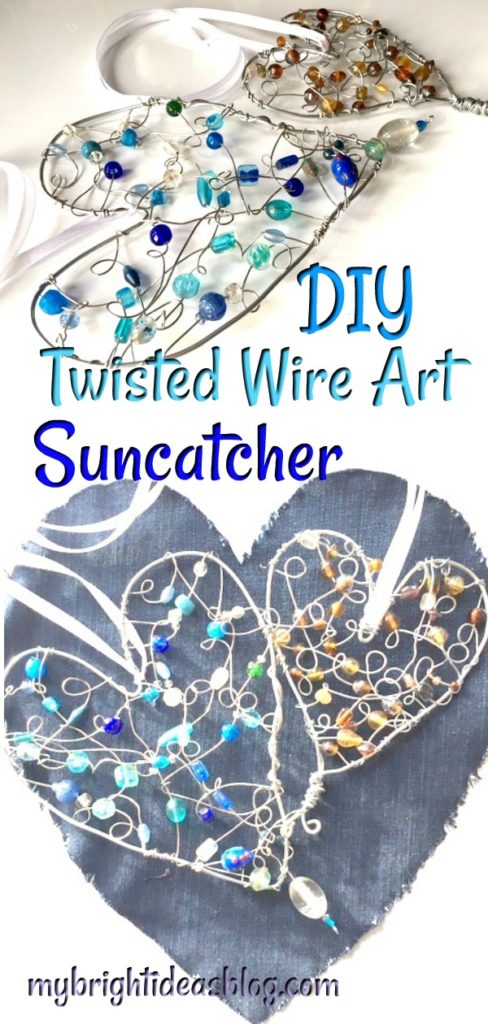
Twisted Wire Art – Love Heart SunCatchers
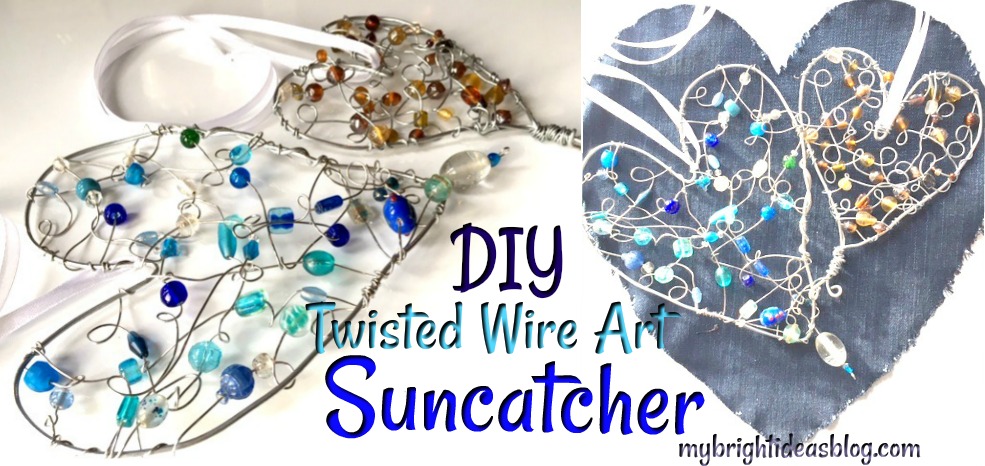
I have been excitedly pinning all sorts of “Wire Art Crafts” on Pinterest – But for some reason I’ve been nervous to get started….until now! This is my first attempt and I hope there will be many more to come! So let me show you how I made a beaded suncatcher!
You will need:
- wire (14 and 20 gauge wire)
- wire cutters
- wire plyers
- beads
- a cutting board or other desktop protection
- ribbon
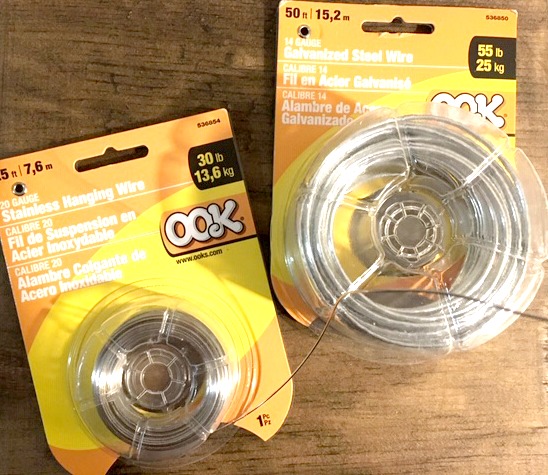
I recommend a cutting board because I don’t want you to scratch up your dining room table or kitchen counter or any other surface you craft on. Wire projects can leave sharp ends-which can do some damage.
For wire: I bought 14 and 20 gauge galvanized stainless steel. This is much cheaper at the hardware store than the craft store.
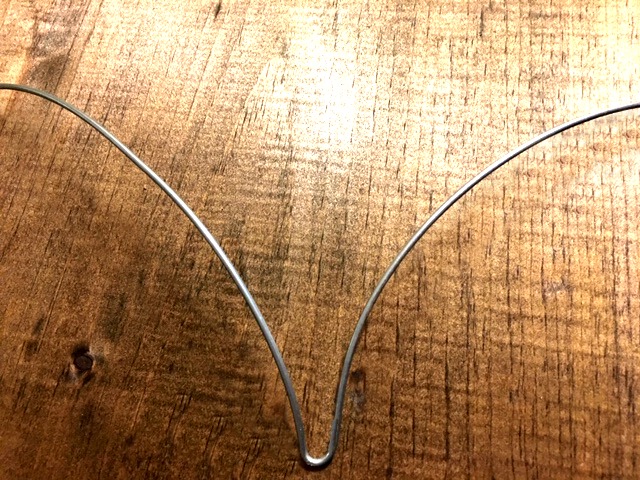
Cut a length of 20 gauge wire approx. 27 inches long (69cm). Use big wire cutters from your DIY tool box rather than jewelry making plyers. 20 gauge wire is thick!
Bend it in half so the heart shape begins to form the point in the top middle of the heart.
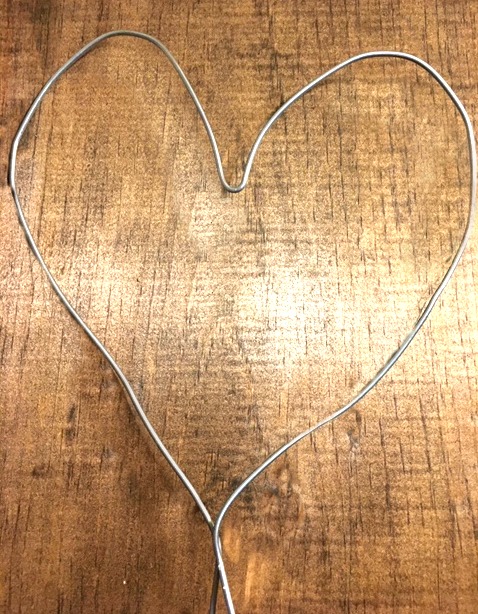
Gently manipulate the wire (with your hands not tools) to make the shape of a heart. Bring the bottoms together and twist.
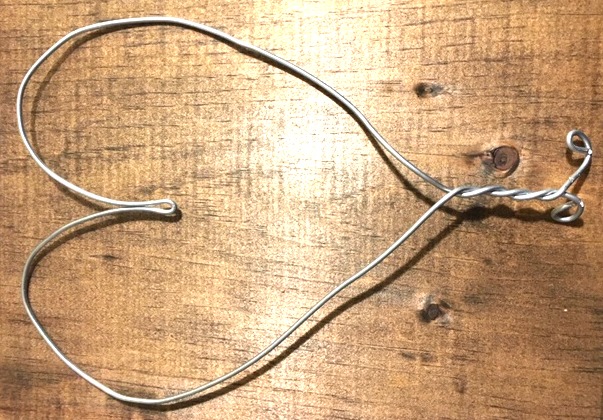
Keep twisting the bottom and rounding the ends.
Fast forward to see how the amber one turned out….
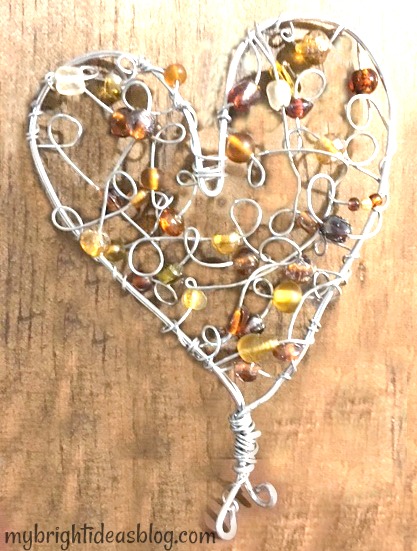
For the blue suncatcher I formed the wire into a heart and wrapped the excess on the side.
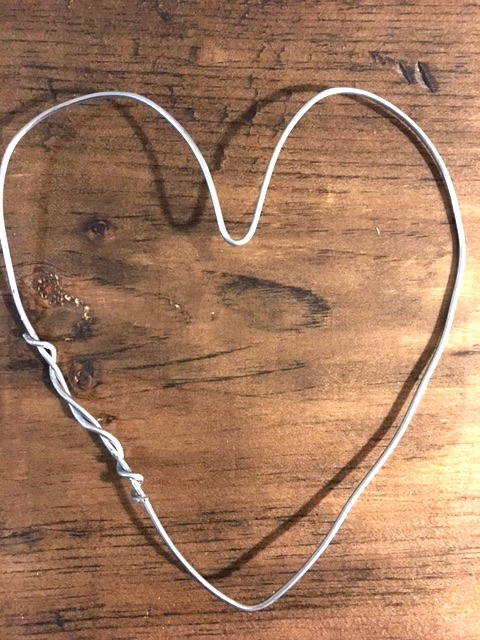
This is actually really hard on your hand muscles. Take breaks if you are getting achy muscles in your arms or hands. I think this looks a bit sloppy so I prefer the first option.
Now cut a piece of fine 14 gauge wire 30-40 inches long (90cm).
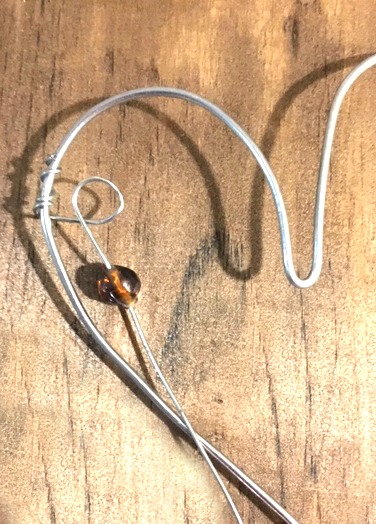
Start by twisting the fine wire around the side of the heart a few times and then wrap the wire around a round pen to make a loop. Slide the bead onto the wire and then make another loop around a pen. Have this loop face opposite direction.
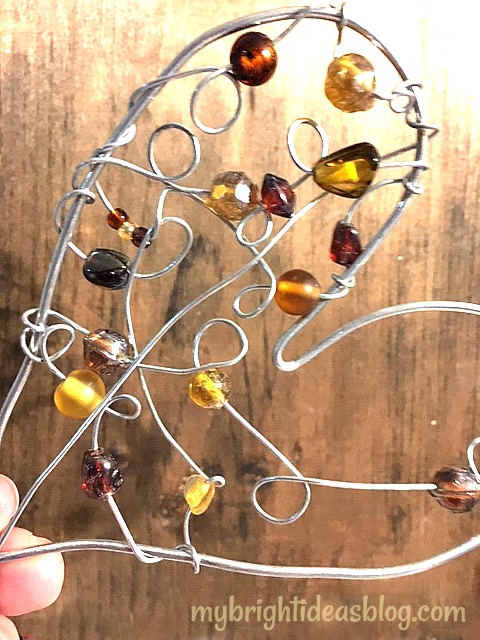
Continue wrapping the wire to make a loop and then bead it and next loop in the opposite direction. Wrap it around the side a few times and repeat making loops and adding beads, zig zagging over the heart. You may need up 3 yards (2.5 m) of wire for this part. This takes a bit of time.

When I finished this one off, I just wrapped the excess wire around the bottom of the suncatcher.
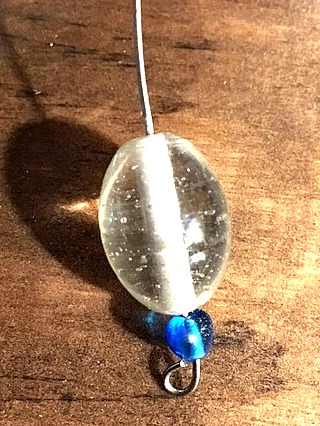
For the blue one I added a drop bead on the bottom. Cut a piece of 14 gauge wire 3 inches long. Twist the end around to anchor a few beads on. Wrap this at the end bottom of the heart.
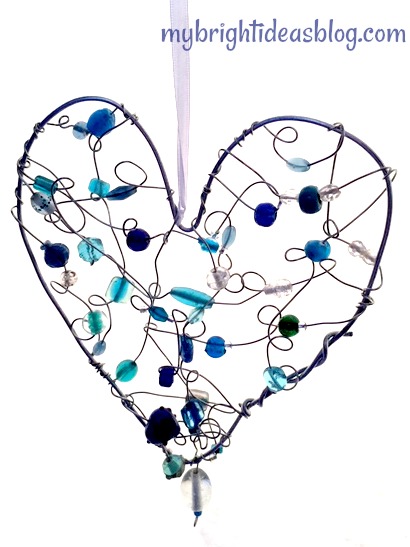
This is a great project for someone who doesn’t follow patterns well and likes to free style (Like Moi). It’s a random, twisting, original piece of wire art.
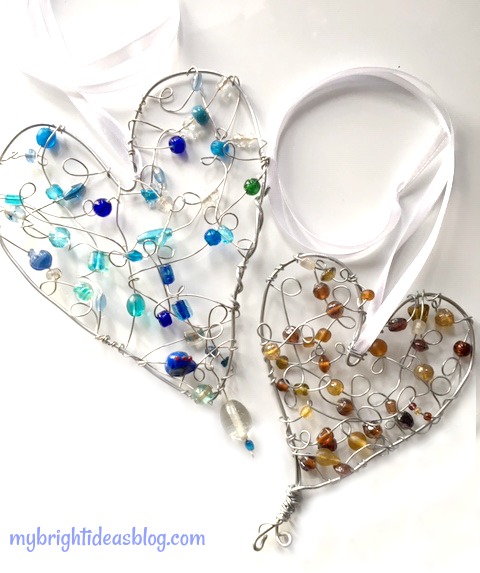
Finish the project by putting a bit of ribbon (or clear fishing line) through the top and tying it in a bow. Hang in your window!
I’m pretty pleased with my first attempts at wire art. I am eager to try it again soon!
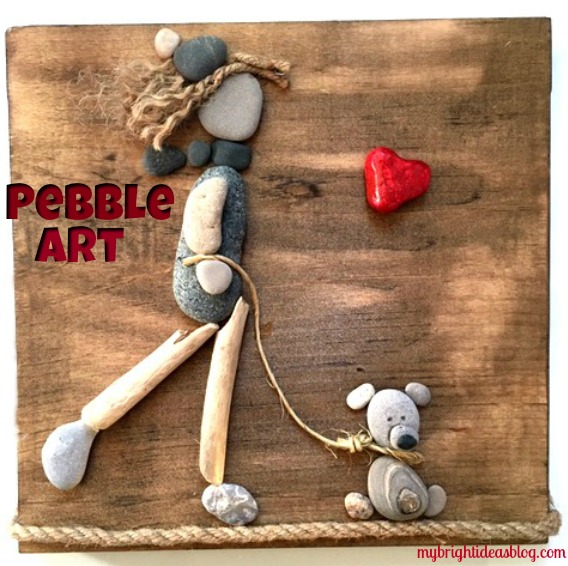
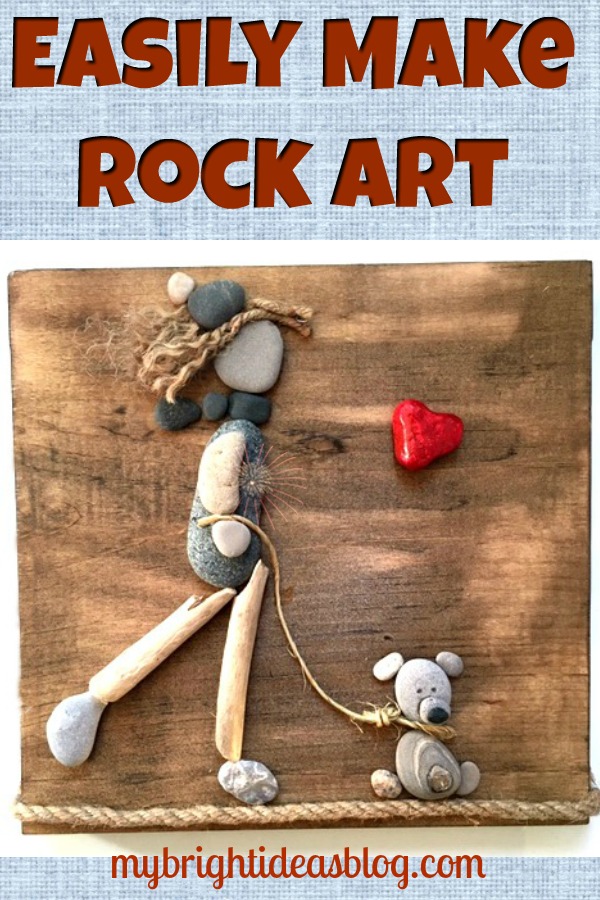
Pebble Art – A Girl and her Dog
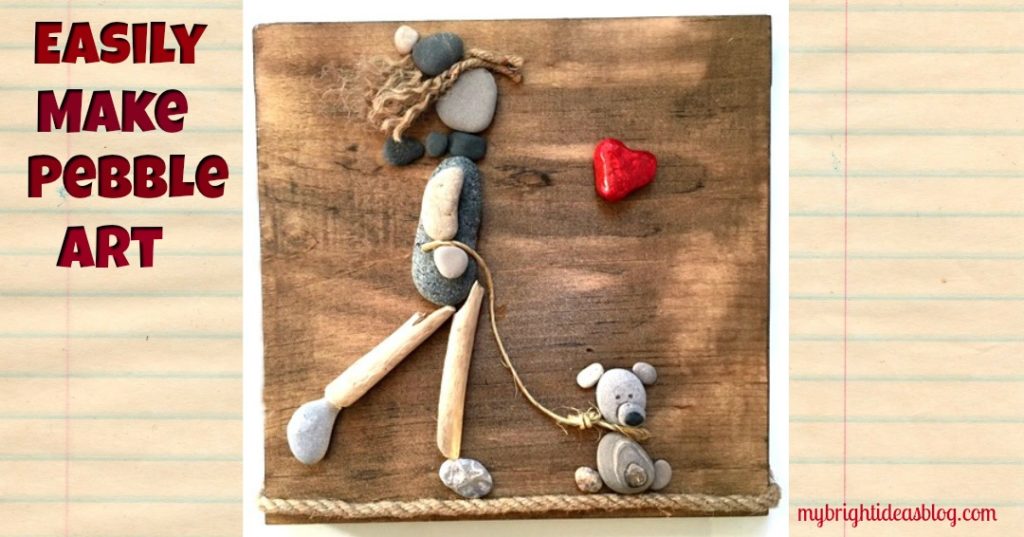
I have been wanting to make pebble art for months but I’ve been nervous to get started. How silly is that? It’s just rocks glued to a board for heavens sake?! Well today I finally went for my first of many (hopefully) attempts to make pebble art.
You will need:
- a wood board
- sand paper
- paint or stain
- rag
- rubber gloves
- pebbles
- industrial glue or hot glue gun
- twine
- jute rope
- red craft paint and red glitter paint
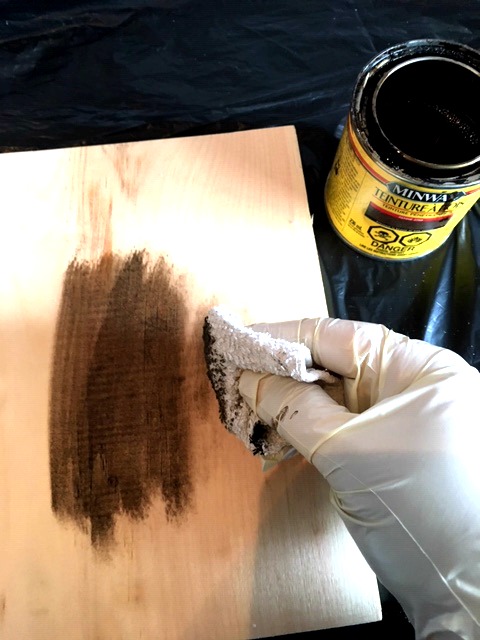
Start by preparing the board. Use sand paper to smooth out rough edges. It doesn’t have to be perfect just make sure the rough corners are smooth.
Apply stain, wearing gloves, use a rag to wipe stain onto the wood. In this project I used my favorite. Minwax “Jacobean”. I waited 12 hours for this to dry.
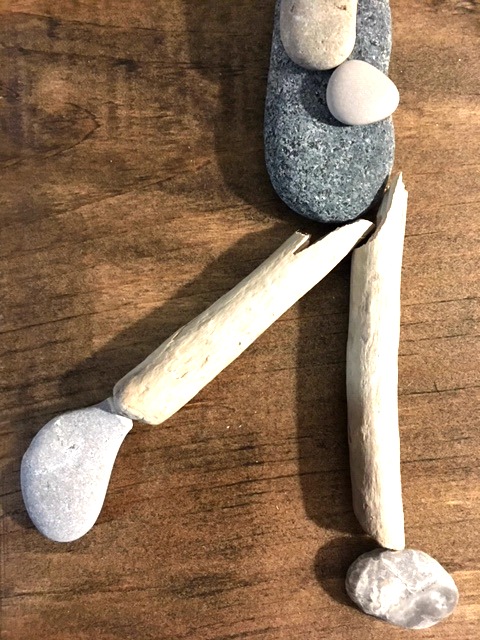
Next, lay out your stones to create your artwork. I broke a little piece of drift wood to become her legs. Rummaging through my treasured pebble collection I found a funny shaped rock for her foot.
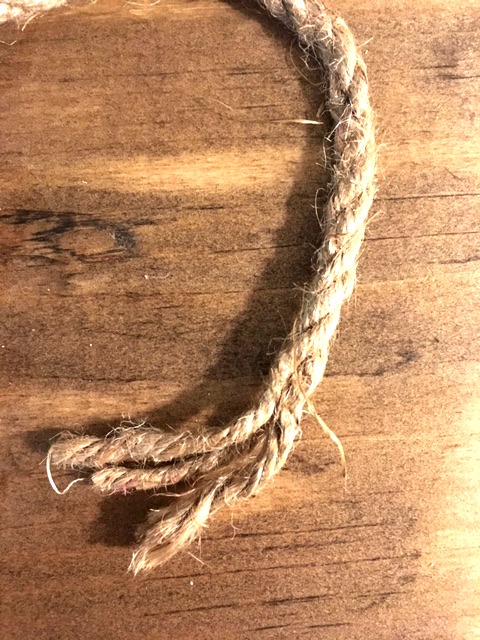
This piece of jute rope was a perfect scrap so I unravelled it to make hair for her.
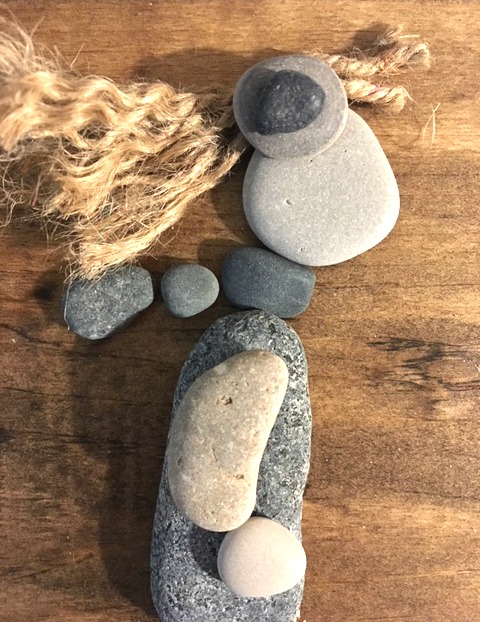
I used industrial strength glue “E6000”. It’s so much stronger than a hot glue gun. But it is stinky and dries slowly. Use in a well ventilated area.
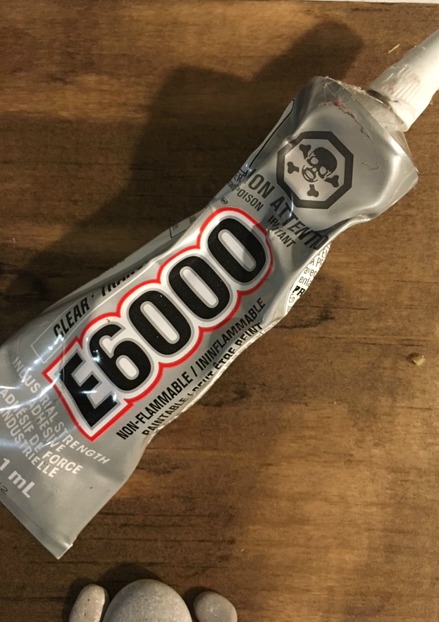
Did you crack a window?
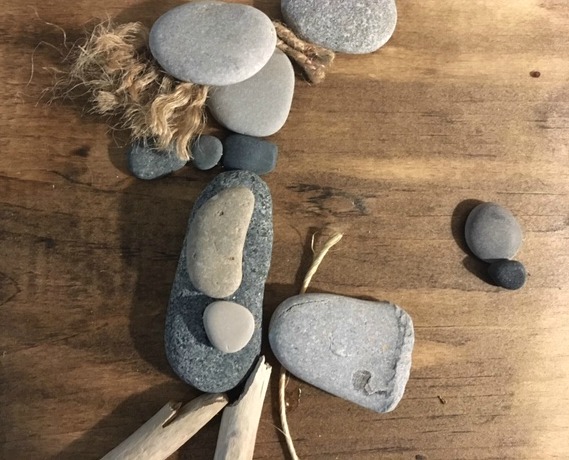
I needed to put some other pebbles on and around the hair to hold it down while the glue dried.
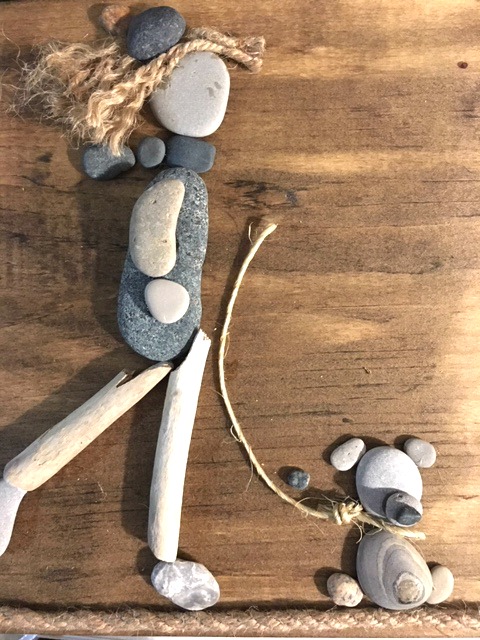
I tied a knot in a piece of twine and made it into the dog leash. At the bottom of the wood I glued a piece of jute rope to make a path for my girl and her dog to walk on. The ends were then tucked around the sides and glued down. (Okay, I confess, for this one part of the project I used the glue gun) I also added tiny dots for the dog’s eyes with a sharpie.
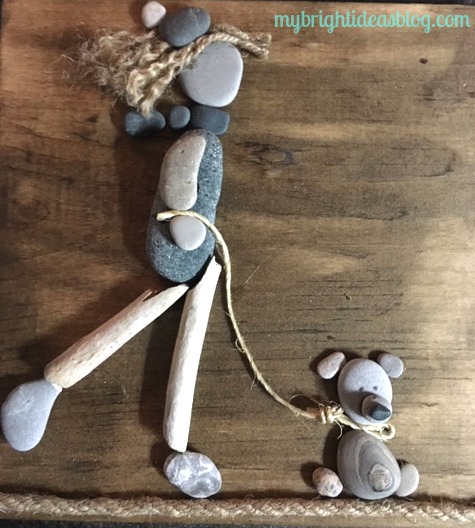
Notice how I just tucked the end of the twine in between the two pebbles to have her holding the leash.
I like the natural colors on this so far, so I found it hard to decide if I should leave it natural….or add a splash of colour.
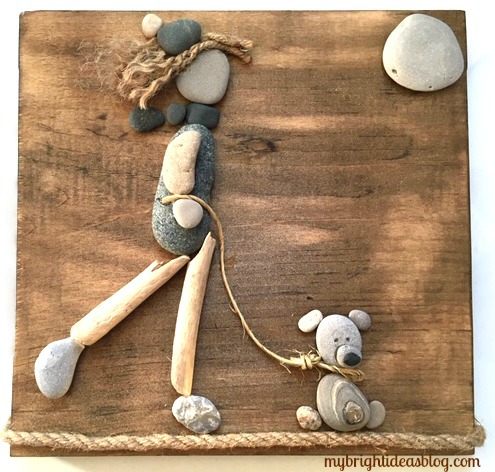
Here I tried out a natural big round stone for the sun or moon.
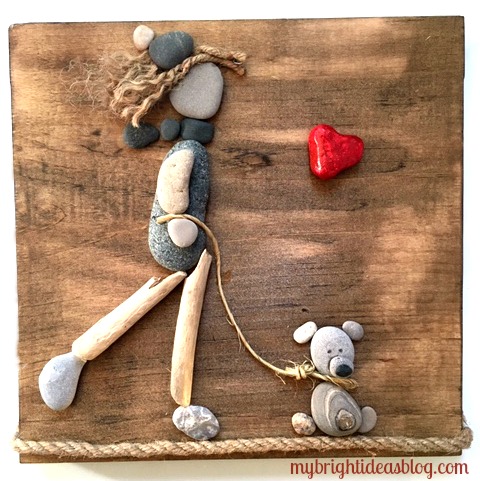
I love this red heart shaped stone that I had previously painted with red craft paint and a sparkly top coat. You could also use nail polish. Since I wanted to make this a gift for my daughter who loves her pooches I think this is a nice touch.
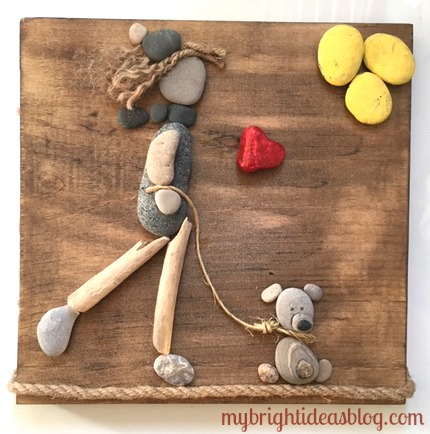
For this one I put in some yellow pebbles for the sun. Nothing is permanent until you glue it on, so you can tinker around with your design while you try out different options.
I loved making this and plan to make a lot more. It becomes a mixed medium art piece. It’s really exciting to try something new and see it turn out great! Since every stone is different it will be impossible to make a duplicate. This is a one of a kind gift idea!!
…..
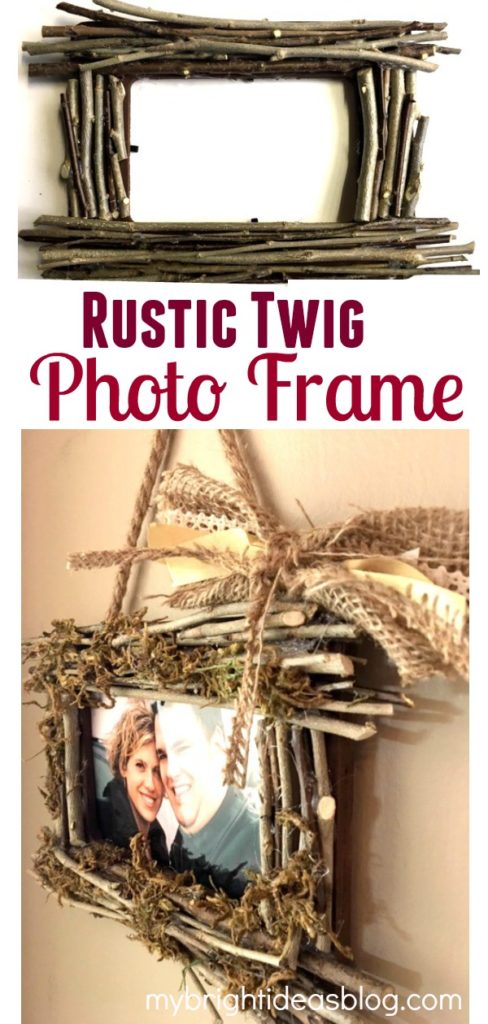
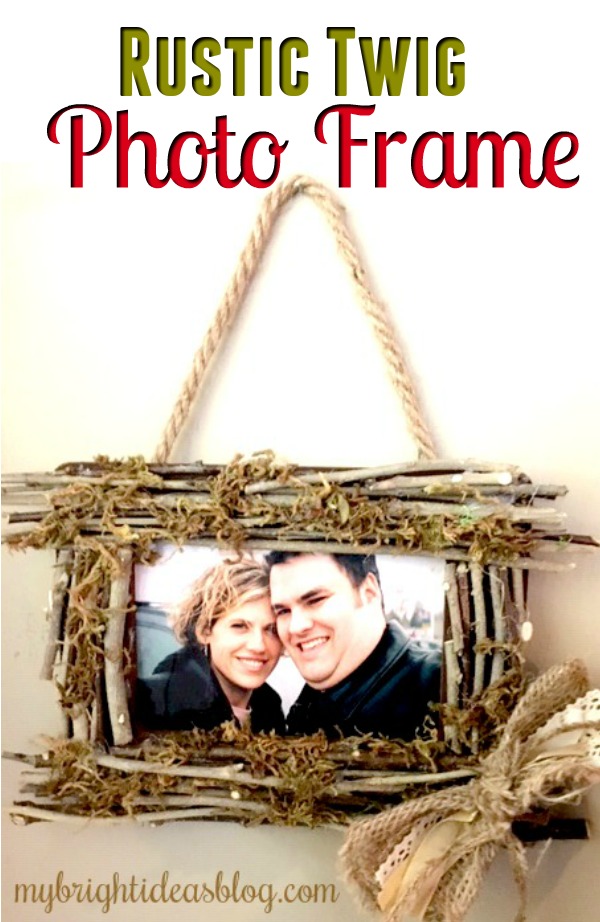
Make a Twig Photo Frame Gift
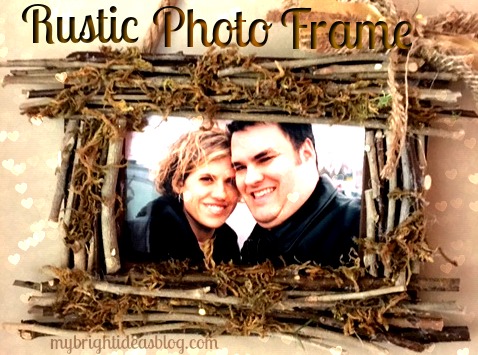
My hubby and I took this picture the day we bought a car together. We had been married a few years by then. It was before kids and a mortgage and grey hair and bags under the eyes. We were so young and dewy. Sigh….
Well that’s nostalgic for days gone by…simpler times. But now we have a home and family and dogs…with our 18th anniversary only a few weeks away we are putting this photo into a home-made twig picture frame.
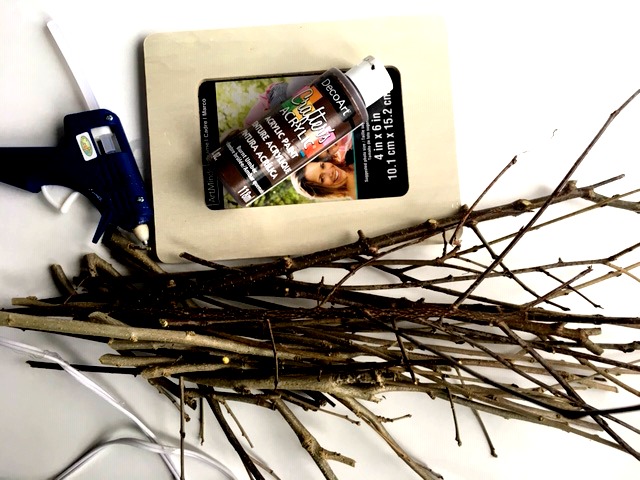
I have 2 or 3 more twig plans before the winter hits. I love twig crafts because they are natural, rustic and free! I have a slew of shrubs and trees that are needing trimming or after a windy night have left twigs all over the lawn so I have an endless amount of free craft supplies within a few steps of our front or back door.
You will need:
- straight sticks/twigs
- gardening snips
- hot glue gun
- inexpensive photo frame
- brown paint
- paint brush
- ribbon/lace/burlap ribbon
- moss
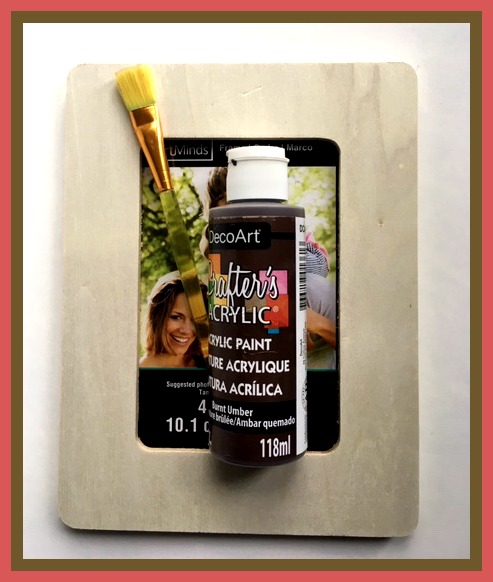
Start by painting the frame with dark brown craft paint. The frame and paint is from my local dollar store, add on the cost of 8 glue sticks and this might cost around $4 dollars….more if you add moss and a burlap bow. This would be a great snow day craft for your older kids (my girls are 8 and 11 and can use a hot glue gun without hurting themselves).
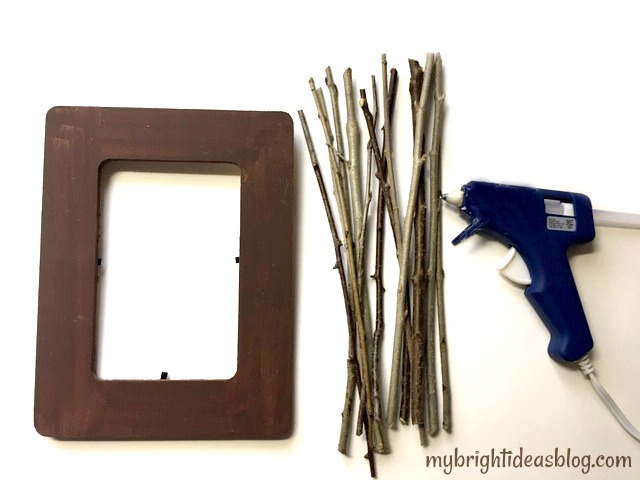
Choose branches that are relatively straight. Snip off the little twiggy parts sticking out. Trim your sticks down to the size just past your frame edge. They don’t have to be exactly the same length-the variation is what makes it rustic. I also didn’t use branches from the same shrubs so the color and texture of the twigs are different.
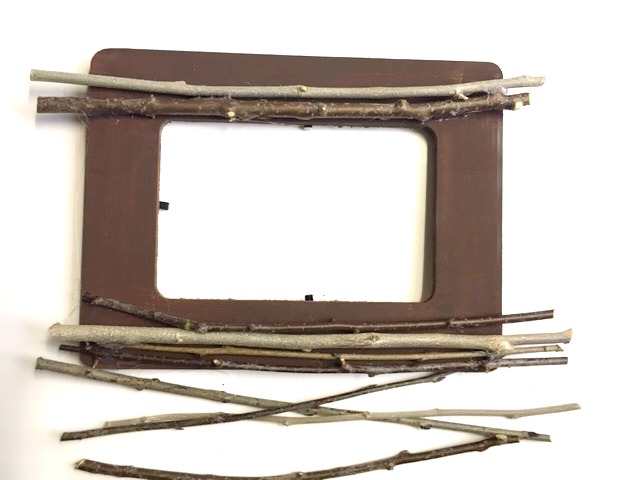
Using your hot glue gun, begin securing twigs to the frame. Start with the long ones on the top and bottom of the frame.
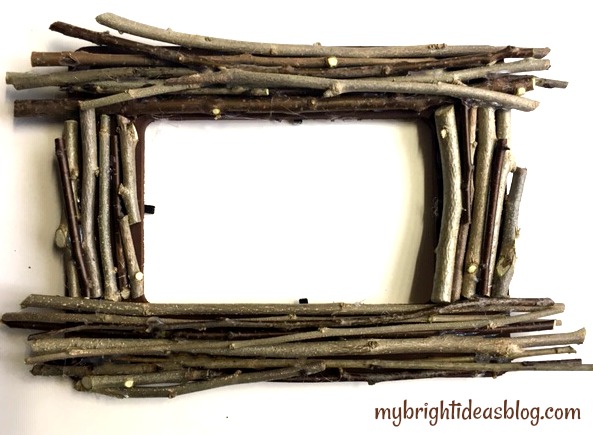
Add smaller twigs to the vertical part of the frame that is bare. Save the skinny twigs until the end to fill in gaps.
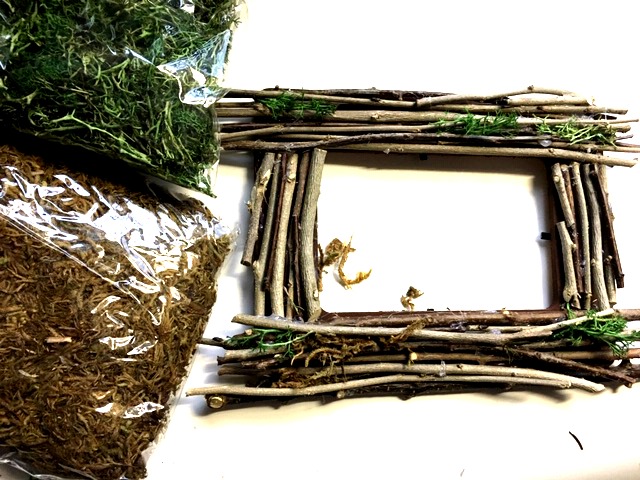
I liked the frame as it was with just twigs…so you might want to stop the project there. But when I added moss to my birdhouse project a few months ago. I really loved it.
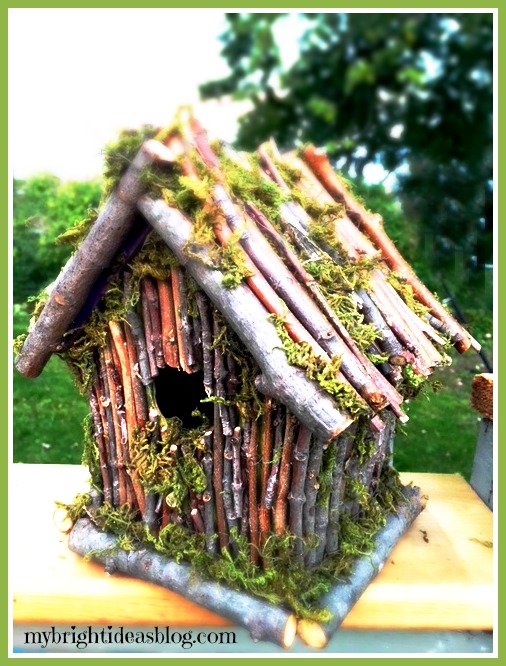
The moss I used on the birdhouse is my favorite but I seem to have run out of it. The one I used on this project is a bit duller. But it looks very natural.
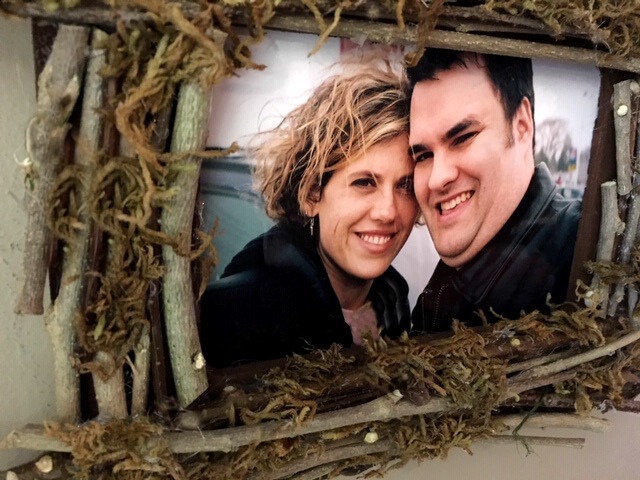
I added some hot glue and pushed the moss into the grooves. It was a bit tricky and my hot glue gun also ended up with rustic coat of moss stuck to it. After the project was done and the glue gun cooled I was able to peel off the mess.
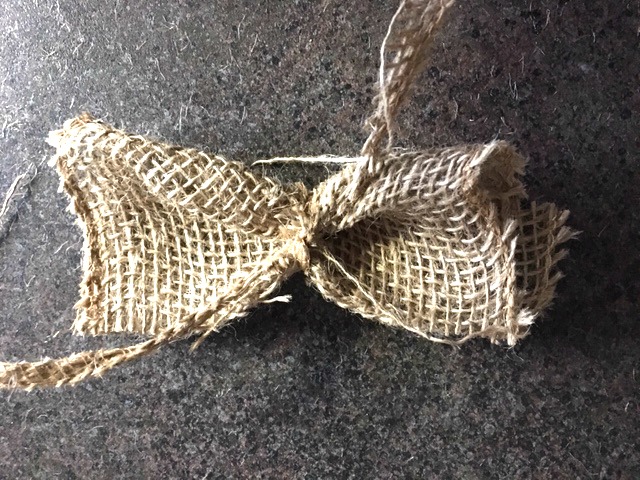
Next I made a few bows out of burlap. This one I just folded a small square of burlap into thirds and used a long thin scrap of the burlap to make a tie in the middle. I had some scraps of ribbons and lace and inserted them under the tie.
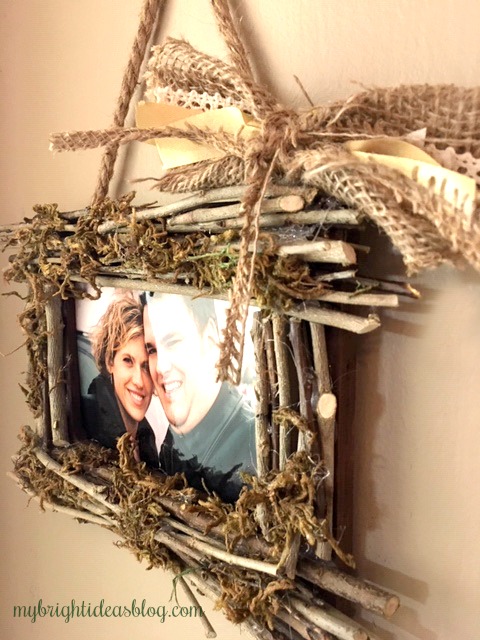
You could try out some different bows and where you would place them on the frame.
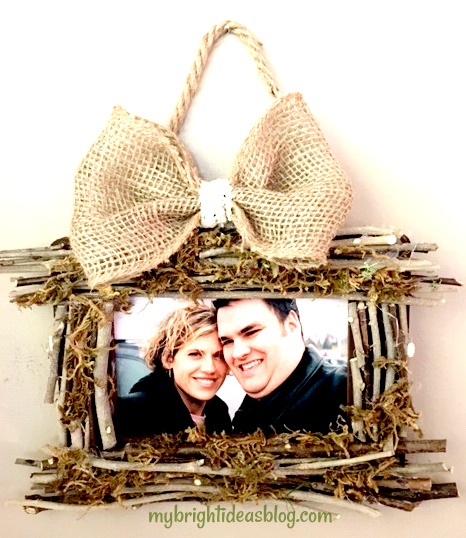
This big bow reminded me of some hair clips I wore as a kid. Maybe if the photo we chose to put in the frame was of children or the dogs….but not over top of hubby’s head. I decided to stick with the previous bow but I didn’t hot glue it on in case I want to replace it later. Using a straight pin, I poked it into the twigs but you could get creative with a straightened paper clip or twist tie or pipe cleaner. Maybe in the spring I will pull off the bow and attach a butterfly or flowers. I’m leaving my options open.
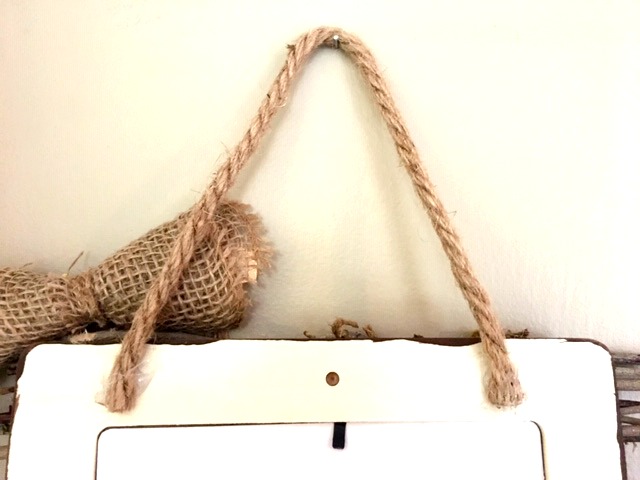
I almost forgot to say that to hang it I cut a piece of jute rope 12 inches long and hot glued the ends to the frame.
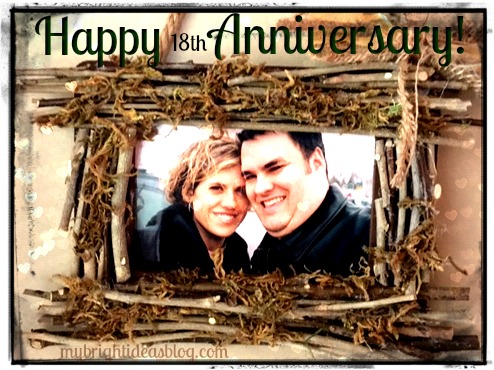
Happy Anniversary to my Hubby!
xoxo
Have a look at the other twig projects below. See you again soon!
…
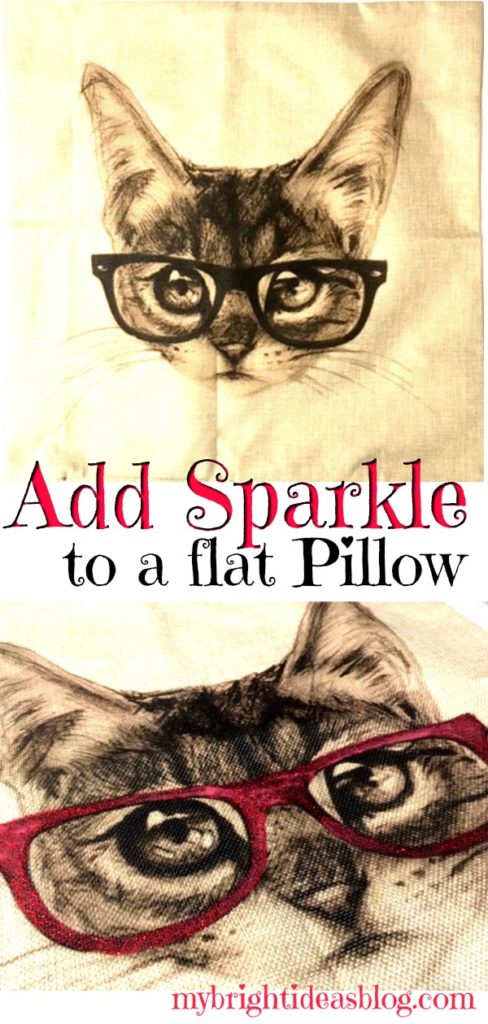
Add Glitter and Sparkle to a Drab Pillow
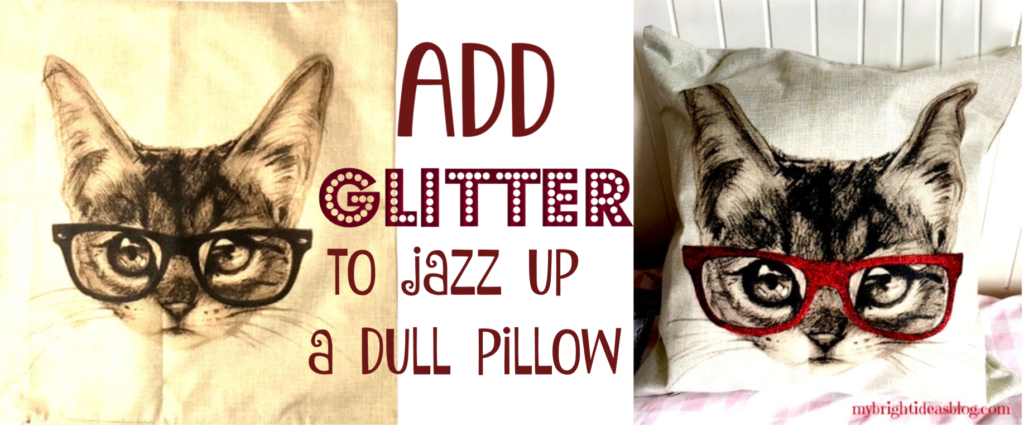
Have you ever seen a black and white print on a pillow or t-shirt and thought…this is a bit dull…how can I jazz this up? Maybe a bit of glitter paint is needed.
A while ago, I purchased a lot of pillows from Ebay for super cheap…Like $4 each. The price was ridiculous…and so was the quantity I bought! Now I had lots and lots of gifts to give to cat and dog lovers. and housewarming presents.
I really like these two pillows but…. Boring…zzzzz
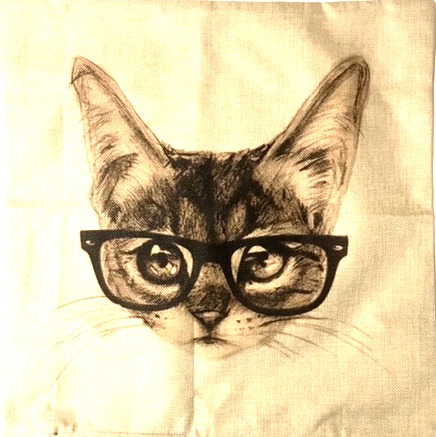
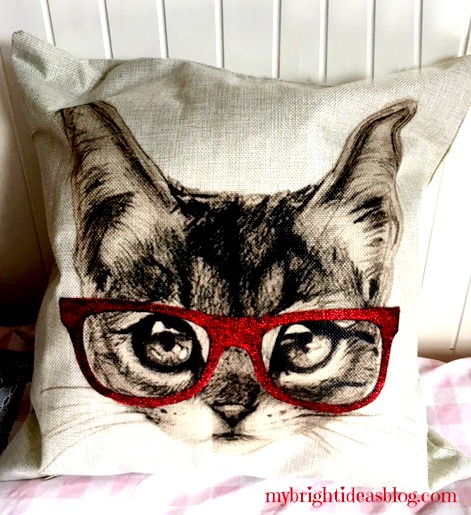
I love this black and white cat but after a while I thought it was a bit flat. So out came a paint brush and the sparkle paint.
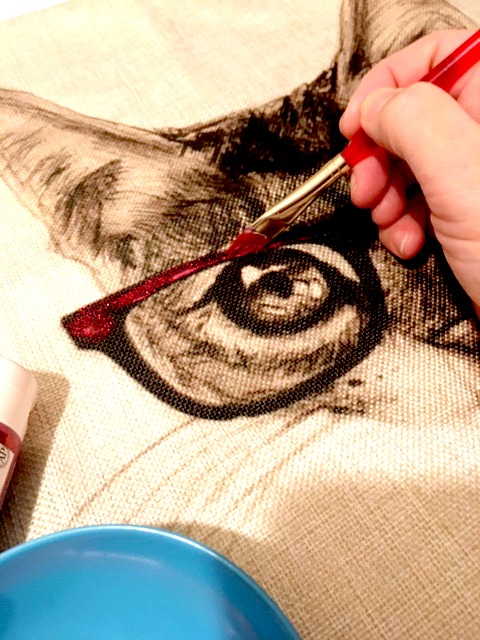
I tested the glitter paint I had on hand before I put it on the pillow. I don’t like having a trail of glitter after a craft. So I tested the Martha Stewart Multi-surface Glitter paint.
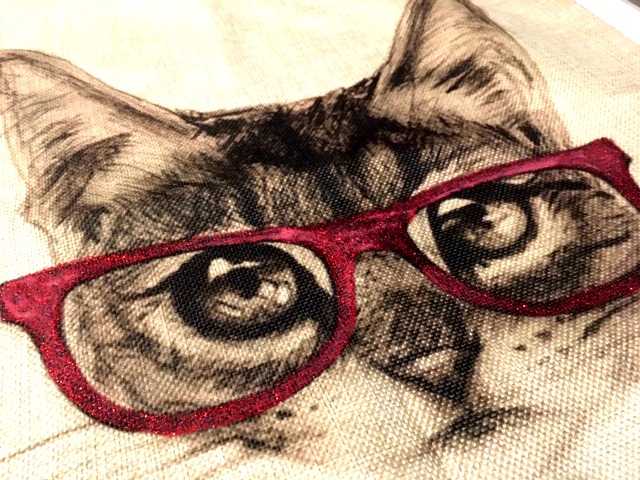
Now that makes it pop!
Here is another one…
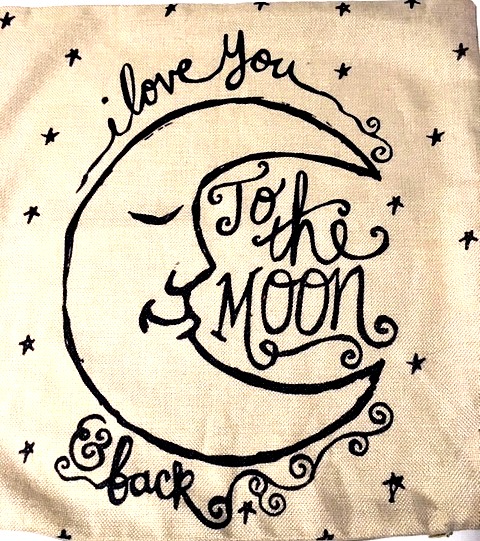
I must confess, I will buy just about anything that says “I love you to the moon and back”. It’s something my youngest and I have said for years especially when I tuck her in at night. This pillow is sweet but also a bit plain Jane.
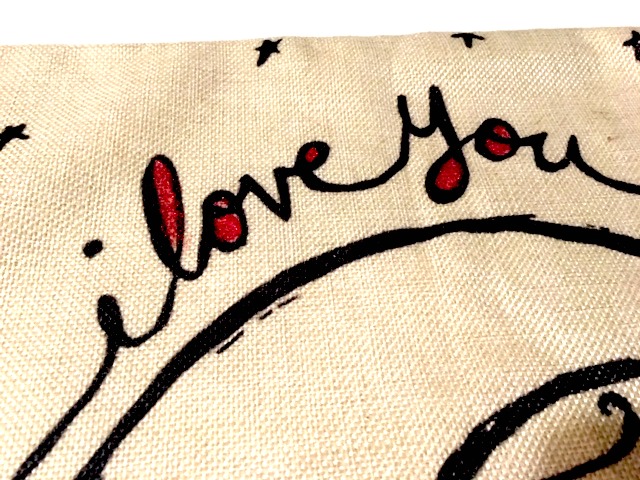
At the moment I only have gold, red and blue sparkle paint. So I used all three.
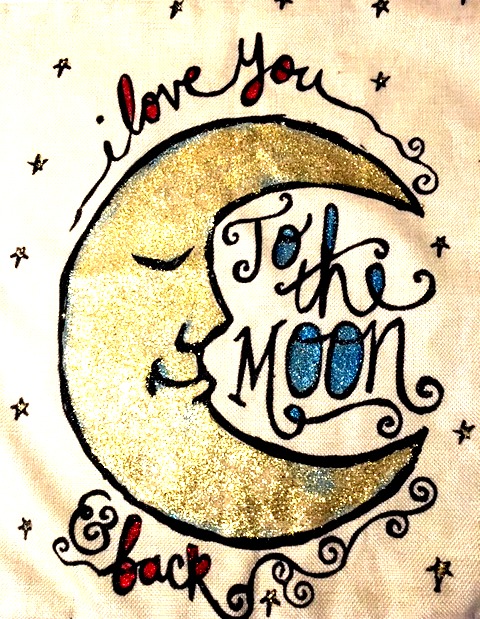
Wowie zowie this turned out great too!
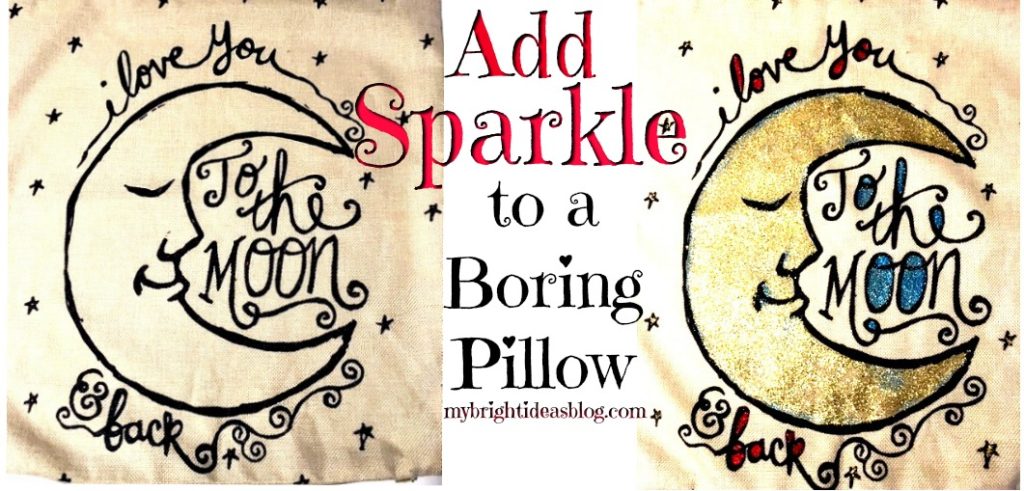
Thanks for checking out this post. I hope you can find something to add some sparkle to also.
Remember to Pin this to Pinterest or share it with your favorite social media!
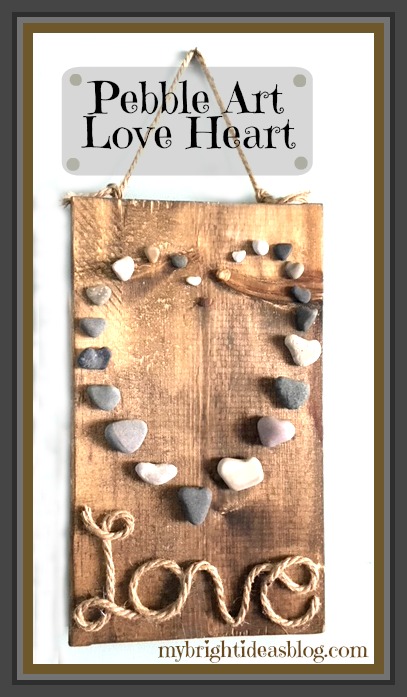
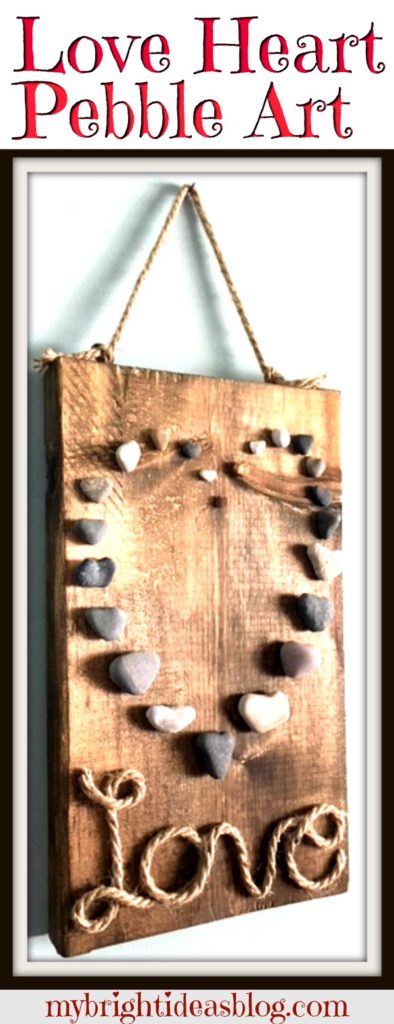
Heart Shaped Beach Stones – Pebble Art
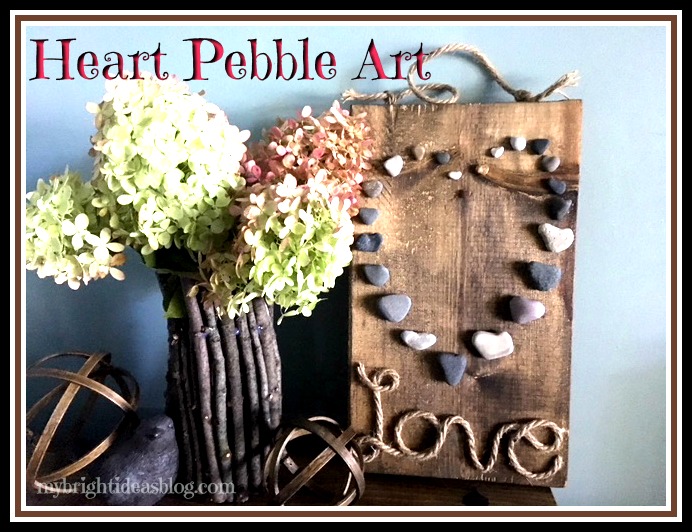
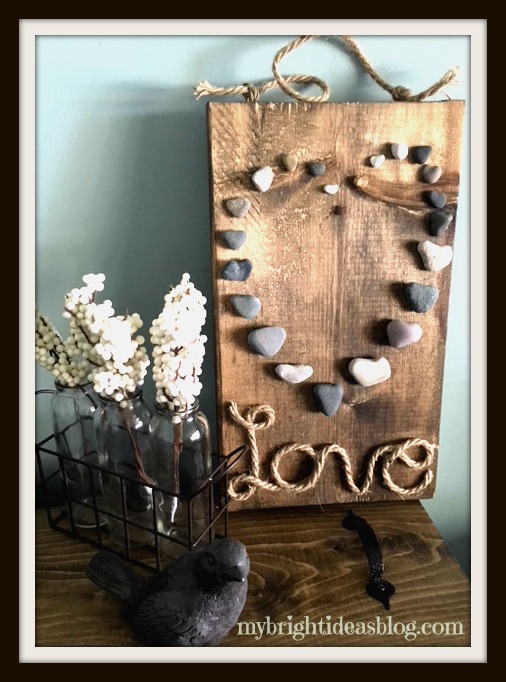
Make heart shaped pebble art with a collection of beach stones and natural rope on wood.
We have gone to the beach twice in October. The cool thing about going to the beach in the Fall is that no one else is there. The beach-that is typically packed with families with picnics and sunscreen….well….is empty. Have you ever had an entire beach to yourself? It’s amazing!
Our home is about an hour’s drive away from Lake Huron. If you aren’t familiar with the Great Lakes allow me to explain….
The Great Lakes
The Great Lakes aren’t your typical lakes. There are 5 and they are huge! Each looks like a sea, with rolling waves, winds, strong currents, great depths and distant horizons. According to Wikipedia if you put all 5 of the Great Lakes together the surface would be the size of the United Kingdom. Lake Huron is where we would head to see a gorgeous sunset.
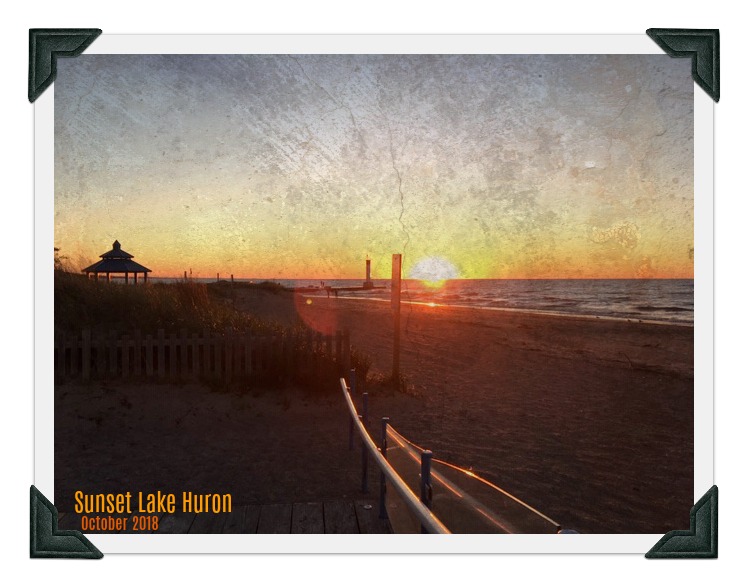
If we drive an hour in the opposite direction from home, we will be at Lake Erie. If you are a morning person you can watch a beautiful sunrise on that side. Yawn…..
The Great Lakes are the largest group of freshwater lakes on Earth. 4 out of 5 are on US Canadian Borders (Superior, Ontario, Huron and Erie). Leaving Lake Michigan the only one that is located completely in the US. According to Wikipedia “they form a single, naturally interconnected body of fresh water”.
Well that is enough of our fun facts for today! Moving back to our craft project and a trip to the beach.
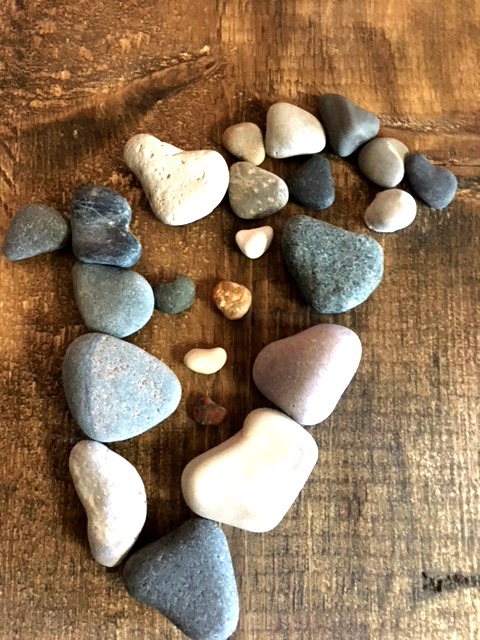
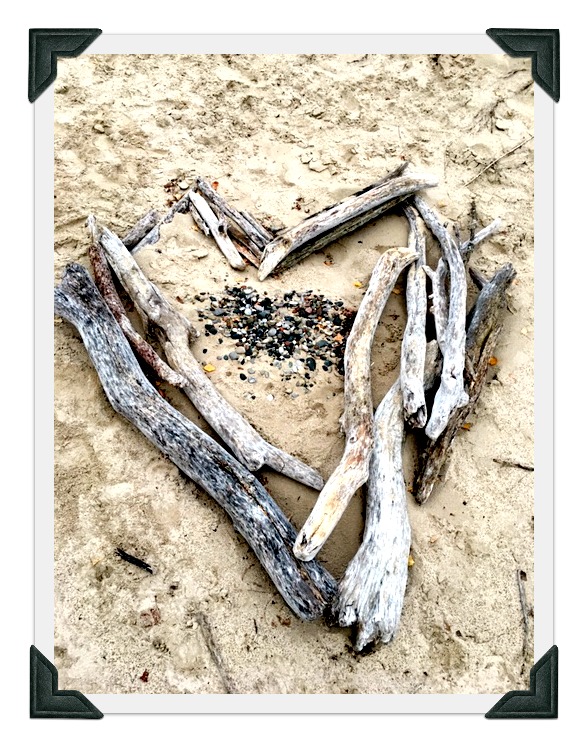
With my eyes on the ground looking for awesome rock treasures I always marvel at how beautiful the stones are wet, sparkling in the sunshine. As we walked along looking for interesting shapes-especially hearts! What did we find but this heart made out of drift wood. Awe isn’t it Lovely!
If you look at the beach for odd shaped stones, you suddenly see how very many there are in the shape of a heart.
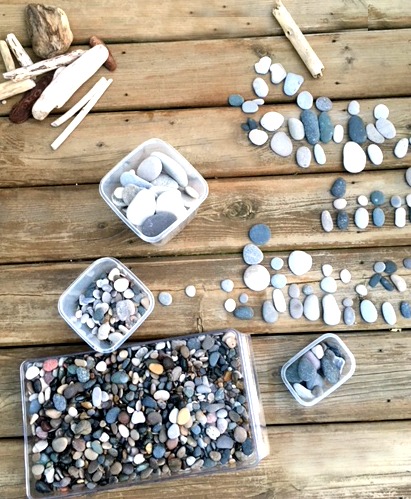
We came home with a nice collection of smooth stones that I sorted into a few containers for different crafts I have planned.
Circles, Oval, Hearts, Big Flat ones and some that were just wonky shapes.
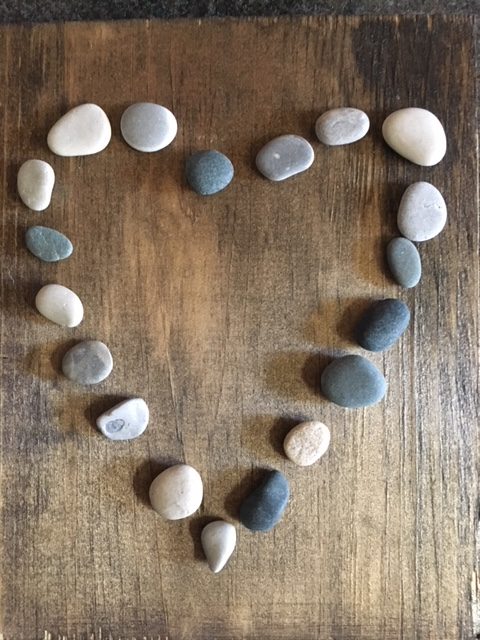
If you are just buying a bag of stones from the dollar or craft store you probably won’t find heart shaped ones, but you can make a heart shape with any natural pebbles and it still looks great.
A month ago, I was spray painting things and I threw in some stones and painted them. If you have already my previous projects from the summer you will soon see that I love to spray paint things! My daughter noticed that I had painted a random stone orange but it was a really cool heart shape. This started my fixation on heart shaped stones.
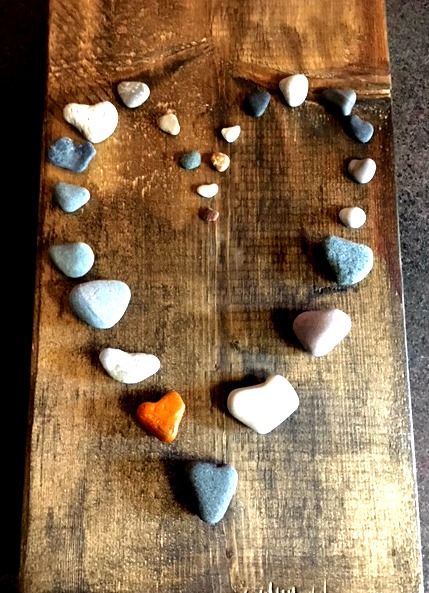
On our next trip to the beach we specifically made a search for hearts, circles and long oval pebbles of any size. Bring on the rock projects!
To make this you will need:
- heart shaped stones (if you can’t find them smooth pebbles are fine)
- wooden board (I had already stained this 9 x 16 board with Miniwax Jacobean)
- jute natural rope
- hot glue gun
- 6 glue stick refills
- 2 eye hooks
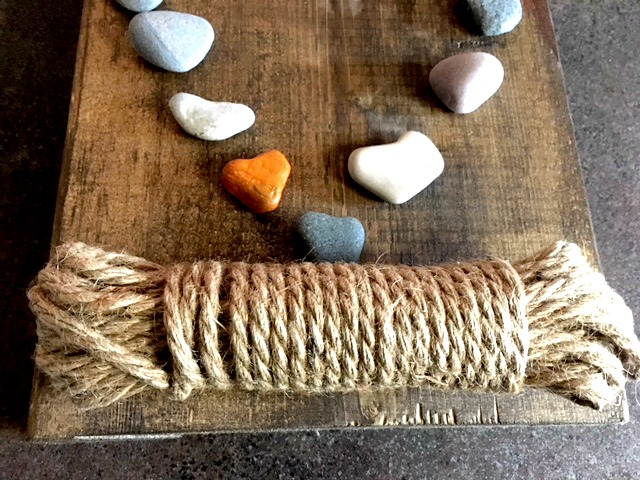
To get started, I organized my love heart shaped rocks to see how big it would be on my wooden board. I didn’t glue it to on yet. Instead, I took a photo of it on my phone in case I needed to refer to it. Then I got my jute natural rope.
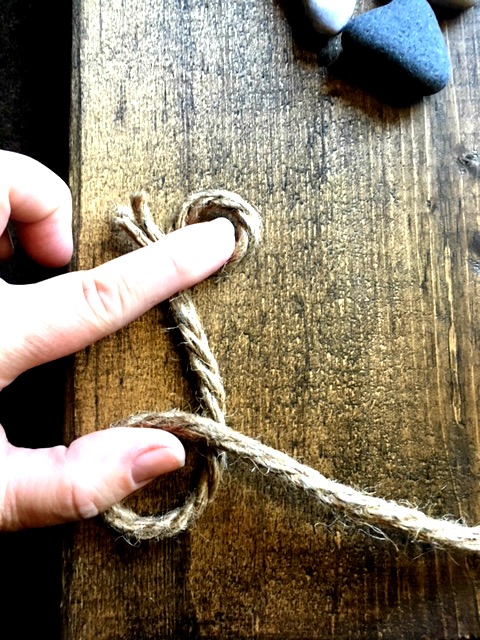
To decide on your letter size use your fingers to make the shape of the L. I usually “eyeball” my projects instead of measuring. Holding the rope down I wrote out the letters of the word Love on the wood.
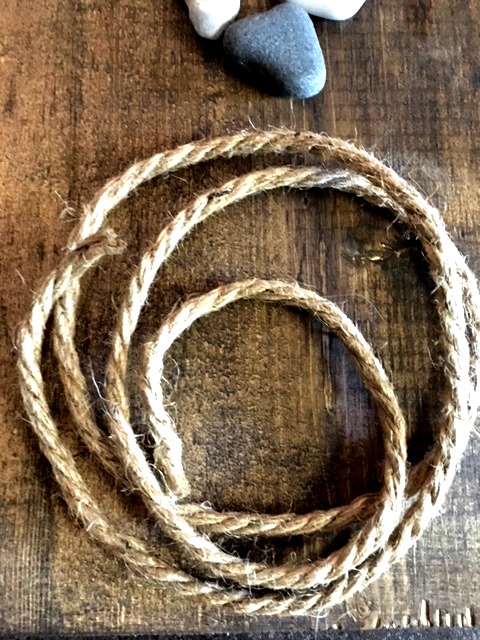
I cut the rope ahead of time because it was quite big to work with. You might choose to leave it on the spool until the end. That’s cool too!
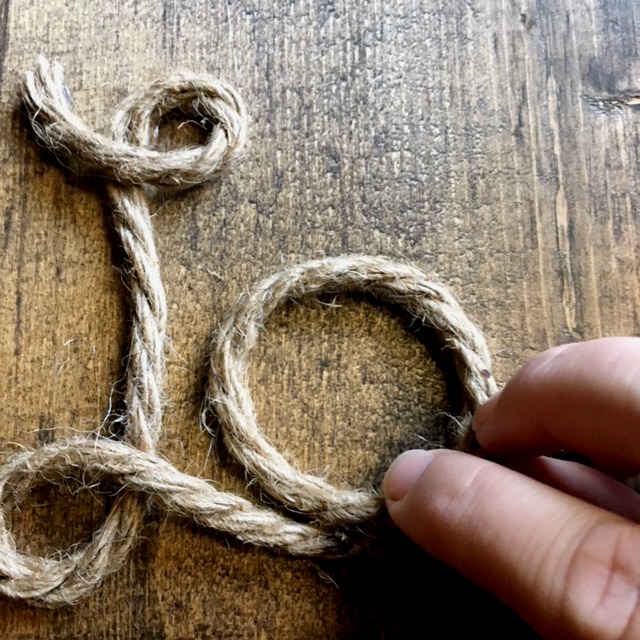
Using a hot glue gun put a few dabs at the top of the loop of your letter L and guide it into the shape of the letter using dabs of glue as you go along. Move on to the letter O and then join into a V and finally an E.
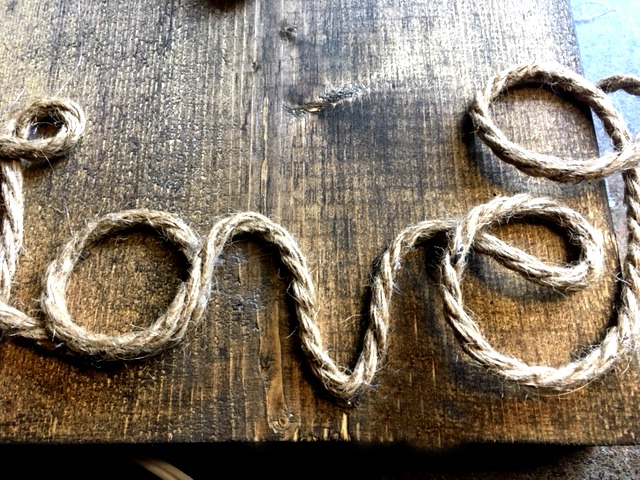
After the E is glued down trim the rope. Make sure the end of the E is secured so that the rope doesn’t fray and lift up.
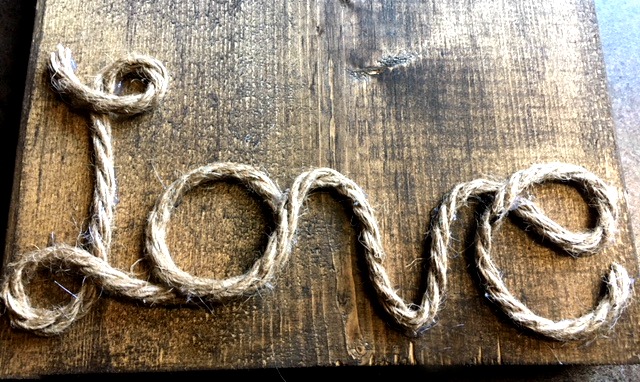
Perfect! Next lay out the rocks in the heart shape again.
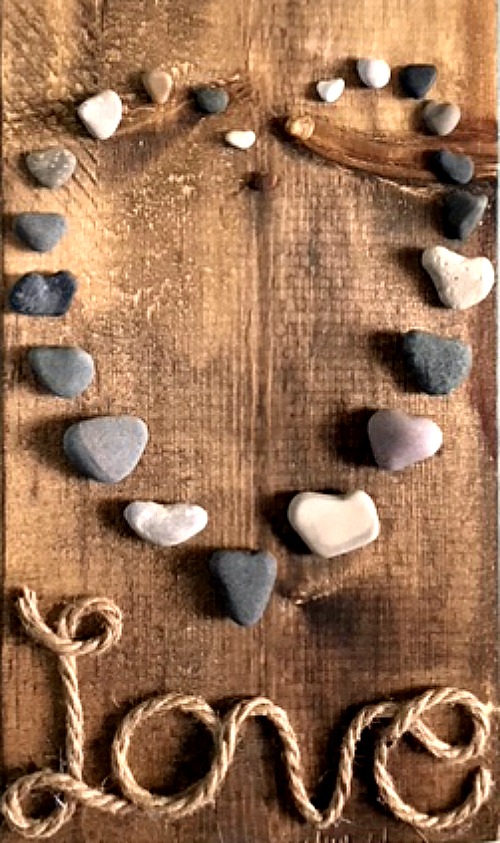
When you have the stones just where you want them. Remove each one and put a dab of hot glue on each pebble and then put in back in its place.
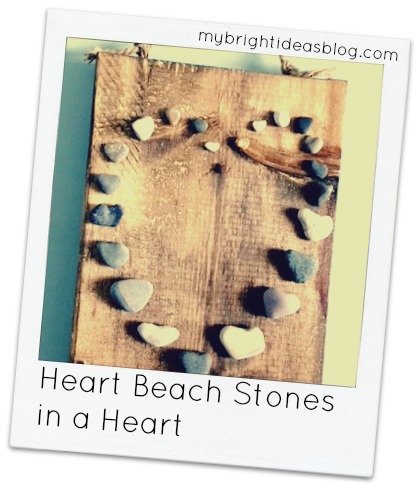
This craft would look good without the rope if just the stones on the wood appeals to you.
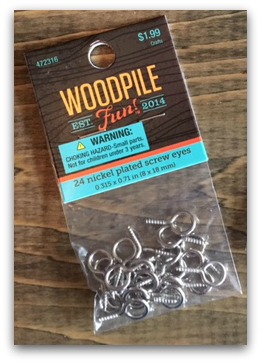
I picked up this package of screw eyes at a craft store but you can find them at the hardware store and dollar stores too. I chose the humble eye hooks so that I could have the rope on the top of the project match the “Love” at the bottom.
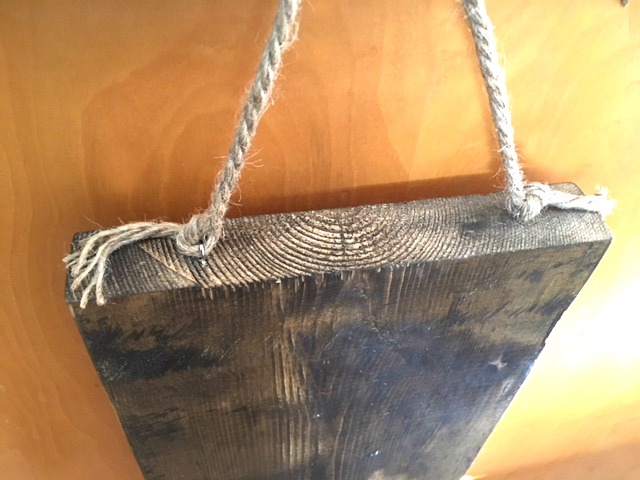
Simply screw these into the top of the board and tie jute rope in a knot. Now it can hang on the wall.
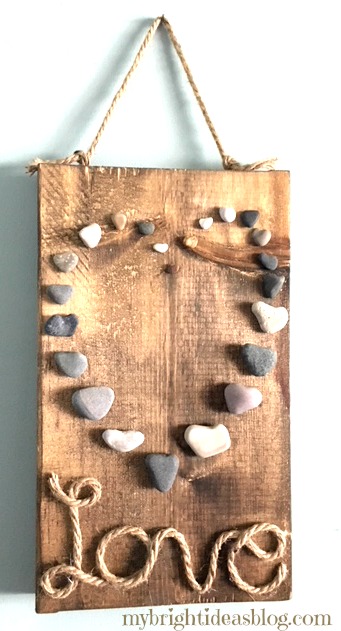
This is a super easy gift idea. You could really personalize it by writing your last name instead of love, or something else…maybe “faith”, “hope”, “smile”, “dream”….something that will inspire or make you smile. You could also make this any size or paint the wood board instead of staining it. Get creative!
Thanks for reading this post and checking out another one of my crafts. I have posted several rustic/wood home décor projects recently, so I’m linking them to this message for you to pop over and see too.
Please pin or share with your social network of friends.
…
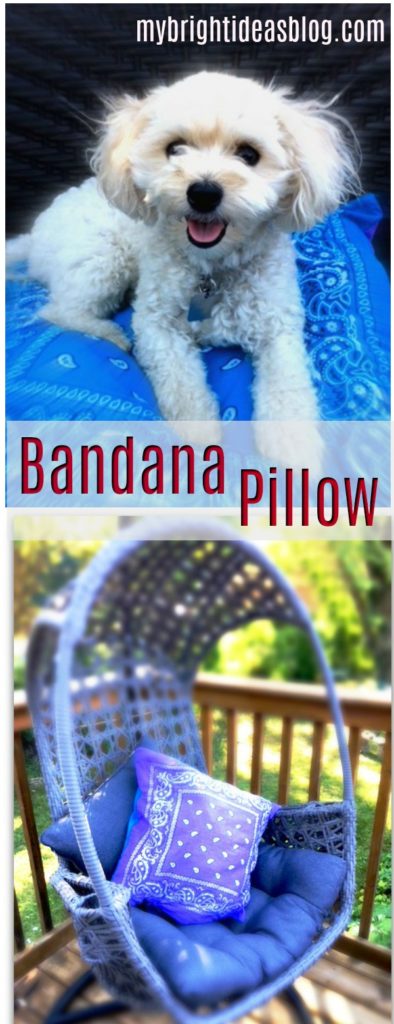
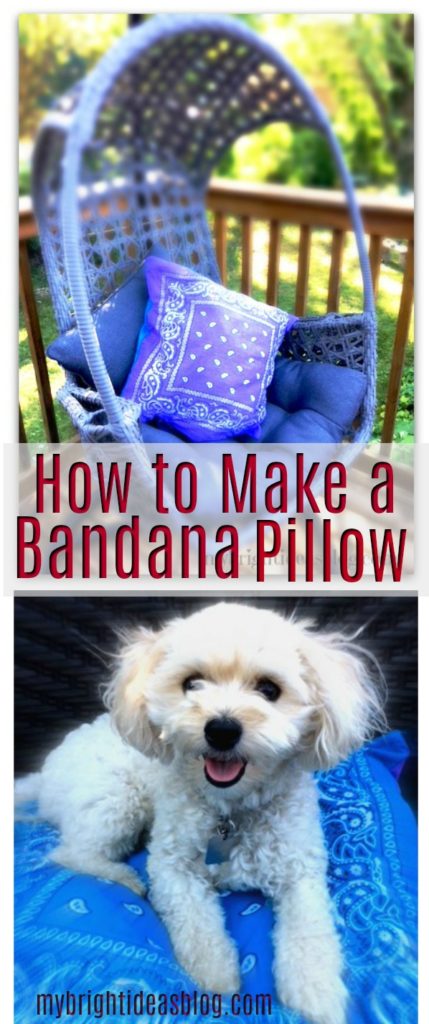
Make an Easy Bandana Pillow
So a month or two ago I purchased way too many bandanas. Since then I’ve been looking for ideas to use some of them in projects. Today I’ll show you how to use 2 more! Let’s make a pillow for the bed, couch, or dog.
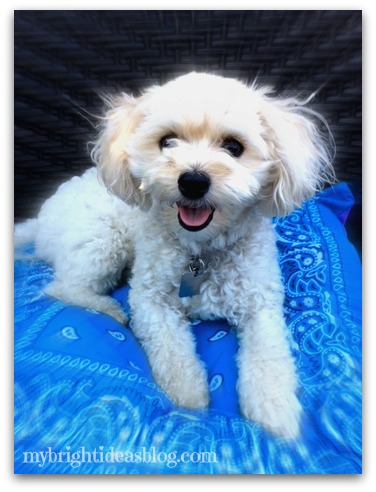
This is the beautiful Gemma. She is our 2 year old Yorkiepoo (Yorkshire Terrier mixed with Poodle). She loves to share my chair when I’m using the computer. Gemma stays up as late as I do and then sleeps in behind the bend in my legs. She is quite yappy to the squirrels but she is a dream dog at home. One of her favorite places to nap is in her crate. So let’s make her a new pillow.
You will need:
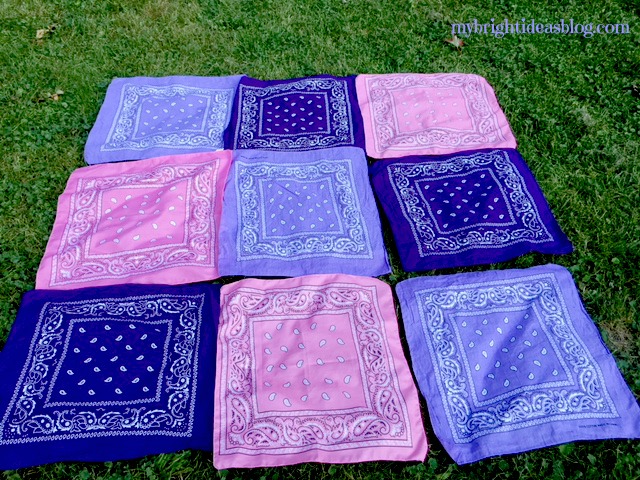
- 2 bandanas/handkerchiefs the same color or complimentary colors
- sewing machine
- needle and thread
- pins
- pillow or stuffing
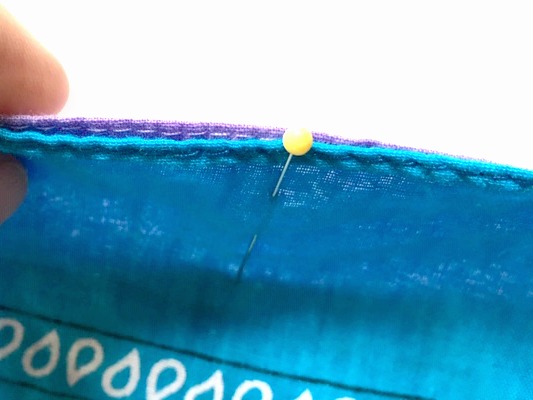
With right sides together, match up the corners and pin them. They don’t make handkerchief/bandanas all the exact same size. So don’t get frustrated. When you sew them together you will be able to correct their wonky sides.
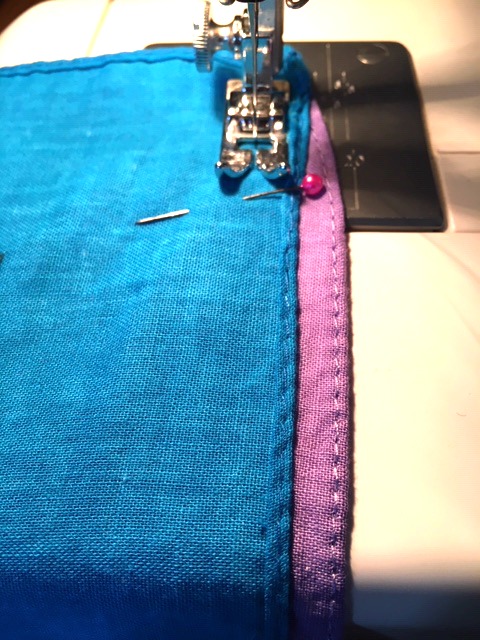
See what I mean. The purple one is not cut straight or is slightly bigger, so it’s sticking out. Sewing them together with a straight line will disguise the mismatch.
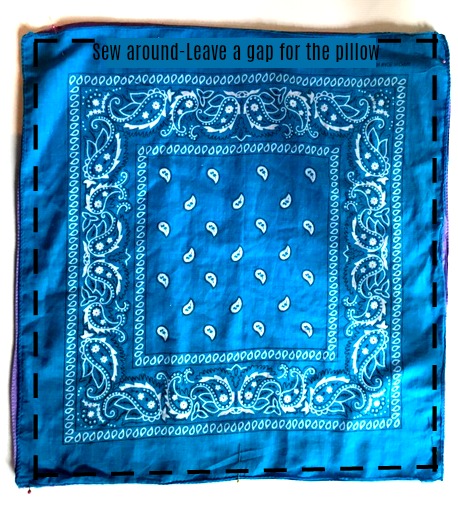
Sew almost all the way around leaving a wide gap on one side.
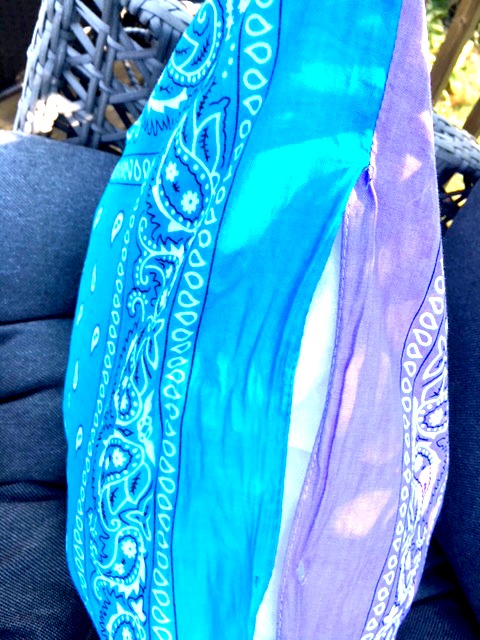
Turn the pillow case inside out and insert the pillow. Since this will be used for Gemma’s crate I didn’t buy a new pillow form. Instead, I used a cheap, old limp bedroom pillow that was wasn’t very fluffy anymore. It easily fit into this pillow case.
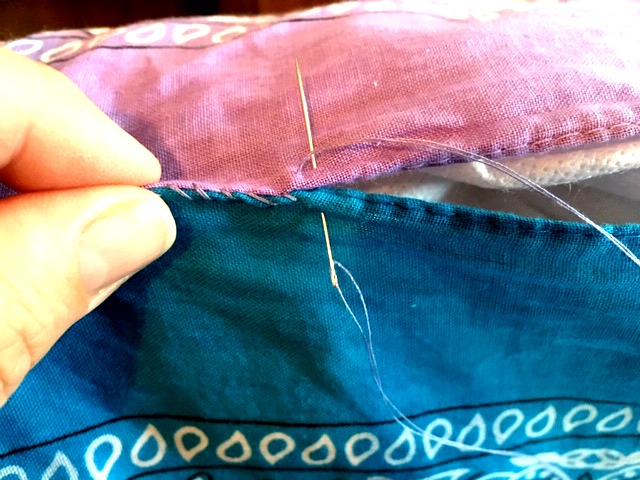
Next, take your needle and thread and hand sew this opening closed.
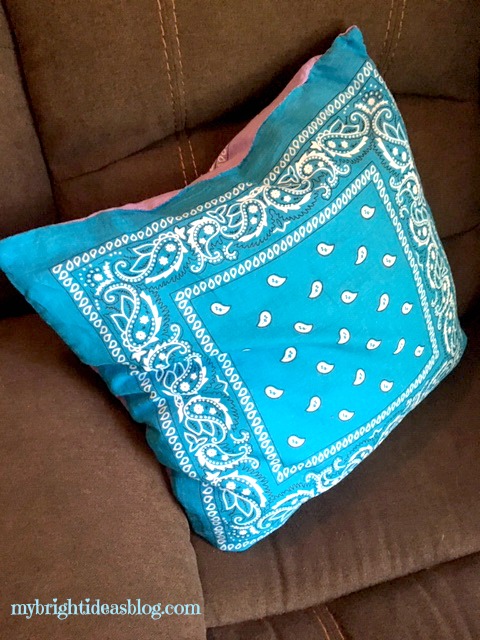
You could use this on the couch, on a bed, outdoor furniture, in the car or……
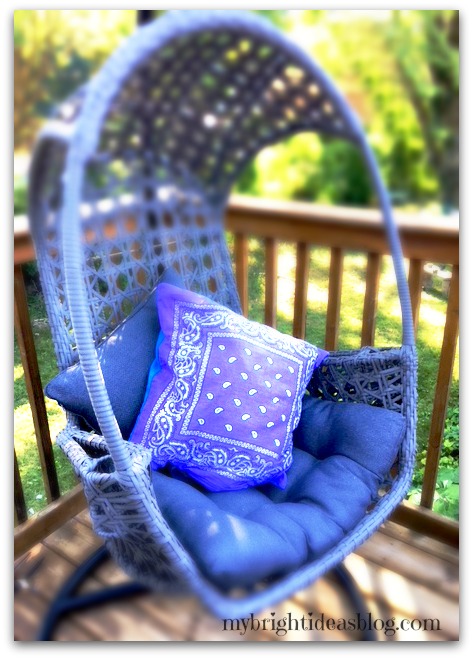
…..for your sweet puppy dog.

Thanks to Gemma for being a gorgeous model for this little photo shoot.
Feel free to comment with suggestions for what to do with the other 15 bandanas I still have left over. Did you see the Fall table cloth I made last month? Have a look.
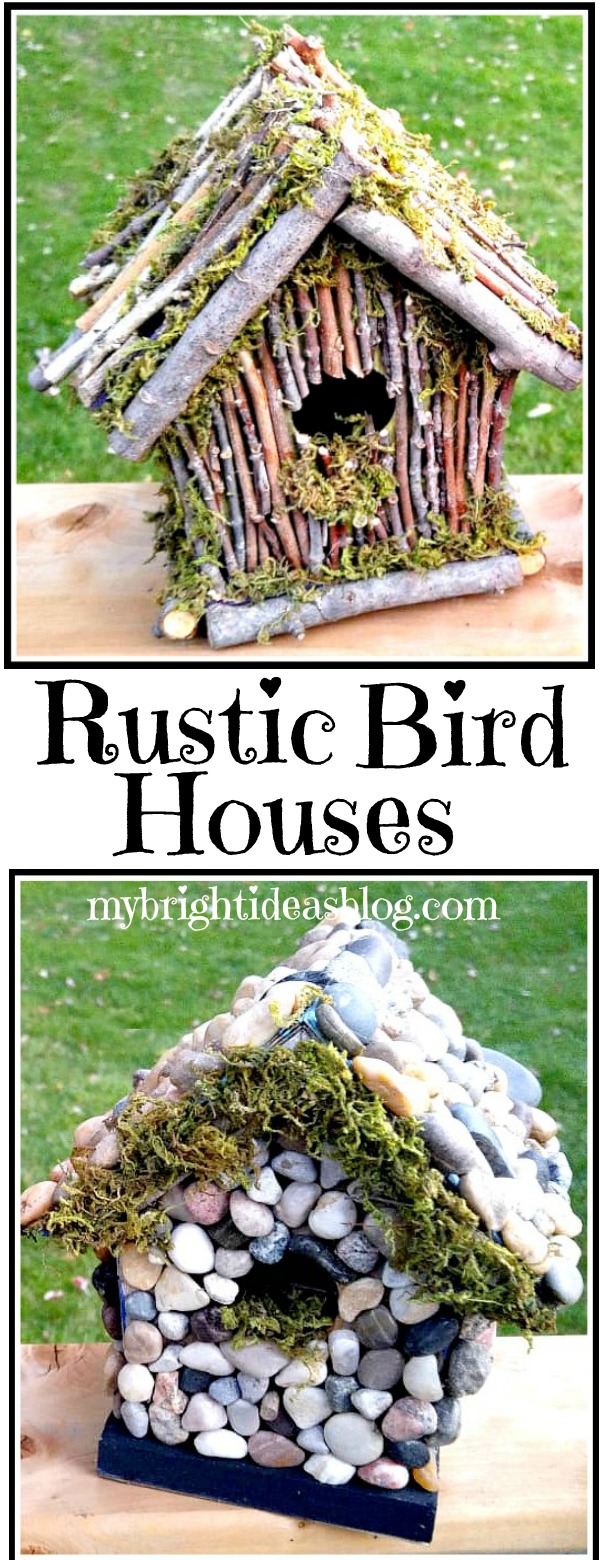
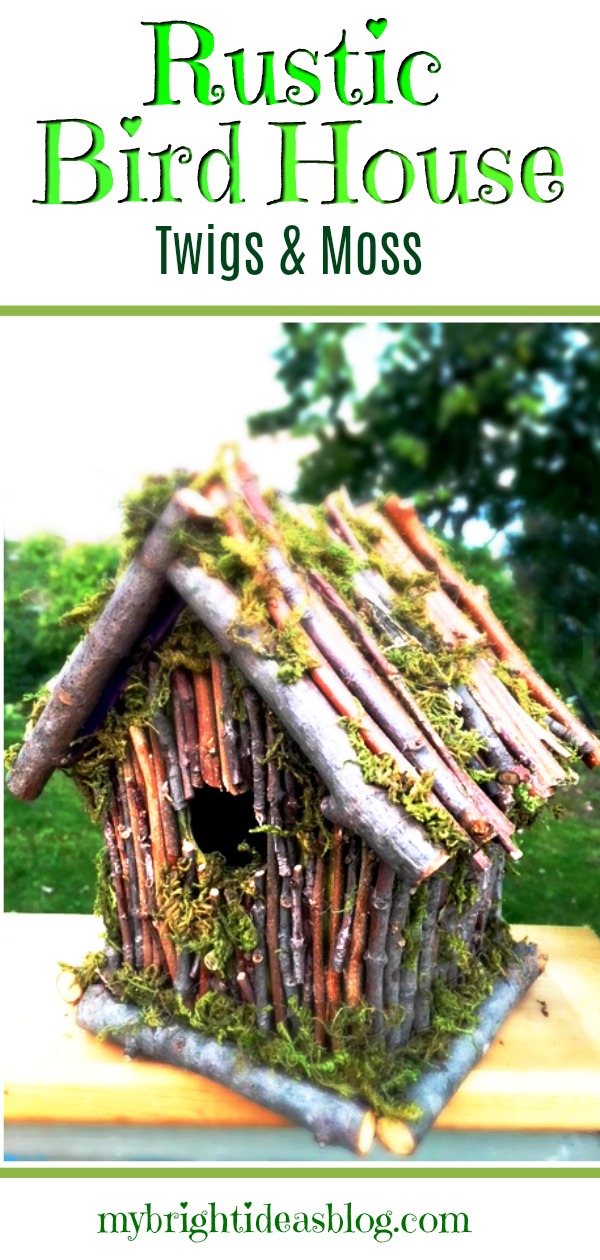
Rustic BirdHouse – Twigs and Moss
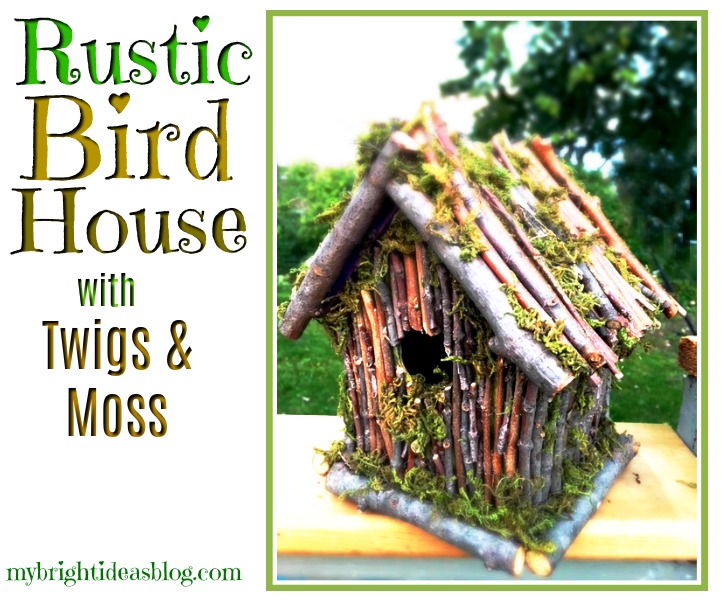
I’m loving sticks and twigs and rocks this year! So you’ll see a lot of these projects from this past summer and heading into the fall and winter. This is birdhouse project, I really enjoyed making and can’t wait to tell you about!
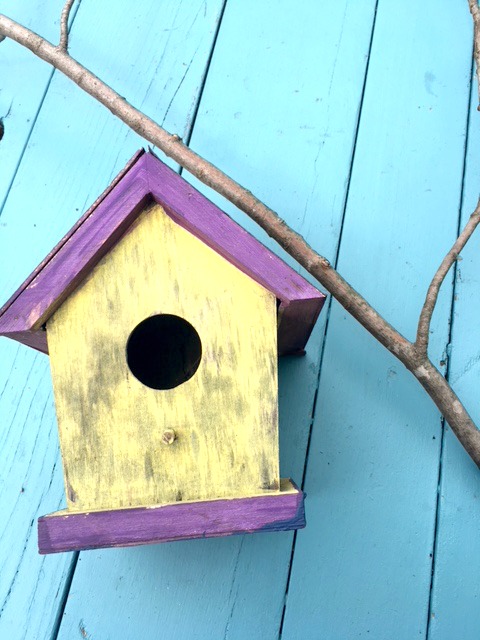
Two years ago my daughter and I painted a bunch of birdhouses and drilled them to the garage. It’s an old wooden garage with peeling paint so if we can distract your eyes from its sad, old, tired look we would! It should get knocked down and rebuilt but we would like it to last a few more years…so instead I’m decorating it.
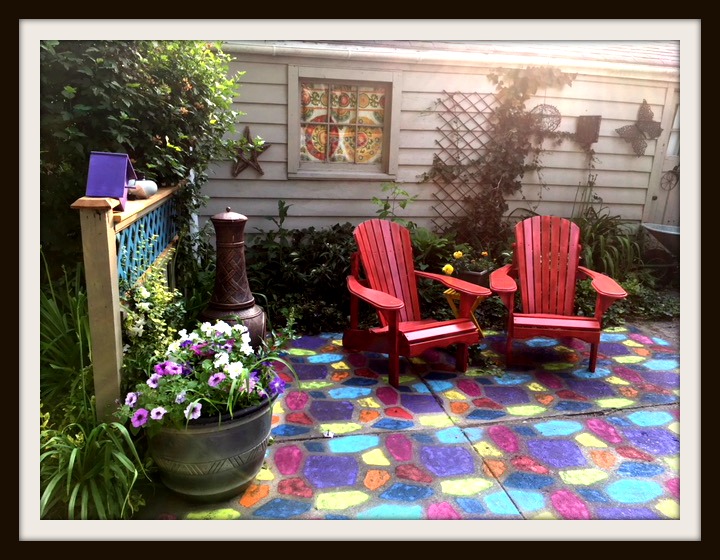
See what I mean…
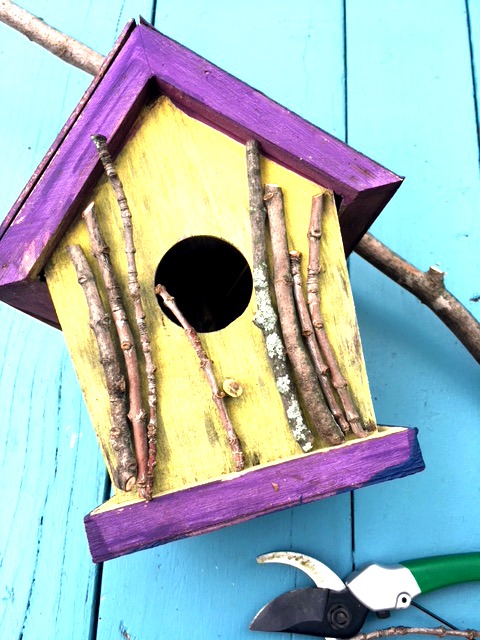
I apologize we got a bit sidetracked there. Back to the twig birdhouse. After two winters the birdhouse collection had gotten worn out and weathered. They were just cheap wooden ones from the dollar store and we didn’t think ahead to put extra clear coats over the craft paint to make them water resistant. That would have been sensible.
If you would like to try this you will need:
- a birdhouse
- outdoor paint or varnish to water proof it
- branches
- garden snips
- E6000 or other industrial glue
- natural moss
You can get inexpensive birdhouses at the dollar store but if you would like it last for years and years get the sturdy ones from the hardware store or make your own. Paint it or put a protective clear varnish so it will last a long, long time. I opted to use the old weather worn ones to try and upcycle it instead of throwing it out.
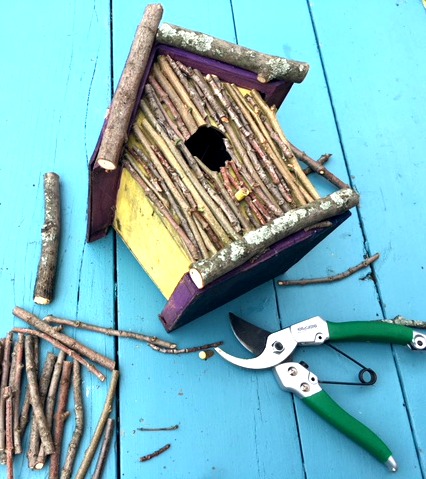
We needed to trim some out of control shrubs and some branches so this project was perfect timing. There was no measuring of the length just line up the twig to the area you want to put it and snip! When I had the area planned out I went back to glue it.
Using E6000 Industrial glue is stinky so I try to use it only outdoors. It is slow to dry but very secure. I have used a hot glue gun to secure sticks and pebbles to things like this before and within a few days it had pieces falling off. If your project is going to be indoors you could get away with quick drying hot glue.
I attached the sticks all over one side of the birdhouse and left it to dry.
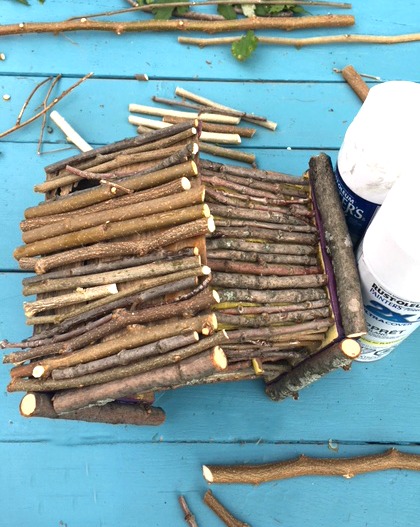
Each side needed several hours to dry. Then I came back to work on the next side. This really slowed down the process. It felt very relaxing making this natural project so I didn’t mind that it took me a few days.
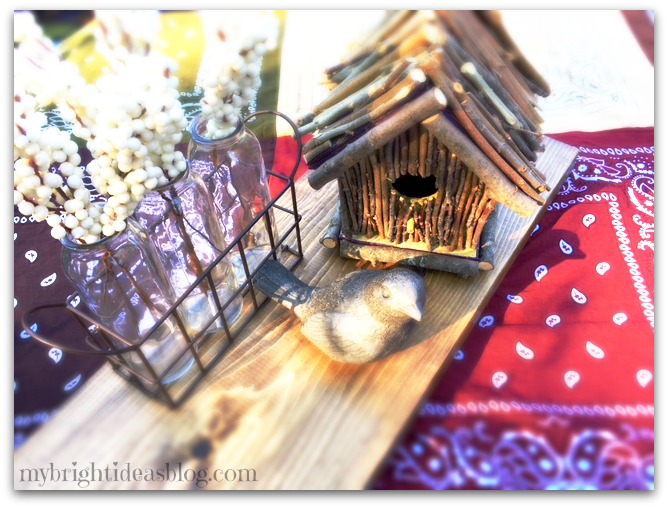
I was actually quite happy with it with just the sticks on the birdhouse. I took this picture a few weeks ago with my bandana table cloth post. It’s cute right!
But then….I had a vision of it with moss and the project took on its final stage….
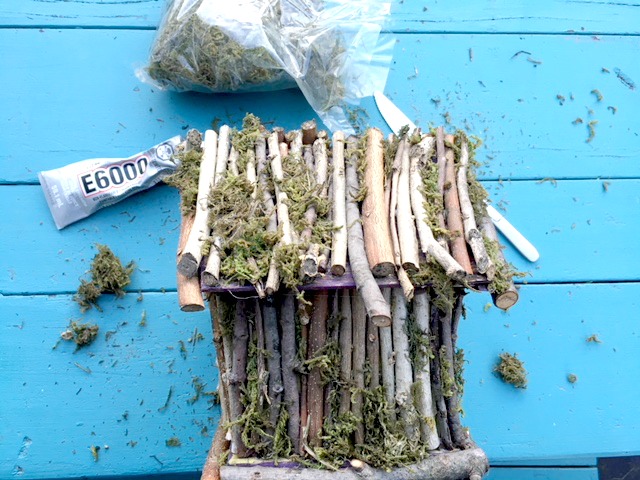
The moss is from the craft or dollar store and comes by the bag. It is quite loose and flakey so it will make a bit of a mess on your work space.
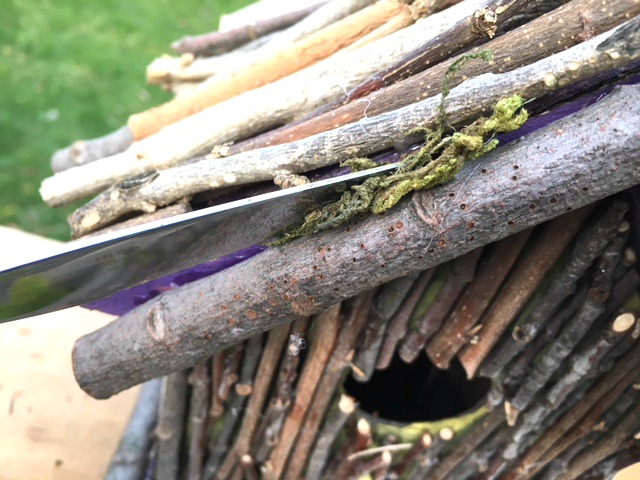
Anywhere I could see the old purple paint I put in some moss. This photo shows me sliding the moss in between each stick using a butter knife as a tool. I also used some dabs of glue plus jamming it in gaps between the twigs.
Heavy rains and wind may be hard on the moss. We will see how it lasts and maybe place it in a bit of a protected area of the garden. A covered porch would likely be ideal.
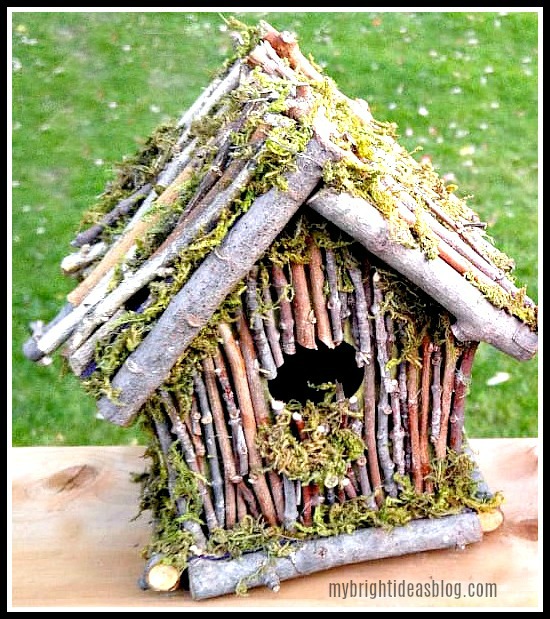
Isn’t that beautiful! I don’t know that any birds will actually want to use it but for a decorative addition to the garden I’m very pleased with it!

Thank you for reading to the end. I hope you enjoy your day. Before you go feel free to visit some of my other posts. Pin this to Pinterest or share it on your favorite social media.
…
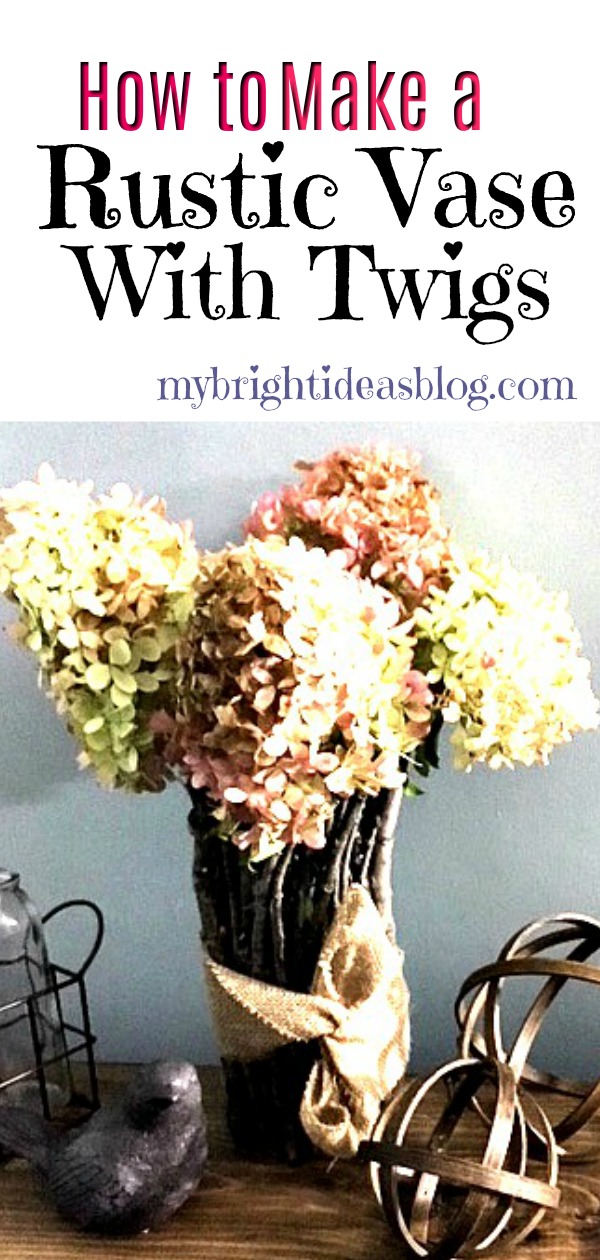
Make a Twig Vase – Super Easy DIY!
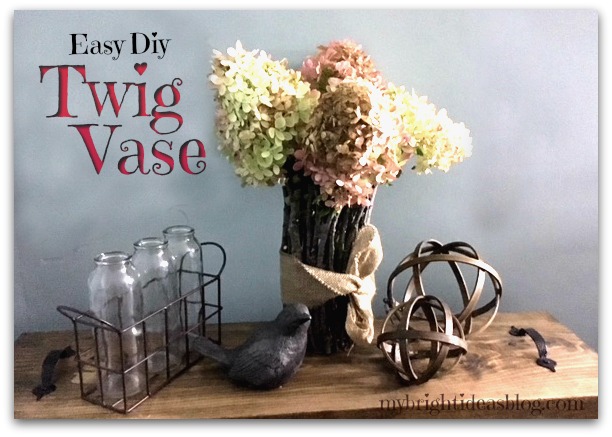
Here is a super easy, super rustic, super pretty twig vase! I am loving using twigs and sticks in crafts. It’s free! It’s also time to do some trimming in the backyard gardens so I get the job done and a craft project to do when the work is done!
You will need:
- an inexpensive straight vase
- twigs
- snips
- hot glue gun
- 6 or more hot glue sticks
- burlap or raffia
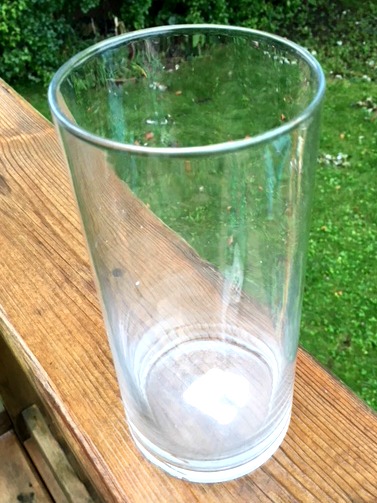
First, choose your vase. If you don’t have a tall straight vase already in the back of your cupboards then pop over to the dollar store, or a thrift store you will definitely find them there. I had this vase on hand. The Dollarama sticker was still on the bottom. $1.25. That is the total expenses on this craft if you already have the glue gun and glue supplies.
I love me a cheap craft!
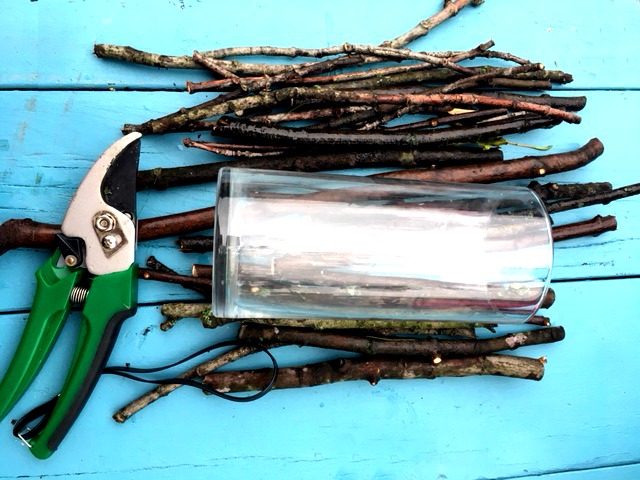
Using sharp shears, cut twigs in different lengths taller than your vase. Choose sticks that are as straight as possible. Trim off any side twigs as short as possible.
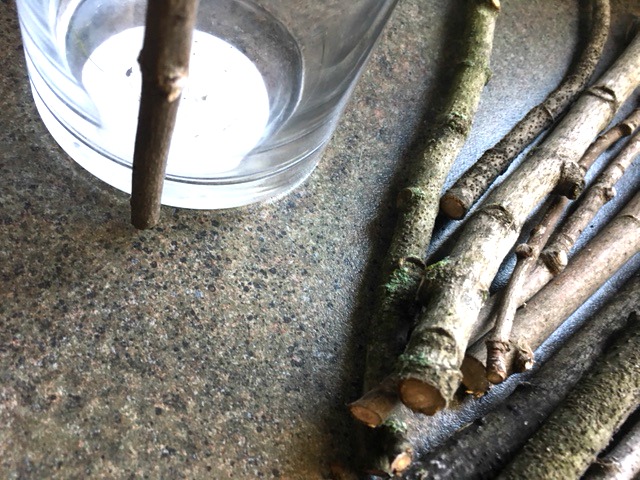
Plug in your glue gun. Set the twig in place and see where it will make contact with the glass of the vase. Add the glue in those contact places. I do this instead of running a line all the way down the stick. That is a lot of waste. Hold the twig in place 10 or 20 seconds while the glue cools. Mind your fingers!
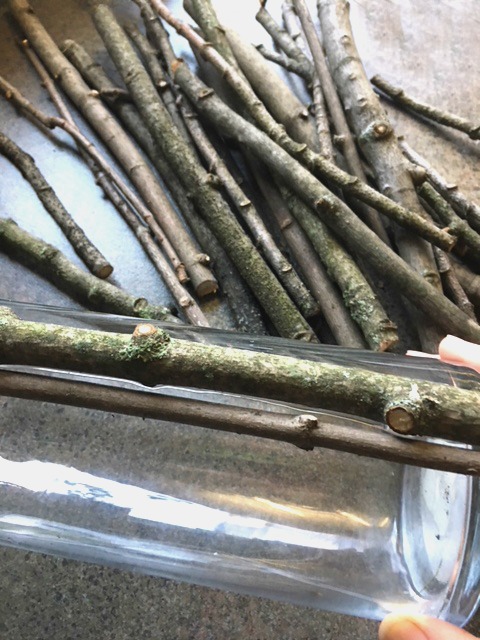
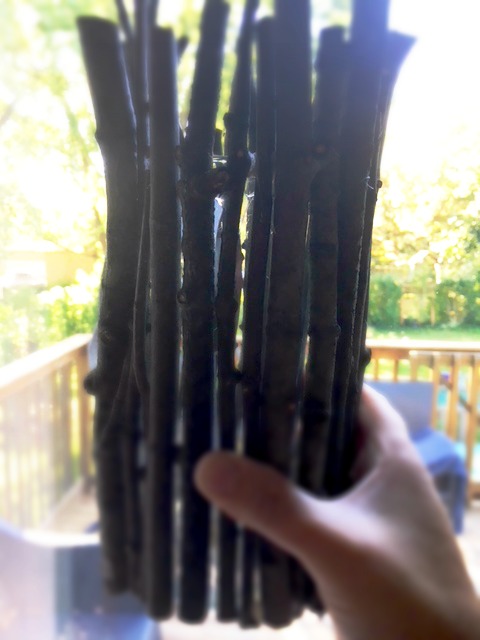
Work around the vase with each twig fitting tightly next to the previous twig. If there are spaces you can put a thin twig in later to fill in the gaps.
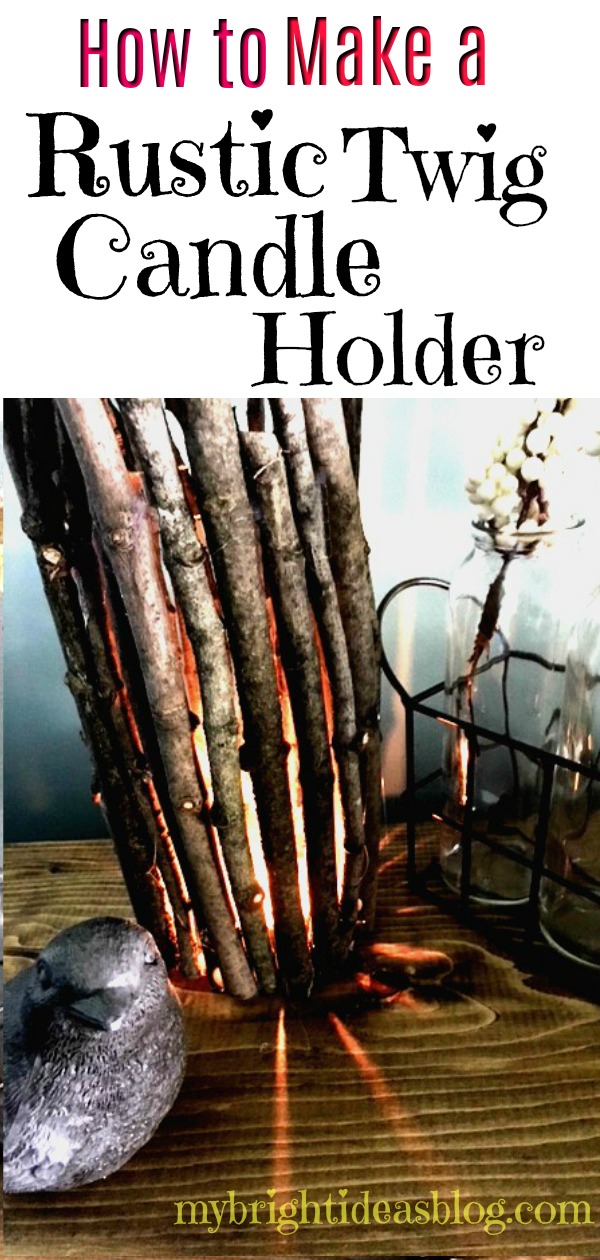
You will notice that the light does pass through the gaps. If that bothers you, cut a brown or black paper down to the vase size and slide it inside.
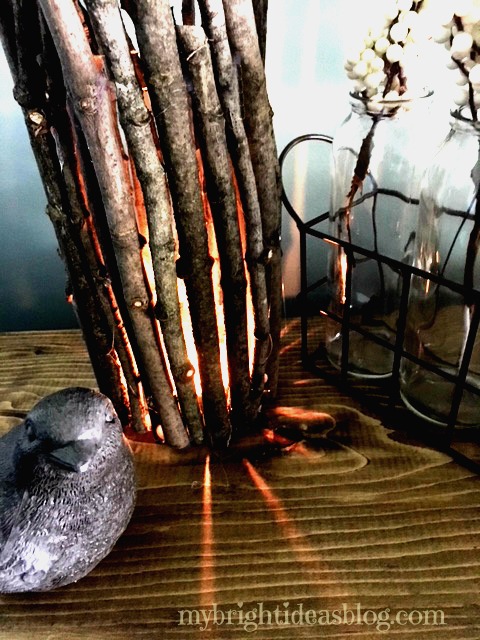
OR…you could embrace these gaps and use it as a candle holder. If you go this route please do not put paper in your vase. You will surely start a fire. Eek!
I didn’t mind the gaps in the vase so I skipped the paper and can use it with a tea light or with dried or artificial flowers.
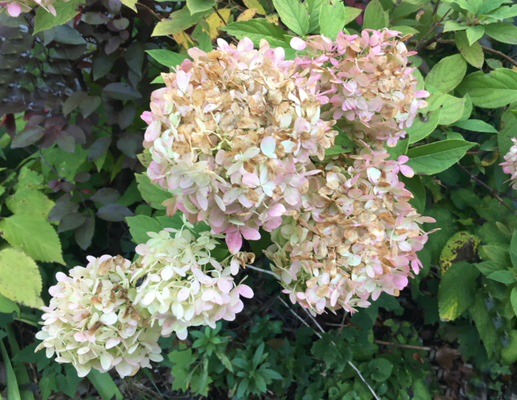
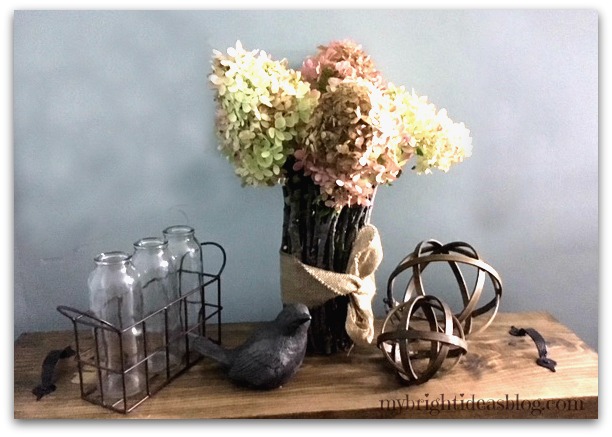
So to the garden we go for some flowers. I cut these hydrangeas. These are going to dry nicely in the vase and look the same for months and months.
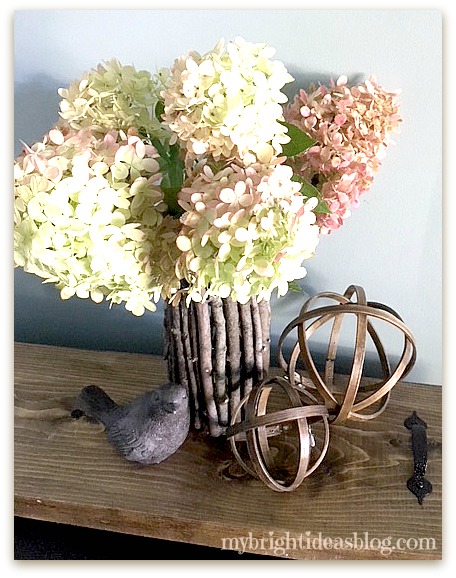
Isn’t that lovely? I hope you enjoyed this rustic twig/stick project. I really love making things with twigs.
Wait! Oh my days!!!! I forgot to put on the bow!
Cancel the photo shoot and back to the craft counter….
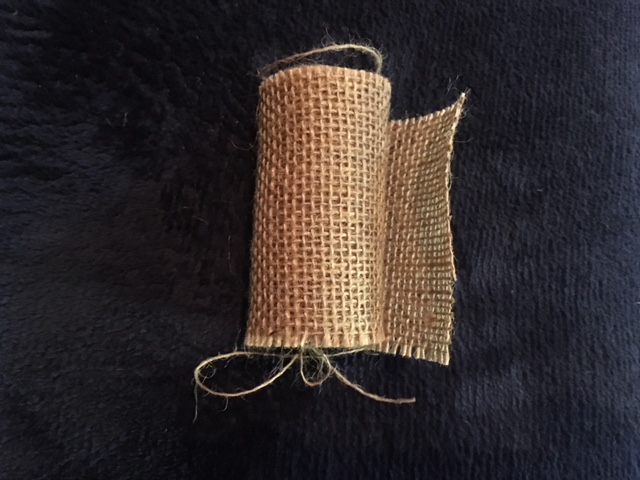
I know I have raffia somewhere but I can’t remember which craft bin I put it in. So instead I used this 3 inch wide burlap roll from the dollar store and wrapped it around the vase.
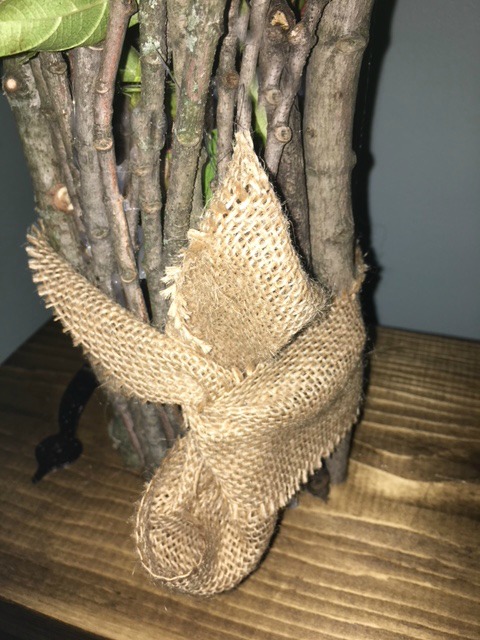
After tying it in a knot I tucked the ends under the centre. It looks like a bow but less bulky.
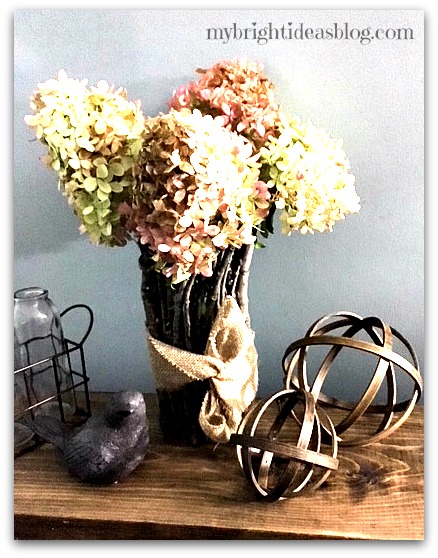
There now that is better! Its a lovely rustic vase perfect for this time of year!
I really appreciate you reading to the end and hope you will remember to pin this or share it on your favorite social media site.
If you would like to see how I made the orbs or wood tray in the photo above, click the links below.
Till next time!
…

