
The No Sew Fleece Blanket

My daughter loves dogs so when I saw this fleece at Joann Fabrics-I grabbed it. It’s so cute wish I had gotten more to make a dog pillow or bed.
I prefer my fleece blankets to have a pattern on one side of the blanket and a co-ordinating color on the back. I chose a bright red to be the second color to match this awesome dog fabric.
To make this project you will need:
- fleece fabric in 2 co-ordinating colors. I had mine cut to 55 inches long
- scissors or rotary cutter and mat
- ruler or tape measure
![]()
Fleece fabric often has one side with writing and the other side will be curled. Start by trimming off these rough edges.
![]()
Lay the fabric on the floor-you need a huge workspace. Stack the two layers of fabric on top of each other and make sure it is a perfect match. If one piece is slightly longer, trim it.
When it’s as close to perfect as you can get it, trim off 4 inch squares off of each corner.
![]()
Without moving the fabric, cut the edge of the fleece into strips 1/2 wide, 3 inches long. Cut each strip through both layers of fabric.
![]()
Take the fabric strip from the top layer and the bottom layer and tie them together to make knots. Do this on every single strip. Make sure you match the top to the bottom to catch every single ribbon.
This is a slow process so turn on a movie if you get bored.
![]()
Cutting and knotting is a long and slow process but that is literally all there is to it. It’s so crazy easy to make, the kids could do it.

This girl loves her furry siblings so much! Look at these pooches, the feelings are definitely mutual!


Gemma is always up for a photo shoot for momma’s blog posts.
Now you have a cozy blanket to take in the car, campfire, couch, bed, deck chair or beach….you should have a few of these as the weather gets chilly.
![]()
Thanks for visiting my website! I’d love it if you would Pin this on Pinterest or share it with your Facebook friends or other social media.
See you again soon!
More cozy fleece projects below!
Easy to Make Fleece Hat with Flowers – Simple Sewing Project
Sew a Super Easy Fleece Poncho-Simple Starter Sewing Project
Kit&Caboodle Blanket Using Scraps
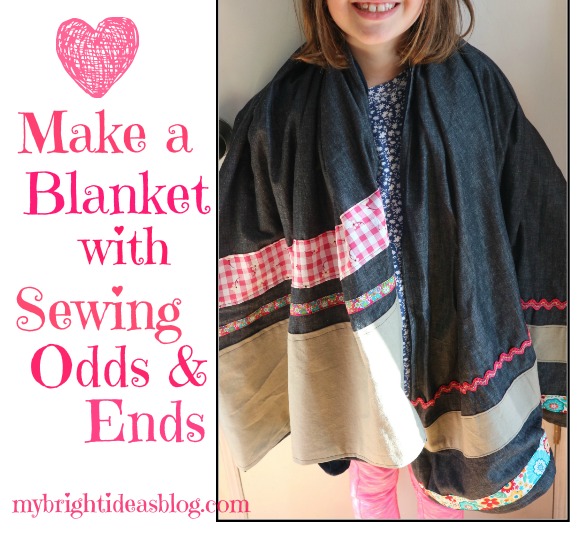
Use up your scraps of fabrics that you’ve collected from other projects-make a blanket! I feel like I have spent a lot recently on craft supplies and fabric so I want to challenge myself to make things out of the scraps I have laying around from old projects.
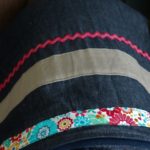
I found a cheap fleece blanket in the laundry room which inspired me to jazz it up a bit. After trying to add some trim to it I decided I didn’t have the patience for that but I liked my idea of using up scraps for a blanket….so I found a few yards of fabric in a cotton that looked like blue denim. Nice!
My blanket is 45 inches (115 cms) wide which is the standard fabric width. You could aim for pieces of fabric 2 yards long (72 inches or 183 cms long) but this is a project for using up what you have so make it whatever size you fancy.
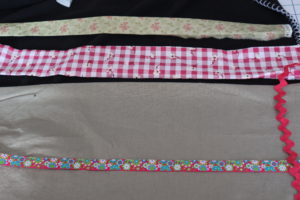
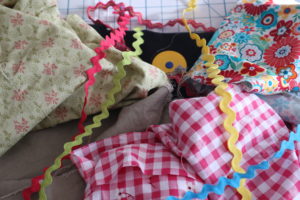
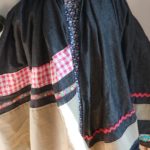
I thought I could arrange the trim and extra pieces of fabric as trim on the bottom of the short ends. I laid it out to get an idea of what it might look like.
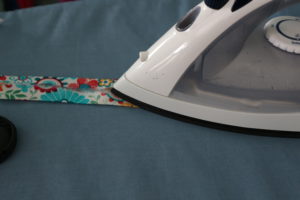
Then I ironed any unfinished hems of the fabrics so it would look like a wide trim. After I arranged it how I like it and I pin everything in place.
After sewing each trim in place I went in search of a backing for this blanket to add weight and cover up the back. I found some blue jersey (t-shirt fabric) that was almost the right size of the blanket. I trimmed off any excess fabric from the jersey to be the right size and pinned it to the project with right sides together. Sewing all the way around leaving a gap big enough to fit my hand into. Reach in and pull the fabric right side out.

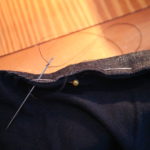

Just a few steps left now…I need to hand sew the gap that was left. Then sew it all the way around again so that the edge stayed flat.
I think this would make a great road trip blanket…or picnic blanket but since its January and we are up to our hips in snow…we’ll use it for now as a snuggle up on the couch blanket.

The final size of the blanket was 45 inches wide (115 cms) and 63 inches long (160 cms). If it was 2 full yards it would be 72 inches long so this was leftover.