The No Sew Fleece Blanket

My daughter loves dogs so when I saw this fleece at Joann Fabrics-I grabbed it. It’s so cute wish I had gotten more to make a dog pillow or bed.
I prefer my fleece blankets to have a pattern on one side of the blanket and a co-ordinating color on the back. I chose a bright red to be the second color to match this awesome dog fabric.
To make this project you will need:
- fleece fabric in 2 co-ordinating colors. I had mine cut to 55 inches long
- scissors or rotary cutter and mat
- ruler or tape measure
![]()
Fleece fabric often has one side with writing and the other side will be curled. Start by trimming off these rough edges.
![]()
Lay the fabric on the floor-you need a huge workspace. Stack the two layers of fabric on top of each other and make sure it is a perfect match. If one piece is slightly longer, trim it.
When it’s as close to perfect as you can get it, trim off 4 inch squares off of each corner.
![]()
Without moving the fabric, cut the edge of the fleece into strips 1/2 wide, 3 inches long. Cut each strip through both layers of fabric.
![]()
Take the fabric strip from the top layer and the bottom layer and tie them together to make knots. Do this on every single strip. Make sure you match the top to the bottom to catch every single ribbon.
This is a slow process so turn on a movie if you get bored.
![]()
Cutting and knotting is a long and slow process but that is literally all there is to it. It’s so crazy easy to make, the kids could do it.
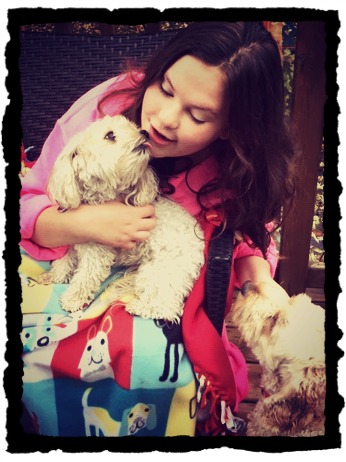
This girl loves her furry siblings so much! Look at these pooches, the feelings are definitely mutual!


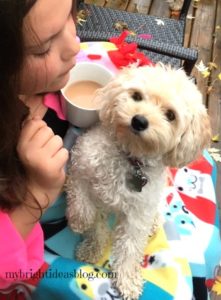
Gemma is always up for a photo shoot for momma’s blog posts.
Now you have a cozy blanket to take in the car, campfire, couch, bed, deck chair or beach….you should have a few of these as the weather gets chilly.
![]()
Thanks for visiting my website! I’d love it if you would Pin this on Pinterest or share it with your Facebook friends or other social media.
See you again soon!
More cozy fleece projects below!
Easy to Make Fleece Hat with Flowers – Simple Sewing Project
Sew a Super Easy Fleece Poncho-Simple Starter Sewing Project
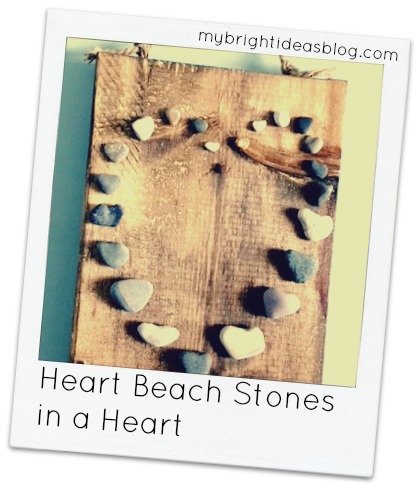
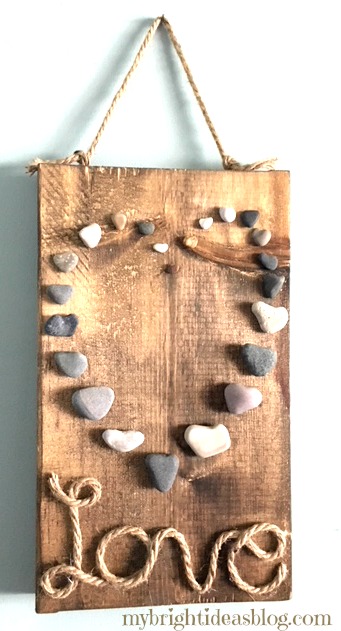
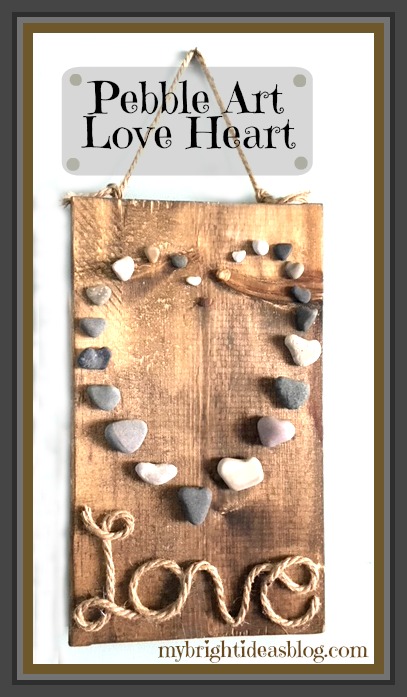
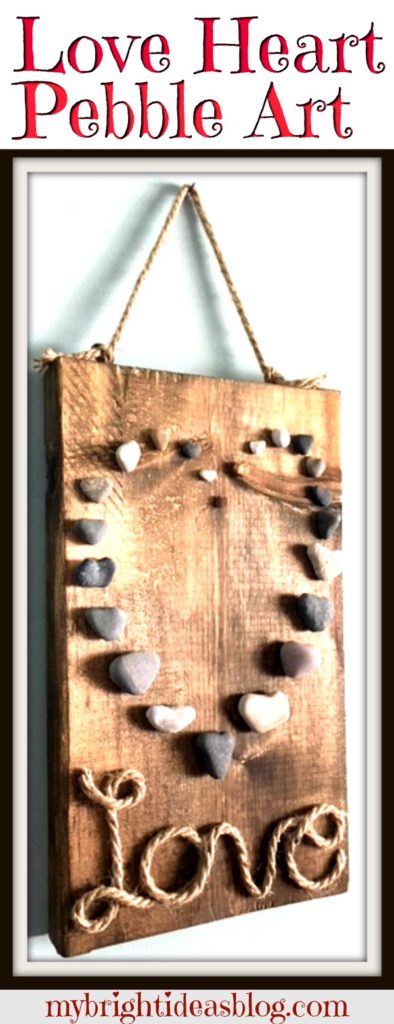
Heart Shaped Beach Stones – Pebble Art
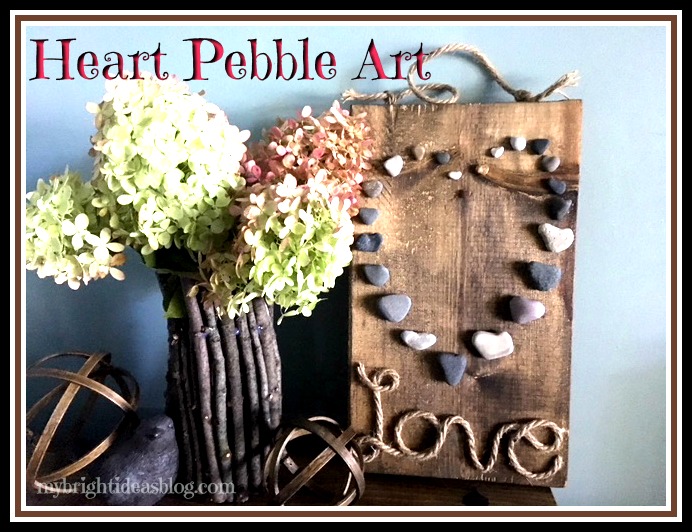
Make heart shaped pebble art with a collection of beach stones and natural rope on wood.
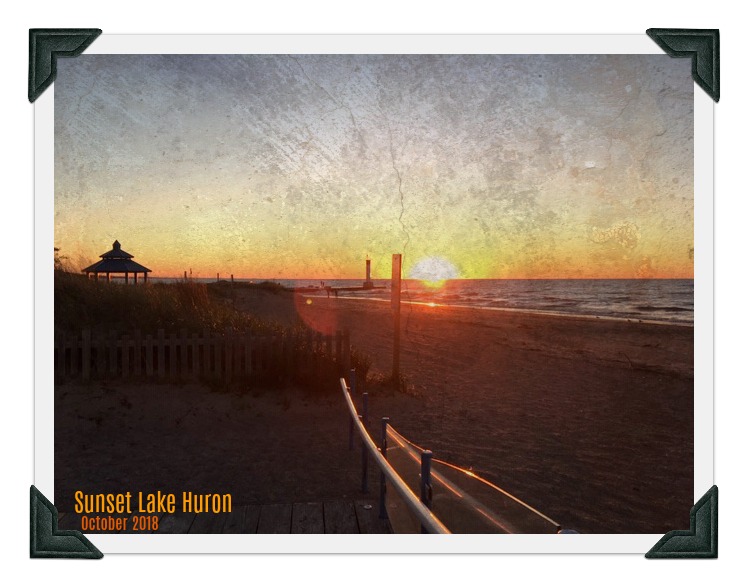
We have gone to the beach twice in October. The cool thing about going to the beach in the Fall is that no one else is there. The beach-that is typically packed with families with picnics and sunscreen….well….is empty. Have you ever had an entire beach to yourself? It’s amazing!
Our home is about an hour’s drive away from Lake Huron. If you aren’t familiar with the Great Lakes allow me to explain….
The Great Lakes
The Great Lakes aren’t your typical lakes. There are 5 and they are huge! Each looks like a sea, with rolling waves, winds, strong currents, great depths and distant horizons. According to Wikipedia if you put all 5 of the Great Lakes together the surface would be the size of the United Kingdom. Lake Huron is where we would head to see a gorgeous sunset.
If we drive an hour in the opposite direction from home, we will be at Lake Erie. If you are a morning person you can watch a beautiful sunrise on that side. Yawn…..
The Great Lakes are the largest group of freshwater lakes on Earth. 4 out of 5 are on US Canadian Borders (Superior, Ontario, Huron and Erie). Leaving Lake Michigan the only one that is located completely in the US. According to Wikipedia “they form a single, naturally interconnected body of fresh water”.
Well that is enough of our fun facts for today! Moving back to our craft project and a trip to the beach.
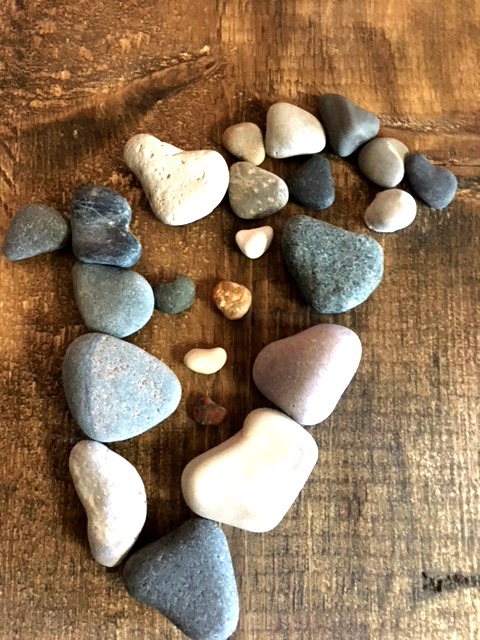
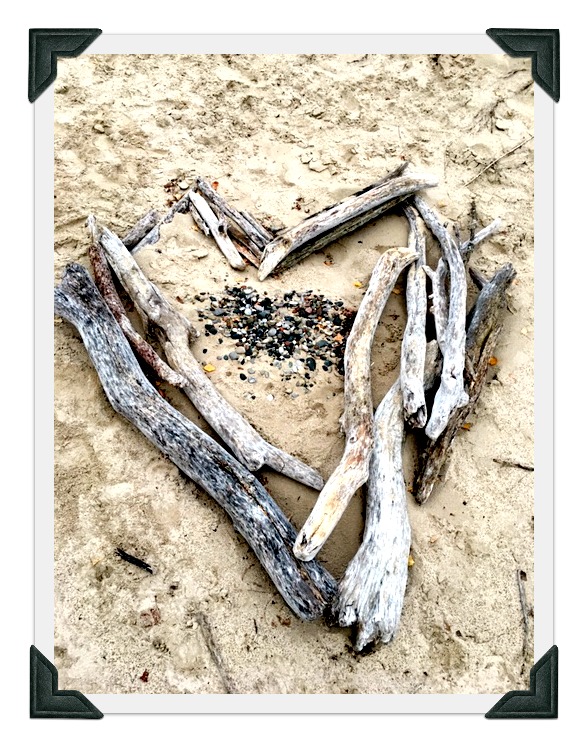
With my eyes on the ground looking for awesome rock treasures I always marvel at how beautiful the stones are wet, sparkling in the sunshine. As we walked along looking for interesting shapes-especially hearts! What did we find but this heart made out of drift wood. Awe isn’t it Lovely!
If you look at the beach for odd shaped stones, you suddenly see how very many there are in the shape of a heart.
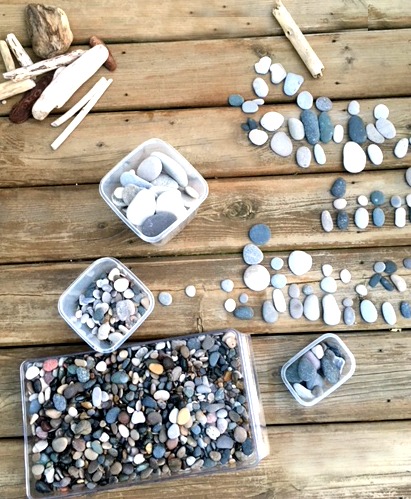
We came home with a nice collection of smooth stones that I sorted into a few containers for different crafts I have planned.
Circles, Oval, Hearts, Big Flat ones and some that were just wonky shapes.
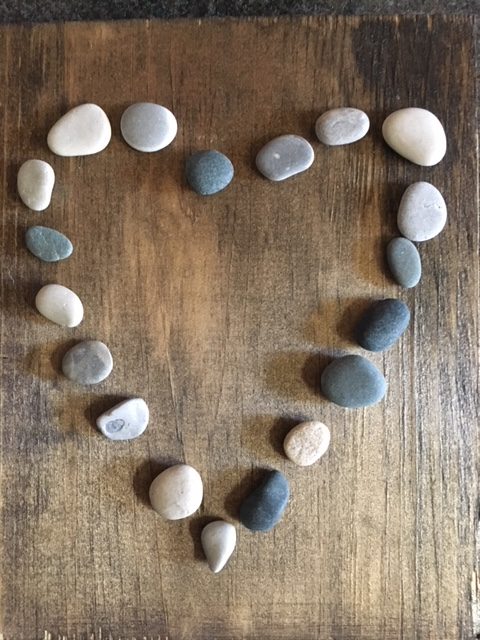
If you are just buying a bag of stones from the dollar or craft store you probably won’t find heart shaped ones, but you can make a heart shape with any natural pebbles and it still looks great.
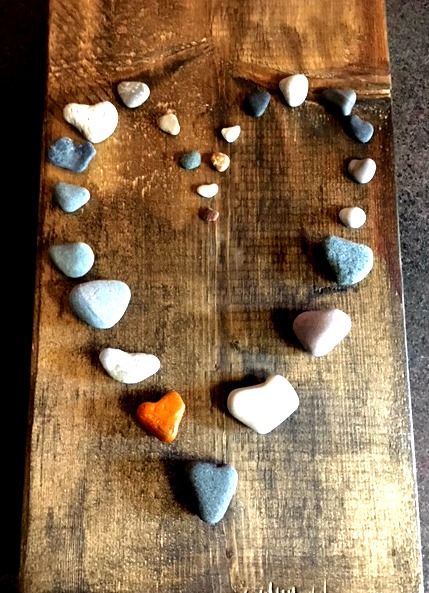
A month ago, I was spray painting things and I threw in some stones and painted them. If you have already my previous projects from the summer you will soon see that I love to spray paint things! My daughter noticed that I had painted a random stone orange but it was a really cool heart shape. This started my fixation on heart shaped stones.
On our next trip to the beach we specifically made a search for hearts, circles and long oval pebbles of any size. Bring on the rock projects!
To make this you will need:
- heart shaped stones (if you can’t find them smooth pebbles are fine)
- wooden board (I had already stained this 9 x 16 board with Miniwax Jacobean)
- jute natural rope
- hot glue gun
- 6 glue stick refills
- 2 eye hooks
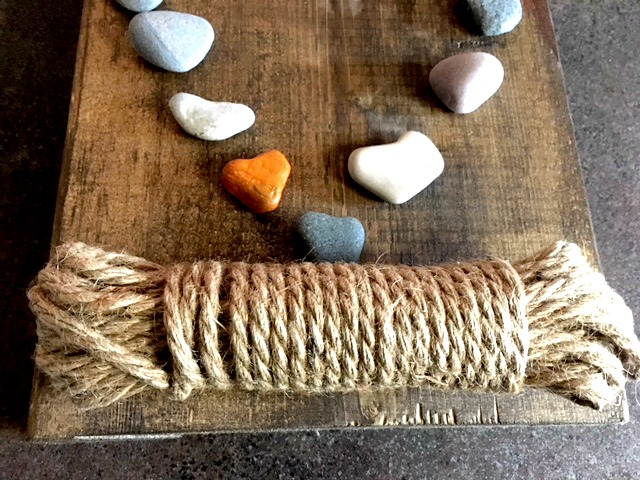
To get started, I organized my love heart shaped rocks to see how big it would be on my wooden board. I didn’t glue it to on yet. Instead, I took a photo of it on my phone in case I needed to refer to it. Then I got my jute natural rope.
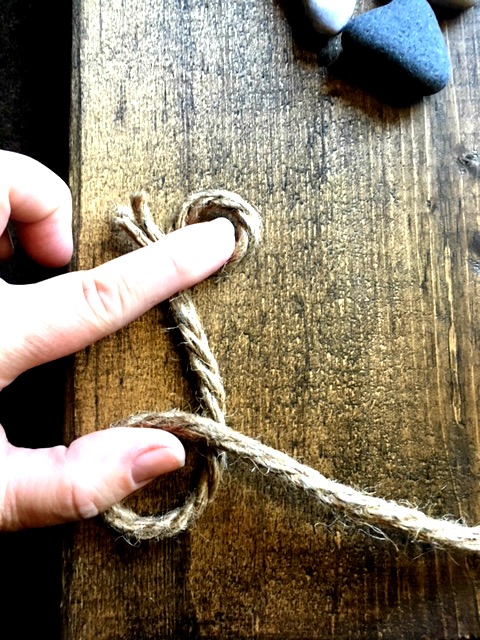
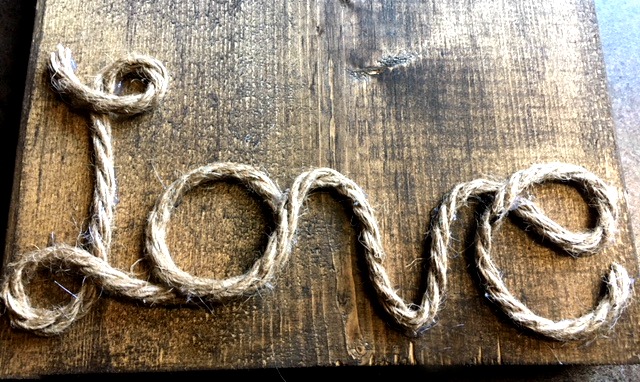
To decide on your letter size use your fingers to make the shape of the L. I usually “eyeball” my projects instead of measuring. Holding the rope down I wrote out the letters of the word Love on the wood.
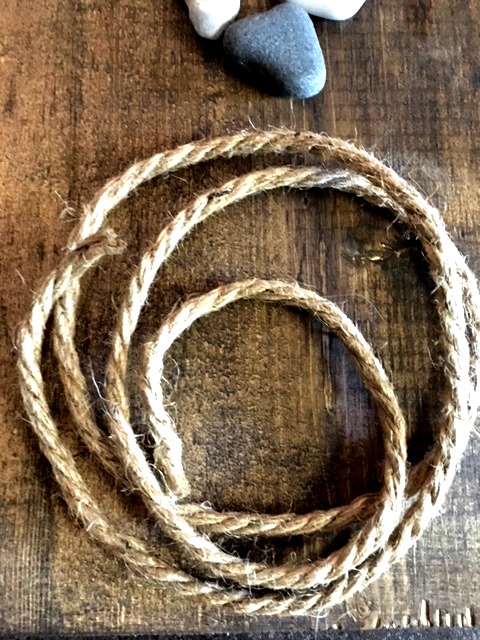
I cut the rope ahead of time because it was quite big to work with. You might choose to leave it on the spool until the end. That’s cool too!
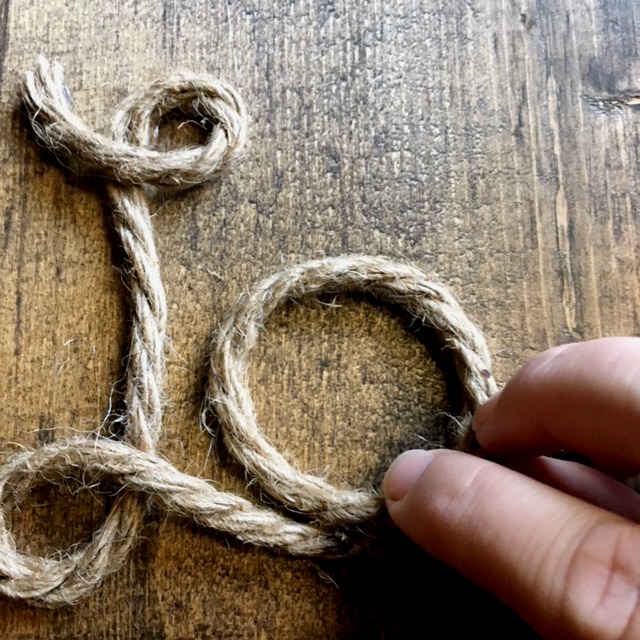
Using a hot glue gun put a few dabs at the top of the loop of your letter L and guide it into the shape of the letter using dabs of glue as you go along. Move on to the letter O and then join into a V and finally an E.
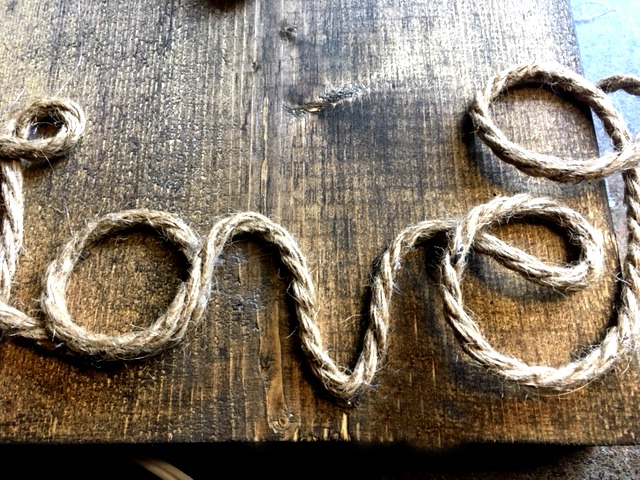
After the E is glued down trim the rope. Make sure the end of the E is secured so that the rope doesn’t fray and lift up.
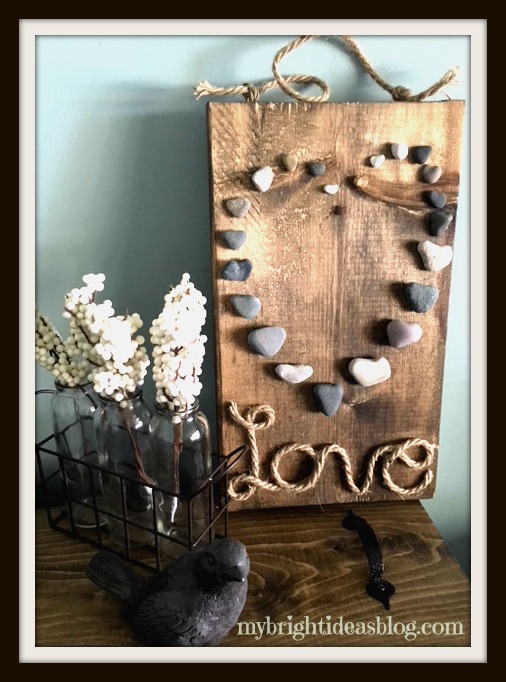
Perfect! Next lay out the rocks in the heart shape again.
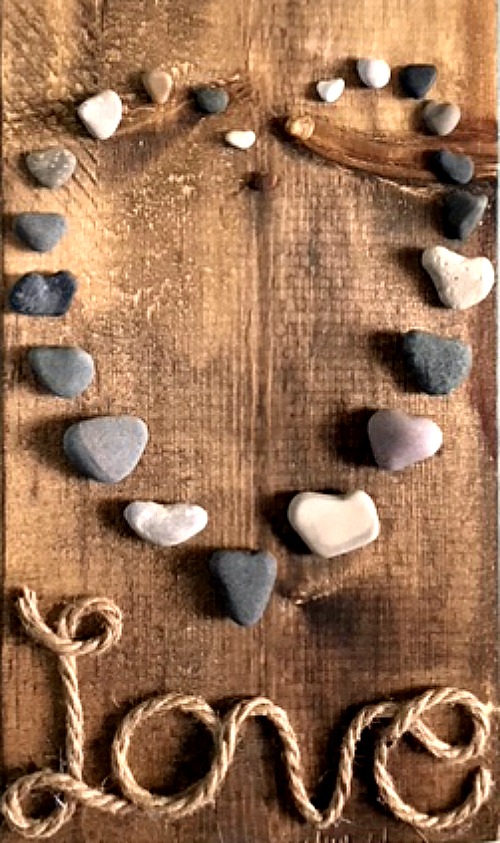
When you have the stones just where you want them. Remove each one and put a dab of hot glue on each pebble and then put in back in its place.
This craft would look good without the rope if just the stones on the wood appeals to you.
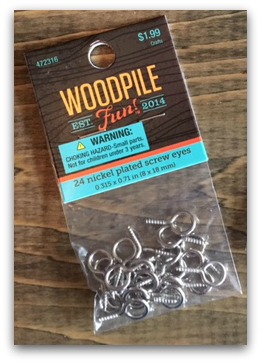
I picked up this package of screw eyes at a craft store but you can find them at the hardware store and dollar stores too. I chose the humble eye hooks so that I could have the rope on the top of the project match the “Love” at the bottom.
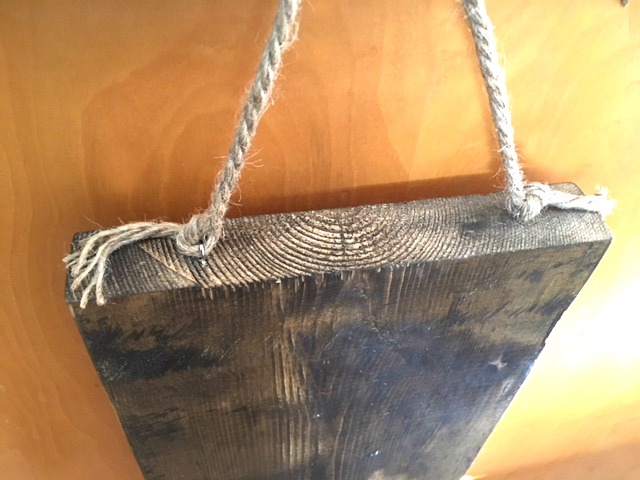
Simply screw these into the top of the board and tie jute rope in a knot. Now it can hang on the wall.
This is a super easy gift idea. You could really personalize it by writing your last name instead of love, or something else…maybe “faith”, “hope”, “smile”, “dream”….something that will inspire or make you smile. You could also make this any size or paint the wood board instead of staining it. Get creative!
Thanks for reading this post and checking out another one of my crafts. I have posted several rustic/wood home décor projects recently, so I’m linking them to this message for you to pop over and see too.
Please pin or share with your social network of friends.
…
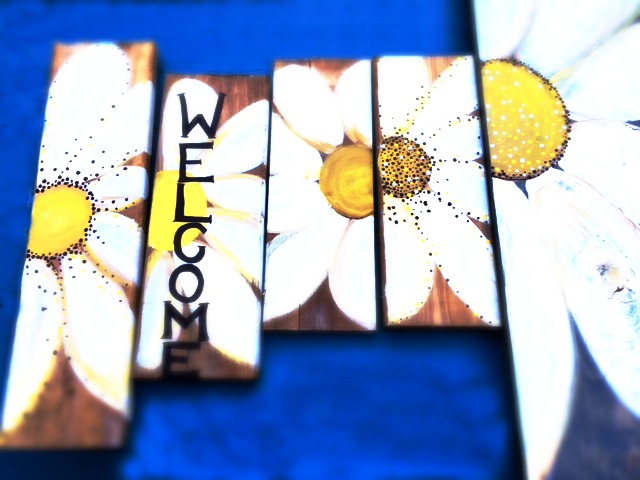
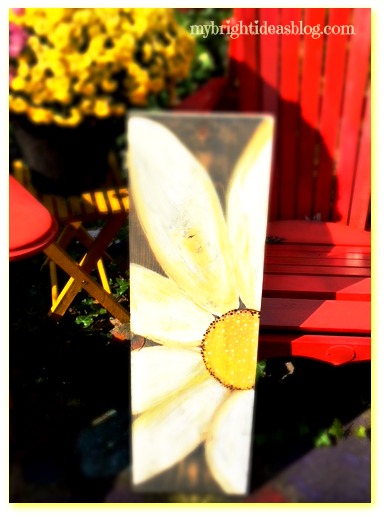
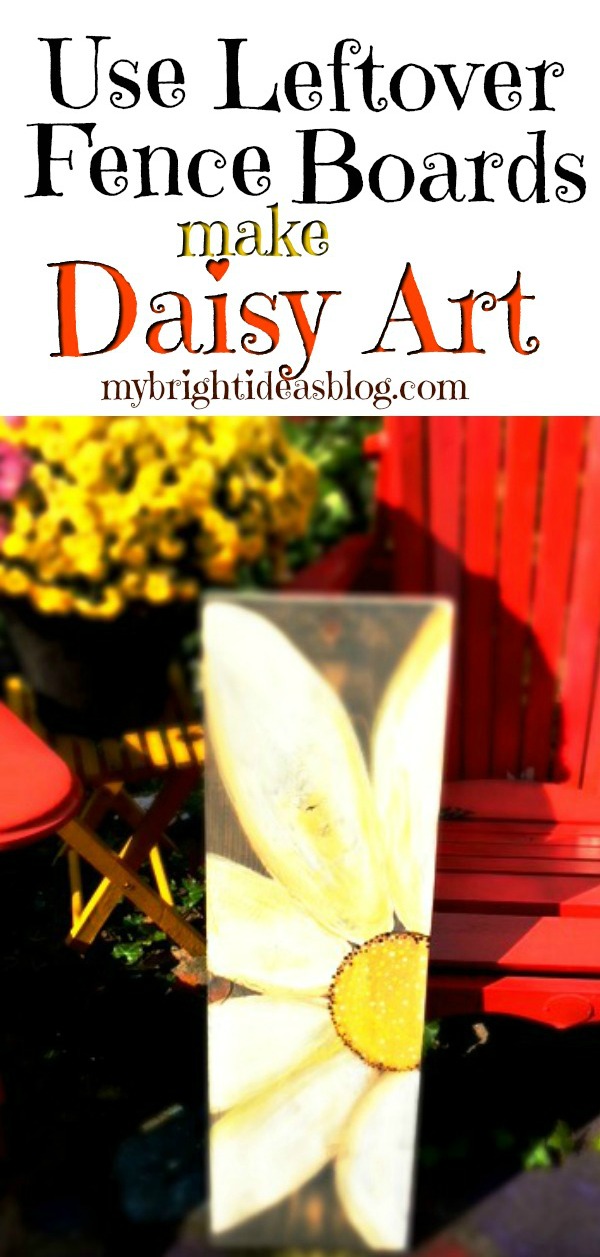
Outdoor Daisy Art – From Lumber Scraps!
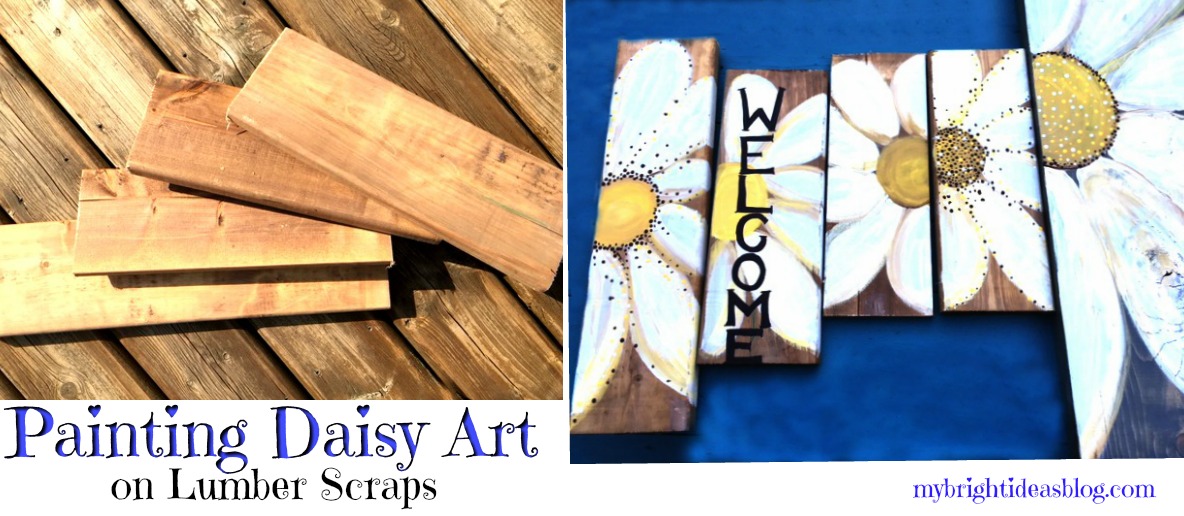
We have done a lot of wood projects this summer and the scrap pile is getting bigger. I am going to show you how to turn your left over wood scraps into painted daisy art that you can use indoor or outdoors. Grab your paint and brushes – lets get started!
You will need:
- lumber or fence boards
- sandpaper
- small and medium art paintbrushes
- craft paint-yellow, white, beige, black
- polyurethane (clear varnish)
- large brush (that you might throw out)
- hammer
- needle nose pliers (optional)
- picture hanging kit
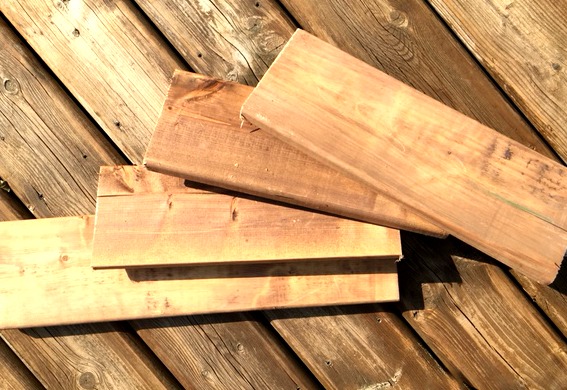
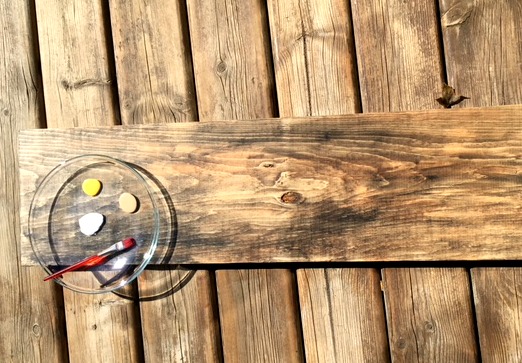
The wood in the photo above is scraps of pressure treated fence or deck boards. The size doesn’t matter-just work with what you have. Mine were approx. 5 1/2 inches x 14 inches (14cms x 36cms). They don’t need to all be the exact same.
Have a quick look at the ends of the boards to see if you have any jagged edges. If yes a quick swipe with your sand paper should remove the frayed bits. No splinters!
If you don’t have treated fence boards you can use bare lumber but put a bit of stain on to make it darker.
This board was not a fence board but rather a this piece of wood I was going to make another tray out of. It’s 9 1/4 inches wide and 35 inches long (or 24 cms x 89 cms). I had already put my favorite Jacobeen Miniwax on it. So it was ready to be used for something else but instead I put daisy on it for a much bigger version of the fence boards.
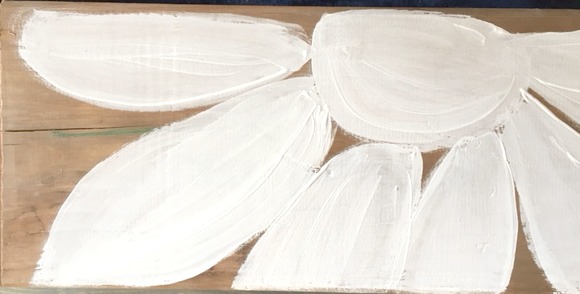
Start with white and paint the shape of the daisy. On this one I painted the centre white also.
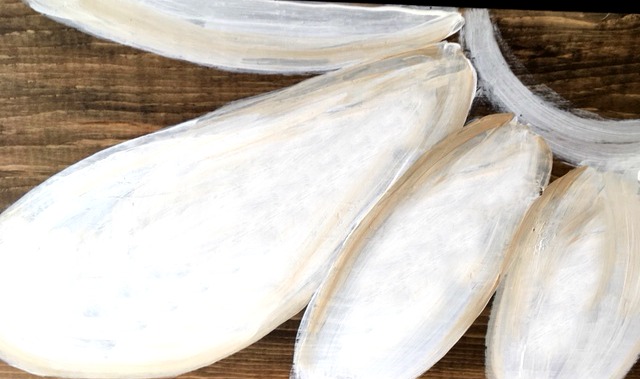
For this board I didn’t paint the centre till later. I double loaded my paint brush with white on the left and dipped a bit of the beige paint on the right side. I went along the edge of the petal to add some depth.
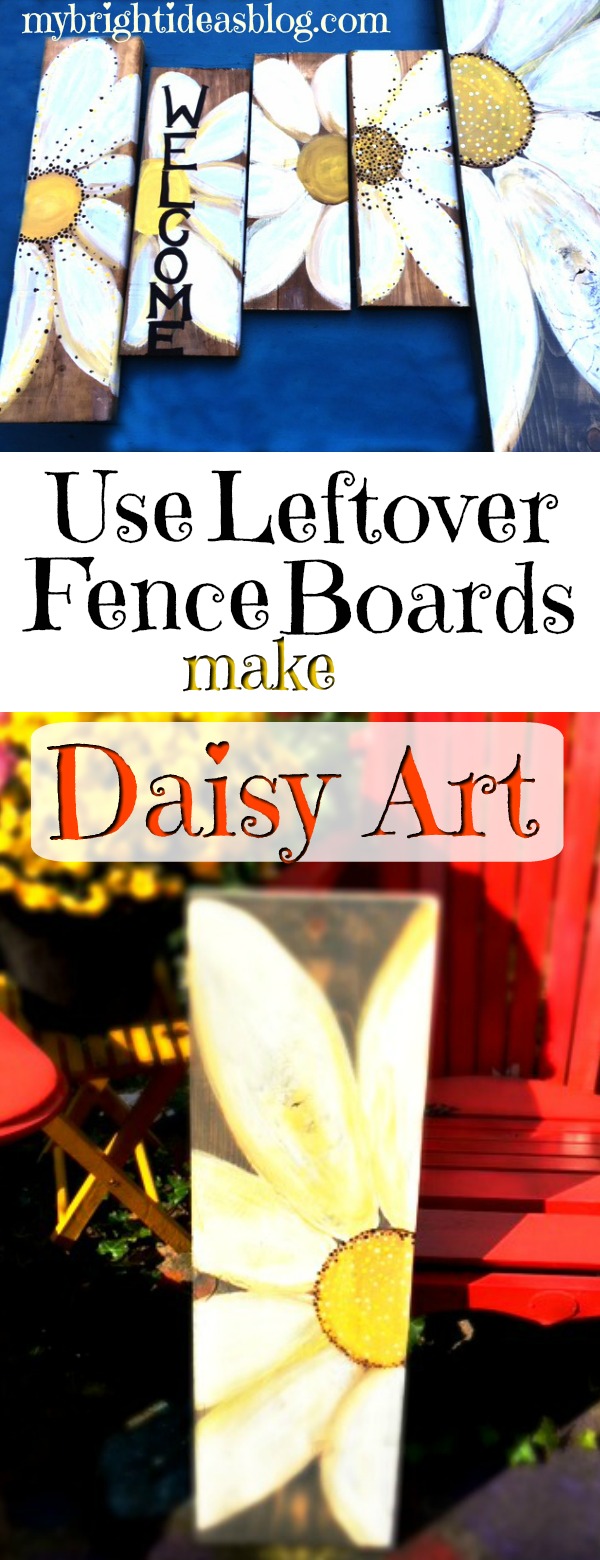
The centre part of the daisy was painted yellow. It doesn’t have to be perfect no one will look at it this close up. The brush strokes look great from a few feet away. If you turn it into a Welcome sign at your entry way or a backyard garden sign, it’s going to look great!
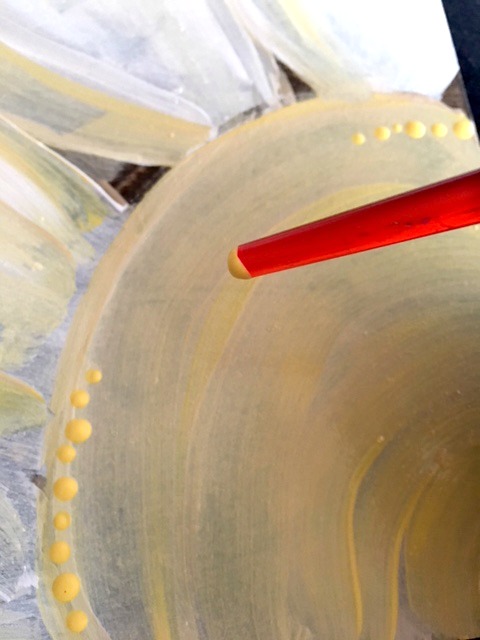
Using the end of the paint brush add dots around the edge of the circle. Some of the boards I didn’t put any highlight dots. The next photo shows I used brown and black dots to make it really stand out. Every board turned out differently.
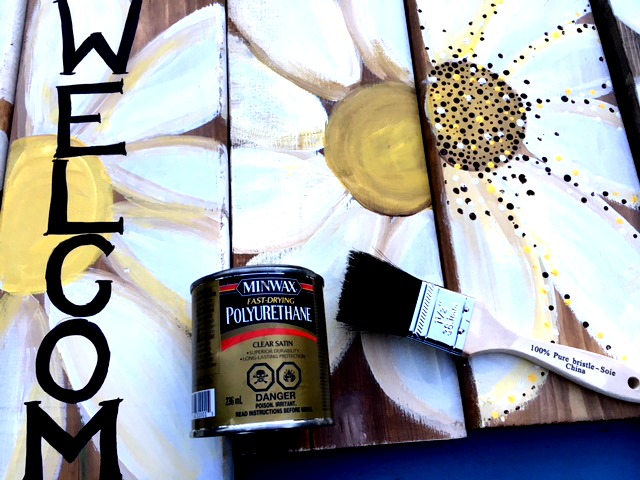
After the craft glue has time to be thoroughly dry, I painted on a clear coat of satin polyurethane. If this is going to be used outside it should have this protection on the front and back and edges. The fence board scraps will be weather resistant but the craft paint might crack in the rain. So this protection over the front and sides is worth the effort.
Oh and I hate cleaning polyurethane out of paint brushes so I just use the cheap brushes so I can toss them out. I have been known to wrap it in a baggy or cling wrap with an elastic band if I am going to need it again in the same day. I also store it that way in the freezer if I will need it again in a few days. If the paintbrush dries it’s hard not usable again.
If you get it on your hands. Make your way to the kitchen-without touching anything. Find a bottle of cooking oil (vegetable or olive have both worked for me). Put it on your hands and massage the oil in and watch the varnish come off your skin. Add hand soap and rinse off. Hands are clean and silky soft! Cool trick!
I made enough to give some away as gifts or put on the office craft table for sale. Since these were scraps and I had all of the supplies in my craft and diy corner…this would be a great item to make some money to sell….gotta support my craft addiction ssomehow!
To hang it or lean it…..mmmm.
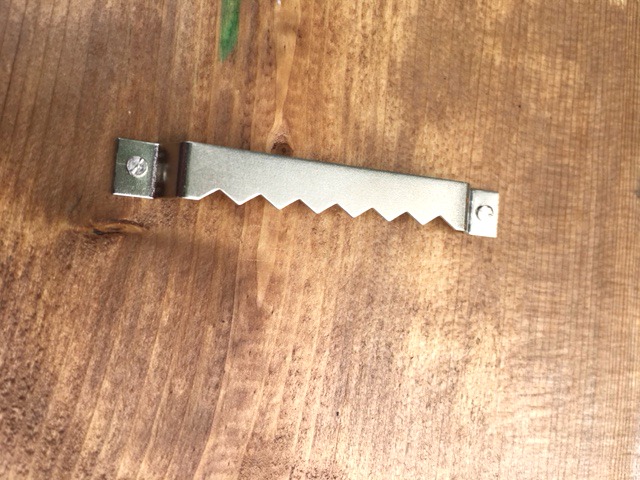
I used these inexpensive picture hangers and just hammered them into the back. The nails are the tiniest nails I’ve ever seen so I hit my fingers with the hammer about 5 times trying to get this nail tapped into the wood. I suggest getting some needle nose plyers to hold the nail while you get it started. Save your poor fingers!
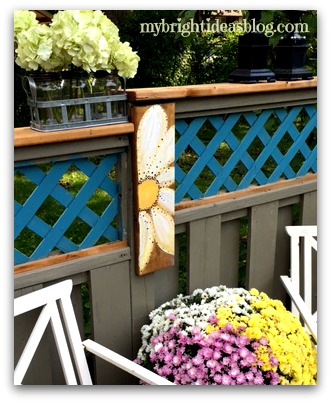
Around the patio we have a very old privacy fence. It has some ugly seams and badly matched up corners. Putting this as a plaque on the fence is a rather awesome solution!
This was super easy to make and looks great! Painting is so therapeutic. I highly recommend it!
Thanks for reading to the end folks! I hope you have a chance to pin this to Pinterest or share it with your favorite social media.
…
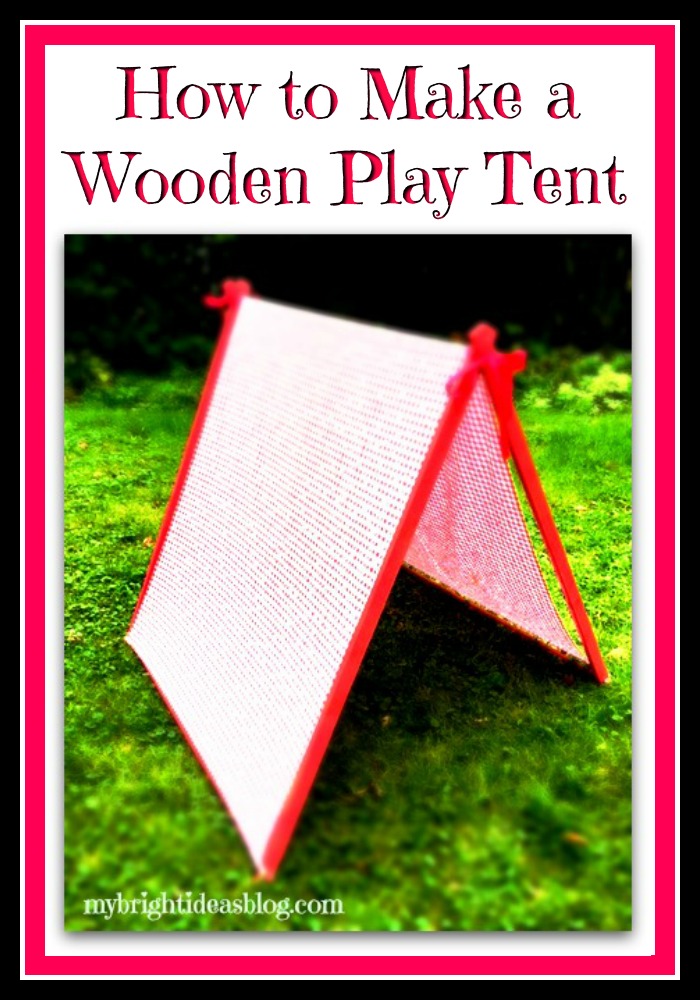
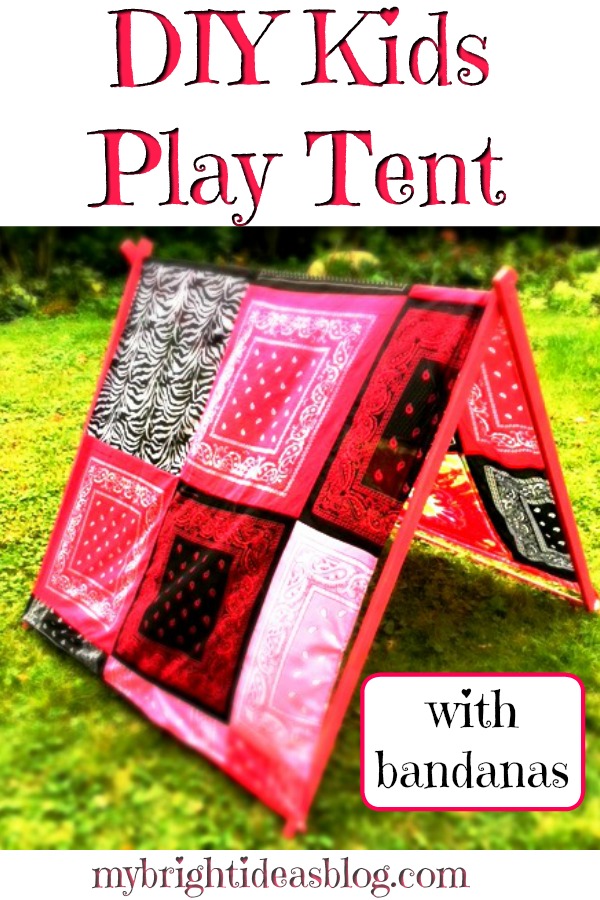
Make a Wooden Play Tent for the Kids!
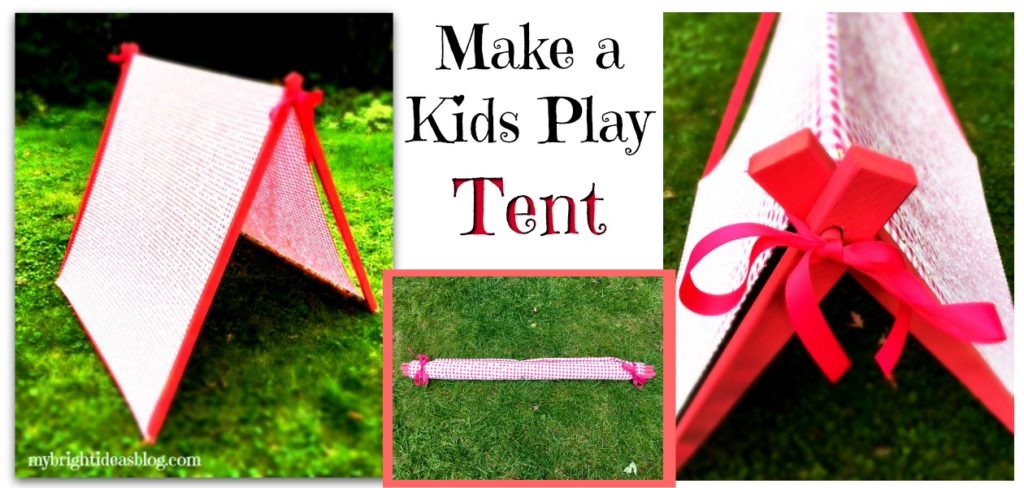
Here is a tutorial for a DIY Kids Play Tent! This won’t take much time or money to build. It would be an easy woodworking and sewing project for kids to help with. Why did I wait so long to make this!?!? The kids love it!
My daughters have always loved building tents. It’s fun for kids to steal the cushions and blankets and chairs to build a tent….sometimes even begging to fall asleep in it. I just wish they would put the cushions and blankets back when they are done….but that’s another story.
For the tent frame, you will need:
- 3 – 1/2 inch wide dowel (4 ft long) (approx. $8)
- 2 1x2x8 wood boards (cut in half) (approx. $5)
- power drill
- 1/2 inch drill bit
- tape measure
- pencil
- paint (optional)
For the tent fabric, you will need:
- fabric 45 inches wide x 90 inches long (115 cms wide by 230cms)
- scissors
- ribbon (2 pieces 30-40 inches/75-100cms long)
- thin elastic (4 pieces 5 inches/13cms long)
- safety pins (6)
- needle and thread or sewing machine (optional)
This is literally all you need, 3 x 1/2 inch dowels. They come from the store 4 feet long so there is no cutting here. Also, 2 boards 1×2 cut in half-so you have 4 pieces of 1×2. You can ask them to make this cut at the hardware store if you don’t have a handsaw or mitre saw.
Gather your drill, tape measure and pencil.
Measure and mark 2 inches from one end and 1 inch from the other end.
Drill the hole with a 1/2 inch drill bit. Test to see if your dowel will fit through the hole. You need it to be able to slide in fairly easily. I found it too tight and frustrating to put together when tight fitting so I ran the drill through the hole again in and out, in and out, to make it slightly bigger.
The top is the end that has a hole 2 inches from the top. The bottom has a hole 1 inch from the end.

Slide the first piece of dowel through the top holes of two of the 1×2’s The second piece of dowel can be inserted into the bottom holes.
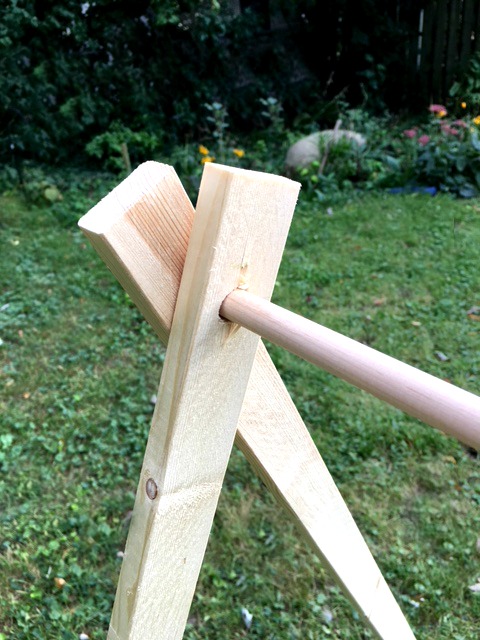
Add the next piece of 1×2 onto the top dowels to make an A.
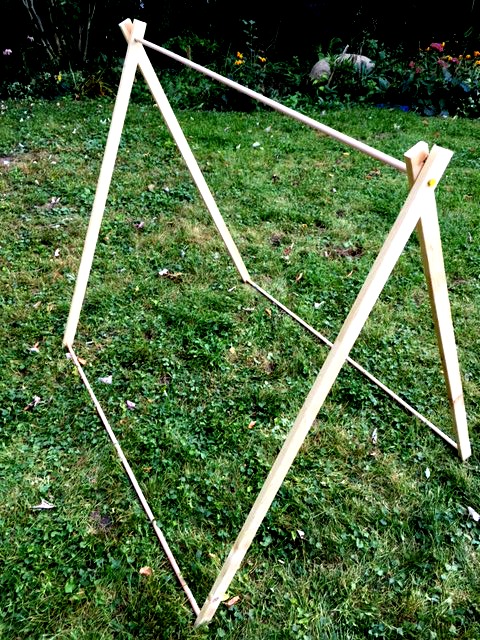
Slide the third dowel into the bottom end of the 1×2’s.

That’s it for the tent frame. Now for the tent fabric.…
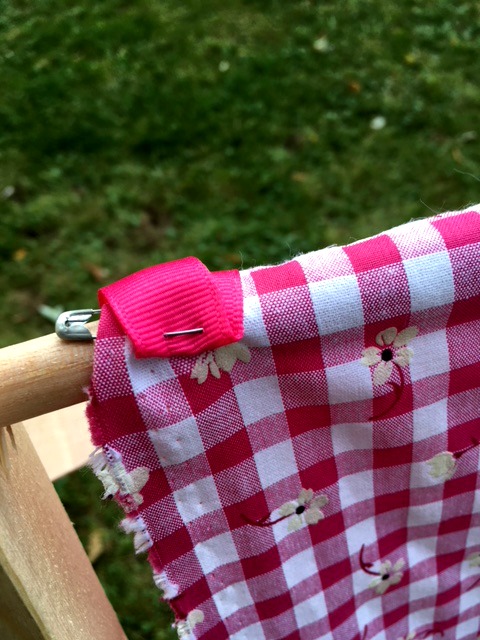
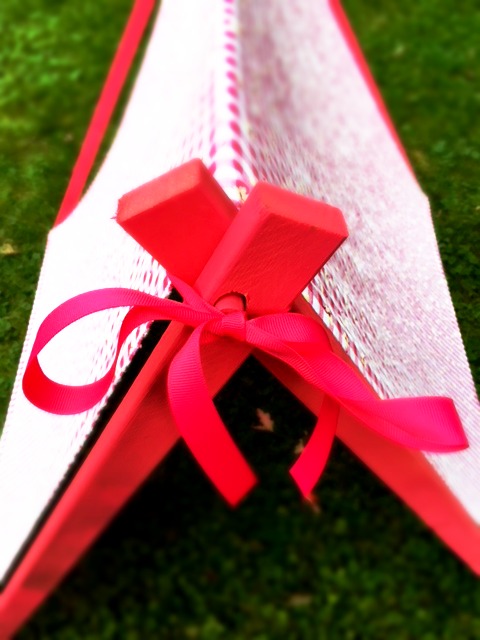
Slide your fabric over the top of the A frame. Pin a ribbon to the front and back ends.
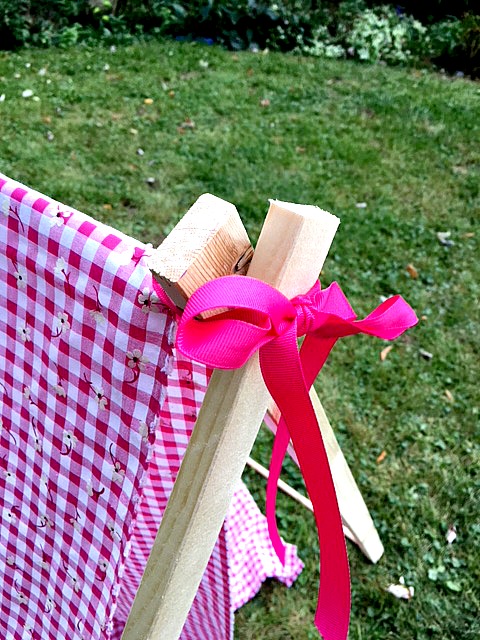
This ribbon isn’t essential but it does look nice and it will be helpful ties when you are storing the tent away.
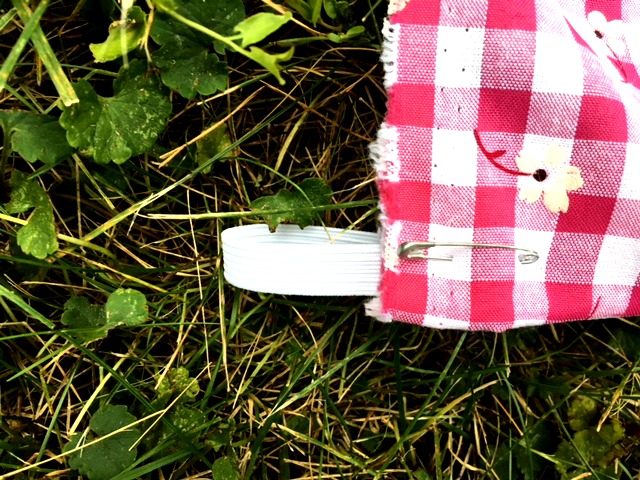
Pin a small piece of folded elastic onto all 4 of the bottom corners of the tent fabric.
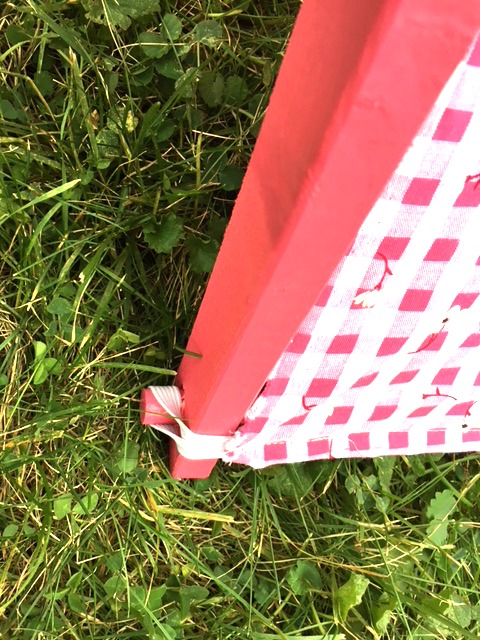
Hook the elastics over the ends of the bottom dowels.
It looks fine with just pins holding everything in place. You may want to hand or machine sew the ribbon and elastics in place. I did sew those in permanently and also hemmed the bottom of the fabric. It’s looking good enough to give away as a gift!
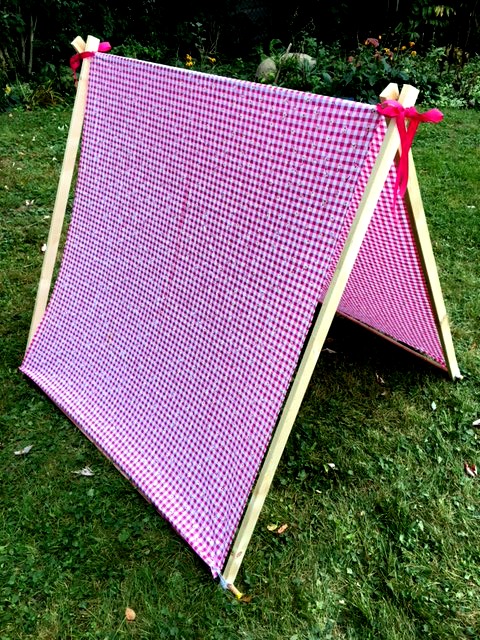
After this sweet picture was taken we decided the only thing to make it better is to paint it pink.
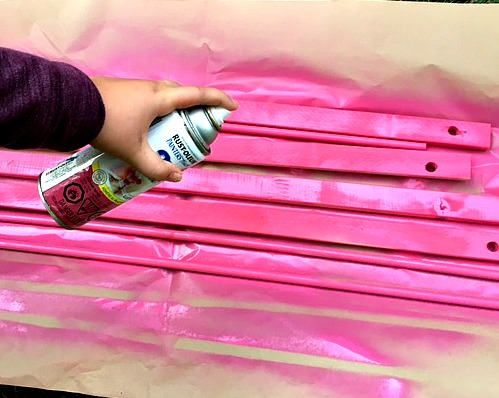
I already have loads of spray paint….because I love to change the color of things. See my previous posts and you will find I used a lot of spray paint this summer. This project doesn’t take much paint so its a great way to use up leftovers.
After allowing it to dry put it all together. Admire your handy work!
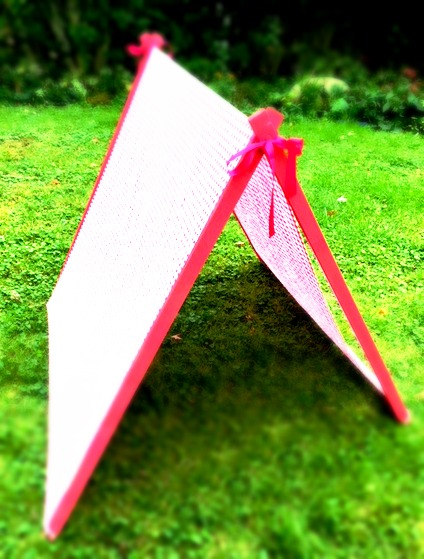
Did I mention that this is super easy to pack up?
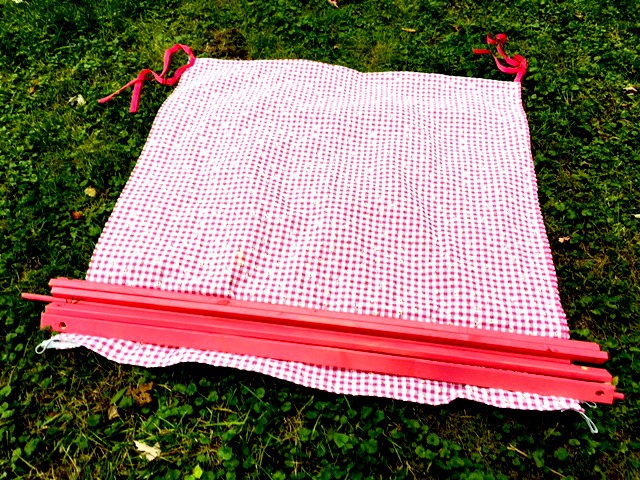
Fold the tent fabric in half. Next, place all the wooden tent parts on the end of the fabric.
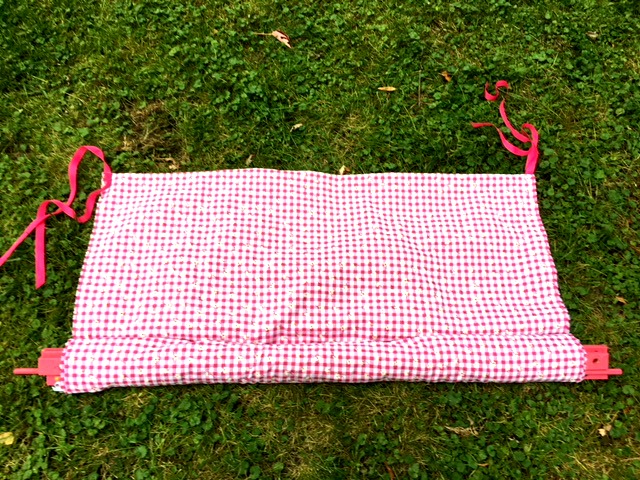
Roll up the fabric into a tube to hold the wood pieces together.
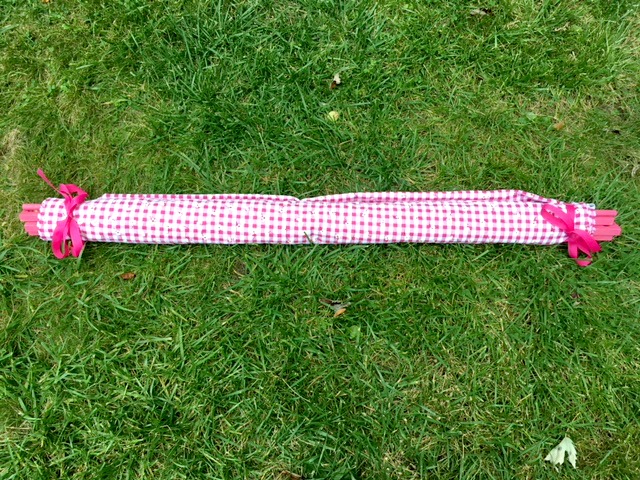
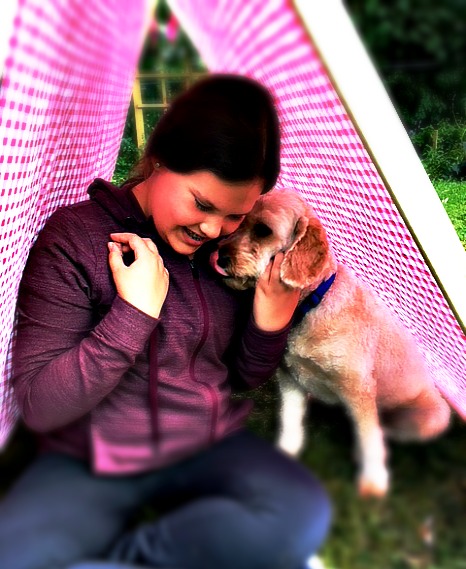
Lastly, tie the ribbons to keep it compact for storing or travelling. Remember when the babies were tiny and you wanted a place for them to nap that was in the shade at the park or beach? This would have solved the problem!
This was so easy to make. I can’t believe I didn’t do it when my kids were smaller.
Please pin or post this to facebook and share this easy DIY with your friends!
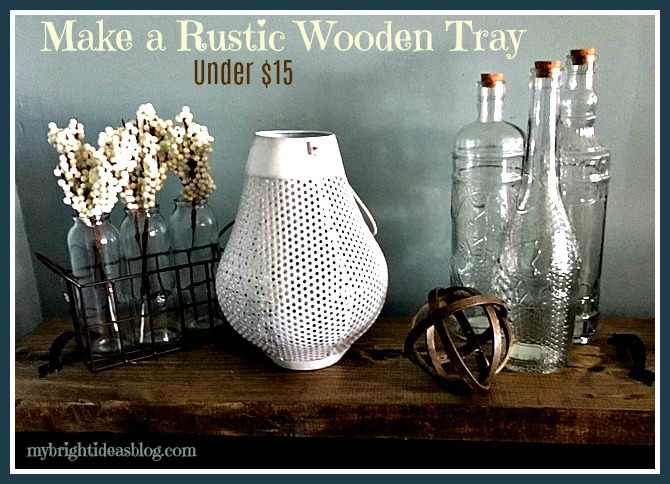
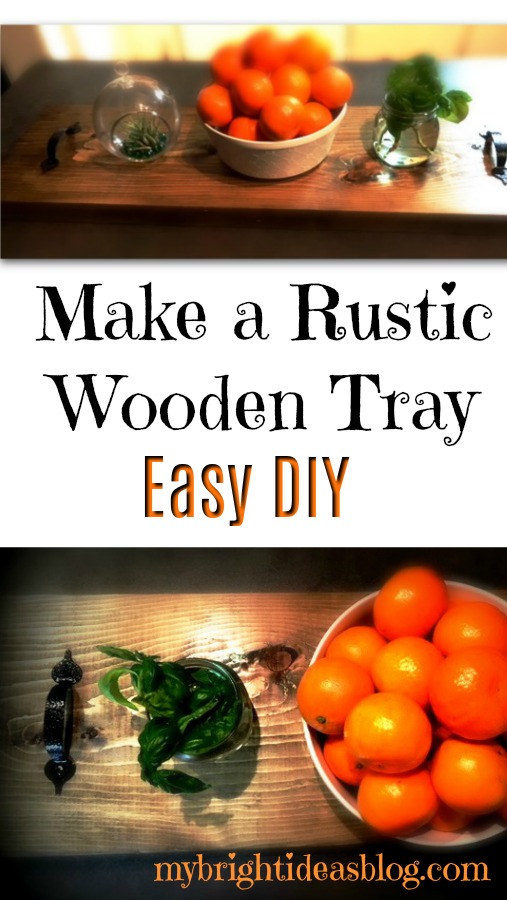
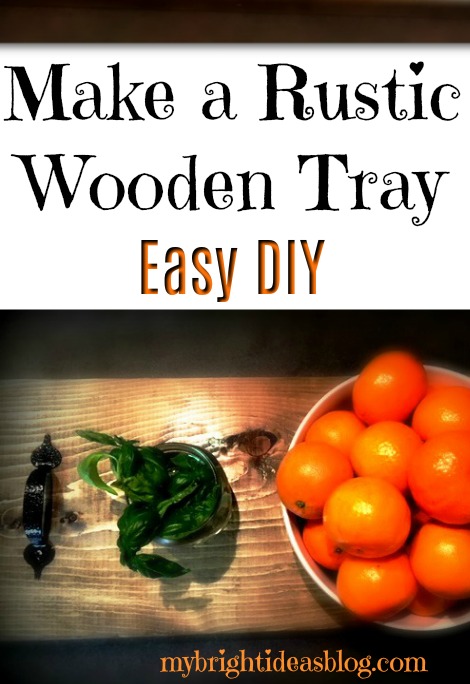
Make a Dark Stained Rustic Wood Tray – Easy DIY!
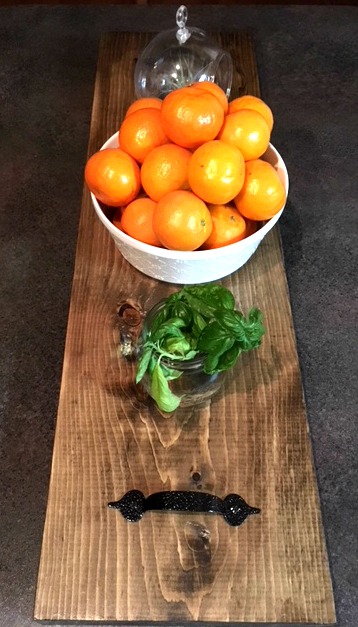
Shortly after making this rustic wood tray I had it placed out on the table with my bowl of clementines and we had company over. My friend Tina’s eyes lit up and said that looks like a Charcuterie Board! I had no idea what she was talking about.
Apparently, these boards are French named partly because harcuterie is the French word for smoked, dry-cured or cooked meats. So during a cocktail party or anytime your entertaining you put out a sampler of all sorts of meats on a wooden board. Cheese and crusty bread or crackers, dips and olives could also be intermingled on your board.
They can be the size of a large wooden cutting board.
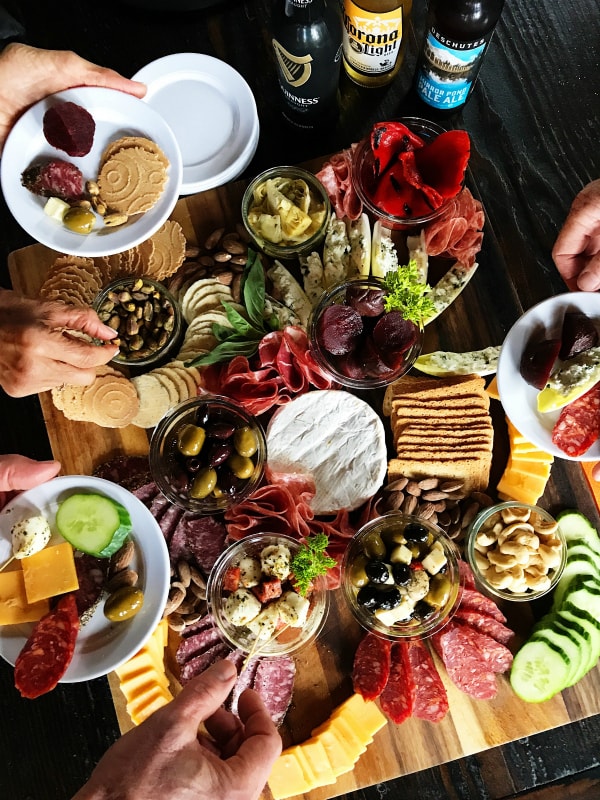
reluctantentertainer.com
Or as big as the table top!
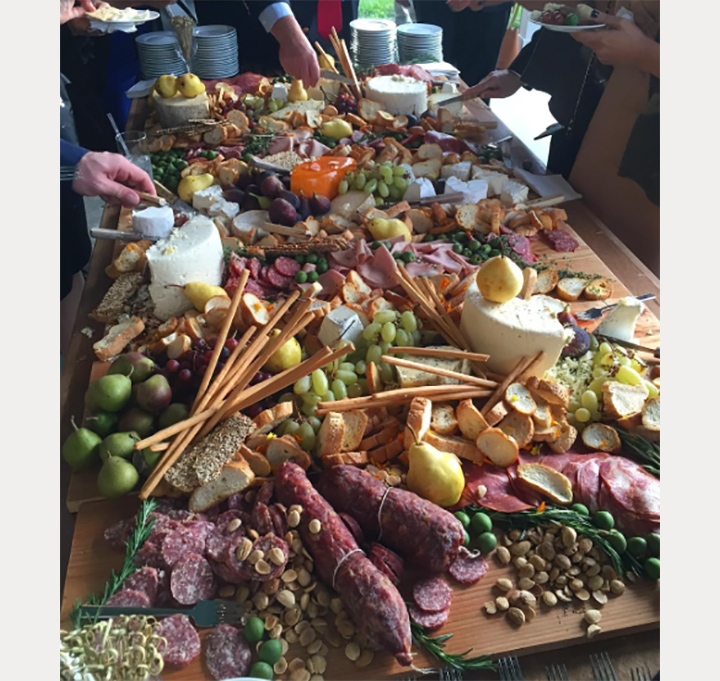
moncheribridals.com
The above photo is wedding spread!
Now this is not a blog about entertaining and making beautiful food. I’m a crafter and DIY-er so I’m going to be telling you about how I made my ridiculously easy to make serving tray.
You will need:
- 1 board 2x10x8 (this is long enough to make 3!)
- 2 handles ($3 each)
- sand paper
- stain
- rag
- clear varnish or polyurethane
- paint brush
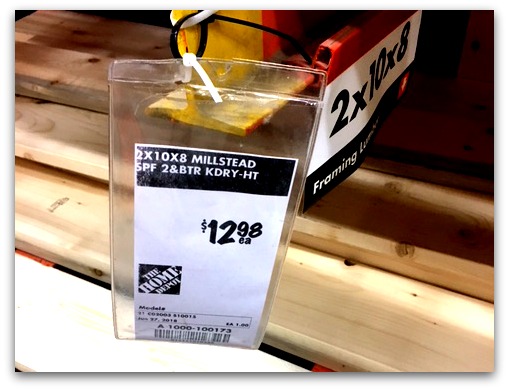 The board above is 2x10x8 cut into three pieces-so you can 2 away as gifts-That makes the lumber approximately $4.50 per tray!!!! That is amazing. When you look at these in the stores and online they can cost $50 to 100.
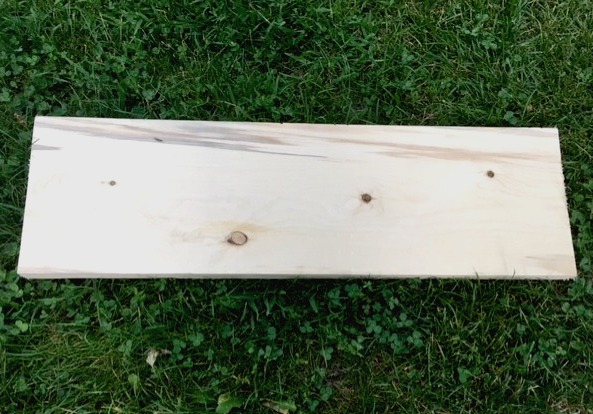
Cut the board into the lengths you prefer. The one I show in the photo was 31 inches long, the second one I made was 30 and the last one was 35 inches. I would recommend that you measure the side table you are going to put this on. Are you planning to make this to be a centre piece in the middle of the dining room table? Then 35 inches is great! But, if its a dresser that is 30 inches wide you don’t want to make it wider than 30 inches.
If you prefer your wood smooth, then you could sand it. If you like it very rustic then you could bang it up a bit with some random tools. I skip the sanding step usually unless there are frayed slivers on the ends of the boards.
With your stain and rag apply the color to your wood.
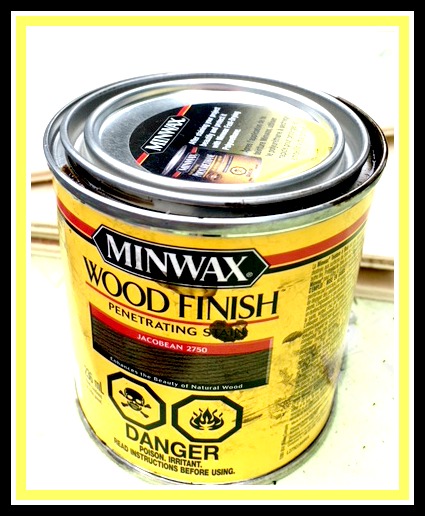
I used my favourite Miniwax color Jacobean 2750. I made the other pieces of board other colors (grey and ebony) but my favorite is always Jacobean.
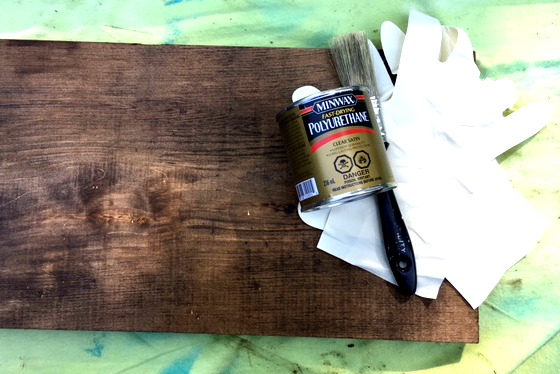
Since I don’t plan to put any food directly on my tray I used my usual clear coat over the wood to protect from wear and tear. This means I could even leave it outside in a rain storm and it would be fine.
If you do want to place food right on top of the tray there are many food safe options. They are not as durable (don’t leave it outside in a rain storm). Food safe options: Pure tung oil, raw linseed oil, mineral oil, walnut oil, beeswax, carnauba wax, shellac. One website suggested a mixture of mineral oil and beeswax. Here is the recipe…. https://www.finewoodworking.com/2006/08/01/food-safe-finishes
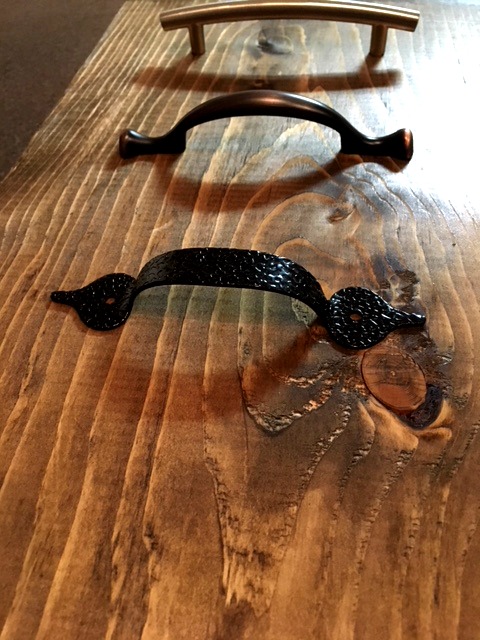
I picked up 3 of the cheapest handles the hardware store had. Each is $3-5 dollars making the cost of the project $11-15 each-assuming you already have the stain and varnish in your DIY stash of essentials. If you find some handles in the craft or specialty shops or even vintage handles by all means use them. They will be on top of the tray so it could be quite the conversation piece.
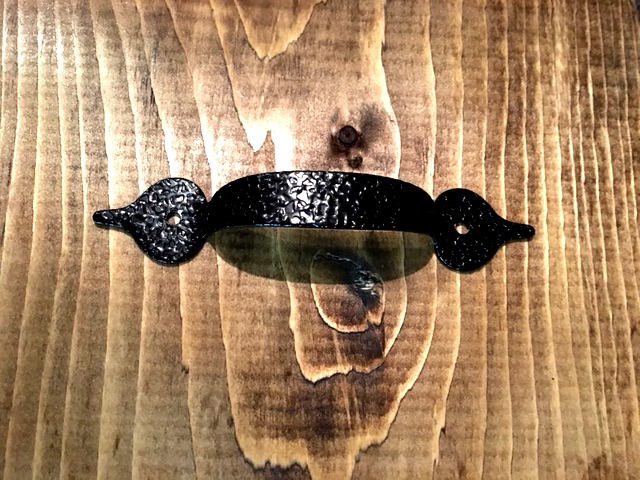
I chose this one because it screws in from the top. This is actually a good point. If you put on handles with screws that go in on the bottom you may need to counter sink the screw so they don’t scratch your table top. Or you could put 2 slim pieces of wood under the wood to lift it.
If like me, you chose handles that screw in from the top this isn’t a problem. Put the handles on the board and see where you would like them to be permanently. I put mine 3 inches from the ends (this board is 30 inches long).
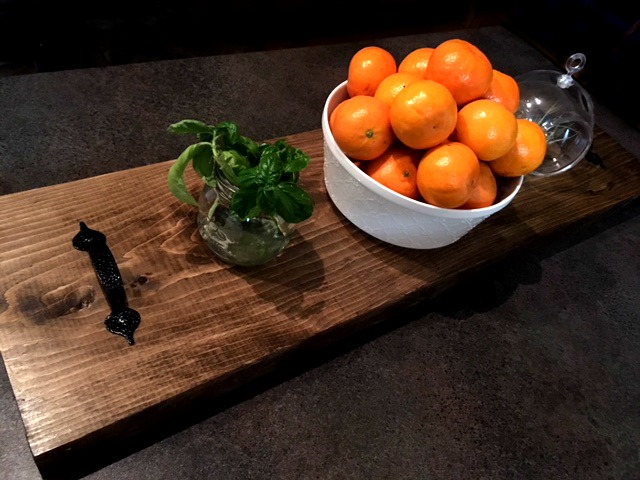
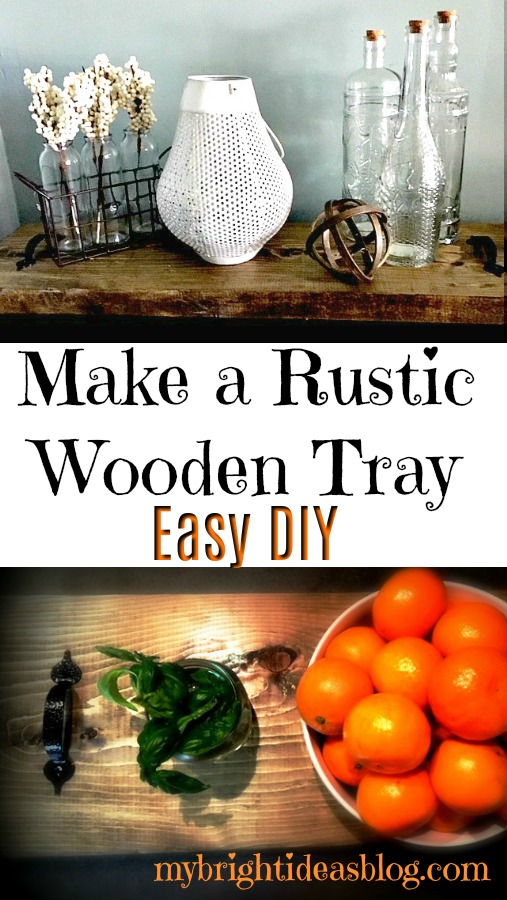
Voila it was that easy…its a simple board with handles.
This would look great on a side table with a few nicknacks between uses. If you do want to use this to lay out meat and cheese, olives and antipasto you could put down paper doilies, little bowls and plates or wrap the board with cling wrap. I would do this even if you use a food safe finish for faster clean up.
If you find this too long or the wood too thick cut the boards shorter to suit you and your space.
This goes to show that if you see something so awesomely simple, see if you can make it yourself for a fraction of the price.
I hope you give it a try!
…..
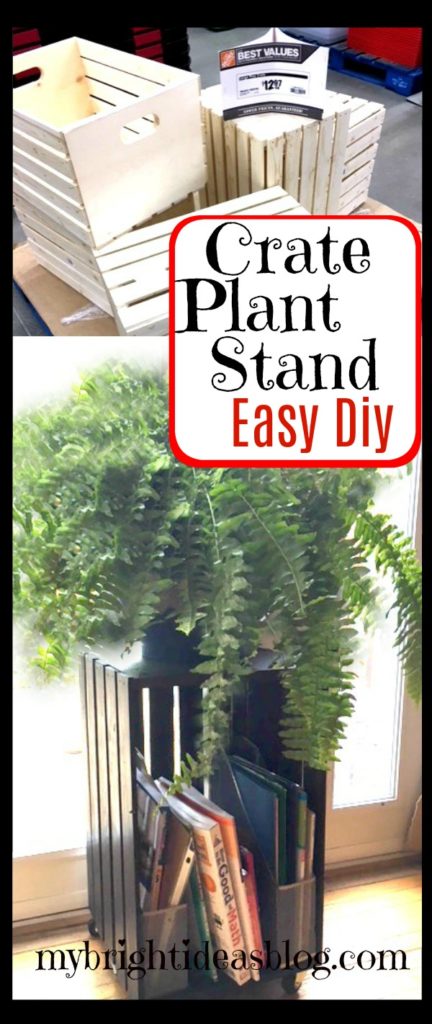
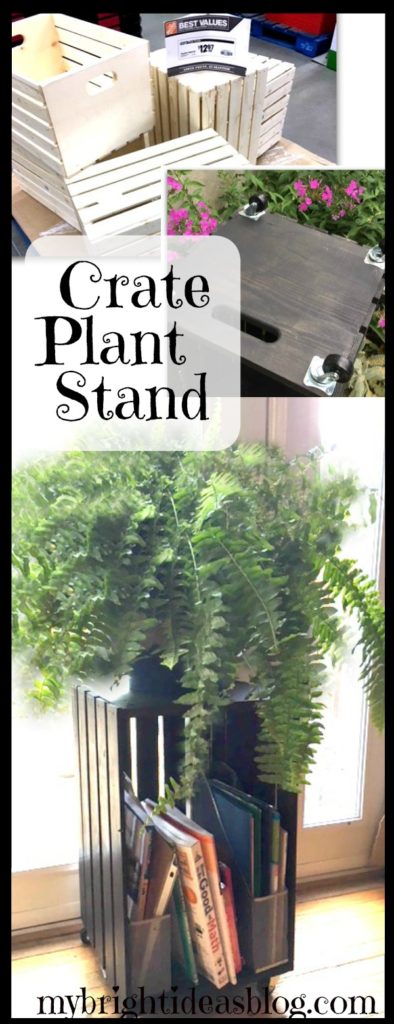
Make a Wood Crate Plant Stand – Super Easy!

Have you seen these bare wood crates around at the craft stores, hardware store and even Walmart? I sure have and I love em!
I had one lying around without a purpose so I decided to make it into a plant stand for my lovely new fern. Simply paint or stain it, tip it on its end and add some wheels and you have got a super easy and cheap end table, night stand for the bedroom or like me a plant stand on wheels.
What you will need:
- large crate
- paint or wood stain
- 4 caster wheels
- screws (description below)
- screw driver or drill
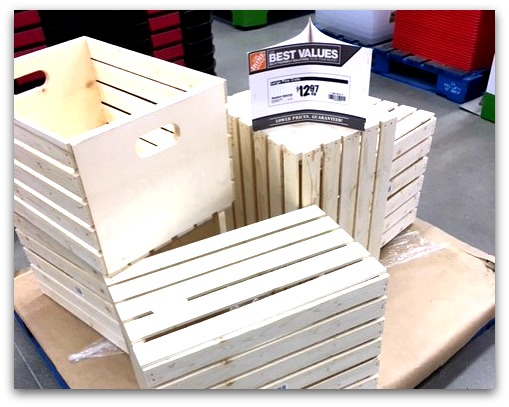 These crates come in more than one size. I used one from Home Depot which was their bigger $12 crate. You could also choose 2 smaller ones, turn them on their sides and attach them.
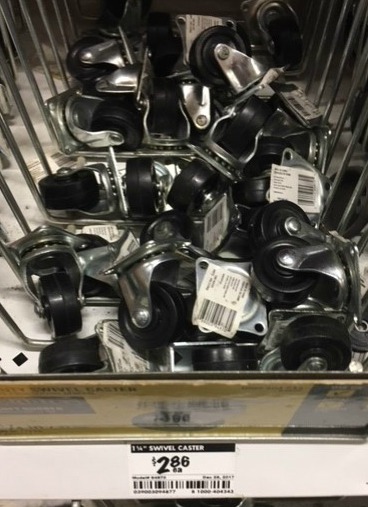
Purchase 4 swivel caster wheels. When you visit this area of your hardware store you may be shocked to see how many different kinds of and sizes there are of caster wheels.
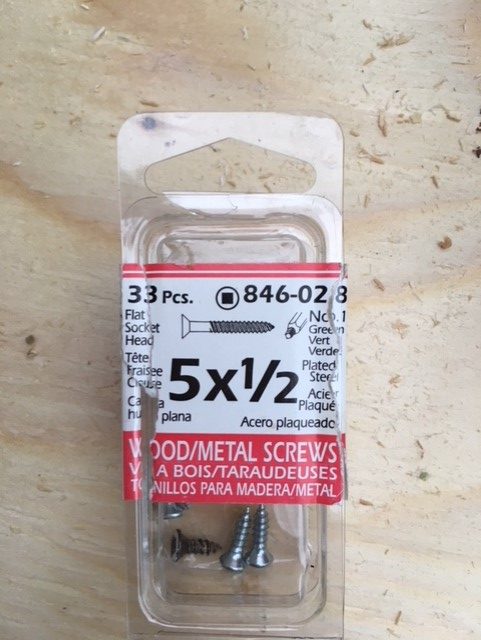
The screws used are really short. If you want to use a longer screw you may need to glue some strips of wood on the inside. You don’t want to use a longer screw and have the end poking through. I used short screws and they are holding just fine.
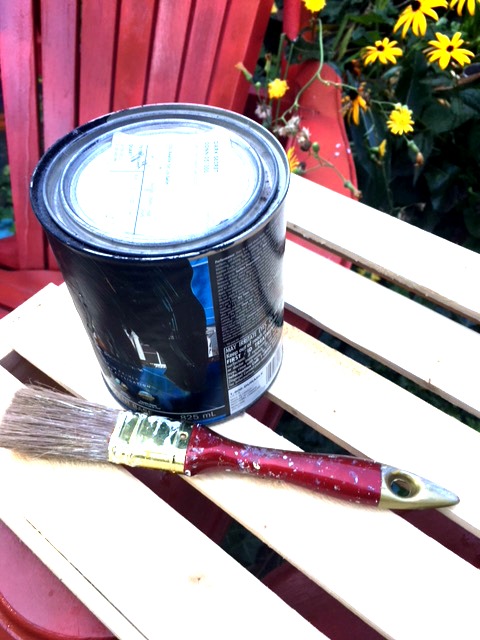
Paint or stain the wooden crate and allow to dry. I just used an acrylic black paint. Check your paint shelf and see what you have to use up. Spray paint would work, craft paint, stain to match other projects in the room…. Just make sure you are thorough because painting all the sides of the slats is a bit of work.
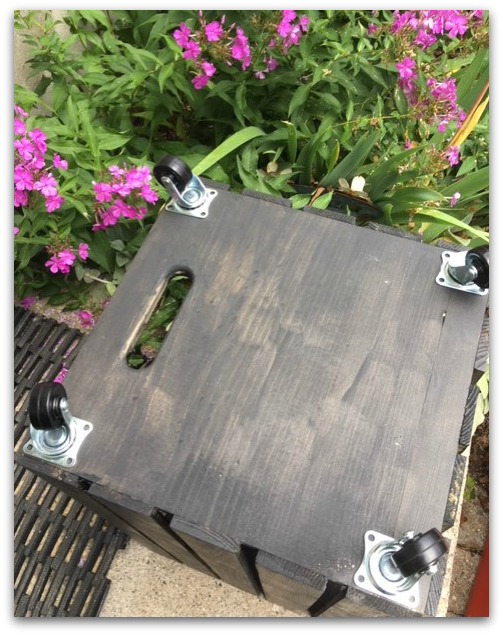 Place the castor wheels on the crate and decide their location.
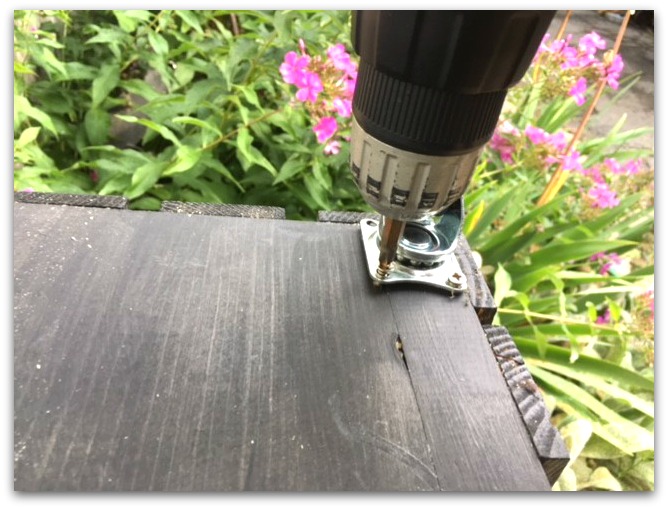
Drill the screws into the wood.
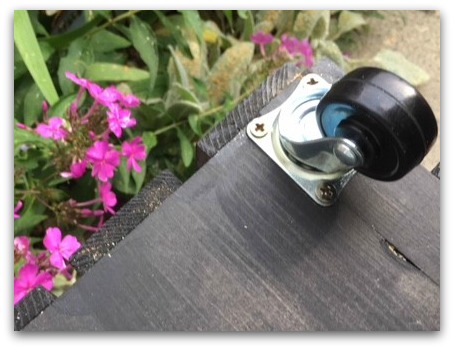
Admire your castor wheels. This is so easy, now I want to add wheels to everything.

Add a fern on top of the crate and some summer math books for the kids below. Voila!
Yesterday was the first day of school for my girls. They were so excited…even my sleepiest kiddo was in the shower before I was out of bed. Way to go B! They worked on their summer homework books really well since June. Hopefully they didn’t forget as much during the 2 month summer break. I bribed them-mind you and put rules on their screen time. Lol. But they did it!
Hopefully you get a chance to make a super easy crate plant stand or side table.
Have a super day!


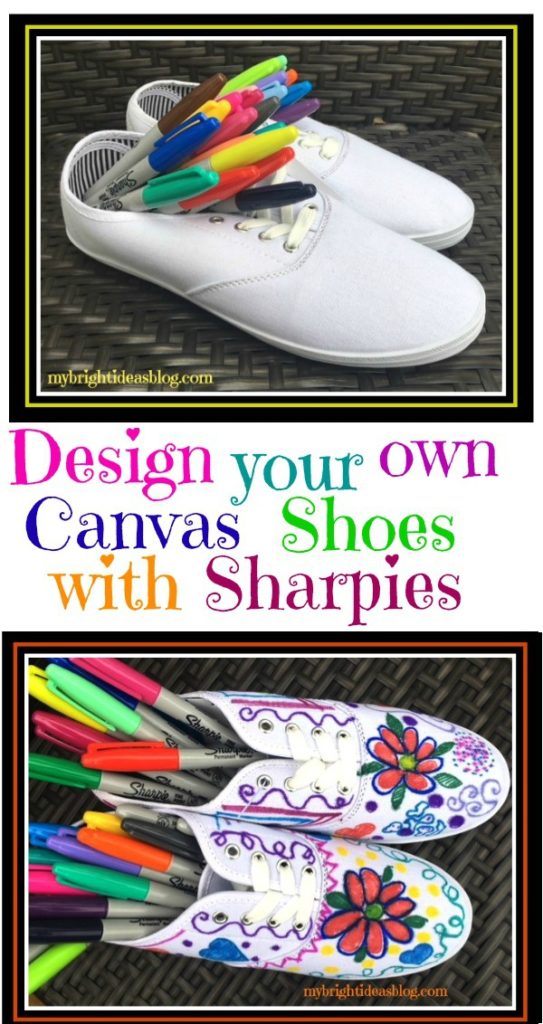
Design your canvas running shoes with a Sharpie Tie Dye Effect

It’s back to school time! Why not send the kids back to school with some personalized canvas running shoes!
You will need:
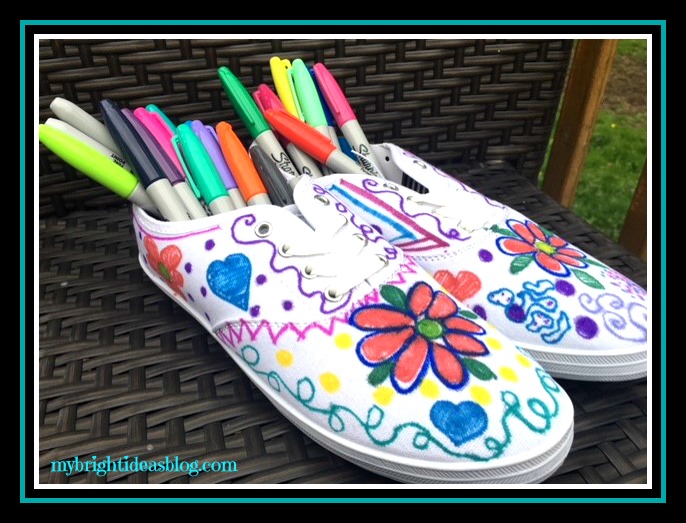
- Permanent Markers (like Sharpies)
- Canvas Runners
- Rubbing alcohol
- Medicine dropper (if you don’t have one you can use a straw with your finger on the end)
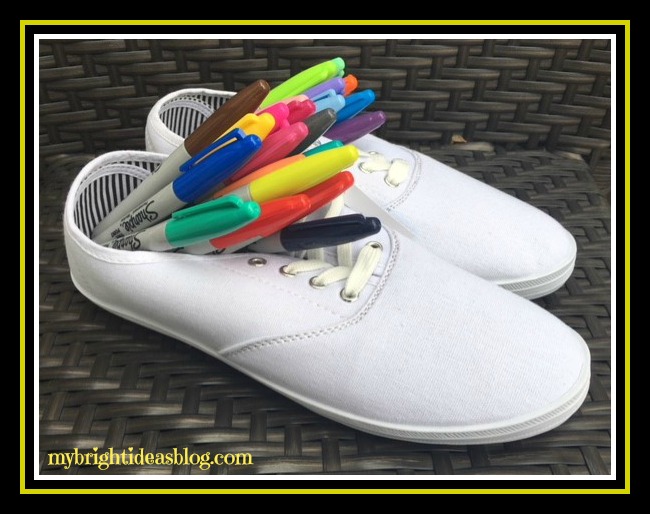
These white canvas shoes came from Michael’s craft store. I am pretty sure that you can pick them up at Walmart and maybe even a dollar store. These are likely going to cost $5-7. The price gives you an idea of the quality of the shoes….these will look cute but have no arch support or cushion so not recommended for gym class or hiking across the country. Cheap and cheerful!
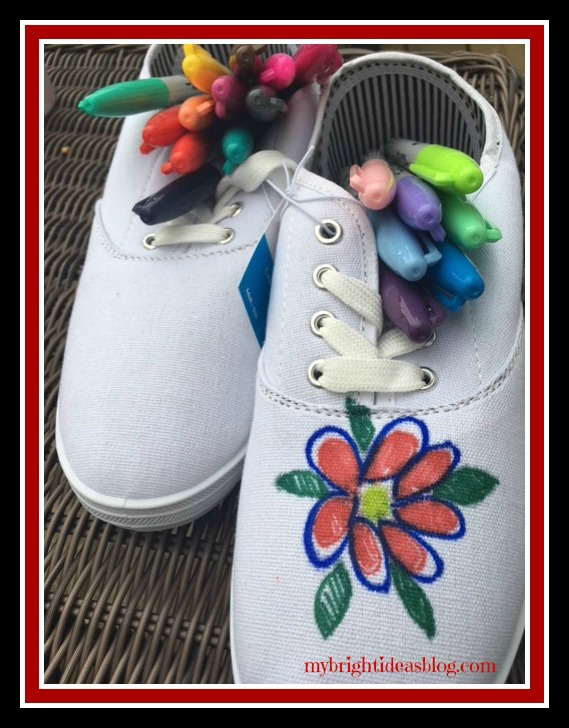
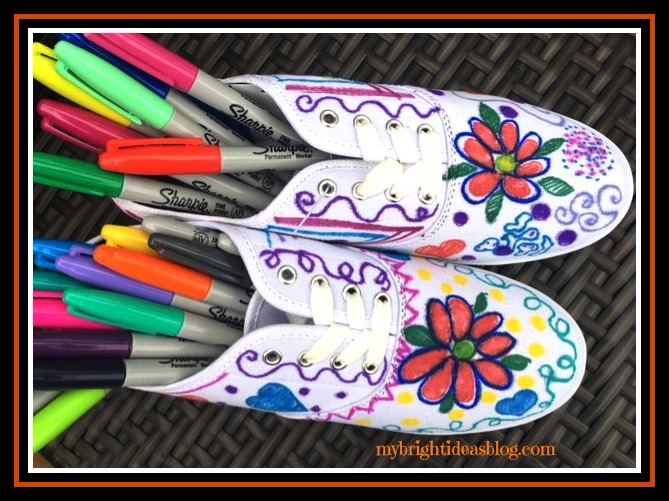
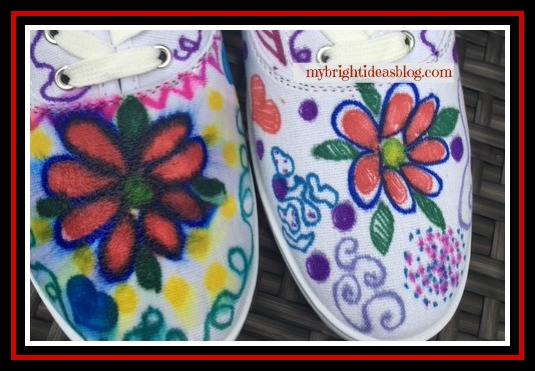
Next begin your design work. I like flowers and squiggles what does your kiddo like? Maybe a message written on the shoe. A+ or “Don’t Give Up” something that will make them smile through the day.
Very subtly I put “I love School”…tee hee… positive subliminal messaging.
Open the Windows or Go Outside!
When you’re happy with your design its time for the stinky part. Open the windows! Or better yet, go outside in the fresh air. The rubbing alcohol fumes will give you and your family a headache. We don’t want a cranky family….
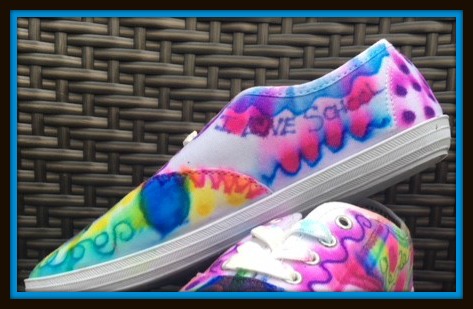
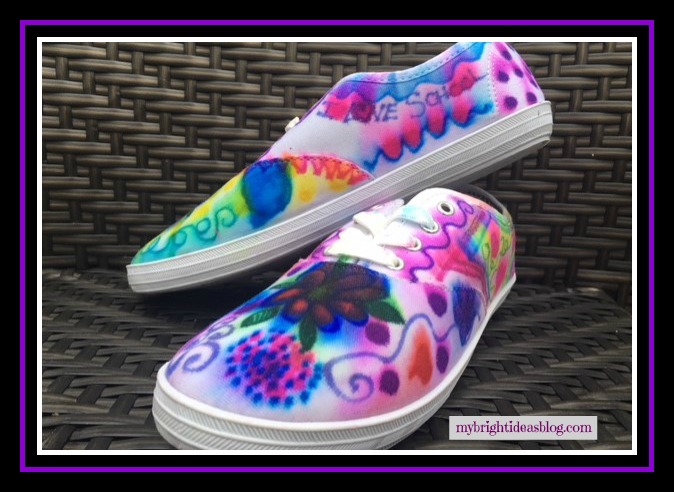
Begin with just a drop or two to see how the color begins to bleed, blend and soften. Here you can see the difference between one shoe that is done and one that is not.
If you don’t have a medicine dropper just use a straw. Dip it into the rubbing alcohol and then put your finger on the end to capture a few drops. Drop onto the canvas to begin the process.
See the difference? Watching the design change is the best part of this project.
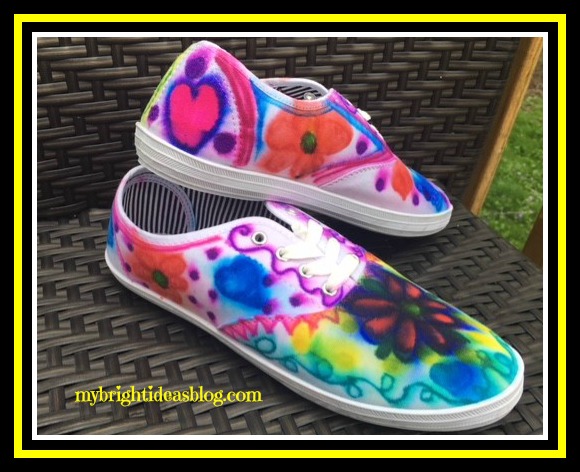
The more rubbing alcohol you use the more it will bleed so just use a bit on areas with a lot of color. Dark colors may end up being much bolder than the lighter ones. Once you start the bleeding process you can’t undo it….so this is why a medicine dropper is recommended. I put way too much on the front blue flower, so its much darker than I planned. As the French say….C’est la vie! Oh well, such is life…and crafts.
You might like the sharpie drawings “as is” and not even want to add rubbing alcohol. That’s cool too. It’s wearable art.
This is my second or third time with sharpies and rubbing alcohol. I will include a link to the t-shirts at the bottom of this post. I love the vibrant colors and funky designs. It looks bright even as the colors were blurred together. This would be very cool on a cotton throw pillow cover or curtains made from cotton or drop cloths.
This is a pretty cool way for kids to express themselves and show off their art work everyday on their feet.

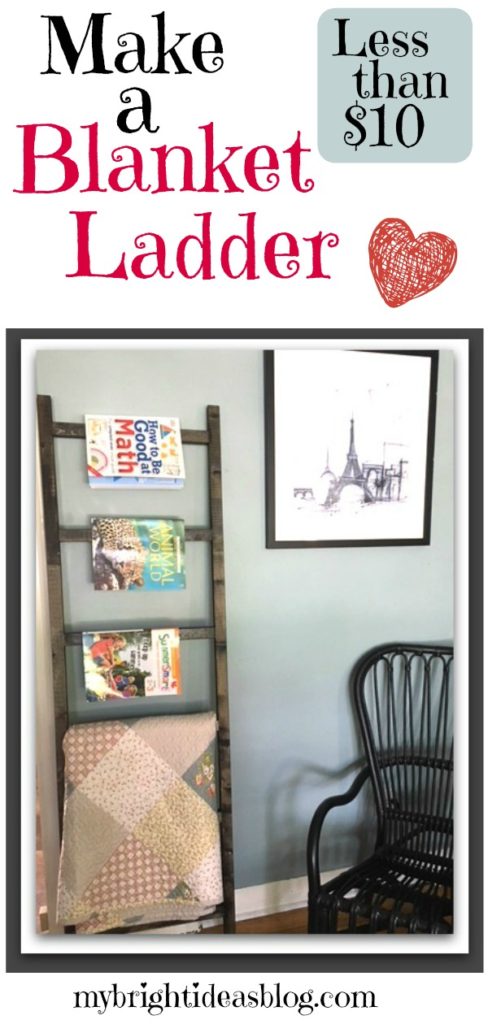
How to Build a Blanket Ladder – Easy Project!
Blanket Ladder DIY
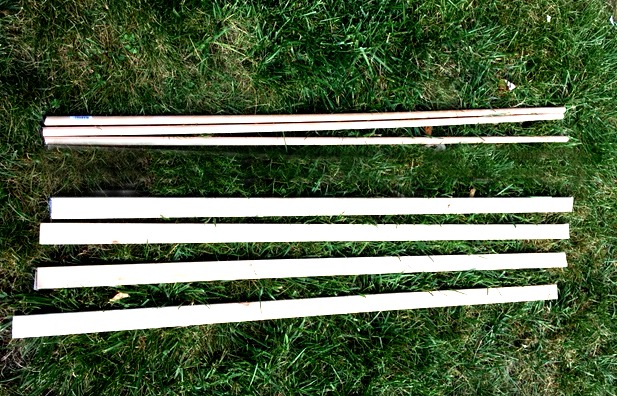
This project is one of the cheapest projects you could make. If you have the stain, varnish and screws left over from a previous project the great news is the lumber should be less than $10.
You will need:
- Lumber 3 – 8 foot 2×2 (3 x $2.50 each = $7.50)
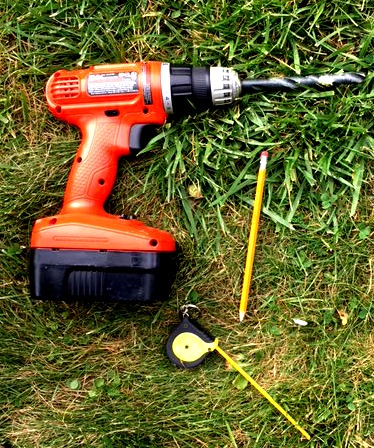
- Power Drill, drill bit and screw driver bit
- Pencil
- Stain
- Sand paper
- Clear Coat Varnish
- 10 – 2 1/2 Wood Screws
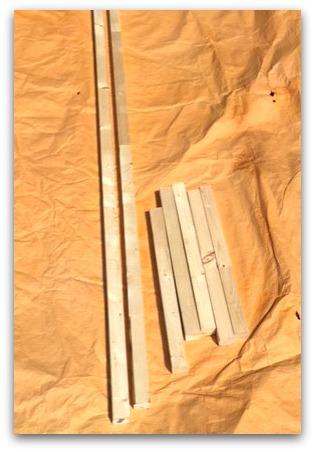 Cut 2 pieces to 6 feet long. Cut 5 pieces to 18 inches long. (This is the size I made)
OR
Cut 2 pieces to 5 feet long. Cut 4 pieces to 18 inches long. (Good if you have a small room)
![]()
Do you see that blue sky? 30 mins later the sky had dark clouds and I was hustling everything back into my garage to avoid a major thunderstorm.
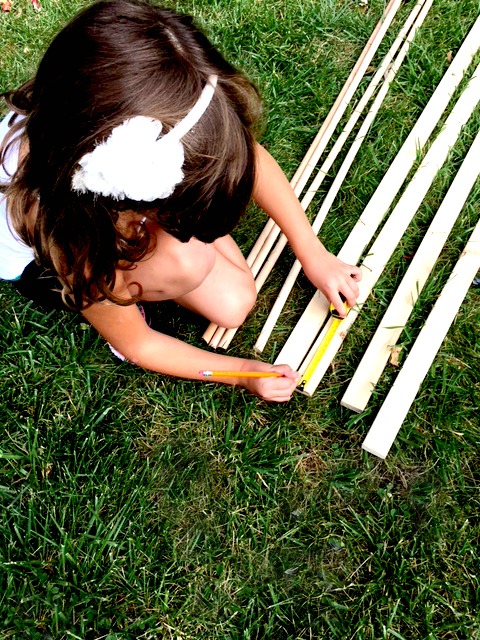
![]() Lay out the wood and decide on your set up. I chose to put the first ladder rung 3 inches from the top. Then each one is set to be 12 inches below the next one. This left about 6 inches from the bottom of the ladder.
Lay out the wood and decide on your set up. I chose to put the first ladder rung 3 inches from the top. Then each one is set to be 12 inches below the next one. This left about 6 inches from the bottom of the ladder.
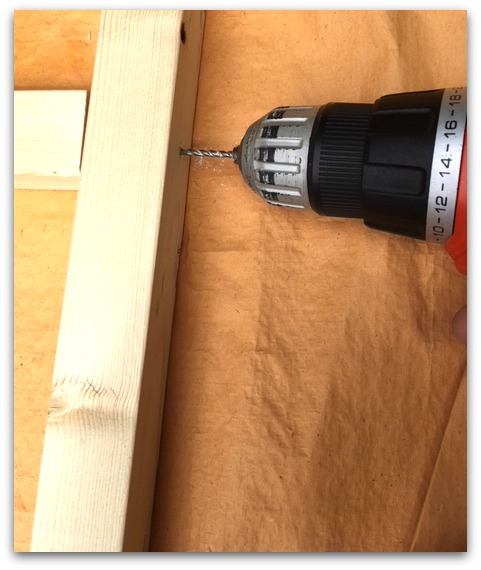 I predrilled the holes to help the wood not split. That would ruin the wood-trust me I’m famous for doing this and having to head back to the store for a fresh piece of wood. Doh!
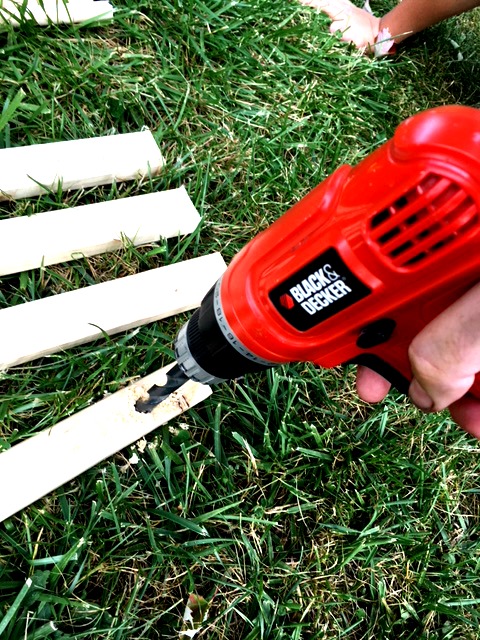
![]() I started to drill each screw into the wood to make the next step of adding the rungs easier.
I started to drill each screw into the wood to make the next step of adding the rungs easier.
![]() Use a square to ensure the rungs go on straight.
Use a square to ensure the rungs go on straight.
![]()
Do you want to have it super smooth finish or rough and distressed…decisions decisions…?
Smooth…then its time to go over it with sand paper or a hand sander.
Distressed…last chance to scratch it up a bit. Rub it with the side of a screw or key. You can even wack it with hammer.
![]() Even if you like it distressed you can almost skip all the sanding but do tidy up the ends with a quick rub using sand paper.
Even if you like it distressed you can almost skip all the sanding but do tidy up the ends with a quick rub using sand paper.
Now for the STINKY wood stain!
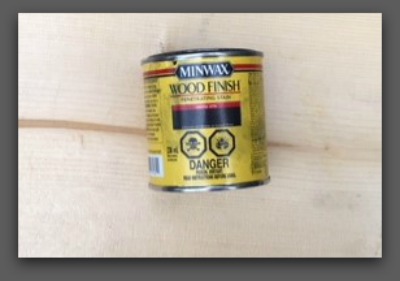
Next step is staining it. Choose a stain that will go with your décor. I really like a dark walnut finish but this blanket ladder is going into a room with a lot of black. So I used an ebony stain by Miniwax. If you are indoors open a window. If you can do it outdoors that is even better.
![]()
Watch the seams for areas where you have missed stained the first time. I used a craft paint brush to touch up the gaps and unintentional light patches.
After allowing it to dry, put a thin coat of clear protector over top. Keep in mind, clear coats come in a mat finish or glossy. I prefer glossy for the sake of smoother dusting my wood furniture but the mat finish looks really nice too. I chose to use a SPRAY clear coat.
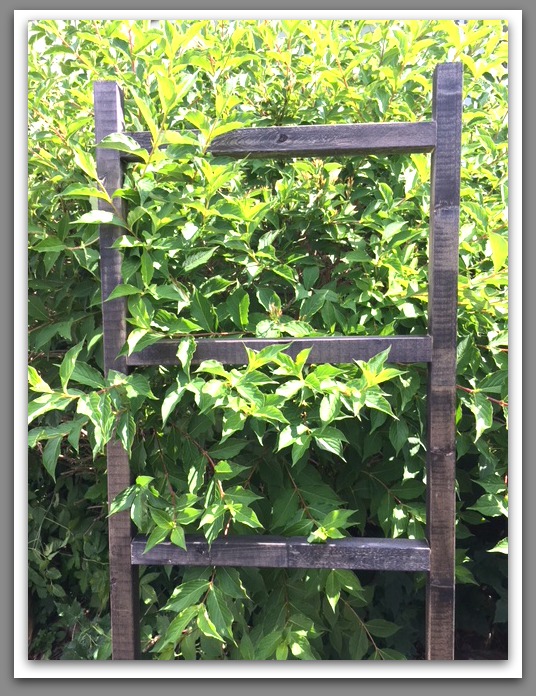
This looks so nice next to the greenery. Maybe I should use it as a trellis instead!
![]()
![]()
This could double as a magazine rack too. I didn’t have any magazines around so I used the kids summer school work books. Tee hee…. :o)

This is such an easy project! Are you teaching your teenager some DIY skills?
What if a teenager used this ladder to set out their school clothes for the week…
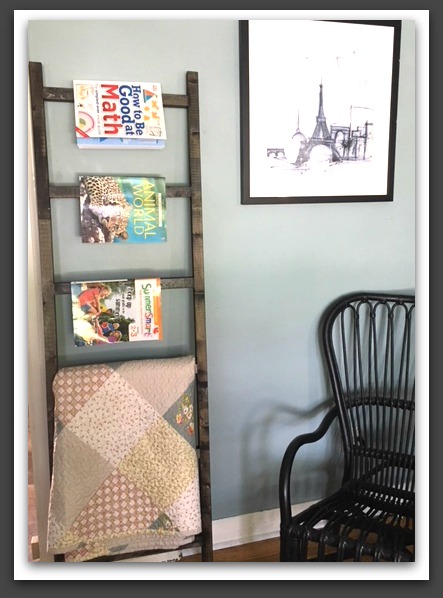
Add a blanket and what a nice housewarming gift this would make!
Crafts Using Burlap and Buttons – Easy Project that Looks Great!
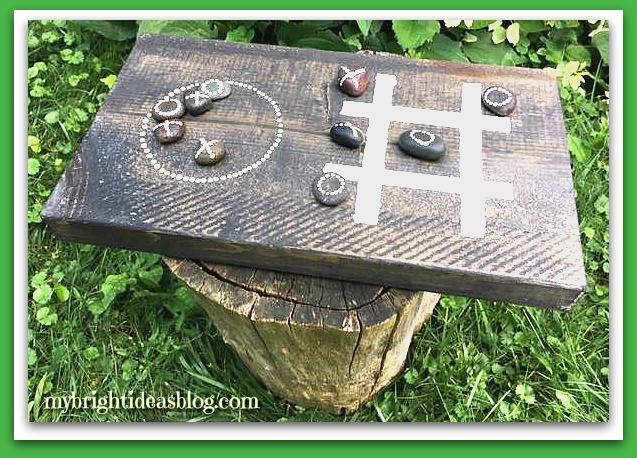
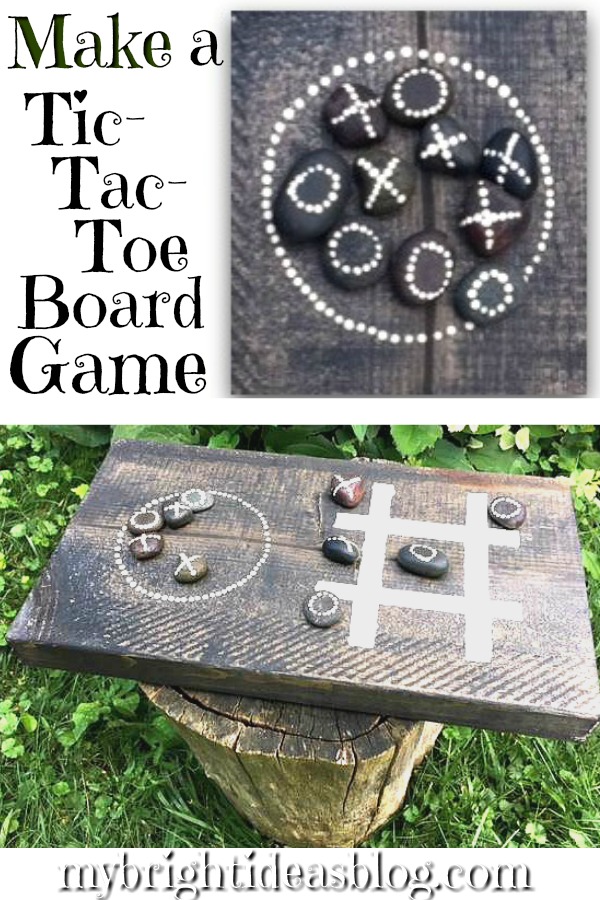
Make a Tic-Tac-Toe Board Game
Today I’ve got a SUPER EASY project you are going to love!
Outdoor Tic Tac Toe Board Game
I’ve been working on some of my wooden projects this week but every day we’ve had sun then clouds and then raining cats and dogs. One of my projects (a wooden sundial) to do with the kids requires a full day of full sun. So there, once again, we are running into the house to dodge raindrops with our sundial. What can you do but be patient and find another project to do. What funny summer weather!
I want to give credit to this bright idea….it was inspired by https://tarynwhiteaker.com/outdoor-tic-tac-toe-game/?m. When I saw her blog post, I immediately put it on my to do list. Outdoor games….hmmm it’s got me thinking about other giant outdoor games for summer family fun.
What you will need:
-
- 10 flat rocks (I used the bagged ones from the dollar store)
- a rectangle block of scrap wood
- wood stain and rag to apply it
- white/cream craft paint
- craft paint brush
- painters tape
- (optional) clear varnish (clear spray paint is handy for the rocks)
Lets Get Started!
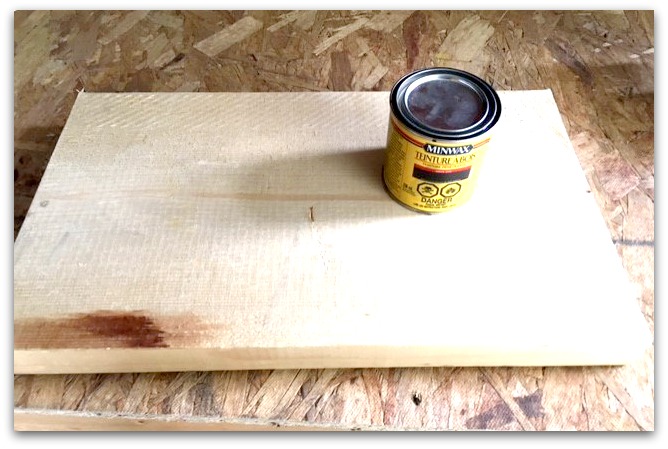 I hope you have a piece of wood left over from another project that you can use. The thickness and width and length is completely up to you. I had this piece of pine left over from a mirror project I made in the early spring. I will put a link to it at the bottom of this post.
The the scrap of wood was…9×16 (23cm x 41cm) and 2 inches thick.
![]() If there is any rough edges give the corners a bit of a sanding. We don’t want slivers. If you want it to be a smooth tic tac toe board, then you will need to put some more time into sanding it.
If there is any rough edges give the corners a bit of a sanding. We don’t want slivers. If you want it to be a smooth tic tac toe board, then you will need to put some more time into sanding it.
The stain I used is by MINIWAX called “Ebony”. If you put a thin layer on you get a grey/black effect. If you put on 2 heavy coats it will be nearly black. I used one coat for this project. I really like!
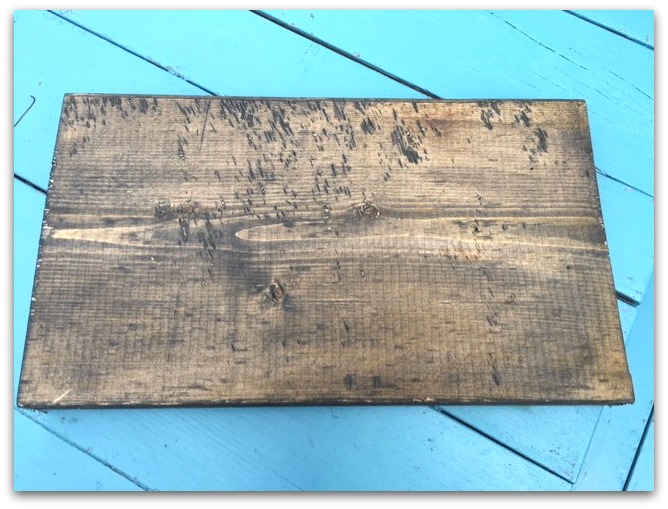
After the board is stained you will see that it’s quite banged up. I really like the rough, distressed lumber look.
You should give the stain plenty of time to dry before moving on to the next step. It started to rain so I abandoned this project until the next day.
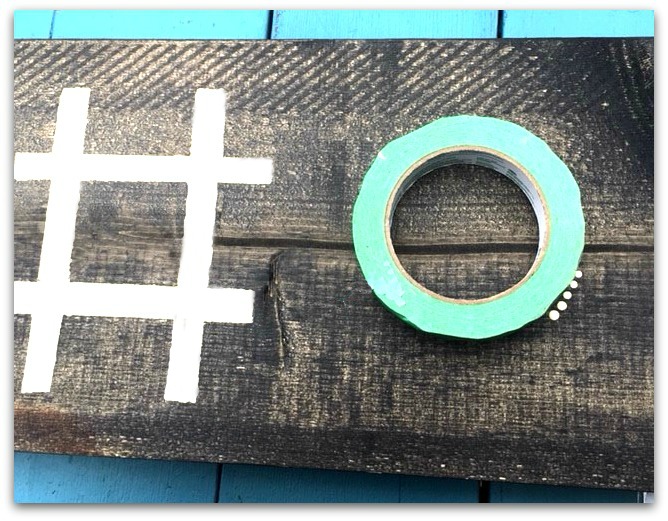
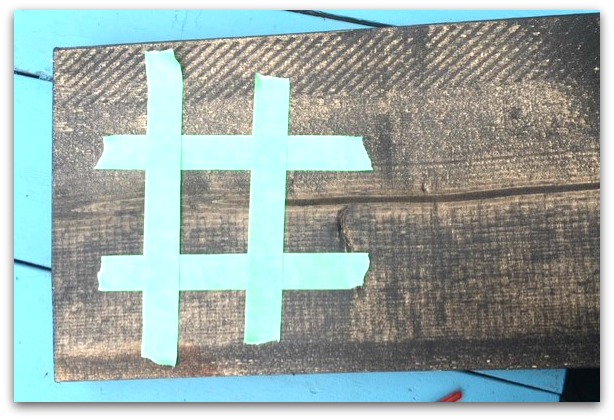 This photo shows me using painters tape to show me where I would want to paint the lines.
Grab Your Paint Brush!
 Using painters tape, mask out where to have the first two lines. Apply a coat of paint and wait 10 mins. It may need another coat of paint. Craft paint dries fairly quick but I gave it 45 mins and then was able to remove the tape and put in the opposite direction. Have a ruler handy to check the distance from the sides is equal.
If all of this is too tedious, you could just paint the lines on free hand. If you were doing your tic tac toe on paper or sand it would look more like the tape in the previous photo. Maybe I’ll try that next time. If you make a mistake you can wipe it off quickly with a wet cloth.
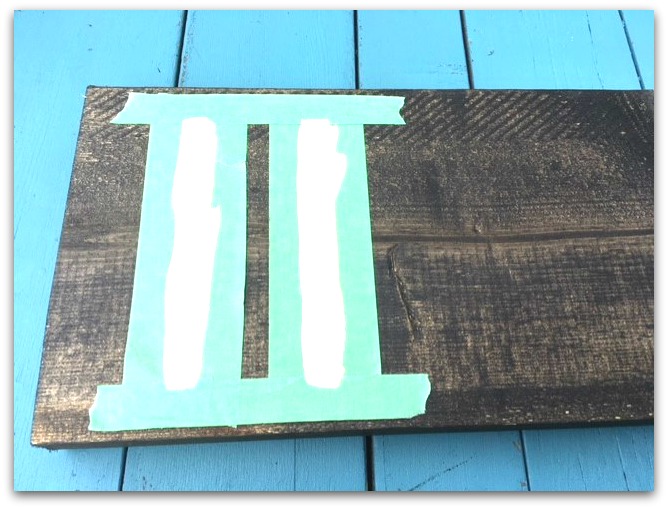
I was looking at the painters tape and thought hmmm…..why not paint a spot for the stones to rest. I love this technique for perfect dots. Dip your paintbrush handle into the paint and dab it on the surface 1-3 times and then reapply with paint and carry on.
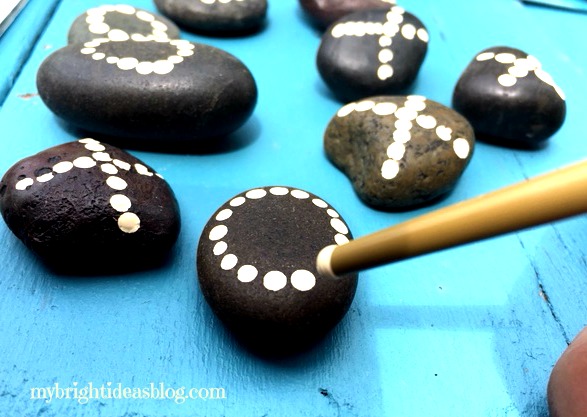
Originally I was going to use a stencil on the stones…..but that was not a success. Then I was going to free hand paint the X’s and O’s and that turned out ugly too. So my solution was to do the dabbed-dots again.
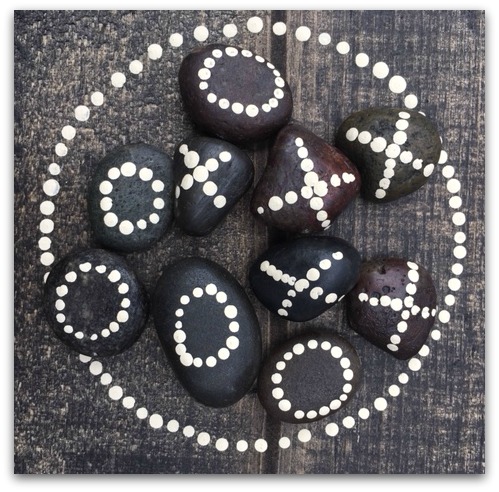
This looks so much better than the ones I hand painted. LOL!
 This is so easy I wonder if I should make some more for housewarming gifts….or maybe sell them at my work craft table. Several of my recent posts have made it to the craft table at work. Fridge magnets, wind spinners, the memory wire bracelets and all those items add some sparkle to the other fabric and knitted items.
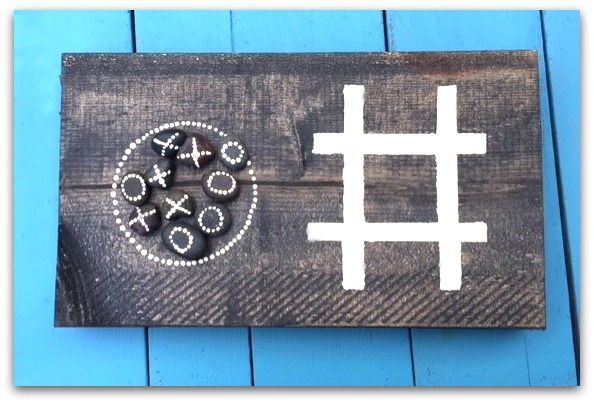
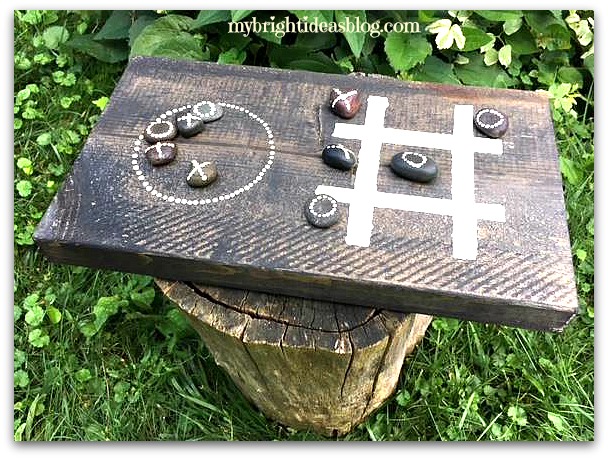 If you put a clear coat of varnish on the wood it will be ready to stay out doors all summer long come rain or shine. It adds an activity and rustic charm to the deck or patio.
(As an after thought, the rain lifted some of the dots off the stones so they should get a clear coat of spray paint.)
Thanks for reading! Enjoy your Sunday and get outside its going to be a beautiful day!


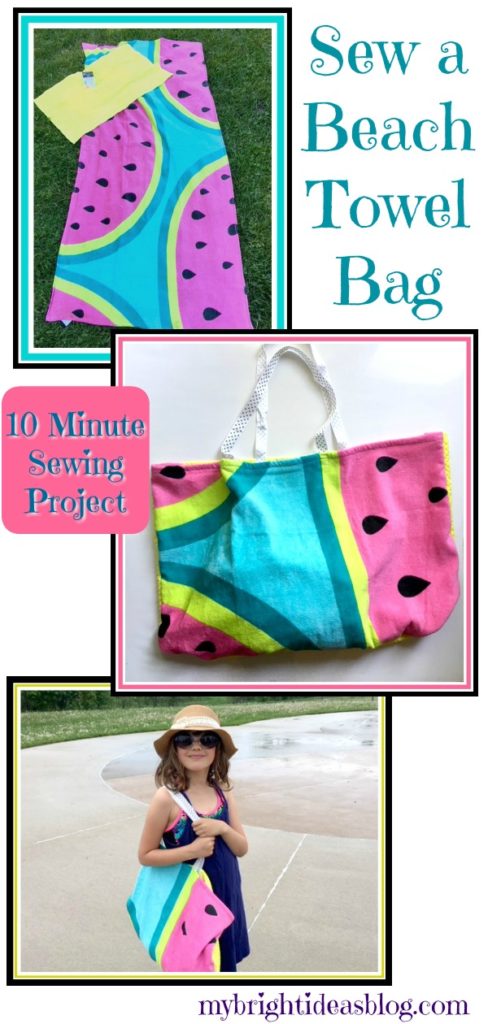
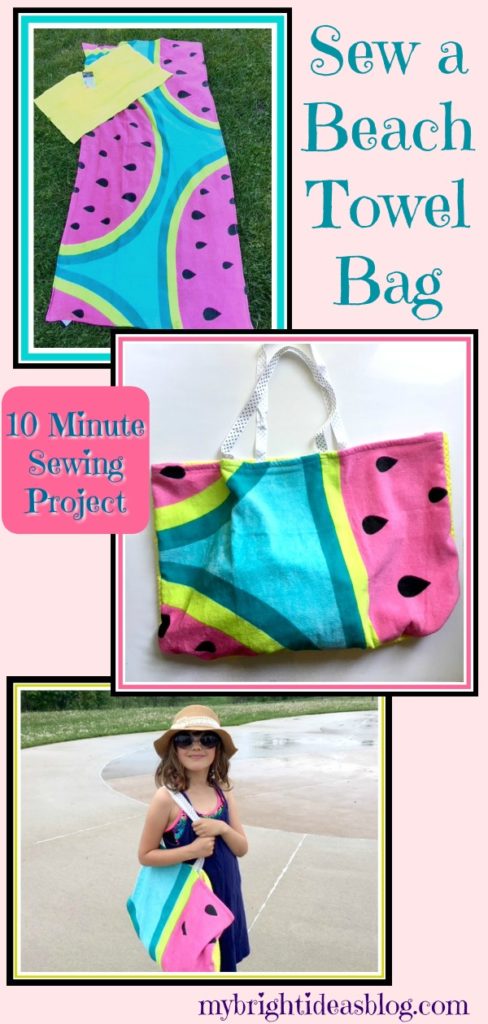
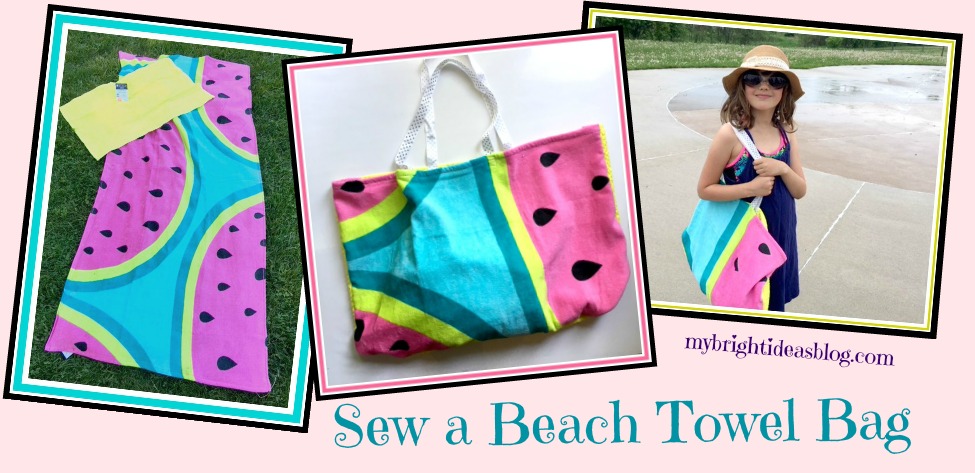
Make a Beach Bag from a Beach Towel and Hand Towel in 10 minutes
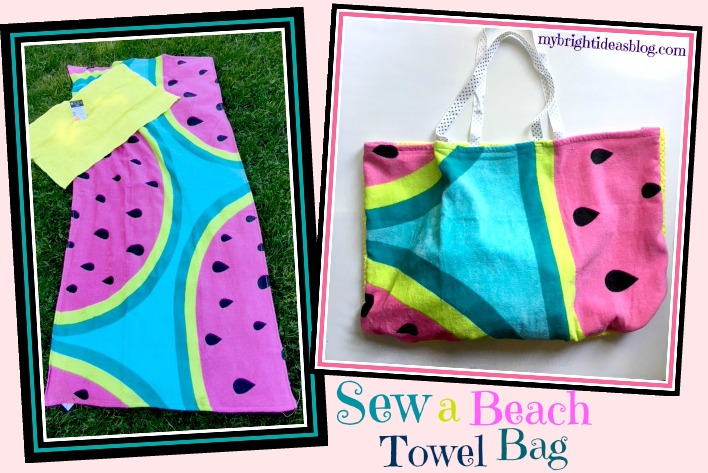
The weather is hot and trips to the beach or swimming pool or splash pad are about to become a nearly daily part of our keeping cool routine. So why not turn your big beach towel into your beach bag! Its such an easy project too. If you have a sewing machine you could have this sewn up in 10 minutes.
You will need:
- a beach towel
- a hand towel
- 4 feet length of ribbon/strapping/cord/shoe lace
- basic sewing materials (sewing machine, thread, pins, scissors)
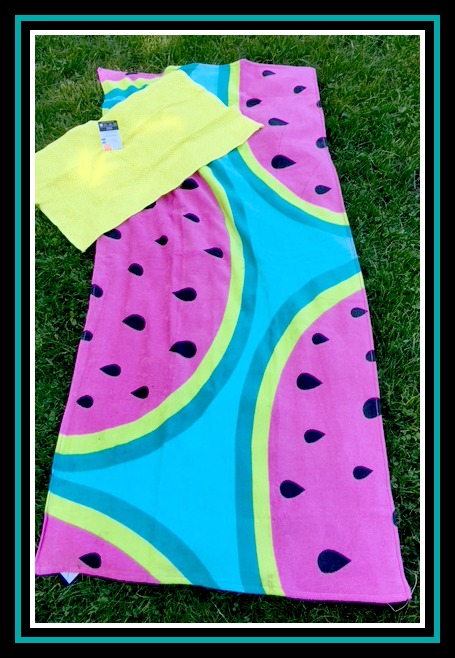
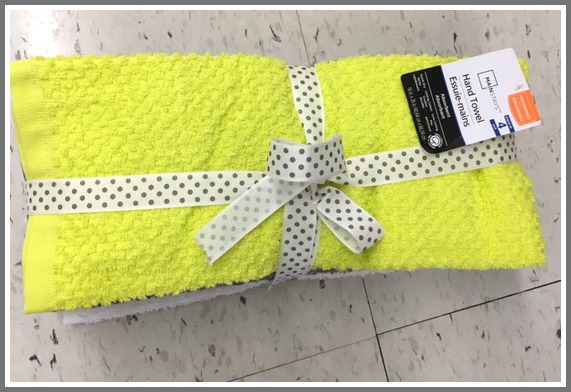
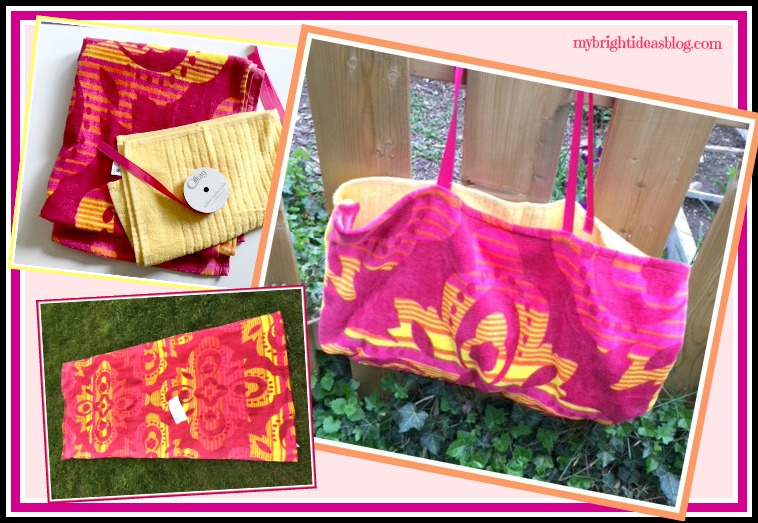
This vibrant beach towel is from Walmart for $8.00.
Happy Childhood Memory Moment…
When I was a youngster my grandma took me and 2 of my sisters and 2 of my cousins on a camping trip. What was she thinking taking 5 girls aged around 10 to 13 year old, on a trip like this. At a family gathering when they announced the trip was being planned, they produced beach towels and toiletries bags for each of us. My towel had hot air balloons on it and she had sewn in a bit of fabric and written my name on it. As much as I loved that trip-I cherished my bag and towel all my own. Sigh…I love my grandma memories…someday I should tell you about when we made horseradish for my big sister’s wedding reception….hilarious!
Back to the project at hand….
So this week I pick up two lovely bright beach towels for my girls. I also spotted some hand towels and bought those too-just simply because our hand towels keep disappearing.
So I’m unloading the newly purchased summertime items. Beach towels, hand towels with a nice ribbon on it, sunscreen, bug spray…and I think, wait a second! Drop everything and get out the sewing machine! LOL
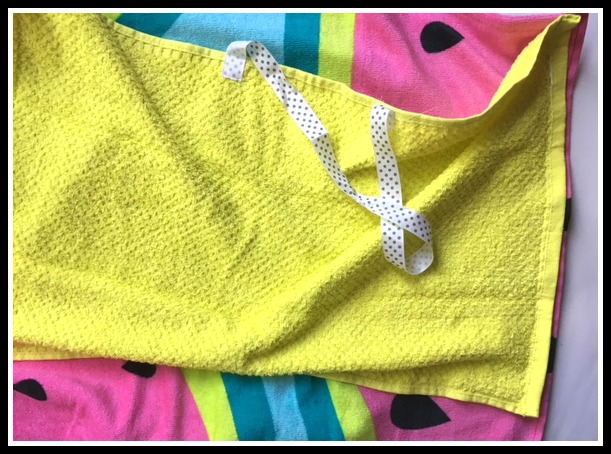
First of all we need to see if that gorgeous yellow hand towel will fit width wise on my beach towel. Take two bag handles from it…yes we can!
So with a big and little towel and the ribbon ready here is what you do…..
Place the hand towel on top of the beach towel right sides facing each other.
Cut the strapping materials into two pieces 2 feet long each (24 inches or 60 cms). Look around to see what you have…shoe laces, webbing, braded trims.
Starting with the beach towel fold in half and mark the middle with a pin. Make a semi-circle with the straps and pin them to the towel.
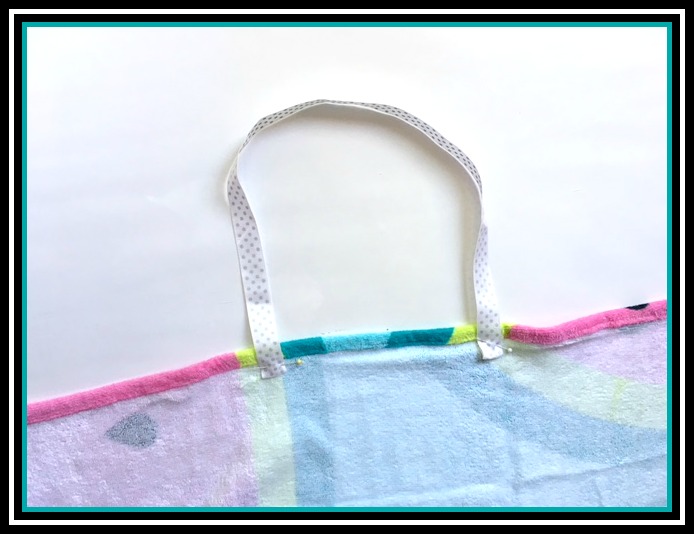
Since my ribbon has the print on only one side I made sure this was showing on the good side of the towel. Also I tucked the ribbon ends under so they look finished and secure when sewn.
Next lay the hand towel on top of the beach towel and match up the location of the handles on the beach towel. Pin in place. I left the tag on the hand towel to remind me which side was my good side and which was the back. I did cut it off later. As you can see the towels don’t match up exactly the same width-one was 1/2 inch wider on both sides. It doesn’t matter!
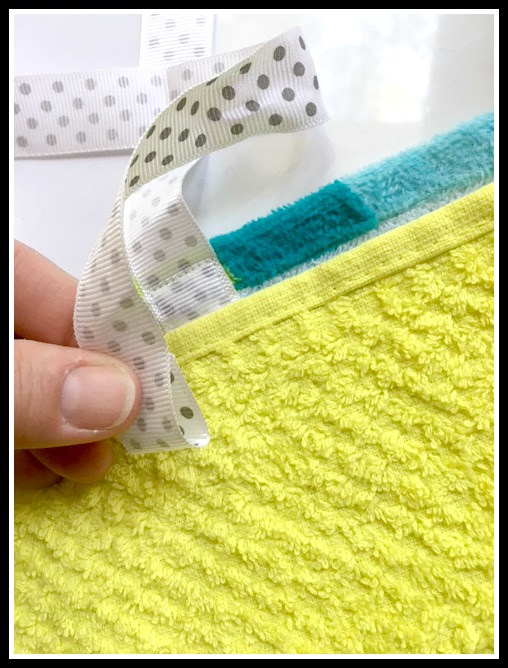
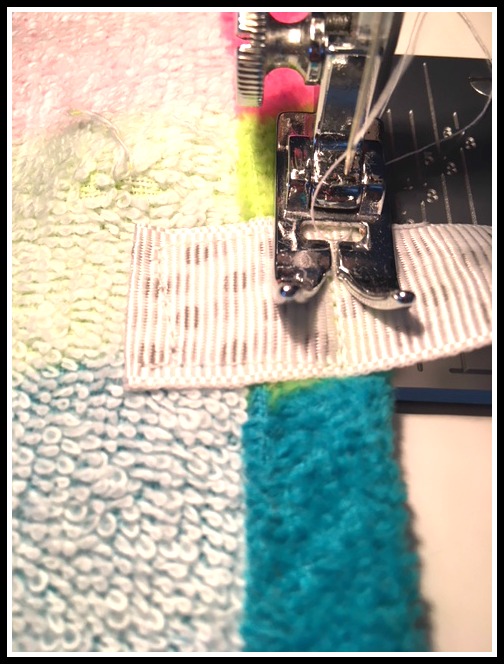
Tuck the ends over so there won’t be fraying from the ribbon or strapping materials.
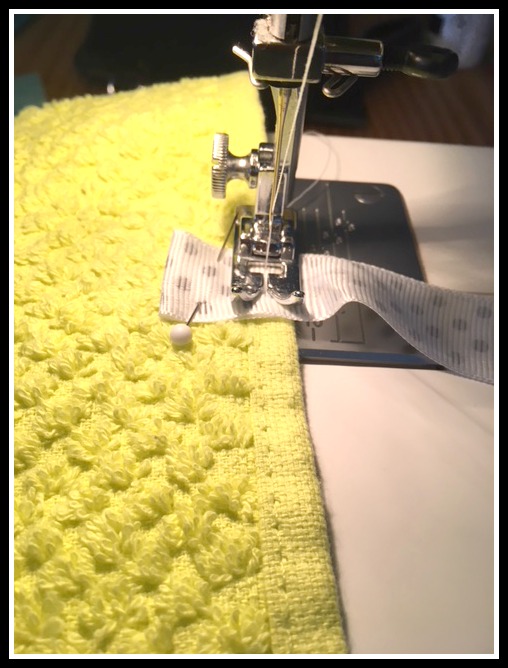
Sew it in place. I usually go around in a square for my stitching on straps to bags. If this was my own bag I would likely put on proper tote bag webbing straps and use a square of fabric or a face cloth to add a pocket or two. That is because I carry everything but the kitchen sink. I would also consider putting a hidden pocket somewhere on it to hide my keys and cell phone.
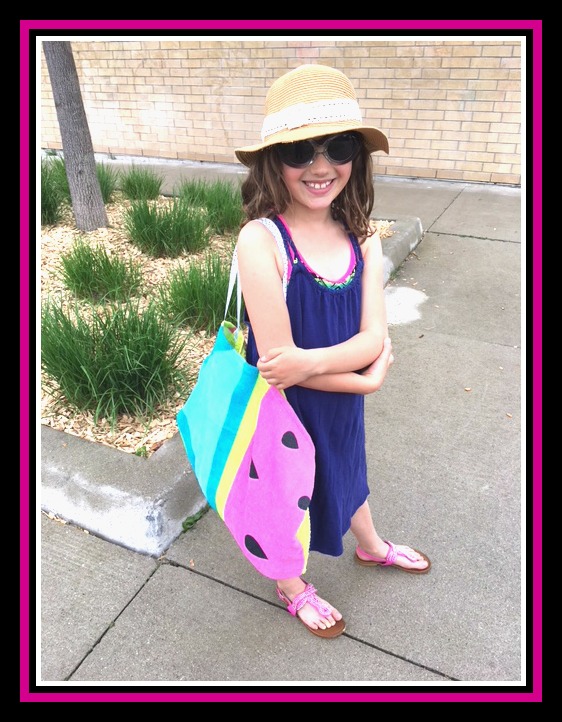
But since these towel bags are for the kids, the ribbon handles I used will be fine.
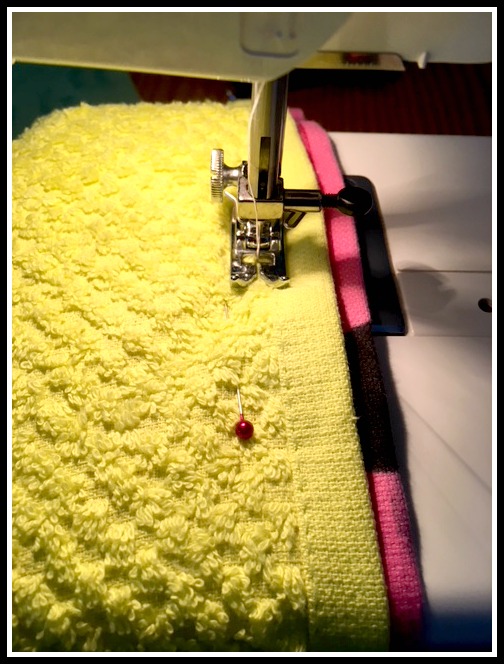
Next we will put the hand towel on the beach towel and pin them in place-Right sides facing in!
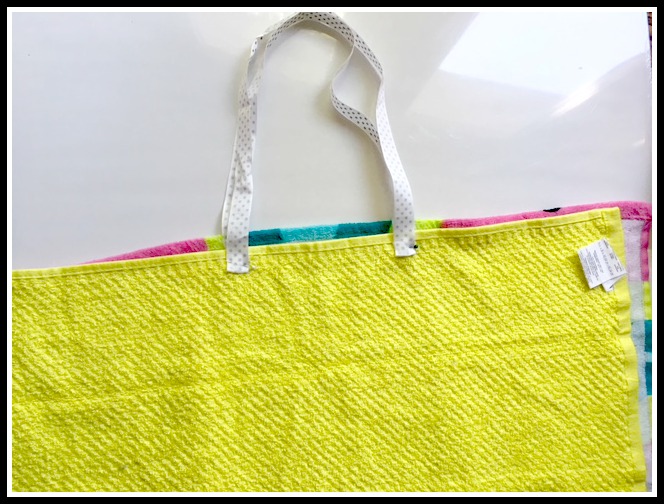
Sew down the side of the hand towel, then turn to sew the length and up to the top. See photo below. Now you have a bag!
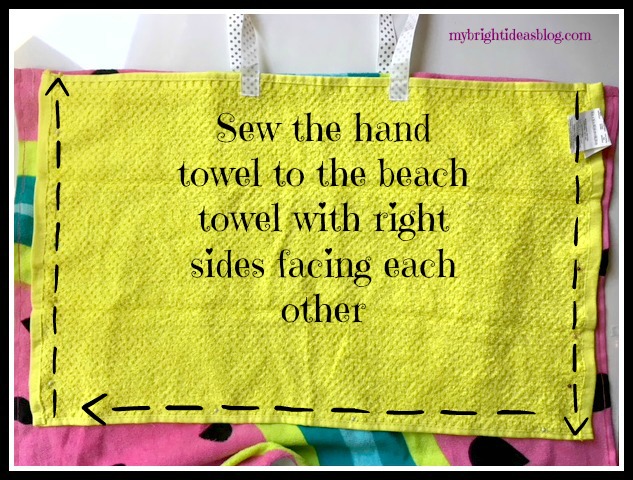
Now you have a bag!
It might look wrong at first. I made 2 of these and at this point I think…uh oh did I do this right? But alas it is fine. Just turn the whole thing inside out and put the tail of the beach towel inside the bag. Add your sunscreen, hat, water bottle, snacks and goggles and off you go!
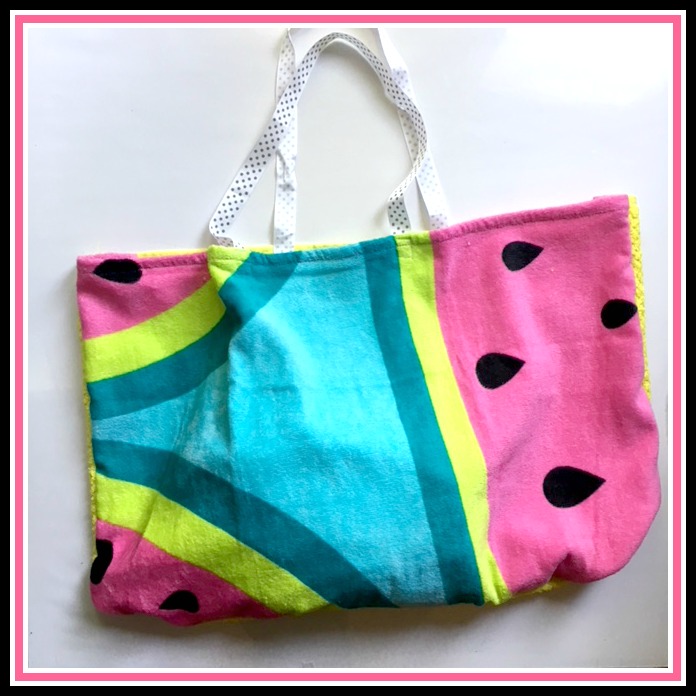
Here is a picture of the second bag. It’s going to be hot day and sunny day here. Perfect beach day!

…