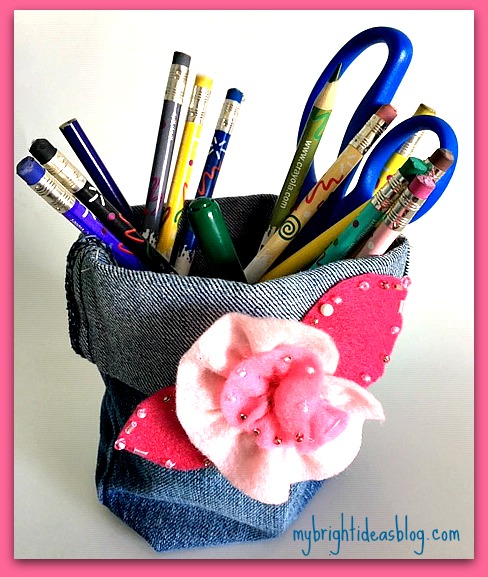
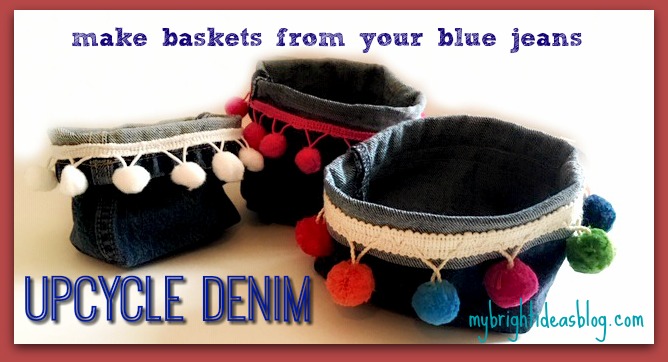
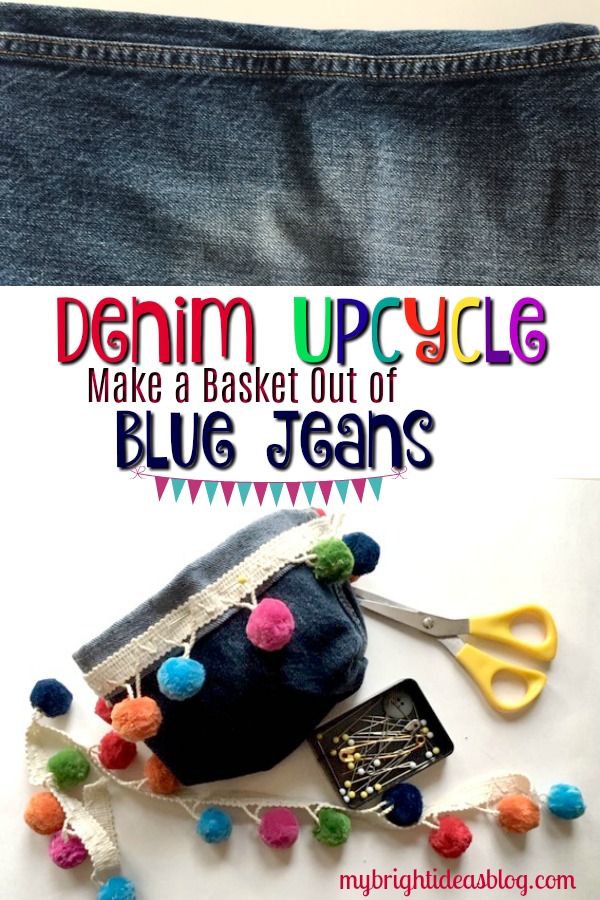
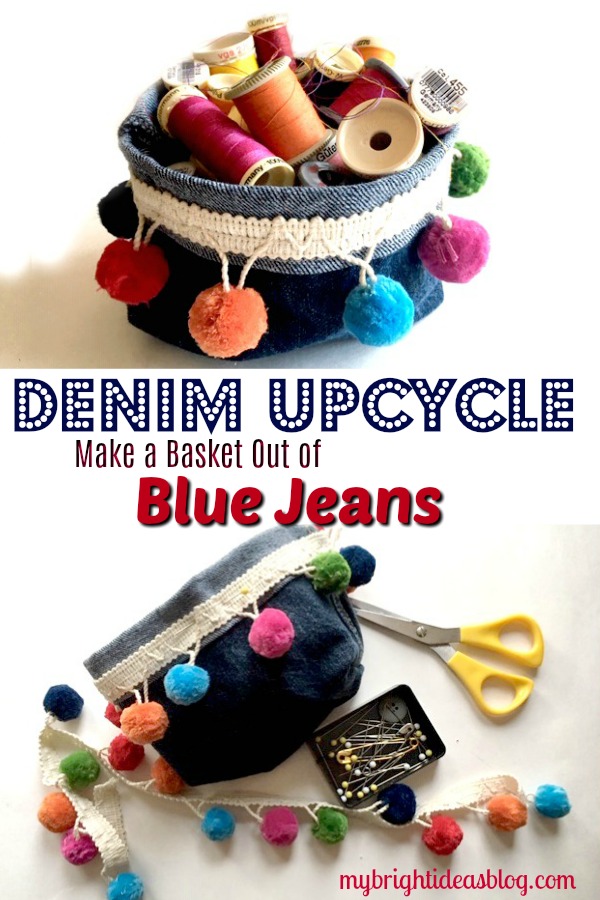
I’ve been working on another denim upcycle. If you have some blue jeans to cut up for an upcycle, you can turn it into a basket for your desk or craft area.
You will need:
- old jeans (I used kids jeans for a narrow basket)
- scissors
- trim
- sewing machine (or needle and thread)
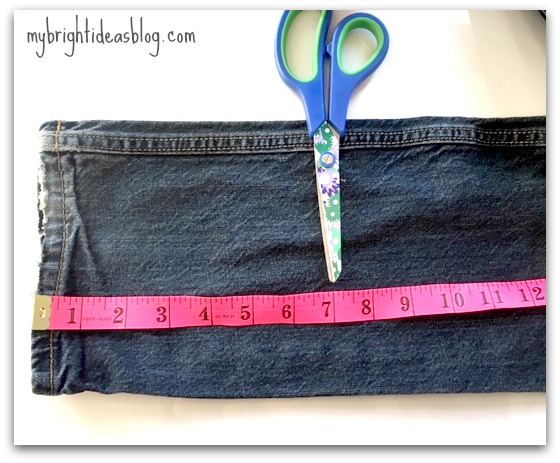
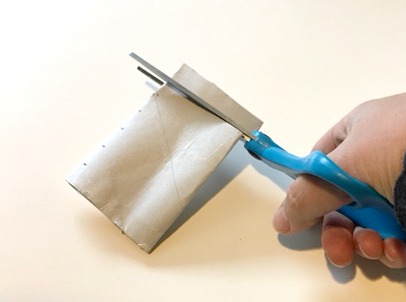
First of all, I cut the jeans off around 7 inches from the bottom. I don’t mind the rough bottoms as long as the jeans are clean before you start. I think the frayed bottoms look good too!
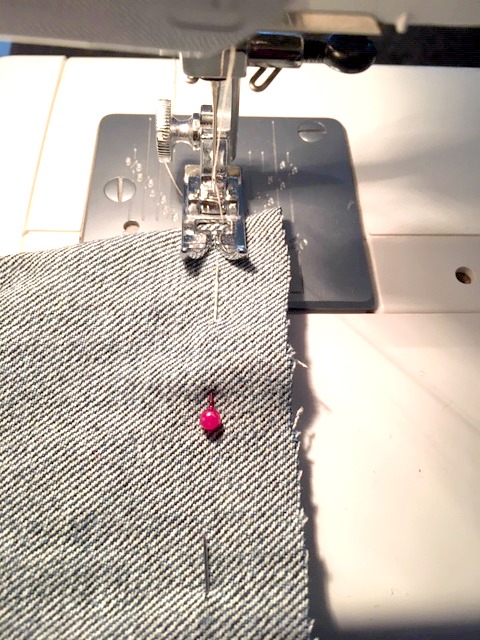
Turn the piece inside out. Sew straight across the bottom 1/2 inch or 1 cm from the cut edge. You could hand sew this if you don’t have a sewing machine.
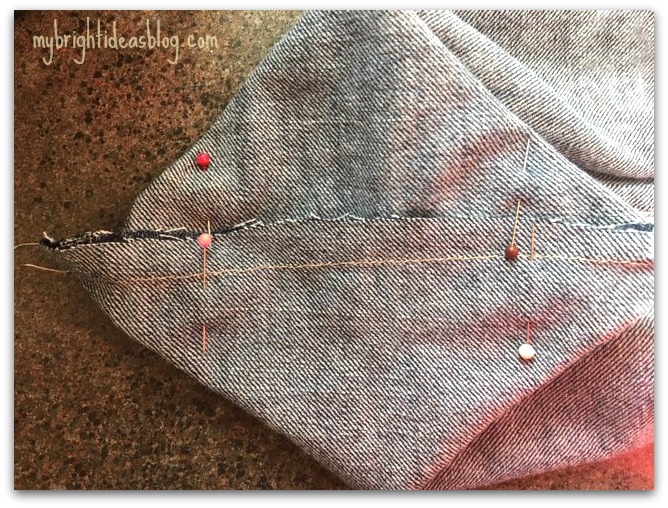
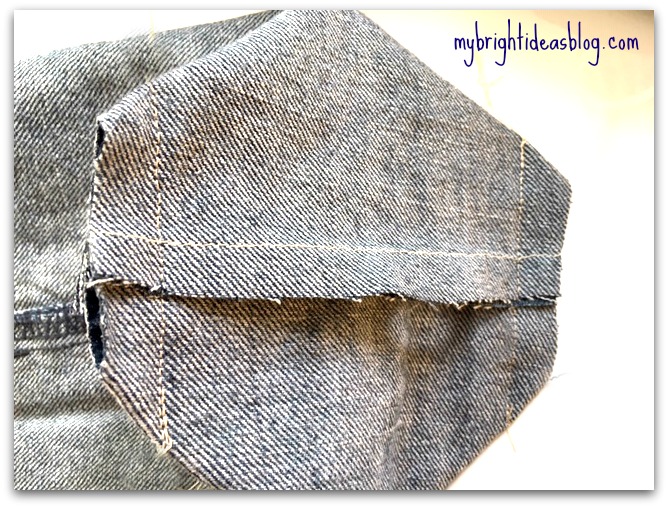
Now flatten the bottom and pin 1 inch (2.5 cms) from each corner. This will make your basket more boxy at the bottom and easier to stand up.
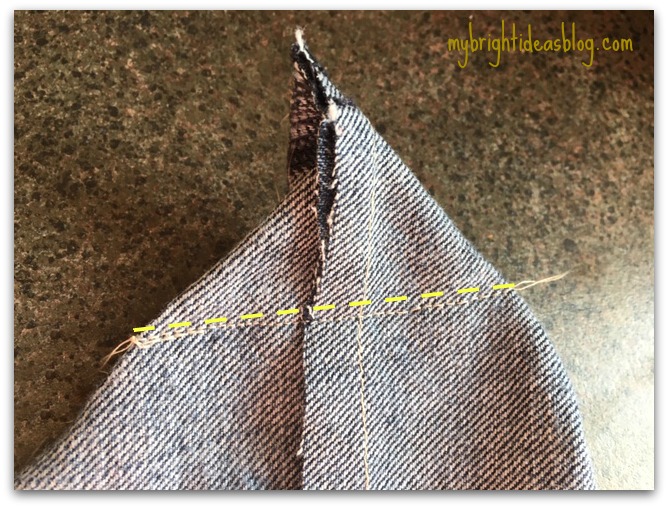
Stitch across the line.
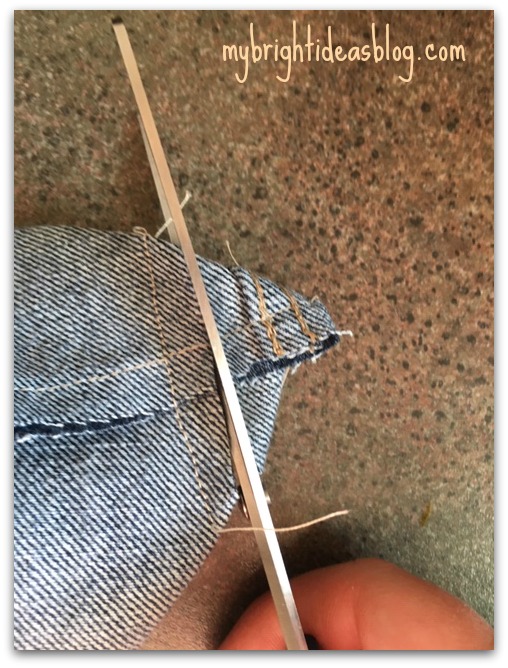
Cut off the triangles on the outside of your last stitch.
Turn the basket inside out.
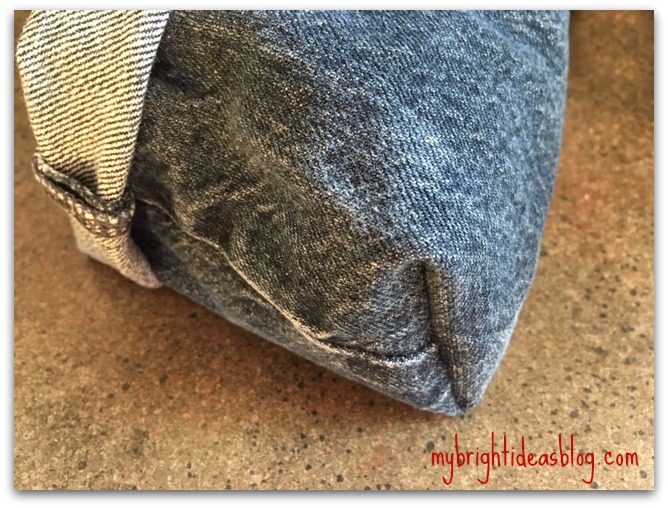
The square corners that you just created will help it to stand up. You can roll over the edge once or twice.
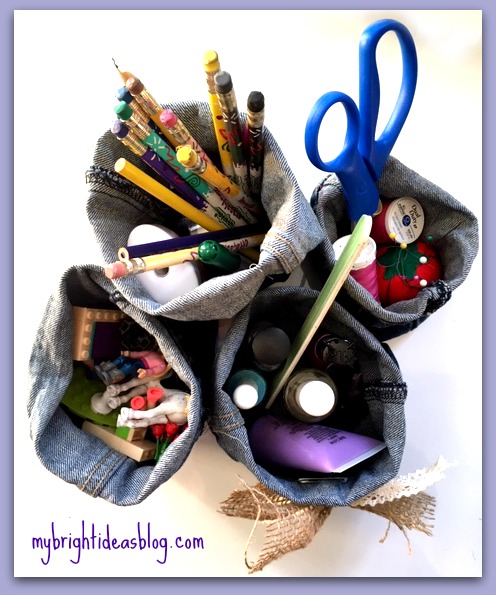
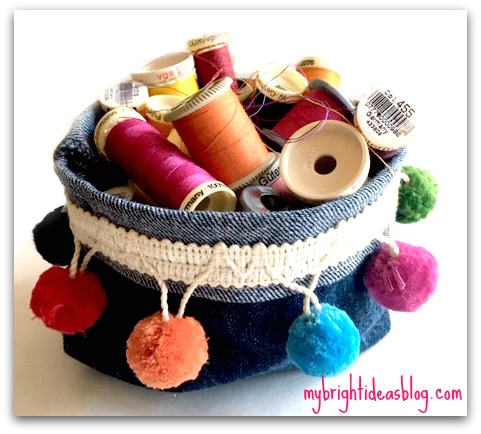
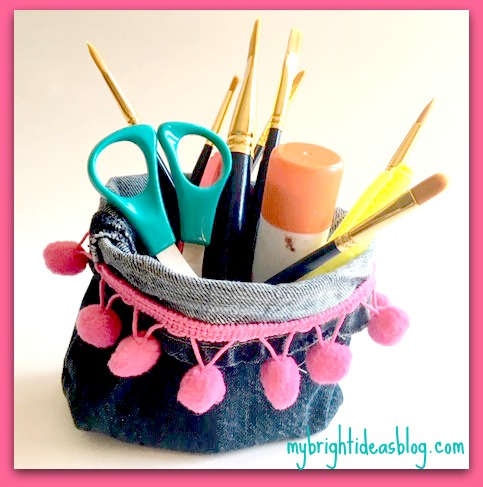
So you can stop there and fill up your baskets with small toys, pens, sewing items, nail polish etc….or…add some garnishes.
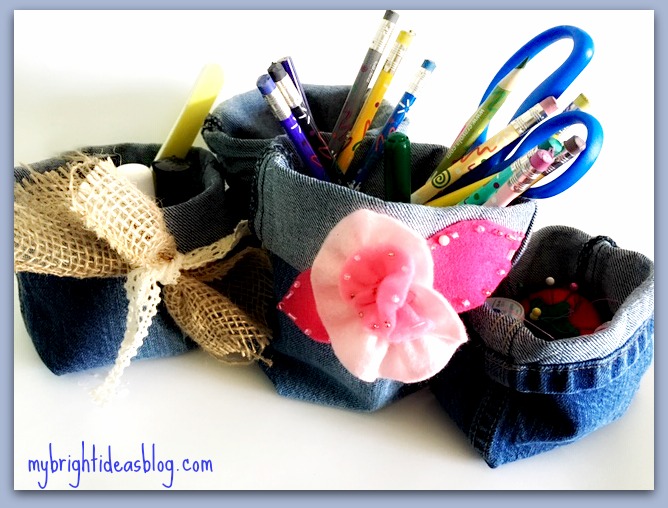
I pinned a bow on one but decided to add more color…. I added a felt flower left over from coffee cup warmers (see the link below).
Then I thought of some trim…maybe with some pompoms. The kind sold in the drapery part of the fabric store. Yes!
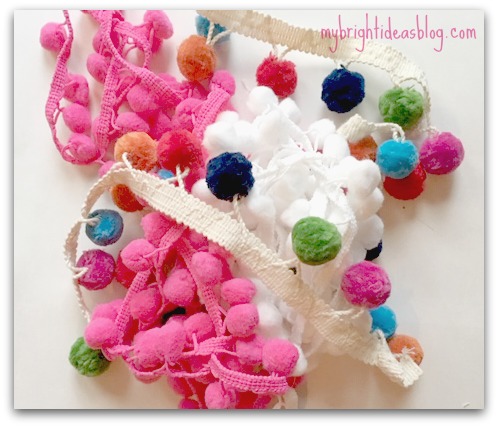
The solid white and pink trims cost approx. $2 per yard but the colourful larger trim was $8.99 per yard. Ouch! Fortunately it was on sale for 50% off so I got a yard.
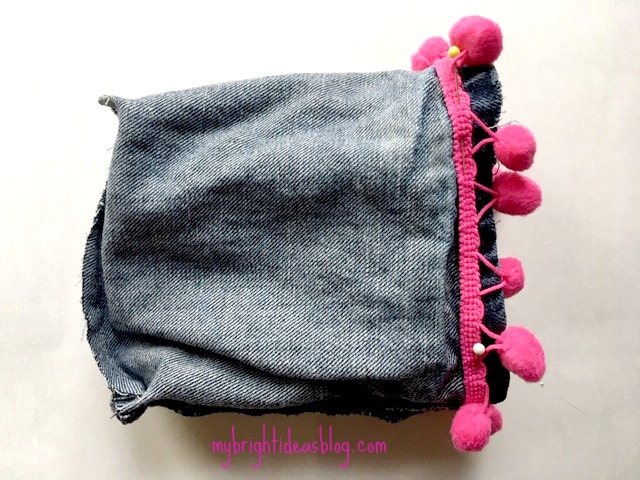
Turn the basket inside out to pin the trim in place.
Before sewing, turn the basket right side out again to check out how it will look.

Here is my colorful pompoms too. They make me so happy!
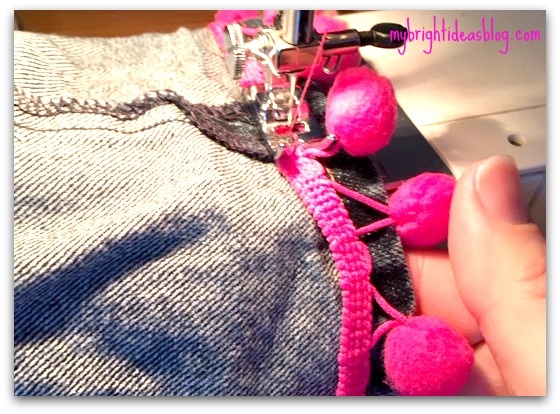
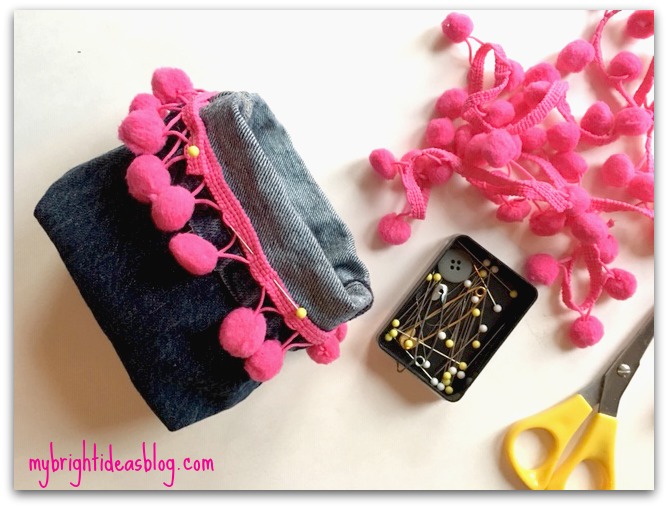
Take it slow while you are sewing on the trim. The pompoms keep trying to get in the way.
There you have it!
I used children’s jeans so that the basket would be small to hold a bunch of nail polish, sewing supplies, Lego or pens. If you use adult jeans and the area higher on the pant leg you could use it to hold magazines Fill the bin with craft supplies, bigger toys, or whatever things need gathering up to keep your place tidy!
Below I have put some more upcycle projects that I posted in the past year. Have a look!
Air Plant Display Ideas
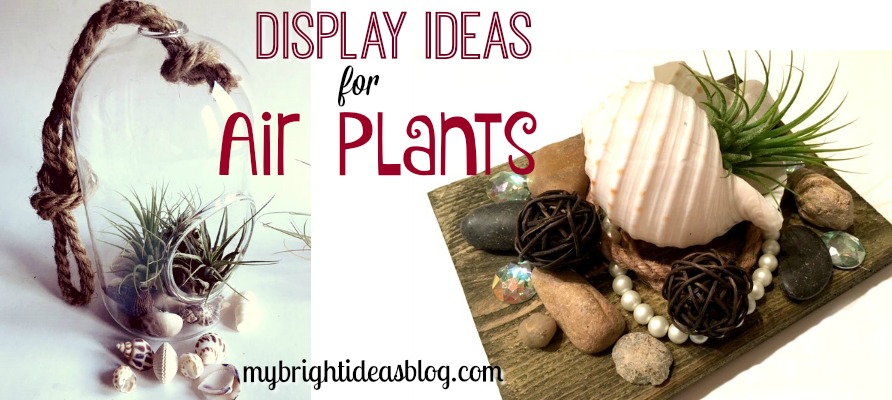
Have you gotten on board with the Air Plant craze? Air plants, are small aerophyte plants that do not need soil to grow. They absorb moisture from the air and indirect light for sustenance. The perfect plant!
Since air plants have no need to be in a pot of soil they can be put almost anywhere. Just so long as you remember to dip them in water once a week and allow the water to drain off.
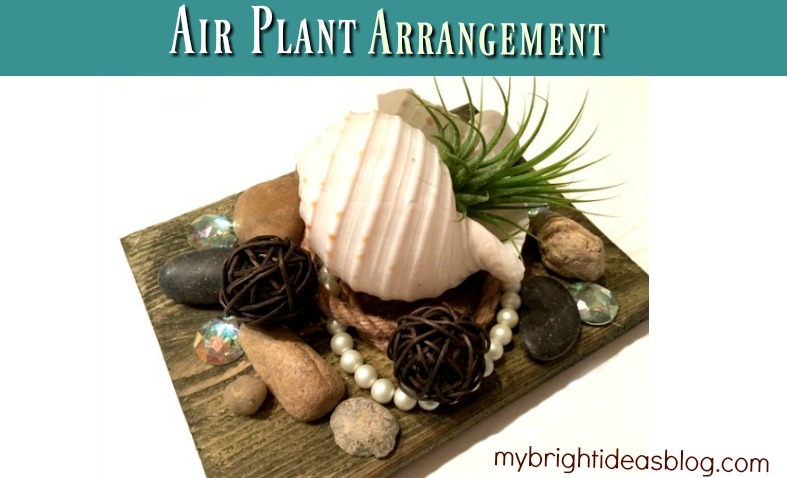
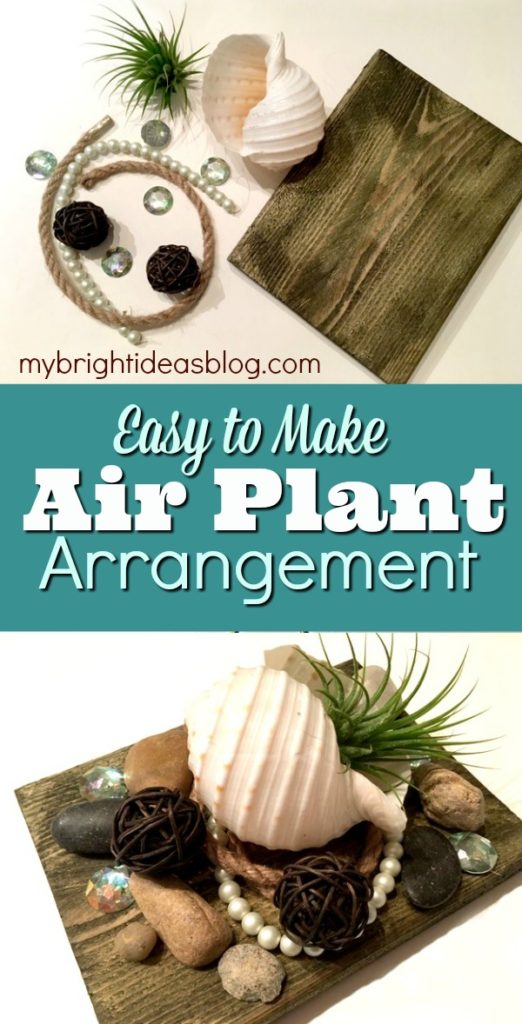
Today I’ll show you how to make an easy arrangement that looks a bit nautical by putting the air plant into a sea shell and accessories on wood or a plate.
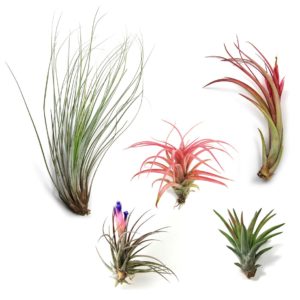
I found my first air plants at the garden centre this past summer and then spotted a shop in the local mall selling them. The ones I have access to sell for $4-$10 each.
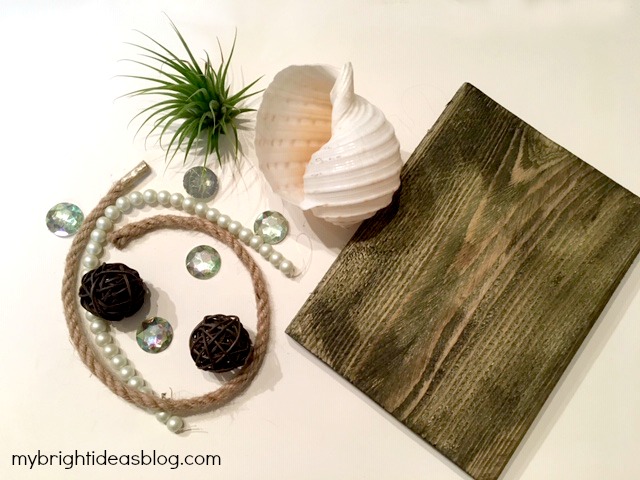
To make this you will need:
- an air plant
- a big shell
- nautical themed items: rope, glass gems, pearls, stones
- a block of wood, plaque or glass plate
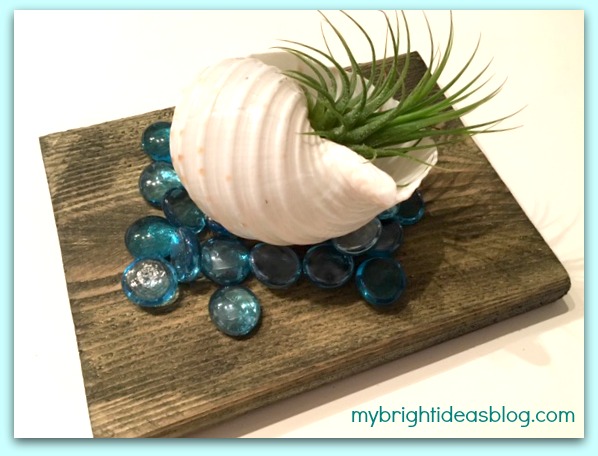
I always have scrap pieces of wood around in case of a sudden project inspiration. For this project I used a scrap approximately 6 inches by 6 inches. If you have a pretty plate you could easily use that too. I am tempted to check the thrift store for a beautiful, antique plate. For this first photo I just used turquoise glass gems.
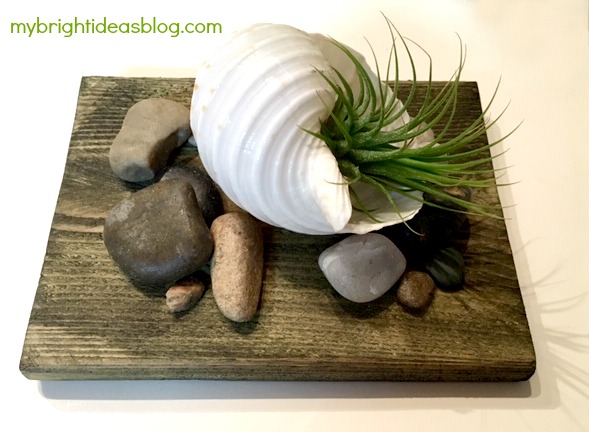
For this attempt I used river stones around the shell. I got them from the dollar store and the same with the gems.
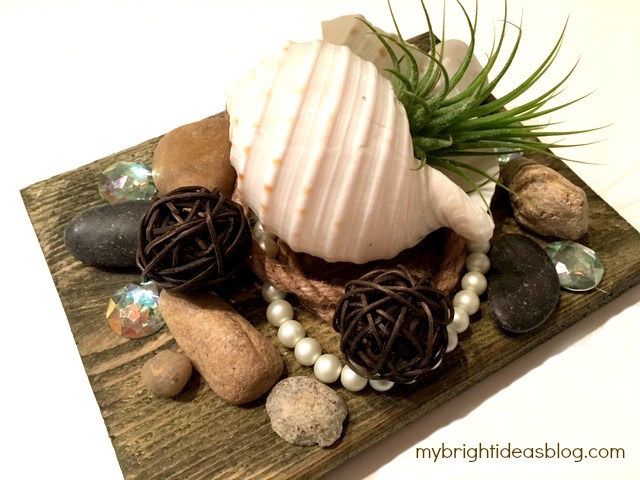
By adding pearls and rope with craft gems and stones I thought it turned out really nautical. Since none of these are attached to the board we can re-arrange them into another craft if I get tired of this one.
Here is another idea!

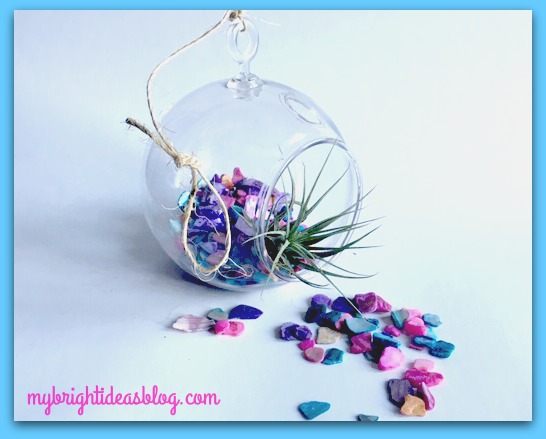
The photo above shows 2 popular air plant display options. The one on the left is plastic and from the dollar tree for $1. I wish I had bought 10 at that price since they were hard to find again. The one on the left is glass and from the garden centre for $8.99.
I used chips of shells that have been dyed for this one. Air plants make great gifts. Since this is plastic and needs very little care it would be easy for a child to care for or a friend in senior care.
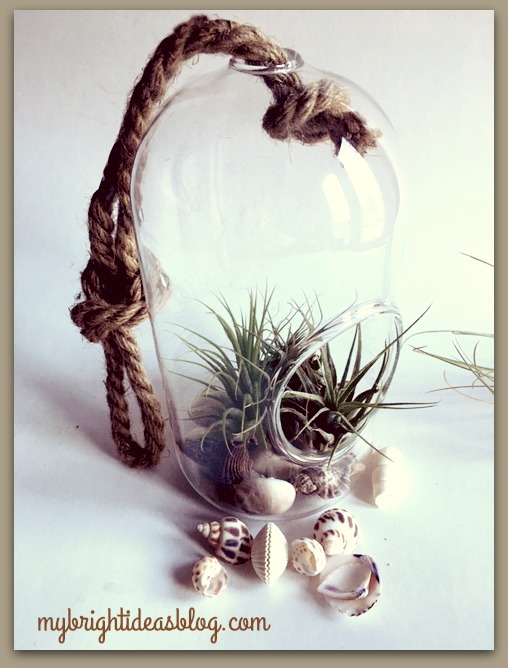
This one I used random shells in the base of the glass dome. I love the chunky rope and shells together-its very beachy.
I’m really excited to try some of the other plant ideas. I’ll let you know if they turn out well! Below are links to some of my other projects!
Nature Craft – Perfect for Earth Day Activity – Clay Imprints with Plants and Flowers
Plant Puns on Painted Potted Flower Pots – Adorable Gift Idea to Make Them Smile!

Toilet Paper Roll Daisy Wall Art
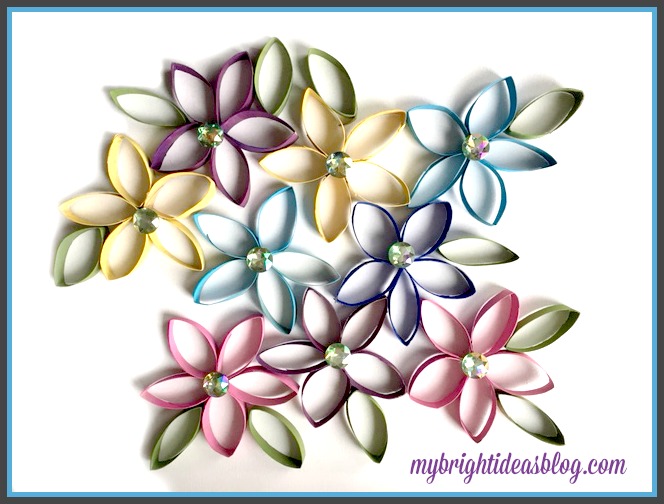
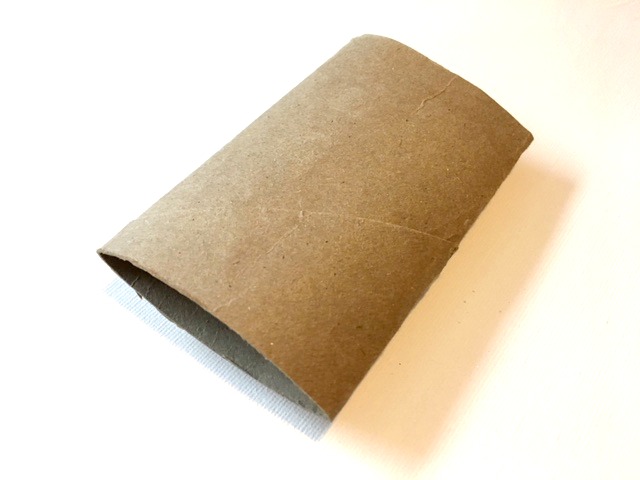
Last year I did a post on making daisy flowers out of toilet paper rolls. I do love to save my toilet paper rolls for crafts so I had plenty more to continue on with more flowers. So this time we are gluing the flowers to a canvas and making a picture to hang in a little girls bedroom.
You will need:
- large white canvas
- 9 toilet paper rolls
- hot glue gun and glue sticks
- craft paint and paint brush
- big gems
For this project you need a plain white canvas from the dollar store ($4). Everything else you likely have in your craft cupboards. I followed the same instructions from the previous daisy toilet paper project. Each daisy makes 1 flower plus 2 leaves.
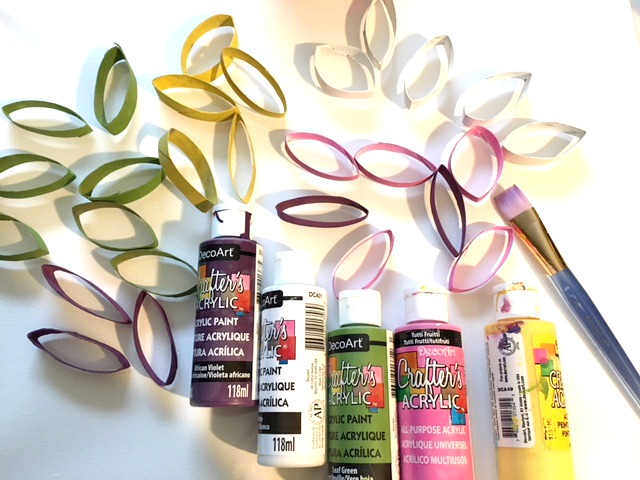
To make this I used 9 toilet paper rolls. I painted: 2 purple, 2 pink, 2 yellow, 2 turquoise and 1 royal blue. I cut the rolls first and painted after. But you might think its more efficient to paint first and then cut and then touch up the edges afterward. Fortunately , the paint will dry quickly.
 Flatten your toilet paper roll.
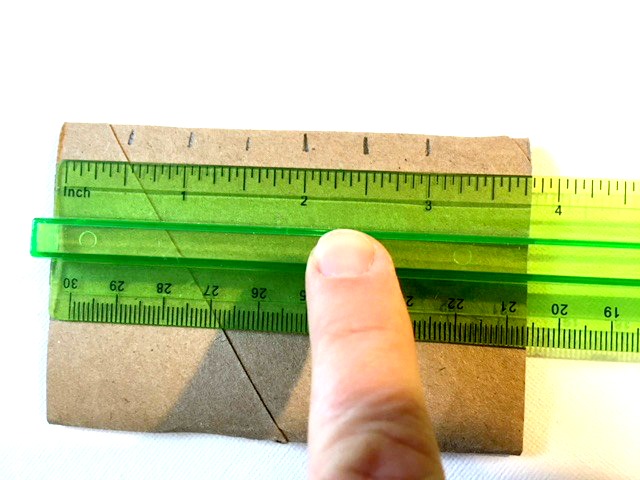 Mark cutting lines 1/2 inch apart.
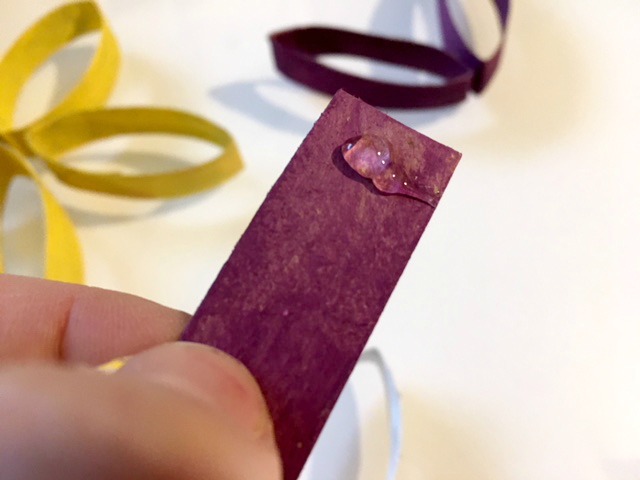
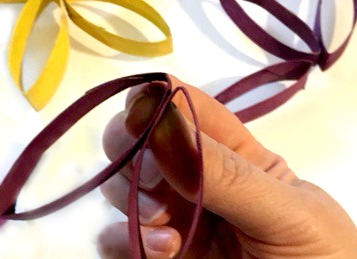
Pinch two petals together. Hold a few seconds while the hot glue dries.
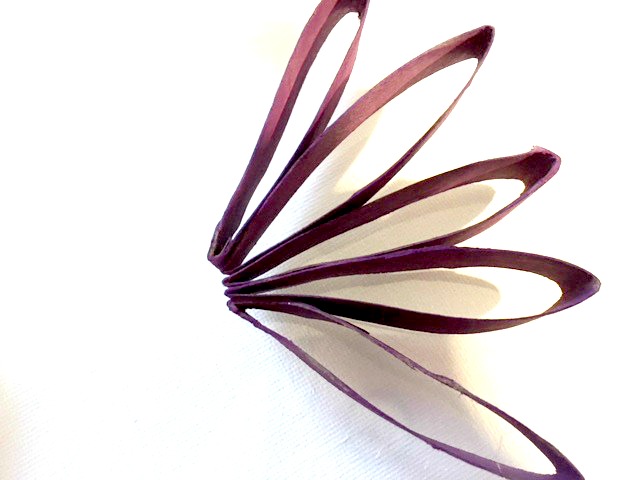
Glue and pinch all 5 petals together. Pull the two outside petals toward each other and glue them together.
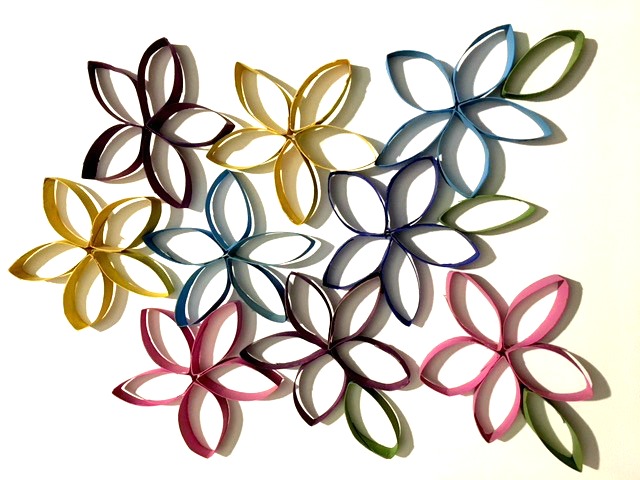 Lay out your flowers and leaves and add a dab of glue to attach them to your canvas.
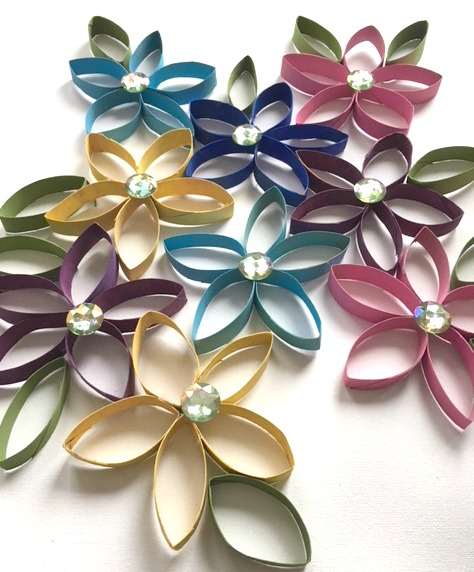
Add a big gem to the centre and attach with hot glue.
Hang your canvas on the wall. Super easy! If your young child is going to do this, please help with the hot glue gun or use white glue.
Look below for more toilet paper roll and Springtime craft ideas!
How to Make Spring Flowers Craft From Painted Toilet Paper Rolls
Toilet Paper Roll Crafts-Use your loo roll tube for easy Crafts!

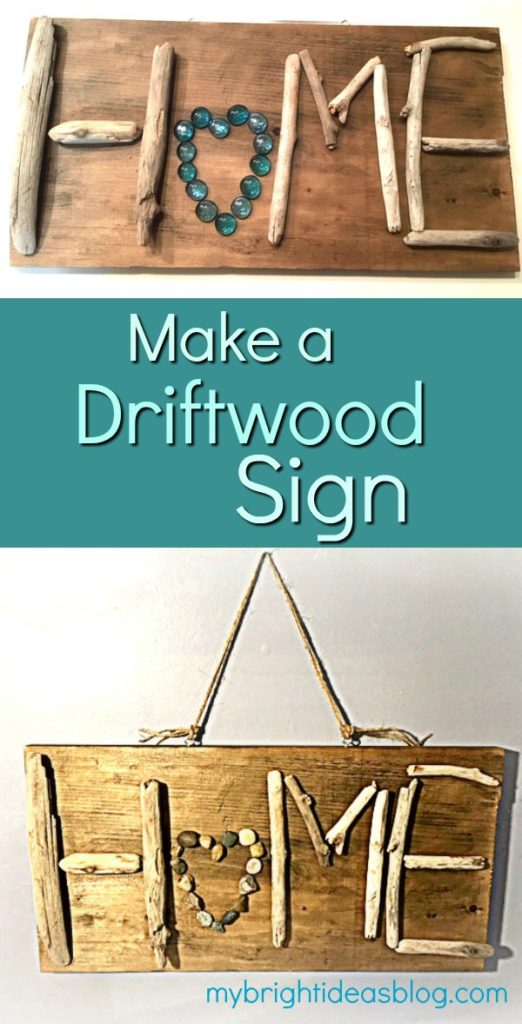
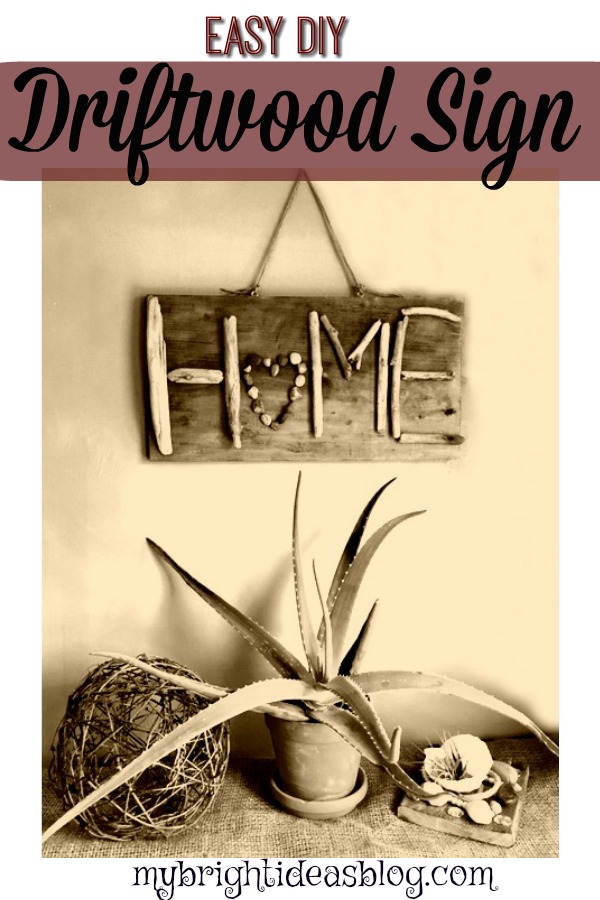
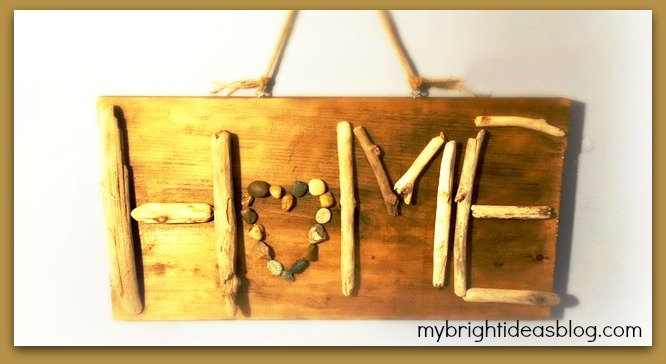
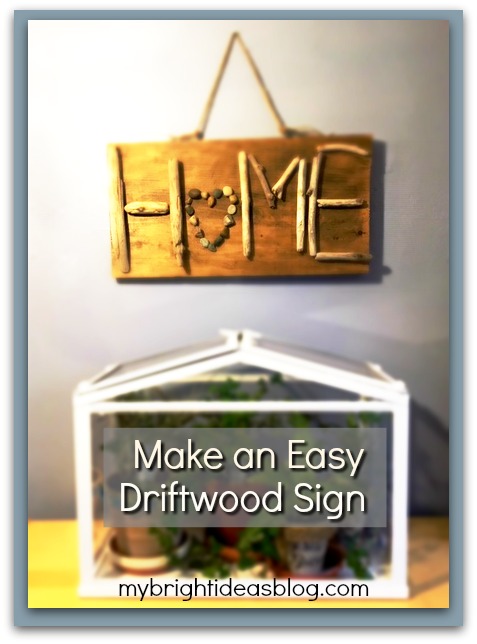
Make a Driftwood Sign – Home
I’m trying to be patient for spring to come but its just early March and it snowed all day….sigh.
Fortunately, I am hoarding craft supplies…including driftwood from trips to the shores last year. So let’s put it together for another rustic, nature craft.
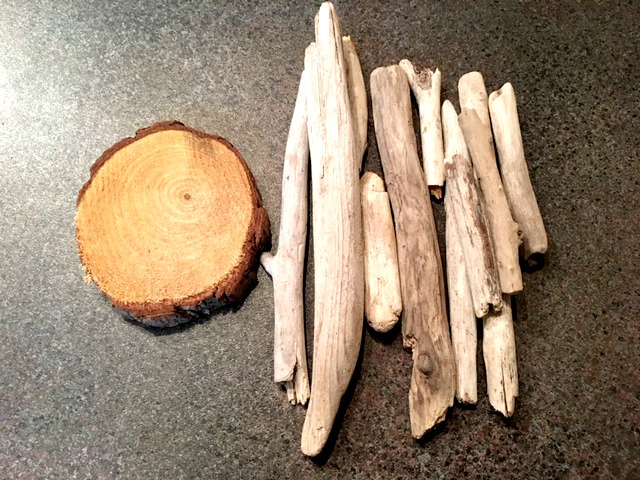
Gather your supplies.
You will need:
- Driftwood
- Wood Slice or Stones
- Wood Scrap
- Wood Stain
- Rag and Gloves
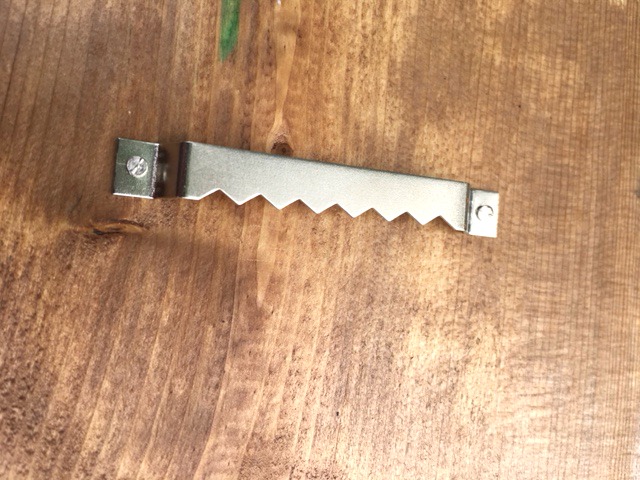
- Eye Hooks
- Twine
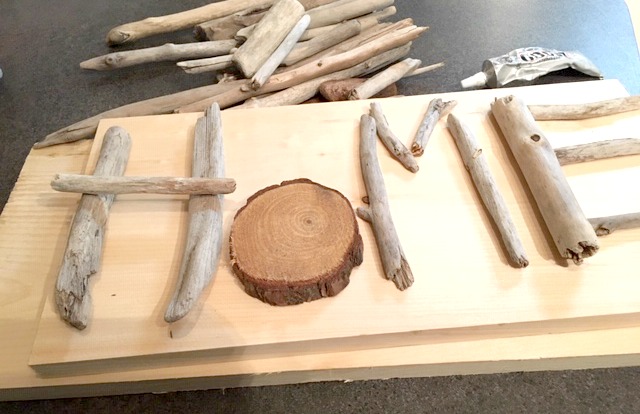
Start by finding a scrap piece of lumber that will match the size of your driftwood. Lay out your pieces of driftwood to arrange them and make sure they fit! My board is 9 x 18 inches (23 x 46 cms) and its a pretty good match for my driftwood pieces.
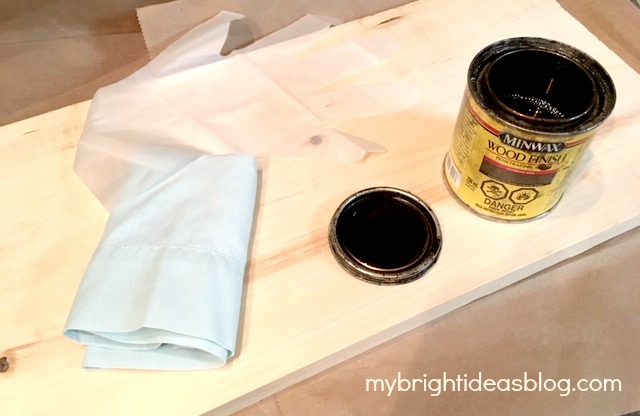
As always, I used my little pot of Miniwax Jacobean stain. I love this dark shade.
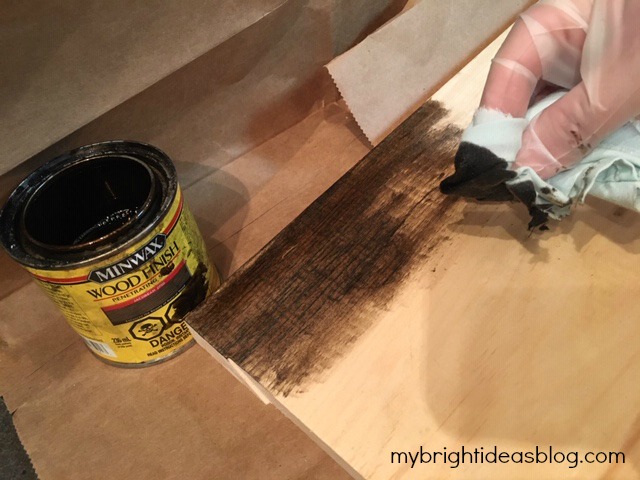
Apply with a rag or brush in the directions of the grain. Allow the wood to dry according to the instructions. My stain can says to wait 8 hours before applying a clear polyurethane. I didn’t add a clear coat because I like the mat finish.
Here I am playing with the driftwood while the stain dries. I’m so impatient.
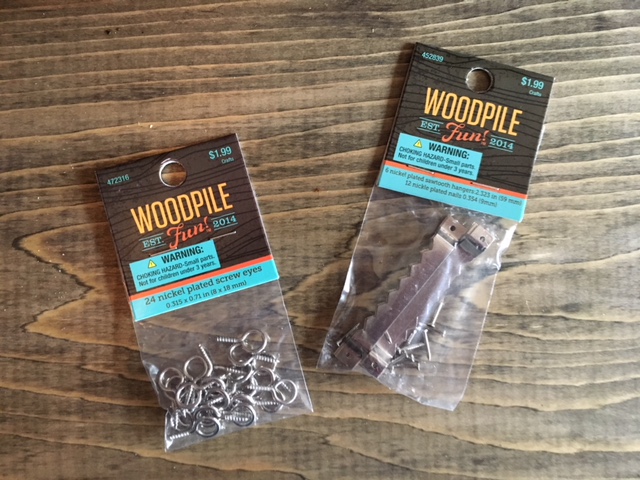
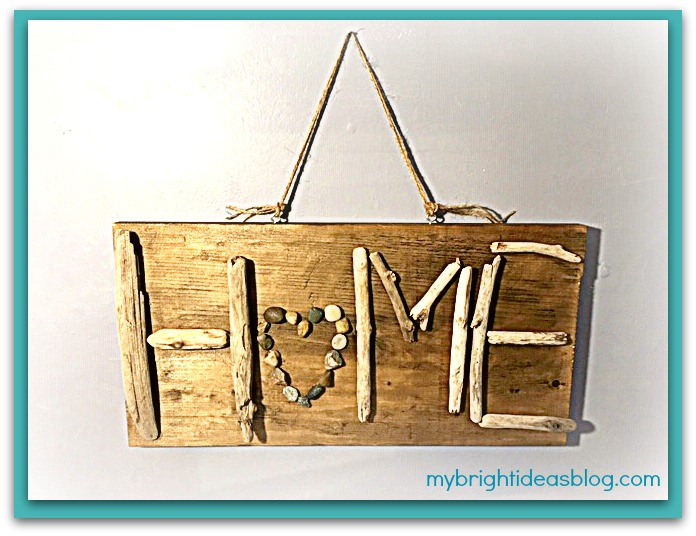
Now that its dry you should decide on how your going to hang the sign up.
Hang it like a picture?
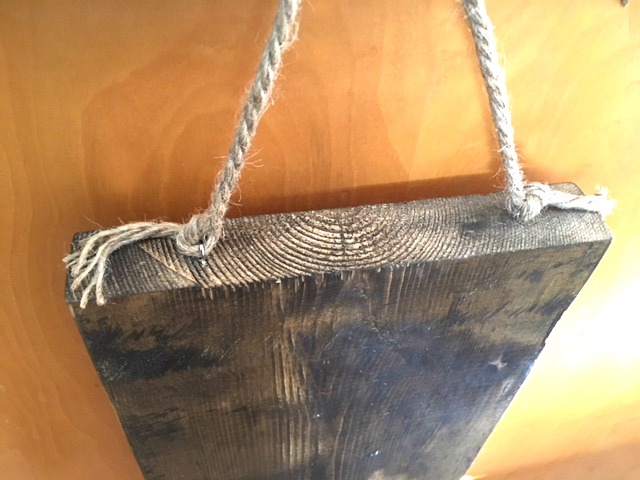
Or like a sign with screw eyes and a bit of twine or jute rope? I’ve used the above options on several projects.
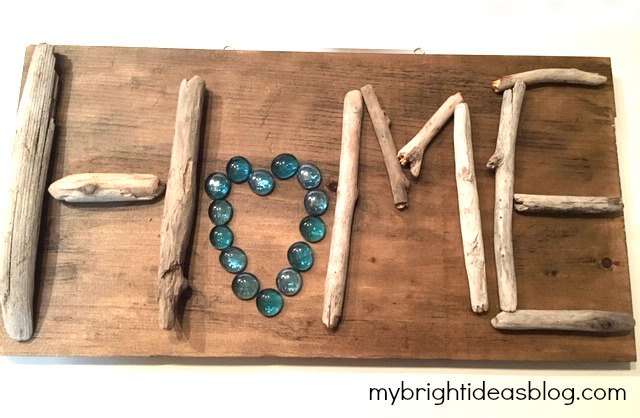
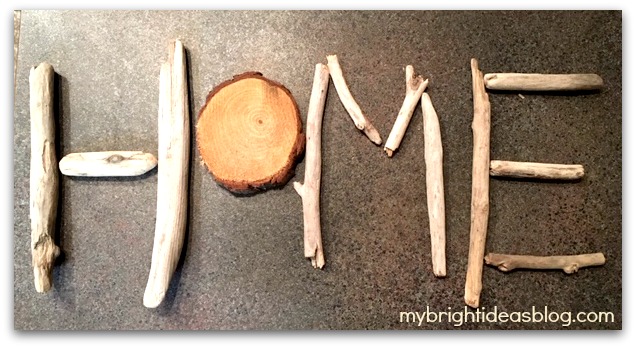
Now the stain is dry and I can pull it all together. I found some blue glass stones? Hmmmm. Tempting to use them but I wanted to have this look natural.
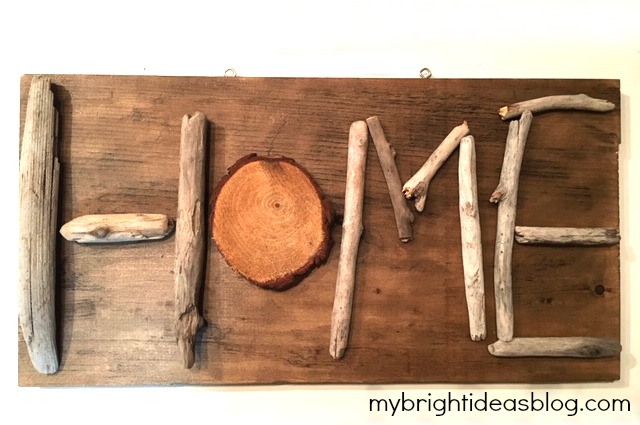
I also like the wood slice for the “O”. That is natural.
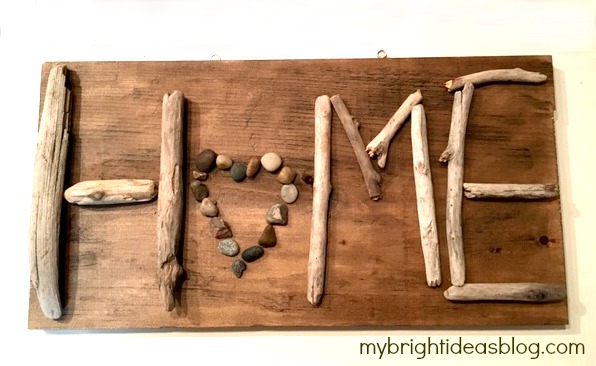
But after deliberations, I settled on small pebbles in the shape of a heart.
You can use your hot glue gun to attach the pieces to the wood. I might put this on the craft sale table at work so I used E6000 glue which is a very stinky permanent adhesive glue that will not pop off like hot glue can when it gets moved. Crack a window or work in your garage…it’s pretty strong smelling stuff.
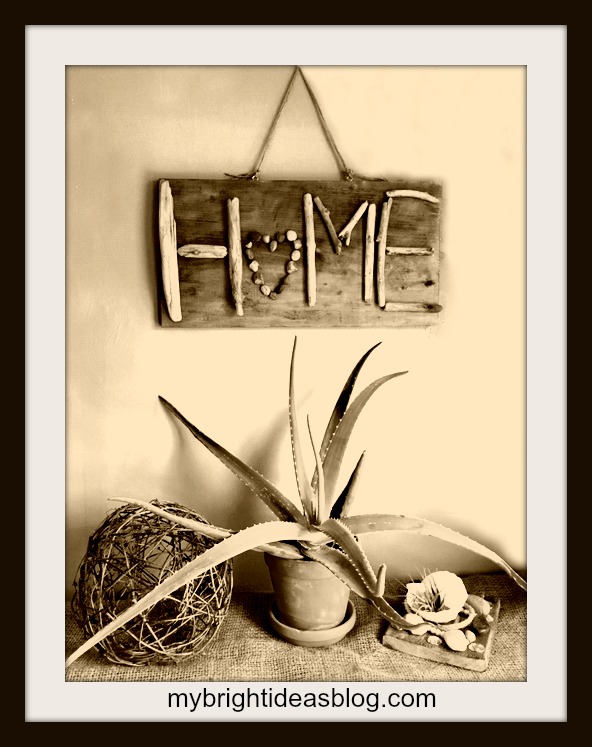
And that is all there is to it!
Here are some other similar projects I have posted you might like….