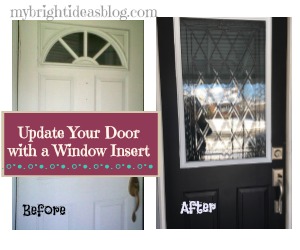
Renew your ugly old door with a window insert and a fresh coat of paint and door handle.
My first home improvement project involving proper tools was to change the window on the front door. Our home was built in the 1950’s and although this door wasn’t the original it was ugly-with a sort of half moon towards the top and didn’t shed light in the front of the house.
At the time I had a home daycare and families were coming to the front door every day several times and the noisy munchkins often made it difficult to tell if someone had knocked and was waiting at the front door. I was constantly running to the front room and peering out the windows to see if anyone was there…and usually there wasn’t.
I went to Home Depot to see what a new door would cost me. It was not too bad but add on the installation costs-eek! I had the side door replaced so I know from watching that done it was well out of my skill level. The staff asked if it was a decent quality door…if yes it might just need an update with an insert. Say what?!?!
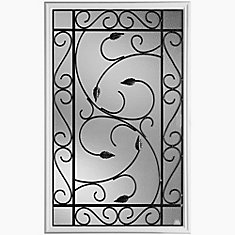
https://www.homedepot.ca/en/home/p.pergola-22-inch-x-36-inch-iron-glass-insert.1000784903.html
https://www.homedepot.ca/en/home/p.pergola-22-inch-x-36-inch-iron-glass-insert.1000784903.html
https://www.homedepot.ca/en/home/search.html?q=door%20insert&page=0
This will be helpful to know if you have a newish door but its the plain standard look. You can upgrade to ones with blinds between the panes of glass, or a window with a screen for a breeze or like me, a decretive pane to let the light in.
It was very hard to find how exactly to install the insert. I copied a blog I found about adding a dog door insert. I drew the cutting lines where I wanted the window to go by tracing the cardboard that comes with the insert. Then I got my largest drill bit and drilled a hole through the metal door an inch inside my cutting line. The drilled hole (or holes if you drill a few next to each other) is big enough to get a jigsaw blade in. Then start cutting lines through the door until you are able to cut out the entire rectangle of the insert.

A few reminders…jig saws have speed gauges which I didn’t realize until after the project was done. It was pretty fast and I could easily have cut the door right in half. It was literally my first time using a jig saw and I should probably have tested it out on something else first!
Move your small children far away and don’t be put off by their fears that their mom is about to ruin the front door.
And of course wear safety glasses. Now find a hubby to help you carry that heavy door back to the front of the house and pop the pins back in the hinges.
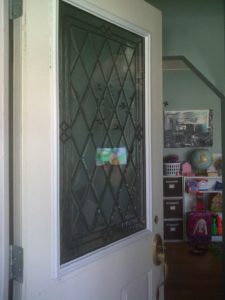
The insert literally just pops in and is secured by some push in plugs and your done! So easy and what an improvement. The inserts range from about $90 to $500 depending if you like fancy stained glass. There are really nice choices in the lower range too. I think mine was around $150.
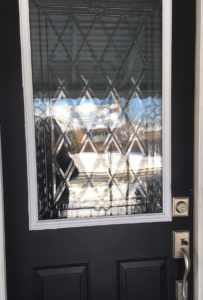
Shortly after we painted the front of the door black and put on a gorgeous handle and had a front door to be proud of!
Follow me on Pinterest, Facebook, Instagram and Twitter!