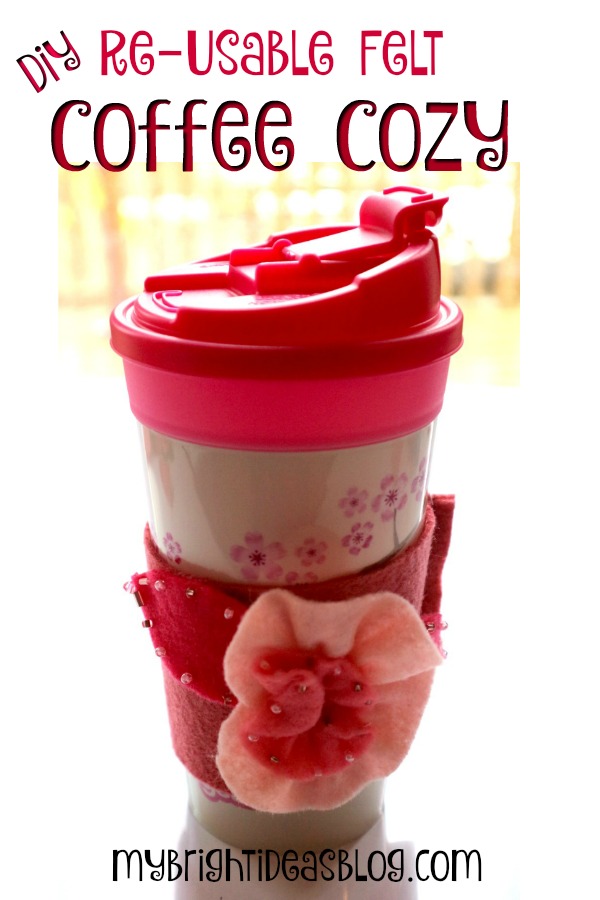
Have you heard of a coffee cup cozy? It’s an adorable name for a glamorous coffee cup sleeve. Often used to protect your fingertips from the hot beverage take out cup.
Today I will show you how to make a felt coffee cozy for either cups from home or a take-out cup. As the weather gets chilly that means ice skating and winter sports (or standing still watching other people do winter sports tee hee…) that will have you warming up with a nice hot chocolate, tea or coffee. You need a coffee cozy to keep the hot inside and protect your hands. They look cute too!
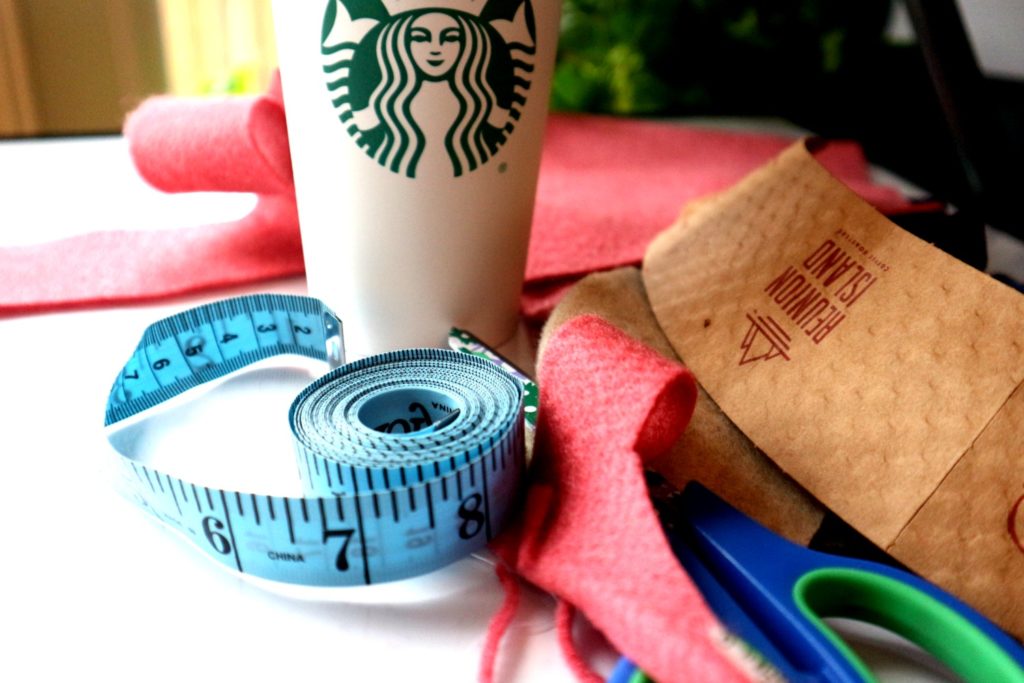
You will need:
- felt (3 inch strip plus scraps for the applique)
- scissors
- measuring tape or ruler
- take away coffee cup
- needle and thread or sewing machine
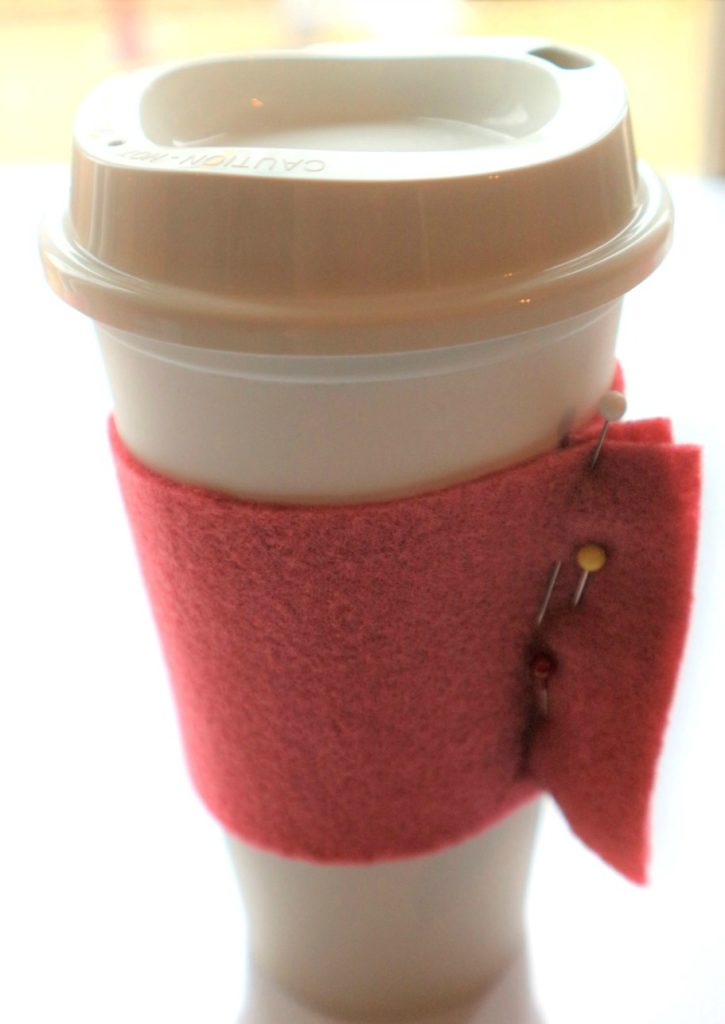
Every cup is different so I recommend that you start by cutting a strip of fleece 3 inches wide and wrap it around your cup. Pin your felt in place to gauge the size you will need.
My favorite take away cup is a Grande Decaf Coffee from Starbucks (with cream and sugar and cinnamon and chocolate sprinkled on top…mmmm). That is also the size of the cups that they made into reusable plastic cups. Yeah! For my friends who live near Tim Horton’s, it fits their medium cups.
Read on to see details to make it this size.
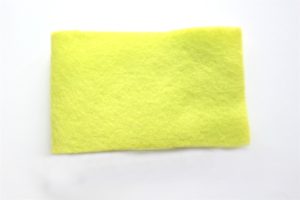
Measure your felt and cut a piece 9 inches long and 3 inches wide. (23cms by 7.5cms) Fold the strip of felt in half.
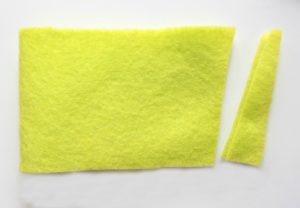
Wrap the strip of fabric around the cup to see how it fits. Trim a small amount of felt on an angle to adjust for the shape of the cup.
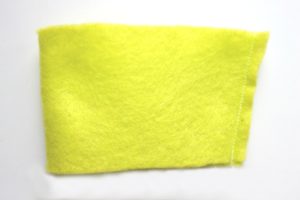
Hand sew or machine sew the edge. Stitch close to the edge…approx. 1/4 inch (or 1/2cm). Fortunately, felt does stretch a bit so if it fits snuggly at first, it will soon be fitting comfortably.
Making the Flower Applique
Sorry there is no pattern made for this. I “eyeball” most of the time instead of using patterns. Sometimes that makes my project a bit crooked but I don’t want it to look like its a perfect cookie cutter project that you can buy at Walmart.
So every project is an original!

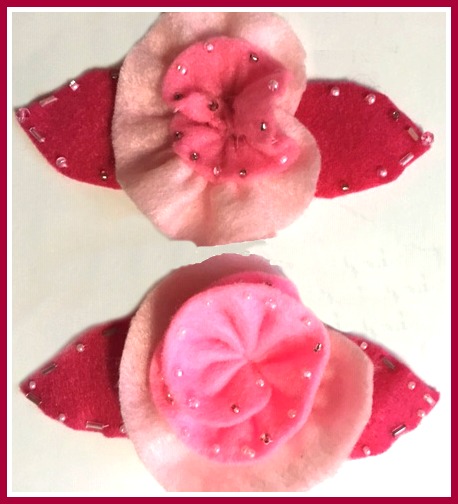
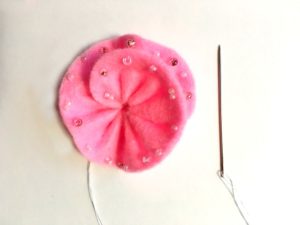
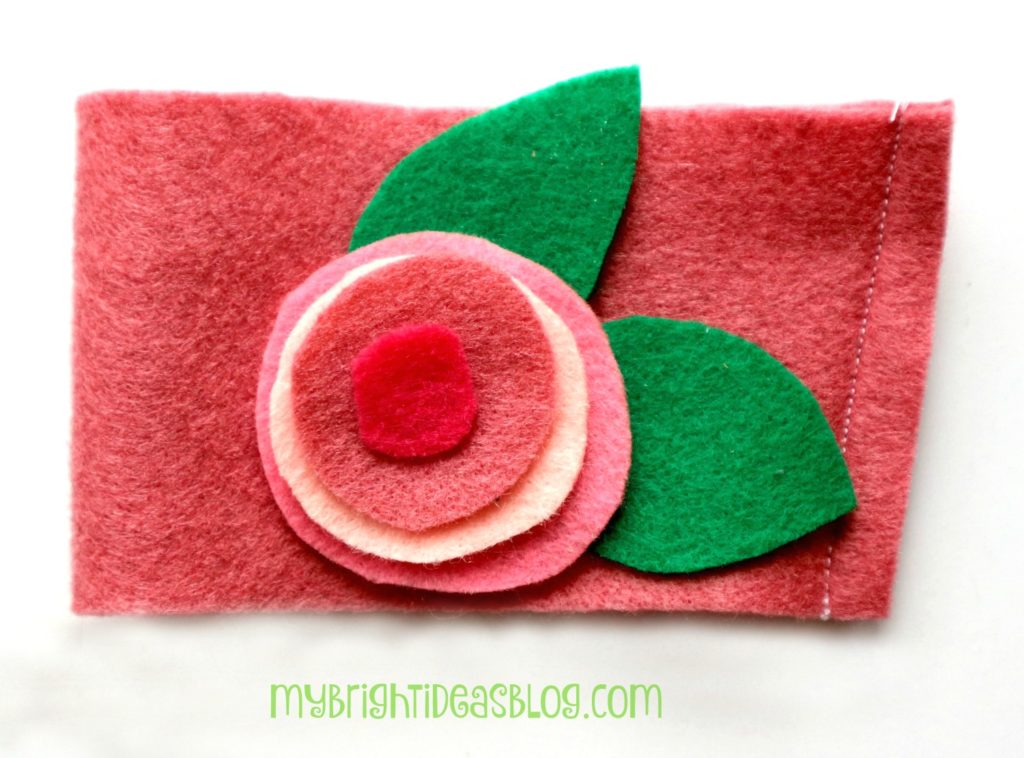
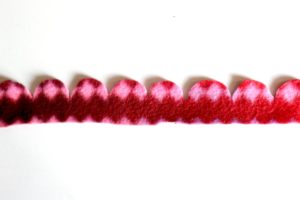
Cut 2 long strips with rounded corners. I used 3 shades of pink. The darkest is for behind the flower and cut into the shape of two leaves. The lightest pink is what I put for the middle of the flower. Cut 3/4 of an inch wide by 9 inches long. The centre pink was 1 1/4 inches by 8 inches. If you would like it to be fuller add another inch or two in the length to this piece.
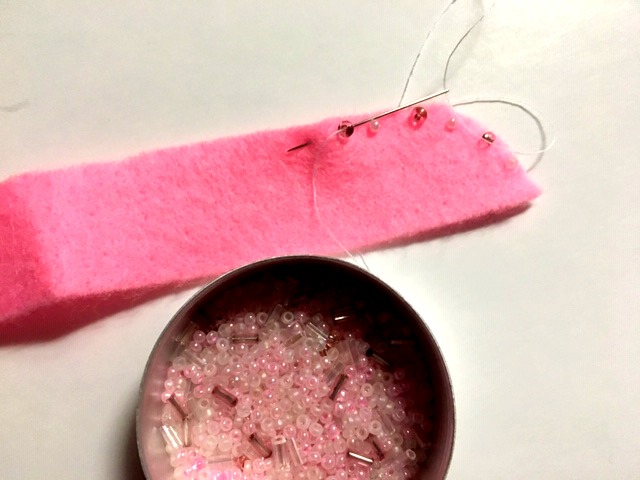
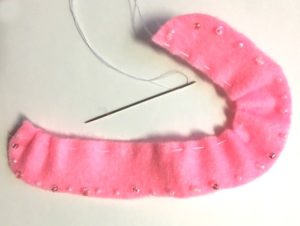
If you are going to add beads to the edges – do it first. Using seed beads add a bead to each stitch as the needle is up on the right side of the felt. Its so easy, we should sew beads onto everything! I added beads to the centre piece and the outside layer but left the middle layer without beads.
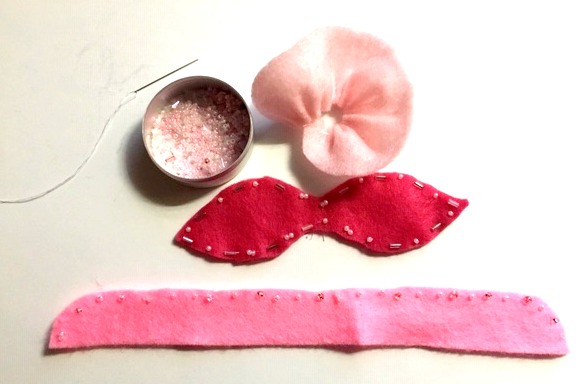
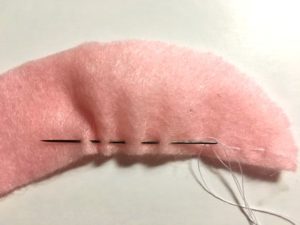
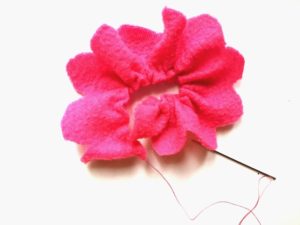
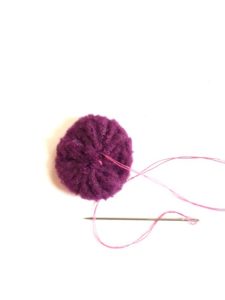
To begin putting the flower together. Slide the needle through the felt with a loose baste stitch. Gently pull the thread at the end to begin gathering.
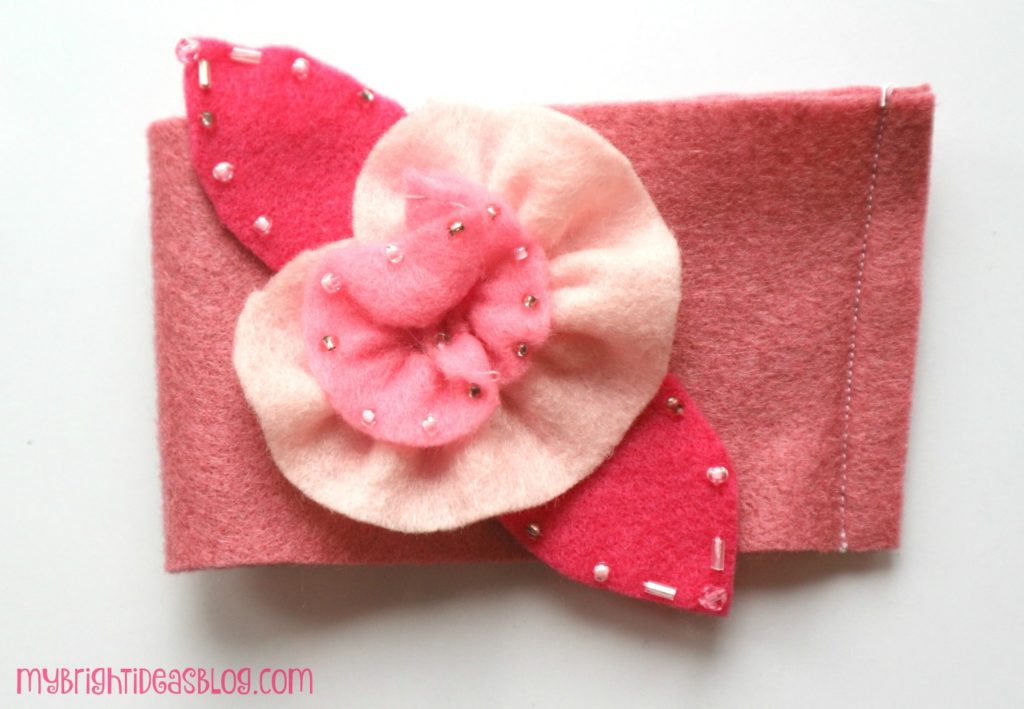
As the final step I put the flower together and sew them in pace. Then attached the entire flower to the sleeve.
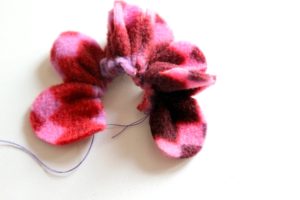
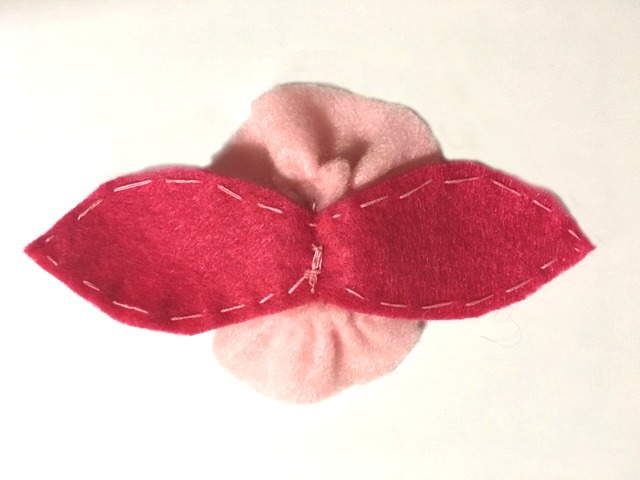 Here is the back side. Now I attached the flower to the cup sleeve.
OR
You could put the flower together by sewing the layers directly onto the sleeve. Which ever makes more sense to you.
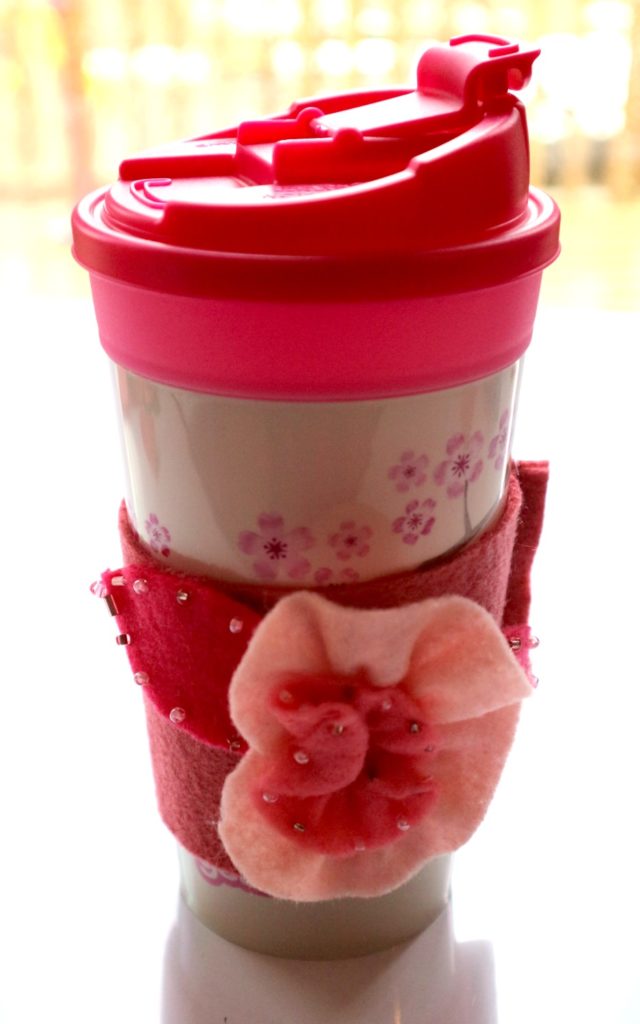
TA DA! Don’t you just want to show it off.
Felt is so easy to work with it will get your creative juices flowing! Now that you see how easy it is you will be designing more for a friend who loves dogs and another flower one for the babysitter, the mailman, workmates….spreading them all over the kitchen table like me making more….and more….
…or is it just me who does this?
This flower is simply just stacking circles. If you don’t want to sew you could glue it on.
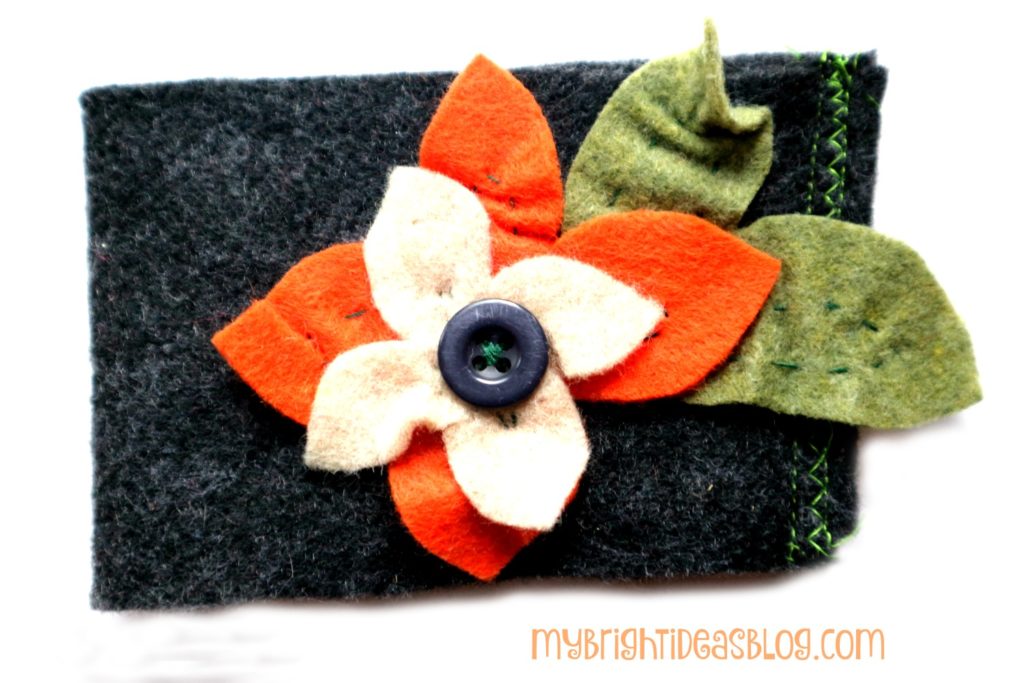
This one is nice for the autumn. I did a few stitches on this seam of this one in green and put a button on as the centre.
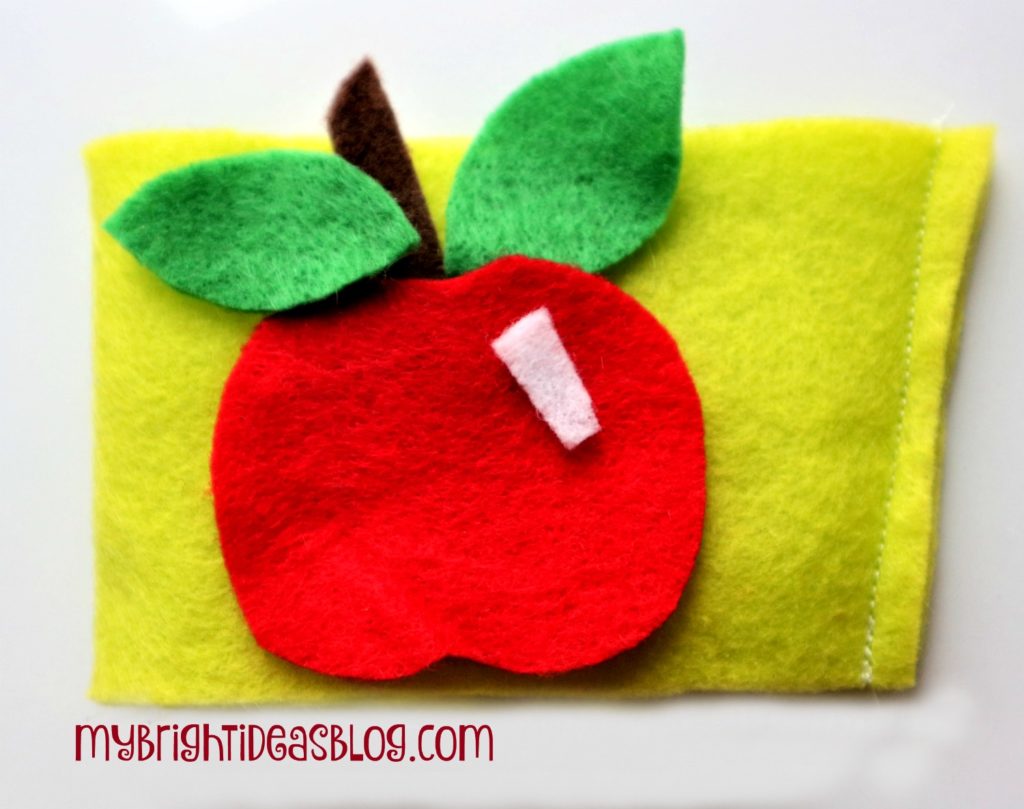
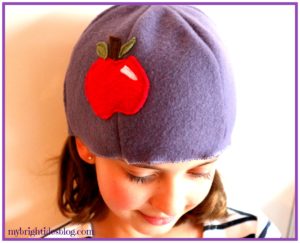
The apple coffee cozy would be great for a teacher gift! If the kids did their own hand sewing I think the teacher would love the personal touch of a child’s efforts to stitch it. Ask your kiddos if their teacher likes coffee and put a gift card with it. I read an article about giving teacher gifts and it is the hand written cards of thanks from the child that really touch their hearts.
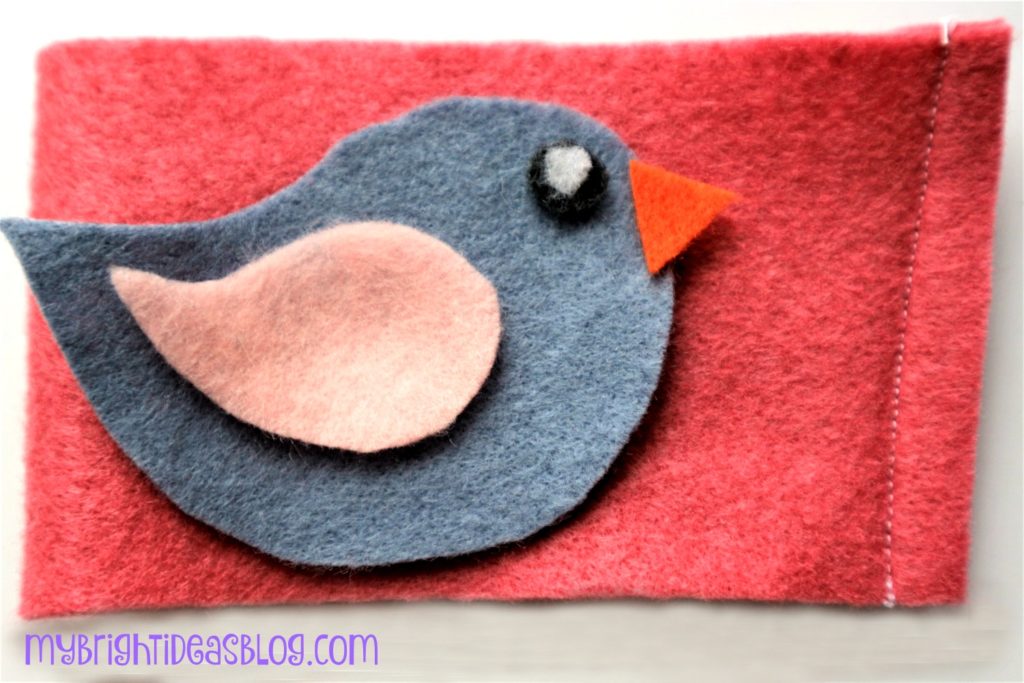
What about a sweet little bird. I had put some birds just like these on the knees of my daughters pants-to cover a hole. I’ll put the link below.
I hope you get a chance to make a coffee cozy! With felt costing around a dollar a piece you could make 3 from one piece and then personalize it with your scrap pieces. Now that is an inexpensive gift!
Felt is so easy to work with. Get your kids learning some hand sewing skills and give gifts they feel proud to give!
Here are a few more projects that we have tried to make with FELT!
Sew a Super Easy to Make Felt Crown – Add to your dress up clothes!
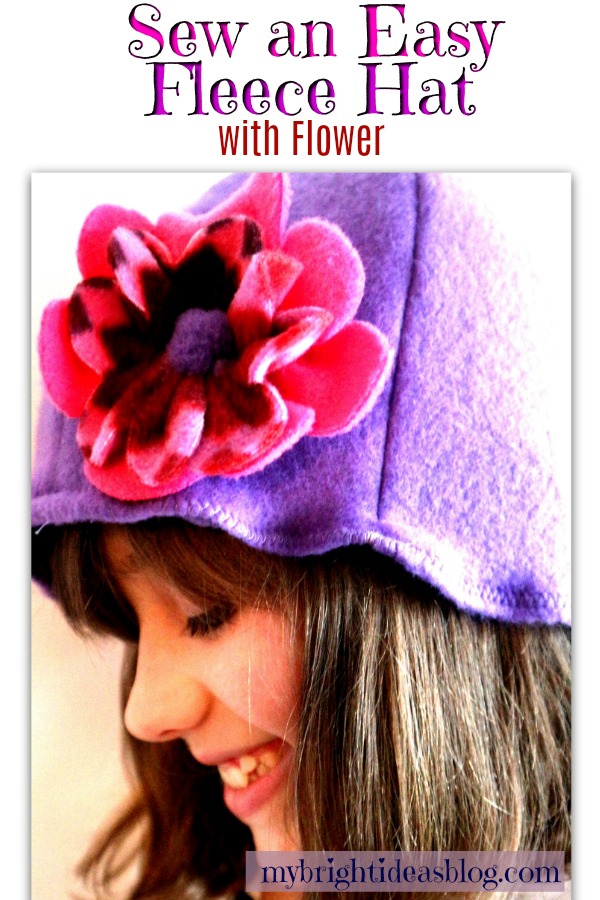
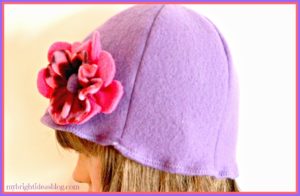
Easy to Make Fleece Hat with Flowers – Simple Sewing Project

This fleece hat project is so easy and fast! You’ll have a new winter hat done in 20 minutes. Then I will show you how to make a simple flower applique. The weather is getting chilly now so this is just the thing to make for yourself or a gift for someone else.
You will need:
- a small amount of polar fleece fabric (10 x 26 inches )
- scraps of fleece from other projects in co-ordinating colors (1-2 inch wide x 12 inches long)
- sewing machine
- scissors
- needle and thread
This hat is made up of 6 long triangle panels.
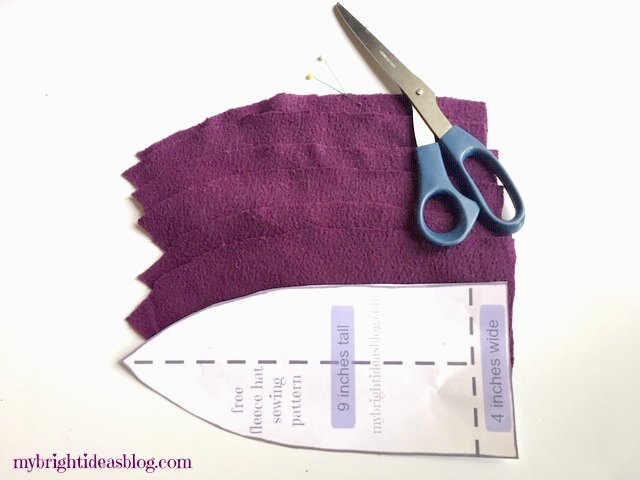
Cut 6 identical pieces from the template below out of fleece.
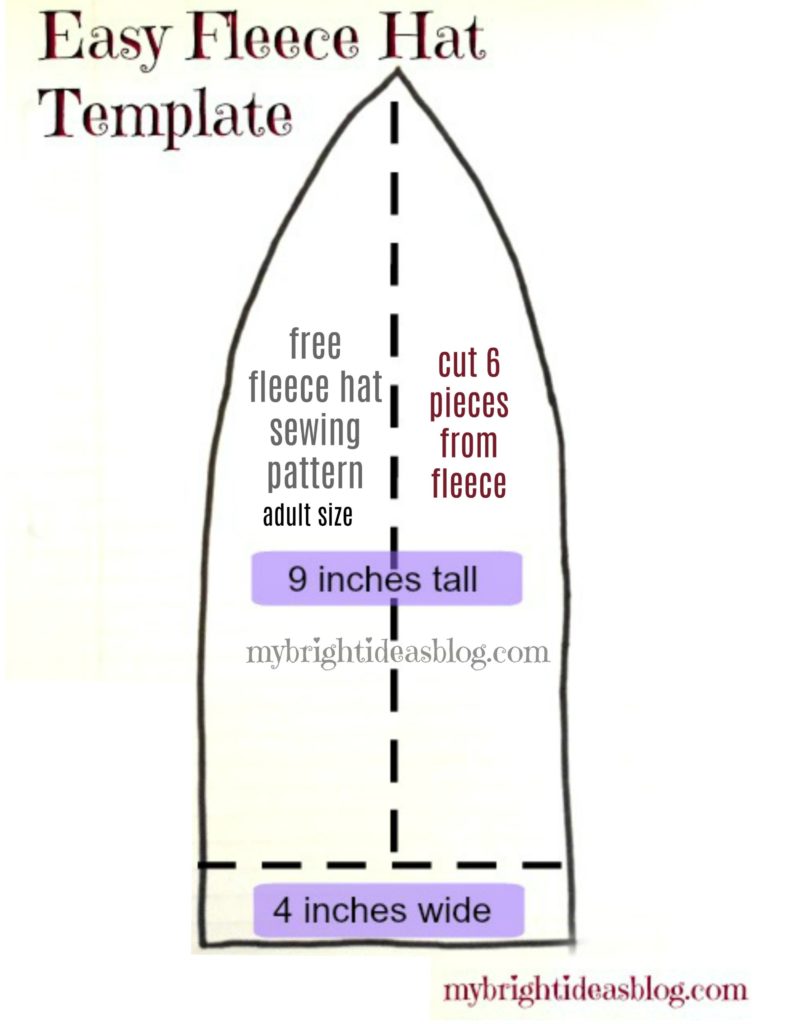
Right click on the photo above and save to your computer. This should print out to the right size on regular 8.5 x 11 computer paper.
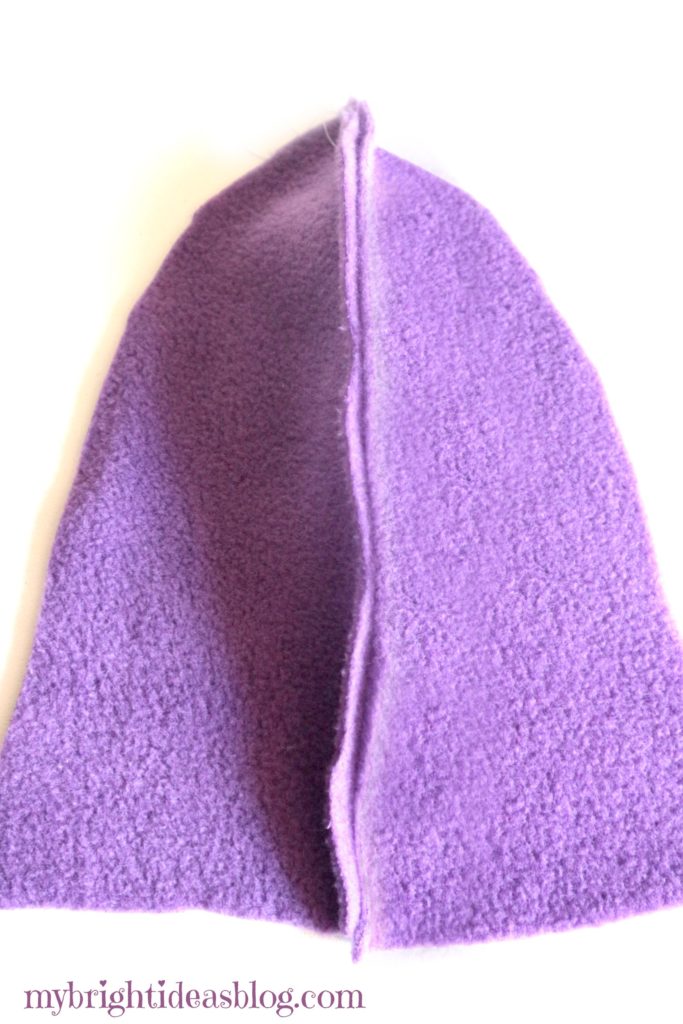
Sew the first 2 pieces together (with right sides together).
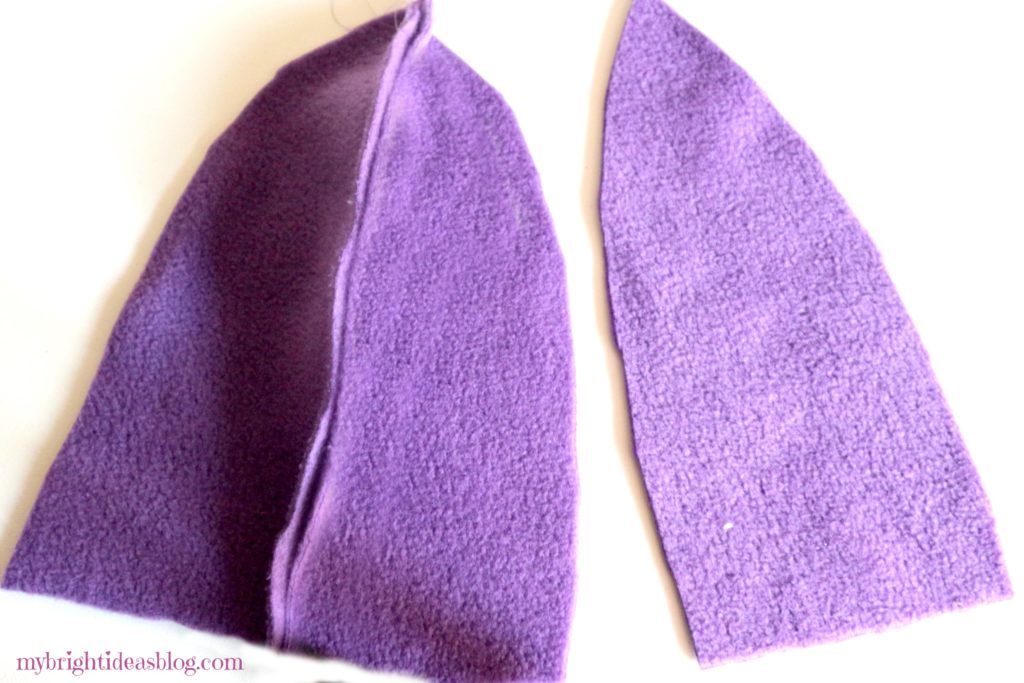
Pin the third section of the hat in place next to the first two pieces and sew it. After the three pieces are sewn together set this aside.
Repeat these steps with the other 3 sections.
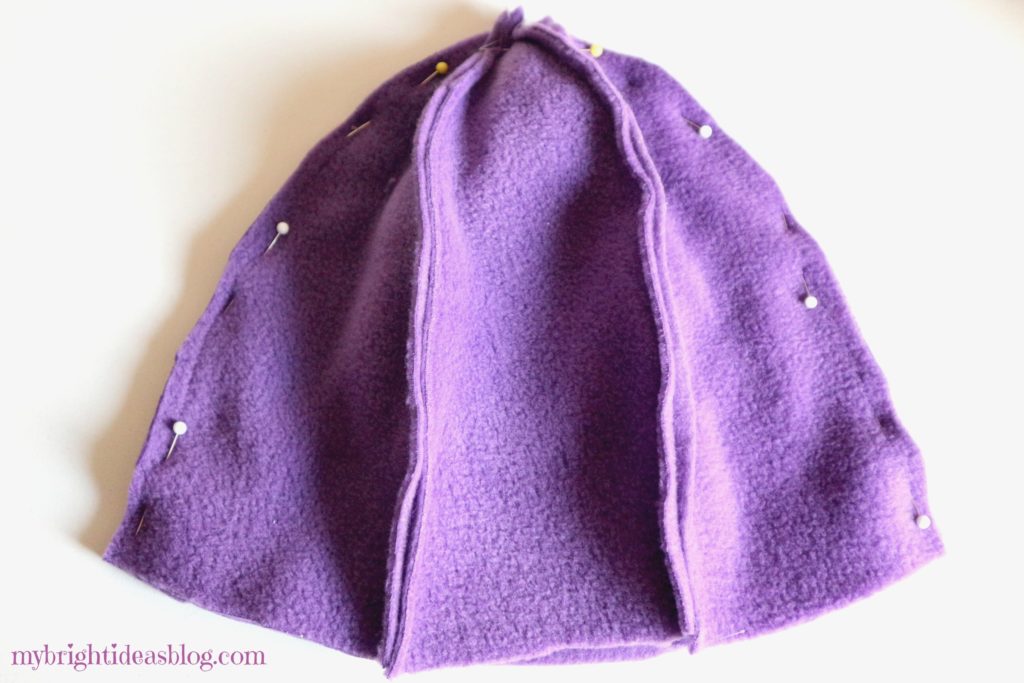
With the right sides together, pin these two halves together. Sew all the way around the top.
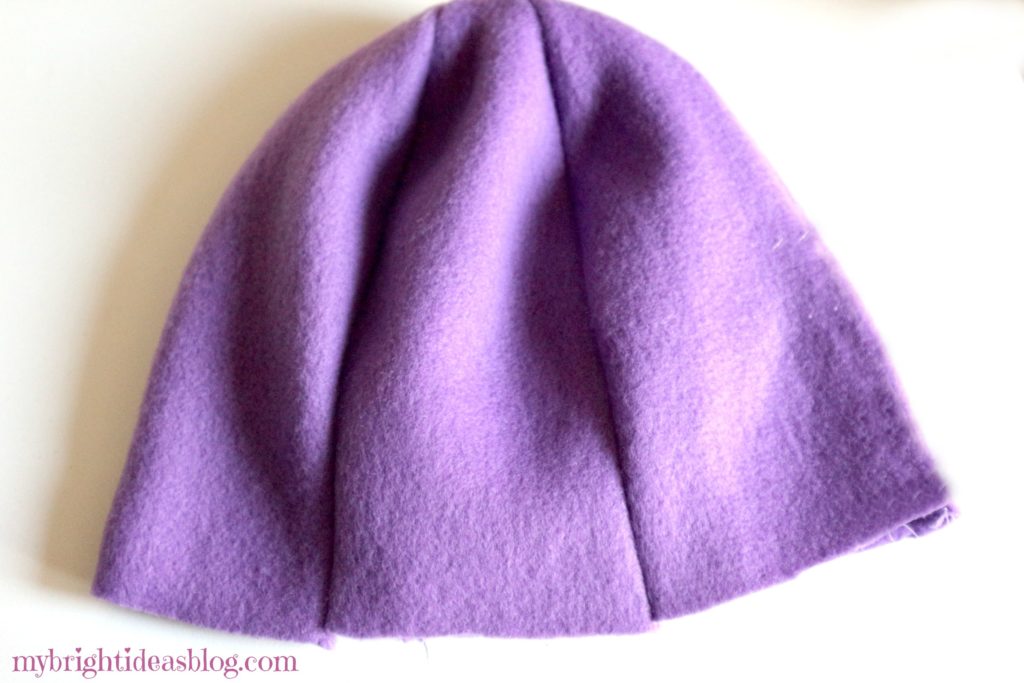
Turn the hat inside out and try it on. Determine how wide the hem should be. If the hat seems too long for you, simply cut 1/2 an inch off the hem and try it on again. Fold the bottom inwards to hem and pin in place.
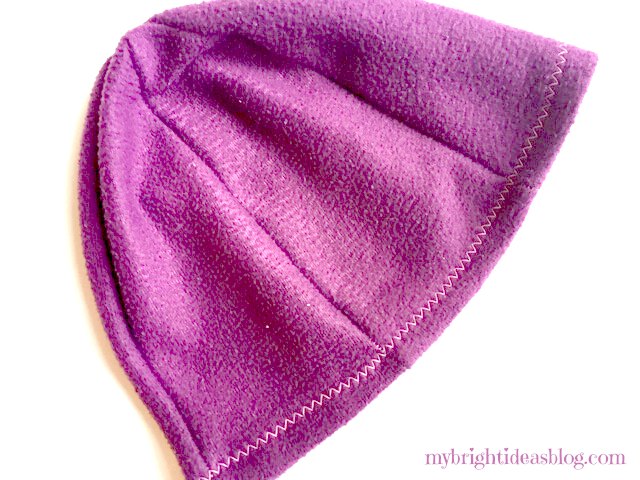
On this hat we folded the bottom over 1/2 inch and did a zig zag stitch all the way around. When your fold is wide, your zig zag hem lays flat. As the photo above shows.

On these three photos of my daughter wearing different hats – the hem was shorter so the zig zag stitch was closer to the edge and it did look quite wavy. I like both ways.
The Flower Applique
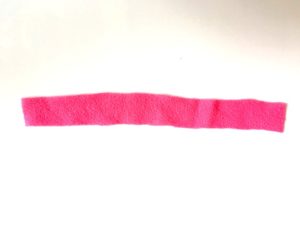
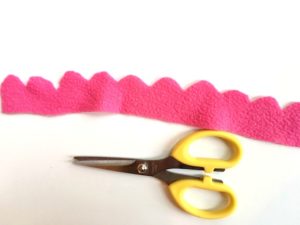
We cut a strip of fleece 1 and 1/2 inches wide by 12 inches long. Then carefully cut a rounded pattern to make the flower petals.
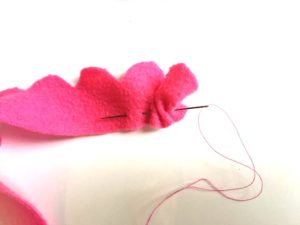
Thread a needle with a knotted length of thread and begin to do a loose baste stitch across the bottom of the petal strip of fleece.
Gently pull the thread to gather the pleats. Set this part of the flower aside for now.
Cut another length of fabric 1 inch by 12 inches long. This will be an inner layer of petals so its a bit shorter than the first. Baste this as we did with the previous flower petal section. Pull the thread to gather the fabric and set this aside too.

For the centre of the flower cut a circle 2 inches in diameter. I traced the vitamin bottle to make the circle. Baste around the circle and pull the thread to gather the edges. When it’s pull closed put a few stitches to keep it tight.
Adding the Flower Applique to the Hat
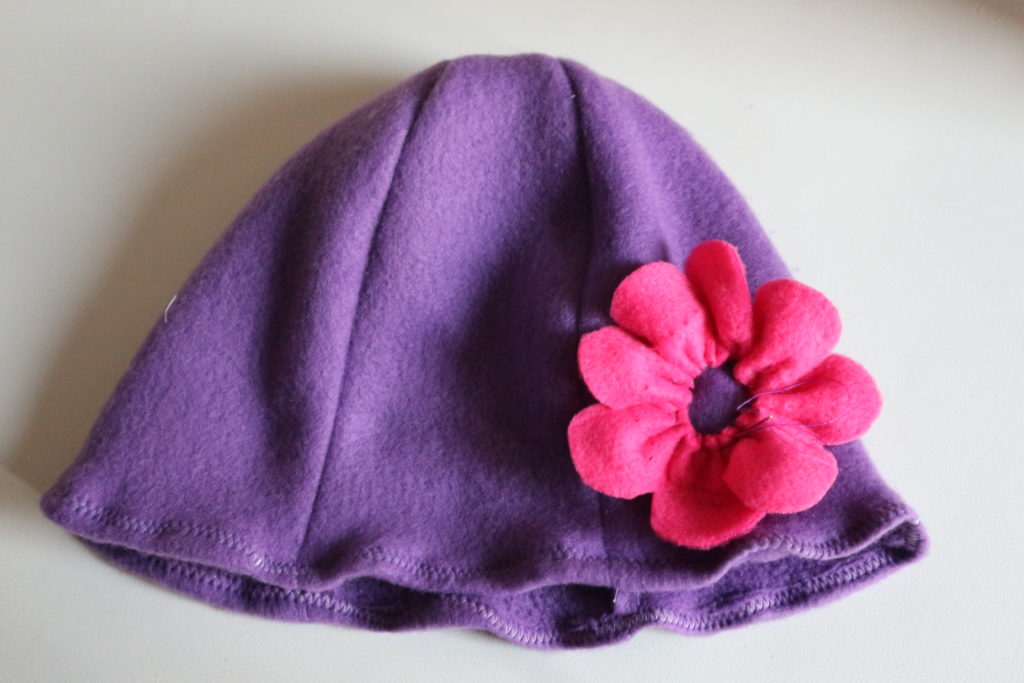
Attach the pink petals to the hat with a few stitches. As you sew this on you can adjust the petals to the desired size of the flower. Next add the inner layer of flower petals into place and stitch that into place. Lastly, sew in the centre piece, with the gathered part facing the hat. Secure this and your hat is done!
I hope you get a chance to try this easy sewing project. I’m working on making pattern sizes for children and babies. I hope to add these to the post too.
Pin or share this with your favorite social media!

Sew a Super Easy Fleece Poncho-Simple Starter Sewing Project