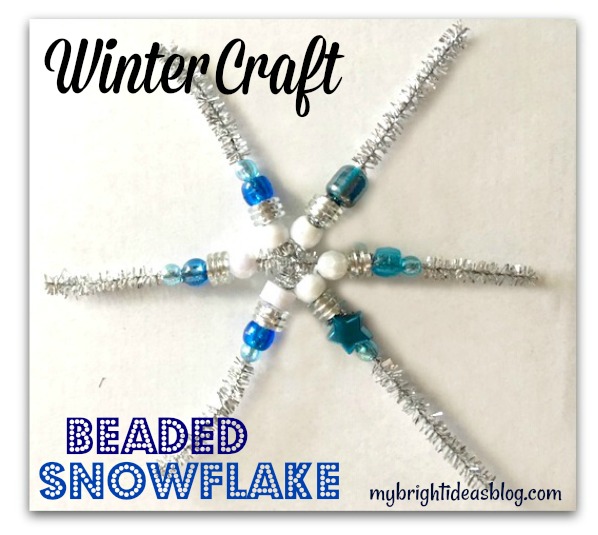
 Make an Easy Winter Kids Craft – Snowflakes made with Pipe Cleaners and Beads!
I attempted a post on this exact craft last year but I had a look at it and they turned out a bit ugly in the end. LOL. So I’m trying it again for a do-over.
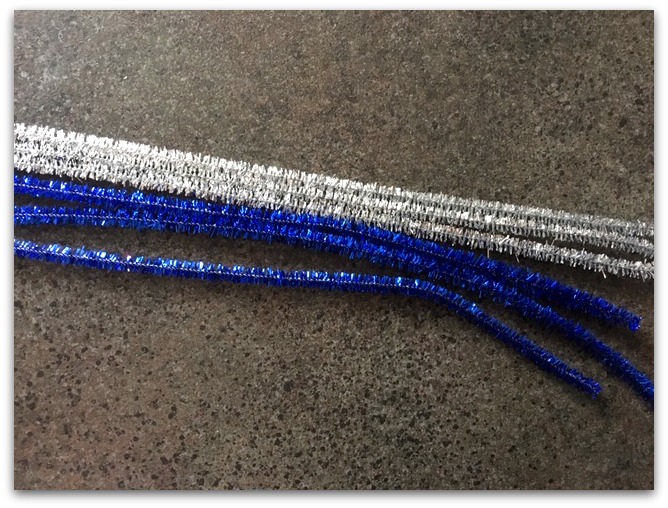
You will need:
- sparkly pipe cleaners
- beads and pony beads
That’s it!
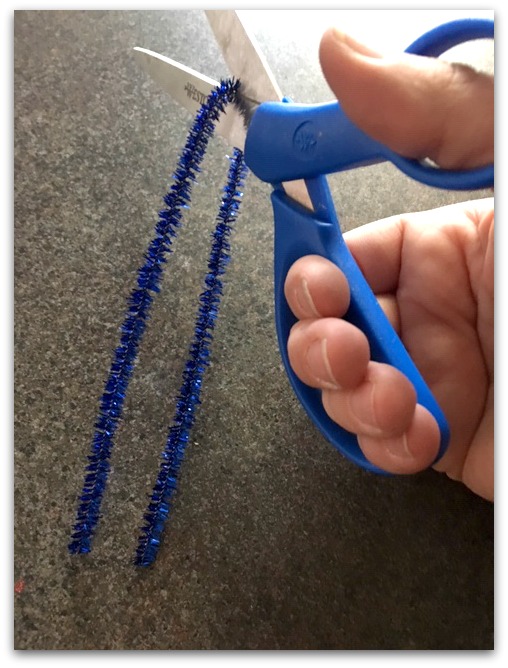
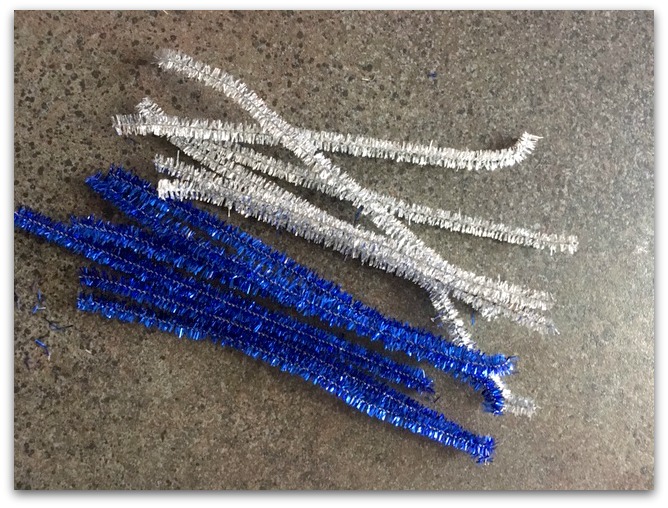
Each snowflake takes 1 and 1/2 pipe cleaners. Cut 2 standard length pipe cleaners in half (so you have 3 pieces 6 inches long).
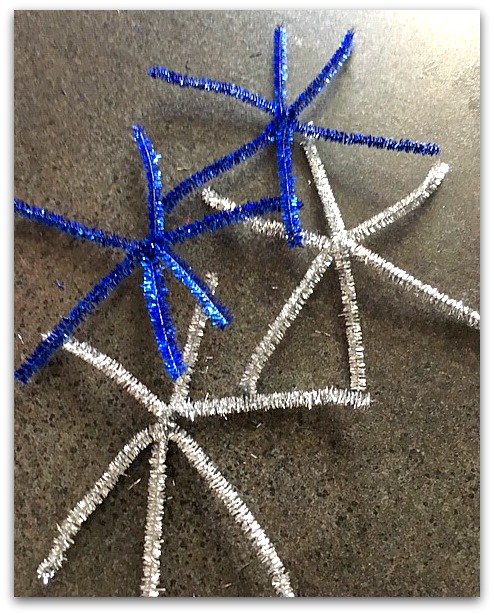
This time I’m using sparkly pipe cleaners. They really stand out. But I’ll warn you the beads didn’t slide on it quite so easily.
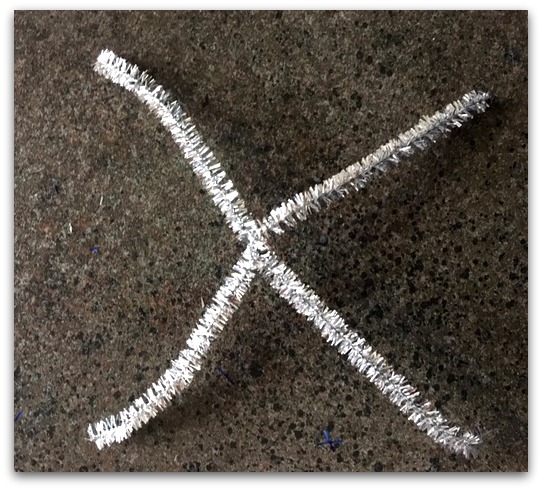
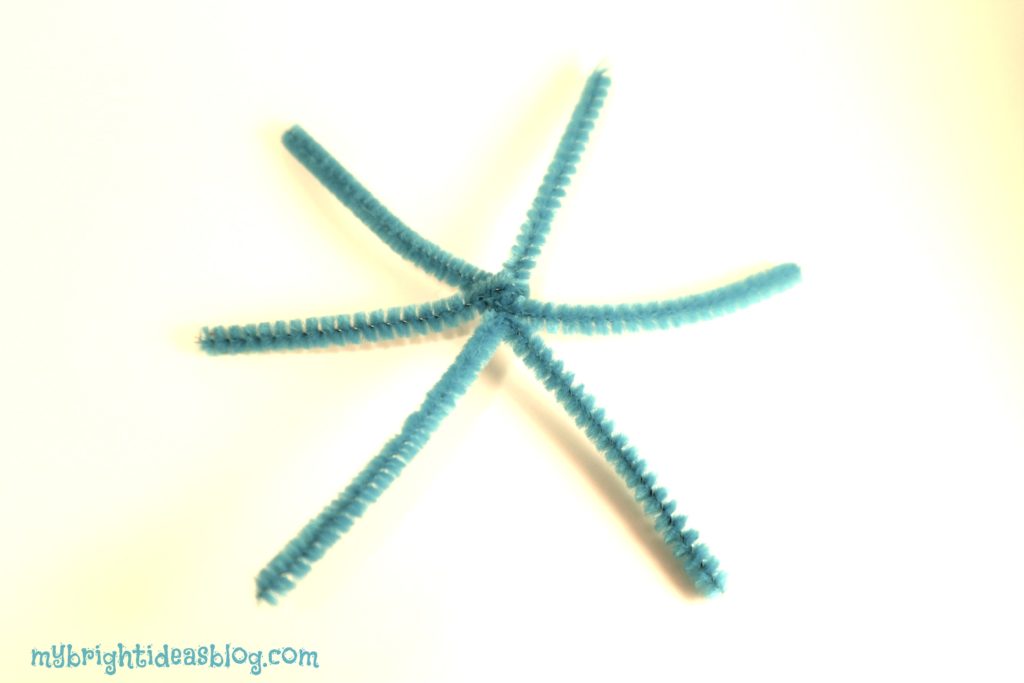
Take 2 pieces of pipe cleaner and overlap them in the middle. Bend them around each other to make an X.
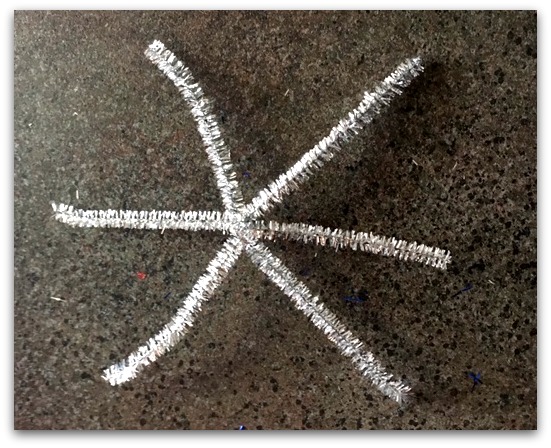
Add a third one to the middle of the X and bend it to make a star.
This is a great craft to teach young ones about making patterns. They also will develop fine motor skills sliding the beads onto the pipe cleaners.
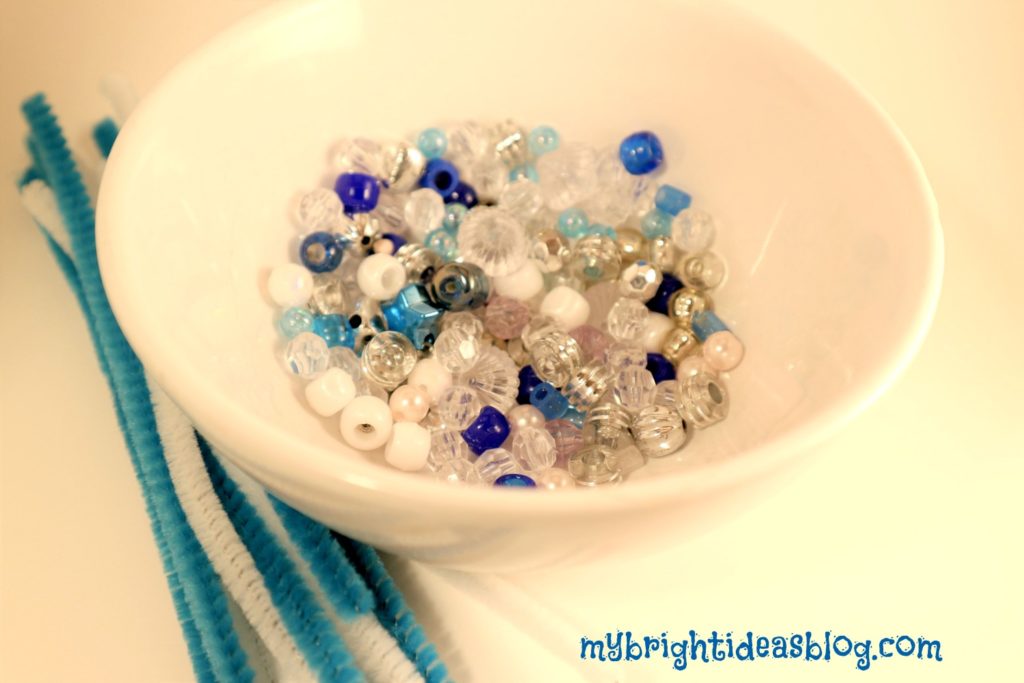
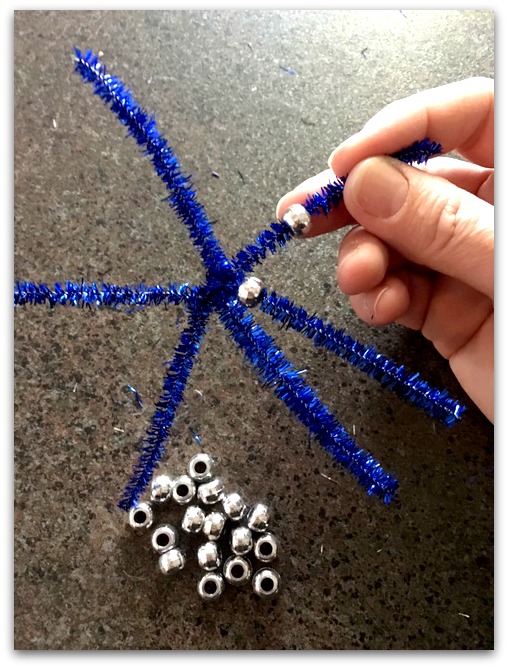 Start with 6 pony beads and slide them onto the pipe cleaners. The dollar tree has a lot of color choices for pony beads. You can also purchase them at Walmart or the craft store.
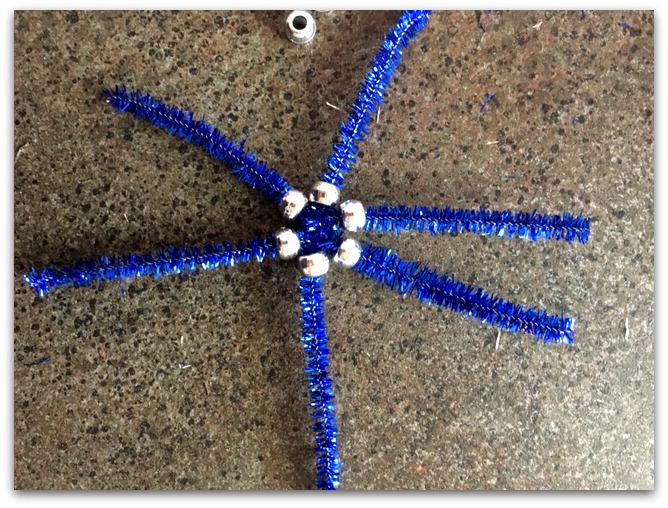
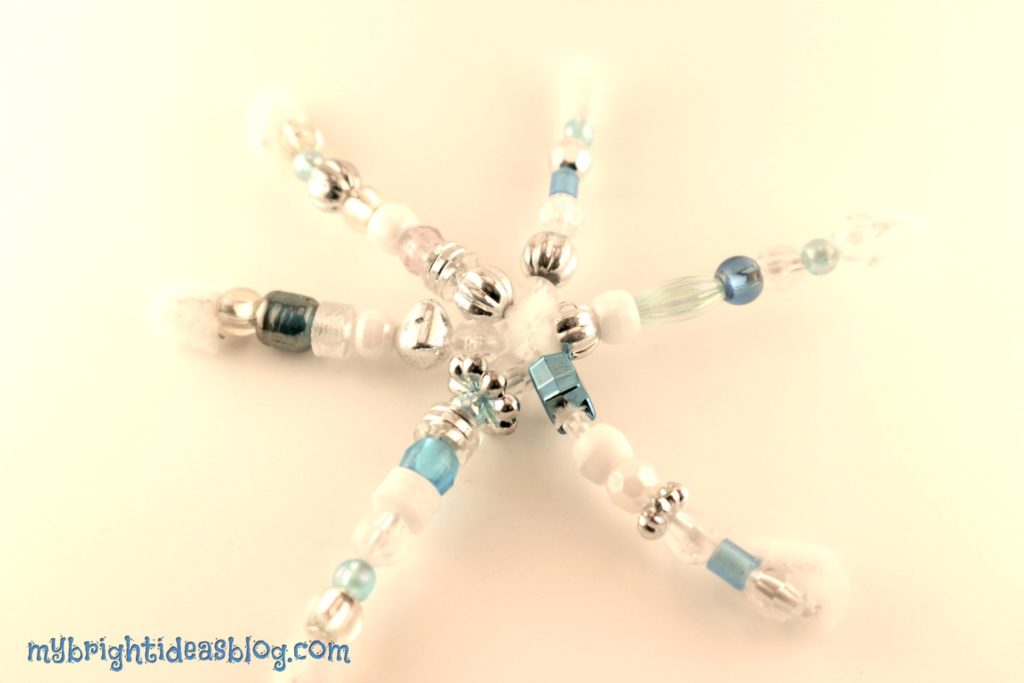
Push them right up to the centre of the snowflake star.
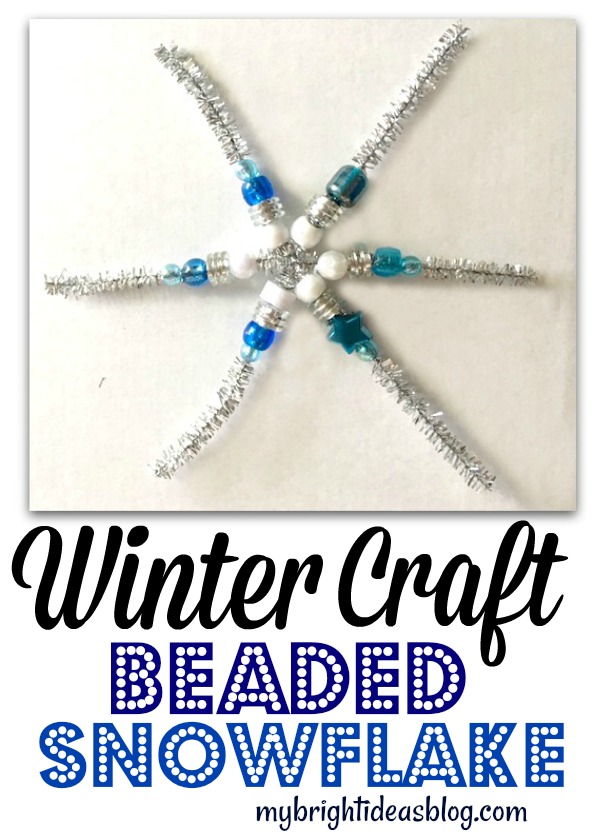
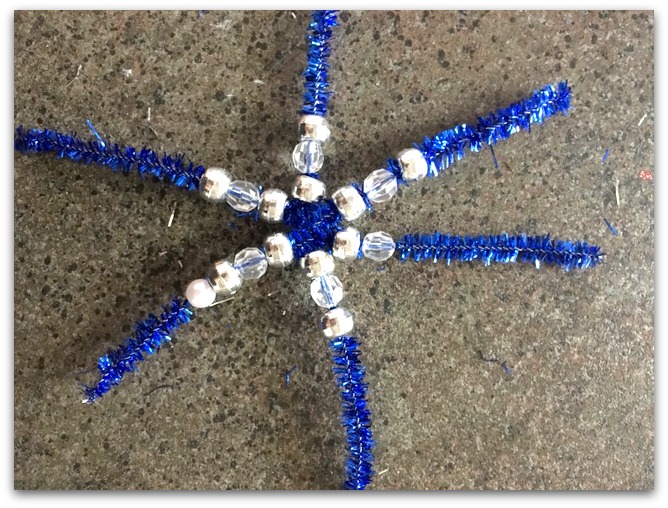 I found sticking with a pattern looks better than going freestyle with your beads. See if you agree.
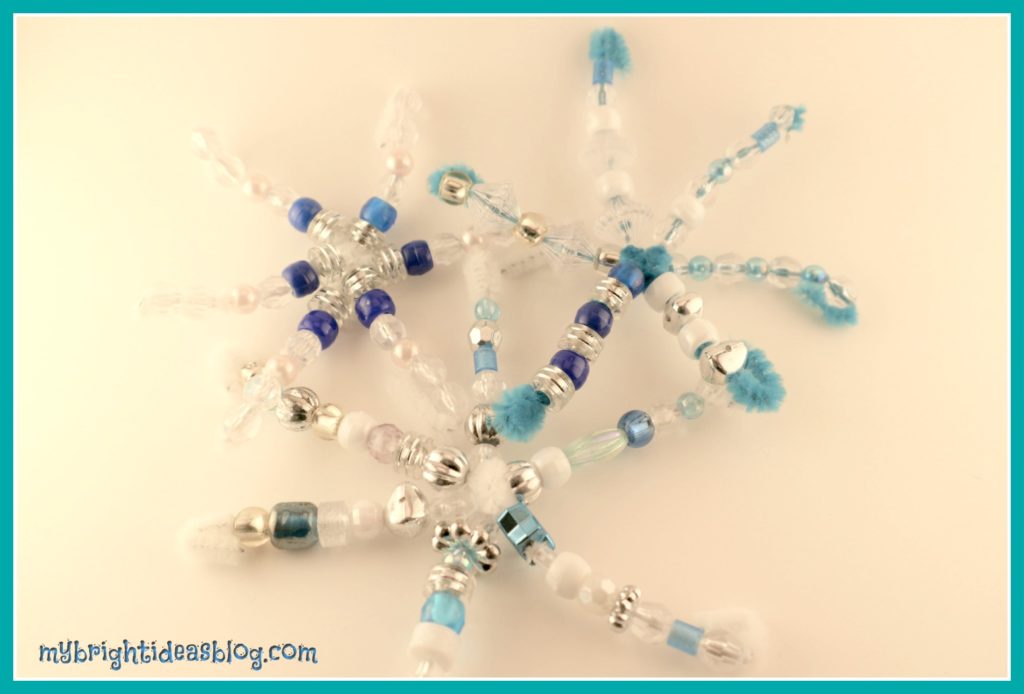
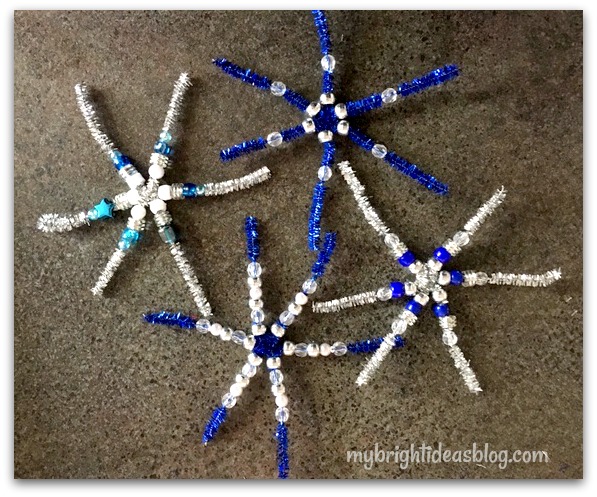
Last year my daughter and I made the examples above with random silver, white, blue and clear beads.
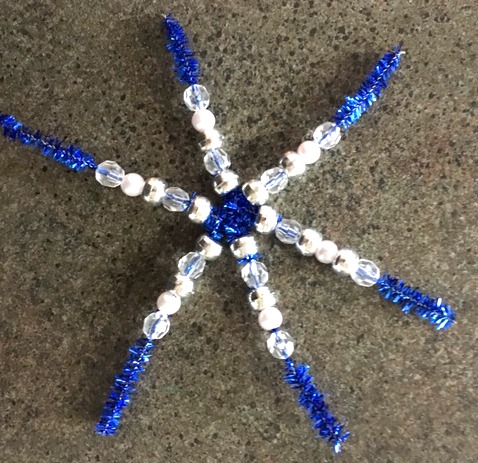
Since the sparkly pipe cleaners are stiff I found if I put the order so that the last bead has a slightly smaller hole as the end-everything stayed in place. If your beads are threatening to shift and might fall off then simply bend the end into a loop.
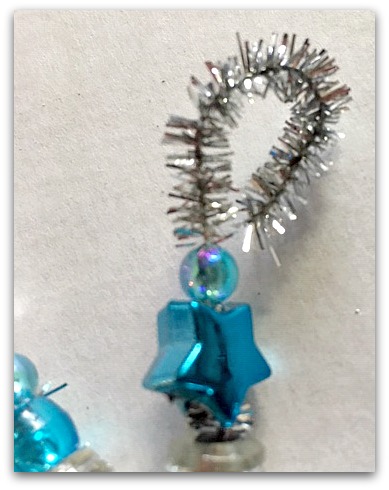
The loop is also perfect for hanging a ribbon. Hang it from a door knob or a curtain rod for a wintery snowflake sun catcher.
 Have fun making these beaded snowflakes. Below are a few more easy winter kids crafts and projects we have done in the past.
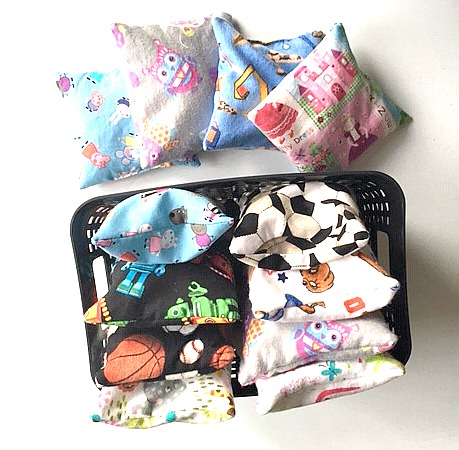
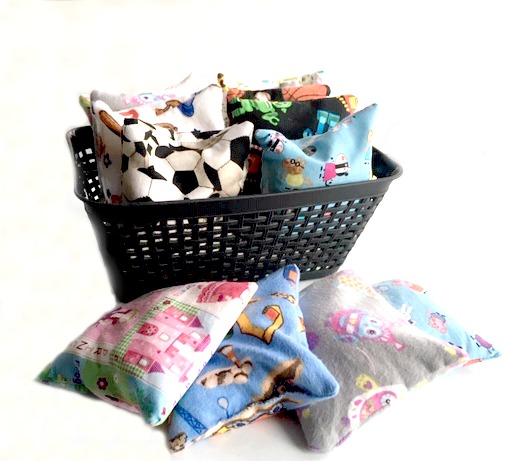
Make Hand Warmers or Ice Packs
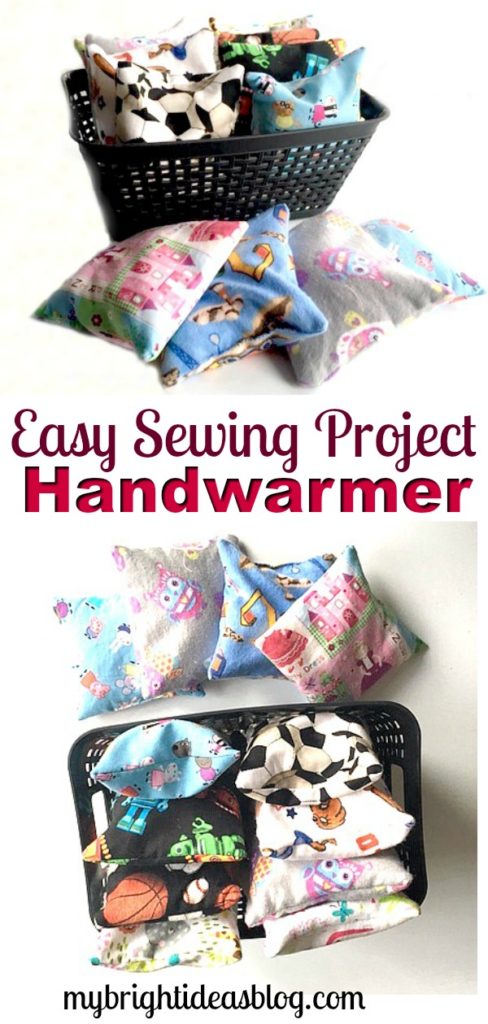
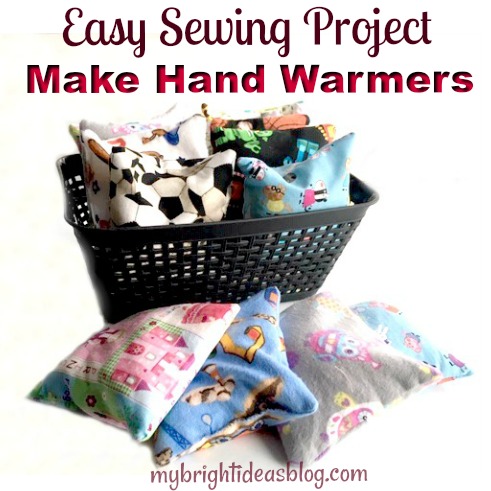
Easy to Make Hand Warmers or Ice Packs
Last year I tried my hand at making a long soothing lavender/rice pack and I LOVED IT! Perfect for sore muscles, tense shoulders or out of the freezer when you need a cold pack. (Link Below)
When summer came I thought how nice it would be to have an ice pack when you hurt yourself. So I put the rice/lavender pack into a Ziploc bag and left it in the freezer to cool. Since its winter, and cold, I’m posting this time a smaller one to warm up your mittens or socks.
What you will need:
- cotton fabric scraps
- scissors
- sewing machine
- needle and thread
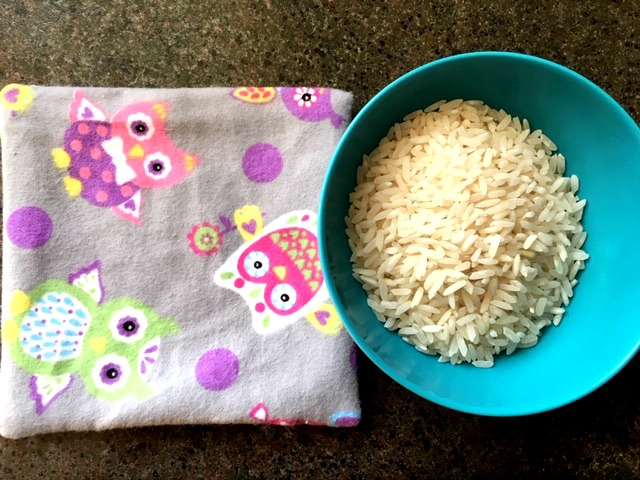
- uncooked white rice
- lavender (optional)
- essential oils-lavender, peppermint, citrus etc (optional)
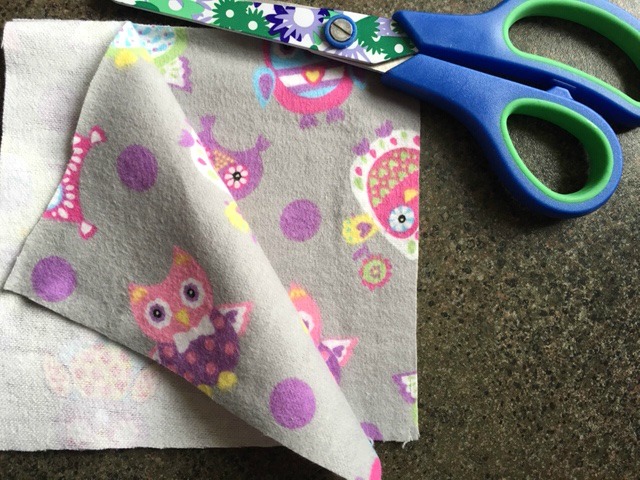
Cut fabric to the size. 3 x 3, 4 x 4 or 5 x 5inches. (I chose to make mine 5×5)
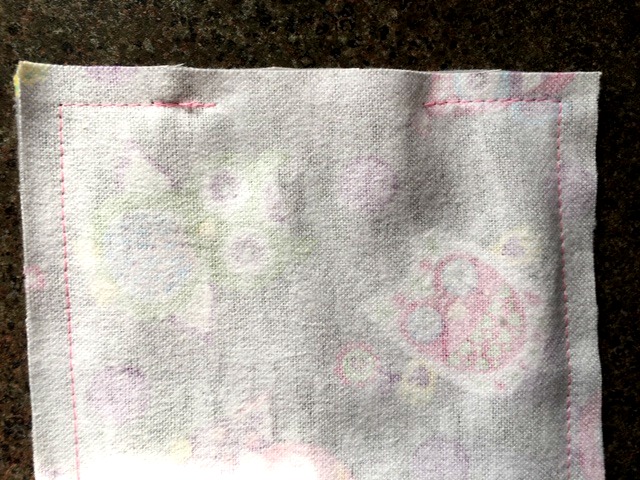
Sew all the way around the fabric leaving a 2 inch gap.
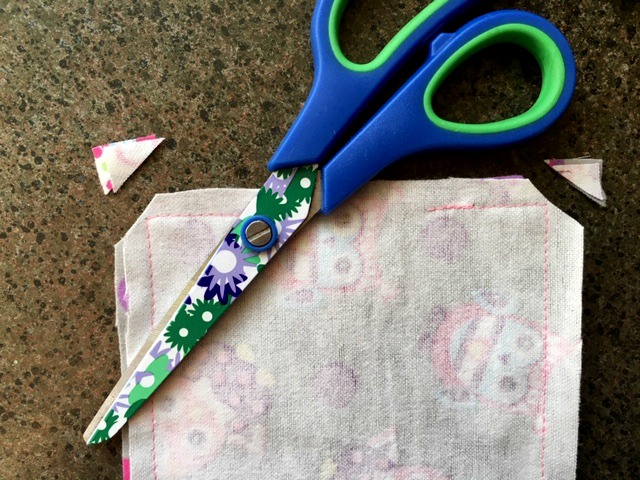
Trim the corners off.
Turn the square inside out by pulling it through the 2 inch gap.
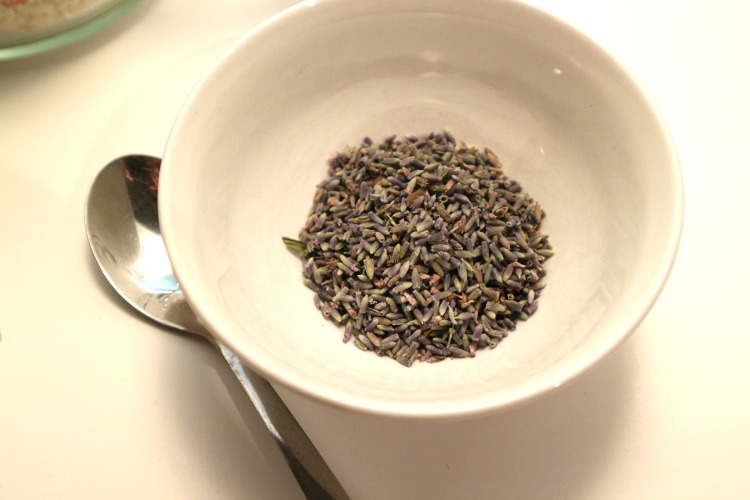
If you like the smell of lavender add a pinch to the uncooked rice. When it is warmed in the microwave the lavender smell will get stronger.
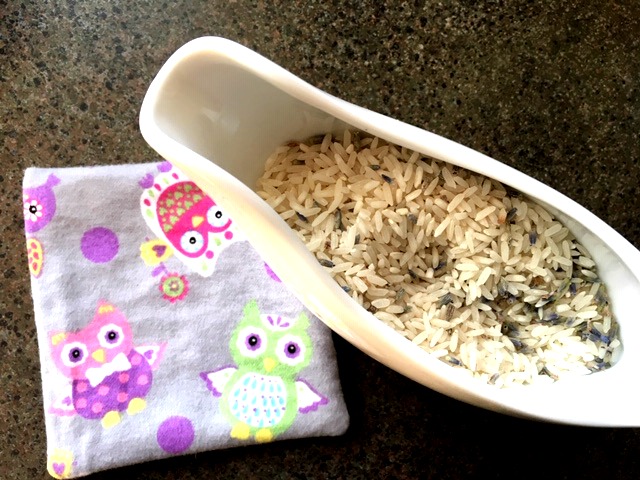
I used my gravy boat to help pour the rice and lavender into the hole.

Fill the square fairly full but not rock hard. Fold over the edge and sew the 2 inch seam closed with a needle and thread.
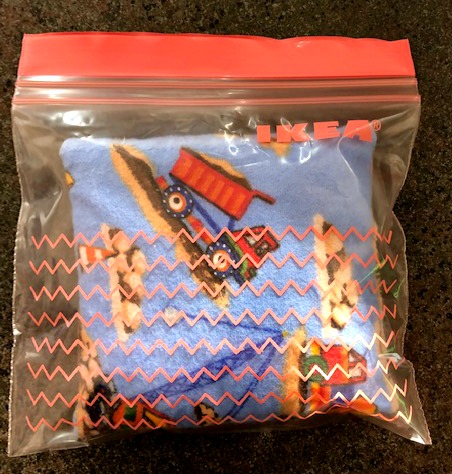
To keep it away from my ice cubes I keep the rice packs in a ziplock bag in the freezer for ouchies.
As a warm pack I still store them in ziplock bags while not in use. Microwave for 30 seconds each and hold onto it or pop into your mittens to warm up you hands.
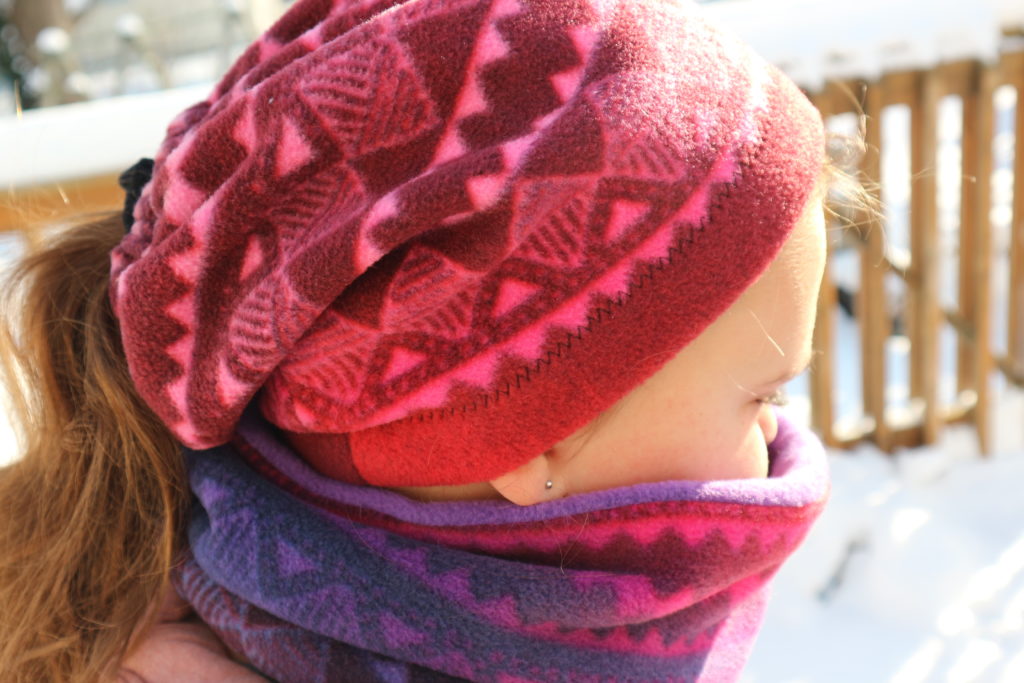
Easy to Make Fleece Hat with Flowers – Simple Sewing Project
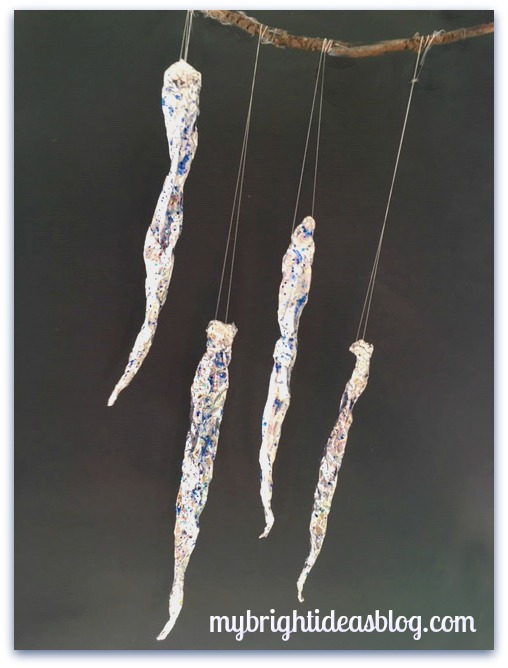
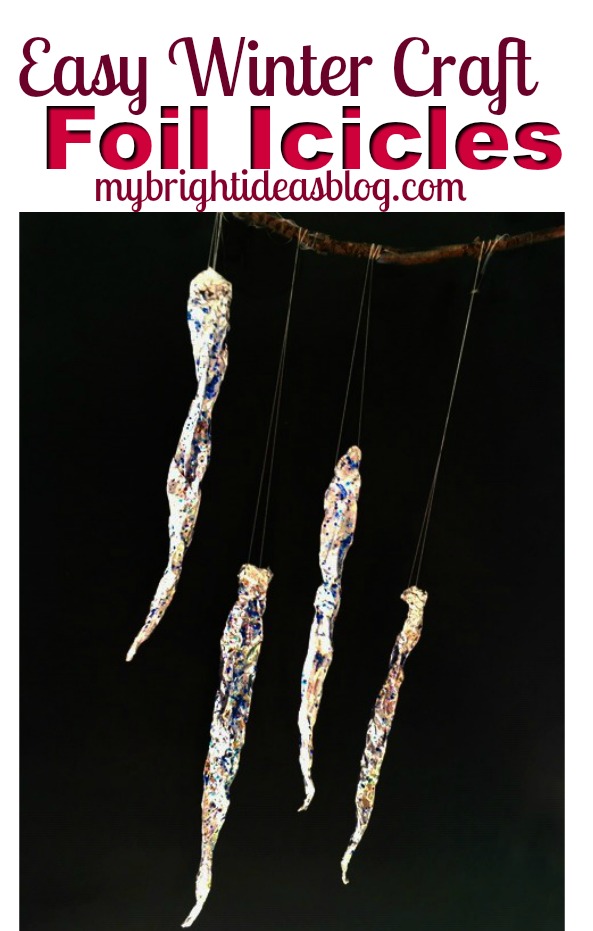
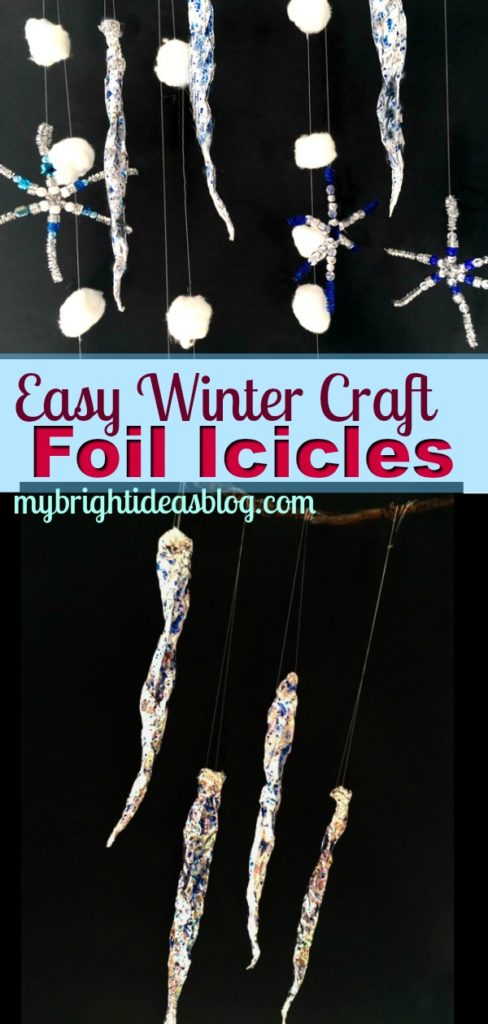
Tin Foil Icicles – Super Easy Winter Craft!
Easy Winter Crafts – Make Glitter Tin Foil Icicles
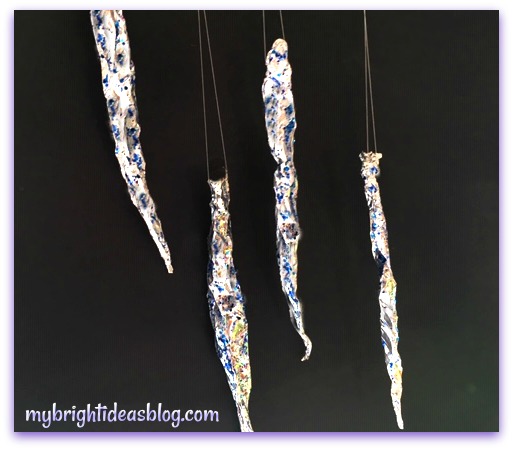 Making sparkly icicles is a great winter craft for kids of all ages! You probably already have the supplies you need to make them.
You will need:
- tin foil
- glue and glitter or combined glitter-glue
- needle and thread
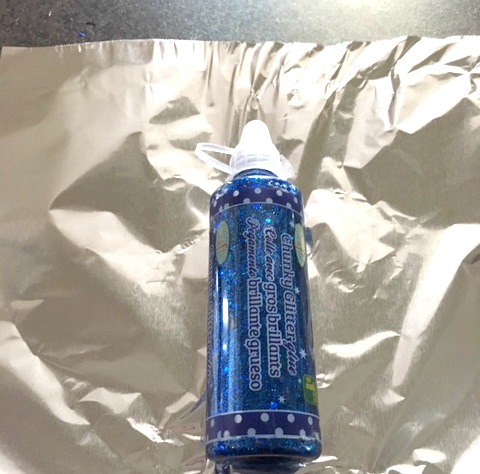
I love when things sparkle but I don’t like it when crafts trickle out a trail of glitter on everything that touches it. So my solution is to use glitter glue that is already mixed together.
The alternative is to spread glue all over the project and then sprinkle loose glitter on top. It’s messy but has great coverage.
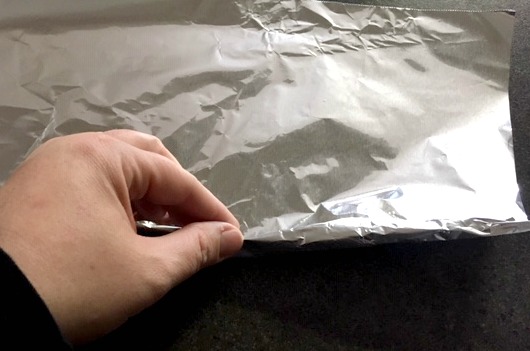
Start with the tin foil. Cut the foil 6 inches wide. Begin to roll the foil pinching one end as you roll it.
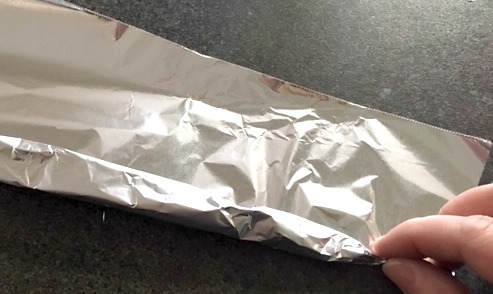
Keep rolling and scrunching as you go. Loose and wide on one end, tight on the end that will come to a point.
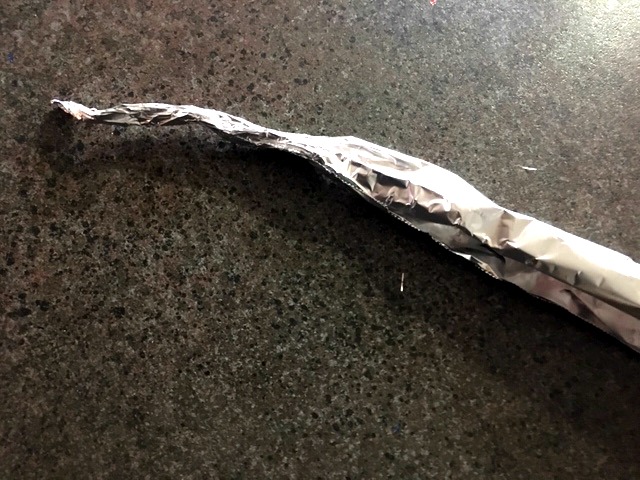
I should find more crafts that involve tin foil. It always helps the craft really stand out!
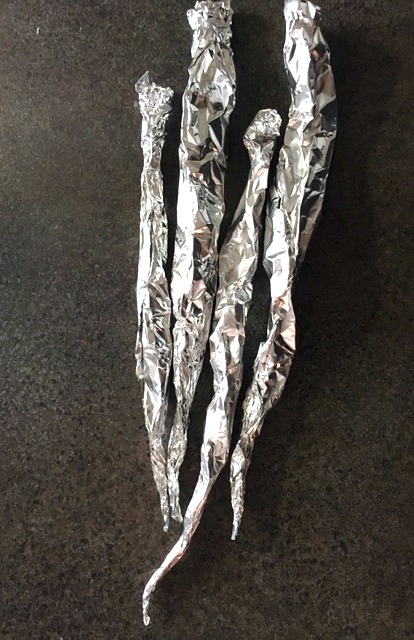
Make a bunch of tin foil icicles. Place them on a piece of paper towel.
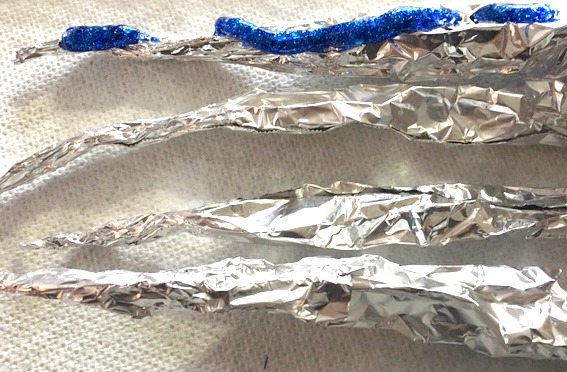
Squeeze out the glitter glue onto the foil icicles.
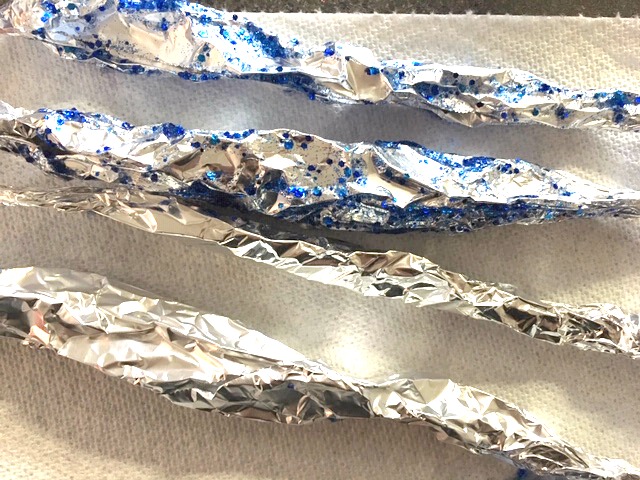
Take a piece of paper towel (or use your fingers if you don’t mind getting sticky) and smear that glitter glue all up and down the icicle.
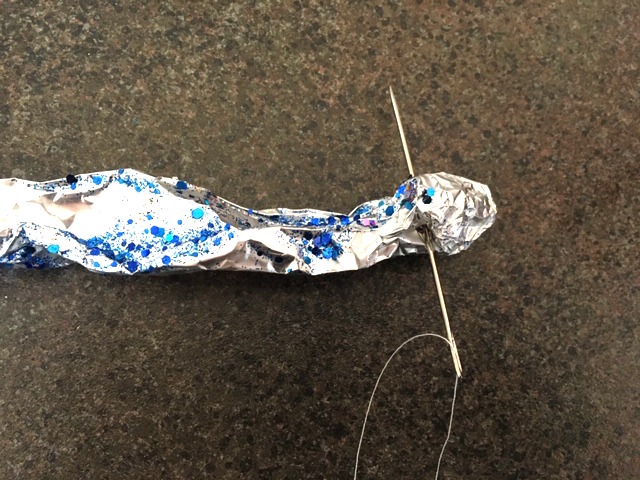
Take an arm’s length of thread and thread your biggest needle. Do not knot it. Push the needle through the tin foil.

Pull the ends of the thread together and tie a knot.
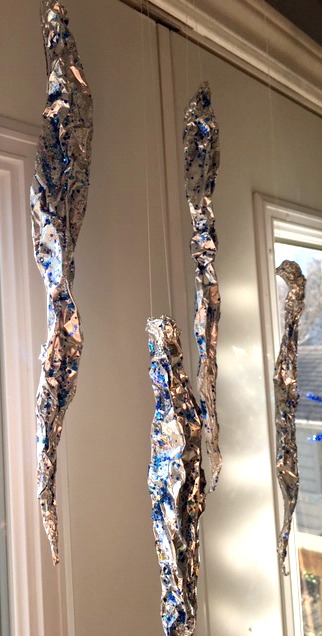
Tie onto a curtain rod or tape to the window trim. Or as below you can tape it to a twig or stick and hang it from a huge vase. When the sun hits it there is an amazing sparkly effect reflected everywhere because of the crinkles in the tinfoil and the sparkles.
Have a look at some other winter crafts we have done.
Easy to Make Fleece Hat with Flowers – Simple Sewing Project

This fleece hat project is so easy and fast! You’ll have a new winter hat done in 20 minutes. Then I will show you how to make a simple flower applique. The weather is getting chilly now so this is just the thing to make for yourself or a gift for someone else.
You will need:
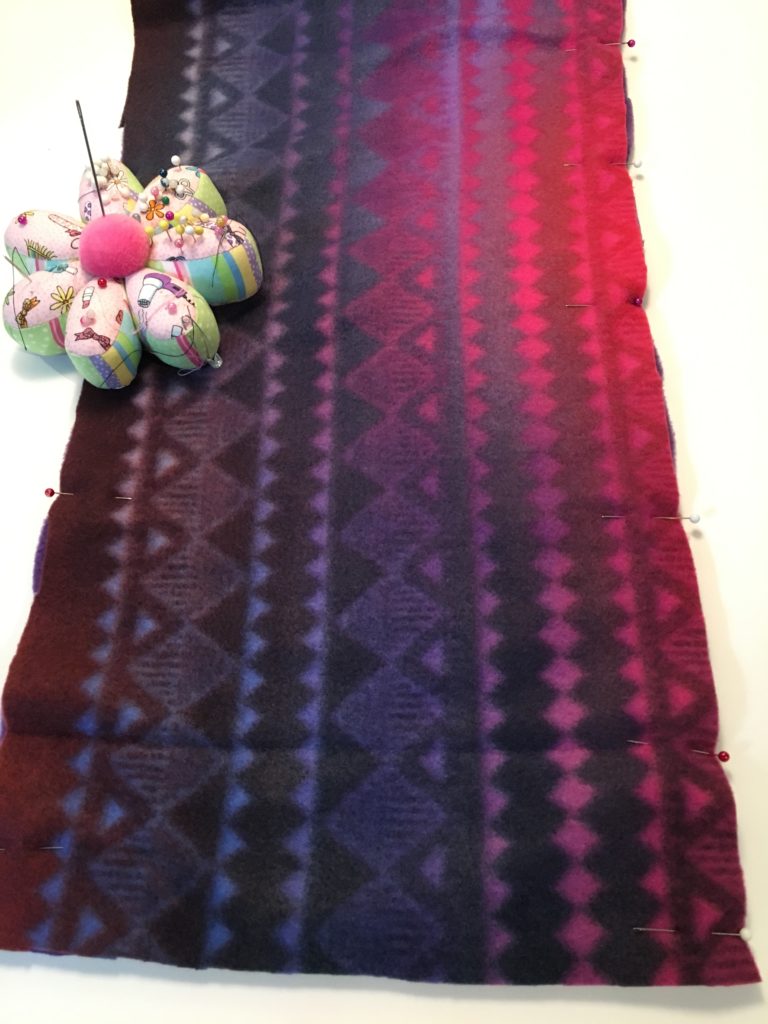
- a small amount of polar fleece fabric (10 x 26 inches )
- scraps of fleece from other projects in co-ordinating colors (1-2 inch wide x 12 inches long)
- sewing machine
- scissors
- needle and thread
This hat is made up of 6 long triangle panels.
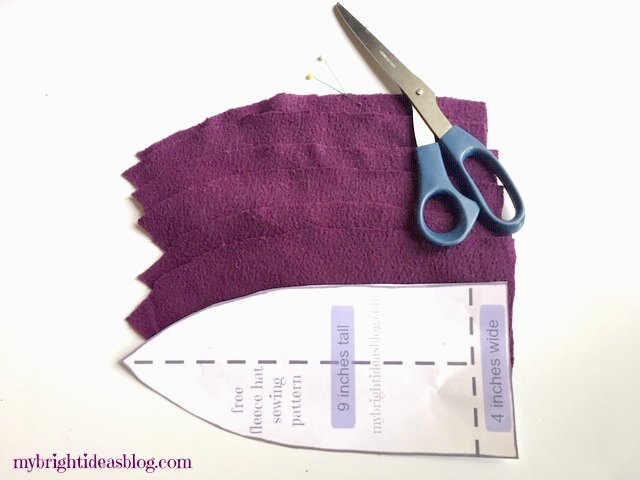
Cut 6 identical pieces from the template below out of fleece.
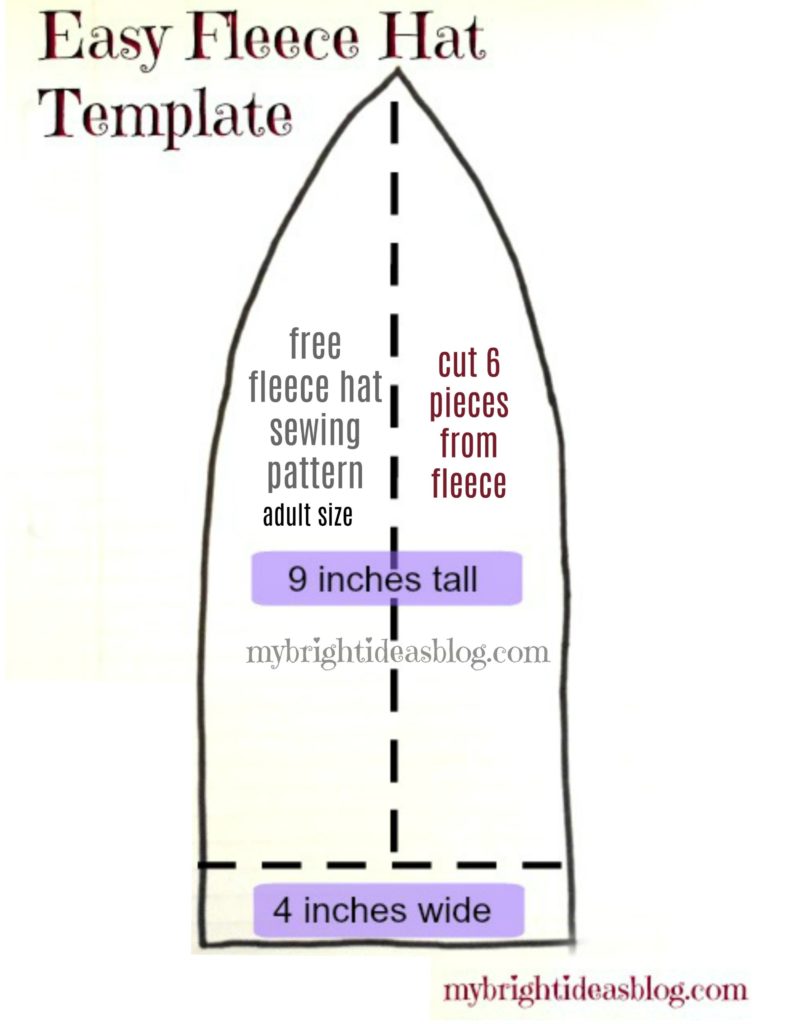
Right click on the photo above and save to your computer. This should print out to the right size on regular 8.5 x 11 computer paper.
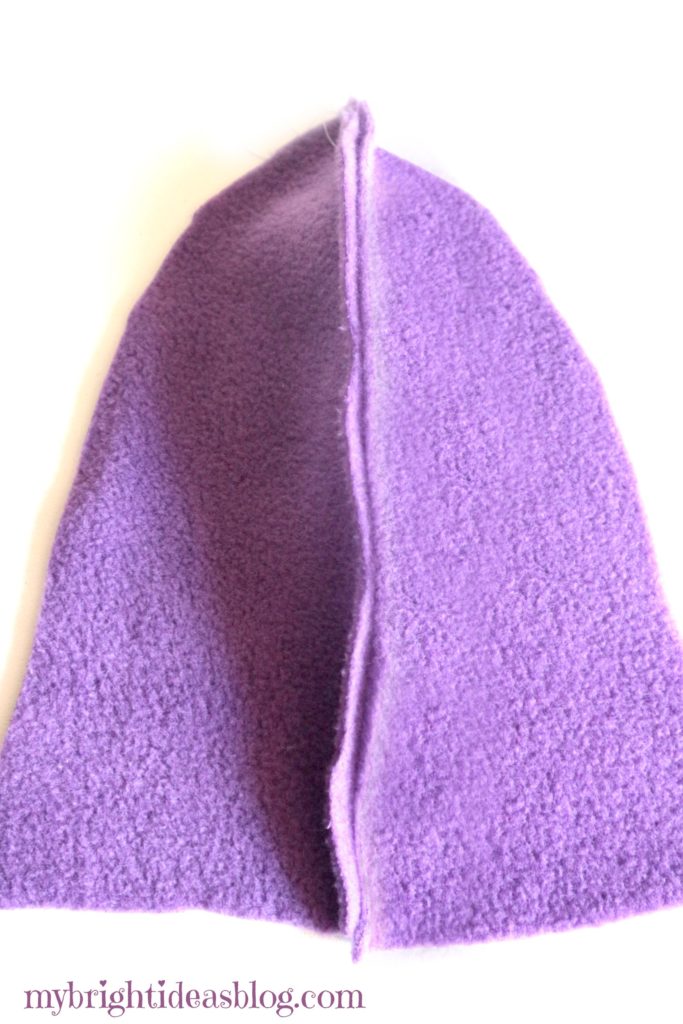
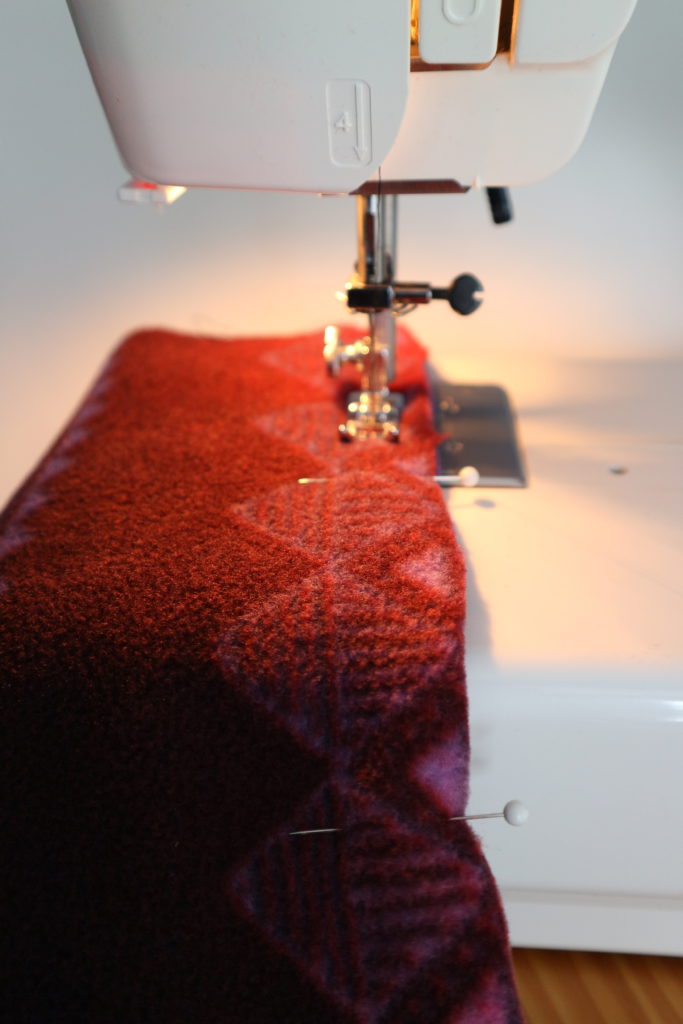
Sew the first 2 pieces together (with right sides together).
Pin the third section of the hat in place next to the first two pieces and sew it. After the three pieces are sewn together set this aside.
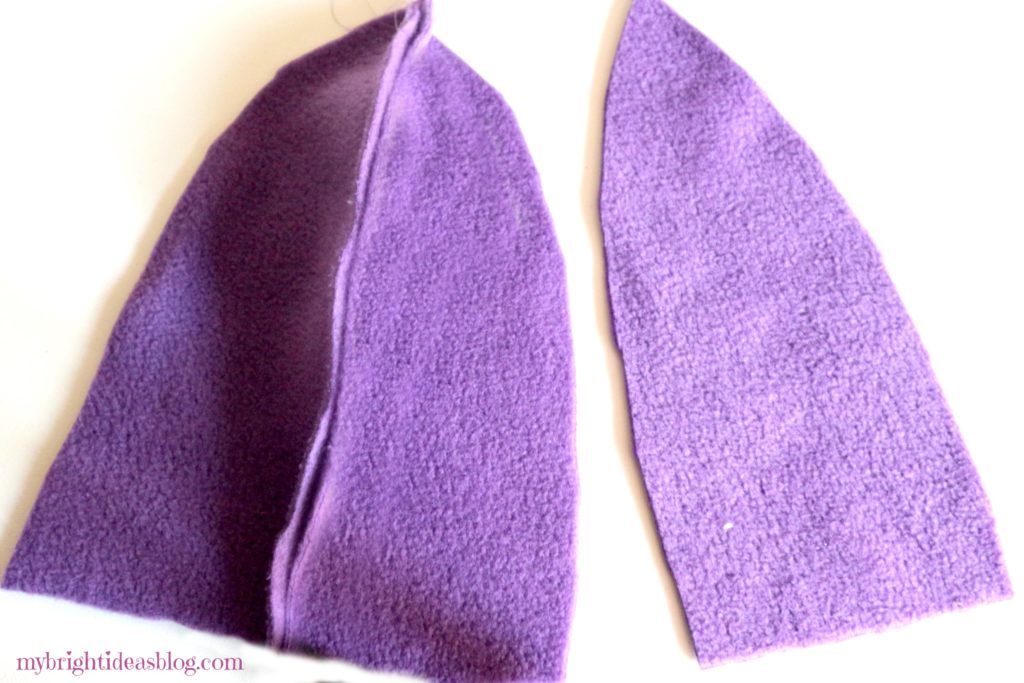
Repeat these steps with the other 3 sections.
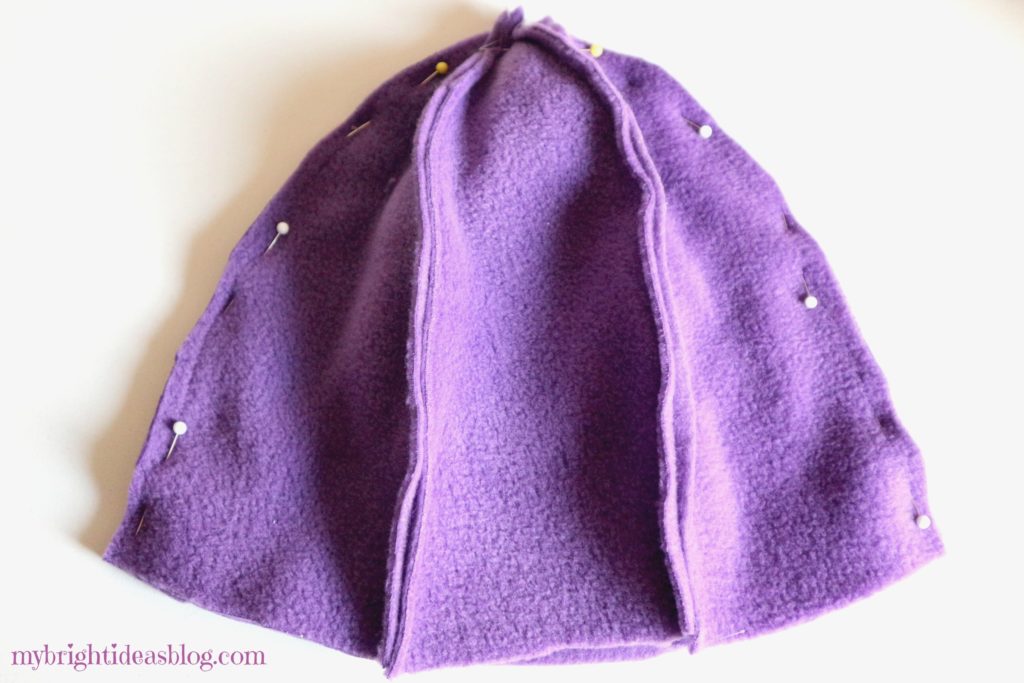
With the right sides together, pin these two halves together. Sew all the way around the top.
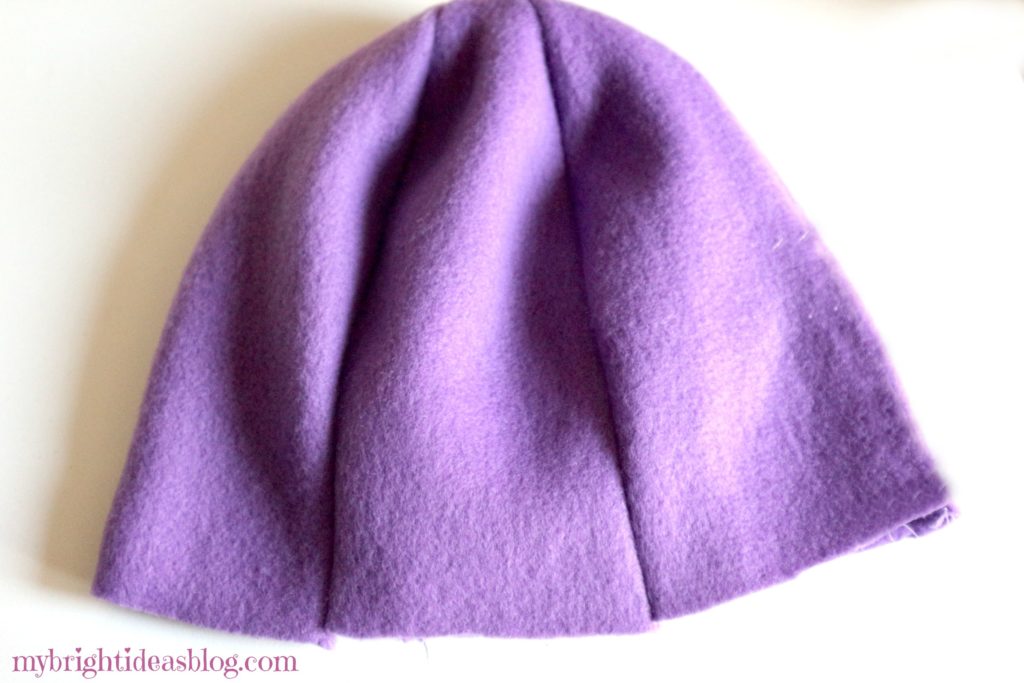
Turn the hat inside out and try it on. Determine how wide the hem should be. If the hat seems too long for you, simply cut 1/2 an inch off the hem and try it on again. Fold the bottom inwards to hem and pin in place.
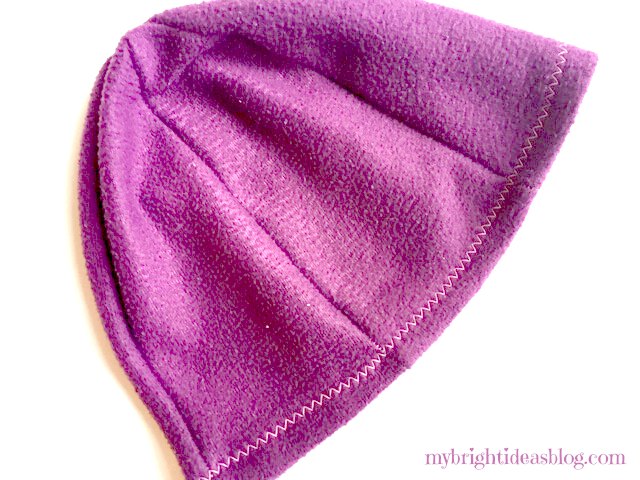
On this hat we folded the bottom over 1/2 inch and did a zig zag stitch all the way around. When your fold is wide, your zig zag hem lays flat. As the photo above shows.
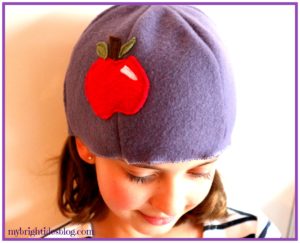

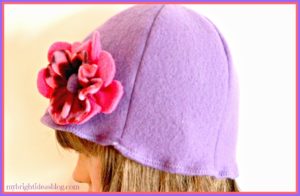
On these three photos of my daughter wearing different hats – the hem was shorter so the zig zag stitch was closer to the edge and it did look quite wavy. I like both ways.
The Flower Applique
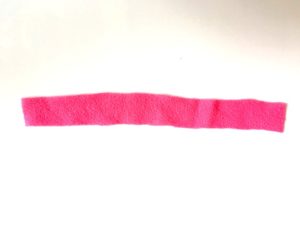
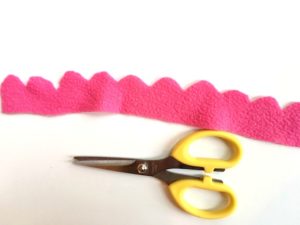
We cut a strip of fleece 1 and 1/2 inches wide by 12 inches long. Then carefully cut a rounded pattern to make the flower petals.
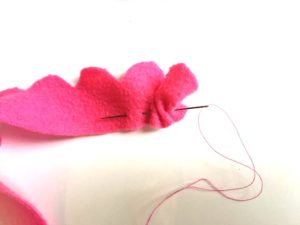
Thread a needle with a knotted length of thread and begin to do a loose baste stitch across the bottom of the petal strip of fleece.
Gently pull the thread to gather the pleats. Set this part of the flower aside for now.
Cut another length of fabric 1 inch by 12 inches long. This will be an inner layer of petals so its a bit shorter than the first. Baste this as we did with the previous flower petal section. Pull the thread to gather the fabric and set this aside too.

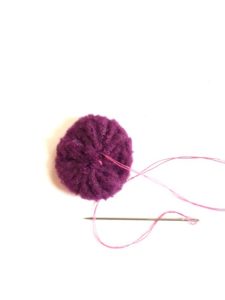
For the centre of the flower cut a circle 2 inches in diameter. I traced the vitamin bottle to make the circle. Baste around the circle and pull the thread to gather the edges. When it’s pull closed put a few stitches to keep it tight.
Adding the Flower Applique to the Hat
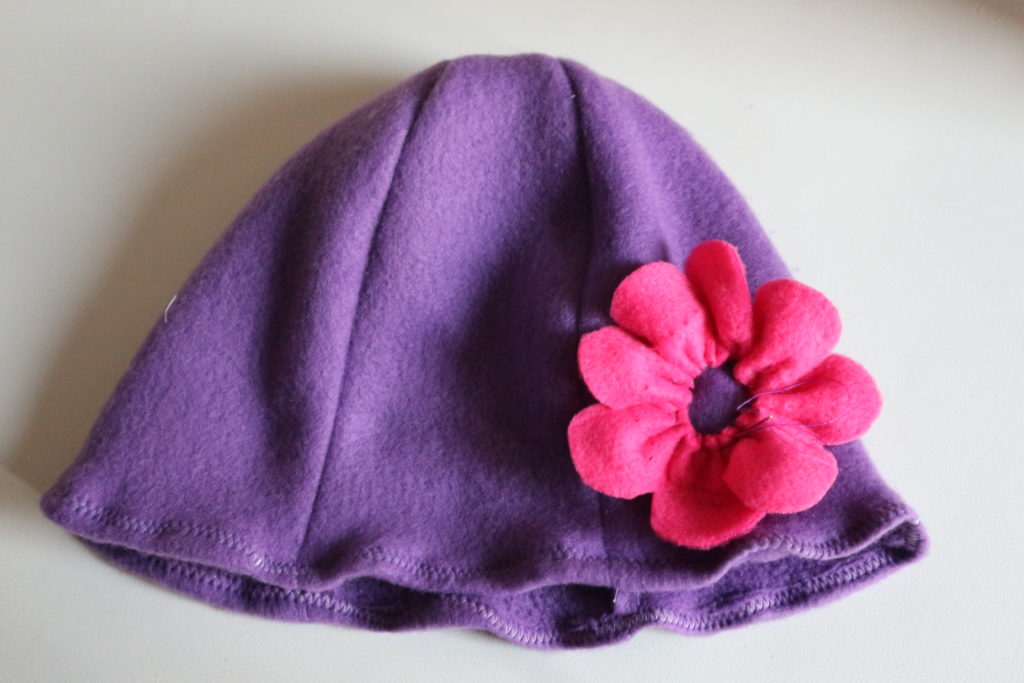
Attach the pink petals to the hat with a few stitches. As you sew this on you can adjust the petals to the desired size of the flower. Next add the inner layer of flower petals into place and stitch that into place. Lastly, sew in the centre piece, with the gathered part facing the hat. Secure this and your hat is done!
I hope you get a chance to try this easy sewing project. I’m working on making pattern sizes for children and babies. I hope to add these to the post too.
Pin or share this with your favorite social media!

Sew a Super Easy Fleece Poncho-Simple Starter Sewing Project

Sew a fleece snood-neck warmer in just minutes!
DIY Sew a Fleece Neck Warmer (Scarf Alternative) Snood
At the school my kids go to they prefer the children do not wear scarves for safety reasons…preventing a playful accidental strangling sounds like a good idea. In my part of Canada (eh!) we need our necks covered when its bitterly cold. So this neck warmer is a create idea for everyone in the family. Its ideal for toddlers though and their skill level and patience with getting on their winter gear.
This link will bring you to my instructions for the hat in this photo-it has a hole in the end so your pony tail can enjoy the outing too… http://mybrightideasblog.com/make-fleece-hat-wear-pony-tail/
So lets make us some Neck Warmers!
You will need:
- 2 pieces of fleece
- sewing machine
- pins
- scissors
Adult 25 inches x 9 inches
Toddler ages 1-3 years old 21 x7 inches
Child 4-9 years old 23 x 8 inches
10 years old to Adult 25 x 9 inches
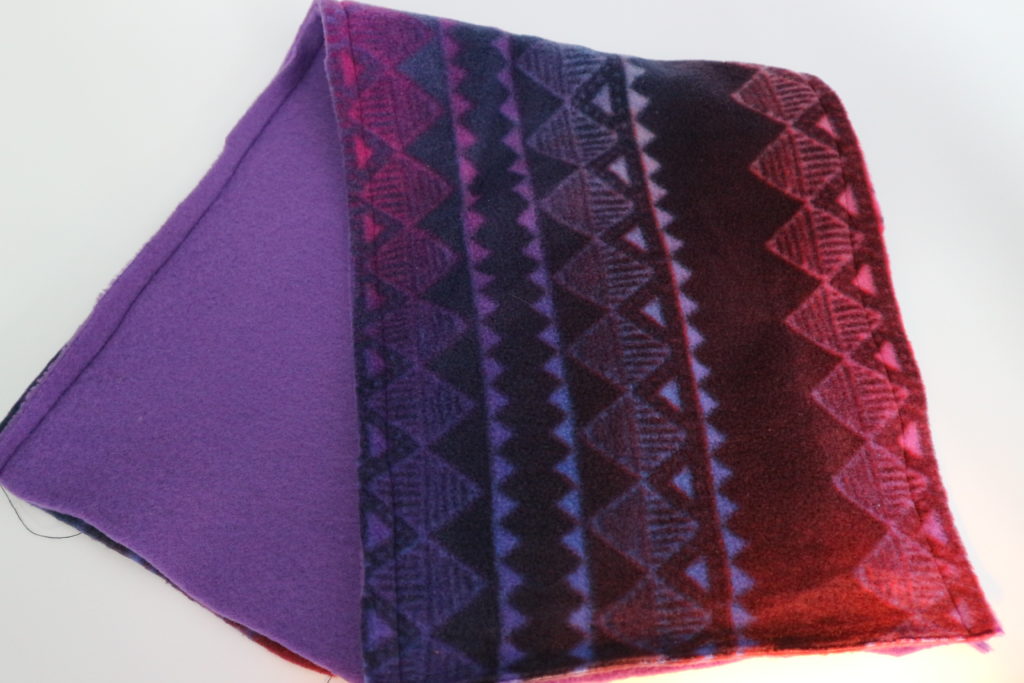
Cut 2 pieces of fleece to size. It can be all one color of fleece or 2 colors that compliment each other. We used the pattern fabric to match her hat and purple fleece for the inside.
Make sure the stretchy-est direction is going lengthwise.
Sew a straight seam on both of the long sides of the fabric.
Place the right sides together and stitch down the long sides of the fleece.
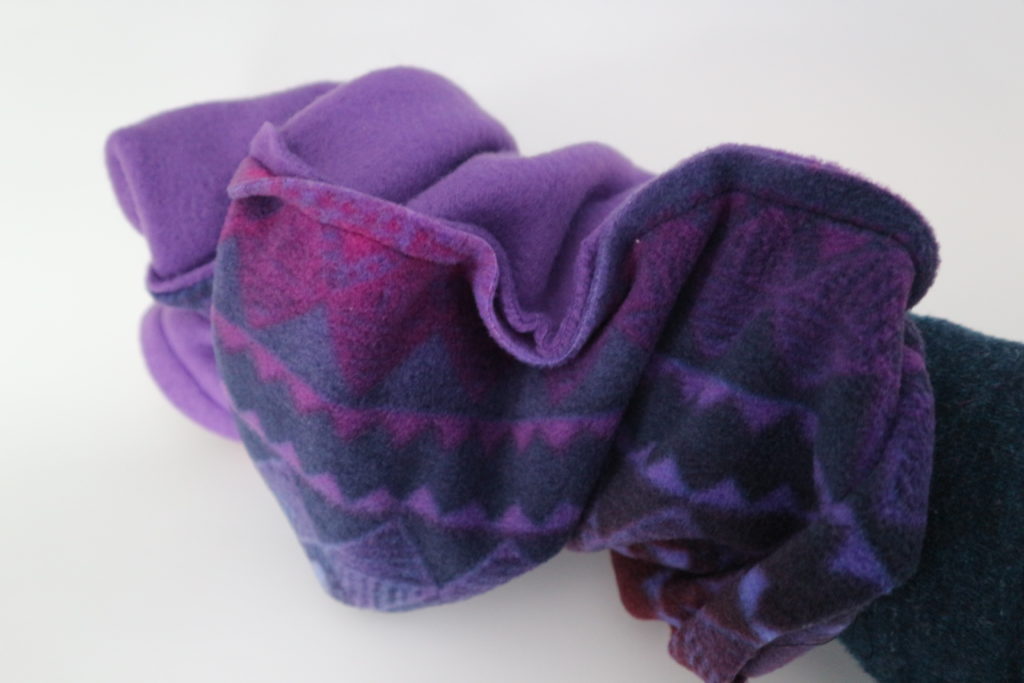
Reach in and grab the end and pull it halfway through the tube. You are pulling one end into the other so its now half the length.
Match up the end seems and pin. Then pin all the way around the opening.
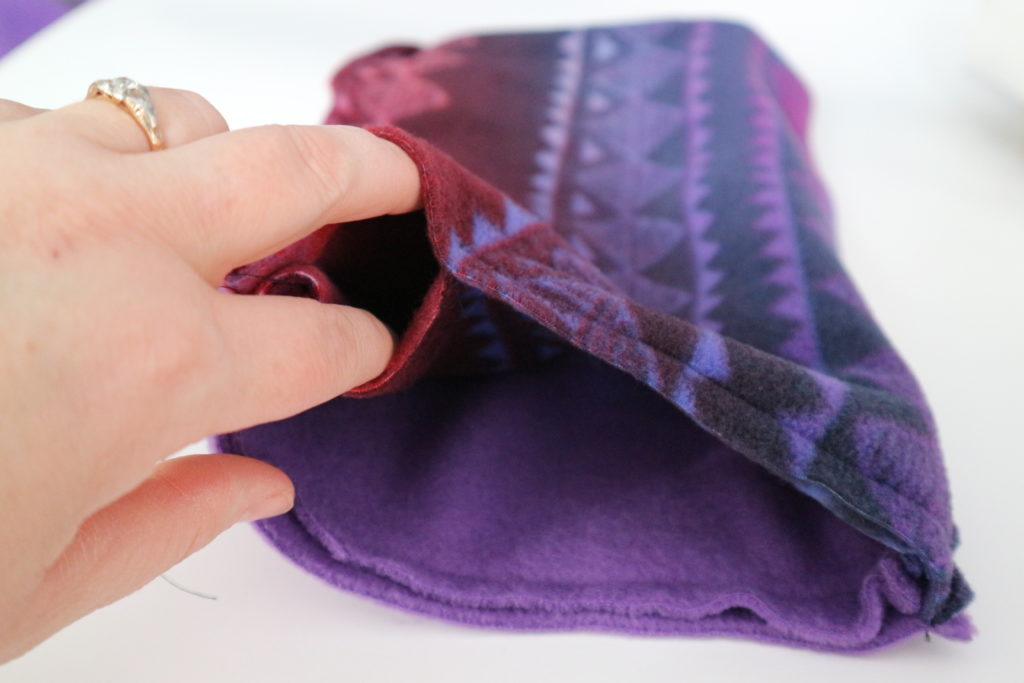
Sew these ends leaving an opening of 2 or 3 inches so you can turn it right side out by pulling everything through the hole.
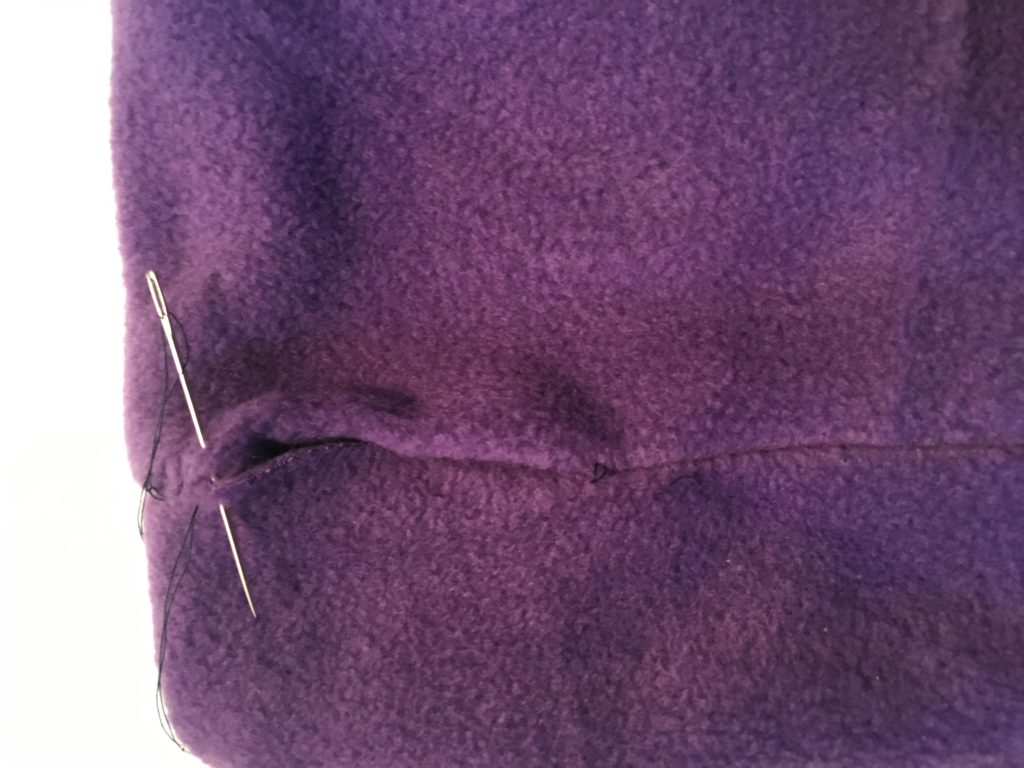
Once you have it right side out…sew the opening closed with a bit of hand stitching.
Voila! Anyone can make a neck warmer in an easy 10 minute project. This is an easy project to have your children do with you.
Also if you don’t live in the bitter north and want a scarf but not so warm make it out of a t-shirt fabric. Better yet make it out of an old t-shirt. Use up your scraps of fabric. I love this sort of thing for camping in September when its pretty chilly at night.

Beaded SnowFlake Suncatcher-Easy Craft for Kids!

We love Beads and Pipe-cleaners are a craft cupboard essential. So on this snowy winter’s day the kids and I made snow flakes to hang in our windows-and we used just those 2 ingredients. Beads and Pipe-Cleaners! Sparkly beads look so lovely in the window-so this will make a gorgeous sun-catcher.
Cut a 3 pipe-cleaners in half. I think the sparkly style would have looked gorgeous but today we only found turquoise and white which both give a nice cool look.
Take the 3 half length pipe-cleaners and twist in the middle so they hold the shape of a snowflake.
String on plastic beads. As long as the bead hole is big enough to slide a pipe-cleaner through it will work. But if your crafter is younger you may want to use pony beads-the type of plastic bead with big holes.
We chose white, clear, silver, turquoise and blue. As you get close to the end bend the pipe-cleaner so that the beads don’t slide off.
Find a scrap of narrow ribbon to tie to an end and hang from the window. Stand back and admire!

….