Have you had nasty stains on your deck chair cushions. Leaving them out in the rain is part of the problem, or people spilling their dinner, sticky fingers and the kids sitting on the chair immediately after applying spray on sunscreen…. Grrrr
So you could just buy new cushions but that is gonna cost ya! As a bit of a cheapskate I would like to get another 2 or 3 years out of these ones.
My solution is to spray paint…I tried 2 brands and let me tell you about how it turned out.
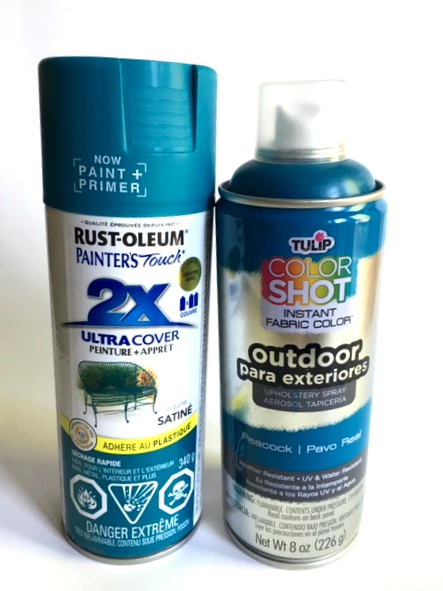
I’m comparing these 2 spray paints.
Rustoleum Painter’s Touch-Satin-Lagoon
and
Tulip Color Shot Outdoor Upholstery Spray-Peacock
The truth is the reason I tried 2 spray paints is not simply to experiment with different paints. I didn’t buy enough and ran out of my first bottle and couldn’t find another store that sells it. Fortunately, I found almost the identical color with another brand so I could finish the project.
So let’s get started!

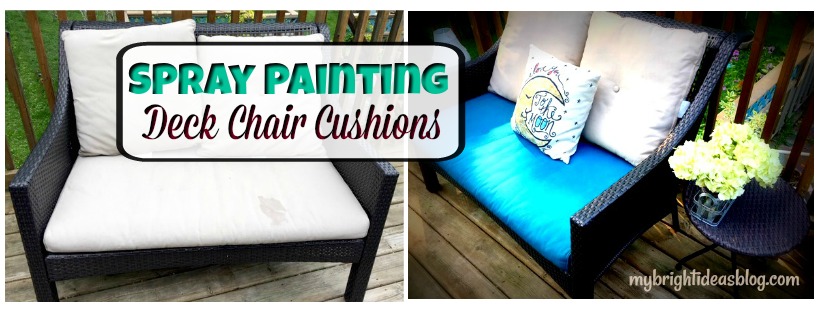
So here is the beige cushions that I have started out with. We bought this loveseat from Canadian Tire 4 or 5 years ago…so it has really lasted well so far. In the back corner you can see the water damage….this is the good side.
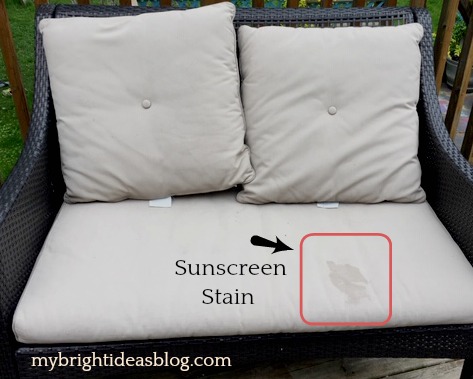
This year somebody left a big ugly greasy sunscreen mark. Hello summer!
If you chose a spray paint closer to your current cushion colour you might get away with just purchasing one bottle of spray paint but since my cushion is beige and I’m turning it so dark I need several coats. Definitely get 2 bottles.
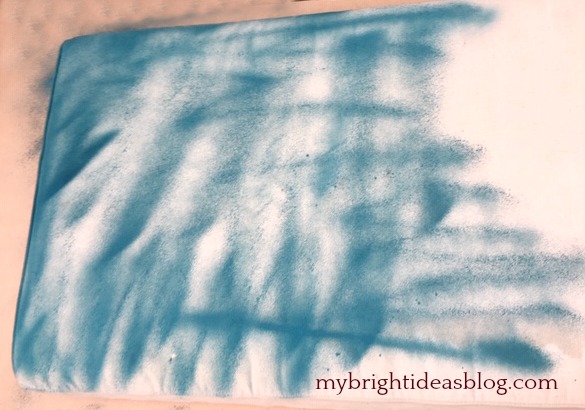
To start with I bought one can of Tulip Color Shot Outdoor Upholstery Spray- in Peacock blue from Hobby Lobby.
I love to spray paint things but this one is not even. This paint is supposed to make the fabric still feel flexible and nice to touch. But in my opinion, the way that it sprays is ineffective and wasteful.
This brand does not spray wide so you will get lines like the photo above. This is what the cushion looked like when my hubby came home and saw it. He wasn’t loving this idea. Pretty much it looked like I ruined it and now I’m all out of spray paint. One can covered the one side of the cushion and part of the second side.
I’m an hour drive away from Hobby Lobby so trying not to panic… I let it dry for several days while I searched to find a local store that sells it. No one near me sells it!
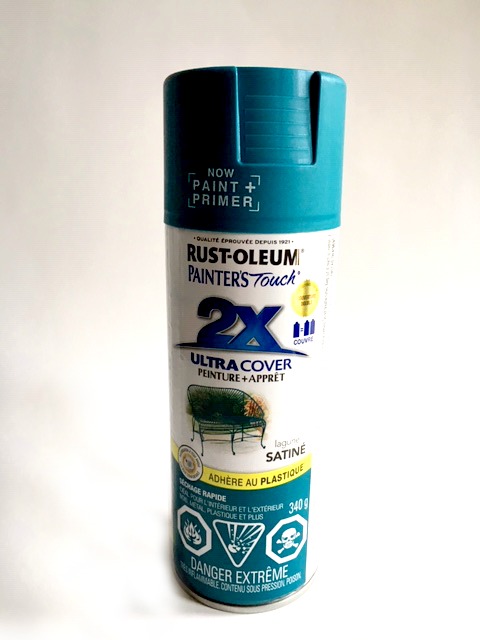
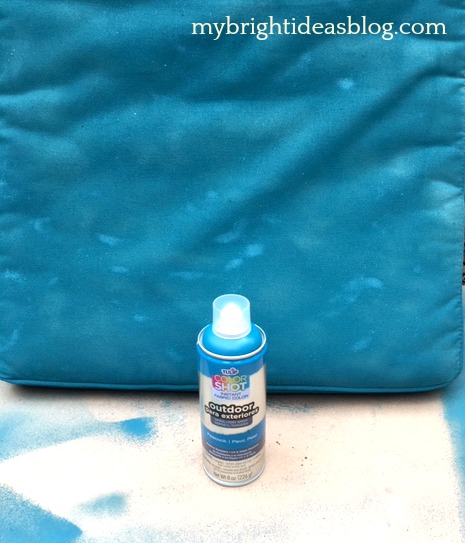
After checking 4 big stores I tried the little hardware store near to me. It has a great selection of spray paint. I took in my empty bottle and found a near perfect match with Rustoleum Painter’s Touch-Satin-Lagoon.
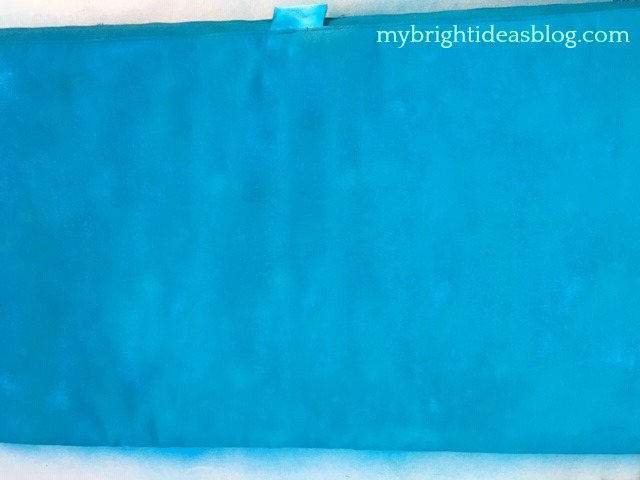
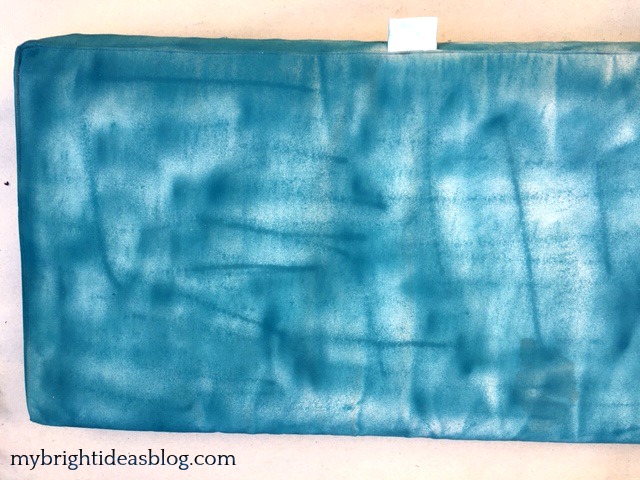
This spray paint has a wide even spray. It took a quick coat from this spray paint and it was nearly done. What a relief! An even and vibrant turquoise. After the paint dried it looked even better. It did need a little bit more coverage so it got another light coat of paint.
I would definitely recommend Rustoleum Painter’s Touch-Satin (Colour: Lagoon).

Looks fantastic right!?! Make sure you follow the instructions on your spray paint to see how long it would take to dry. I would make sure you have this project done several days before you have a backyard dinner party. You’ll want to make sure its fully dried. I have had no problems with the paint coming off on the pillows or anyone’s clothes. It’s really set and permanent.
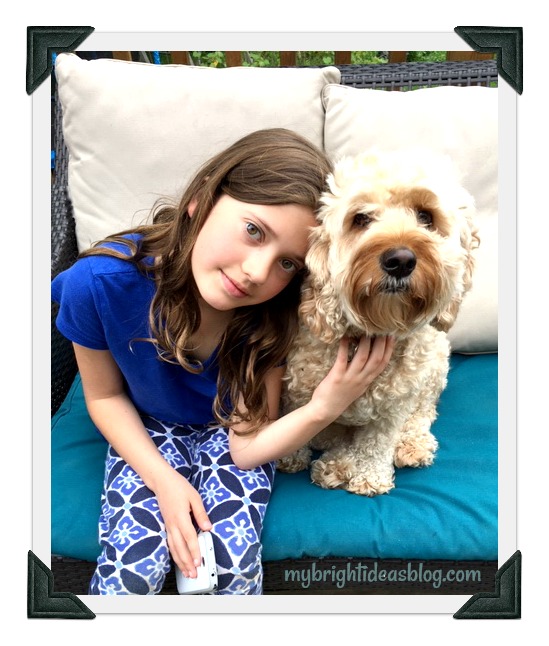
Gus approves of the new colour but lovely daughter M feels its not as soft to sit on. True enough, but I don’t mind how it feels. It’s a great solution to the stains and you can stretch the life of your current cushions for a few more years. Plus you could choose from a wide variety of colours and tape off sections to make your own designs.
Have fun adding color to your yard with spray paint…Lets see if I have some other ideas for adding color to things….
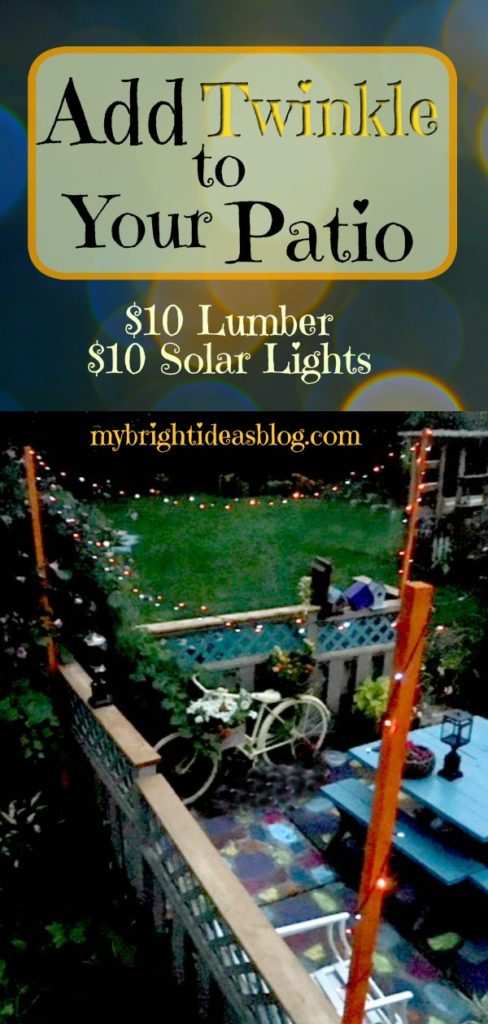
Add Twinkle to Your Patio with a String of Solar Lights
$20 Solar Twinkle Light Project – No Tools Needed
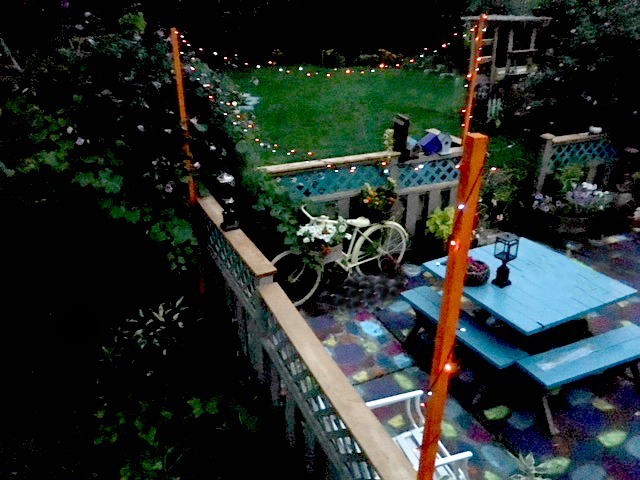
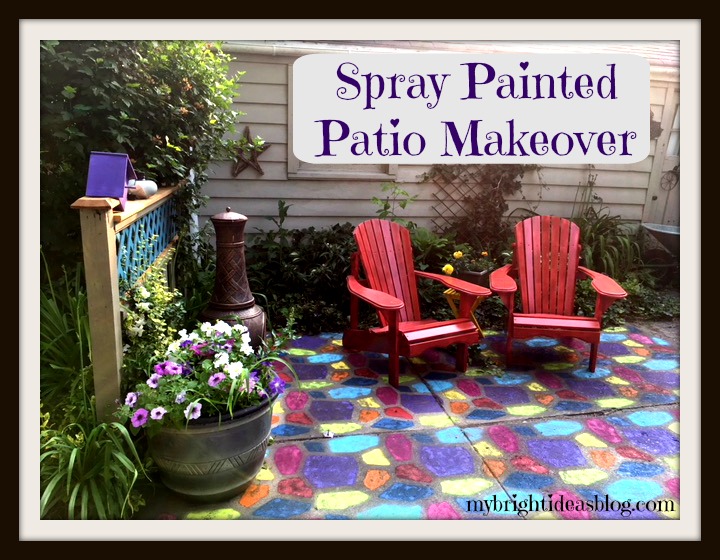
Usually by this time of the summer I have had enough of the heat and let the weeds take over and the vegetable garden dry up. But this year has been different! This year I have been adding colour to the backyard patio. I have painted the old picnic table and parts of the fence turquoise, the white Muskoka chairs are now red, an old bike is now yellow with plants attached and the entire patio a multi color design.
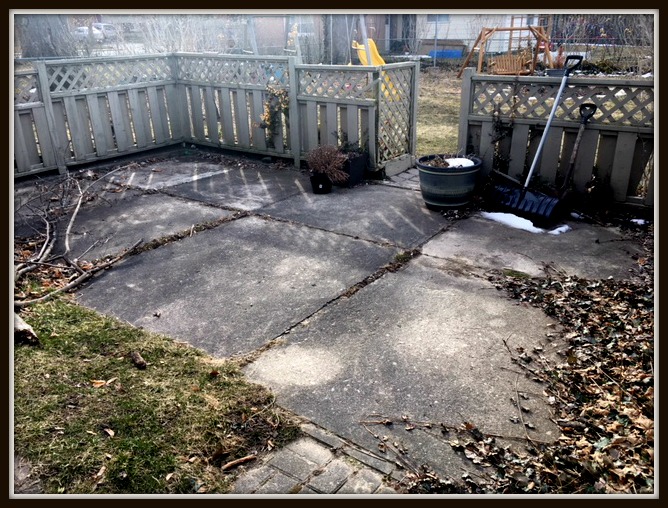
This is what it looked like as the final bit of winter melted away. So dismal! In the summer our garden is lush and private but everything is bare naked in the winter. Grey and bleak….
We have a lattice privacy fence around the patio area that needed a bit of repair and some paint touch ups battered by the winter. This is the going to be the support for the 2×2 pieces of lumber.
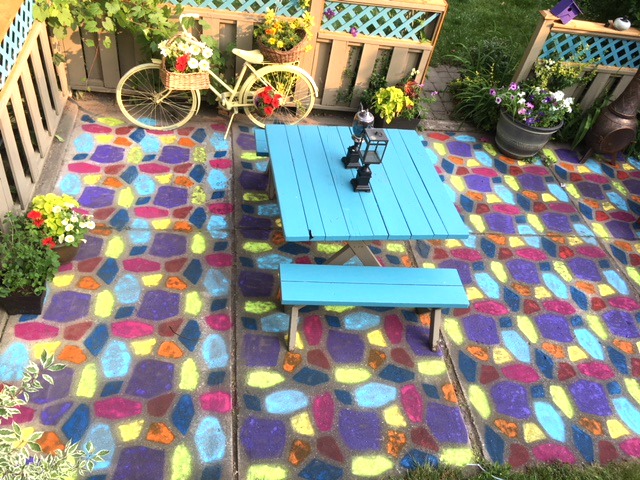
Below is a pic of the other half of the patio and garage area after I finished painting the patio.
Have a look at the painted patio blog post from July.
So the next logical step for this backyard makeover is to add some twinkle lights. Being the frugal person that I am-I must brag that I did this project for $20!
First stop – the hardware store….
 You will need:
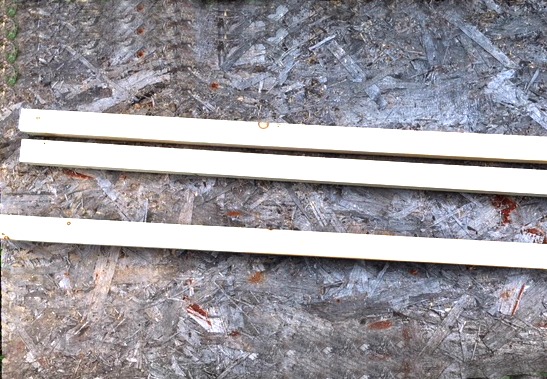
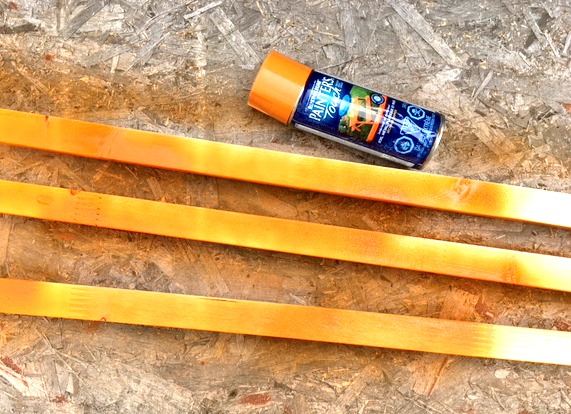
- 2×2 lumber (3 for $2.70 each)
- string of solar power lights (sale $9.99)
- left over deck stain or spray paint (it costs $6.99 usually but I had this left over from the patio project)
- zip ties (dollar store)
- cup hooks (dollar store)
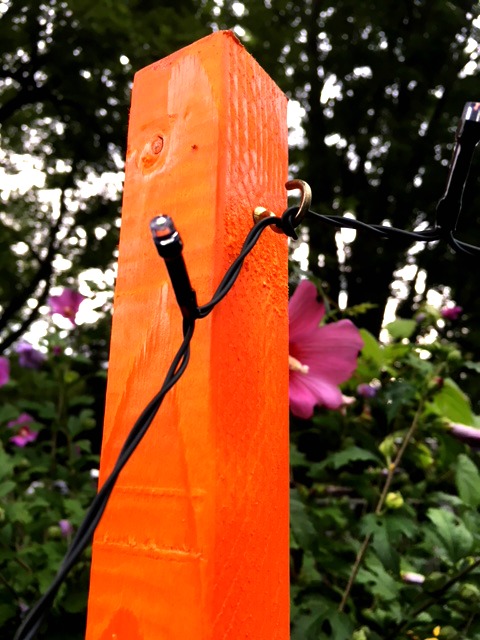
Step 1 Spray Paint The Boards
The great news is we use the full pieces so no power tools are needed. Just choose a paint color and get started.
I wanted to make a splash of color so I chose to use my bright orange. I could have used a dark green or left over deck stain or fence paint if I was feeling subtle. But I wasn’t….
Spray the 3 2×2 boards on two sides then allow to dry before flipping them over and doing the other two sides.
Step 2 Add The Hooks
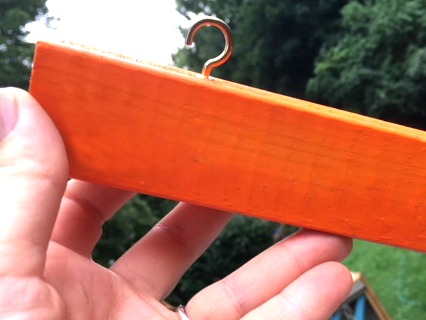
I used mug hooks because you simply screw it into the wood. The hook is twisted into the wood a few inches from the top.
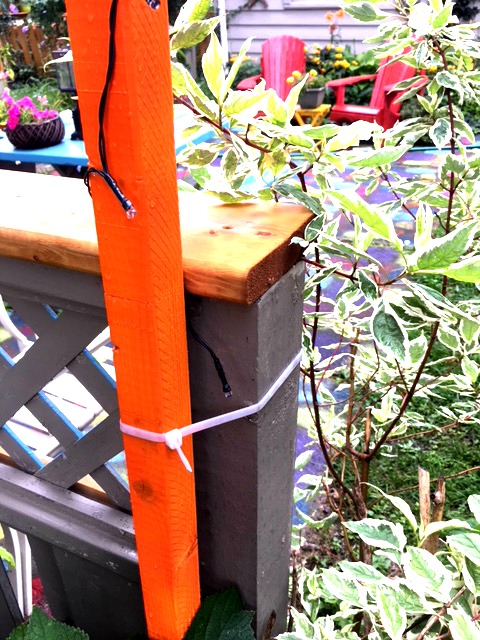
Step 3 Tie The Supports To The Fence
Securing the 2×2 to the fence was easy with zip ties. When we are putting everything away before the snow comes these zip ties will be cut off and my orange light supports will be put away in the garage.
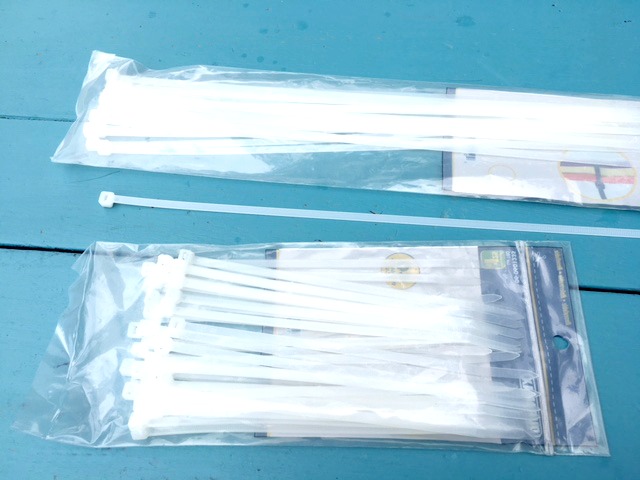
The dollar store or hardware stores have these for super cheep I used the 14 inch zip ties.
If you don’t have a handy fence or deck to secure the wood to, you can find others who have put them in cement in a bucket to create a portable pole. Some use 2×2’s or 2×4’s and even 4×4’s.
Check out this link to a tutorial using barrels and concrete and then turning it into a planter. Its great if you have no walls, deck or fence to secure it to. https://www.diynetwork.com/how-to/outdoors/patios-and-decks/how-to-make-planter-posts-for-string-lights

Step 4 Adding The Lights
It’s August, so now is the perfect time to find clearance solar powered lights. Lets give a shout out to solar lights! What a wonderful invention this solar power is. No extension cords to plug it in. No batteries. Just leave the little solar panel out facing the sky.
![]()
Turn the light on so it has a chance to charge up with solar energy before sunset. F means flashing, S means static so the lights will be still.
Wrap the solar light cord around the 2×2 support. At the top wrap it around the hook a few times. Next drape it over to the next support. We simply wrapped it around that hook and over to the third hook. Finally wrap it down the third pole and its done.
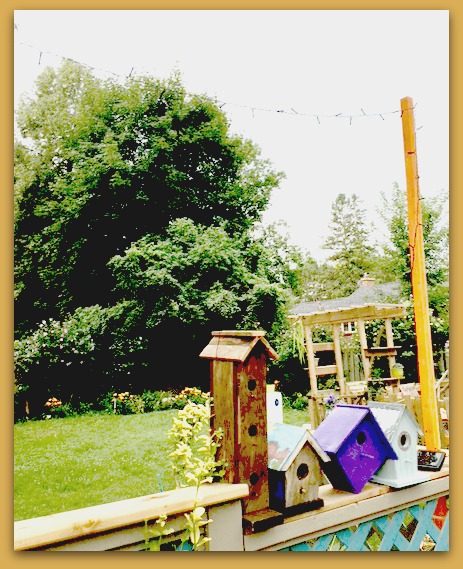
Next to the bird houses you can see the solar power part. I need to think of how to put it more out of sight since it does need the sunlight to charge it for after the sun sets.
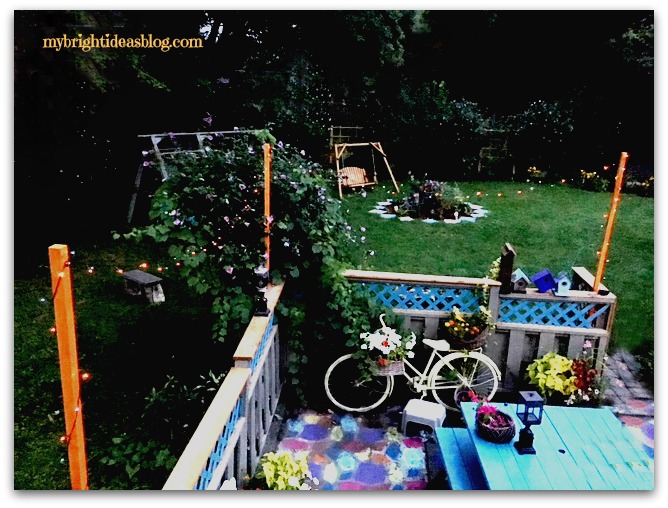 As the sun begins to set, I can see they are lighting up perfectly. Twinkle lights are such a simple pleasure!
Now I feel like calling some friends to come over for a root beer float and having a little party under the lights!
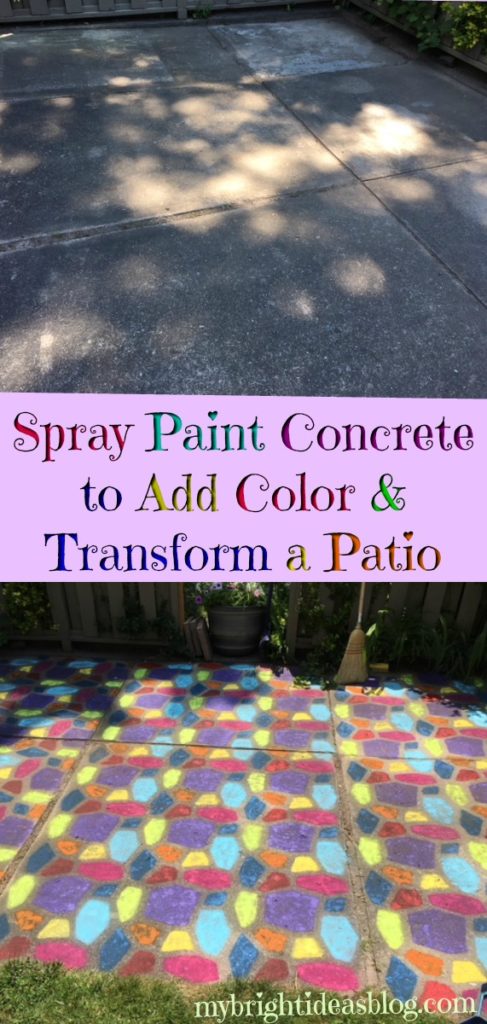
Paint Old Concrete for a Colorful Patio Makeover

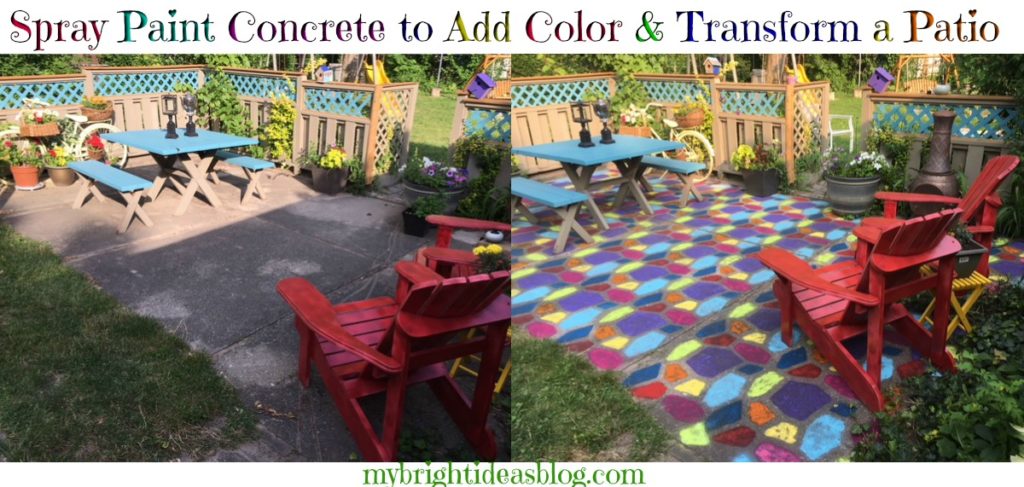
I may have taken things a little too far this time! I have been adding color to a very beige and grey backyard bit by bit. This weekend I went hog wild and I literally spray painted my tired old cement pad.
Our house is rather old built in the 1950’s. Its a mystery at what point they would have added this concrete pad and privacy fence but its safe to say it was a long, long time ago.
Our patio is approximately 232 inches by 135 inches or 3.5 meters by 5.9 meters.
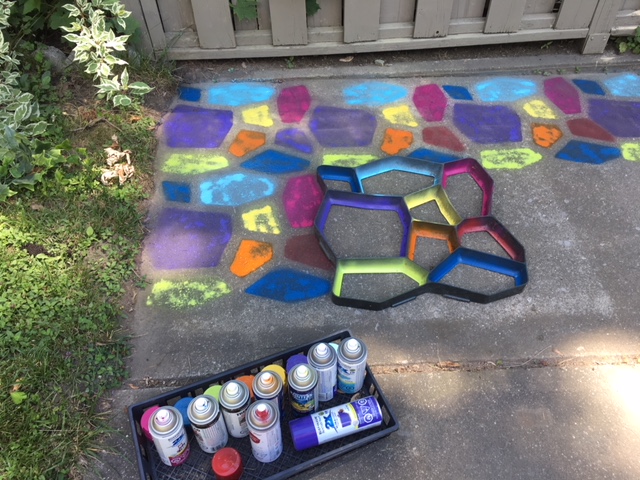
It has 4 sections at various widths 51 inches 52 inches 67 inches 62 inches. I worked in sections. I was done three sections when the spray paints started running out.
You will need:
- brooms, dust pans
- power nozzle on your garden hose or power washer
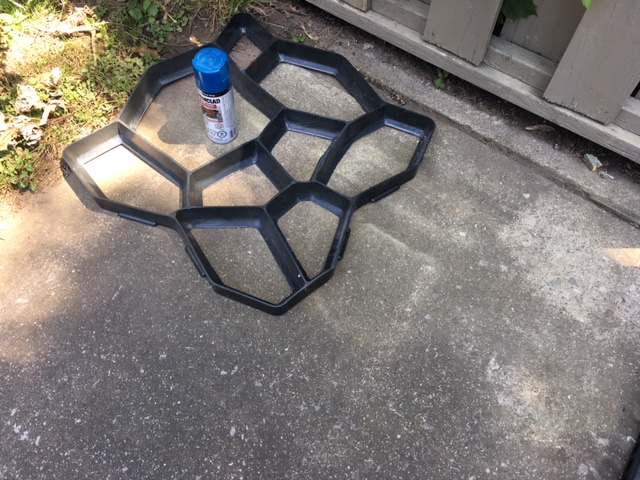
- a concrete mold
- 9 or 10 colors of spray paint (expect to pay approx.$7.50 per can of paint)
- clear concrete sealer
Before you get started you need to clean every bit of your concrete…
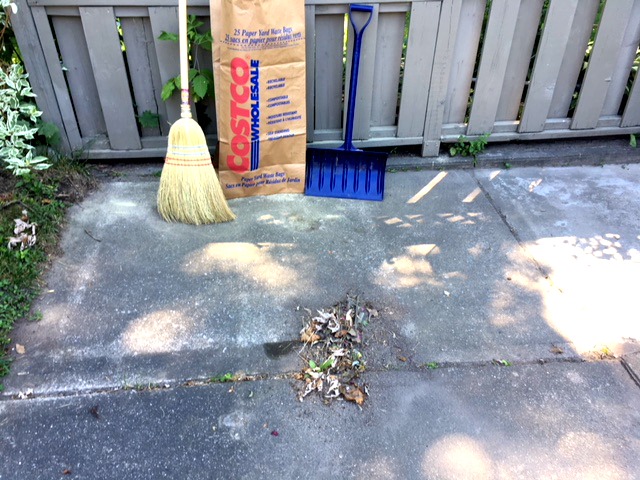
In order to successfully paint concrete you must clean and prep the area properly. This means going over the surface to remove all dirt and debris. Our patio had lots of that!
All the credit goes to my father in law for digging all the grass and weeds out from the cracks in the concrete slabs. New bits of nature are constantly blowing through the air so even during the process you may need to re-sweep. So keep a dust pan and broom or whisk handy through the entire process.
Plan on spending at least an hour on the clean up process. First I used the corn broom and a kids sized snow shovel for my dustpan. Then I used an old kitchen broom for finer bits of dirt. Then I used a flat broom for a final run over to see if I had gotten it all. To be thorough now consider if any areas need to be scrubbed. I had two areas where there were potted plants with thick mud caked onto the ground under the flower pots-it would not budge. Scrubbing with soapy water will tackle this…or use a power washer. Then you will need to wait for it to completely dry.
If you leave dirt on the concrete the paint will stick to it and likely wash away the next time it rains so don’t skip the cleaning stage.
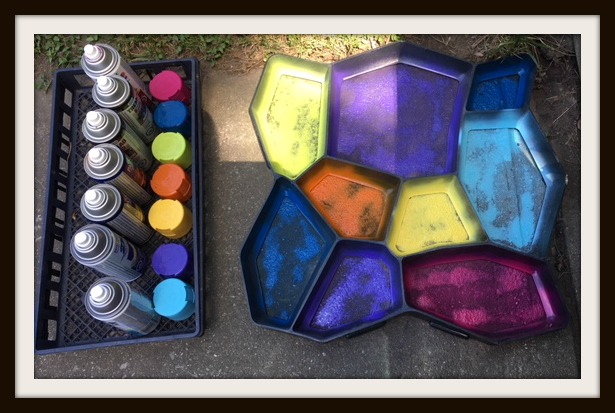
Gather the Supplies: Concrete Mold and Paint
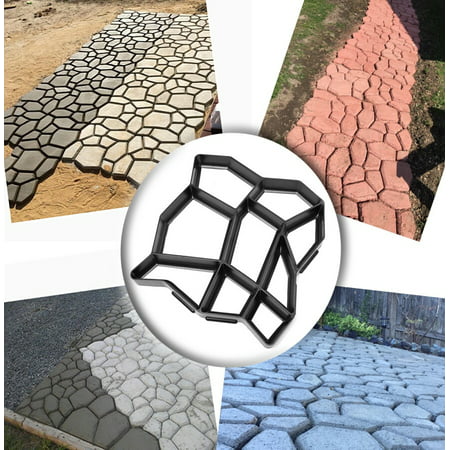
What is a concrete mold?
A concrete mold is typically used with quick-setting concrete pre-mix to create cobblestone walkways or patios of any size.
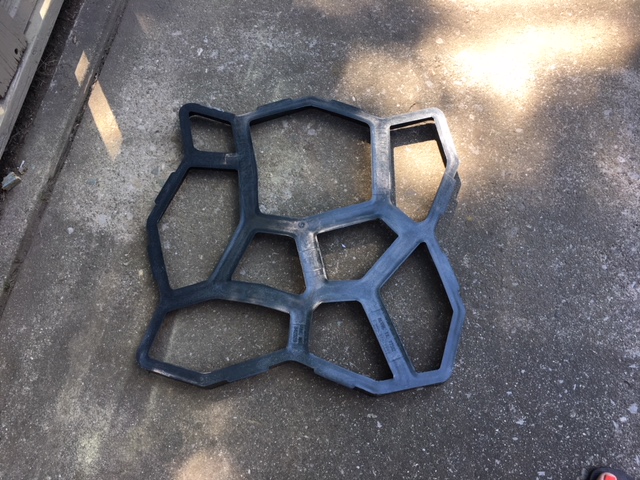
If you were pouring concrete into this mold you would want to have it as pictured above (wide edges upwards) but for spray painting we want to have the wide part on the bottom of the mold. This will create a tiled grout effect.
Where does one buy a concrete mold?
I have had this mold stored for the last 5 years! I bought it from Lee Valley with the idea of making a concrete path in a section of my backyard. However, I took one look at the bags of concrete that I would have to haul home and mix and thought it was best to put it off for a bit….lol. That sounds back breaking!
I have looked at the website and Lee Valley does still sell this mold for $34.50. Its 20×20 and very sturdy. Here is the link. http://www.leevalley.com/en/garden/page.aspx?p=10339&cat=2,2180,33222
If you aren’t near a Lee Valley store, you may need to investigate if your closest hardware store does carry it. It looks easy enough to purchase online but harder to find in actual stores.
Here is a similar one at Walmart.com. https://www.walmart.com/ip/17×17-Inch-Pavement-Mold-Irregular-Concrete-Stepping-Stone-Patio-Paver-Mold/163739522
Possibly a cheaper alternative would be to take a piece of plastic and cut a pattern out with an exacto knife. This would be like creating a stencil. At my local dollar store they have thick pieces of sturdy plastic in the craft section that looks like a big placemat. This is meant for a work surface for crafting kids so they don’t wreck your table. I could see this being cut up as a stencil. Just a thought!
Next you’ll need to choose the paint!
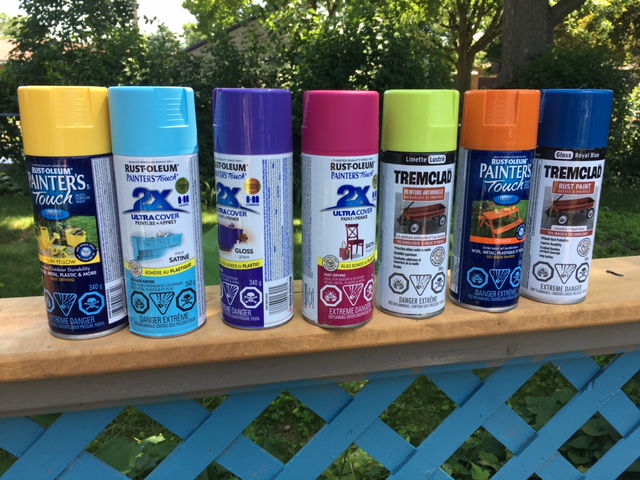
I started out with these 7 colors but after the first section decided to add a red spray paint that I recently used to paint my Muskoka chairs an awesome red.
As you can see the lime green and sunshine yellow colors did not have the impact that awesome royal blue did. Lets give a shout out to Tremclad Royal Blue for its awesome job covering concrete on the first try. Yellow and lime did get a second coat once everything was dry. I didn’t actually mind the faded effect it had since colored tiles or bricks are not perfect. But then I wondered if it will fade with the sun and snow so I thought that I would want to make it darker by going over just the yellow and lime the following day.
Here I am at the 3/4’s done mark and very pleased with myself…but running out of some of my spray paints.
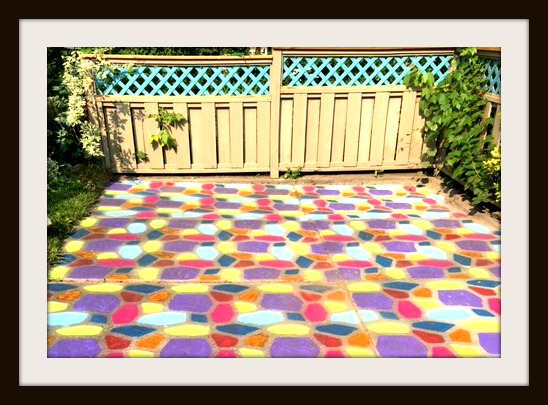
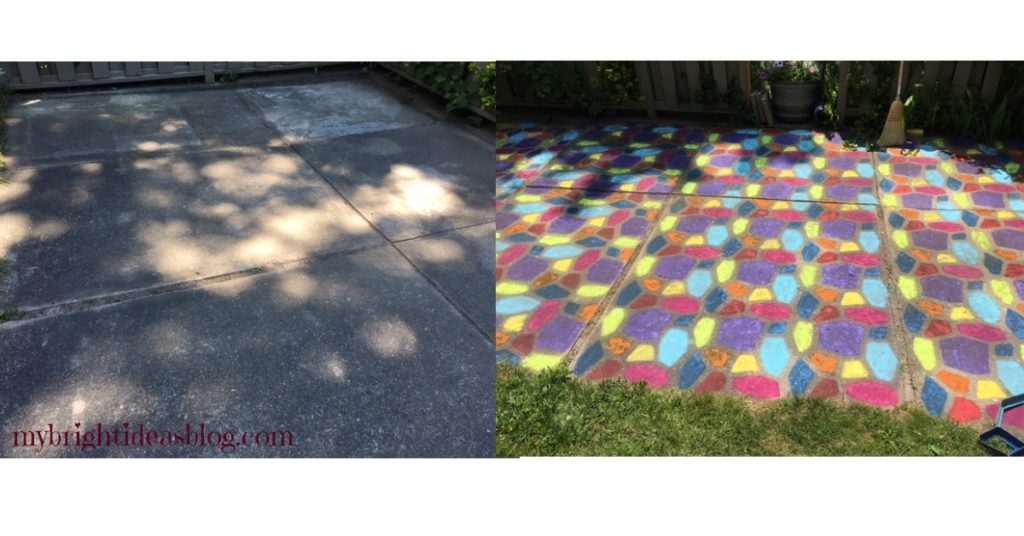 Here is a good picture from before and after the paint. Concrete doesn’t need to remain bland grey. The hardware store has several options for painting cement. If this is a bit too bright and busy for your space, you could do it in shades of green, brown, copper, charcoal etc. Pinterest also shows several techniques using a stencil effect. Or just painting a rectangle with a pattern on it so it looks like a carpet. So cool!
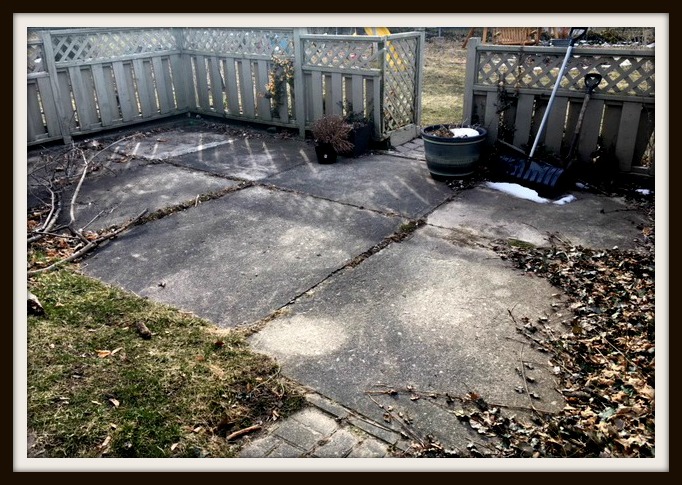
Here is the patio in the early spring with the last of snow melting. All the garden furniture packed away for the winter and the formerly-lush ivy looking creepy and brown.
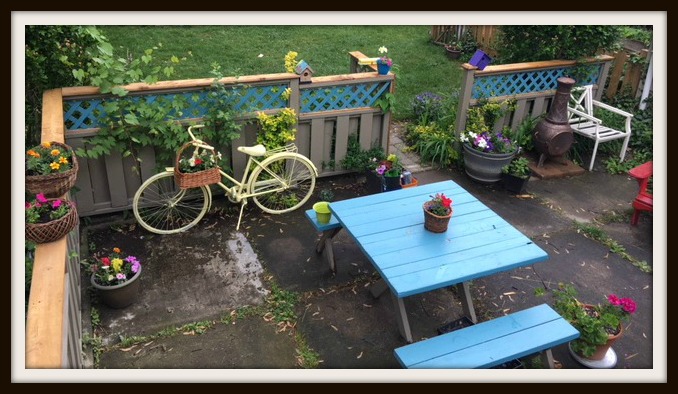
In May and June I was having a lot of fun adding color by painting a few things, but the patio concrete was pretty ugly grey and not cleaned up since the spring.
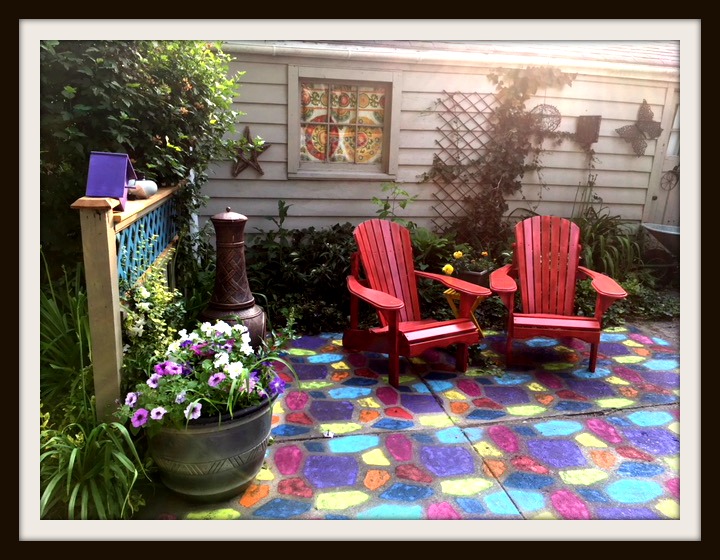
This is a cool angle from the deck! Now that I have put all the furniture in place….and I realized I forgot to put the clear sealer on top. Oh plumpers! I was so eager to see it all come together I completely forgot! Tomorrow is a holiday so…hubby is home to help me remove it all again. I will start early before the temperature gets too hot. I’m hoping that with the sealer on top this color will stay vibrant and last through the seasons. This is July 1st 2018. I’ll follow up with how it held up over the years.
…