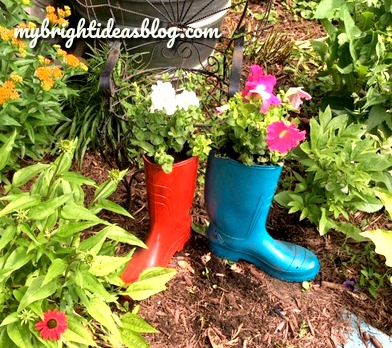
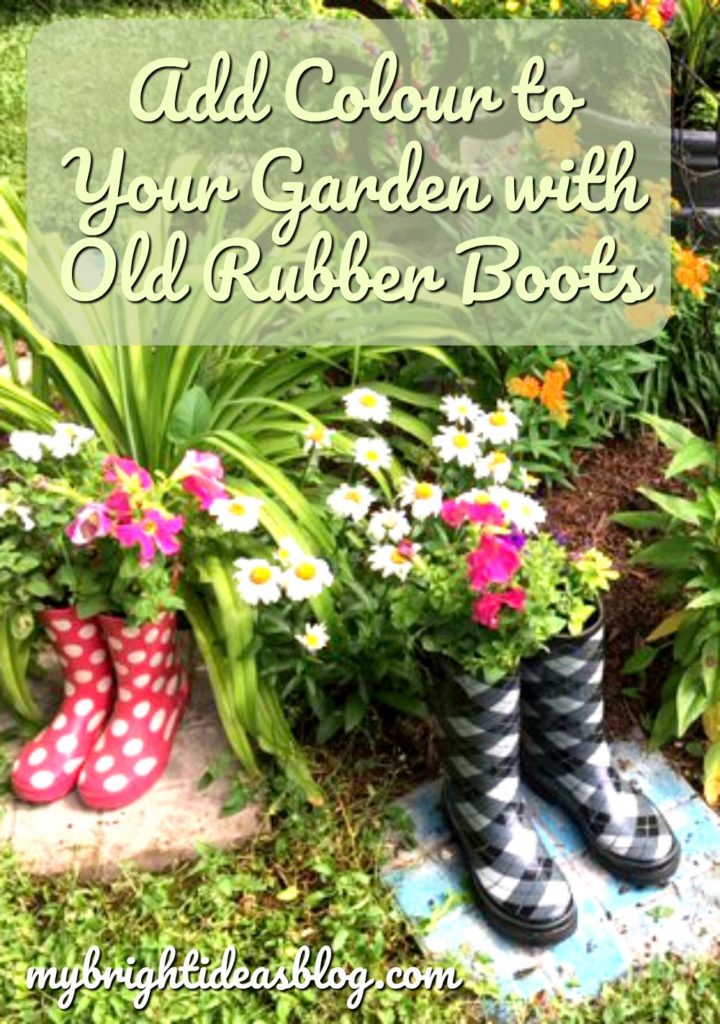
Check out the colour added to my garden by turning old rubber rain boots into flower planters!
In an effort to declutter (an impossible goal for me I’m affraid). We found some rubber boots that we no longer needed. Three pairs of wellies we don’t use because the kids outgrew them or we just realized even in the rain we have other footwear options we would rather wear. The patterns on two pairs were really cute and the third pair was a classic old black pair. Why not turn them into something fun!
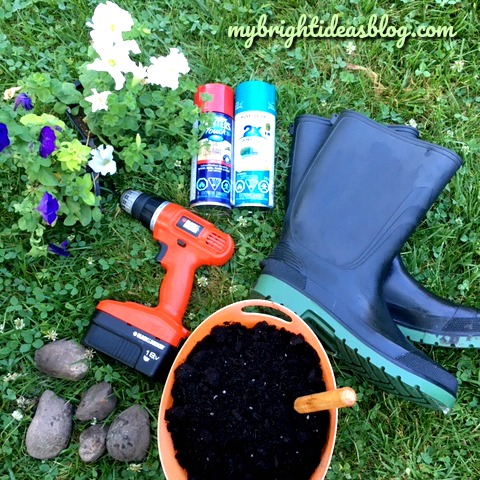
For this project you will need:
- old boots
- rocks
- sand/dirt mixture
- soil
- flowers (real or artificial)
- drill or screw driver
- spray paint (optional)

Don’t buy new boots for this project. If you don’t have any to upcycle go to the thrift store and look for a pair. They make rain boots in adorable colours and patterns, especially the children’s sizes. Even plain toddler yellow rain boots would look fantastic in the garden. I wish I had saved the girls smallest sizes. They were so adorable and small!
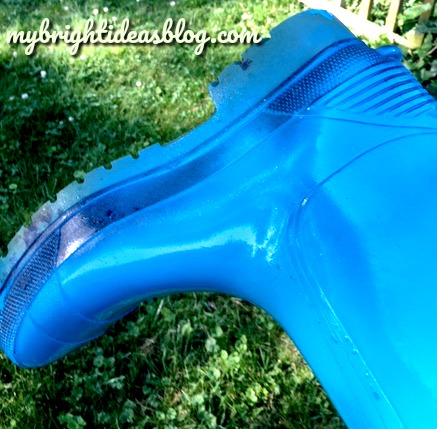
Before you get started, use a wet rag and wipe them clean…especially if you are spray painting them.
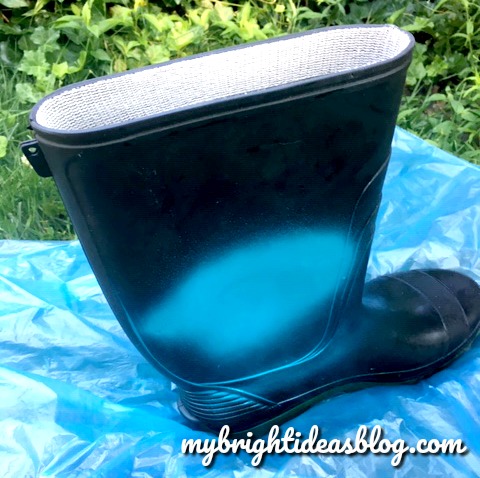
If you need to spray paint the boot, of course, do that next. Outdoors on a drop cloth or plastic. Don’t wait to start this project on the hottest day of the year. Our temperature yesterday was rising past 38 degrees Celsius (100.4 degrees Fahrenheit) and the spray paint would not dry! I have never had that happen before…and I have been spray painting things for years!
To get the bottom edge and toe of the boot put your hand right inside and turn it upside down for the second coat of spray paint. Allow to dry completely.
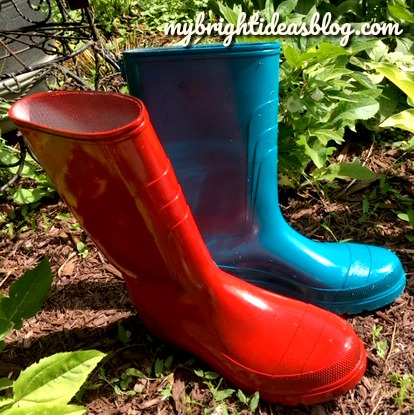
I painted one red and one turquoise. It doesn’t take much spray paint so you can use a colour in a leftover can from another project.
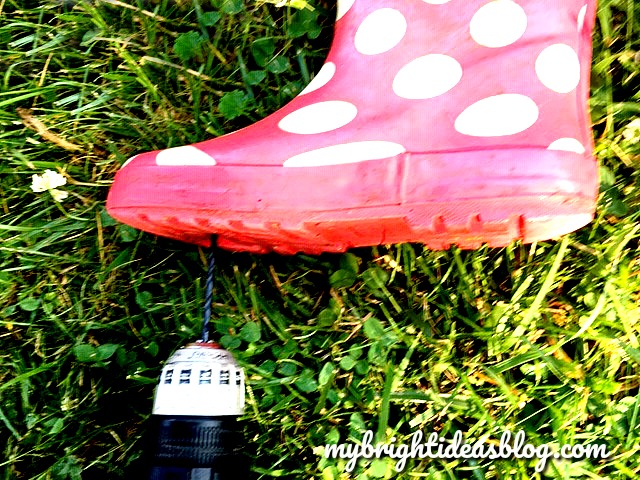
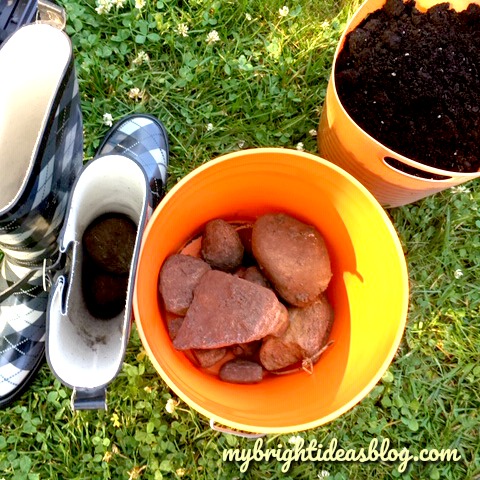
To prepare the boot for some drainage first remove any insoles and then put 3 or 4 holes in the bottom with a drill or screw driver.
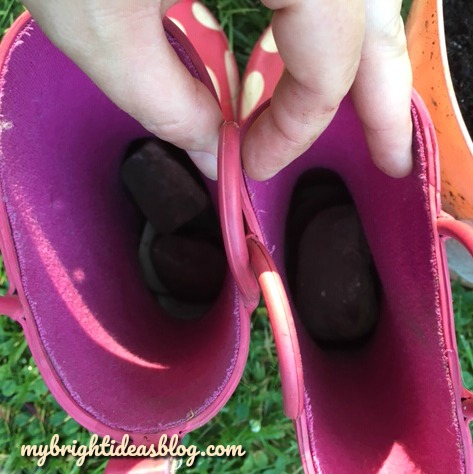
The next step is to put a few rocks in the bottom. This will help excess water drain away from the roots and to make it bottom heavy. If you happen to have sand or a mixture of soil and sand add a few inches of that over the rocks.
Then add the soil on top leaving several inches from the top of the boot.
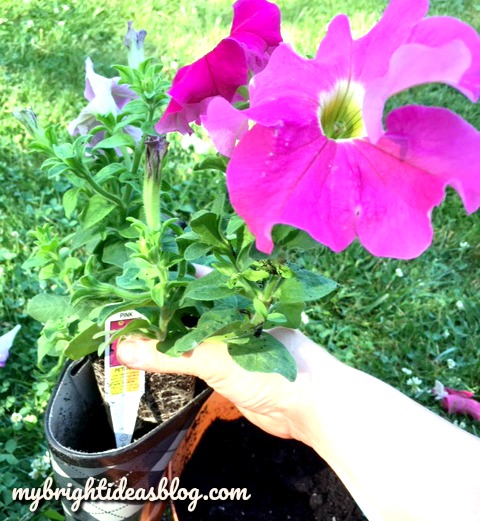
Next add some flowers. I chose petunias because they are so easy to care for and they will fill out the container nicely.
Place the flowers in the top of boot and add soil in any spaces around the plants.
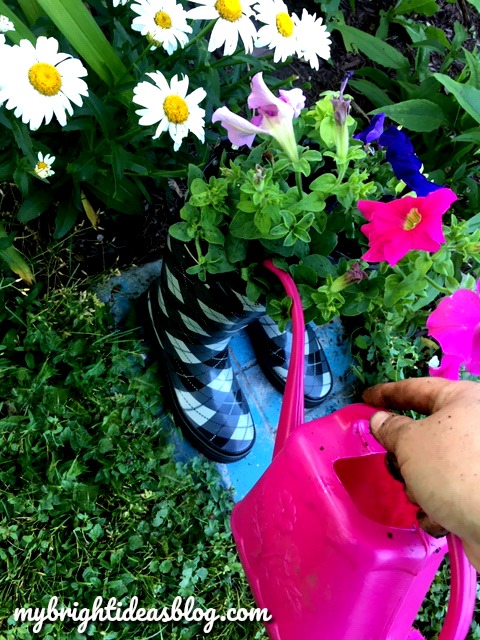
Thoroughly water! Every time you water it, have a look to see if the soil settled. You might need to add more soil. These are unusually tall planters.
Once every other week, add a bit of fertilizer.
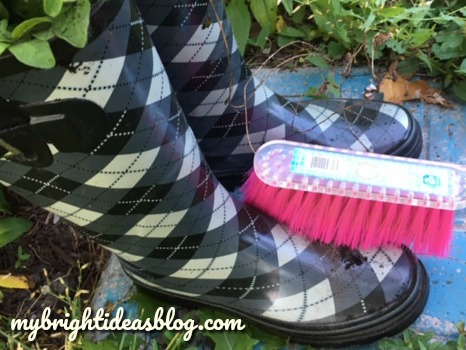
Get a whisk or small broom and clean up the boots.
These would look great anywhere in the garden or next to a fence or on the front porch. Wherever you need some colour. I have a bare patch in a garden that looks like it needs a bit of colour.
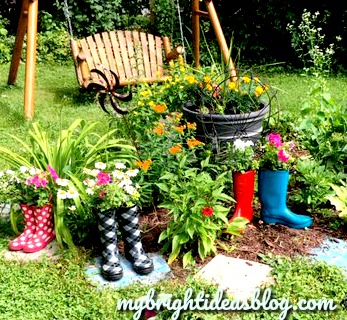
By dinner time, my daughter looked out the window and said, “what are all those rainboots doing in the garden?” Tee hee hee!
I love to add colour to the garden. Have a look at some of the other posts I have shared to show more ideas for colourful summer projects.

Air Plant Display Ideas
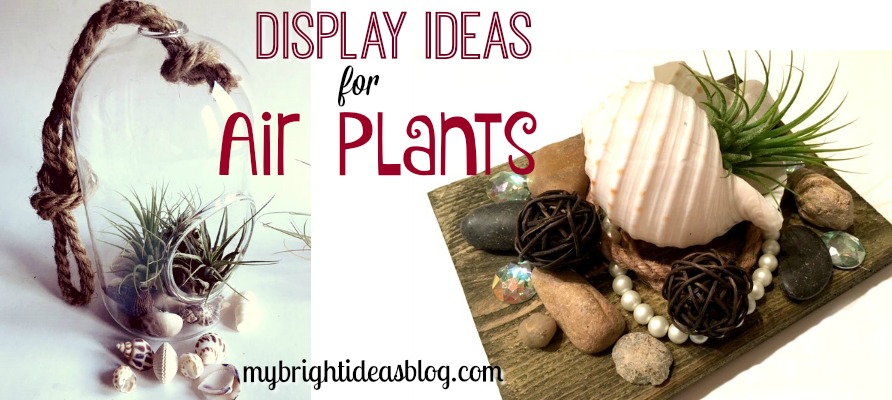
Have you gotten on board with the Air Plant craze? Air plants, are small aerophyte plants that do not need soil to grow. They absorb moisture from the air and indirect light for sustenance. The perfect plant!
Since air plants have no need to be in a pot of soil they can be put almost anywhere. Just so long as you remember to dip them in water once a week and allow the water to drain off.
Today I’ll show you how to make an easy arrangement that looks a bit nautical by putting the air plant into a sea shell and accessories on wood or a plate.

I found my first air plants at the garden centre this past summer and then spotted a shop in the local mall selling them. The ones I have access to sell for $4-$10 each.
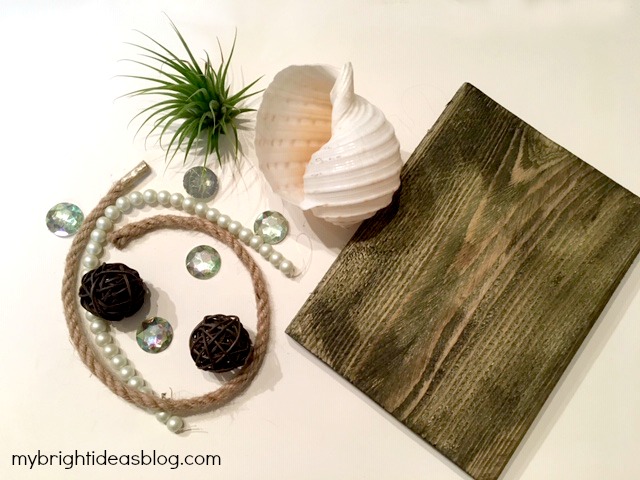
To make this you will need:
- an air plant
- a big shell
- nautical themed items: rope, glass gems, pearls, stones
- a block of wood, plaque or glass plate
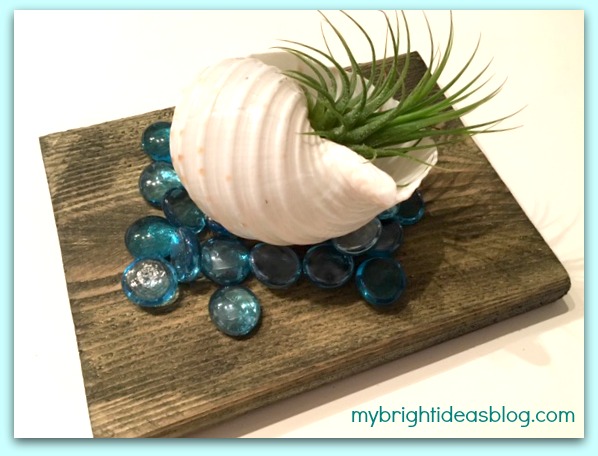
I always have scrap pieces of wood around in case of a sudden project inspiration. For this project I used a scrap approximately 6 inches by 6 inches. If you have a pretty plate you could easily use that too. I am tempted to check the thrift store for a beautiful, antique plate. For this first photo I just used turquoise glass gems.
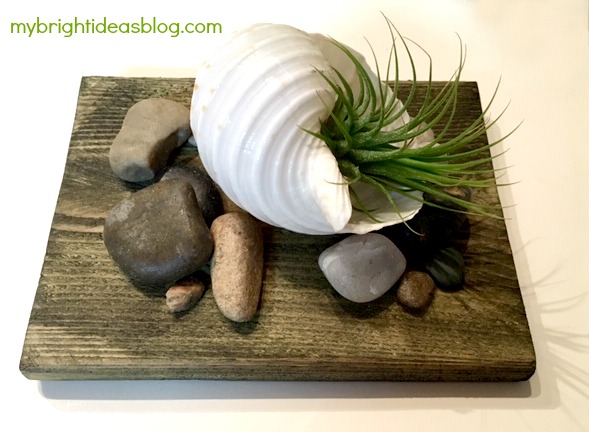
For this attempt I used river stones around the shell. I got them from the dollar store and the same with the gems.
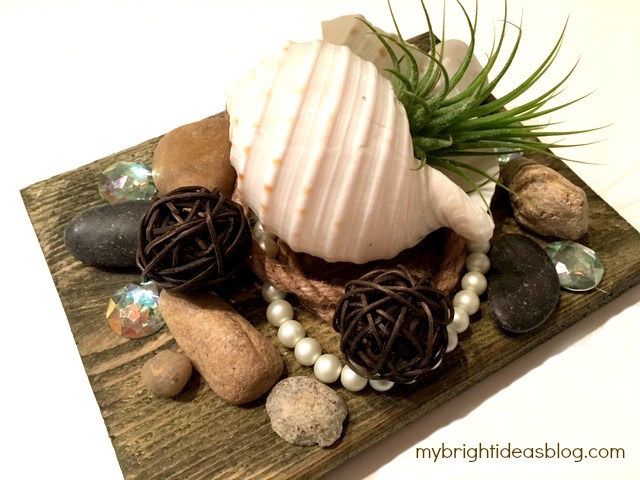
By adding pearls and rope with craft gems and stones I thought it turned out really nautical. Since none of these are attached to the board we can re-arrange them into another craft if I get tired of this one.
Here is another idea!

The photo above shows 2 popular air plant display options. The one on the left is plastic and from the dollar tree for $1. I wish I had bought 10 at that price since they were hard to find again. The one on the left is glass and from the garden centre for $8.99.
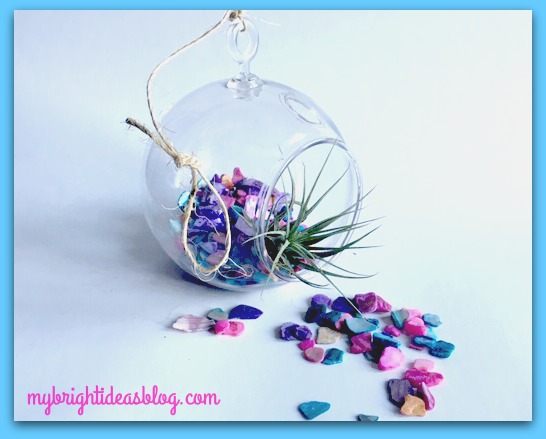
I used chips of shells that have been dyed for this one. Air plants make great gifts. Since this is plastic and needs very little care it would be easy for a child to care for or a friend in senior care.
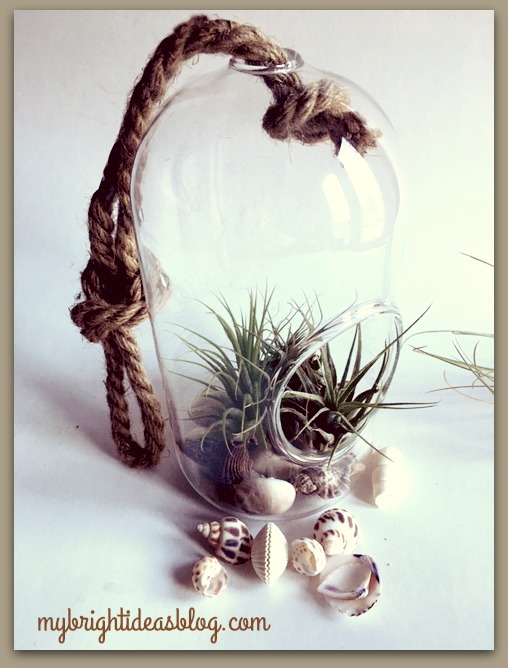
This one I used random shells in the base of the glass dome. I love the chunky rope and shells together-its very beachy.

I’m really excited to try some of the other plant ideas. I’ll let you know if they turn out well! Below are links to some of my other projects!
Nature Craft – Perfect for Earth Day Activity – Clay Imprints with Plants and Flowers
Plant Puns on Painted Potted Flower Pots – Adorable Gift Idea to Make Them Smile!


How to make an Autumn Wreath from Branches!
The other day, I was having a visit with my neighbour Tanya, and I looked at her door with a wreath that was way over due for a change. I think it she put it up in April….now its September…She mentioned that she should go shopping for an autumn wreath. I said Whoah! Don’t buy anything. Leave it with your buddy ol’ pal to make one.

I didn’t want to make it a typical round wreath but what could I do to make it different…but in-expensive….mmmm.
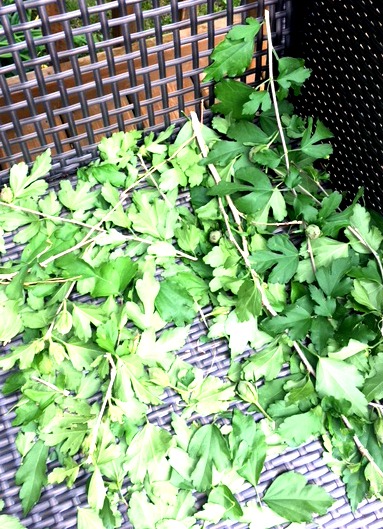
Meanwhile….my garden looks like a jungle. We have had lots of rain and sun and this means everything had big gnarly growth spurts.
When we purchased the house we were surprised that we had 25 Rose of Sharon bushes around the backyard. That is a lot of purple Rose of Sharons. They are pretty when they are in bloom and get quite full adding to privacy along the chain link fence. However, they do attract bees and the pods open and drop seeds and grow more and more and more.
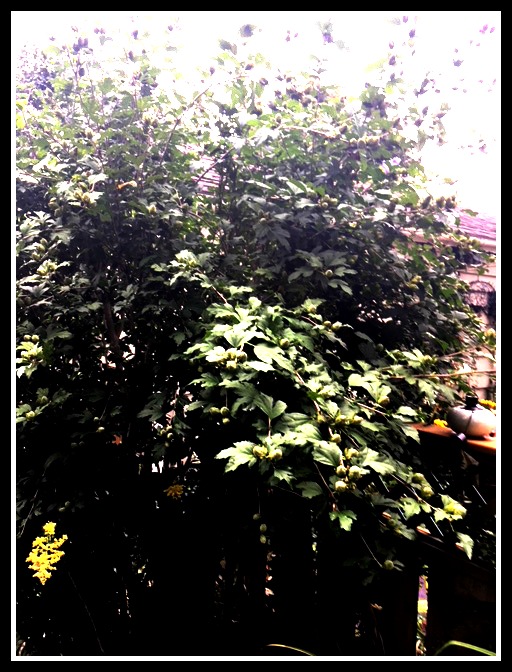
There is a lot of trimming to do….and did I mention there is 25 of these shrubs? Momma Mia that’s a lot of trimming to do this week.
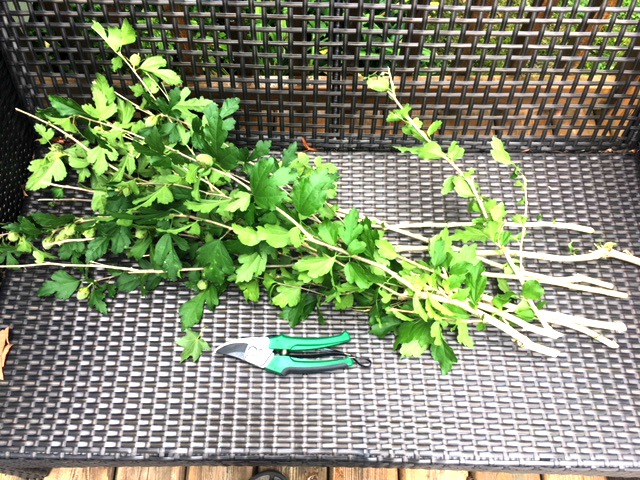
I was thinking about the promised wreath I wanted to make for Tanya. But I was looking at the trimming to do…wreath….trimming….and then it hit me!! Use the branches from the shrubs to make Tanya’s autumn wreath!
Supplies I used:
- Shrubs or Trees branches
- Garden Snips
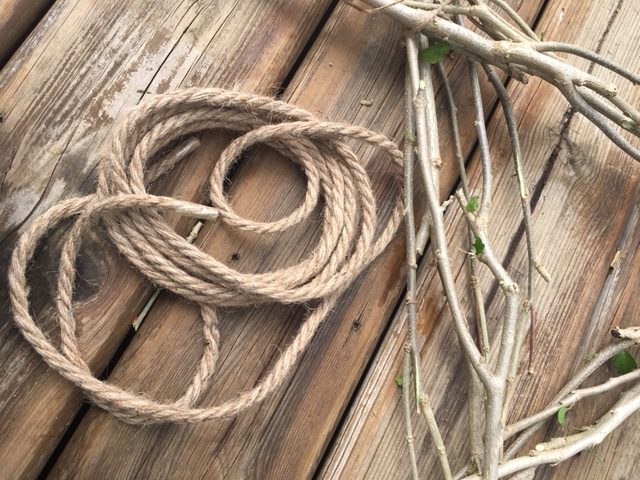
- Twine or Rope
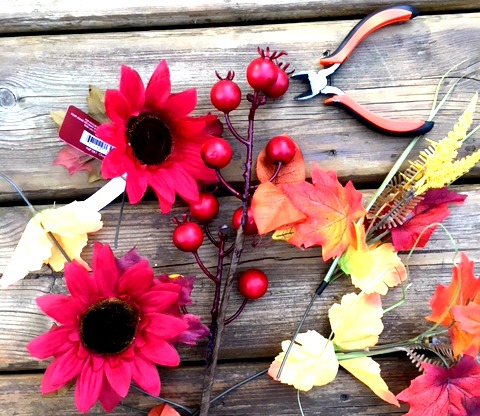
- Wire Cutters
- Autumn Flowers
- Glue Gun (I didn’t need it but I had it handy)

I pulled off the little branches and the leaves on 9 longish branches.

I put 3 twigs in a triangle shape and located some twine.
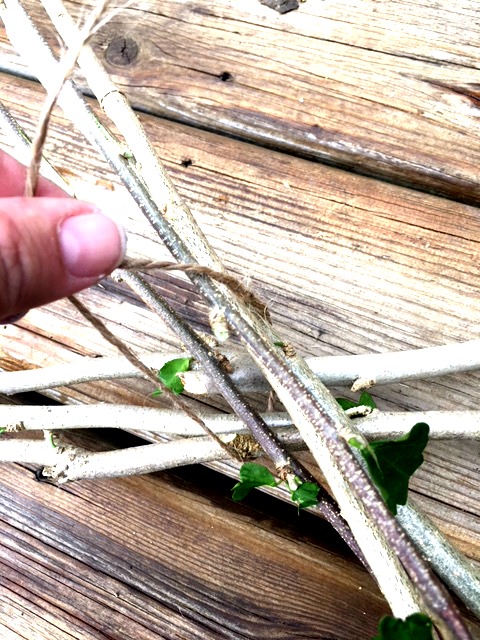
Twine is great for tying your sticks together. I better keep it handy for the rest of the trimming that is still waiting for me.
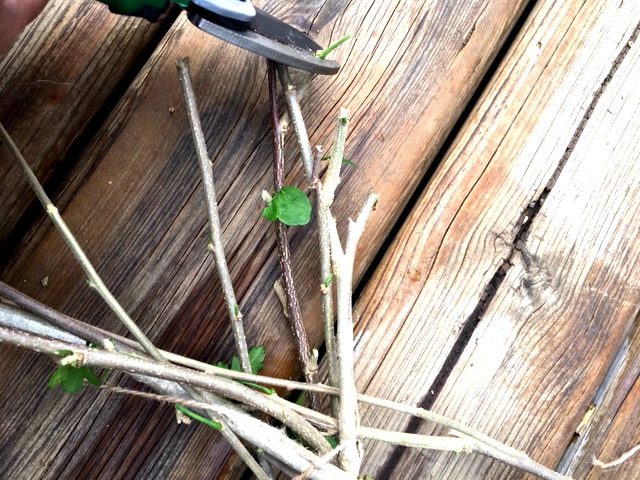
At first, I was going to keep the ends long and staggered but I decided to trim the ends down further.
I like the rough ends but we don’t want to poke out Tanya’s family’s eyes!
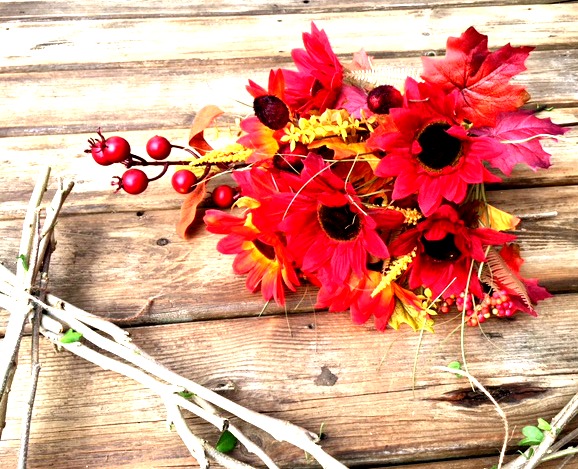
Time to add the flowers. I picked up a few bunches of autumn flowers from the dollar store. I only used a few sprigs from this lovely bouquet. I could easily make a few more of these as gifts (or to put on the craft table at work…of course). I spent about $10 on the flowers and twine so if I made another 3 or 4 that would make them each costing only $3 each. Cha-ching!
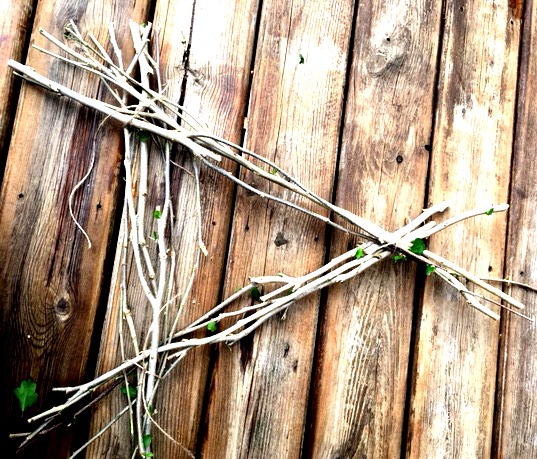
I had some thick twine that I used to reinforce the corners. Ribbon or lace would look cool too. Use what ever scraps you have.
I didn’t need to use a hot glue gun because I wove the ends into the twigs and wrapped the wire of artificial flowers around the twigs. You might want to use a hot glue gun to secure short pieces to the twigs.
Since the sticks make up the base and they are free-from my backyard-this is quite inexpensive. I’ve got enough flowers left to make another 4 of these! Cool…any other neighbours with a bare front door?
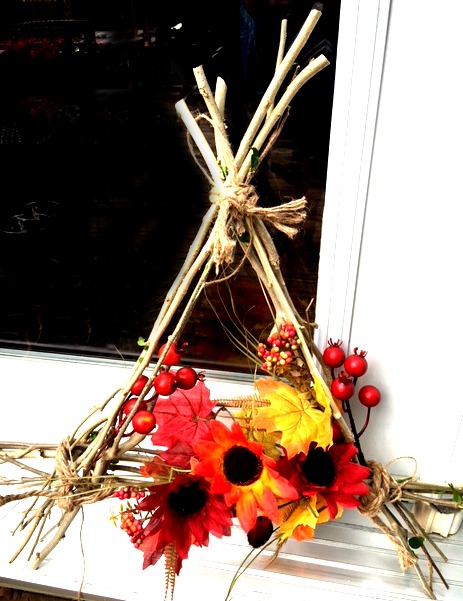
So rustic and woodsy.
Now who is going to clean up the left overs and finish the trimming….sigh…better get back to work.
See you again soon!


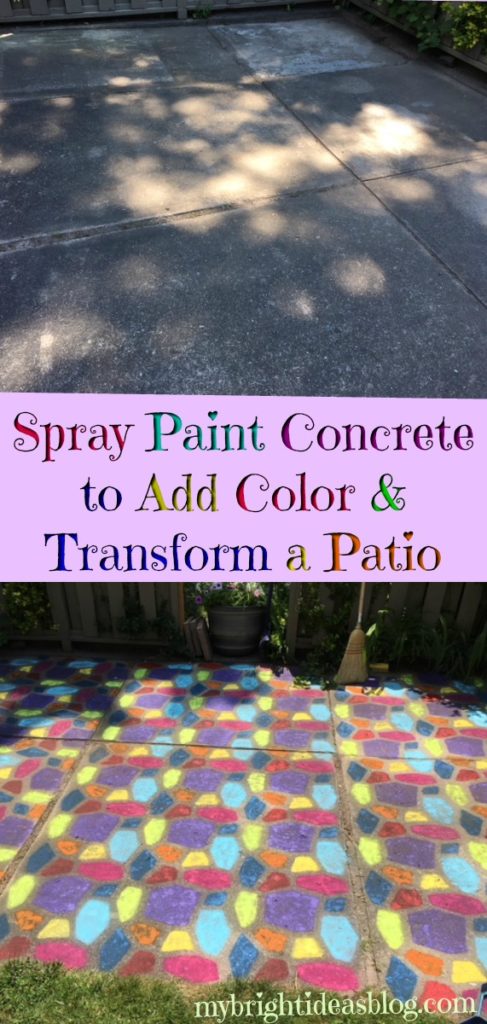
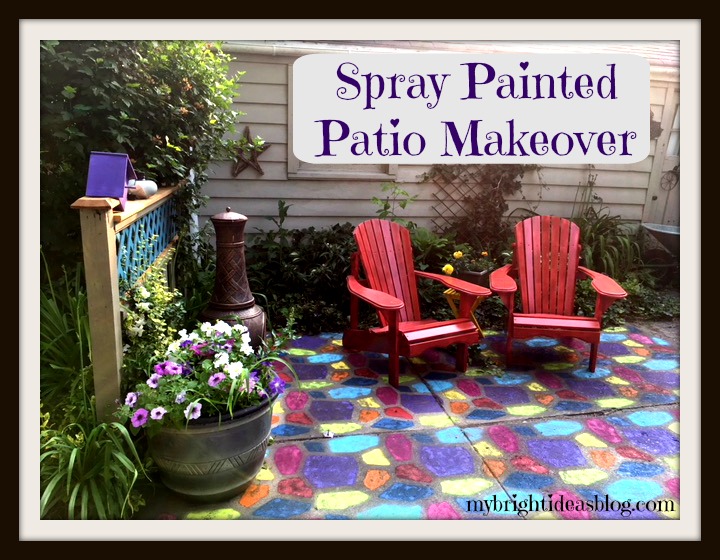
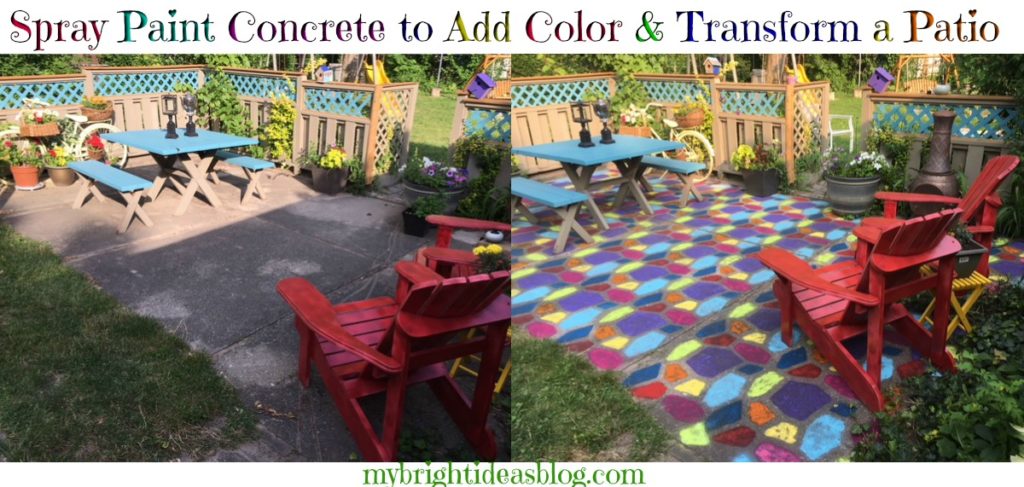
Paint Old Concrete for a Colorful Patio Makeover

I may have taken things a little too far this time! I have been adding color to a very beige and grey backyard bit by bit. This weekend I went hog wild and I literally spray painted my tired old cement pad.
Our house is rather old built in the 1950’s. Its a mystery at what point they would have added this concrete pad and privacy fence but its safe to say it was a long, long time ago.
Our patio is approximately 232 inches by 135 inches or 3.5 meters by 5.9 meters.
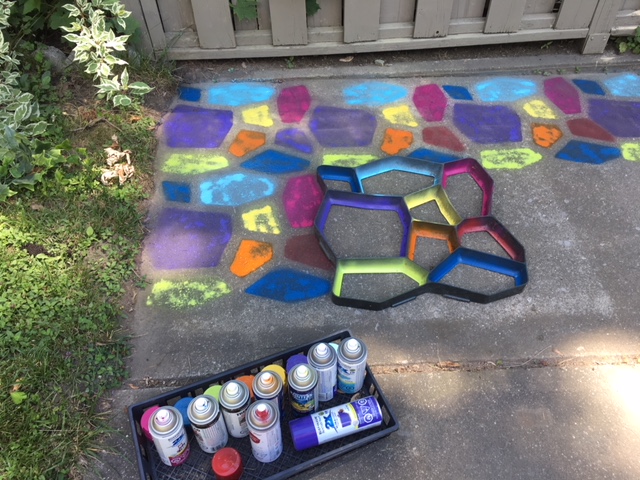
It has 4 sections at various widths 51 inches 52 inches 67 inches 62 inches. I worked in sections. I was done three sections when the spray paints started running out.
You will need:
- brooms, dust pans
- power nozzle on your garden hose or power washer
- a concrete mold
- 9 or 10 colors of spray paint (expect to pay approx.$7.50 per can of paint)
- clear concrete sealer
Before you get started you need to clean every bit of your concrete…
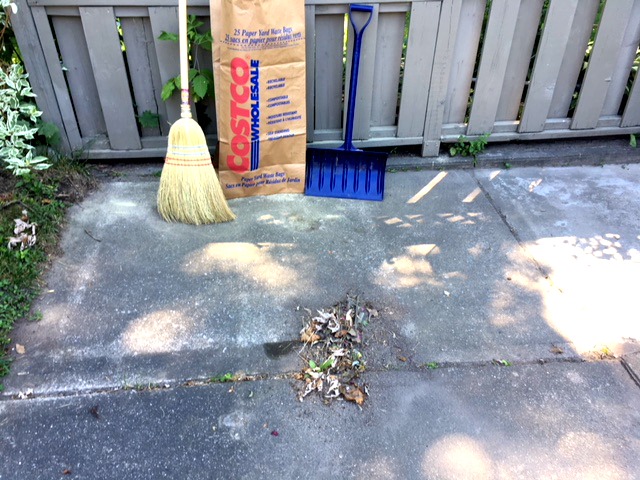
In order to successfully paint concrete you must clean and prep the area properly. This means going over the surface to remove all dirt and debris. Our patio had lots of that!
All the credit goes to my father in law for digging all the grass and weeds out from the cracks in the concrete slabs. New bits of nature are constantly blowing through the air so even during the process you may need to re-sweep. So keep a dust pan and broom or whisk handy through the entire process.
Plan on spending at least an hour on the clean up process. First I used the corn broom and a kids sized snow shovel for my dustpan. Then I used an old kitchen broom for finer bits of dirt. Then I used a flat broom for a final run over to see if I had gotten it all. To be thorough now consider if any areas need to be scrubbed. I had two areas where there were potted plants with thick mud caked onto the ground under the flower pots-it would not budge. Scrubbing with soapy water will tackle this…or use a power washer. Then you will need to wait for it to completely dry.
If you leave dirt on the concrete the paint will stick to it and likely wash away the next time it rains so don’t skip the cleaning stage.
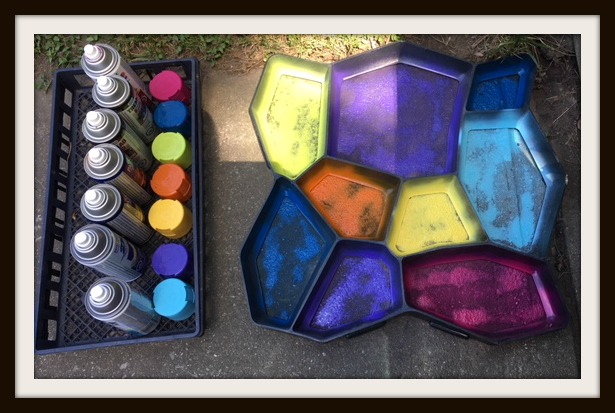
Gather the Supplies: Concrete Mold and Paint
What is a concrete mold?
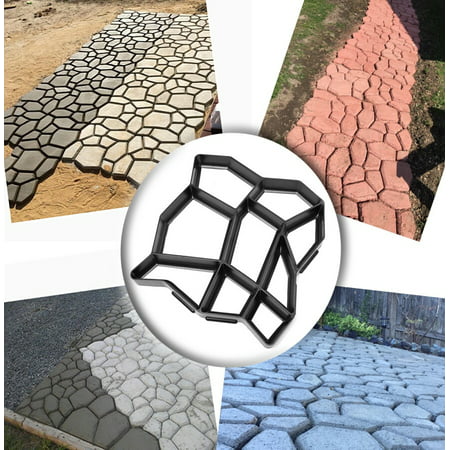
A concrete mold is typically used with quick-setting concrete pre-mix to create cobblestone walkways or patios of any size.
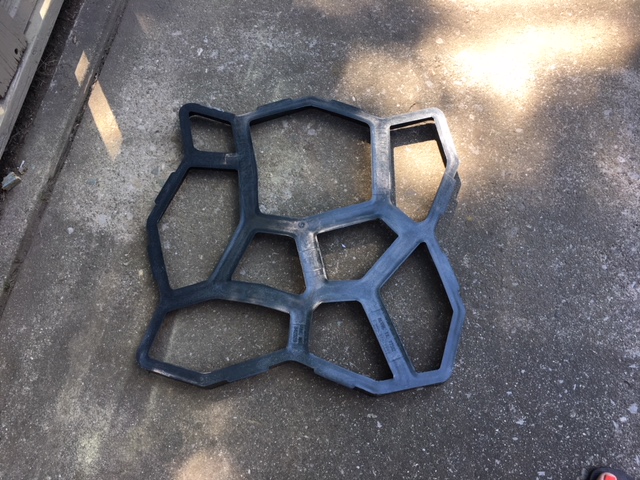
If you were pouring concrete into this mold you would want to have it as pictured above (wide edges upwards) but for spray painting we want to have the wide part on the bottom of the mold. This will create a tiled grout effect.
Where does one buy a concrete mold?
I have had this mold stored for the last 5 years! I bought it from Lee Valley with the idea of making a concrete path in a section of my backyard. However, I took one look at the bags of concrete that I would have to haul home and mix and thought it was best to put it off for a bit….lol. That sounds back breaking!
I have looked at the website and Lee Valley does still sell this mold for $34.50. Its 20×20 and very sturdy. Here is the link. http://www.leevalley.com/en/garden/page.aspx?p=10339&cat=2,2180,33222
If you aren’t near a Lee Valley store, you may need to investigate if your closest hardware store does carry it. It looks easy enough to purchase online but harder to find in actual stores.
Here is a similar one at Walmart.com. https://www.walmart.com/ip/17×17-Inch-Pavement-Mold-Irregular-Concrete-Stepping-Stone-Patio-Paver-Mold/163739522
Possibly a cheaper alternative would be to take a piece of plastic and cut a pattern out with an exacto knife. This would be like creating a stencil. At my local dollar store they have thick pieces of sturdy plastic in the craft section that looks like a big placemat. This is meant for a work surface for crafting kids so they don’t wreck your table. I could see this being cut up as a stencil. Just a thought!
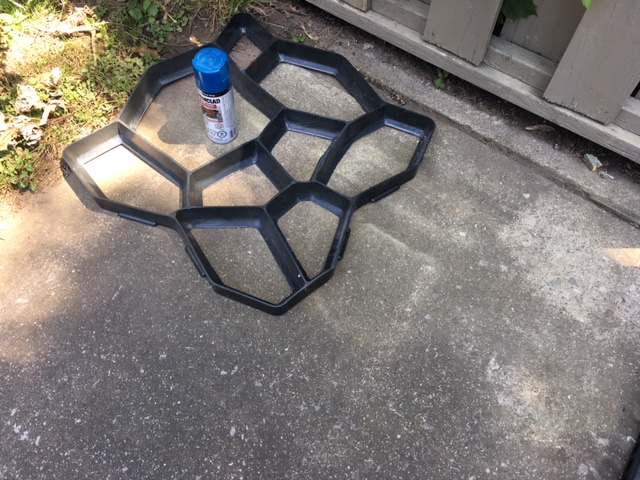
Next you’ll need to choose the paint!
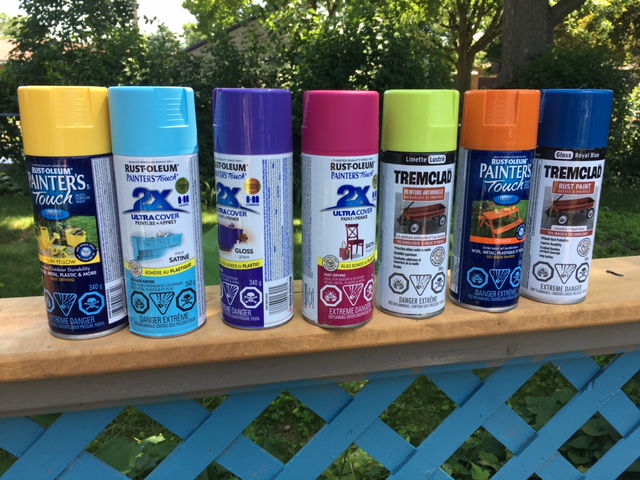
I started out with these 7 colors but after the first section decided to add a red spray paint that I recently used to paint my Muskoka chairs an awesome red.
As you can see the lime green and sunshine yellow colors did not have the impact that awesome royal blue did. Lets give a shout out to Tremclad Royal Blue for its awesome job covering concrete on the first try. Yellow and lime did get a second coat once everything was dry. I didn’t actually mind the faded effect it had since colored tiles or bricks are not perfect. But then I wondered if it will fade with the sun and snow so I thought that I would want to make it darker by going over just the yellow and lime the following day.
Here I am at the 3/4’s done mark and very pleased with myself…but running out of some of my spray paints.
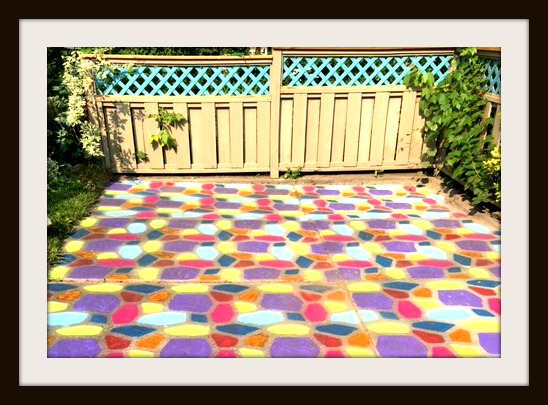
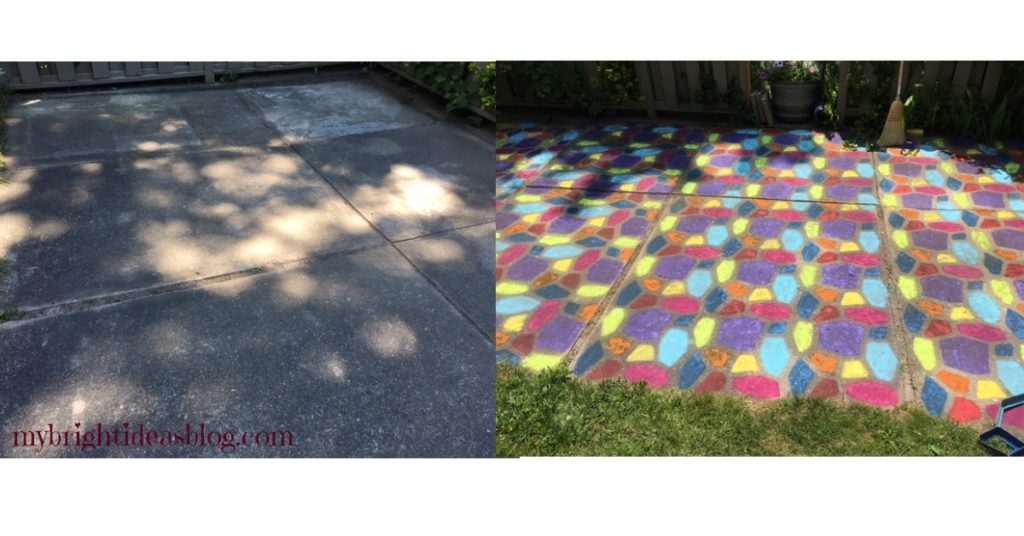 Here is a good picture from before and after the paint. Concrete doesn’t need to remain bland grey. The hardware store has several options for painting cement. If this is a bit too bright and busy for your space, you could do it in shades of green, brown, copper, charcoal etc. Pinterest also shows several techniques using a stencil effect. Or just painting a rectangle with a pattern on it so it looks like a carpet. So cool!
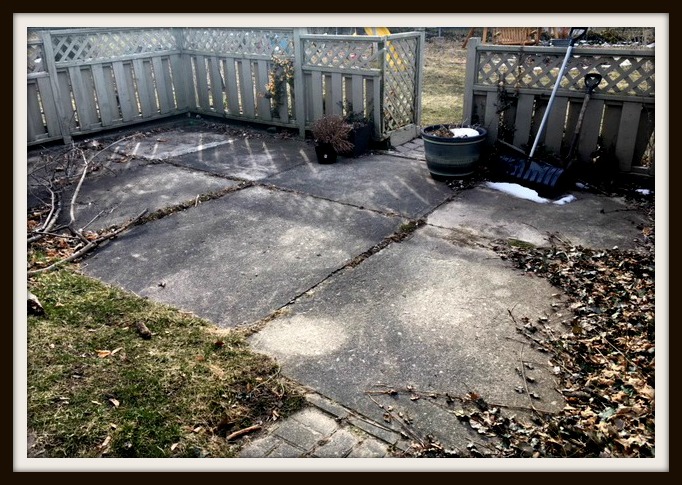
Here is the patio in the early spring with the last of snow melting. All the garden furniture packed away for the winter and the formerly-lush ivy looking creepy and brown.
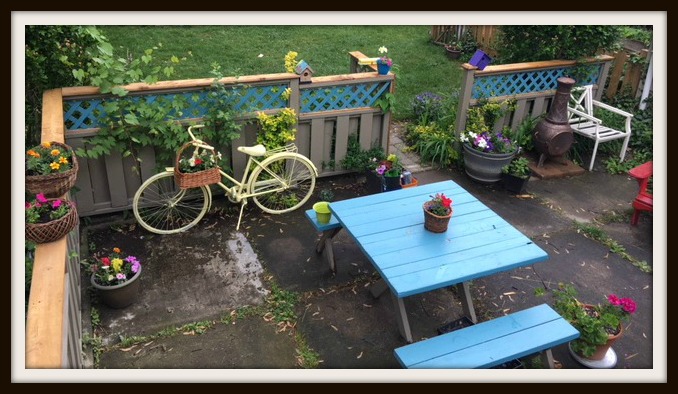
In May and June I was having a lot of fun adding color by painting a few things, but the patio concrete was pretty ugly grey and not cleaned up since the spring.
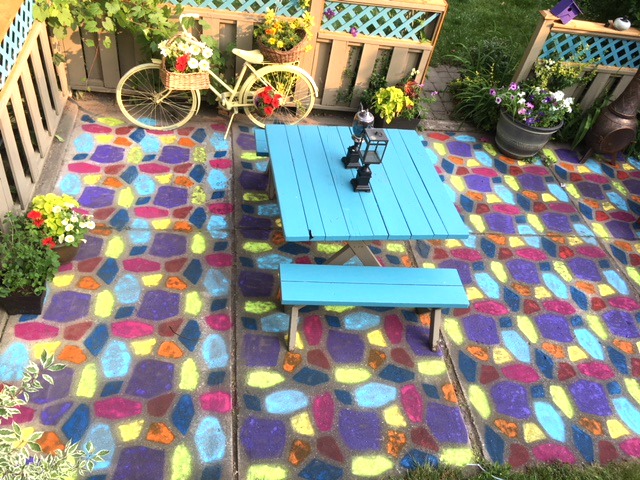
This is a cool angle from the deck! Now that I have put all the furniture in place….and I realized I forgot to put the clear sealer on top. Oh plumpers! I was so eager to see it all come together I completely forgot! Tomorrow is a holiday so…hubby is home to help me remove it all again. I will start early before the temperature gets too hot. I’m hoping that with the sealer on top this color will stay vibrant and last through the seasons. This is July 1st 2018. I’ll follow up with how it held up over the years.
…