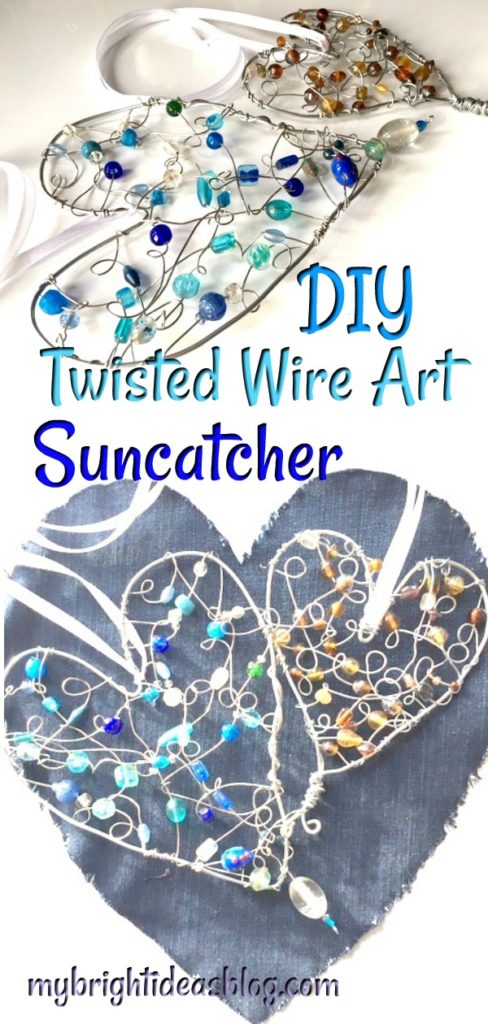
I have been excitedly pinning all sorts of “Wire Art Crafts” on Pinterest – But for some reason I’ve been nervous to get started….until now! This is my first attempt and I hope there will be many more to come! So let me show you how I made a beaded suncatcher!
You will need:
- wire (14 and 20 gauge wire)
- wire cutters
- wire plyers
- beads
- a cutting board or other desktop protection
- ribbon
I recommend a cutting board because I don’t want you to scratch up your dining room table or kitchen counter or any other surface you craft on. Wire projects can leave sharp ends-which can do some damage.
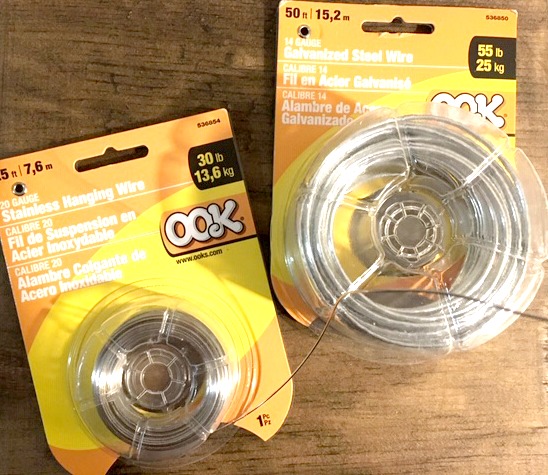
For wire: I bought 14 and 20 gauge galvanized stainless steel. This is much cheaper at the hardware store than the craft store.
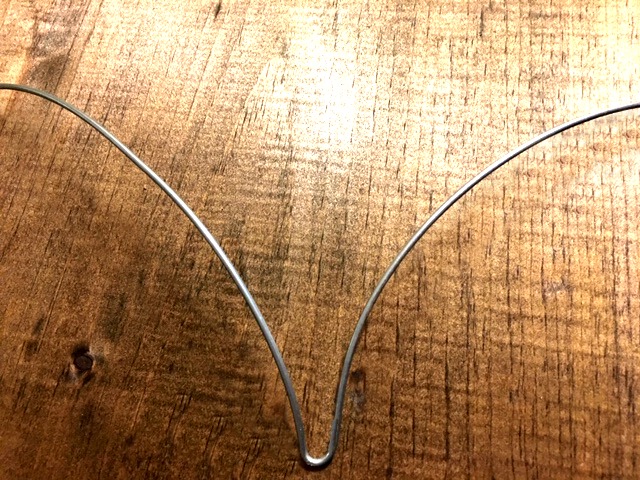
Cut a length of 20 gauge wire approx. 27 inches long (69cm). Use big wire cutters from your DIY tool box rather than jewelry making plyers. 20 gauge wire is thick!
Bend it in half so the heart shape begins to form the point in the top middle of the heart.
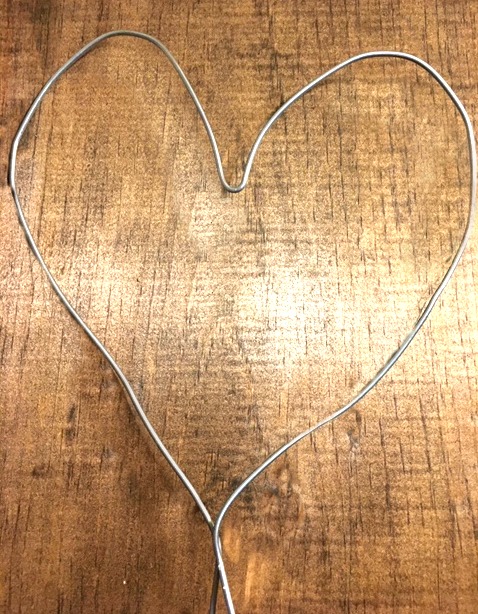
Gently manipulate the wire (with your hands not tools) to make the shape of a heart. Bring the bottoms together and twist.
Keep twisting the bottom and rounding the ends.
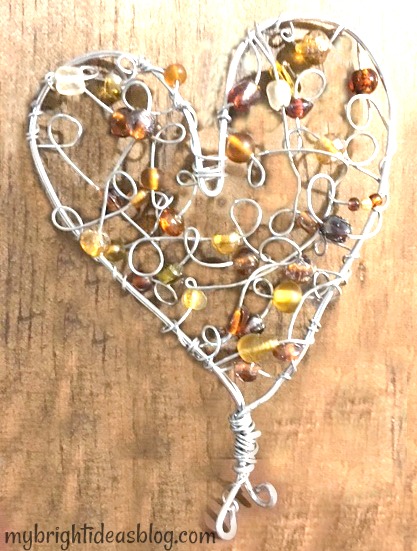
Fast forward to see how the amber one turned out….
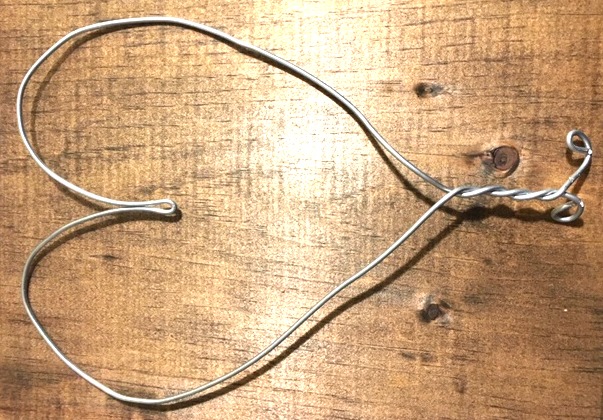
For the blue suncatcher I formed the wire into a heart and wrapped the excess on the side.
This is actually really hard on your hand muscles. Take breaks if you are getting achy muscles in your arms or hands. I think this looks a bit sloppy so I prefer the first option.
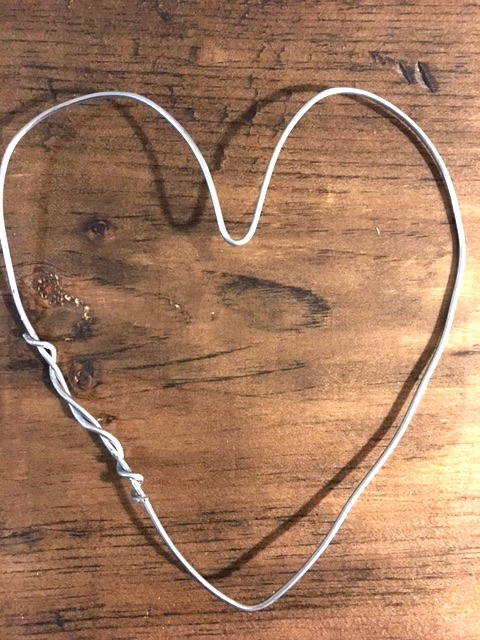
Now cut a piece of fine 14 gauge wire 30-40 inches long (90cm).
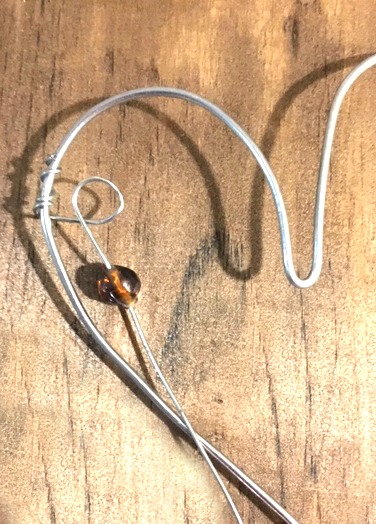
Start by twisting the fine wire around the side of the heart a few times and then wrap the wire around a round pen to make a loop. Slide the bead onto the wire and then make another loop around a pen. Have this loop face opposite direction.
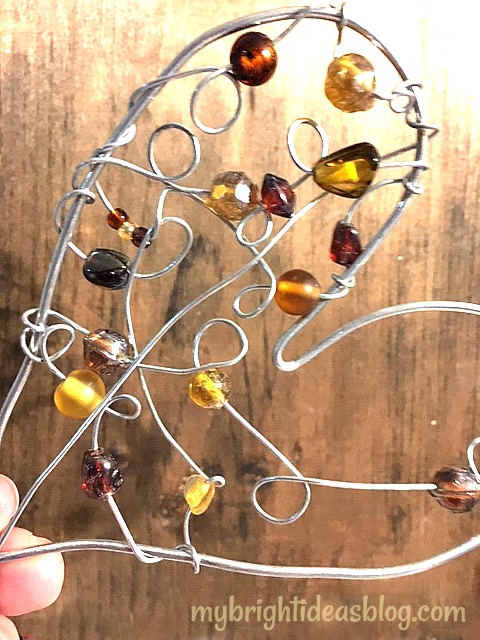
Continue wrapping the wire to make a loop and then bead it and next loop in the opposite direction. Wrap it around the side a few times and repeat making loops and adding beads, zig zagging over the heart. You may need up 3 yards (2.5 m) of wire for this part. This takes a bit of time.
When I finished this one off, I just wrapped the excess wire around the bottom of the suncatcher.
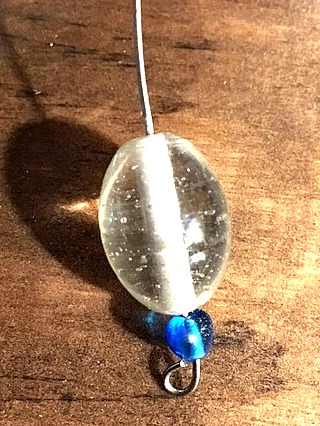
For the blue one I added a drop bead on the bottom. Cut a piece of 14 gauge wire 3 inches long. Twist the end around to anchor a few beads on. Wrap this at the end bottom of the heart.

This is a great project for someone who doesn’t follow patterns well and likes to free style (Like Moi). It’s a random, twisting, original piece of wire art.

Finish the project by putting a bit of ribbon (or clear fishing line) through the top and tying it in a bow. Hang in your window!
I’m pretty pleased with my first attempts at wire art. I am eager to try it again soon!
How to make an Autumn Wreath from Branches!
The other day, I was having a visit with my neighbour Tanya, and I looked at her door with a wreath that was way over due for a change. I think it she put it up in April….now its September…She mentioned that she should go shopping for an autumn wreath. I said Whoah! Don’t buy anything. Leave it with your buddy ol’ pal to make one.
I didn’t want to make it a typical round wreath but what could I do to make it different…but in-expensive….mmmm.
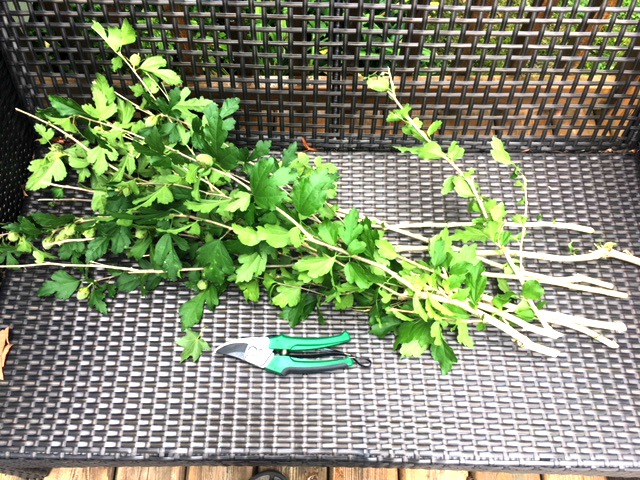
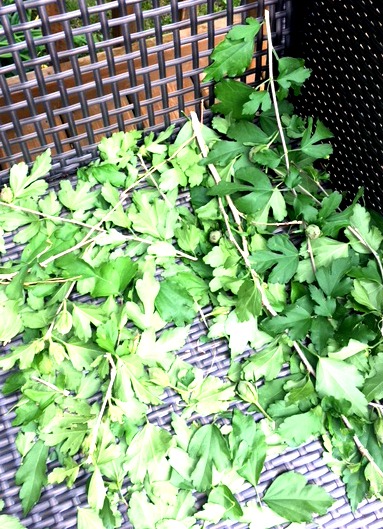
Meanwhile….my garden looks like a jungle. We have had lots of rain and sun and this means everything had big gnarly growth spurts.
When we purchased the house we were surprised that we had 25 Rose of Sharon bushes around the backyard. That is a lot of purple Rose of Sharons. They are pretty when they are in bloom and get quite full adding to privacy along the chain link fence. However, they do attract bees and the pods open and drop seeds and grow more and more and more.

There is a lot of trimming to do….and did I mention there is 25 of these shrubs? Momma Mia that’s a lot of trimming to do this week.
I was thinking about the promised wreath I wanted to make for Tanya. But I was looking at the trimming to do…wreath….trimming….and then it hit me!! Use the branches from the shrubs to make Tanya’s autumn wreath!
Supplies I used:
- Shrubs or Trees branches
- Garden Snips
- Twine or Rope
- Wire Cutters
- Autumn Flowers
- Glue Gun (I didn’t need it but I had it handy)

I pulled off the little branches and the leaves on 9 longish branches.

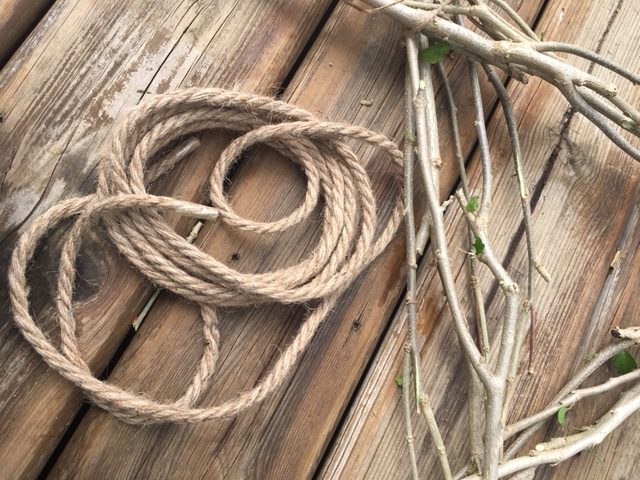
I put 3 twigs in a triangle shape and located some twine.
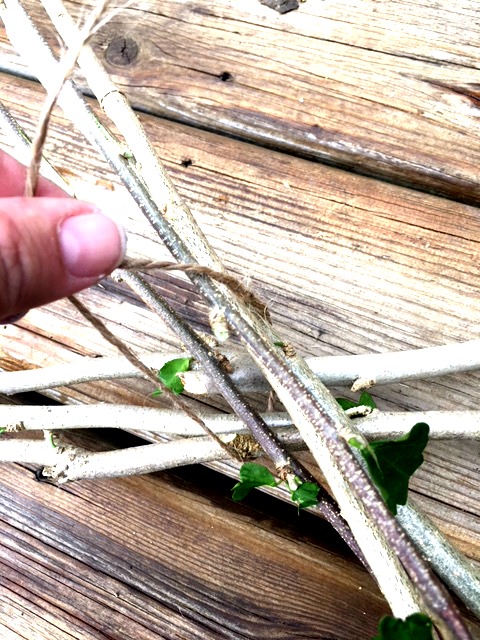
Twine is great for tying your sticks together. I better keep it handy for the rest of the trimming that is still waiting for me.
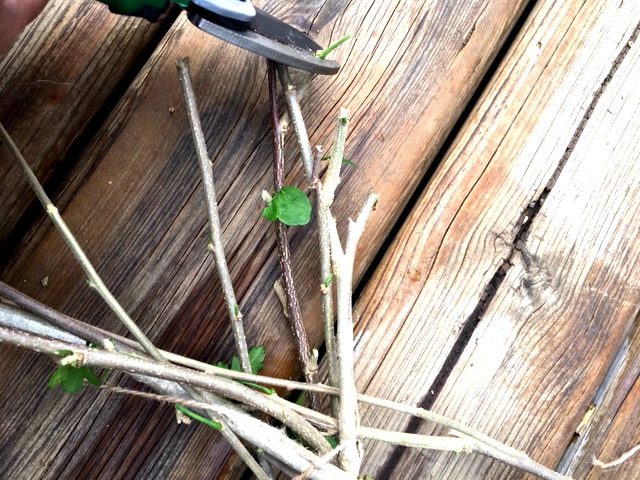
At first, I was going to keep the ends long and staggered but I decided to trim the ends down further.
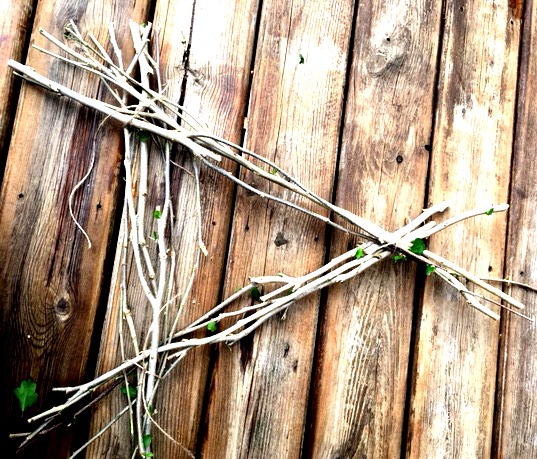
I like the rough ends but we don’t want to poke out Tanya’s family’s eyes!
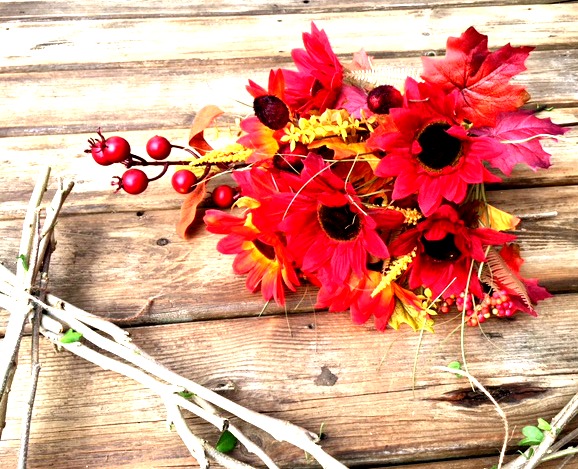
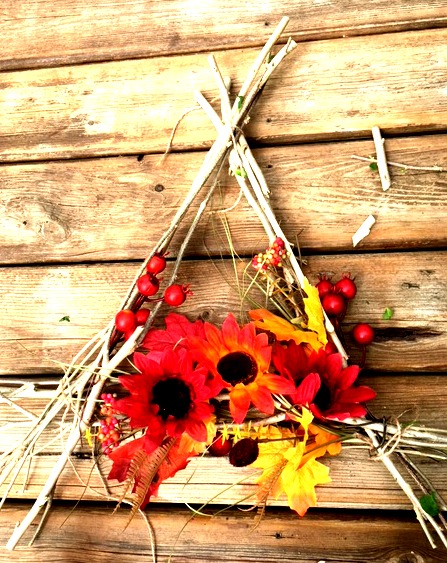
Time to add the flowers. I picked up a few bunches of autumn flowers from the dollar store. I only used a few sprigs from this lovely bouquet. I could easily make a few more of these as gifts (or to put on the craft table at work…of course). I spent about $10 on the flowers and twine so if I made another 3 or 4 that would make them each costing only $3 each. Cha-ching!
I had some thick twine that I used to reinforce the corners. Ribbon or lace would look cool too. Use what ever scraps you have.
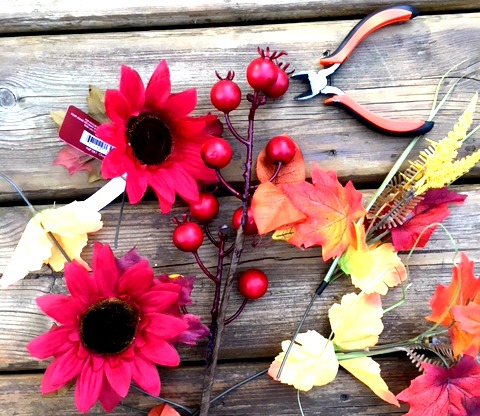
I didn’t need to use a hot glue gun because I wove the ends into the twigs and wrapped the wire of artificial flowers around the twigs. You might want to use a hot glue gun to secure short pieces to the twigs.
Since the sticks make up the base and they are free-from my backyard-this is quite inexpensive. I’ve got enough flowers left to make another 4 of these! Cool…any other neighbours with a bare front door?
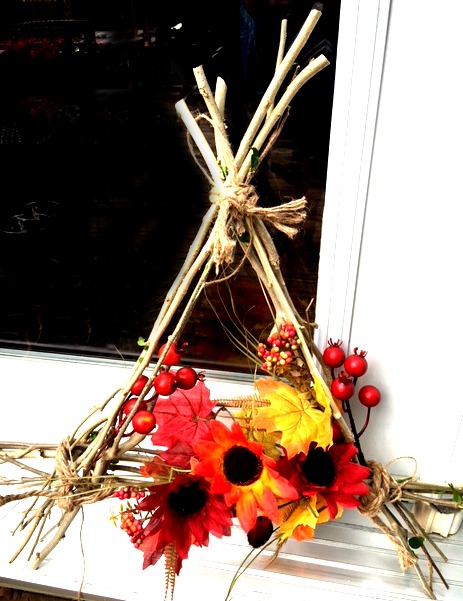
So rustic and woodsy.
Now who is going to clean up the left overs and finish the trimming….sigh…better get back to work.
See you again soon!


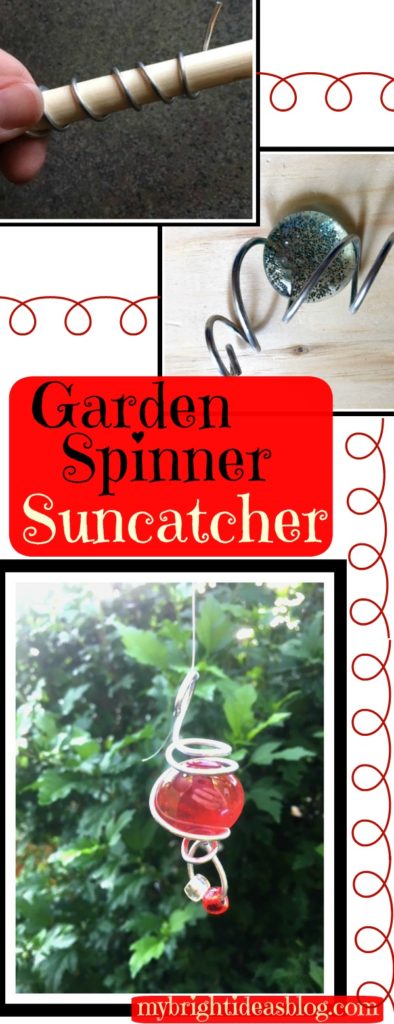
Make an EASY Garden Decoration From Wire, Marbles and Beads
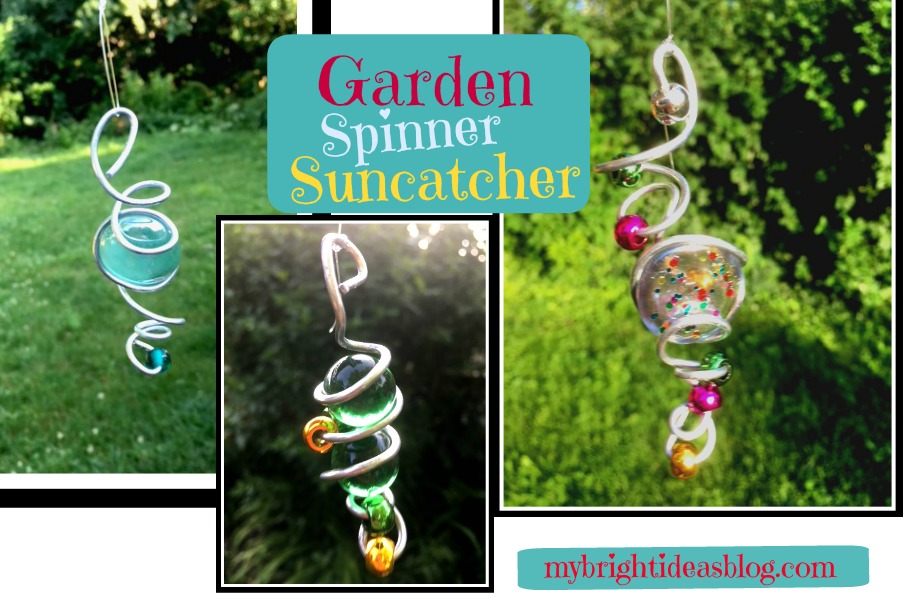 Wire Art – Suncatcher / Wind Spinner
This gorgeous craft will make you feel like an artist and is easily made in just 15 mins! Make it in the summer for the outdoors to spin in the breeze or in the winter hang it in the window as a sun catcher.
You will need:
- marbles, beads, glass stones
- sparkly nail polish
- Galvanized Steel Wire 14 Gauge
- 2 pairs of pliers, one with wire cutting edge or wire cutters
- clear fishing line
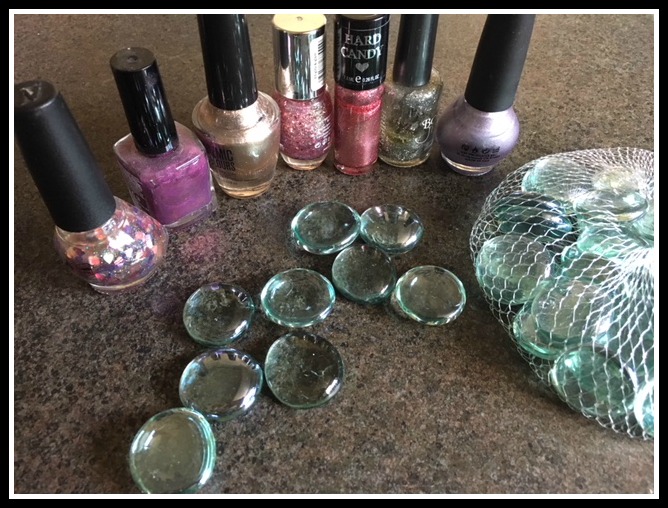
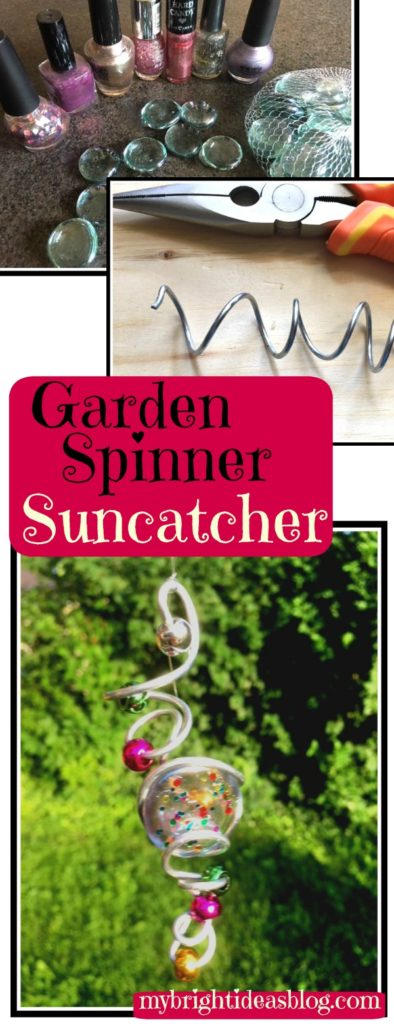
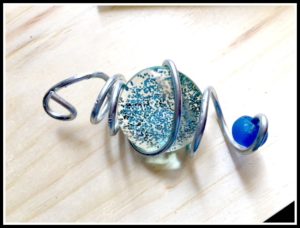
Simply get started with a bag of medium sized flat glass stones from the dollar store. Put a piece of newspaper or wax paper down to protect your work space.
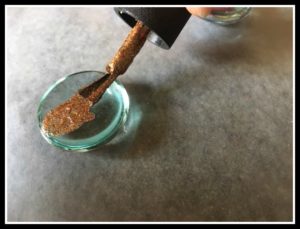
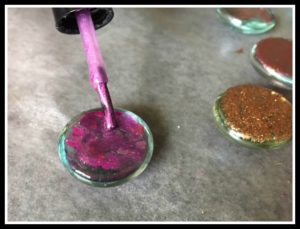
Paint one side of the stone with sparkly nail polish. Allow to dry.
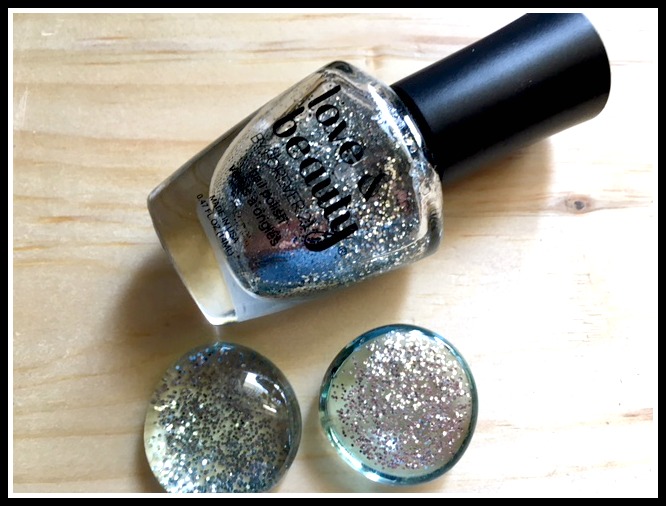
If you paint the flat bottom side of the stone the glitter shines through so you only need to paint one side. You could do a similar effect by putting glue on the stone and dipping it in a bowl of glitter. We went with nail polish which dries so quickly and we have lots!

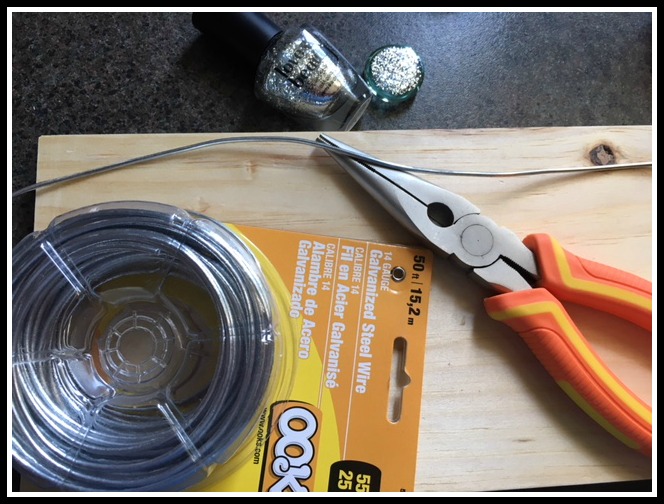
After your stones or marbles are ready, cut a 12 inch length of wire. We used 14 Gauge Galvanized Steel Wire. You can cut your sizes longer or shorter depending on your own preference. At times the ends can be a bit sharp so protect your surface by using a scrap of wood or a cutting board.
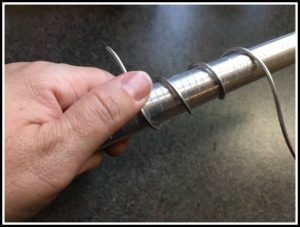
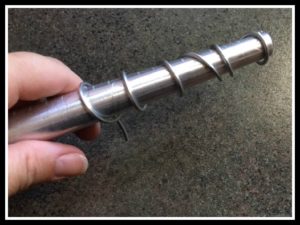
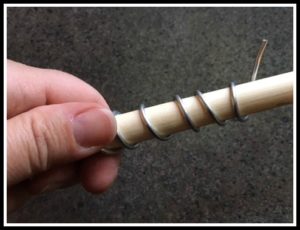
If you don’t have a jewellers mandrel you can look around the house for something similar. I had a wooden dowel that looks just like the handle of a wooden spoon. Find something to wrap the wire around and use the pliers to further twist and squeeze the wire into the desired shape.
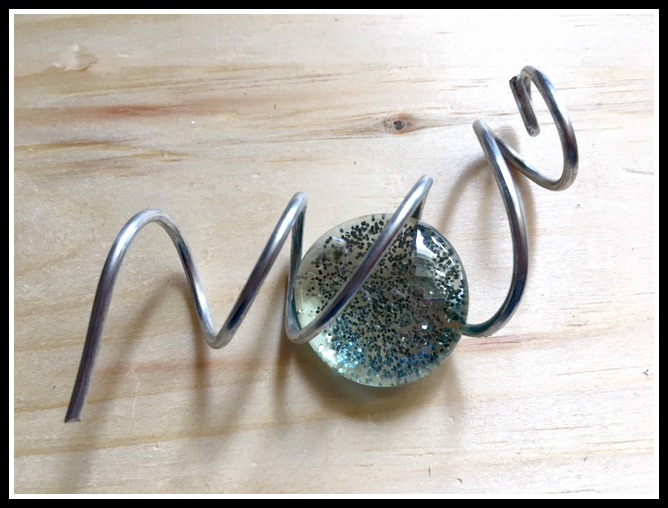
Using flat glass decorative stones will require you to flatten the wire slightly to hold it in place. If you are using marbles the twists will be nearly perfect for sliding the marble in and pinch the wire slightly to hold it in place.
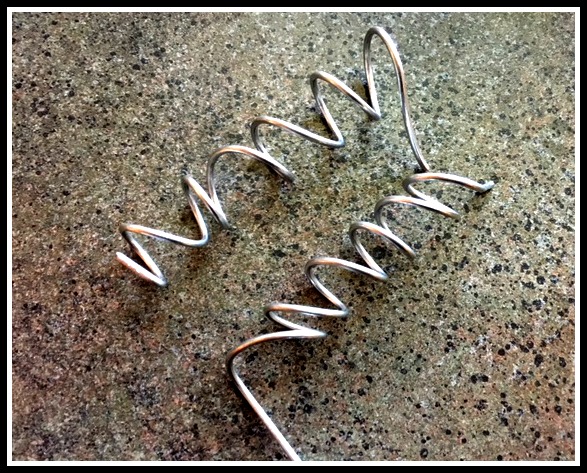
 My first attempt at this was a bit frustrating. As I pulled one part of the wire the shape would change and the stone would fall out. But then I got the hang of things. Once you see how cool it looks as the spiral gets a bit crazy it feels like your making a real piece of wire art!
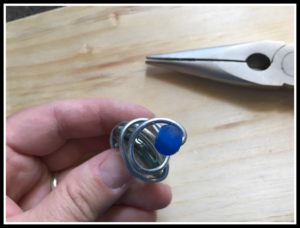
You may need to use a use both of your pliers to twist the wire how you want it. This will help to focus bending a particular section of the wire without affecting another part of it that you are already happy with.
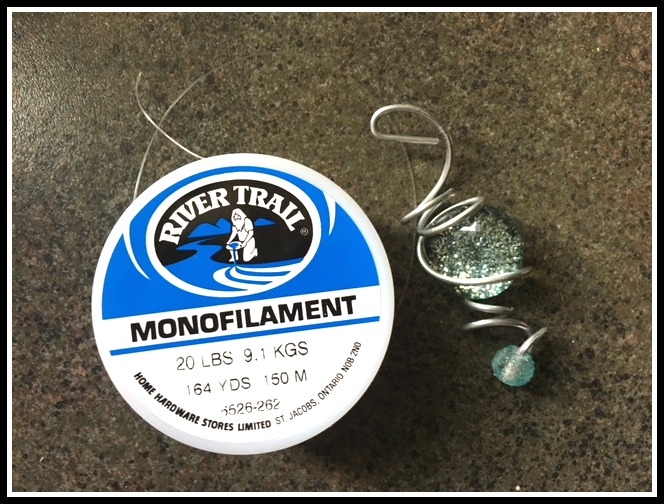
Cut a length of clear fishing line. This is a must have for your craft supplies if you don’t already have it. You can get fishing line from the hardware store, craft store and dollar store. It has many uses including bracelet making or hanging decorations from the ceiling when your having a party.
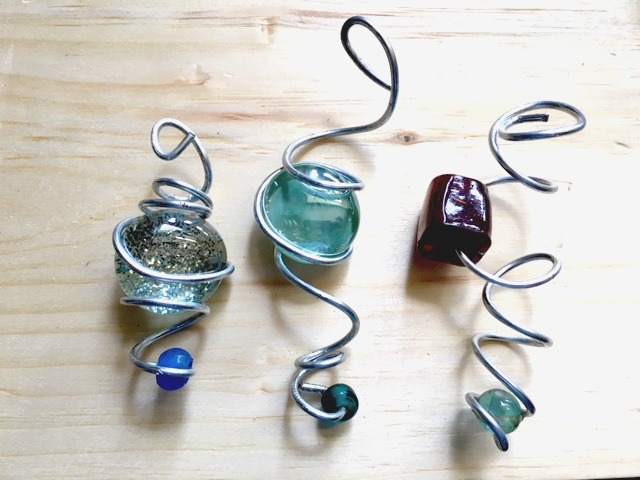
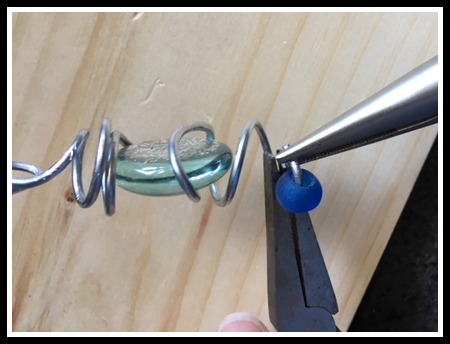
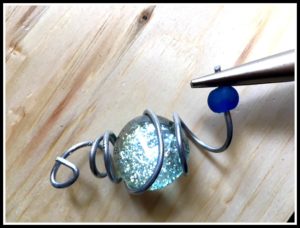
I like how each one turns out completely different. Shape the wire in a tight spiral or loose and whimsical. Add a bead on the end. Or several beads throughout the wire. Use a giant bead instead of a flat stone. Or use marbles!
These are dollar store marbles that you might put in the bottom of a vase. I need to locate some play marbles and see if we can find some cool ones.
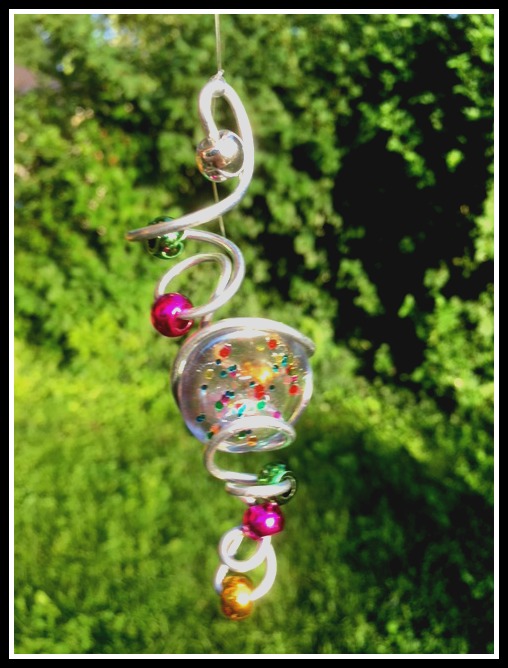
These shiny beads are metallic pony beads and very inexpensive (around $3 from Walmart if I remember correctly)For this wire project the hole needs to be fairly wide. Choose beads with big holes if you are using glass beads. I had these left over from a previous bracelet making project. The nail polish used here is a speckled multi coloured one. It looks fantastic in the sun!
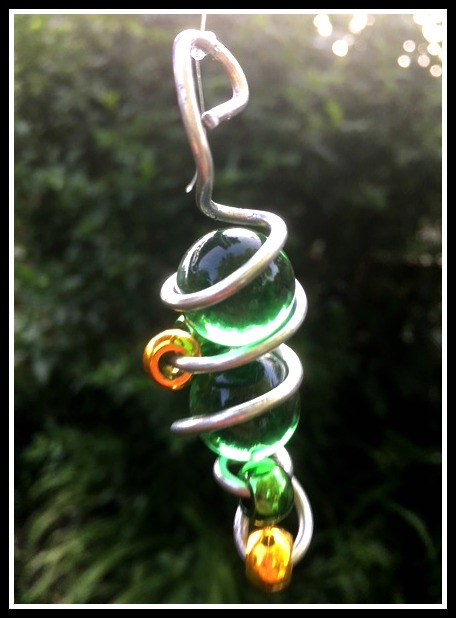
So there you have it! Every one of these turns into a unique bit of wire art. Hung from a branch with fishing line will have it spinning in the breeze.
I hope this inspires you to make some wire art suncatchers/wind spinners for yourself. I just made 10 and I’m so pleased with these I think I will keep on making them and try selling them at the craft table at work.
Don’t you love it when a craft exceeds your expectations! You really should try this!

…