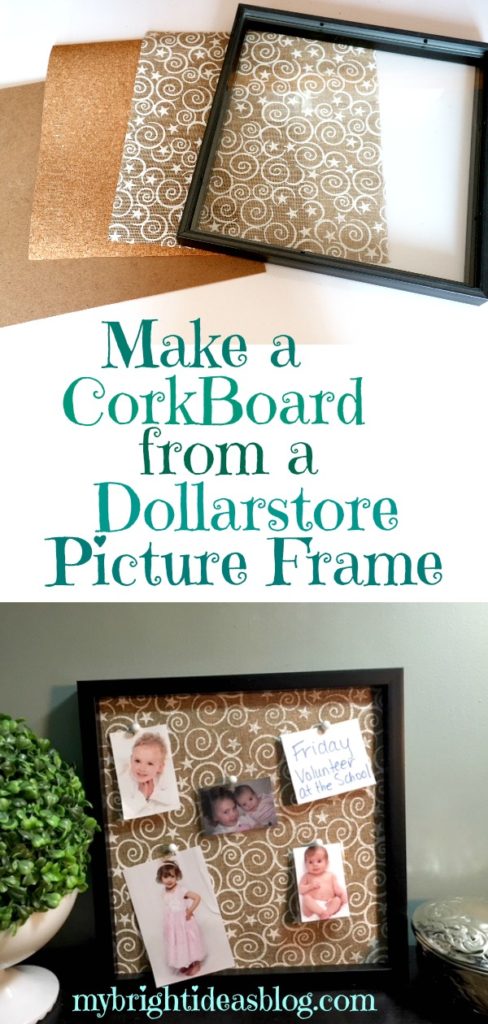
Hello again! Today’s project is all made from Dollarstore items! Its a bulletin board or corkboard-covered in fabric! The Dollarama Stores near me are getting great craft items. They are no longer everything in the store is $1 but they are getting better quality items and still much cheaper and closer than going to my local craft store.
For this project I purchased a very modern photo frame for $4, a roll of cork $3, a roll of jute (this one had a white painted design) you could use fabric for this instead. Additionally, you will need your scissors, ruler and hot glue gun and some cute tacks to post pictures or notes to it.
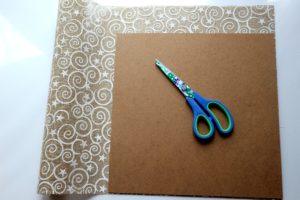
The frame I used was square 12×12. Take off the backing and remove the glass from the frame. Use the backing to trace and cut the cork to exactly the same size. Next cut the fabric larger than the backing. Make it an inch wider all the way around so you can wrap it around the cork and board and secure it on the back.
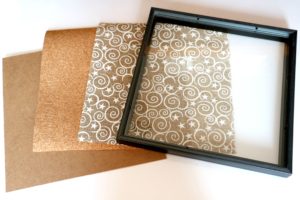
Now stack the layers-the board on the bottom, then the cork, then the fabric-and push it into the frame. Pull the fabric in tight. Everything should be snug.
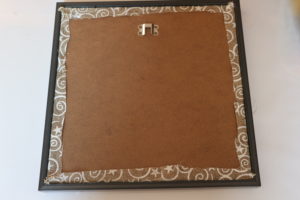


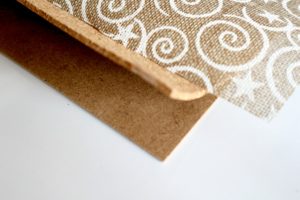
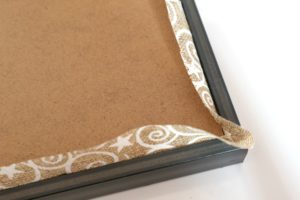
Hot glue the fabric flat-close to the edge and trim off extra fabric. Fold the corners so it is tidy with a mitred look. Find some little pictures and cute push pins. At the moment I have it leaned against a wall on a side table but it could be hung up on the wall….in fact-there is plenty of supplies left over to make more frames and put a collection of 2 or 3 on a wall! I just took down some shelves and know just the place!
All in all this is a 10 minute project with a cost of about $10 with left overs to make more projects. It was a success!

…
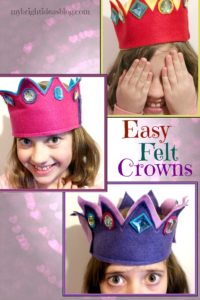
Sew a Super Easy to Make Felt Crown – Add to your dress up clothes!
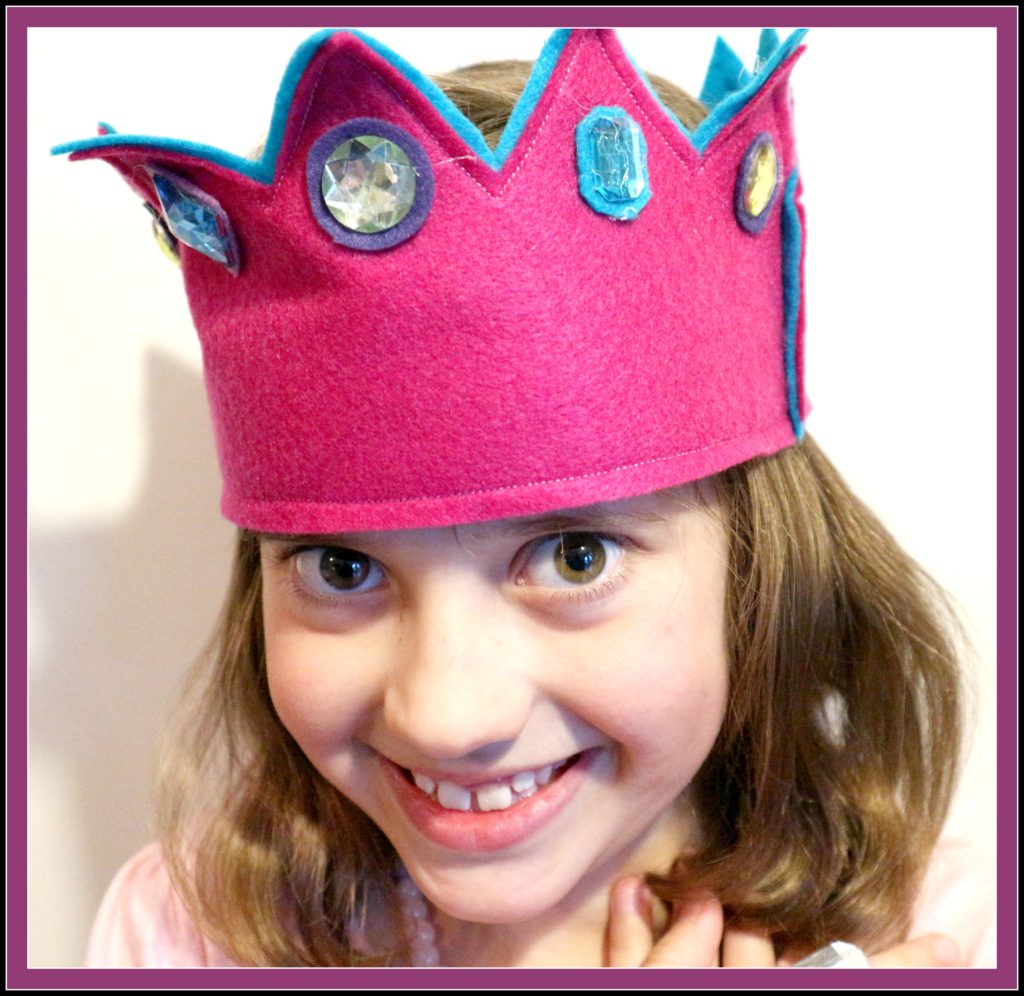
How to Make an Easy Felt Crown!
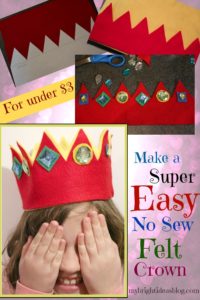
I went to Dollar Tree this time to get a few time things and got these vibrant colours of pink, 2 shades of purple and turquoise. They charged $1.25 which is a lot more than Michael’s $.59 each. But I was there and the colours were so appealing….A piece of craft felt can cost $.50-1.25 depending on where you are buying it. For each crown you will only need 2 rectangles of felt-I used different bright colors. You will need some gems, scraps of felt and your hot glue gun, This time we are going to use the sewing machine.
If you would like to use do this project without sewing follow this link….http://mybrightideasblog.com/make-no-sew-felt-crown/
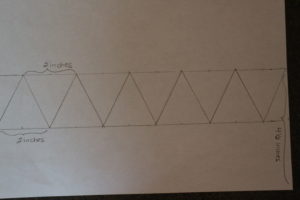

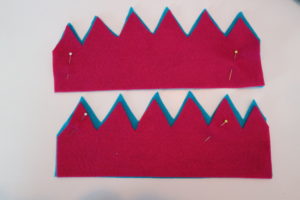
Make a template using an 8 1/2 by 11 standard piece of paper. Measure 4 1/2 inches from the bottom and draw a line. Draw another line 2 inches below that. Put a mark every inch along both lines. Then using your ruler create a zig zag. This measurement should make it possible to do this twice on a felt rectangle that measures 9′ x 11 1/2″. To make sure you don’t cut into the other half you could cut the felt in half lengthwise before you cut the zig zag, If your felt isn’t as wide as mine just shorten the bottom portion of the template…it doesn’t need to be that thick. Do the same with the second color that you have. This extra layer will stiffen the project so it can support the gems. It also makes it really pop with the extra color.
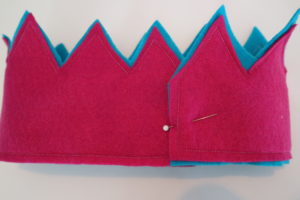
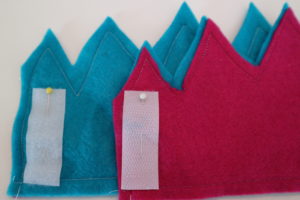
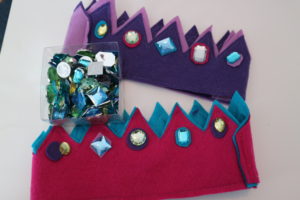
Next overlap the two colors a bit and pin them together. Sew all the way around the bottom, side, zig zag and other side. Overlap one side to the other and sew a seam to connect them. The other seam will be open so pin Velcro strips so the size is adjustable and easy to get on and off. If you don’t have Velcro you could just fit the crown to the child’s head and sew that seam too. Cut pieces of felt out of scraps to place under the gems. Using the hot glue gun, glue the felt to the crown and the gem on top.I only put gems on the front of the crown, but you could put them all the way around. You could also add a strip of ribbon or gold trim around the bottom to decorate it further.

Sewing Diy- Extend the Length of a Short Top with Lace
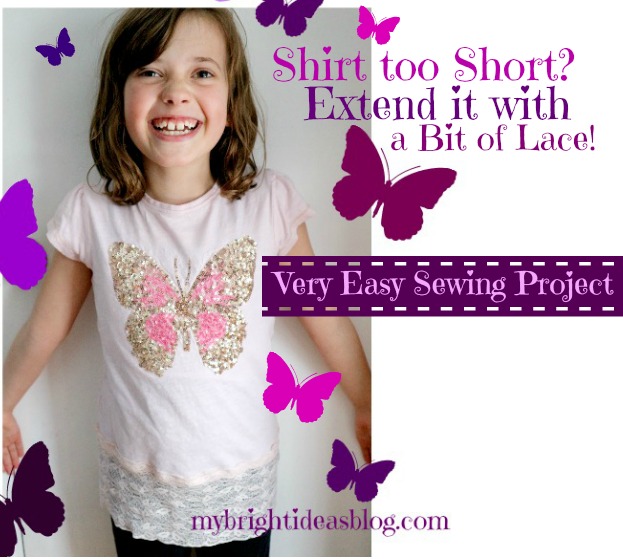
Have you got a great shirt that has gotten too small and you aren’t ready to say good-bye to it? Adding a bit of lace to the bottom is so easy and will make all the difference on how much longer it will work for you. Great for growing girls….also helpful for adults…I have a 100% cotton tank top that is going to have a similar extension as it now is a crop top…just from regular laundering it shrunk inches!
For this project you will need:
An awesome shirt you want to save
A piece of stretchy lace that will be as wide as the top
Sewing machine, thread, tape measure etc etc
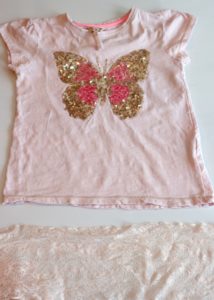
Iron the t-shirt and the lace before you start. This lovely, shimmery, sequin butterfly top is 14 inches wide (36 cms) along the bottom seam when laying flat. So the lace would need to be 28 inches (73 cms) wide plus one extra inch (2.5 cms) for a seam allowance. Check to make sure this will be a good match in width.
 Fold the lace in half and sew the edges together. Turn it inside out.
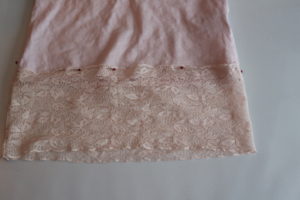
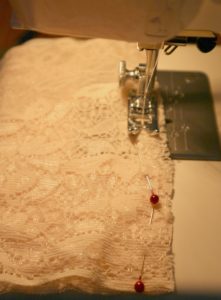
Lay the lace on the bottom of the t-shirt and decide if you would like to sew it on top of the bottom edge or underneath. My lace has a nice look to the top so it didn’t need to be hidden. Lay the lace down flat and put a pin on each end…this will help you to line up the pin to the side seams.
I pinned the lace on top of it all around the top. After I took this photo I decided that the t-shirt would be on the left of the sewing machine so all the pins needed to be turned around. Since the t-shirt and the lace have some stretch you can pull and stretch it a bit if things aren’t lining up well. After you sewed all the way around you are done. Try it on. Can you believe that only took you 10 minutes!?!? Well done!
We love this sequin butterfly top enough that we would probably cut the butterfly off and sew it onto another shirt when its just too small.


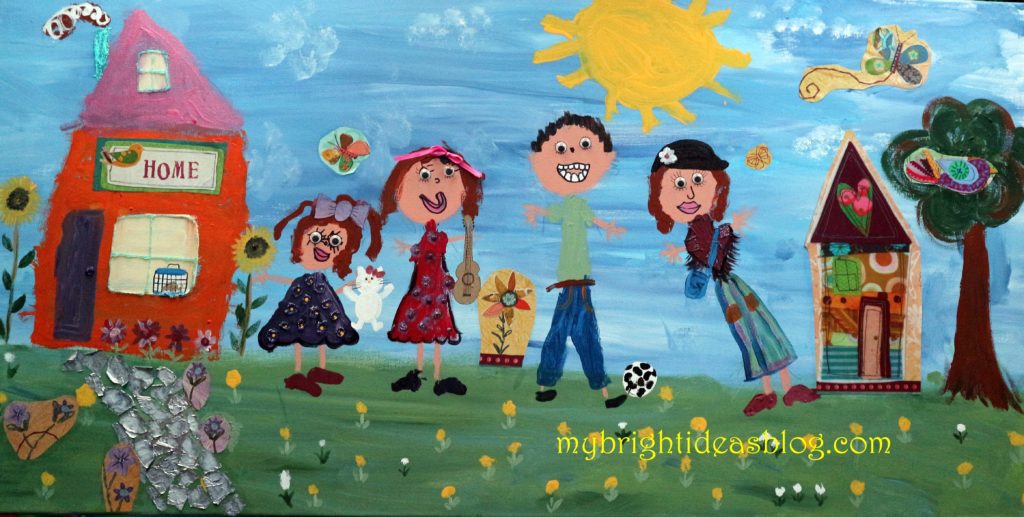
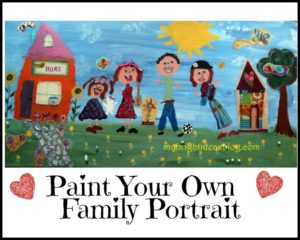
Family Self Portrait Painting by Everyone – So original!
Family Self-Portrait Painting – The whole family made together!
Years ago I had this calendar that had really nice pictures in it of fabric birds and butterflies. I thought the photos were so nice that I would cut them out for card making or something….I just didn’t know what.
One day I came across the file folder and clippings and a light bulb came on! Maybe I could use it on mixed up painting/collage of sorts, and it would decorate our play area. I got a big white canvas…..dimensions 20 inches by 39 inches but you could make this much smaller…an 8 x 10 maybe…using sharpies instead of paint brushes…
First, I started out by drawing the circles for the heads and then had each family member decide how to draw their face and hair and body. After Miss M…quite an artist and then only 3 years old….after she drew my body for me quite sideways I had a bit of correcting to do.
Mommy was going through a bit of a hippy fashion stage so we painted me in a poncho and typical clothes I though I was pretty hip. Daddy likes soccer, the color green and hates dandelions which I actually like…so that is why the we have yellow dots on the ground. Tee Hee!
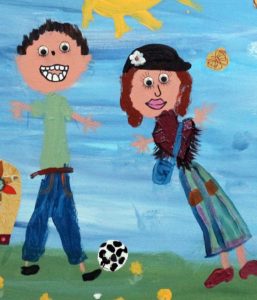
Miss B was taking classical guitar at the time so we painted that in and Miss M’s favorite stuffy…Hello kitty! Also we had a hamster named Happy Homer so he is in the window of our house. M loves sunflowers and I like crafts made out of tin-foil (so shiny!) so I put that in the path.
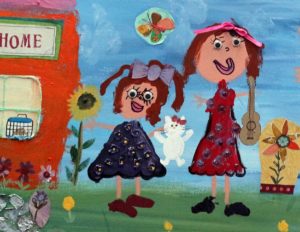
I actually could have added all sorts of things from the craft cupboard to make this even more interesting but I think the family lost interest. Cotton ball clouds, gold glitter glue on the sun….the pink roof could you sunflower seeds for texture…