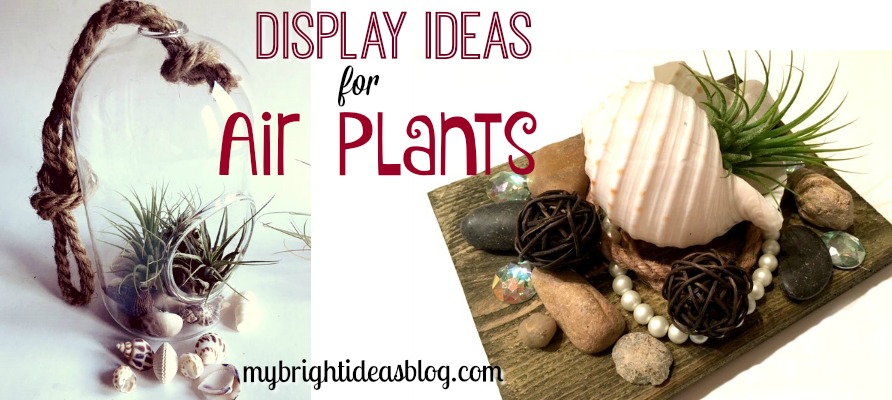
Have you gotten on board with the Air Plant craze? Air plants, are small aerophyte plants that do not need soil to grow. They absorb moisture from the air and indirect light for sustenance. The perfect plant!
Since air plants have no need to be in a pot of soil they can be put almost anywhere. Just so long as you remember to dip them in water once a week and allow the water to drain off.
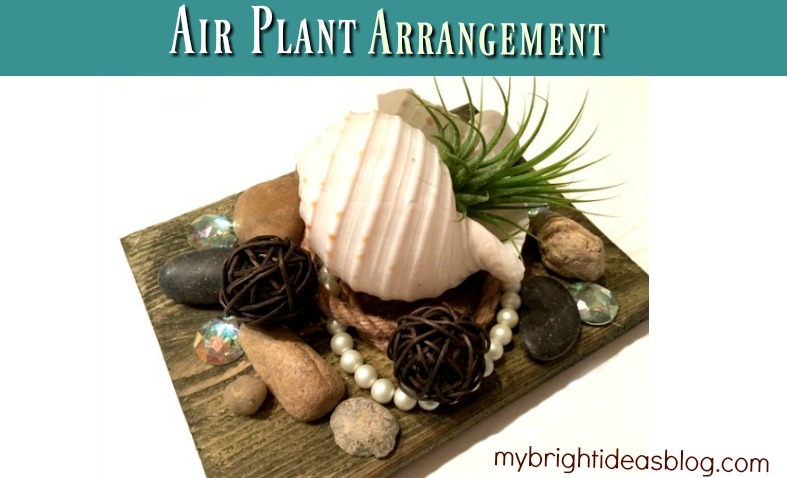
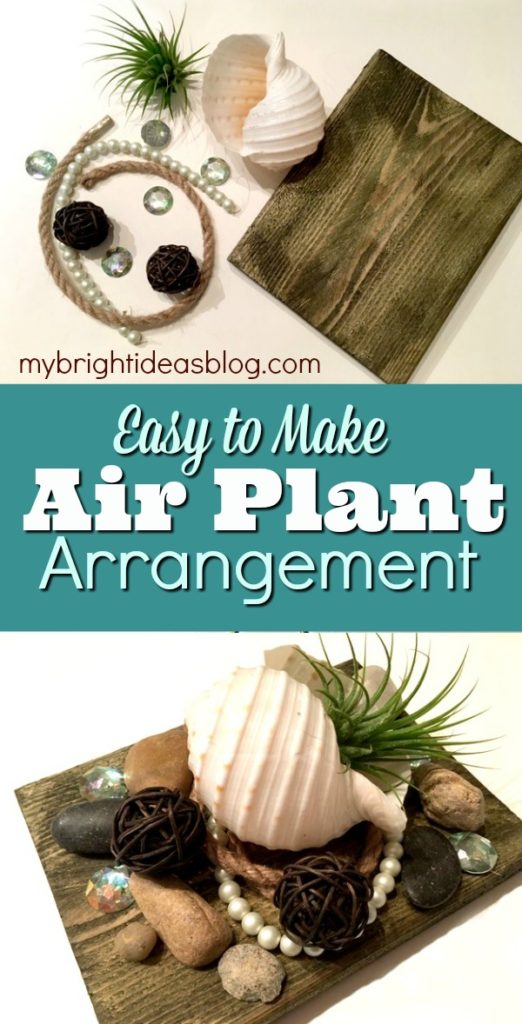
Today I’ll show you how to make an easy arrangement that looks a bit nautical by putting the air plant into a sea shell and accessories on wood or a plate.
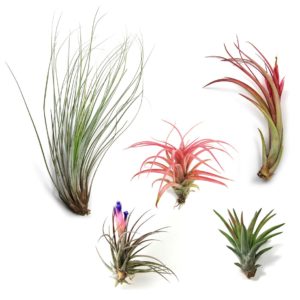
I found my first air plants at the garden centre this past summer and then spotted a shop in the local mall selling them. The ones I have access to sell for $4-$10 each.
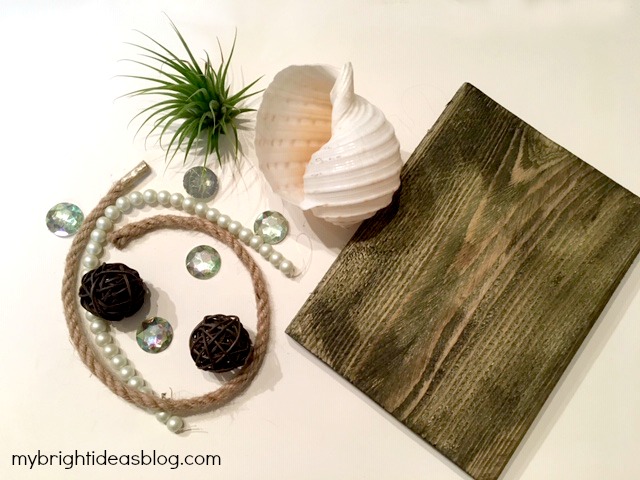
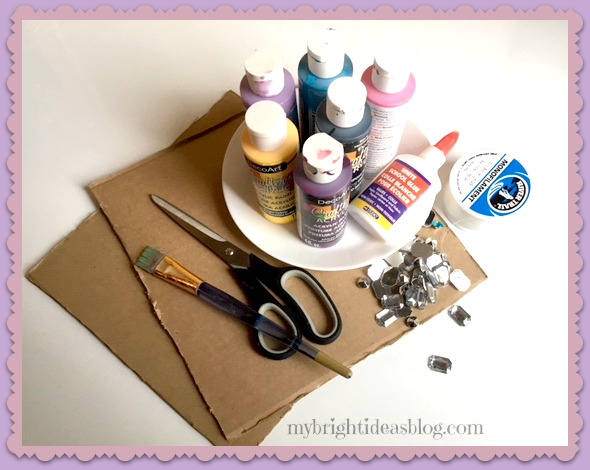
To make this you will need:
- an air plant
- a big shell
- nautical themed items: rope, glass gems, pearls, stones
- a block of wood, plaque or glass plate
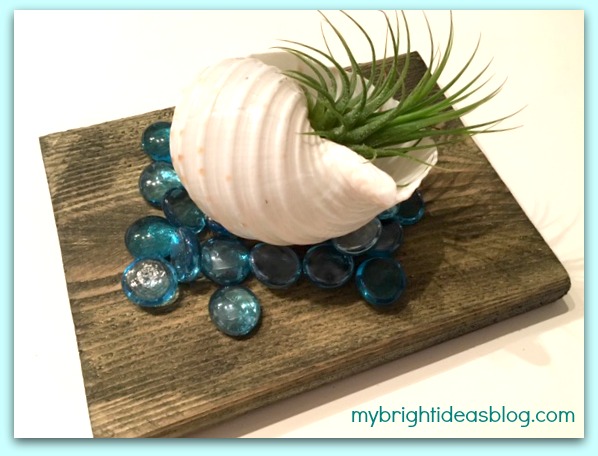
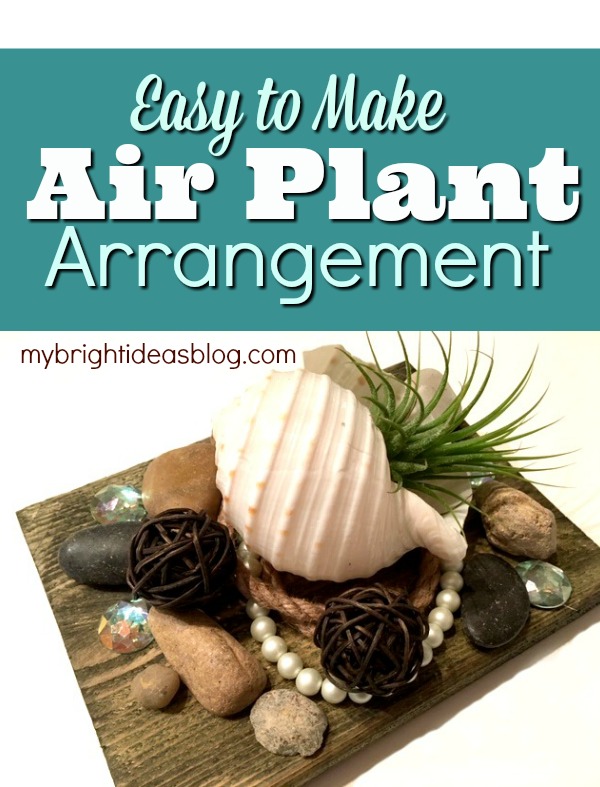
I always have scrap pieces of wood around in case of a sudden project inspiration. For this project I used a scrap approximately 6 inches by 6 inches. If you have a pretty plate you could easily use that too. I am tempted to check the thrift store for a beautiful, antique plate. For this first photo I just used turquoise glass gems.
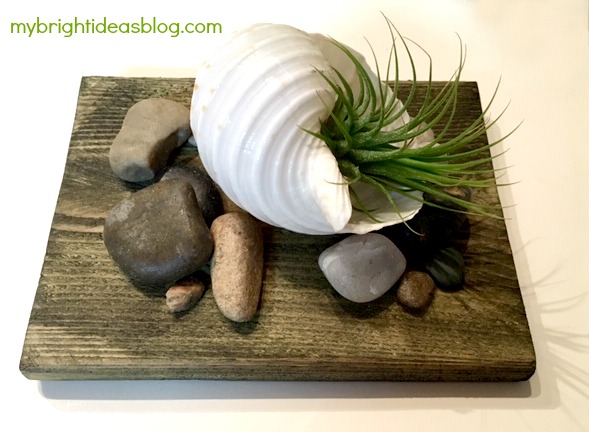
For this attempt I used river stones around the shell. I got them from the dollar store and the same with the gems.
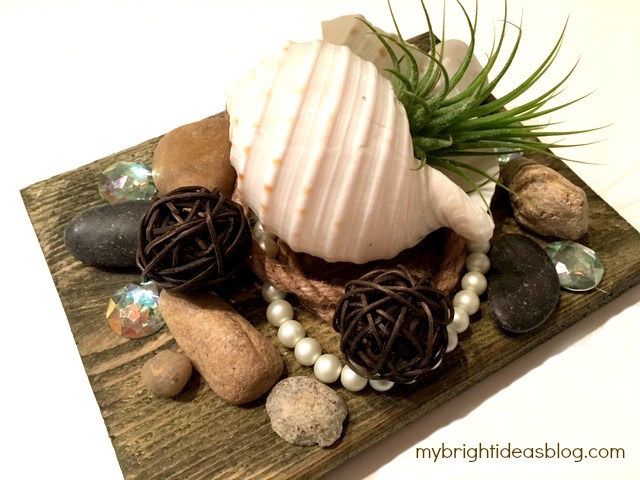
By adding pearls and rope with craft gems and stones I thought it turned out really nautical. Since none of these are attached to the board we can re-arrange them into another craft if I get tired of this one.
Here is another idea!

The photo above shows 2 popular air plant display options. The one on the left is plastic and from the dollar tree for $1. I wish I had bought 10 at that price since they were hard to find again. The one on the left is glass and from the garden centre for $8.99.
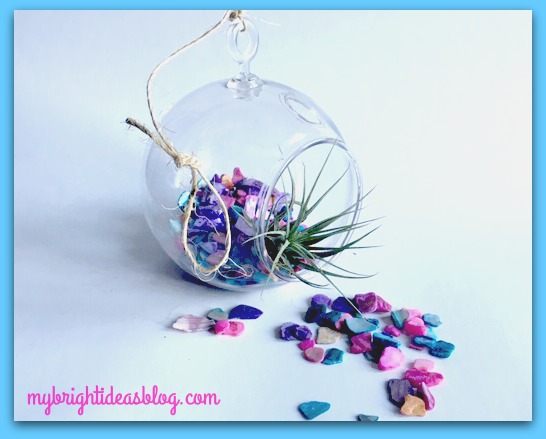
I used chips of shells that have been dyed for this one. Air plants make great gifts. Since this is plastic and needs very little care it would be easy for a child to care for or a friend in senior care.
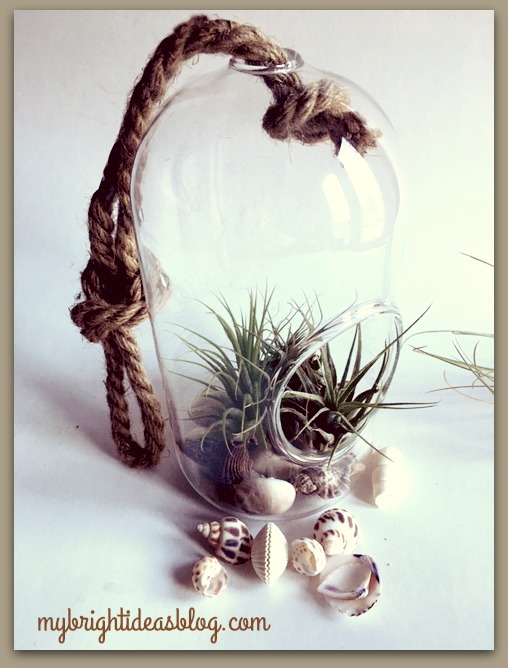
This one I used random shells in the base of the glass dome. I love the chunky rope and shells together-its very beachy.
I’m really excited to try some of the other plant ideas. I’ll let you know if they turn out well! Below are links to some of my other projects!
Nature Craft – Perfect for Earth Day Activity – Clay Imprints with Plants and Flowers
Plant Puns on Painted Potted Flower Pots – Adorable Gift Idea to Make Them Smile!
Toilet Paper Roll Daisy Wall Art
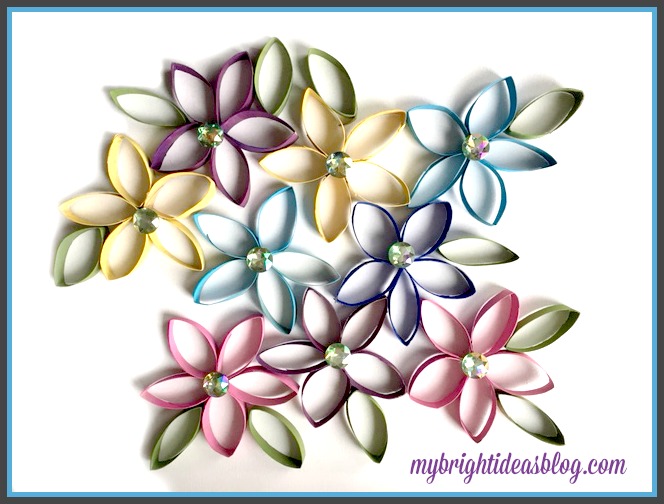
Last year I did a post on making daisy flowers out of toilet paper rolls. I do love to save my toilet paper rolls for crafts so I had plenty more to continue on with more flowers. So this time we are gluing the flowers to a canvas and making a picture to hang in a little girls bedroom.
You will need:
- large white canvas
- 9 toilet paper rolls
- hot glue gun and glue sticks
- craft paint and paint brush
- big gems
For this project you need a plain white canvas from the dollar store ($4). Everything else you likely have in your craft cupboards. I followed the same instructions from the previous daisy toilet paper project. Each daisy makes 1 flower plus 2 leaves.
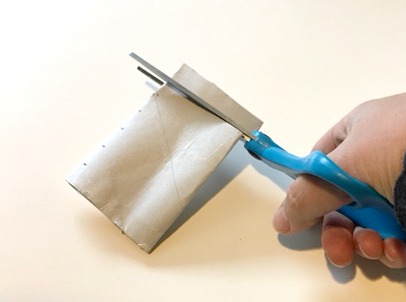
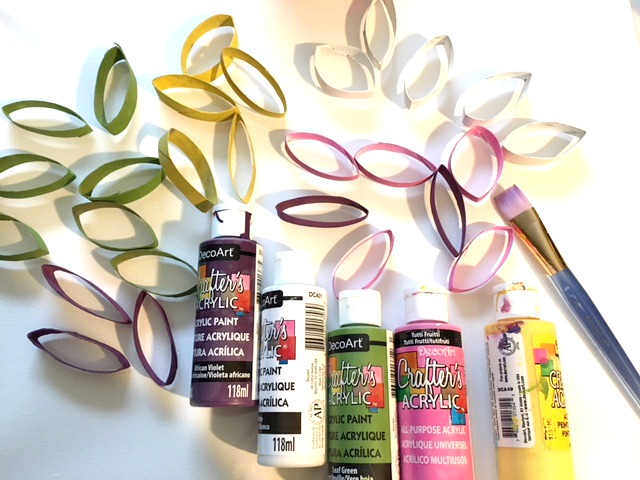
To make this I used 9 toilet paper rolls. I painted: 2 purple, 2 pink, 2 yellow, 2 turquoise and 1 royal blue. I cut the rolls first and painted after. But you might think its more efficient to paint first and then cut and then touch up the edges afterward. Fortunately , the paint will dry quickly.
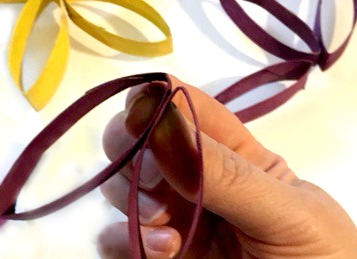
 Flatten your toilet paper roll.
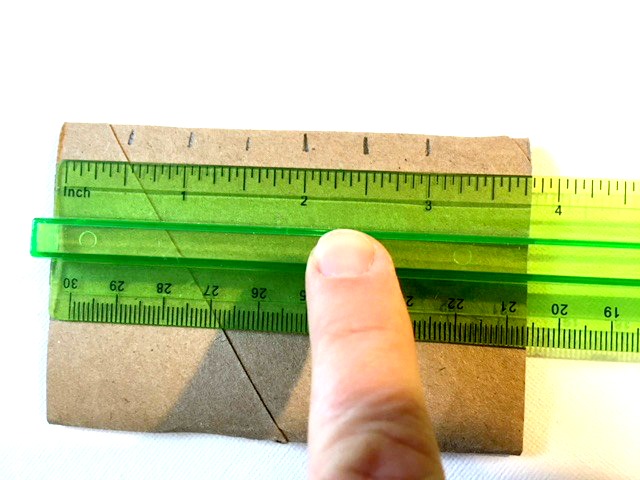 Mark cutting lines 1/2 inch apart.
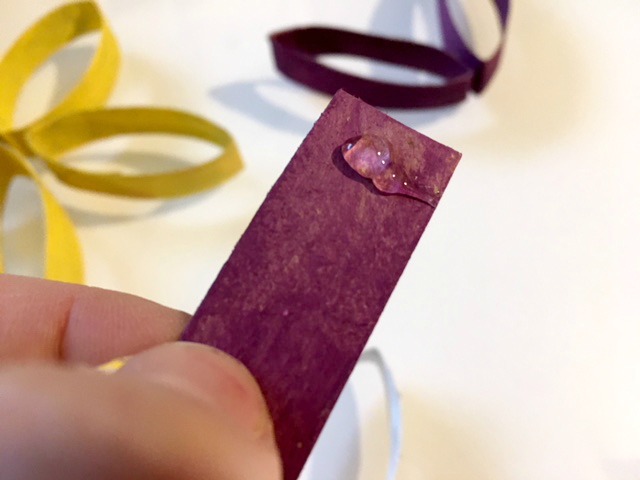
Pinch two petals together. Hold a few seconds while the hot glue dries.
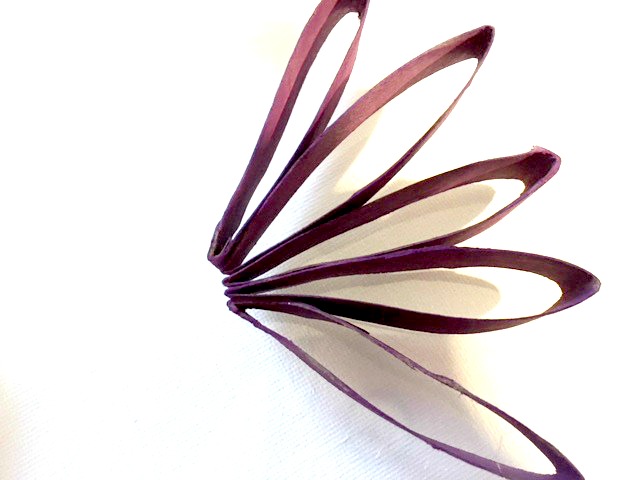
Glue and pinch all 5 petals together. Pull the two outside petals toward each other and glue them together.
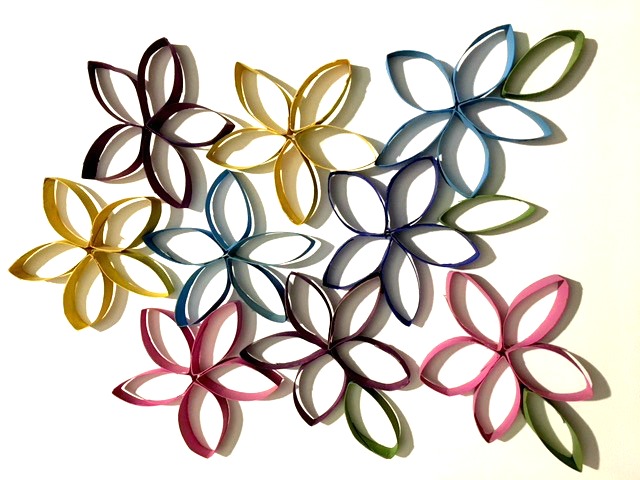 Lay out your flowers and leaves and add a dab of glue to attach them to your canvas.
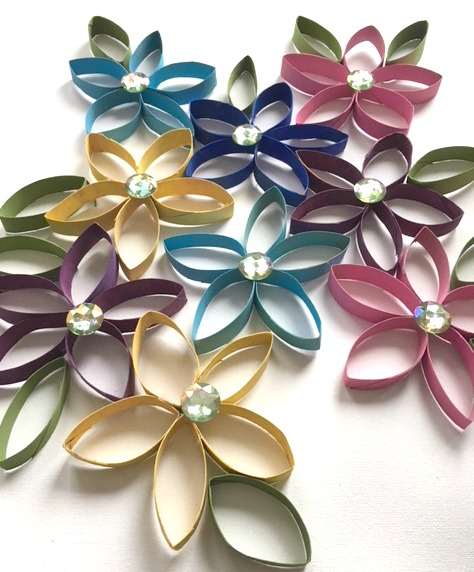
Add a big gem to the centre and attach with hot glue.
Hang your canvas on the wall. Super easy! If your young child is going to do this, please help with the hot glue gun or use white glue.
Look below for more toilet paper roll and Springtime craft ideas!
How to Make Spring Flowers Craft From Painted Toilet Paper Rolls
Toilet Paper Roll Crafts-Use your loo roll tube for easy Crafts!

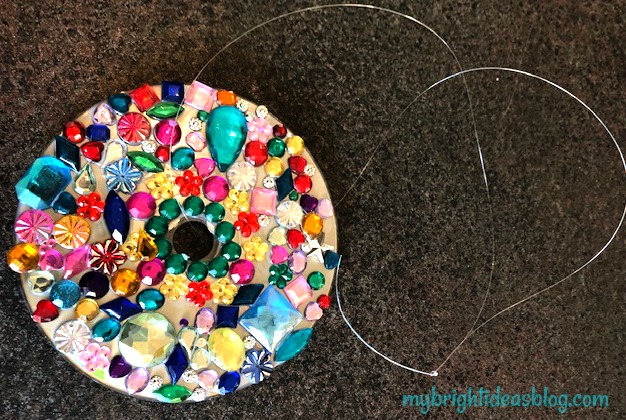
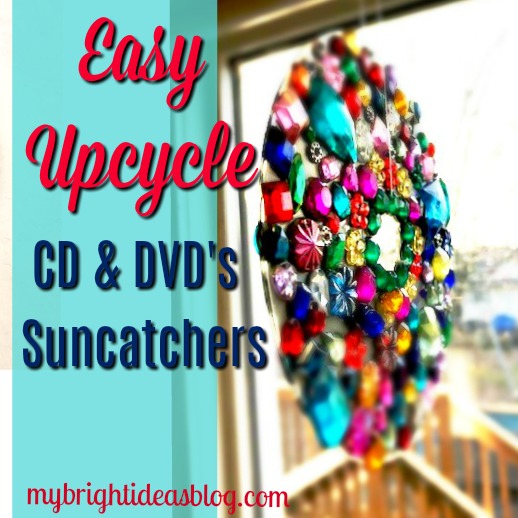
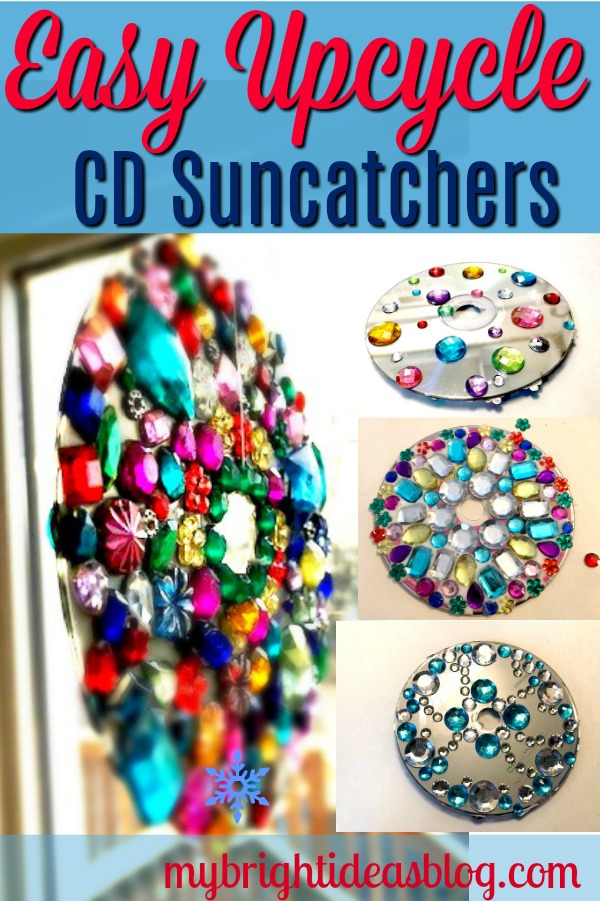
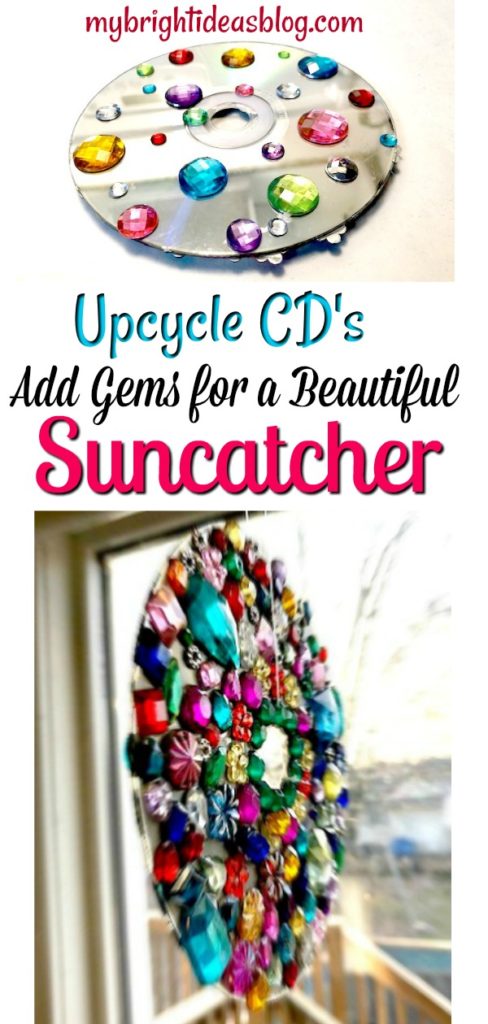
Upcycle CD’s into a Gem Covered Suncatcher
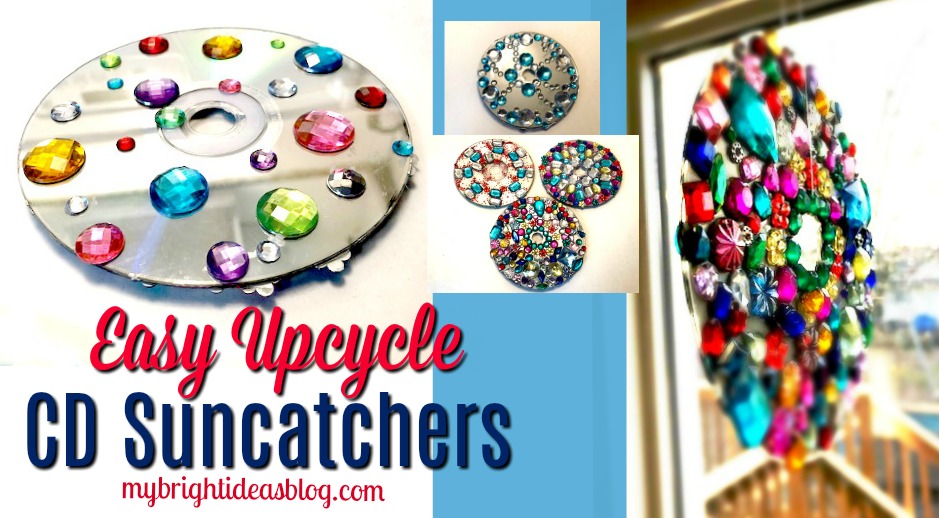
Have you got a collection of CD’s and DVD’s that you no longer need? Make a craft with them! There are loads of CD Upcycle ideas out there. Today we are going to turn a few old disks into beautiful suncatchers!
It’s midway through the Winter break for the kids, so we are looking for easy kids crafts. You will likely already have all the supplies for this craft in your cupboards.

You will need:
- Gem Stones
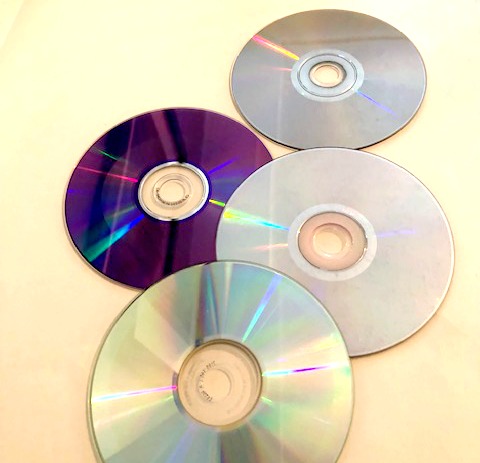
- Old CD’s or DVD’s
- Craft Glue
- Fishing Line
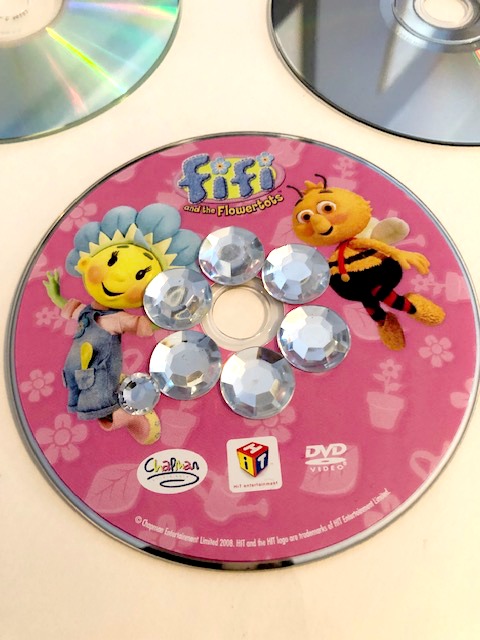
Have you seen Fifi and the Flowertots? It’s a super cute British kids cartoon. This DVD was sent to us from family in England. We watched it for years. We decided we are finished with this disk and it’s the first one to get glamourous.
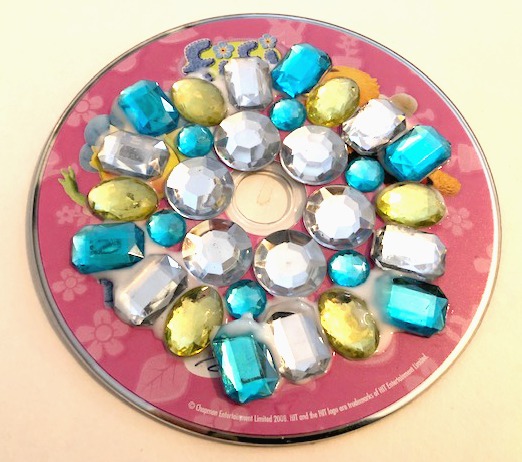
This disk has pink showing through which makes it original. Simply glue your gems to the CD.
It looks really pretty if you can make a pattern with the gems.
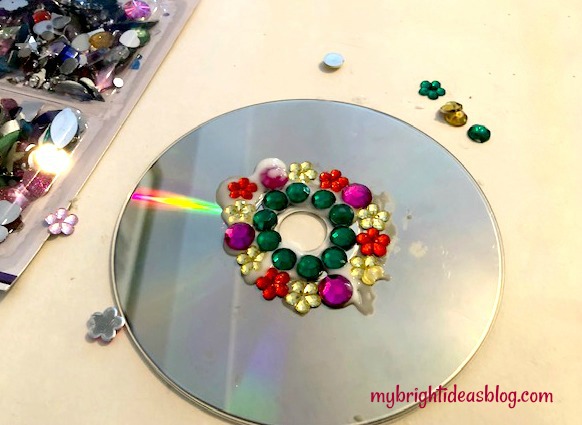
This one started out organized but then things got very random.
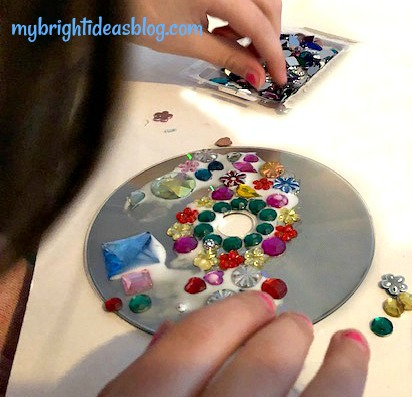
The sparkle of the CD’s plain silver side will look fantastic spinning in the sun. Adding the gems makes a beautiful combination.
Okay it looks like a mess here but when it’s done its dazzling!
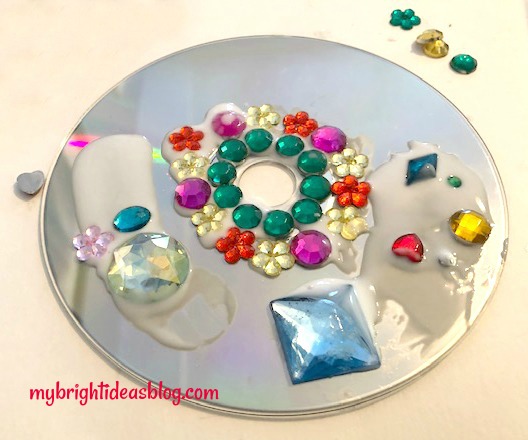
This is full of variety in sizes and random colours and it looks beautiful!
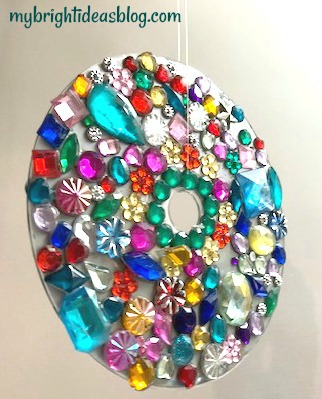
There is no need to drill a hole to tie it up. It already has one! Cut an arms length of fishing line, insert it through the Cd’s hole and tie a knot.
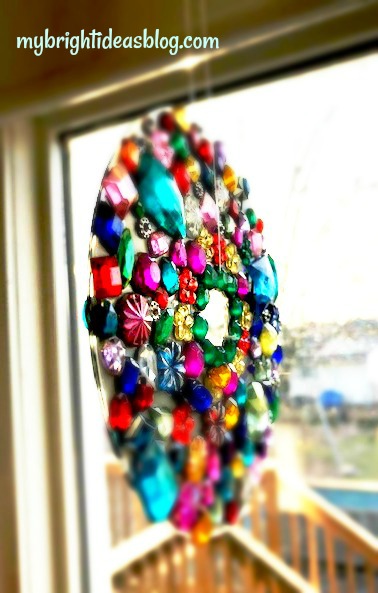
Hang it from the kitchen window and wait til you see the sun hit it!
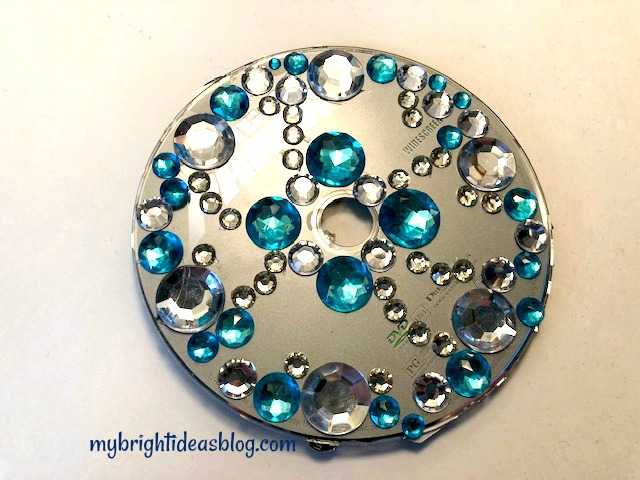
This shows that your CD upcycle doesn’t need to be full of gems to look good. This one required no glue since the gems came on a page of gem stickers. No mess! Also, its quick-no need to wait for glue to dry.
Flip it over and decorate the other side.
This could be a great craft for a camping trip! Gem stickers, old CD’s, and ribbon or fishing line.
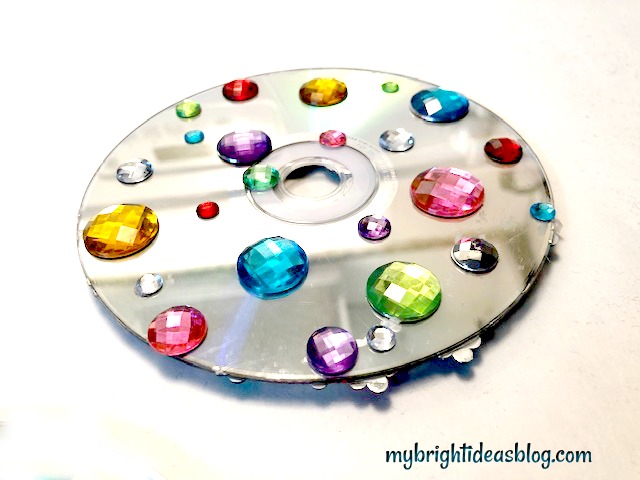
This was done with stickers also. Do you have a pre-teen who babysits? This would be a great craft for the babysitter to take to their babysitting job. I loved it when we had a young babysitter arrive with projects and crafts for the kids. Very good business plan kids!
This CD and DVD upcycle craft is a project you will really enjoy doing with your kids! I could see this given as a gift from the kids to their grandparents….or a sick friend or a teacher gift.
Have a look at some other suncatchers I’ve already done.
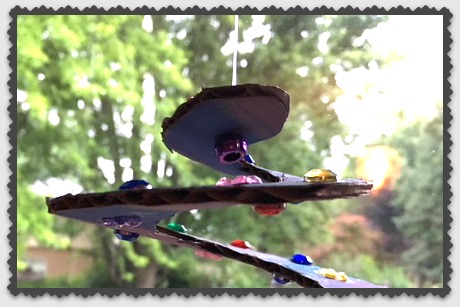
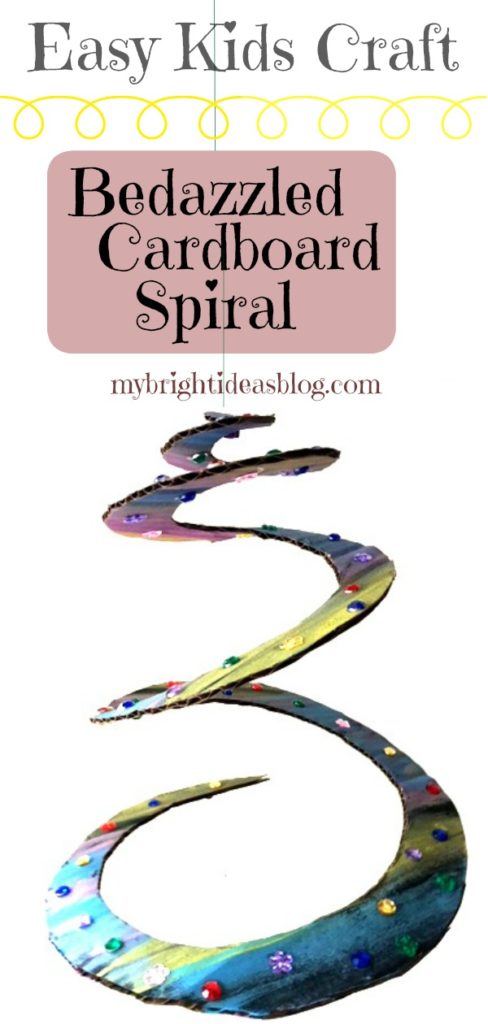
Cardboard Spiral Craft – Easy Kids Project
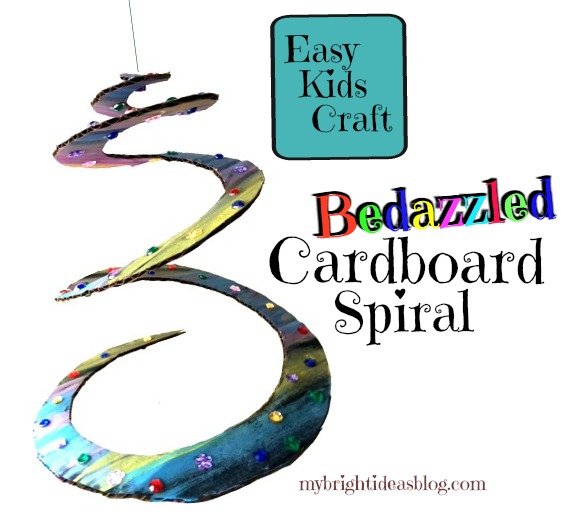
How to Make a Spinning Cardboard Spiral-Easy Craft!
This idea will be a hit with kids as young as toddlers to pre-teen. It’s likely you already have all the craft supplies in your cupboard which makes it the perfect anytime craft.
 You will need:
- cardboard
- scissors
- glue
- paint
- paintbrush
- gems or stickers
- yarn or fishing line
- one pony bead or small bell
- pencil
- plate to trace the circle
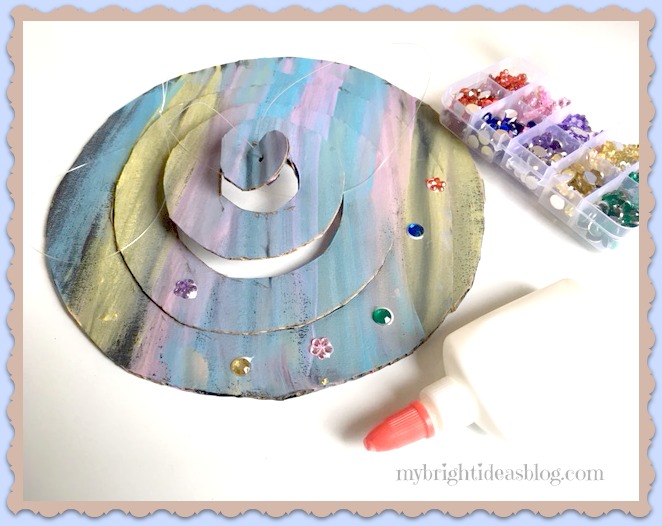
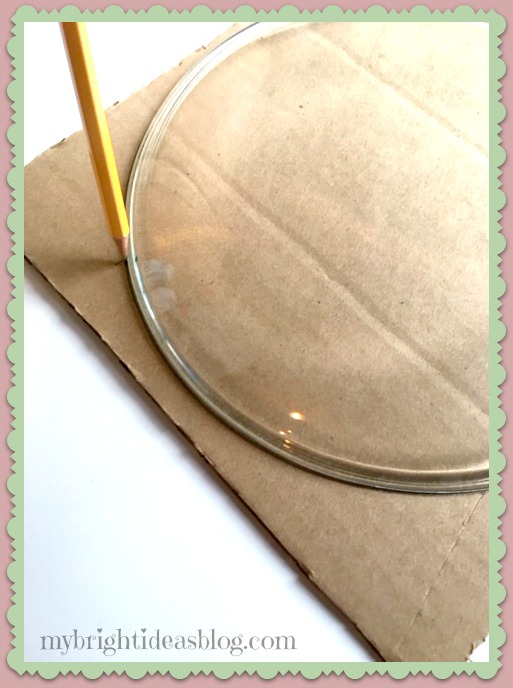 I started with a square piece of cardboard about 11 inches x 11 inches (27cm x 27cm) wide. Trace a 9 or 10 inch plate (20cm wide plate) on the cardboard for a perfect circle.
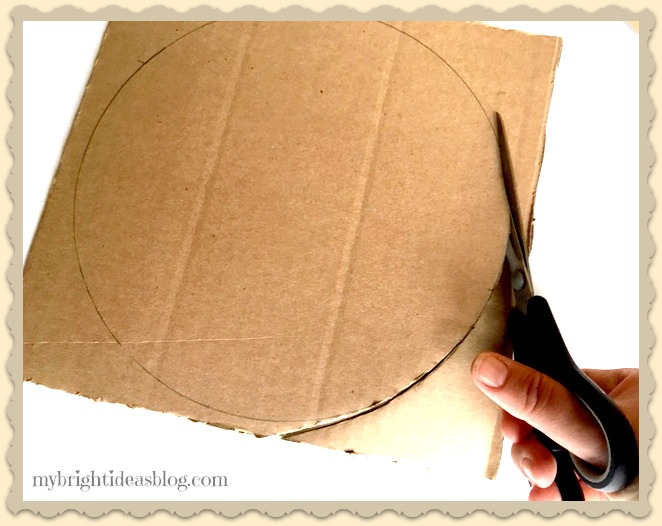 Cut the circle from the cardboard. This is not a job for the little kids. Big scissors and strong hands are needed for this part of the project.
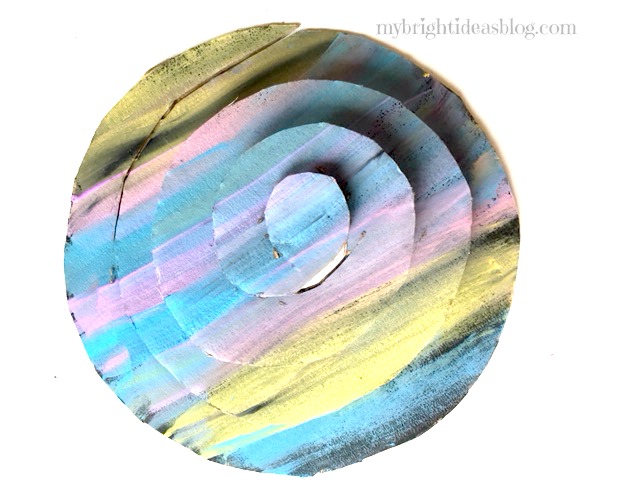
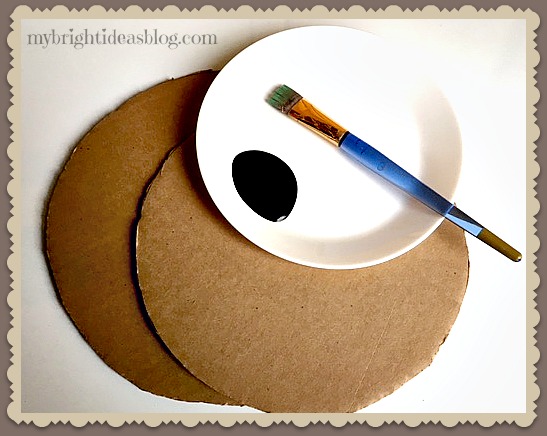 So that the brown cardboard doesn’t show through the I painted a black base coat.
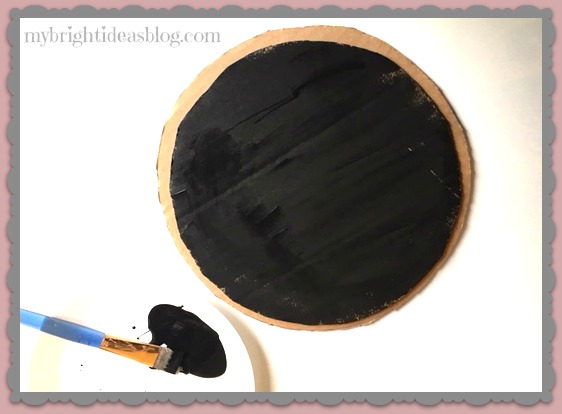
Paint both sides of cardboard and allow a few minutes for this to dry.
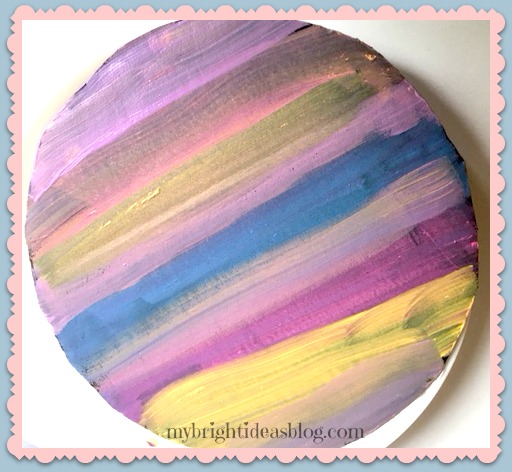
Now paint over the base coat with what ever design or colors you want. You will need to paint both sides again. Allow a good 10 minutes for this paint to dry before moving on to the next step.
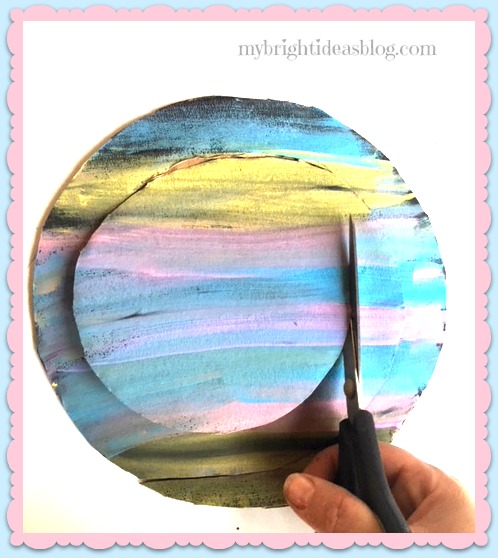 Again, the strong hands and big scissors are needed to cut a consistent spiral in the cardboard. Begin cutting around the circle 1/2 inch (1 cm) wide.
Keep on cutting in a circle until you get to the middle.
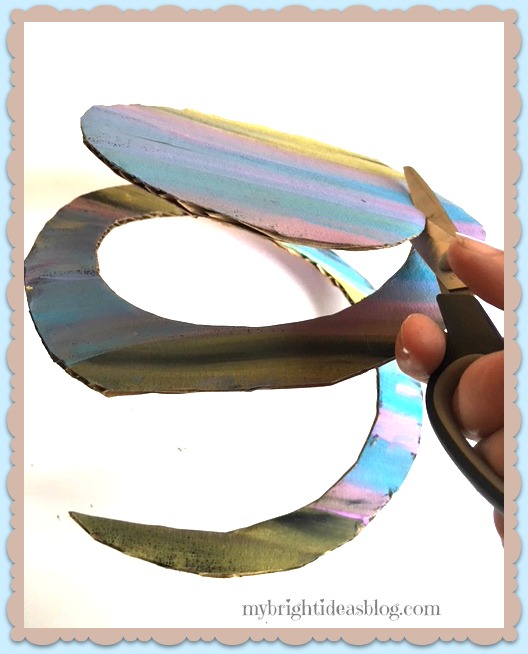
 Voila! The spiral is complete.
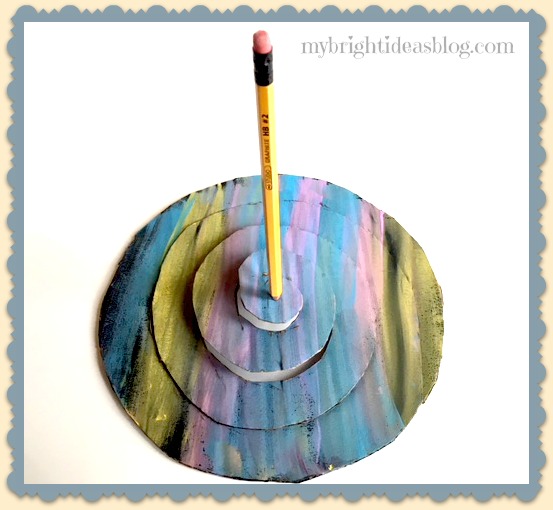 Use a pencil to poke a hole in the centre of the cardboard.
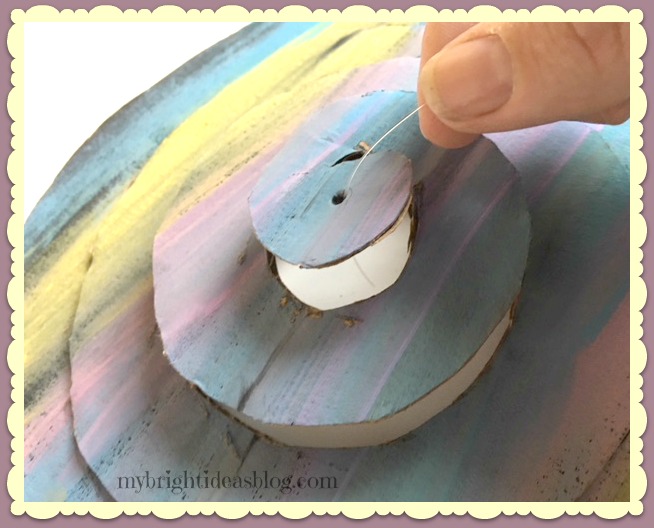
Loop some yarn or fishing line through the end. To make it spin the key is to loop a pony bead or a tiny bell under the hole and then pull the line back up through the hole.
I didn’t take a photo of this step so here it is afterward to show the pony bead. The fishing line is simply looped through the cardboard and then the bead and back out through the hole again.
This step allows for it to spin better than if you just tied a knot in the cardboard.
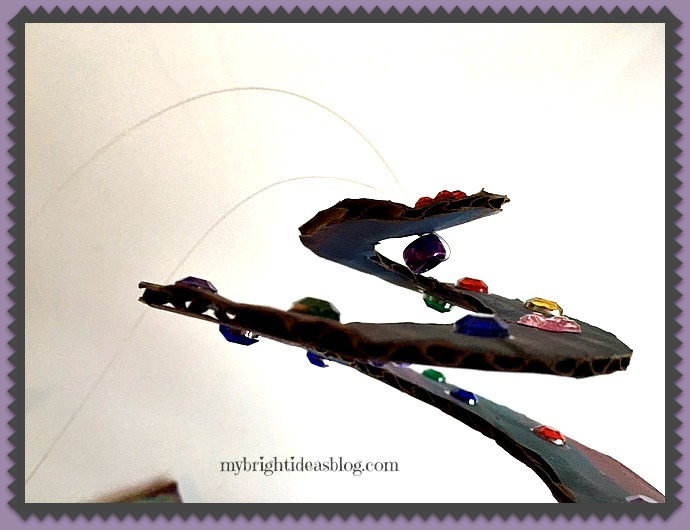
BEDAZZLE TIME!
Bedazzle: (verb) The art of taking ordinary things and making them EXTRAORDINARY by adding sparkles, rhinestones, glitter, stars, beads, etc.
This is the fun part!
Gather your gems, rhinestones and glue to decorate the spiral. The little box of gems in the photo above is from Dollar Tree for $1.25 – it looks small but there is enough to last a lot more projects! I love a cheap craft!
For toddlers you could use shiny stickers instead. Glitter glue would also jazz this up and hide some of the unintentional globs of glue that may end up drying on the project.
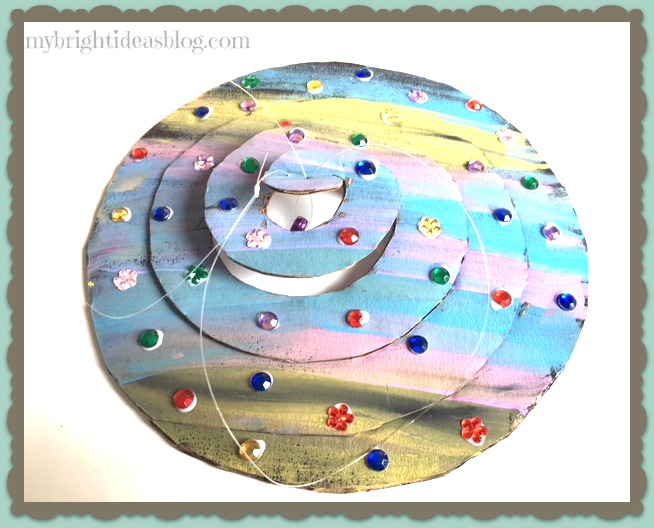
After the first side is dry, flip it over and repeat on the bottom side. This spiral is going to look great no matter what angle you are looking at it.
Allow it to fully dry.
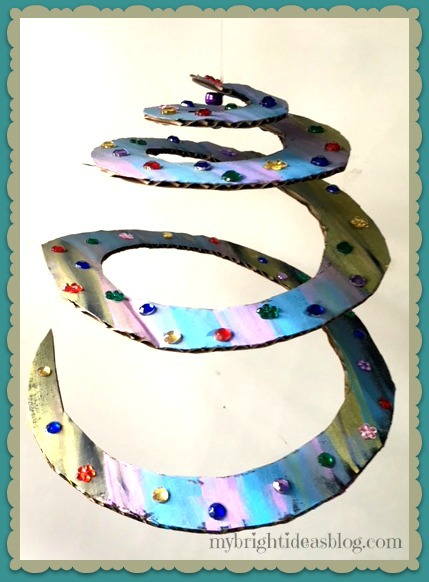
And you are done! Hang the spiral by taping the end of the string or line to the ceiling so it can spin. I used an S hook to hang it from a curtain rod.
Remember to Pin this on Pinterest!
Toilet Paper Roll Crafts-Use your loo roll tube for easy Crafts!
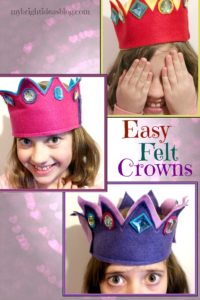
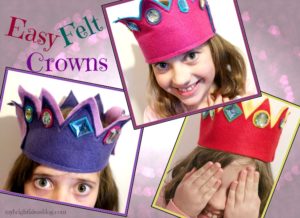
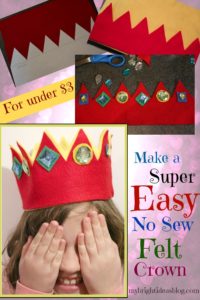
Sew a Super Easy to Make Felt Crown – Add to your dress up clothes!
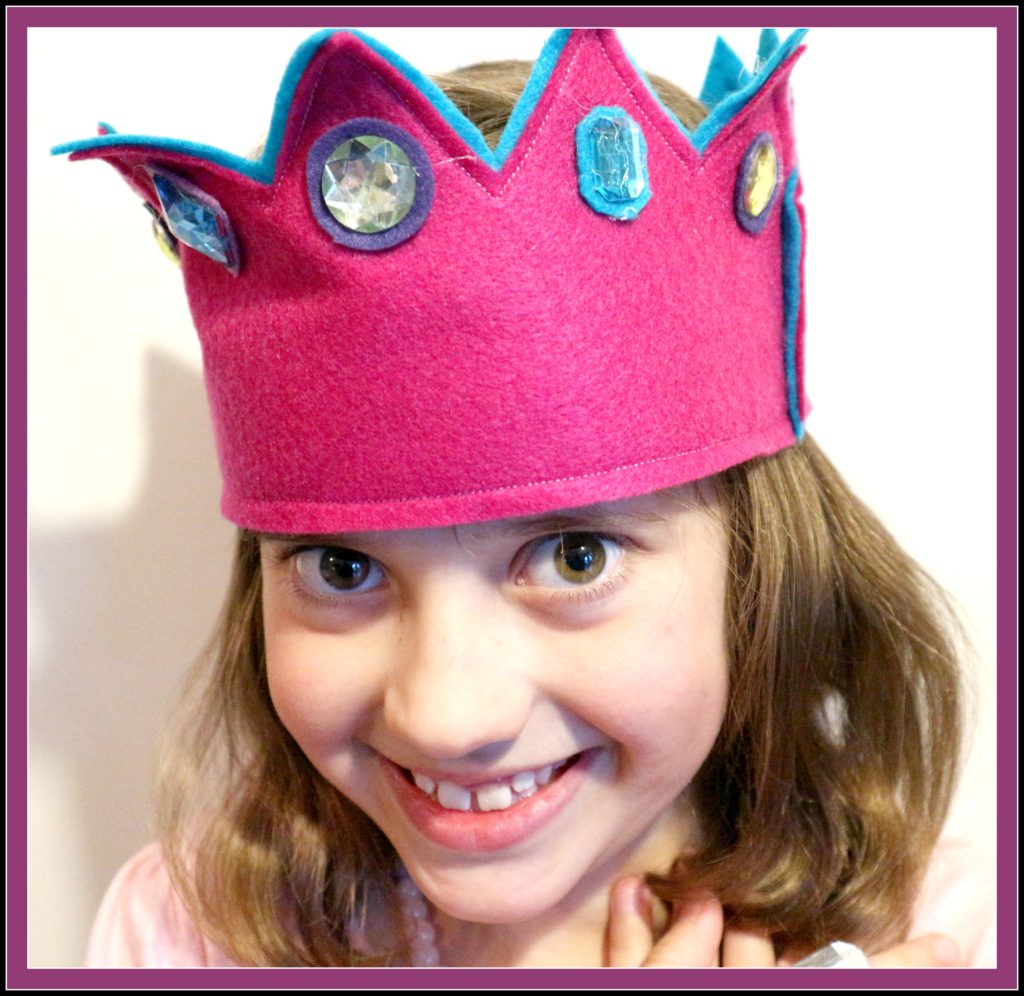
How to Make an Easy Felt Crown!
I went to Dollar Tree this time to get a few time things and got these vibrant colours of pink, 2 shades of purple and turquoise. They charged $1.25 which is a lot more than Michael’s $.59 each. But I was there and the colours were so appealing….A piece of craft felt can cost $.50-1.25 depending on where you are buying it. For each crown you will only need 2 rectangles of felt-I used different bright colors. You will need some gems, scraps of felt and your hot glue gun, This time we are going to use the sewing machine.
If you would like to use do this project without sewing follow this link….http://mybrightideasblog.com/make-no-sew-felt-crown/
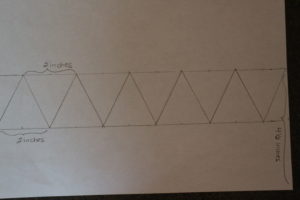

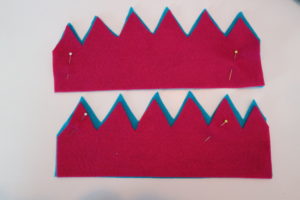
Make a template using an 8 1/2 by 11 standard piece of paper. Measure 4 1/2 inches from the bottom and draw a line. Draw another line 2 inches below that. Put a mark every inch along both lines. Then using your ruler create a zig zag. This measurement should make it possible to do this twice on a felt rectangle that measures 9′ x 11 1/2″. To make sure you don’t cut into the other half you could cut the felt in half lengthwise before you cut the zig zag, If your felt isn’t as wide as mine just shorten the bottom portion of the template…it doesn’t need to be that thick. Do the same with the second color that you have. This extra layer will stiffen the project so it can support the gems. It also makes it really pop with the extra color.
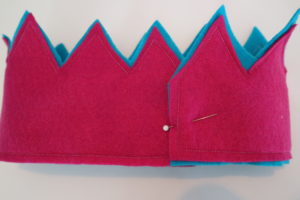
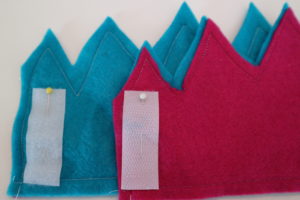
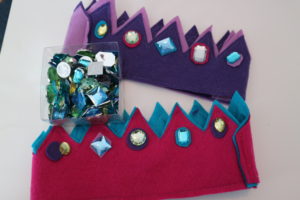
Next overlap the two colors a bit and pin them together. Sew all the way around the bottom, side, zig zag and other side. Overlap one side to the other and sew a seam to connect them. The other seam will be open so pin Velcro strips so the size is adjustable and easy to get on and off. If you don’t have Velcro you could just fit the crown to the child’s head and sew that seam too. Cut pieces of felt out of scraps to place under the gems. Using the hot glue gun, glue the felt to the crown and the gem on top.I only put gems on the front of the crown, but you could put them all the way around. You could also add a strip of ribbon or gold trim around the bottom to decorate it further.