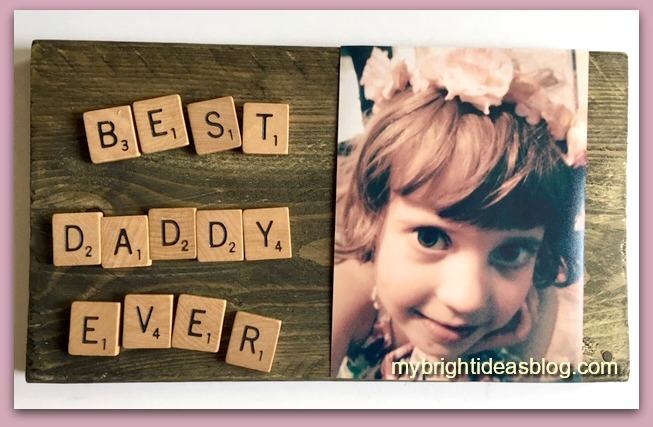
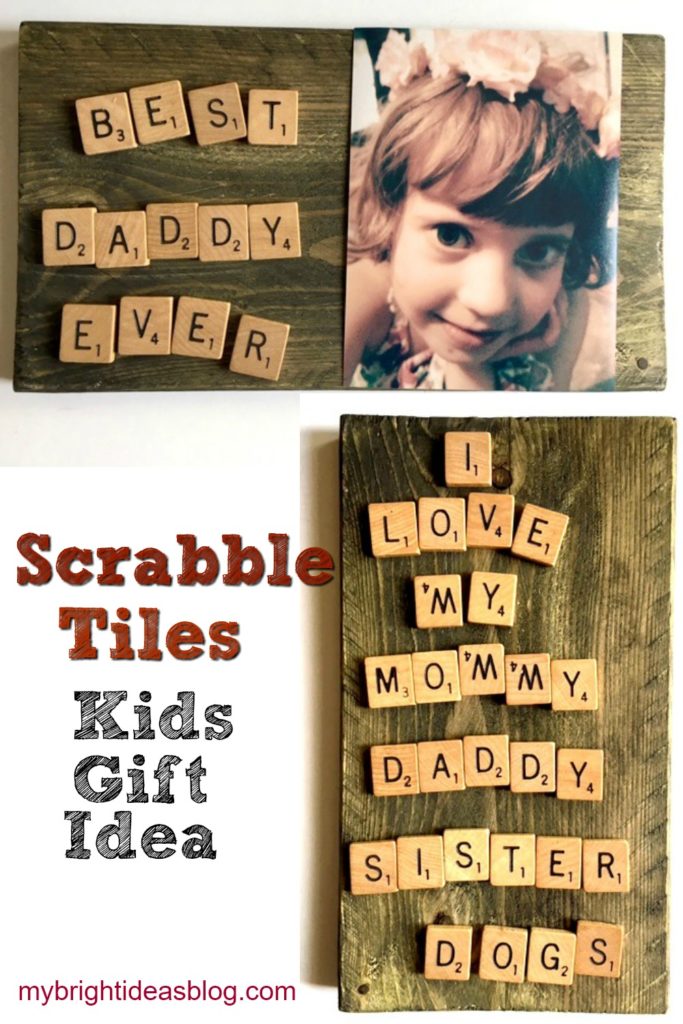
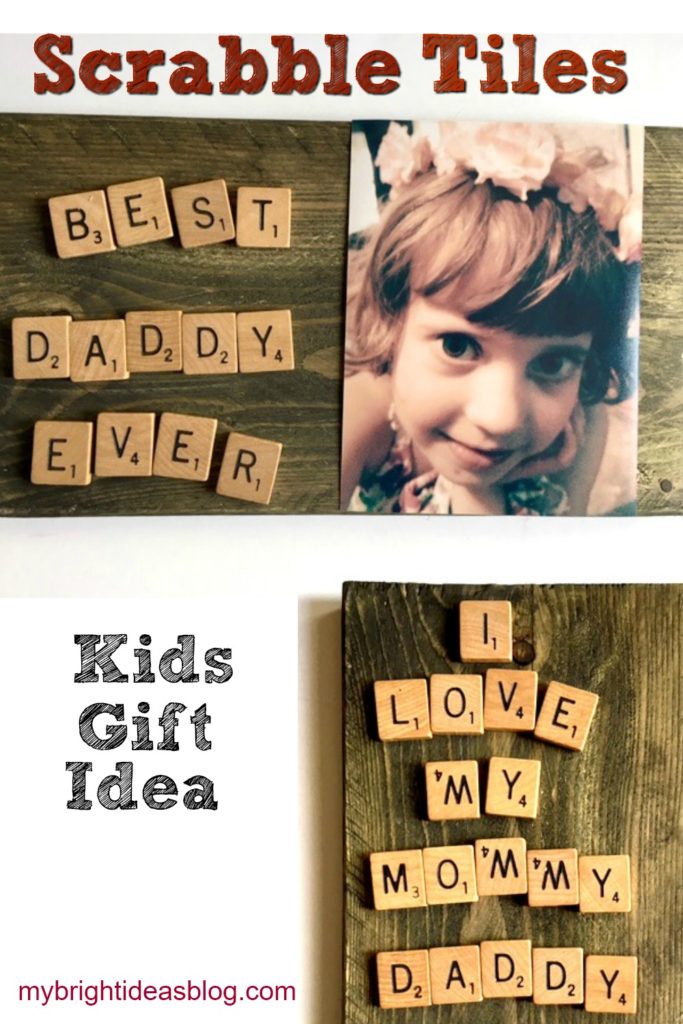
I have a sick kiddo at home (head cold, sneezy, wheezy) and she wants to use my craft supplies to make a gift for daddy’s desk at work. So here is what she came up with a love letter in Scrabble Tiles to Daddy and an old photo of herself.
Where can you get Scrabble tiles? From the board game of course silly! Or from a thrift store or online.
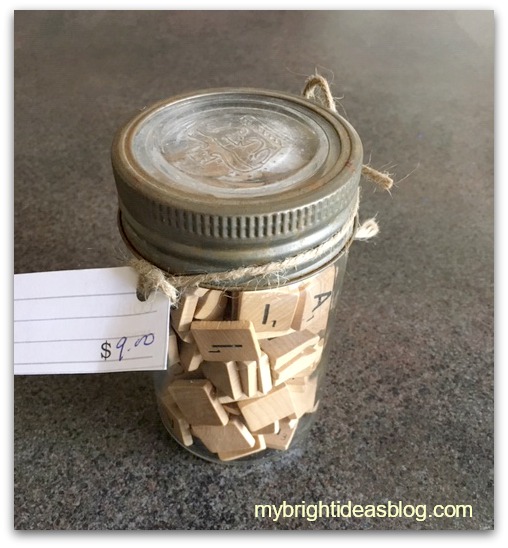
The other day I found myself parked next to an antique store I didn’t know existed. So I went in and found a gazillion things I would love to have and upcycle. The store was AMAZING! One of the items that I bought was a cool old mason jar filled with scrabble tiles.
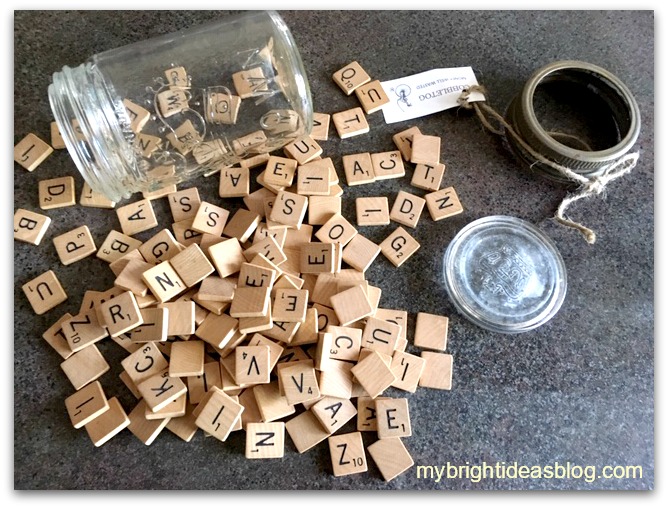
My sick little darling sorted out the letters into piles while I went rummaging for supplies.
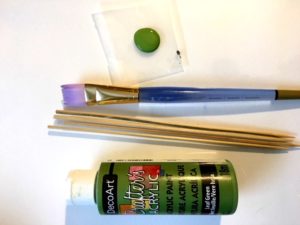
You will need:
- scrabble tiles
- a piece of wood, picture frame or canvas
- white glue-for the photo (or to make it temporary use “sticky tack”)
- hot glue gun-for the tiles
- hanging hook (optional)
![]()
I have scraps of wood and often will stain or varnish a few extra pieces in case I want to make a wooden plaque in a hurry. We chose out of scrap options a piece approximately 9 1/2 by 5 1/2. It was already stained with “Forest” Behr Semi-Transparent stain-which has a subtle green tinge to it.
![]()
Another option would be to use a blank canvas from the dollar store. You could paint with inexpensive craft paint in his favorite color or leave it white.
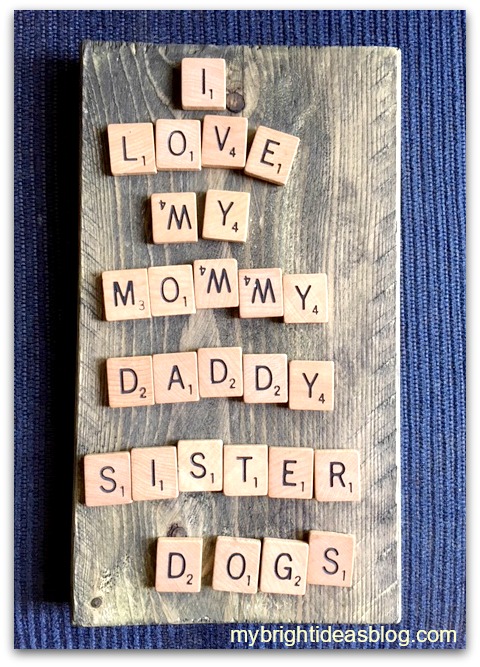
First she wrote out this…awe Mommy is at the top of the list!
I love that she is not bothered that 3 of her M’s are upside down W’s. When you see the letters are crooked its tempting to want to straighten them out but resist! It’s a child’s gift and adds character to the final product.
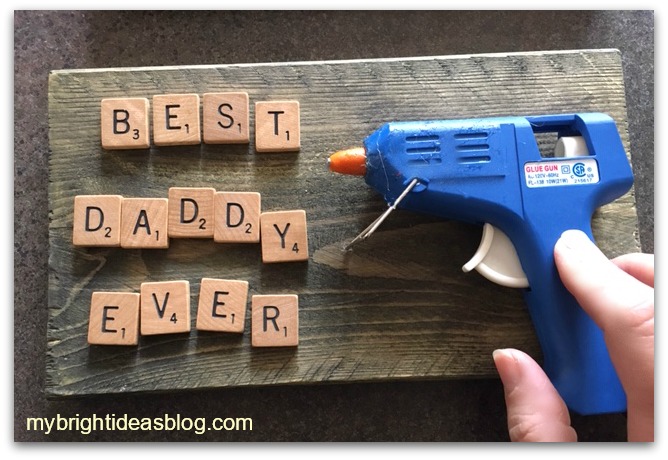
Arrange the letters and photo to your liking. Hot glue your scrabble letters to the wooden board.
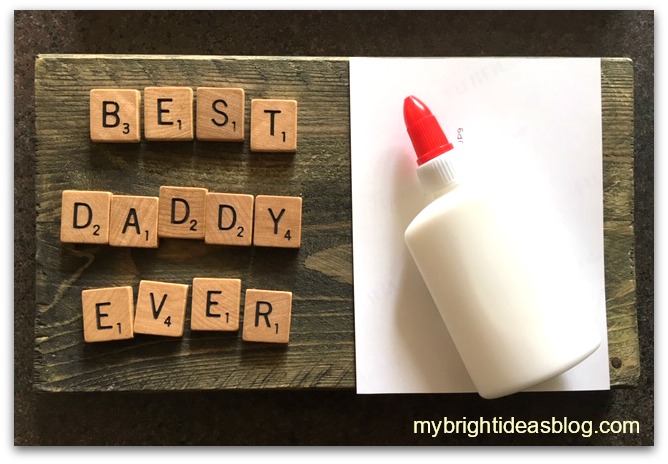
Have your child put a thin coat of glue on the back of the photo. Or if you want to be able to take the photo off later and replace it you could use sticky tack instead!
Would you look at those gorgeous eyes! This gift will melt his heart!
Crafts Using Burlap and Buttons – Easy Project that Looks Great!
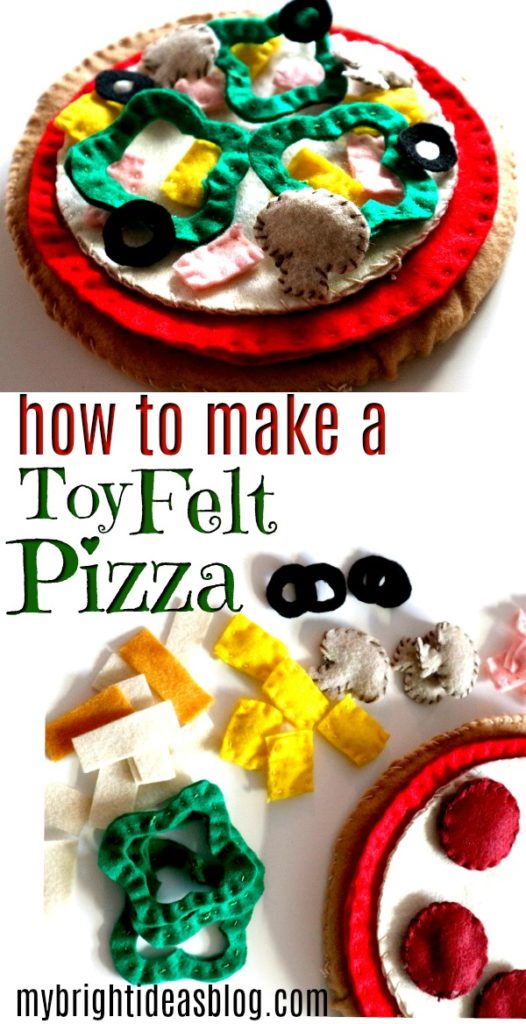
Cloth Pizza Toy Made From Felt
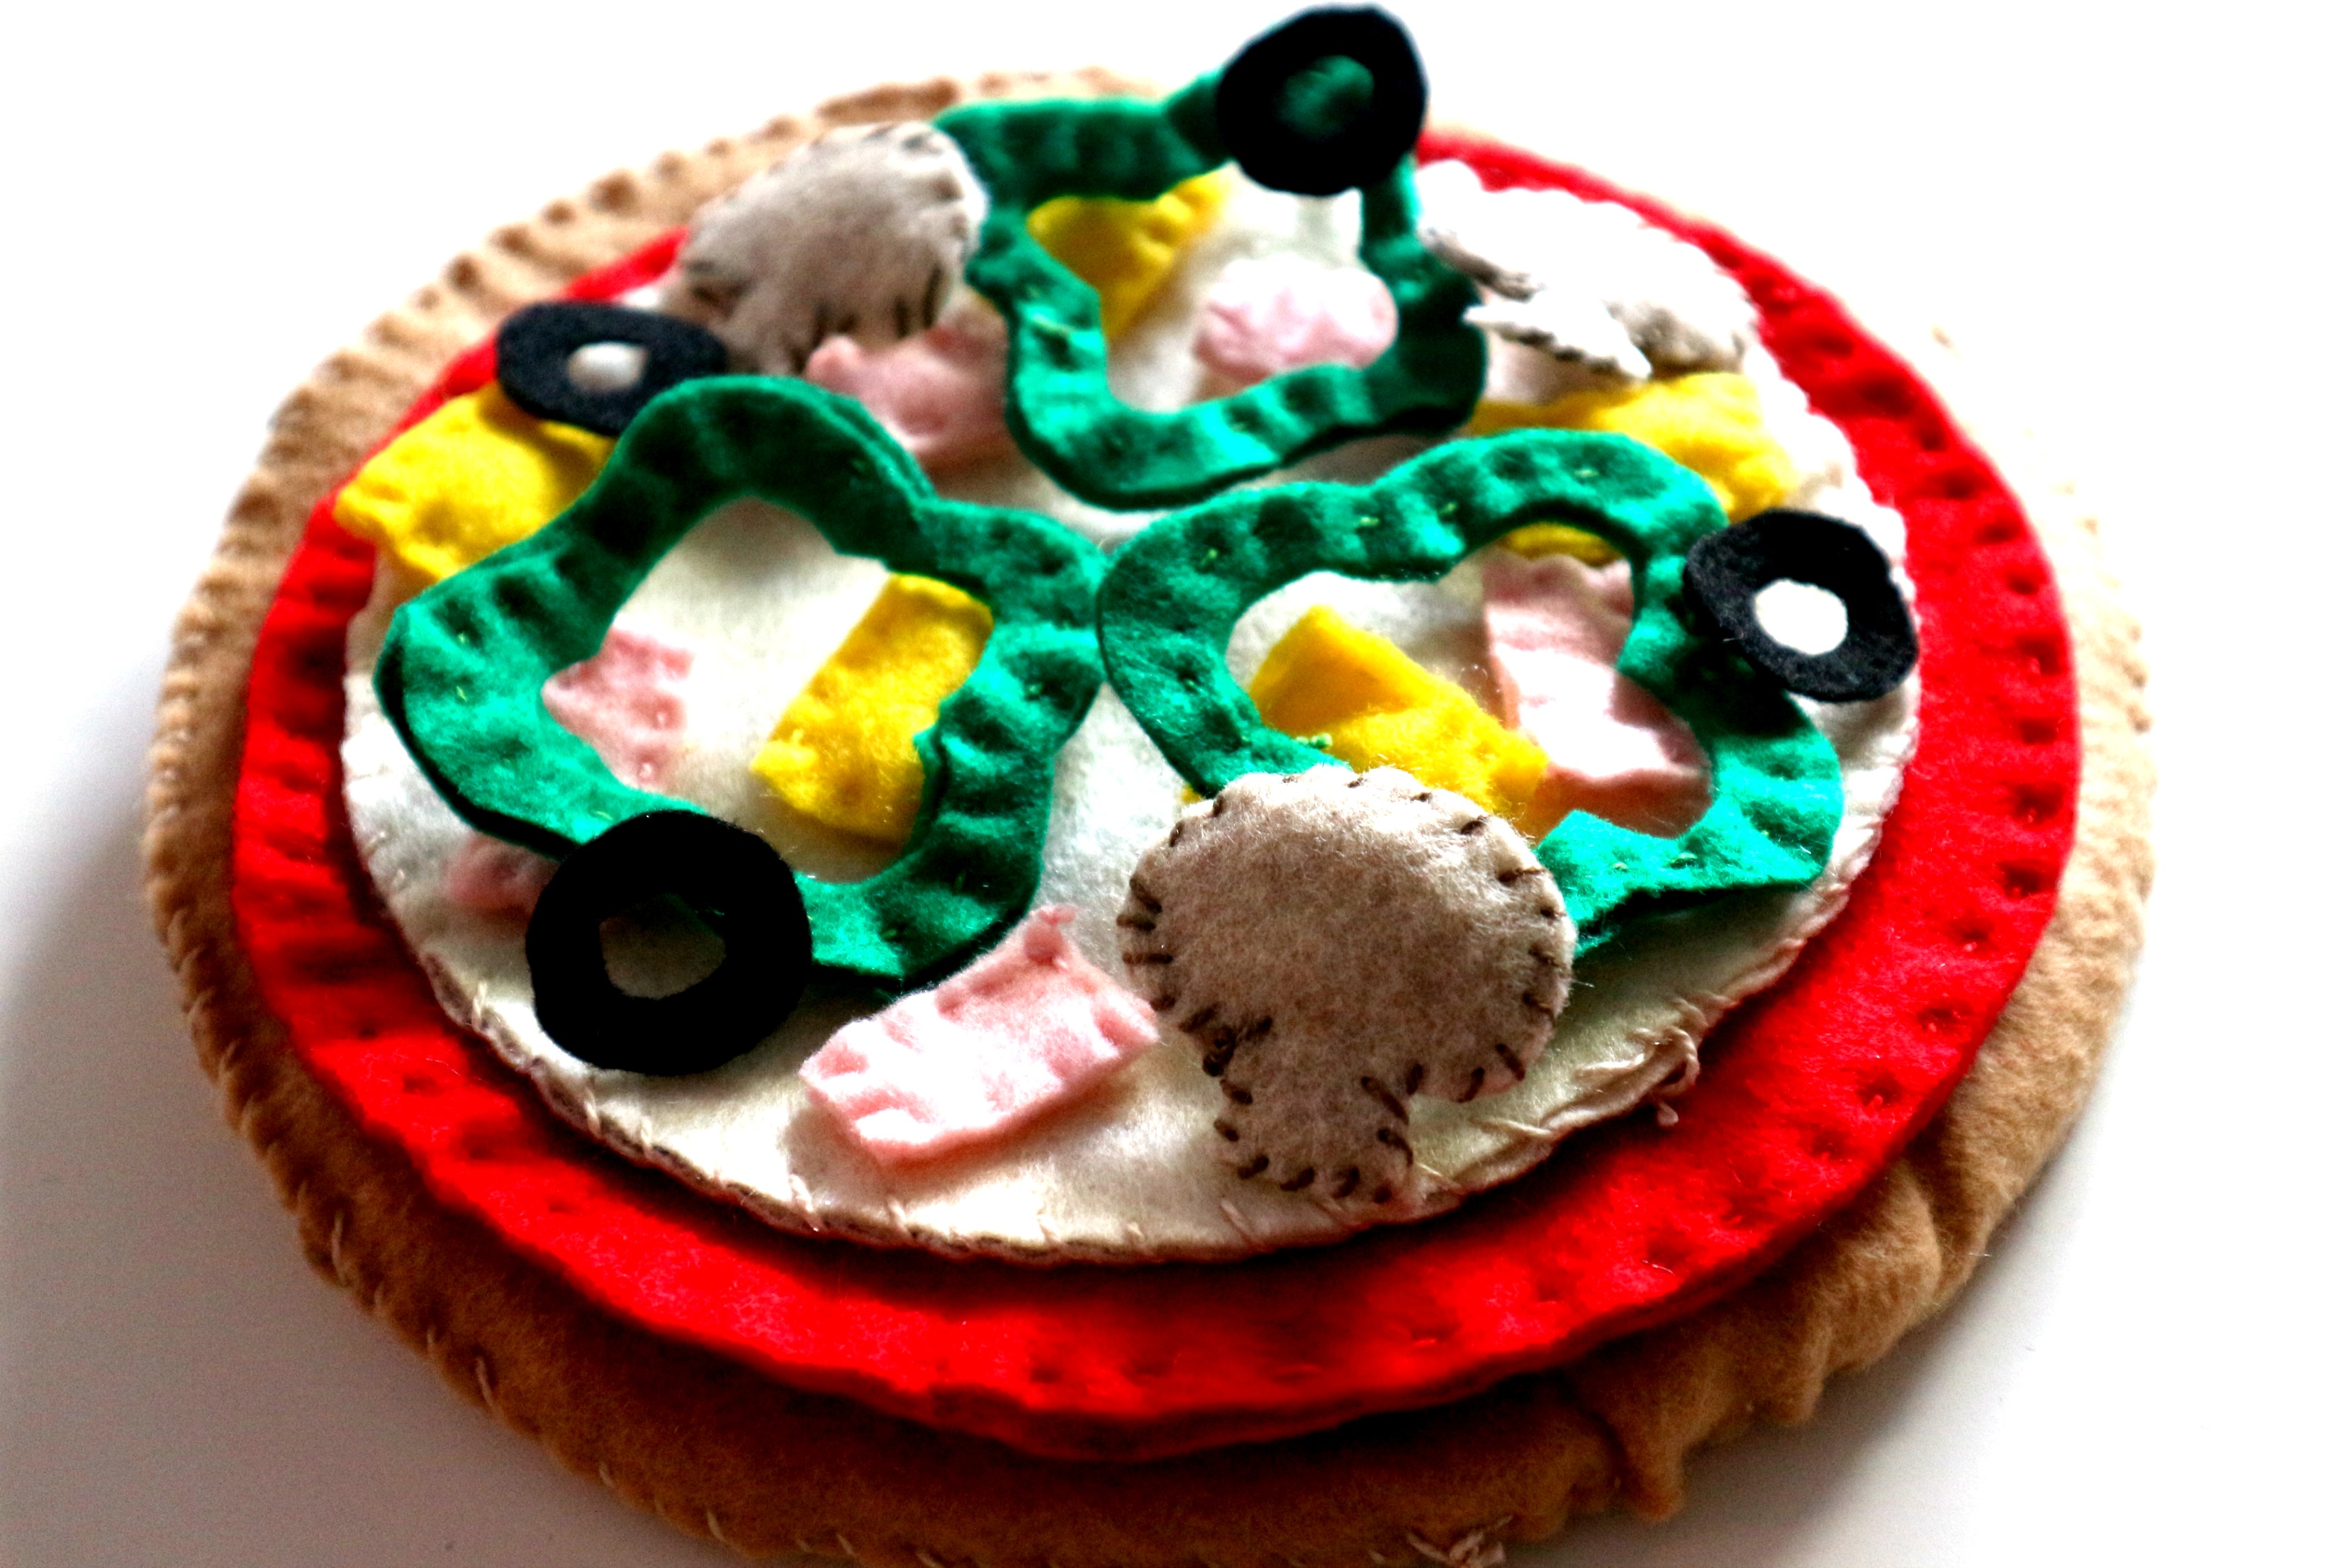
Kids love Pizza! Kids love to imitate their parents in the kitchen! Kids will love to play with this felt pizza.
This pizza toy/felt project can be made in 20 minutes with just scissors and felt or you can spend a few hours if you want to do a bit of hand sewing and add some stuffing.
You will need felt in the following colours:
- 2 tan/light brown for the crust
- 2 red for pizza sauce
- 2 white/cream for mozzarella cheese
- 1 dark red for pepperoni
- 1 green for peppers
- 1 grey for mushrooms
- 1 pink for ham
- 1 black for olives
- 1 yellow for pineapple
- 1 orange for extra cheese
You will also need:
- bowls and plates to trace for big circles
- sewing needle
- embroidery floss (or thread)
- quilt batting or stuffing
Let’s Get This Pizza Party Started!
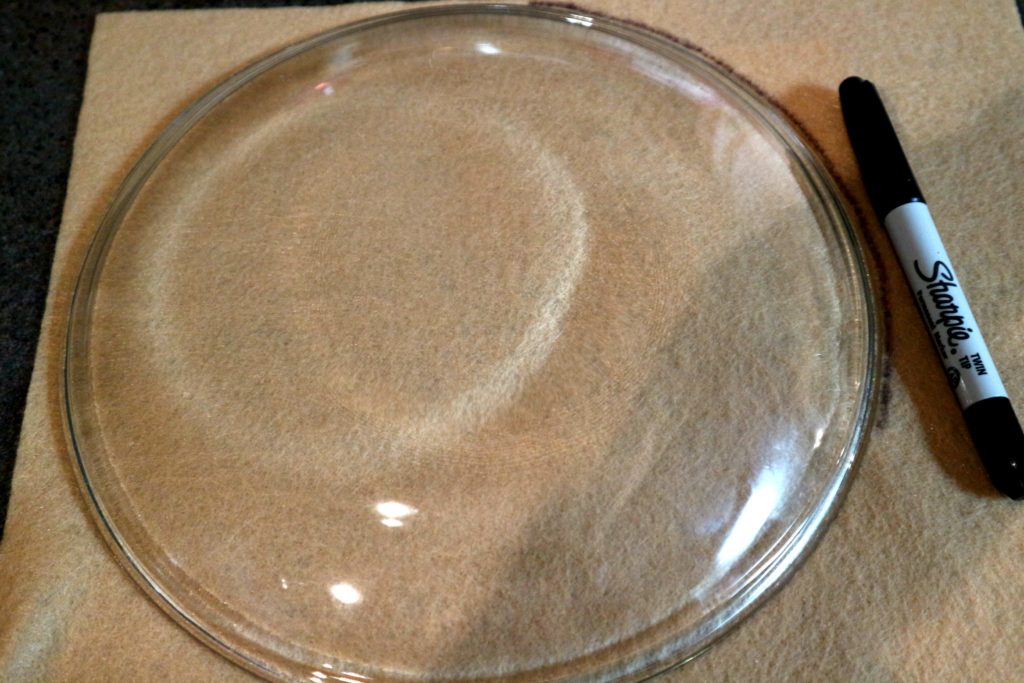
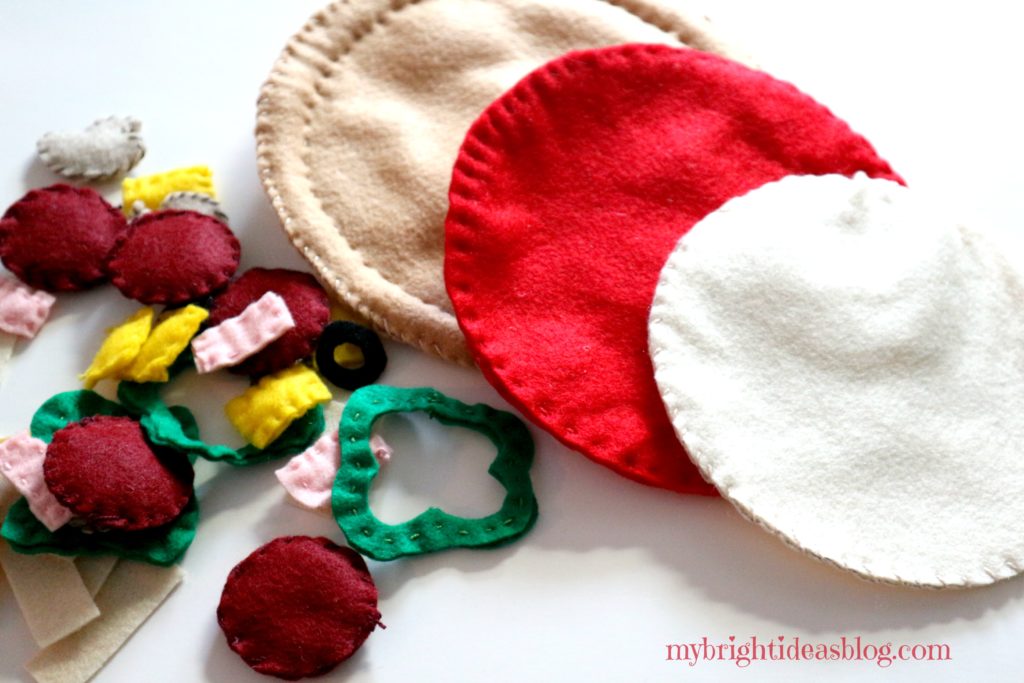
Beige Piece of Felt – Pizza Crust: Trace a large bowl or plate for your crust. Cut 2.
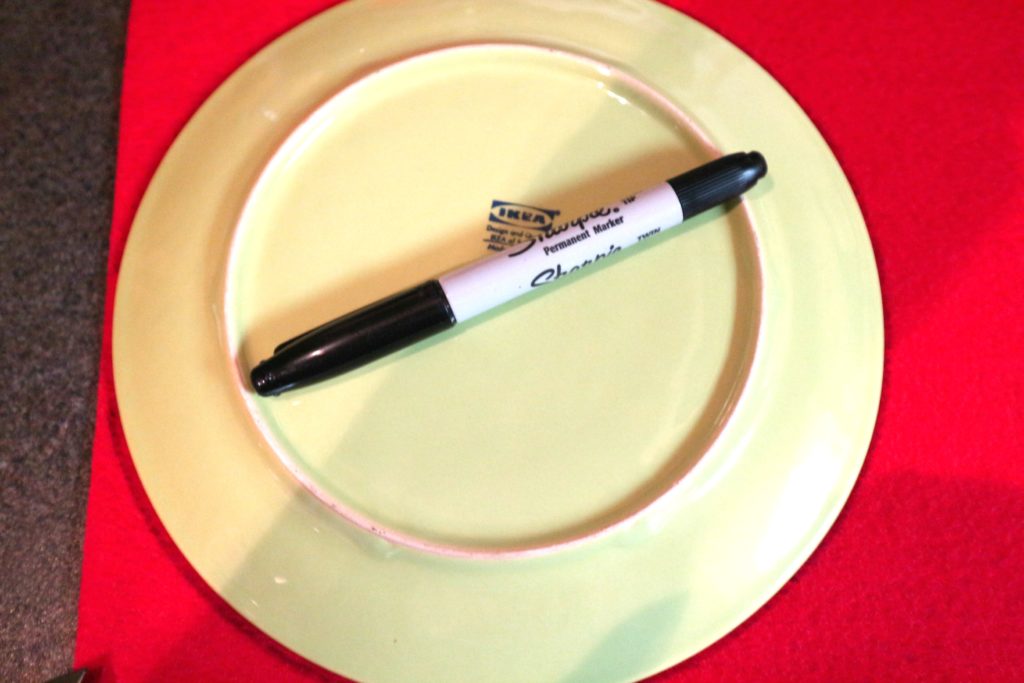
Piece of Bright Red Felt – Pizza Sauce: Using a plate or bowl slightly smaller than the last one, cut a slightly smaller circle than the crust pieces. Cut 2 red circles.
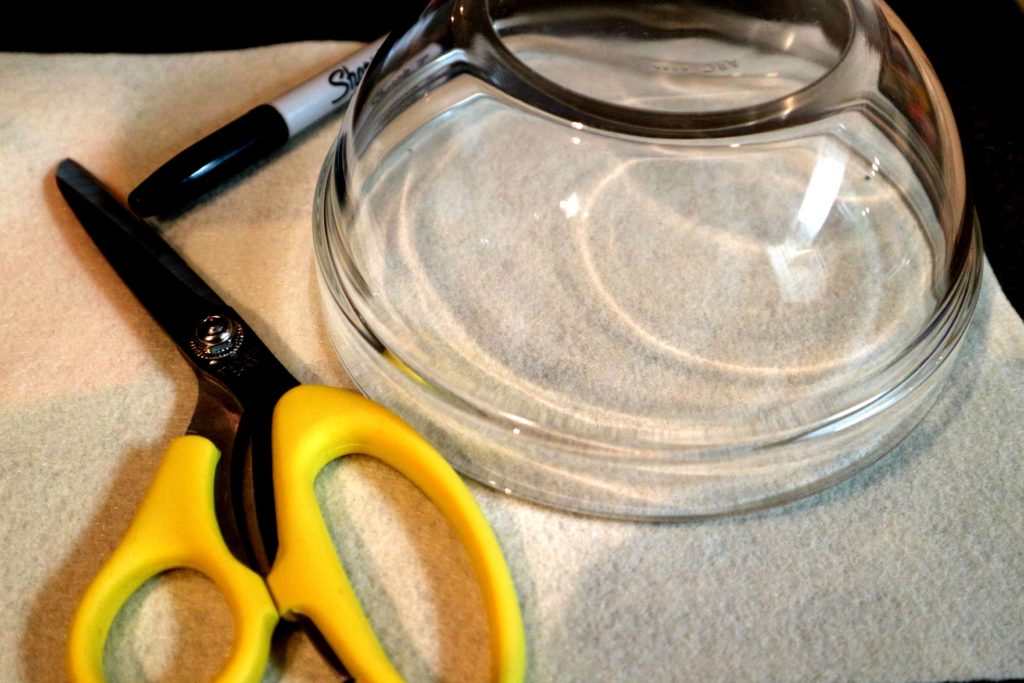
Cream or White Piece of Felt – Mozzerella Cheese: Cut the cheese…tee hee…out of a piece of white felt. Trace a slightly smaller plate or bowl than the piece of pizza sauce red felt. Cut 2 white circles.
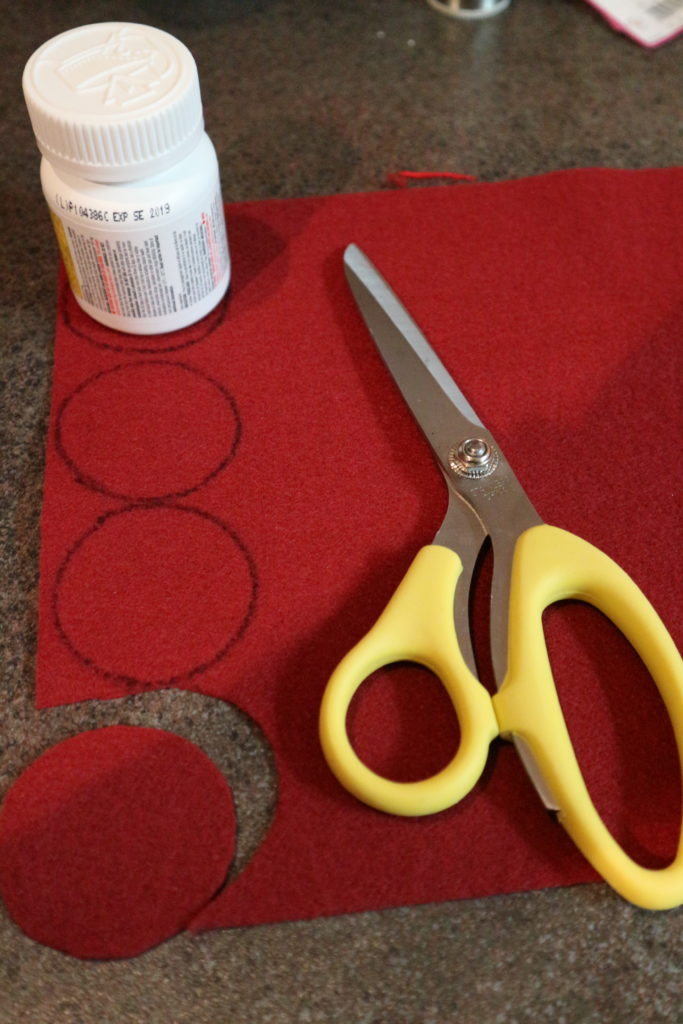
Dark Red Piece of Felt – Pepperoni: Cut 12 circles tracing something small like a vitamin bottle.
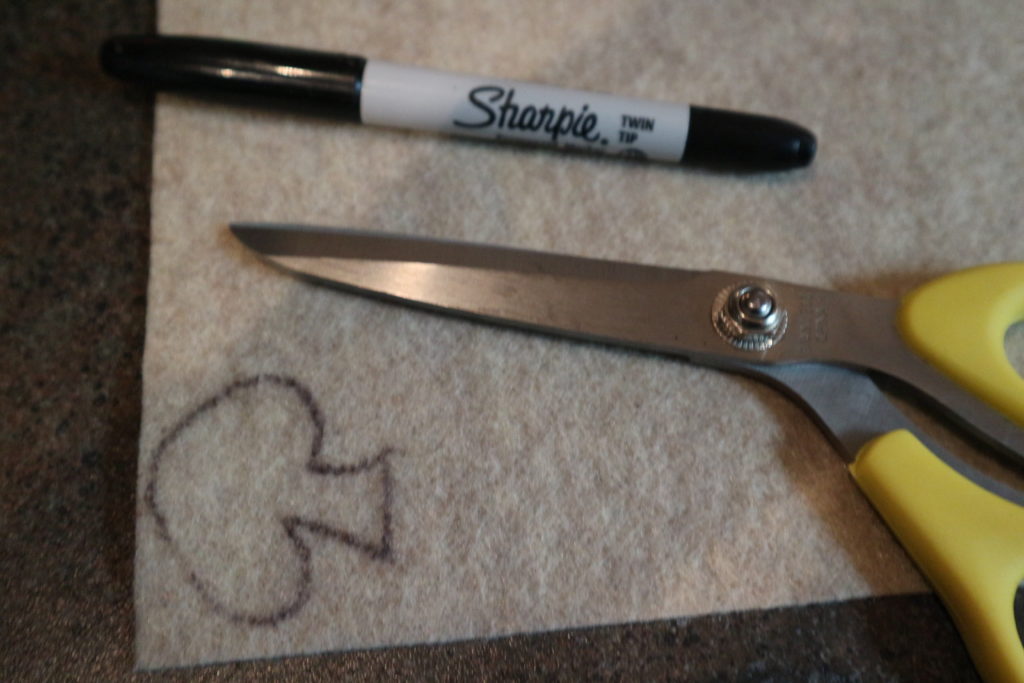
Grey/Beige piece of Felt – Mushrooms: Draw a mushroom shape and cut it out. Cut 10 mushrooms.
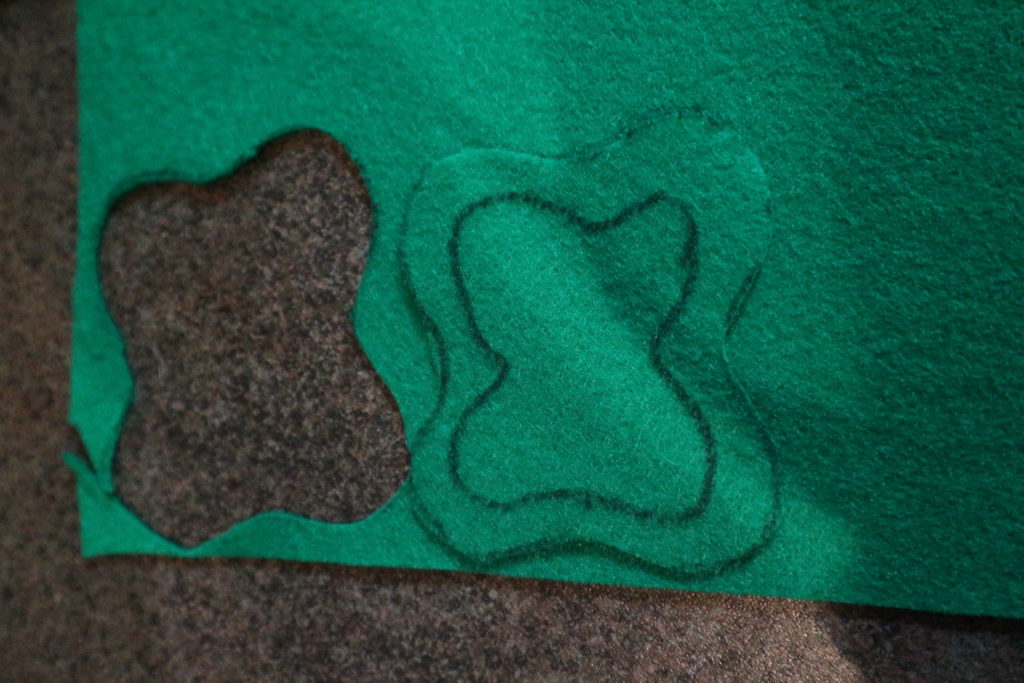
Green Piece of Felt – Peppers – It looks like a wiggly square, then outline it again and cut it out. Cut 8 peppers.
The rest of the toppings are up to you….
Black Felt – Olives: Cut a small circle and trace it a second time. Cut 8 olives.
Orange and White Felt – Grated Cheese: Cut long rectangles for some shredded cheese on top. Cut 6 of each.
Pink Felt Squares – Ham: Cut into squares-10 pink ham squares will be enough.
Orange/Yellow – Pineapple: This begins a great debate about whether you should have pineapple on a pizza. I’m for it! Hawaiian Pizza is my favorite. If you feel the same cut 10 pineapple pieces.
You aren’t a sewer? Then you could stop now and you can use this as a toy as it is. If you want to make it more 3 dimensional, find colors of embroidery floss that will closely match the colors of the felt.
Finishing the Pizza with Hand Sewing
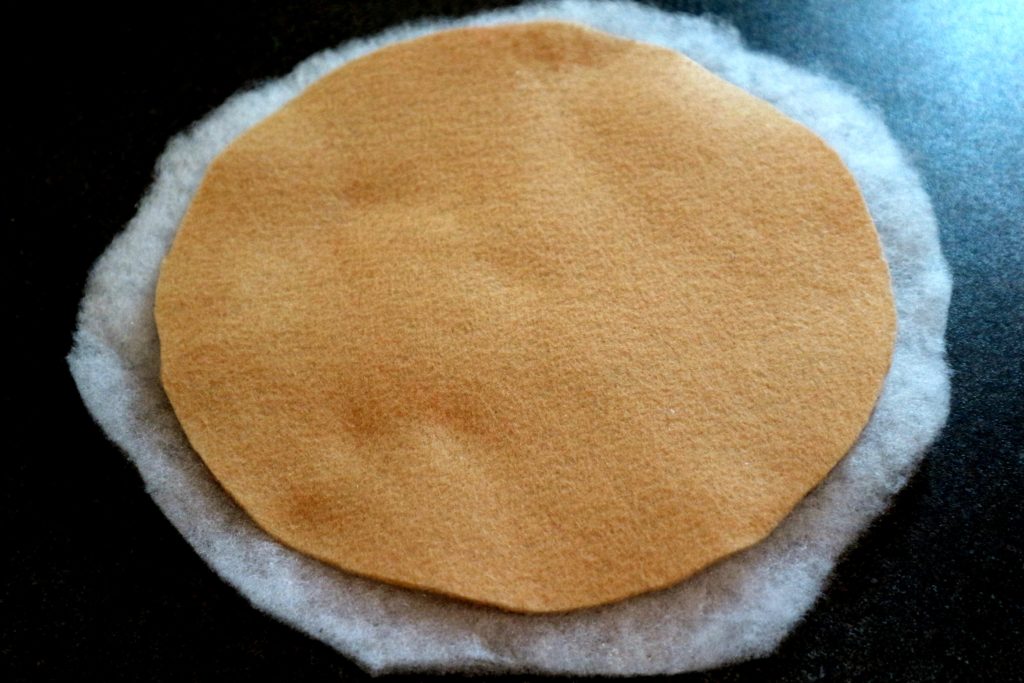
Finish the pizza crust: Cut a piece of cotton batting an inch larger than the pieces of beige felt. Sandwich the batting between the two pieces of beige felt.
Hand sew around the outside folding and tucking the excess inside the pieces of fabric. I think I used a whip stitch but you could also do a blanket stitch for this part.
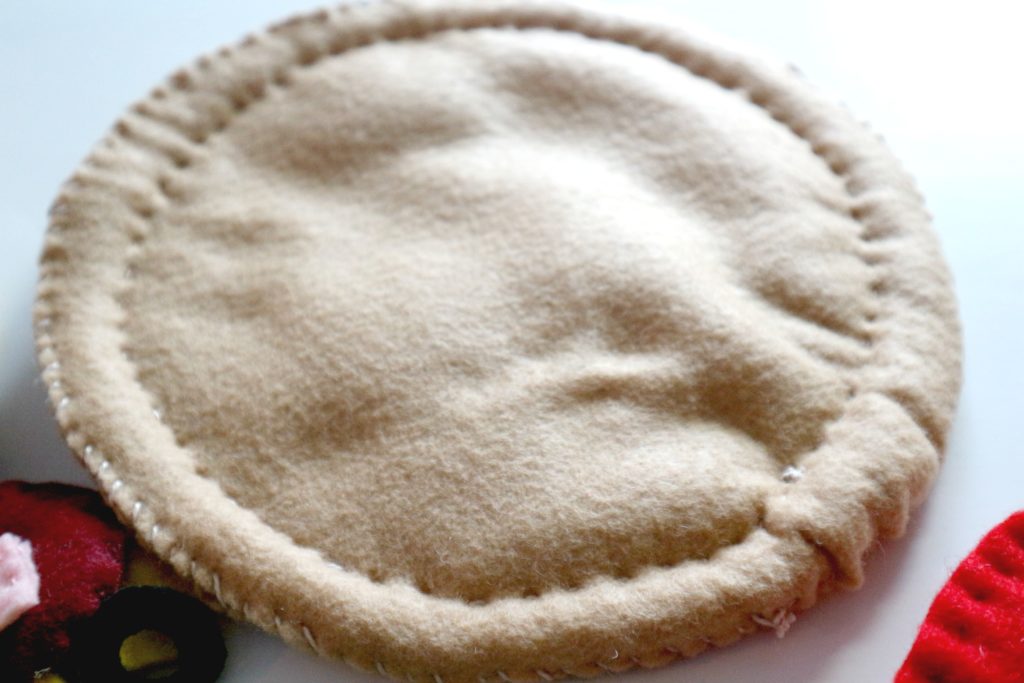
Sew around again an inch inside the seam to create the edge of the crust. For this I used a running stitch.
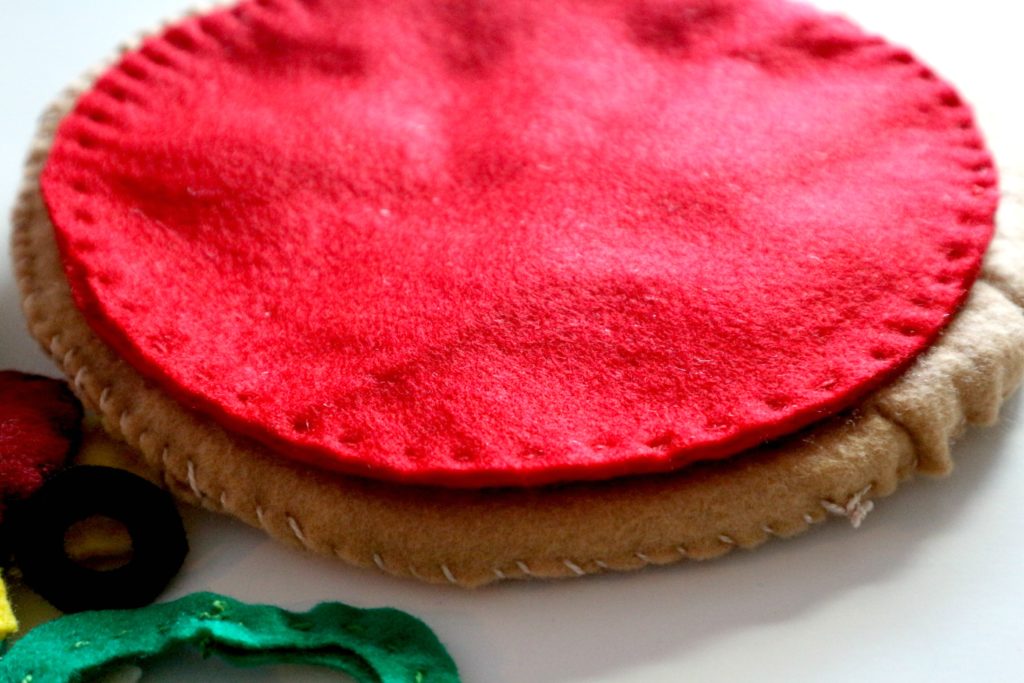
Stack the 2 pieces of red and sew around the edge with a running stich.
Next, put the two white pieces of mozzarella cheese pieces together and sew around the edge. Stitch each of the toppings together.
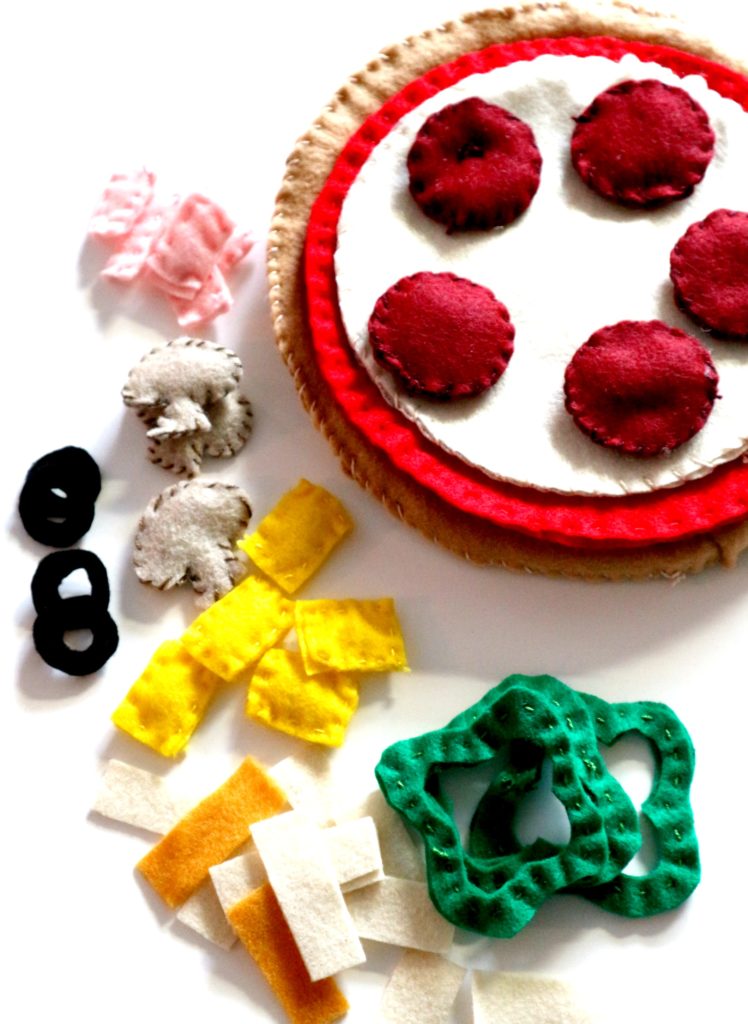
When sewing the pepperoni I added a little stuffing. The rest… mushrooms, ham, green peppers, pineapple were all sewn together….the olives and shredded cheese pieces I left as a single layer but you could double it and sew them together.
That’s all there is to it!
Store your pizza pieces in a large ziplock bag so you don’t lose the pieces. Have fun making this project for a little one in your life.
Here is the link to my previous post to make a no sew felt pizza.

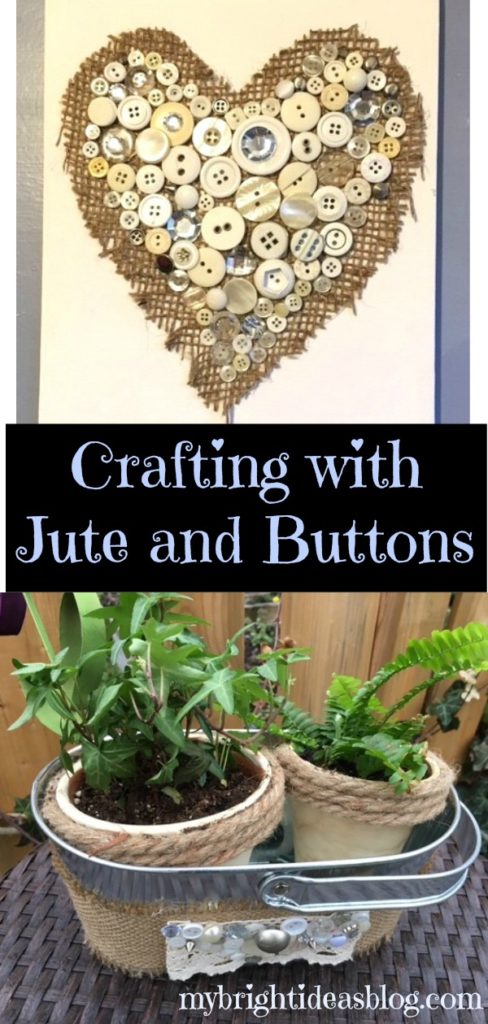
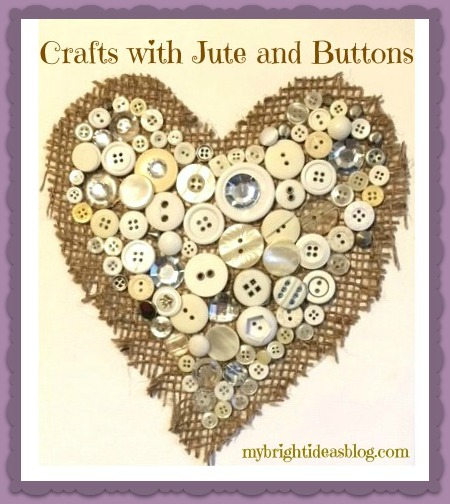
Crafts Using Burlap and Buttons – Easy Project that Looks Great!
Is it a new trend that burlap and jute are in so many crafts? Maybe this has been around a while and I’m just noticing it. The crafts on Pinterest with both jute/burlap and buttons are really catching my eye. So I thought it was high time to get on this button-burlap-jute wave! :o)
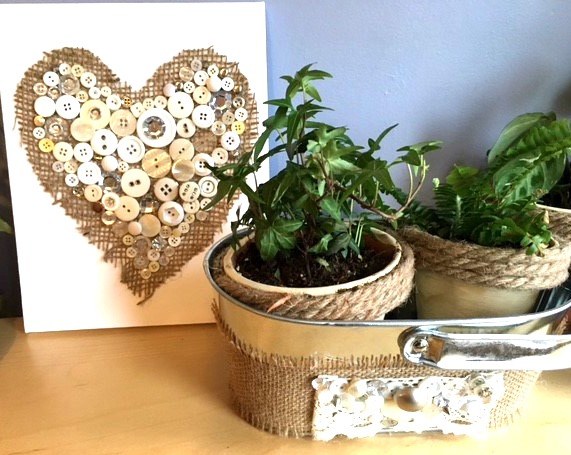
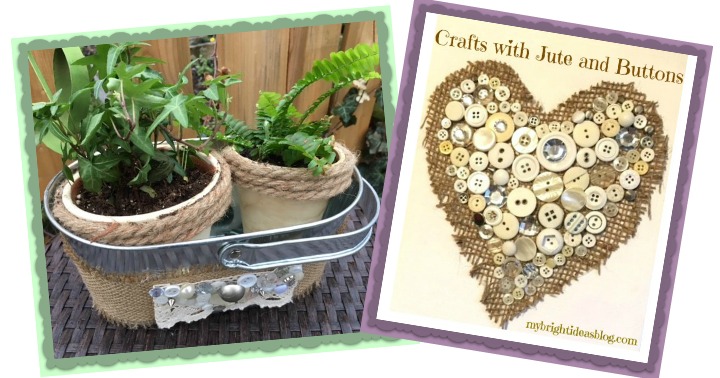
Project #1 – Jute and Button Wall Art
You will need: Burlap/Jute, Mixed Buttons, 8×10 Canvas, Hot Glue Gun or White Glue and Paper
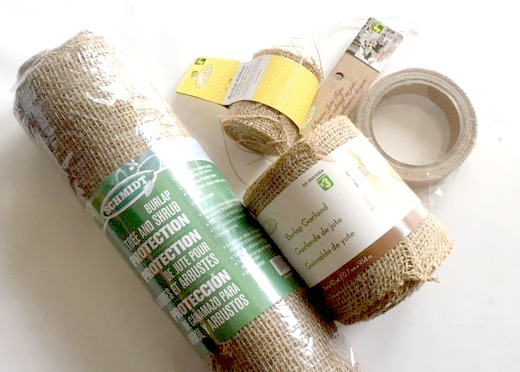 The local Dollar Store had several options…in both the garden area and the craft sections. For this project I cut up the big burlap bag that you would cover your shrubs with for the winter. There is still plenty of fabric left over I could still use it in the garden or other crafts.
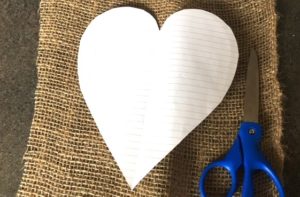
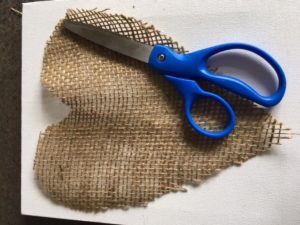
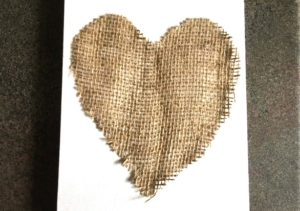
I cut a heart shape on paper first and then used it as a template for cutting out the burlap. Then I put a few dabs of hot glue on the 8×10 canvas to flatten the burlap into place.
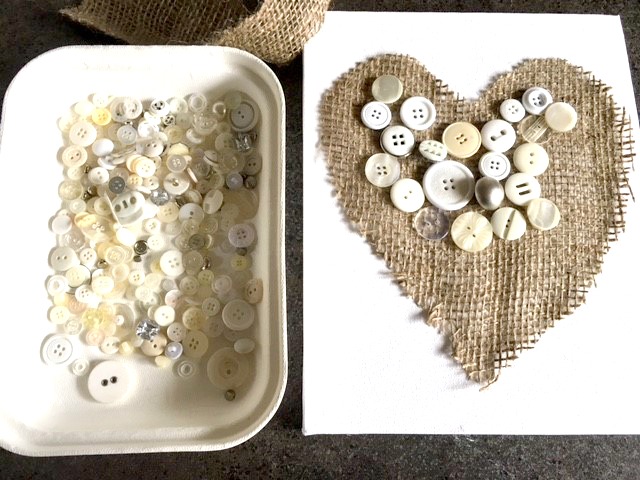
The buttons I used were all cream color or silver. They came as a bag of buttons from my Dollar Store for $1.50. There are some nice Pinterest posts with examples of art made with colorful mixture of buttons-I might try a colorful one next time. Start by gluing the biggest buttons in the centre and work outwards with the smallest buttons.
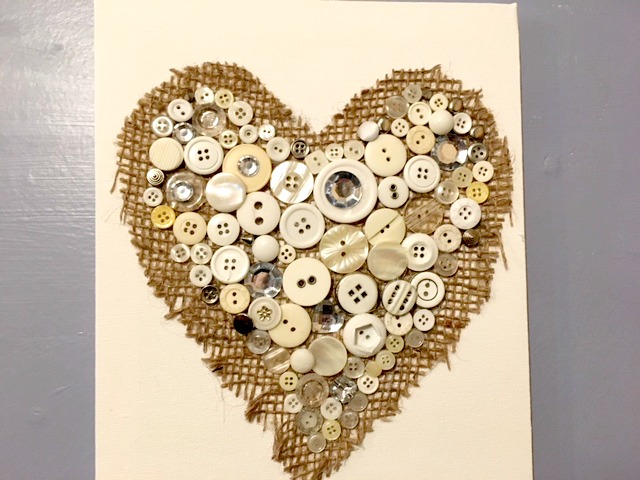 Watch your fingers while you glue the buttons on! Using the hot glue gun might be a bad idea for the small buttons. I like the speed of hot glue drying but since the project lies flat you could easily use regular white glue and spare your fingertips.
Project #2 – Jute Wrapped Tin Flower Pot
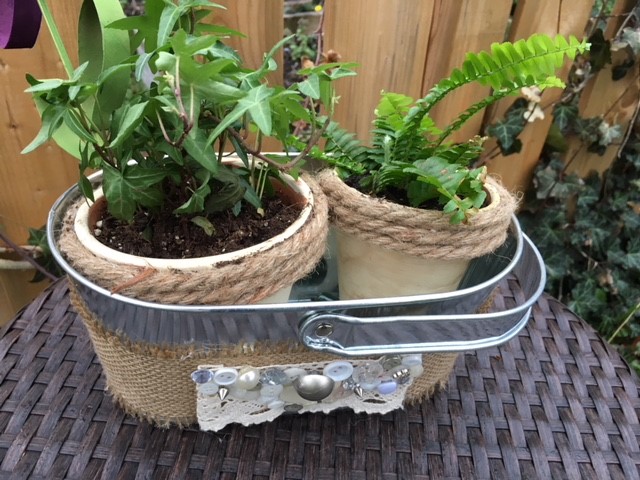 For this project you will need: Jute Ribbon 3 inches wide, a bit of lace, mixed buttons, flower pot (mine is a tin bucket style) and hot glue gun.
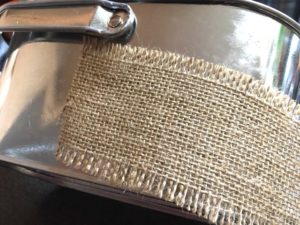
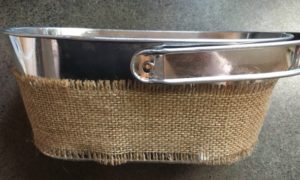
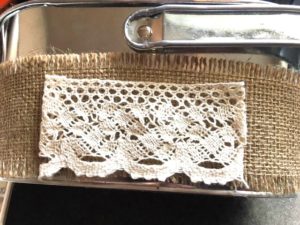
Using the hot glue gun attach the jute with a dab of hot glue on the back of the aluminum tin. Wrap it around the container and glue it flat. Mine puckered at the bottom so I pulled the jute snuggly and added more glue to secure it flat. I had a few inches of lace that was glued to the front of the container.
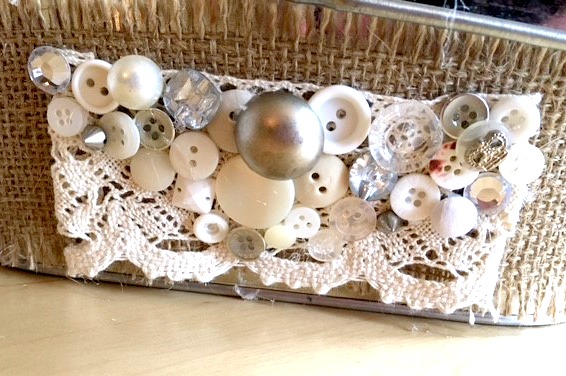 Then add on the buttons.
 I really like how these turned out and I think I might have some follow up projects with more glue and buttons. I would love to get a few bags of vintage buttons from a thrift store and mix it with broken jewelry to make a more sophisticated eclectic bit of art. On my to-do list are button bracelets and hairbands for the kids. I’ll let you know how that turns out later!
Have a super day!
….


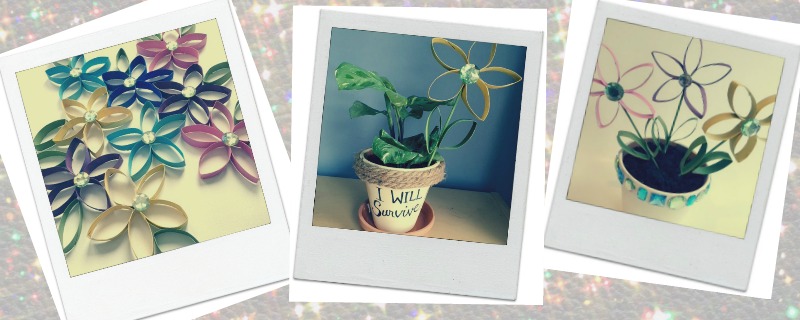
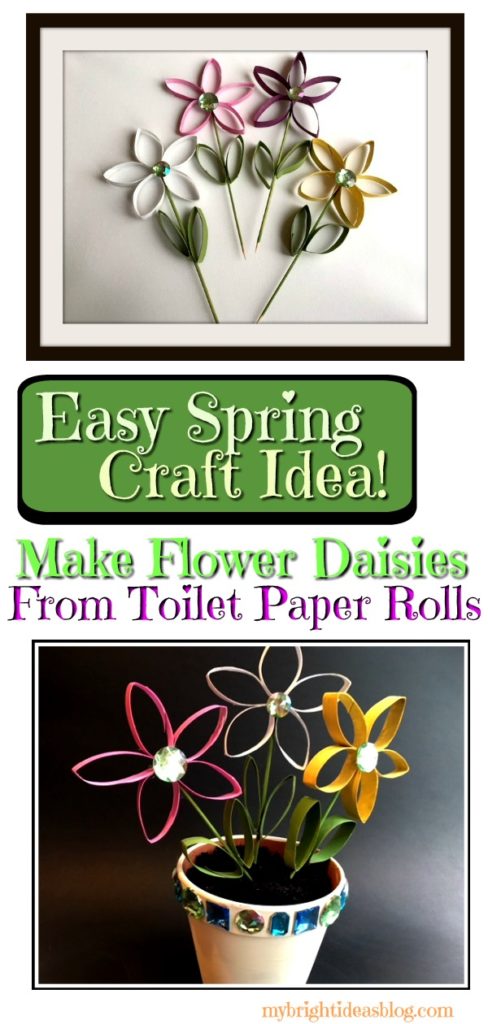
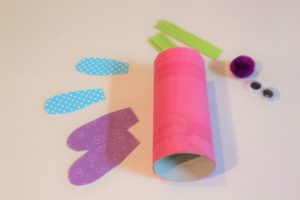
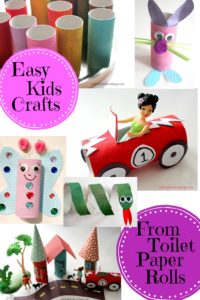
How to Make Spring Flowers Craft From Painted Toilet Paper Rolls
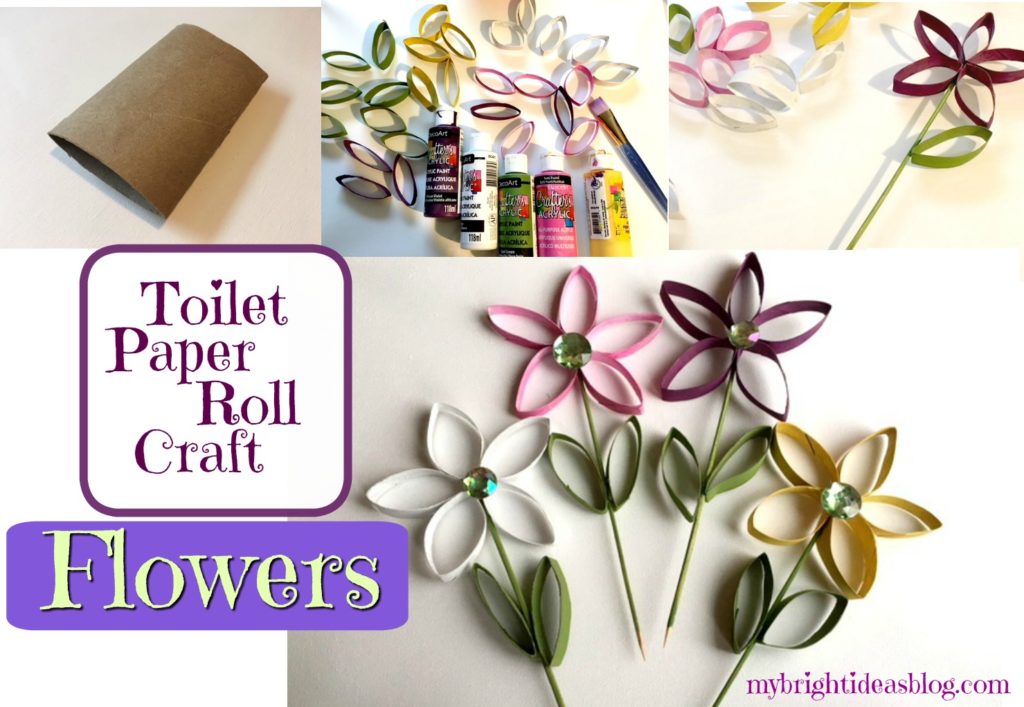
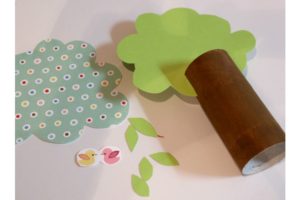
Looking for something to do with all those toilet paper rolls that your hoarding? Or am I the only one who doesn’t toss them directly into the recycle bin? Well all it takes is one toilet paper roll to make 5 flower petals and 2 leaves.
What a nice idea as we welcome Spring…ignore the fact that I’m posting this in mid April and we are shut in from an ice storm. Not to worry, Springtime will be back tomorrow.
For each flower you will need: 1 toilet paper roll, ruler, scissors, glue gun, craft paint and paint brush. For the stem I used a wooden skewer but for safety sake you could use a popsicle stick. For the flower centre I used a big shiny gem but you could use a pom pom or button.
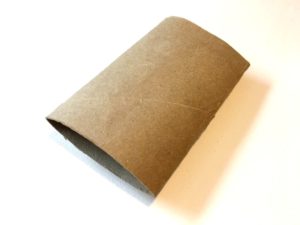
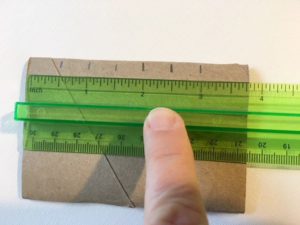
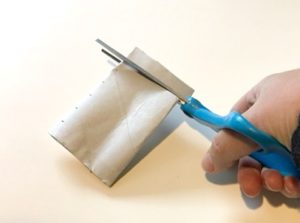
To begin you need to flatten your cardboard roll. Next measure and mark approximately 1 cm or 1/2 inch. It doesn’t have to be exact but we want to end up with it cut into 7 equal pieces.
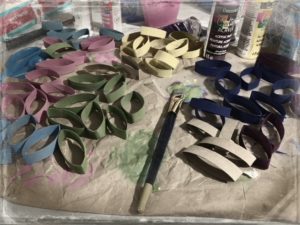
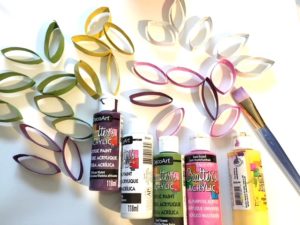
Take 5 pieces of the cardboard tube and paint them all the same color. This will be the flower petals. Paint the remaining 2 pieces green for leaves. I was surprised at how messy you can get trying to paint this. Paint the inside first then the outside. Then paint the stem skewers or popsicle sticks green. As I mentioned I did use skewers but my 8 year old was poking her big sister with it reminding me how dangerous this would be in a toddlers hands. So as a safer option I would choose a popsicle stick. They come in a few sizes-if you can get the long skinny type like they have at Starbucks that’s what I would choose but any kind would work. Now allow everything to dry thoroughly.
After the petals have had a chance to dry we begin to glue the first two together. Put a dab of glue on the end of one and pinch it with another while it dries. Add a dab of glue to the next one and pinch them together. Add on each one the same way until all 5 petals are glued together.
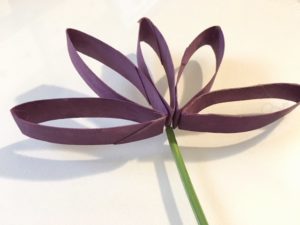
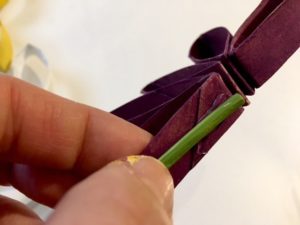
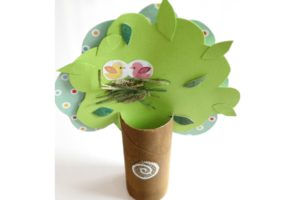
Place the stem in the middle of the petals and add a dab of glue to it. Pinch the daisy petal to the stem. Add a dab of glue on the other side of the stem and pinch the other petal to stem. This will complete the daisy shape. Put a dab of glue on the stem and place on the leaves-one at a time.
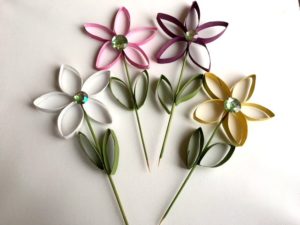
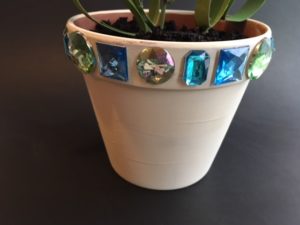
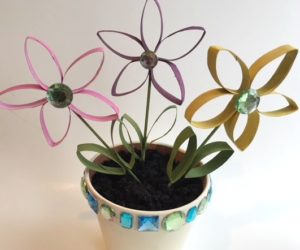
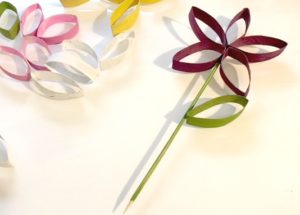
To finish it off glue the gem (or button or pom pom). Now you can pop it into a plant and give it away as a gift. I had extra gems and a flower pot handy so I hot glued the gems all around the flower pot too. It was so easy that I am in the process of making a bit of wall art out of the daisies.
Here is another post using toilet paper rolls.
Toilet Paper Roll Crafts-Use your loo roll tube for easy Crafts!
…

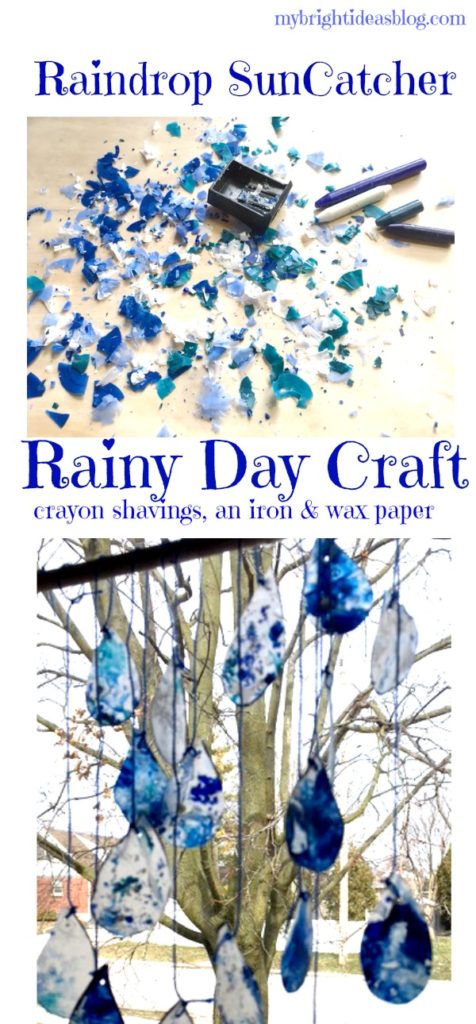
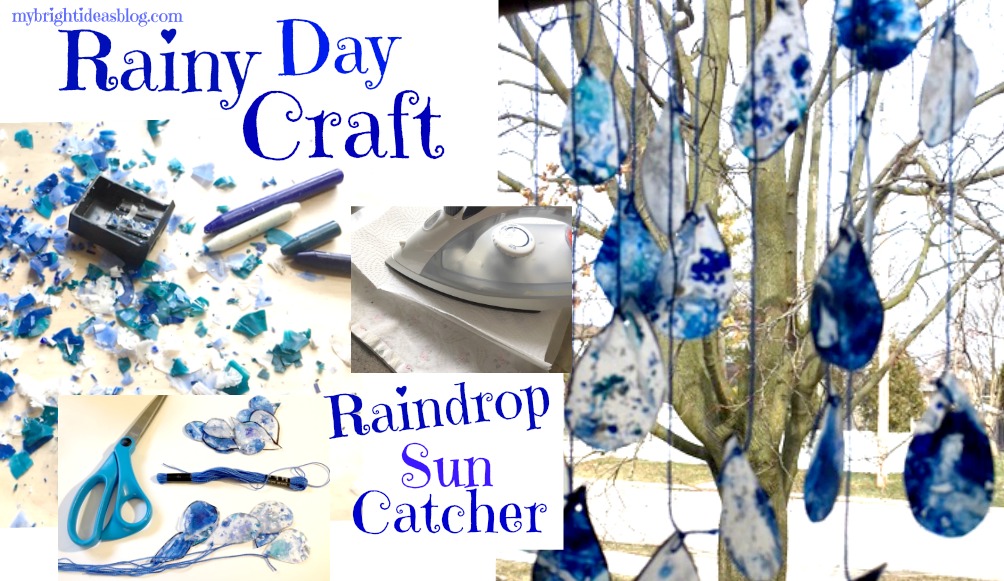
Rainy Day Kids Craft – Raindrop Sun Catchers
 Is it raining near you today? It is spring so we are going to have a lot more to come. Rain and sun is what is going to make my brown lawn green and that naked tree grown luscious leaves. In the meantime, let’s make the best of it with a cool craft.
You will need:
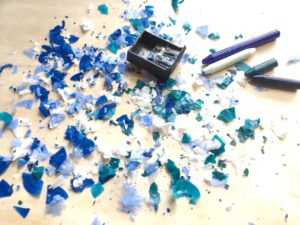
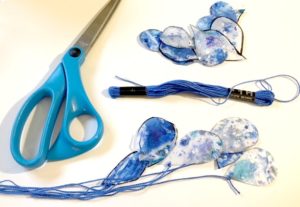
Several shades of Blue Crayons, Wax Paper, Iron-set to low heat setting, Old tea towel and Paper Towel, Scissors, a Pencil Sharpener, String or Yarn or Embroidery Floss (Blue) and a Hole Punch.
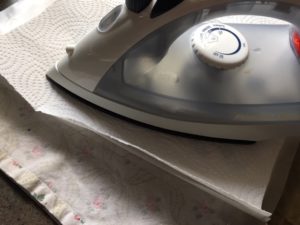
Choose some blue crayons and peel off the paper so they are ready for sharpening. I chose several shades of blue, turquoise and white. Lay out a piece of wax paper and sharpen the crayons overtop of the wax paper. Spread the shavings out. Next cut another piece of wax paper the same size and place it on top of the shavings for a crayon shavings sandwich. I did the craft on a wooden cutting board with a tea-towel under the wax paper and paper towel on top of the other wax paper. The shavings move around a lot so you may end up with some melted to the towels. My main thought was trying to protect the iron from permanently melting crayons to it. Now you make a quick run over the top layer with the iron. Adults should do the ironing-start at lowest setting if it doesn’t seem warm enough increase a bit at a time.
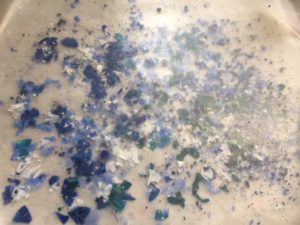
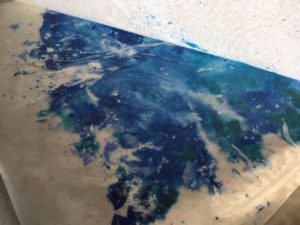
Draw a raindrop shape onto the wax paper and cut out the water drop shape. Next use a hole punch to pop a hole in the top of the raindrop. String up the raindrops and tape or wrap it around a stick or dowel or wooden spoon. If you haven’t got anything to use just put it with a line of tape right on the window. If I had blue painters tape I would have just put a line of that on the window.
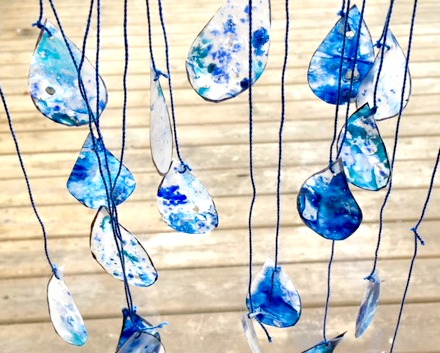 The sun is trying to push through the clouds!! Better hurry and grab a kiddo and doggo and get out for a walk….
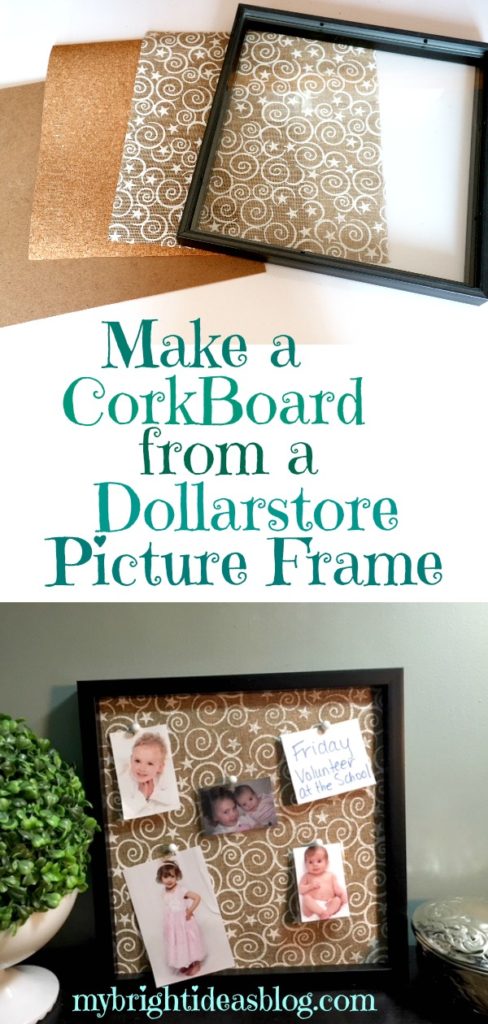
How to make a DollarStore Picture Frame into a Cork Board! Easy Project!

Hello again! Today’s project is all made from Dollarstore items! Its a bulletin board or corkboard-covered in fabric! The Dollarama Stores near me are getting great craft items. They are no longer everything in the store is $1 but they are getting better quality items and still much cheaper and closer than going to my local craft store.
For this project I purchased a very modern photo frame for $4, a roll of cork $3, a roll of jute (this one had a white painted design) you could use fabric for this instead. Additionally, you will need your scissors, ruler and hot glue gun and some cute tacks to post pictures or notes to it.
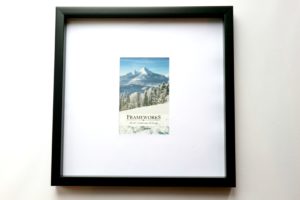
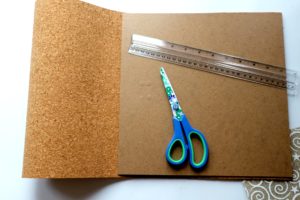
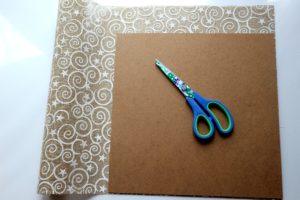
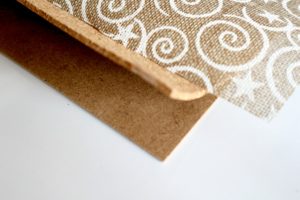
The frame I used was square 12×12. Take off the backing and remove the glass from the frame. Use the backing to trace and cut the cork to exactly the same size. Next cut the fabric larger than the backing. Make it an inch wider all the way around so you can wrap it around the cork and board and secure it on the back.
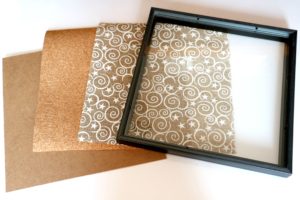
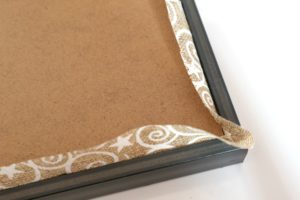
Now stack the layers-the board on the bottom, then the cork, then the fabric-and push it into the frame. Pull the fabric in tight. Everything should be snug.
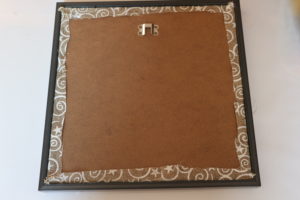


Hot glue the fabric flat-close to the edge and trim off extra fabric. Fold the corners so it is tidy with a mitred look. Find some little pictures and cute push pins. At the moment I have it leaned against a wall on a side table but it could be hung up on the wall….in fact-there is plenty of supplies left over to make more frames and put a collection of 2 or 3 on a wall! I just took down some shelves and know just the place!
All in all this is a 10 minute project with a cost of about $10 with left overs to make more projects. It was a success!

…
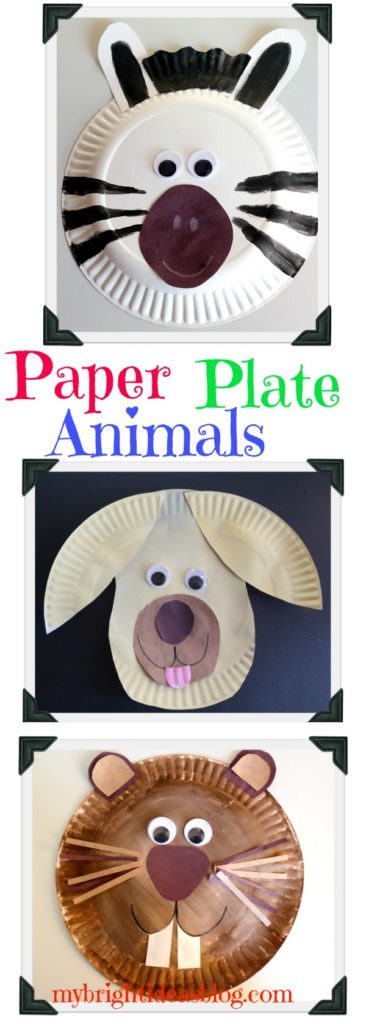
Paper Plate Animals Groundhog Zebra Dog
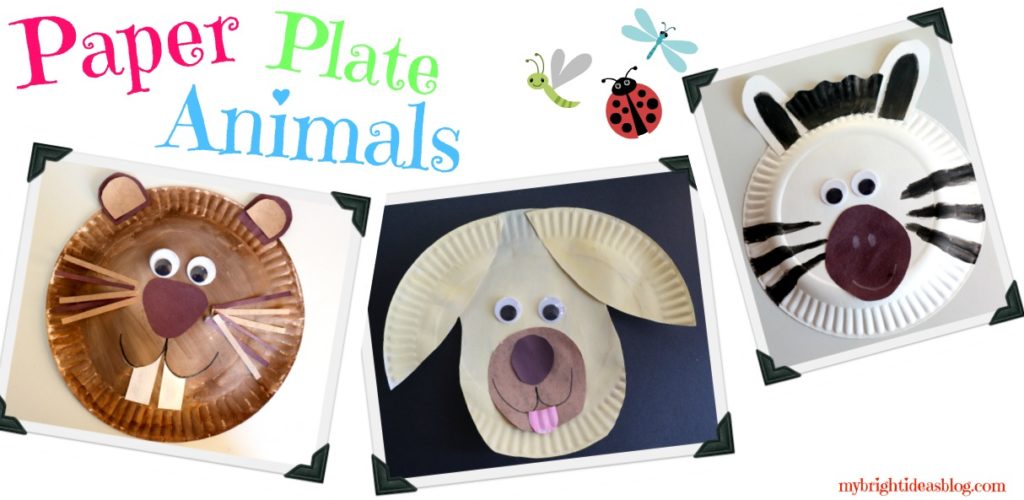
It’s March Break this week! That means it’s time to look around the house for easy, inexpensive crafts using things we already have. My favorite go-to craft items are paper plates, lunch bags and coffee filters. There is so much you can do with these basic household items-and no trip to the craft store is required. Endless possibilities!
Today lets talk about the sturdy paper plate! For crafts, I like the thin ones that makes you nervous at a picnic that your coleslaw and hot dog are going to fall off the plate and onto your sandals. EEK! They might not be great for dinner in the park, but that is what makes them so perfect for crafting.
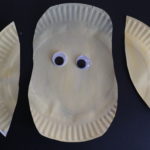
For these three crafts we have used a thin paper plate, paint and brush, construction paper, scissors and glue, big googly eyes and a black marker.
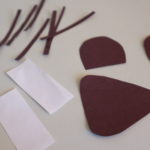
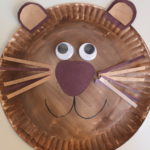
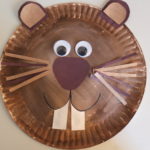
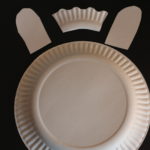
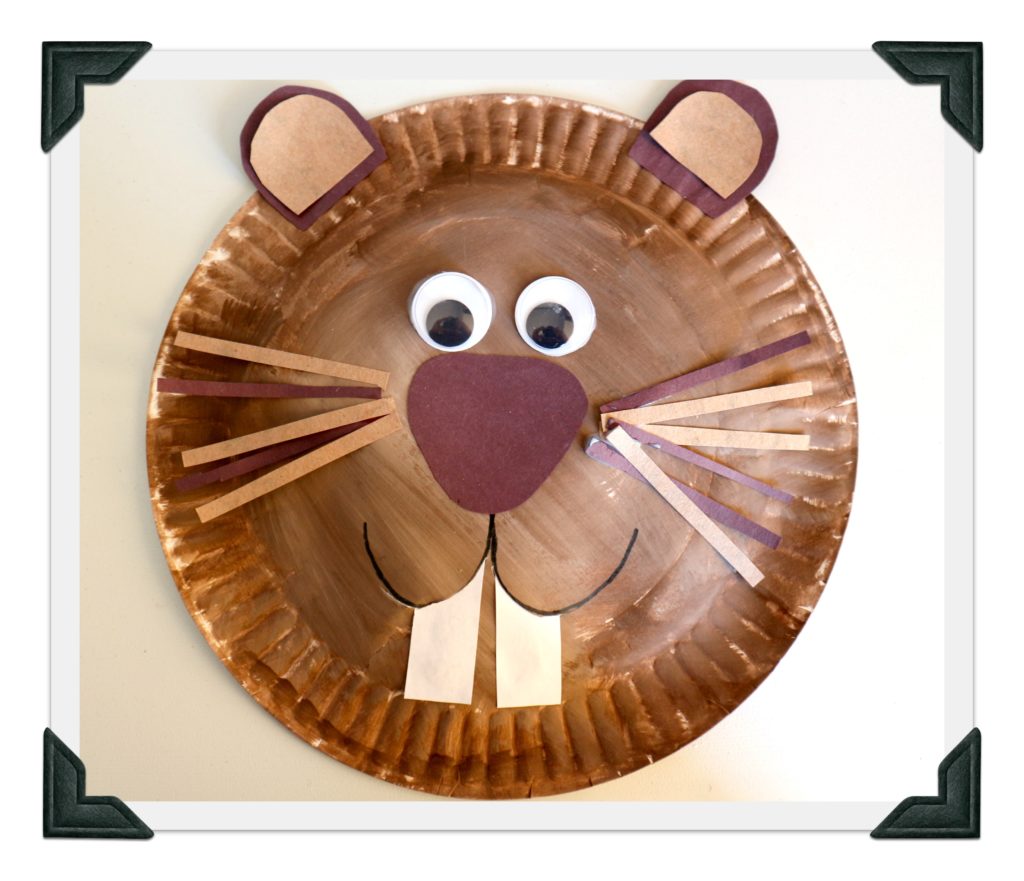
This brown paper plate animal was meant to be a beaver, but it could easily be a bear or groundhog if you want it to match a hibernation theme or a book you have read. Here I used 2 shades of brown for the ears, slivers of paper for the whiskers a brown nose that looks like a triangle with soft edges. After drawing on the mouth, you can slice a slit thru plate along the mouth line to slide the white teeth through and add a dab of glue on the back to keep them in place.
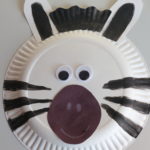
This is a paper plate zebra. Just add a scrap off of another plate, paint it black to be his mane and some ears. Add black stripes with a marker. The nose is sort of an oval/diamond shape. Use a white crayon or pencil crayon to make his mouth and nostrils. I love big googly eyes to add to my crafts but you could draw on eyes if you’re out of googly eyes.
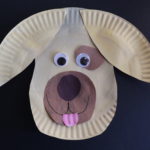
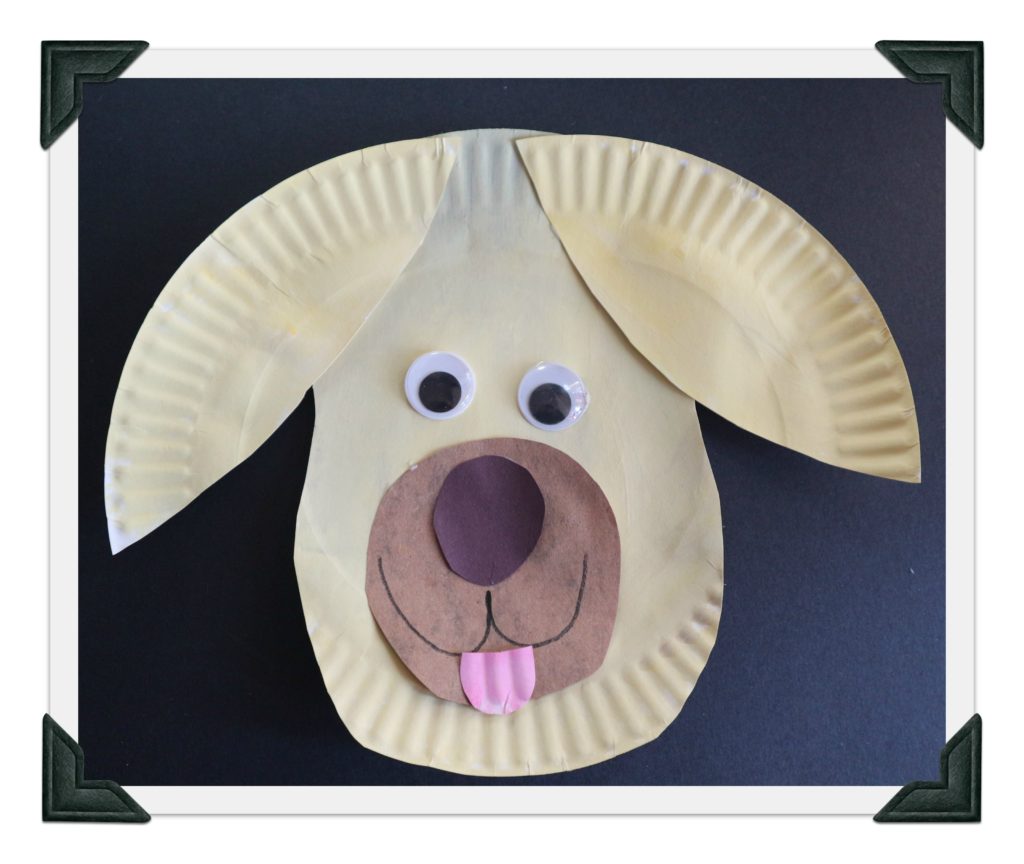
This dog looks like our Gus. Gus badly needs a haircut at the moment-he is bringing in all sorts of dirt.
For this dog paper plate craft we painted him a creamy yellow and added a big, round, brown snout cut from construction paper. The nose is simple circle of black paper…but a big pink or black pom-pom would be cute too. We put a brown patch under the googly eye and had his tongue sticking out. Again you could slice a line in the paper plate to have the tongue look like its coming out of his mouth.
Have fun with your kids and crafts this March break!
…

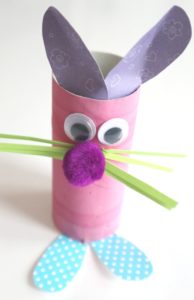
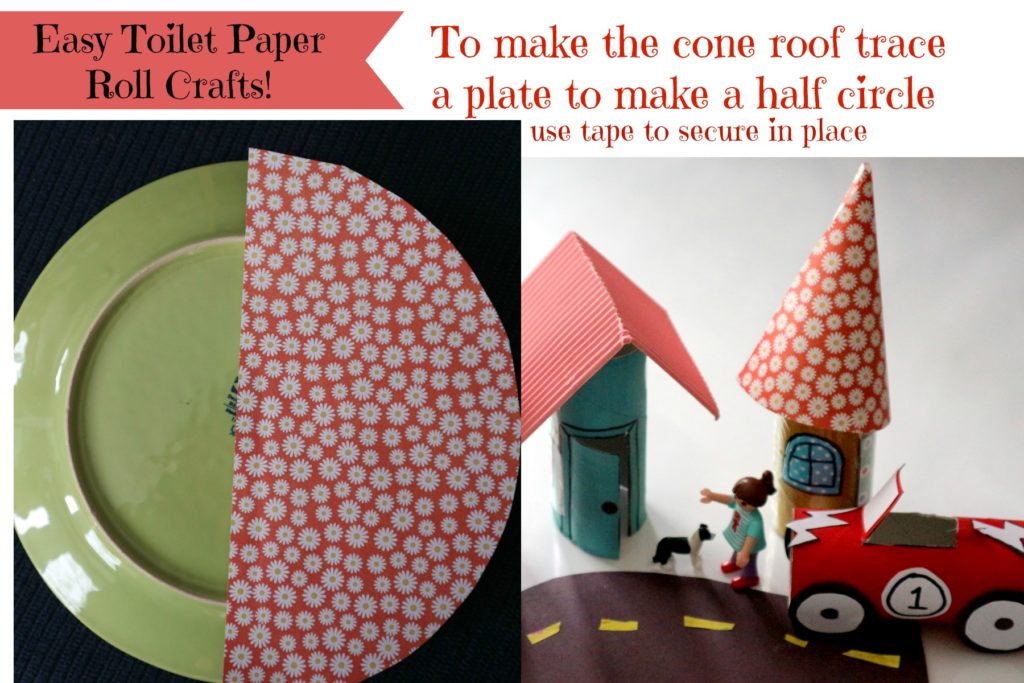
Toilet Paper Roll Crafts-Use your loo roll tube for easy Crafts!
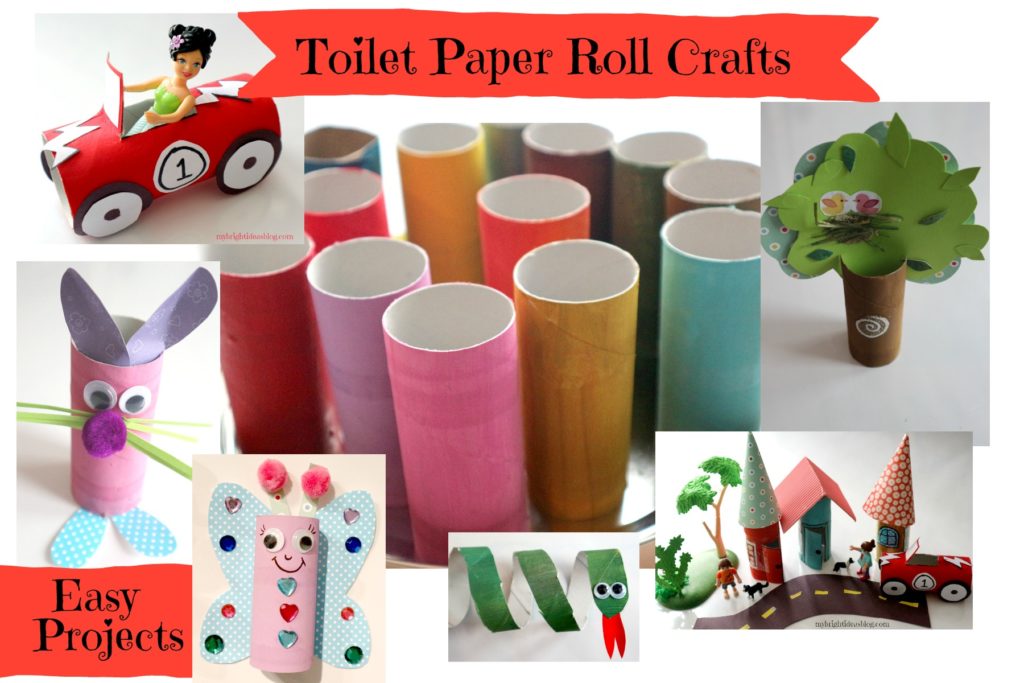
Are you collecting toilet paper rolls for kids crafts?!? Of course you are! Here are some ideas for what to do with them.

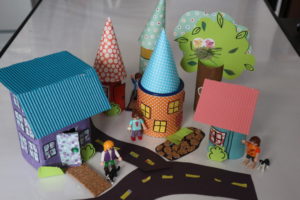
There is just so many things you can make once the ideas start to roll in. I started with the polly pocket race car, then a tree, several houses and a road. Using tea tins and boxes I made some different shaped houses. Several toilet paper houses too.
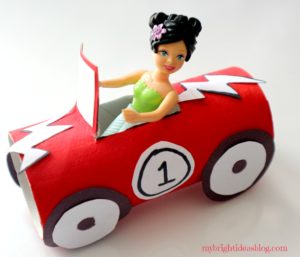
Cruising through pinterest I can see a lot more ideas and not to worry I have plenty of toilet rolls saved for more crafting. March break is this week and that is the perfect time to get out the cheap crafts and paints and glues and make a toilet paper roll community. Have Fun Everyone!
…

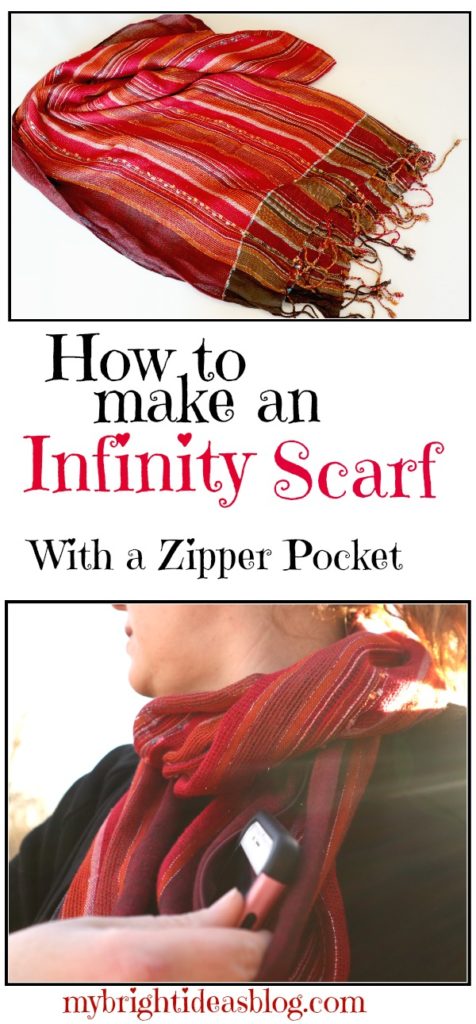
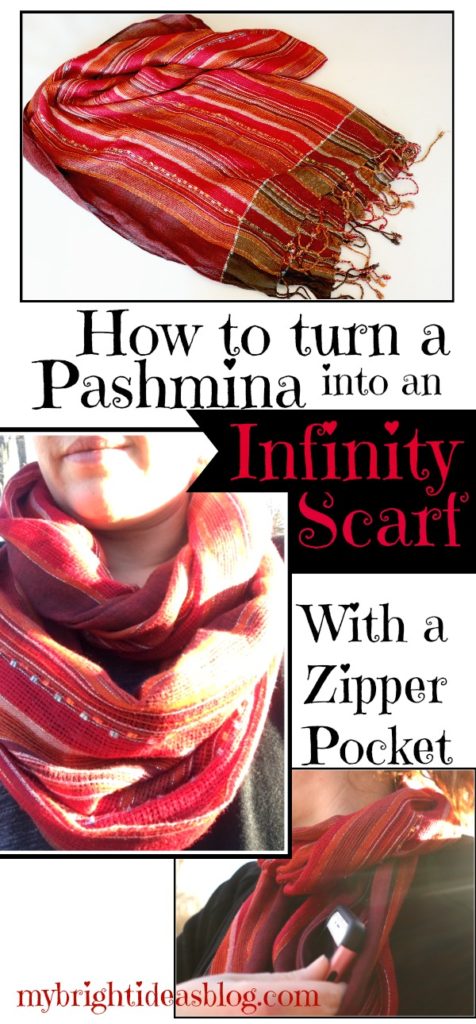
How to Make an Easy Infinity Scarf with Zipper Hidden Pocket
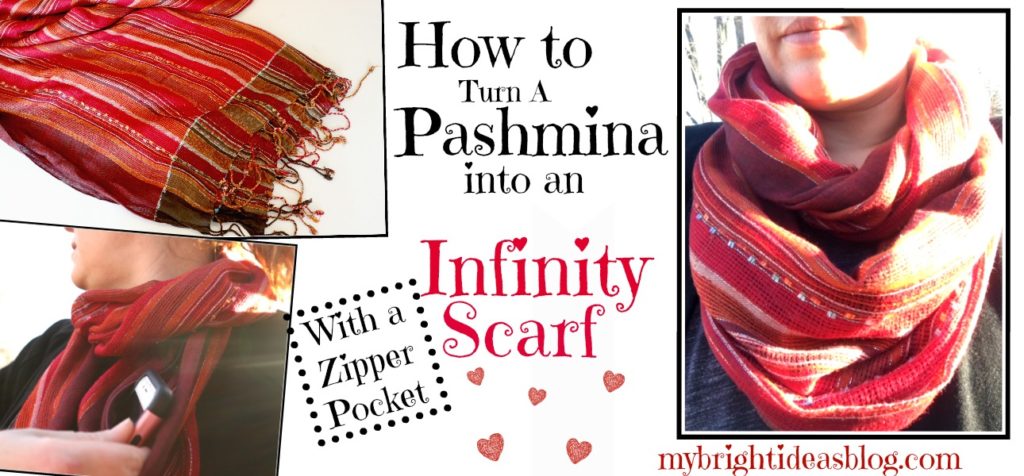
I love scarves! I find a cute pattern or fabulous colored scarf on sale and I can’t help myself! Then I hoard them. So I had an idea to make a scarf with a hidden pocket and thought, instead of using new fabric why not make it with an older scarf I had not used in a long time.
The hidden pocket scarf idea I stumbled upon the last time I was travelling abroad and wanted to be able to keep my passport handy-but hidden while on the journey. Now I am thinking about how handy it would be to walk the dogs with keys, ID and phone hidden in a zipper section of the scarf. Maybe it would be a gift idea for a tween or teenager who isn’t into purses and needs to carry her personal items.
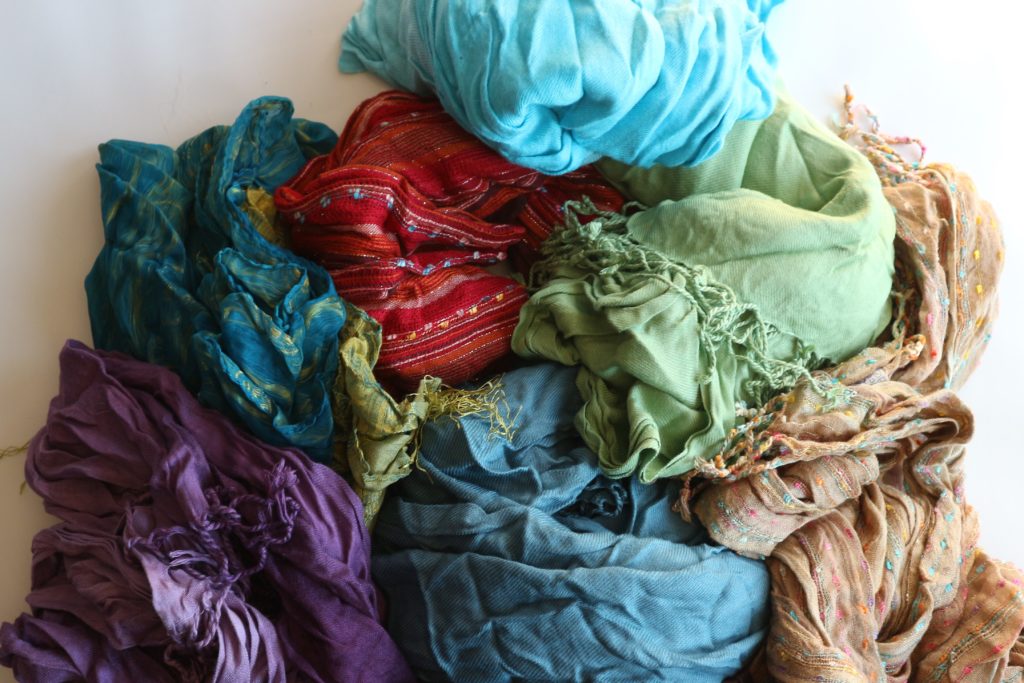
Here are just a few of my older pashmina scarves. I have bins and bins of them.
For this project you will need:
- Scarf or Fabric
- Short Zipper (7 inches or 18 cm long)
- Sewing Machine
- Pins
- Scissors
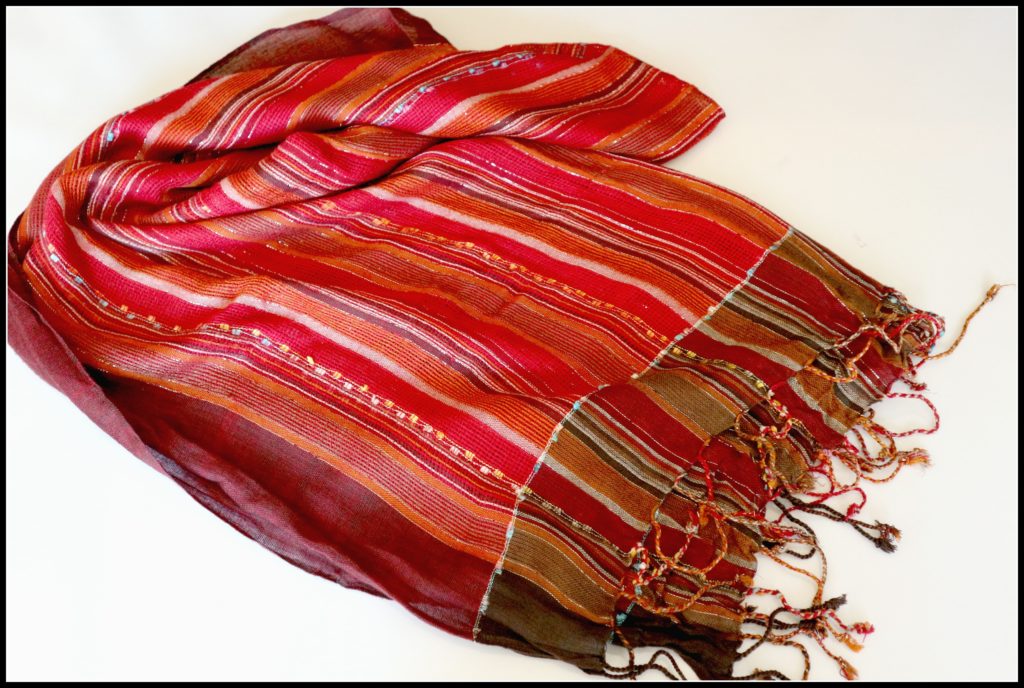
I happened to have a small RED zipper so I chose the red scarf. I love it when a project uses old things I have around rather than buying new supplies!
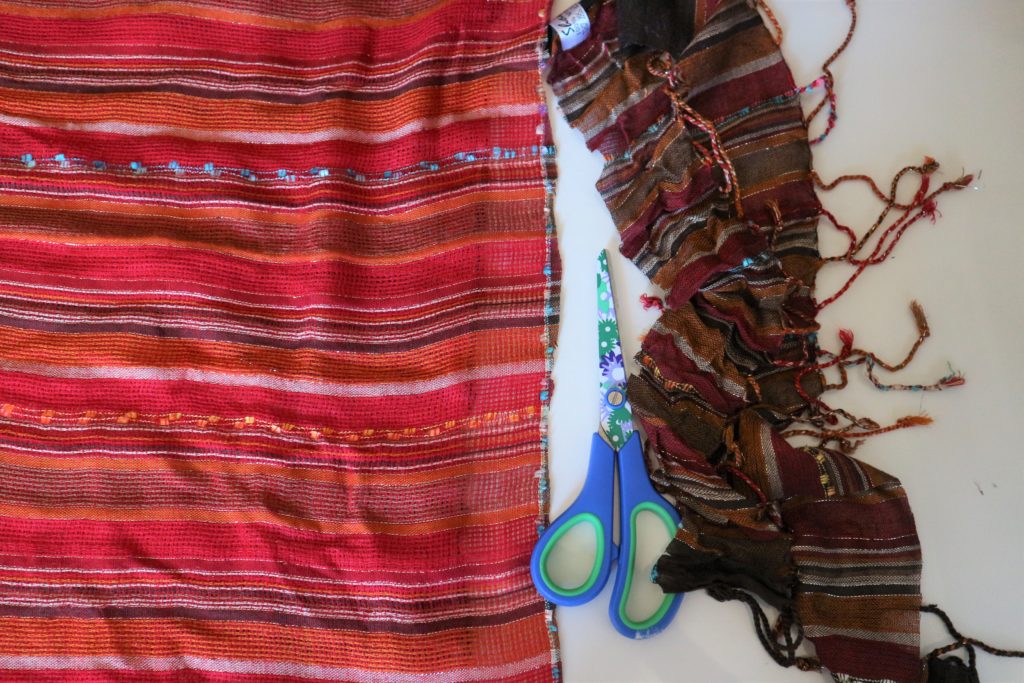
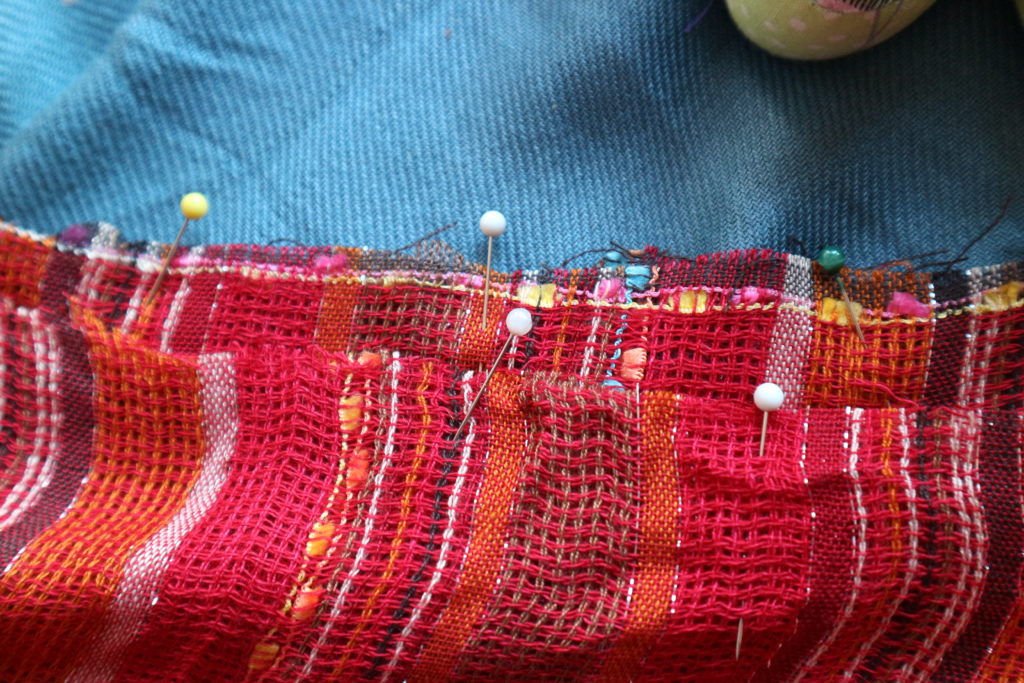
If you are using a pashmina trim off the fringe.
You can also make the zippered infinity scarves out of old clothes, a soft blanket or scarves or new fresh fabric.
For this project I would find a bit of fabric that measures at least 18 x 70 inches (45cms x 177cms).
My scarf was 26 x 69 inches (66 cms x 175 cms). It was even shorter after I trimmed off the fringe and I think it’s a great length-finished its 66 inches long. I prefer it to be extra wide too.
You will need a zipper approx. 7 inches or 18cms long.

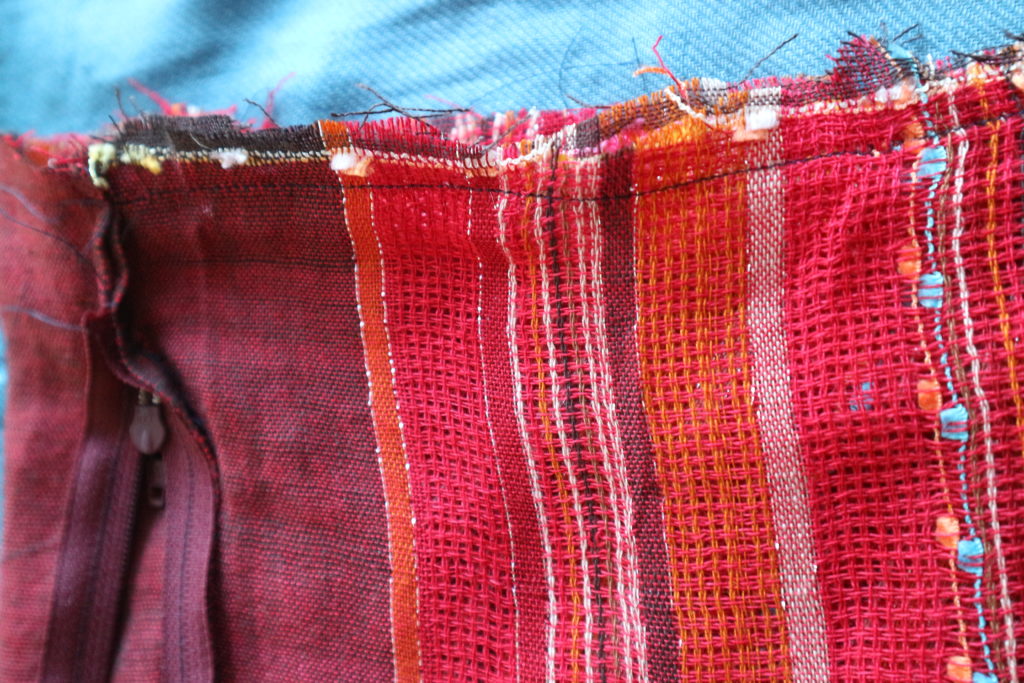
Fold the scarf in half, so its long and skinny with right sides facing together. Decide where you would like the zipper to sit. I put mine a few inches from the end. Using pins, mark the ends of where the zipper will go.
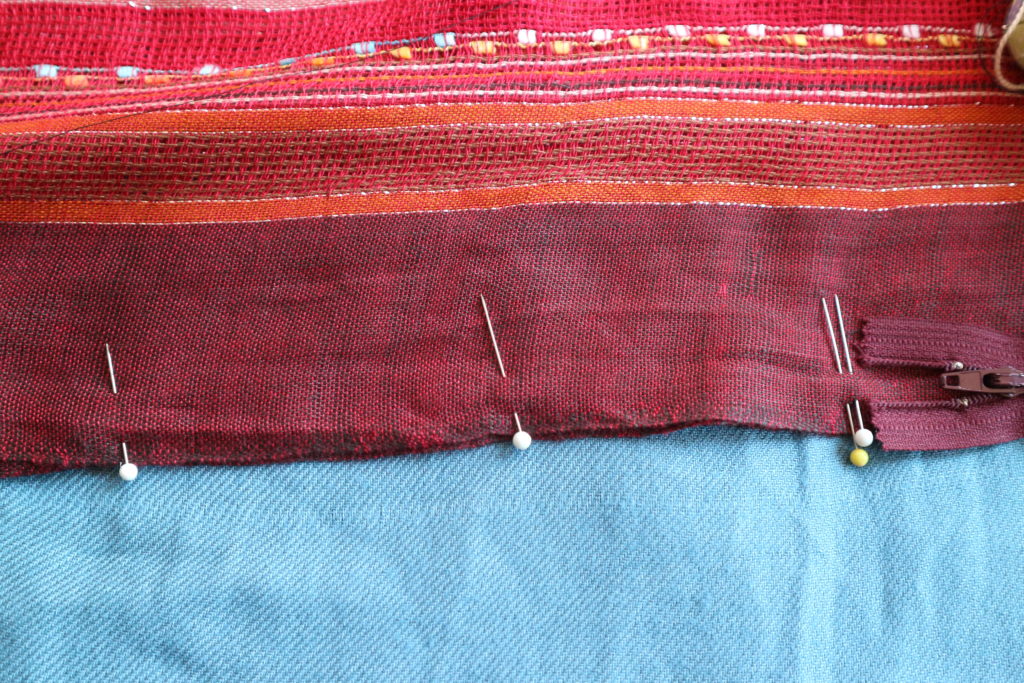
Pin along the rest of edge.
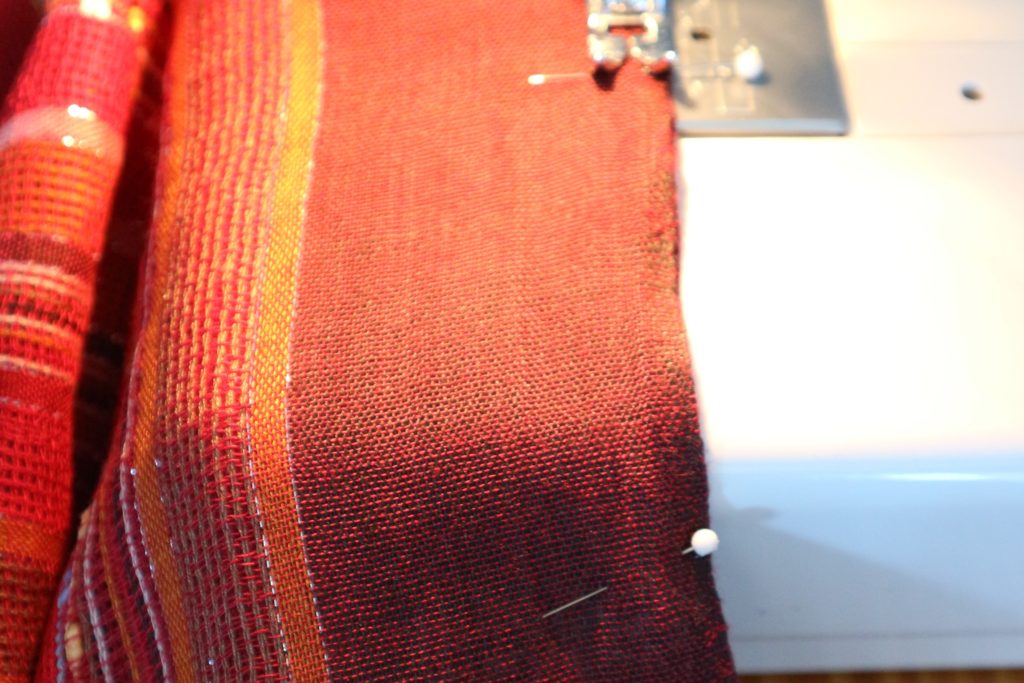
Sew along the long edge. Stop sewing where you marked the zipper will be.
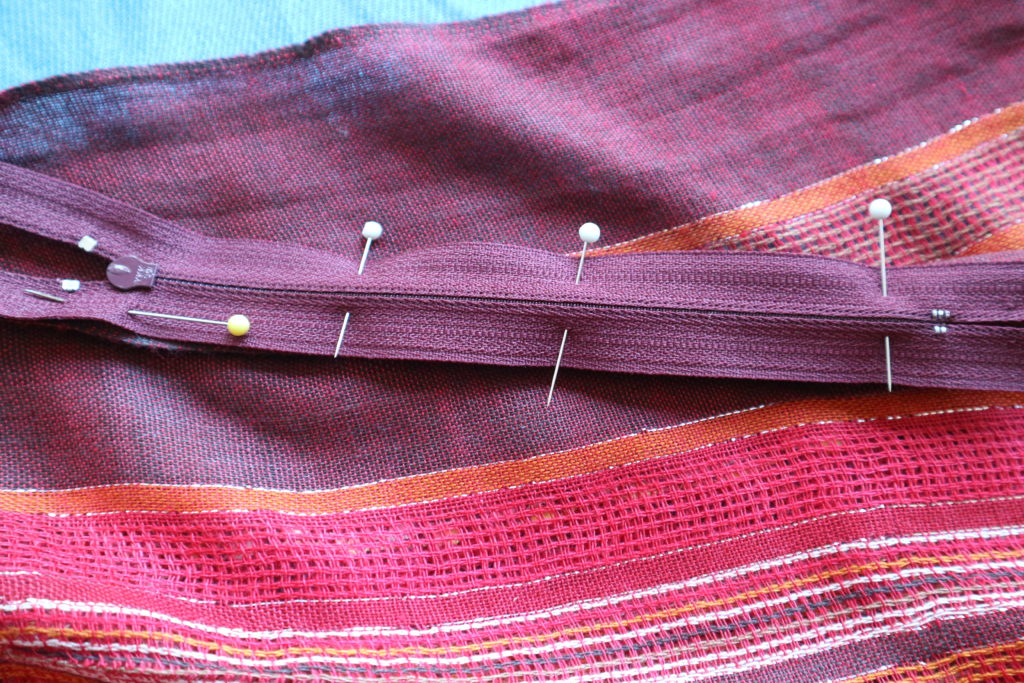
Open the gap you left for the zipper and pin one side of the zipper in place. The right side of the zipper should be down facing the right side of the fabric.
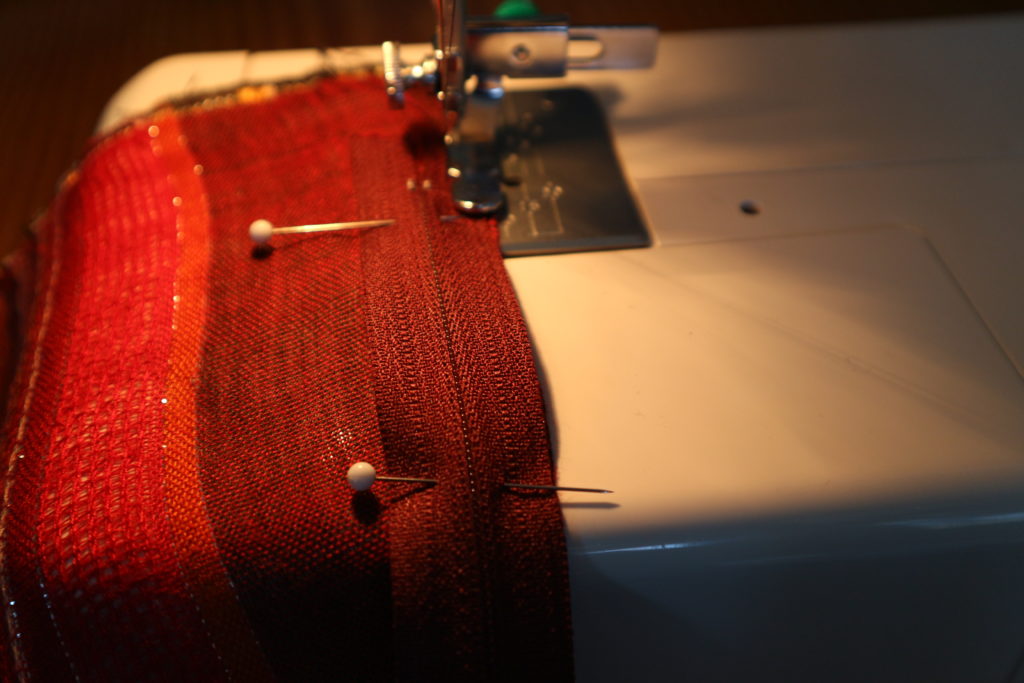
Sew the zipper into place on the first side. Flip it over and pin and sew the other side in place.
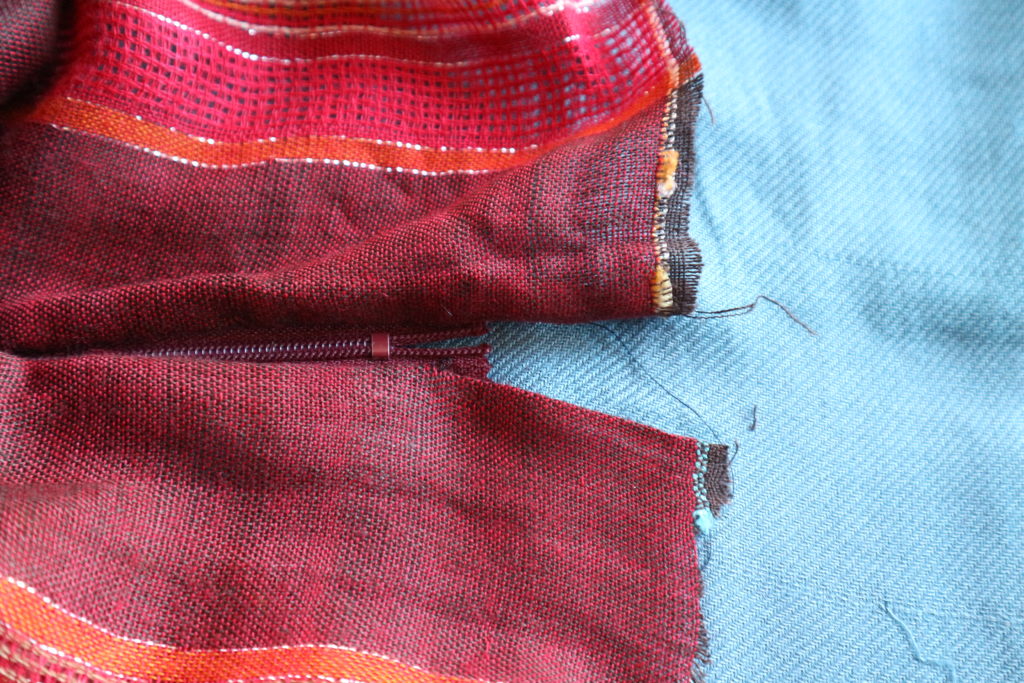
Close the gap at the end of the scarf by sewing the seam together.
Now test the zipper. It’s opening smoothly. Yeah! Leave the zipper open.
Pull one end of the tube through to meet the other end. Match up the seams and pin all the way around the tube.
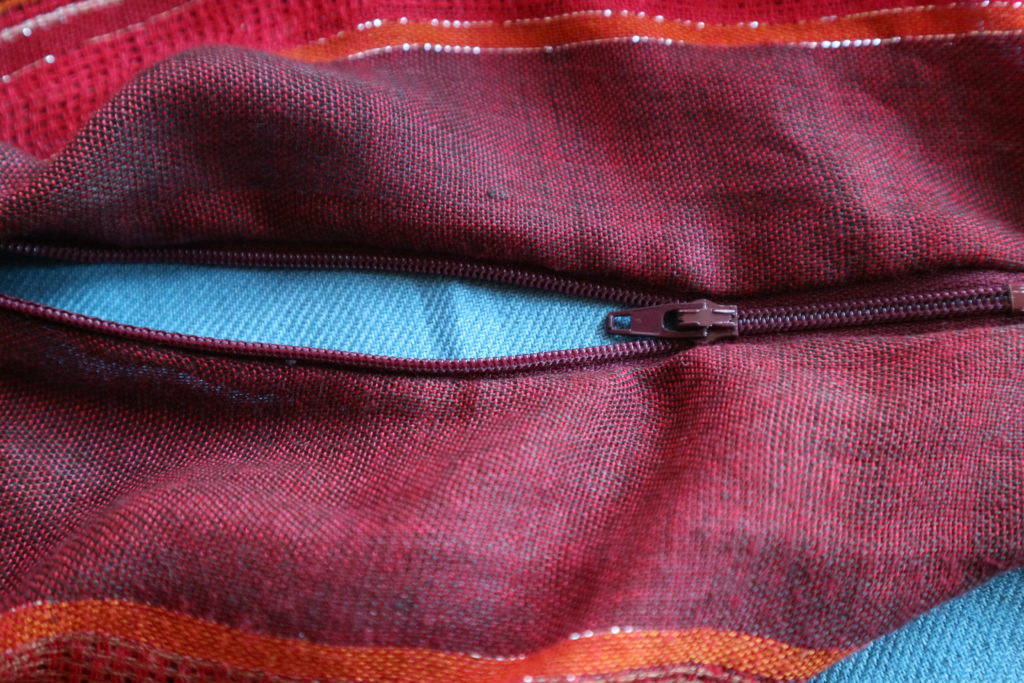
Sew all the way around the edge. Be sure to only sew through two layers – we’re making the tube into a circle. Sew the two layers together all the way around.
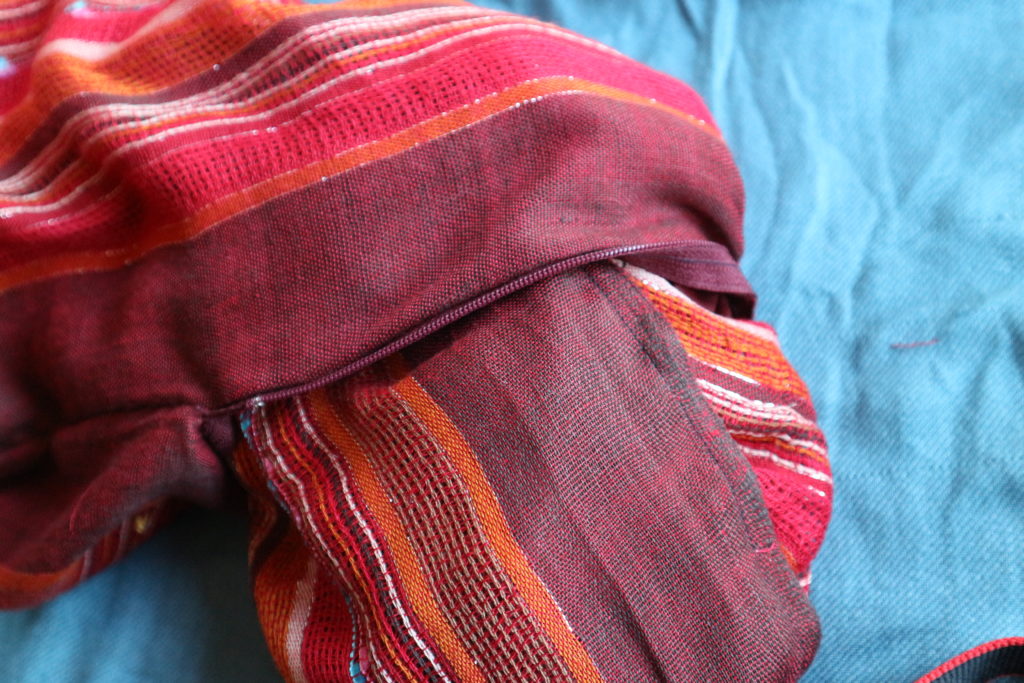
Pull the scarf out through the open zipper hole.

Great Job! Now try it on!
Use the zipper pocket to hide your phone or passport or other lightweight items. Your belongings will fall down toward the bottom of the scarf. That is cool with me since its easy to grab.
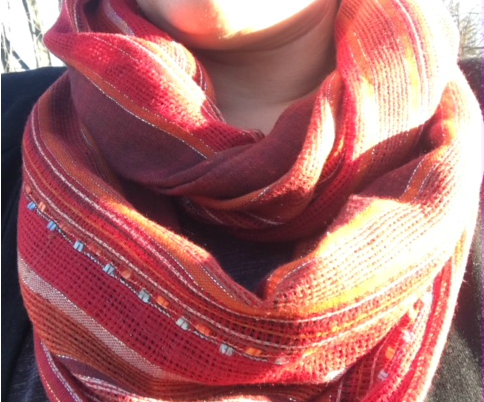
Tuck the zipper towards your body so its not noticeable.
This is a great solution for where to put your things when wearing leggings that have no pockets. Or travelling in an area where you are concerned about pickpockets. Or dog walking….It’s just plain convenient too.
I really enjoyed reinventing my scarf! Thanks for reading this post, feel free to comment if you need more details!
…

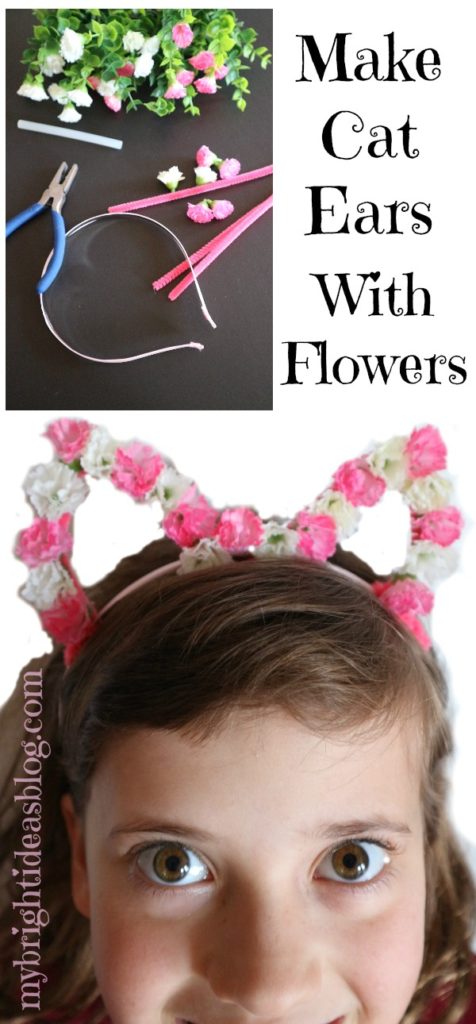
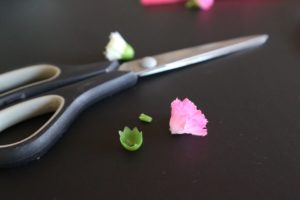
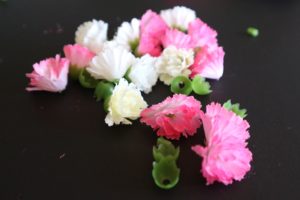
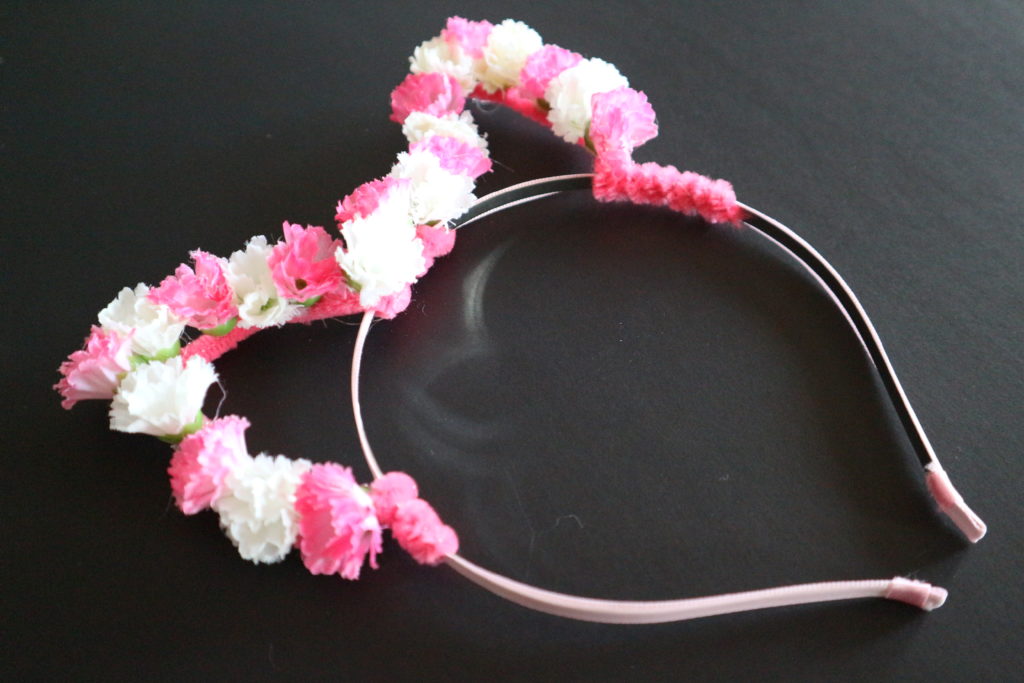
Easy to Make “Kitty” Cat Ear Hairband with Flowers
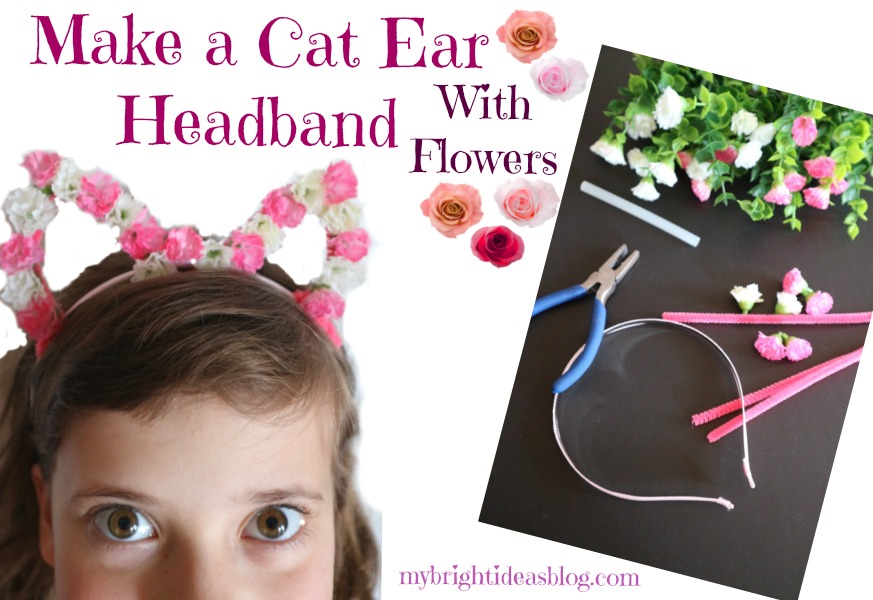
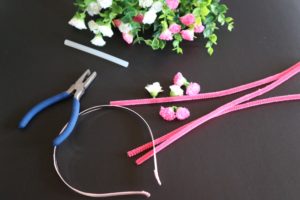
My kids tell me that cat ear hairbands are what everyone is wearing to school. So make one that is springy with flowers and pipe-cleaners. You will need:
Artificial plants with small flowers, a plain hairband, 2 matching pipe-cleaners, hot glue gun and scissors.
Use one pipe-cleaner to make each cat ear, wrap the wire tightly then use plyers to pinch it tight so it doesn’t poke you in the head.
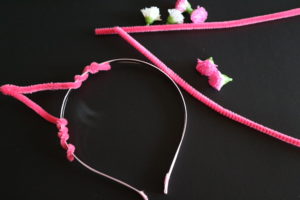

Pop the flowers off the stems and trim off the little green nub. This will make the flower sit flat when you glue it on but it will also make the flower fall apart a bit so put a dot of glue on the flower and attach the green plastic end back on. Then glue the flower into place.
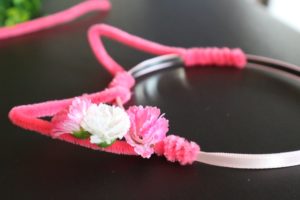
Remember to pull all the glue strings off from the hot glue gun. I always miss some! This would make a fun project for a girls playdate or visit to grandma’s. Have fun!
….