I’m trying to be patient for spring to come but its just early March and it snowed all day….sigh.
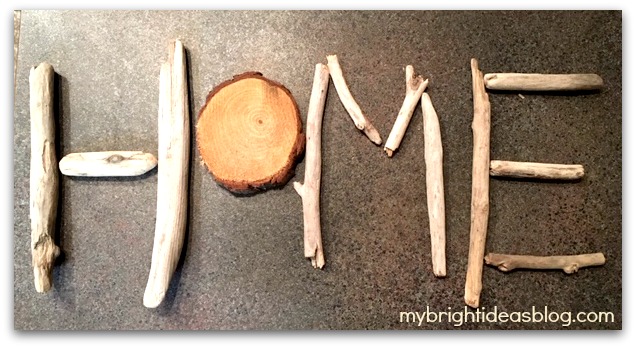
Fortunately, I am hoarding craft supplies…including driftwood from trips to the shores last year. So let’s put it together for another rustic, nature craft.
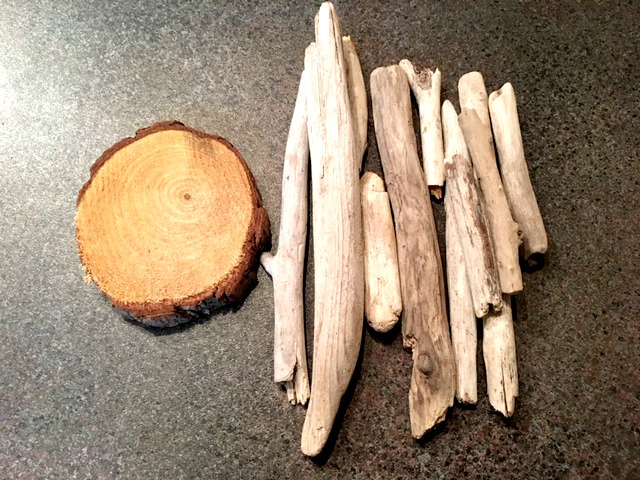
Gather your supplies.
You will need:
- Driftwood
- Wood Slice or Stones
- Wood Scrap
- Wood Stain
- Rag and Gloves
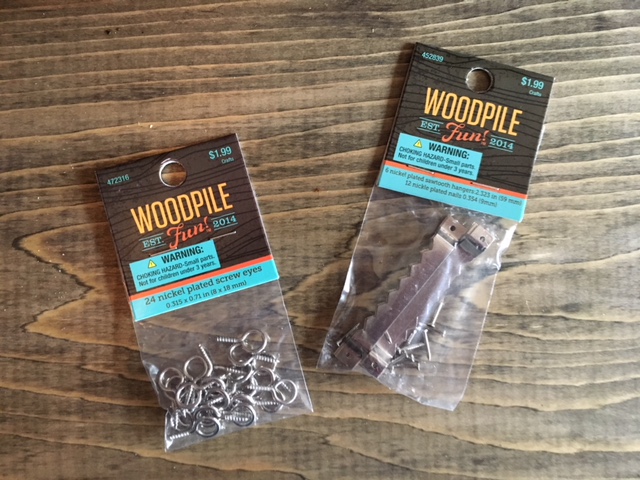
- Eye Hooks
- Twine
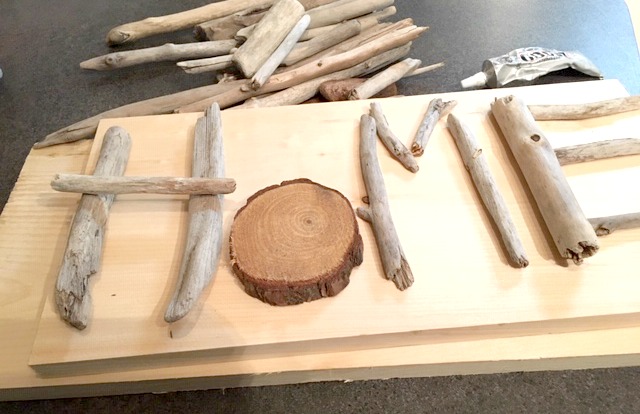
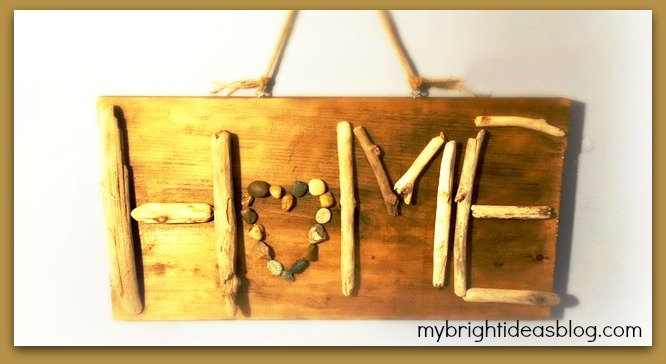
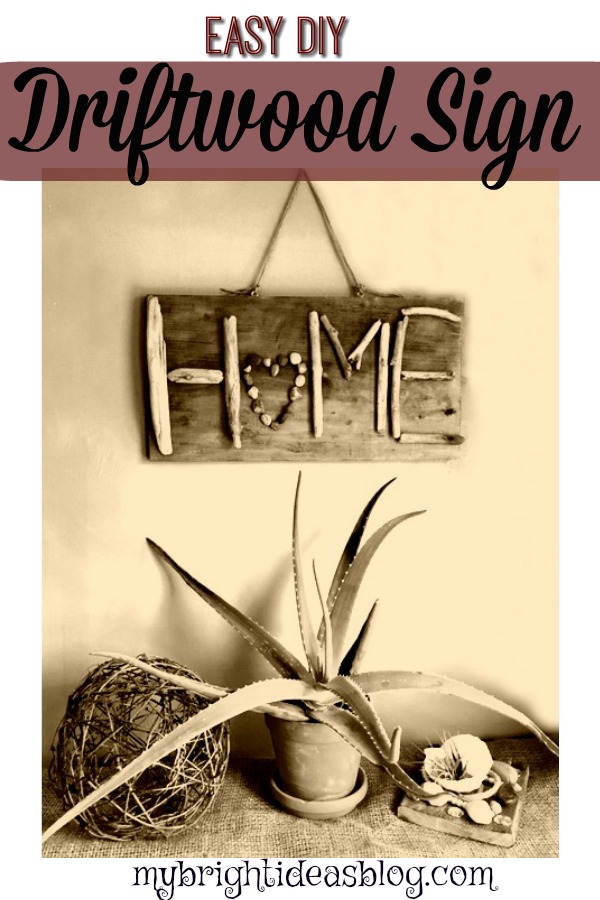
Start by finding a scrap piece of lumber that will match the size of your driftwood. Lay out your pieces of driftwood to arrange them and make sure they fit! My board is 9 x 18 inches (23 x 46 cms) and its a pretty good match for my driftwood pieces.
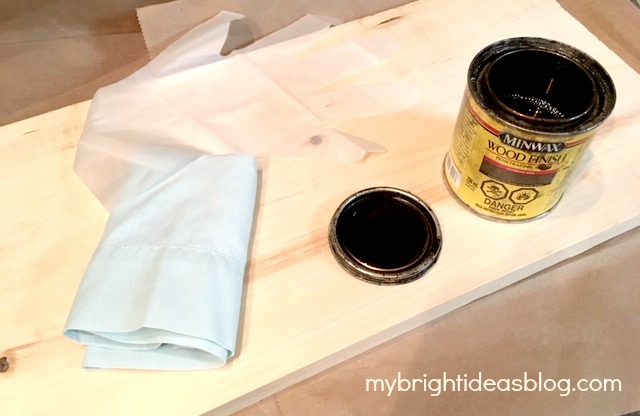
As always, I used my little pot of Miniwax Jacobean stain. I love this dark shade.
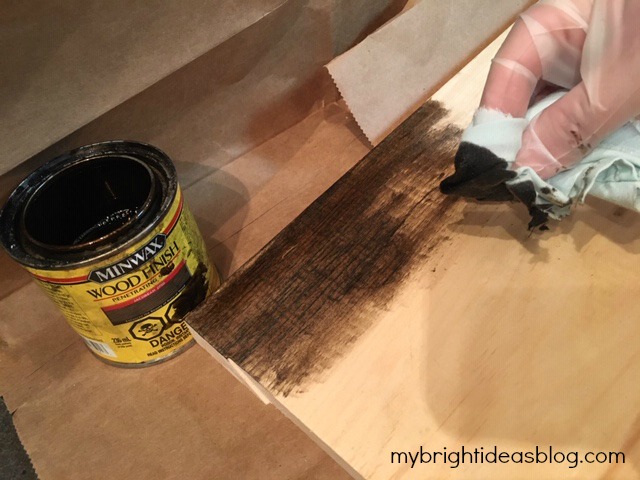
Apply with a rag or brush in the directions of the grain. Allow the wood to dry according to the instructions. My stain can says to wait 8 hours before applying a clear polyurethane. I didn’t add a clear coat because I like the mat finish.
Here I am playing with the driftwood while the stain dries. I’m so impatient.
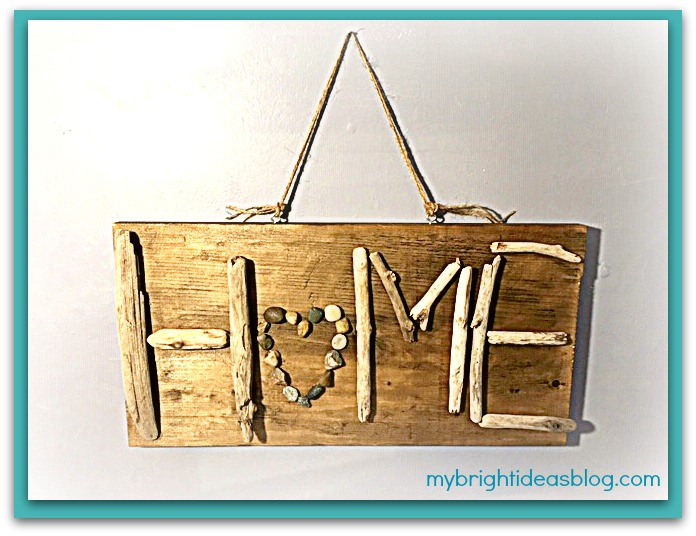
Now that its dry you should decide on how your going to hang the sign up.
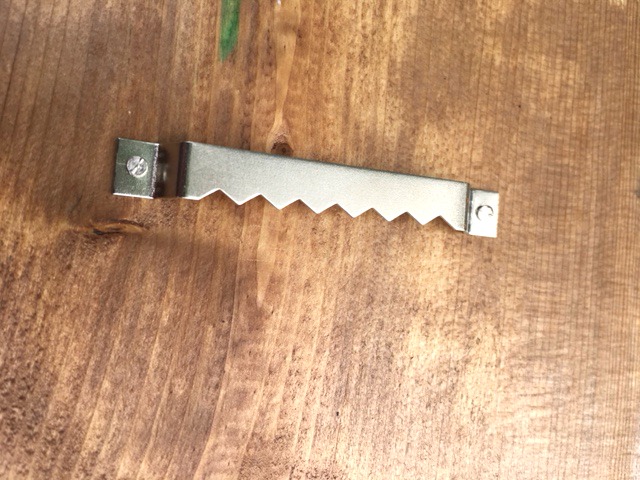
Hang it like a picture?
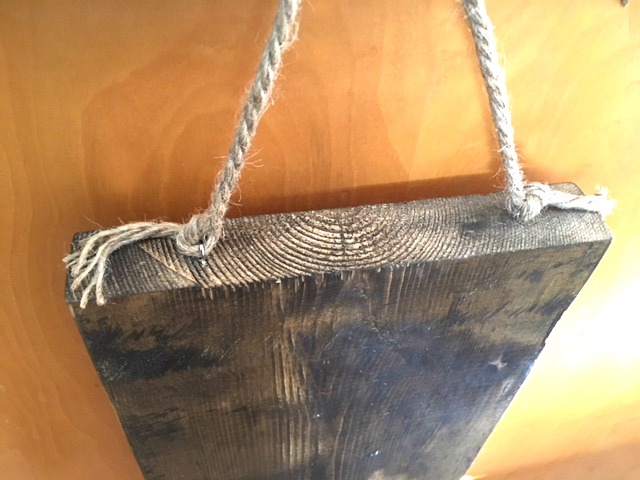
Or like a sign with screw eyes and a bit of twine or jute rope? I’ve used the above options on several projects.
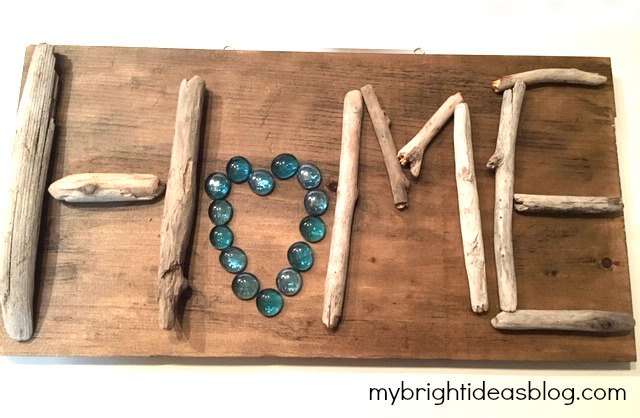
Now the stain is dry and I can pull it all together. I found some blue glass stones? Hmmmm. Tempting to use them but I wanted to have this look natural.
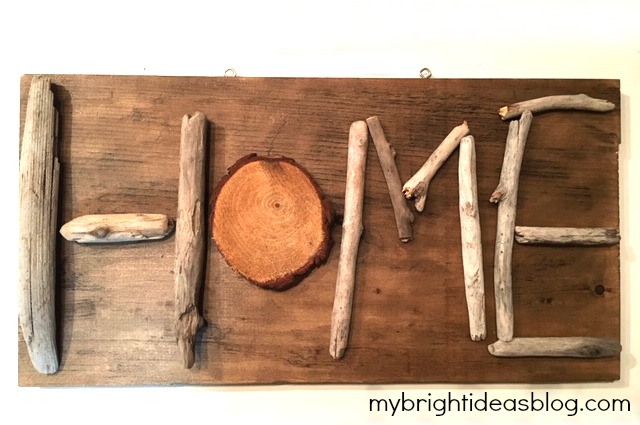
I also like the wood slice for the “O”. That is natural.
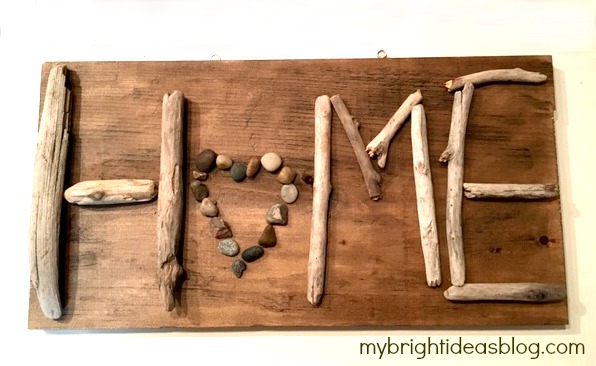
But after deliberations, I settled on small pebbles in the shape of a heart.
You can use your hot glue gun to attach the pieces to the wood. I might put this on the craft sale table at work so I used E6000 glue which is a very stinky permanent adhesive glue that will not pop off like hot glue can when it gets moved. Crack a window or work in your garage…it’s pretty strong smelling stuff.
And that is all there is to it!


Here are some other similar projects I have posted you might like….

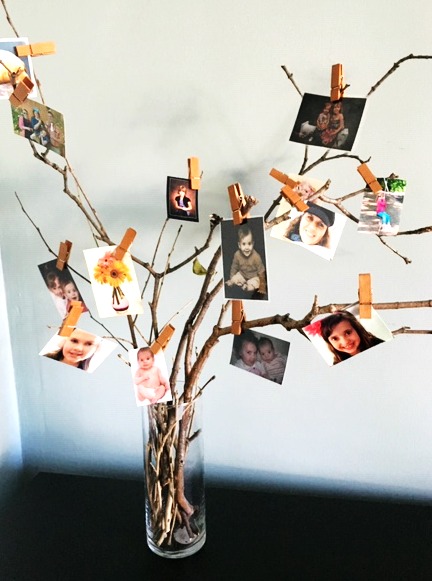
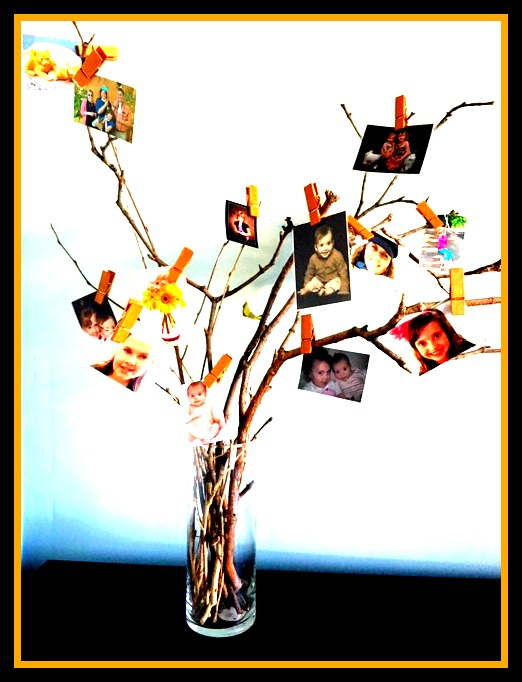
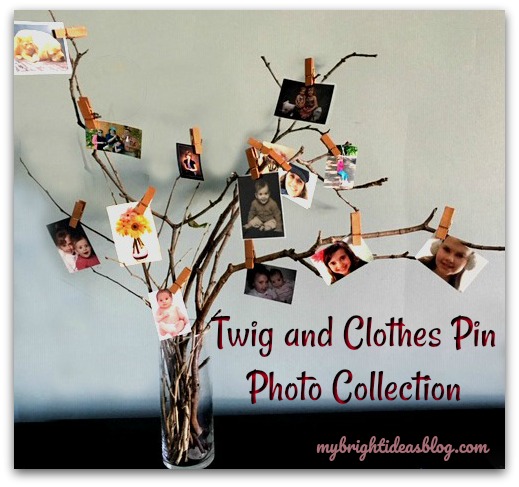
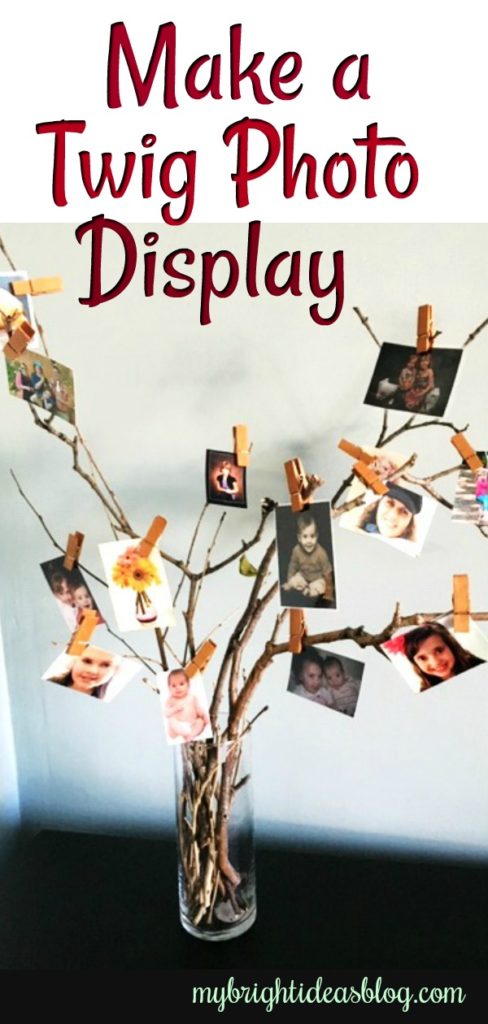
Make a Twig Photo Display
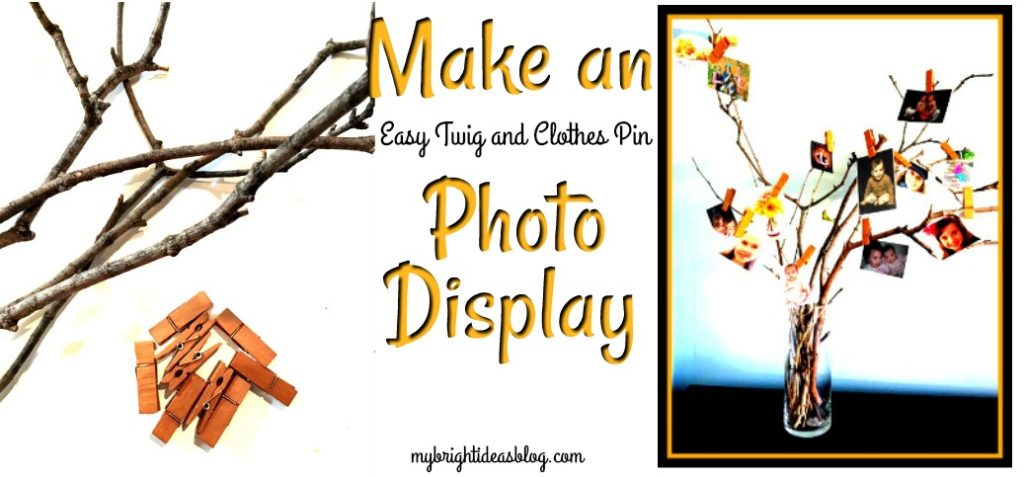
This is such an easy way to set up a quick photo display. It uses things you will already have at home.
I know this is my 4th twig project in the last 3 months but its such a fast, free and rustic product to work with. I have a particular tree that sheds sticks every time the wind blows. My last next door neighbour hated this tree. It made a sweet neighbour very bitter as it would litter those branches and bark all over their lawn too. She would say…that is a messy, messy tree!
What could I do but agree…..and make a craft with it! You know what they say….when life gives you lemons make lemonade.
You will need:
- a vase
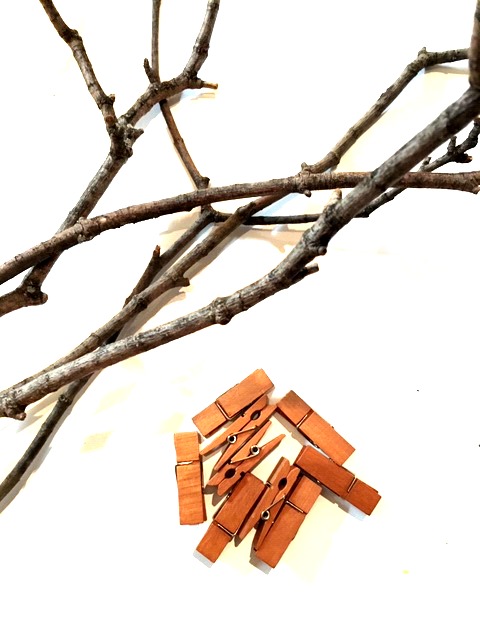
- sticks
- small photos
- clothes pegs
These clothes pins are from the craft store. They are a shorter version of a classic clothes pin with a coat of an orange stain. If you use regular clothes pins you could spray paint them or decorate the clothes pins to make them a little fancier.
Usually my posts are tutorials showing you how to do a project step by step. But I imagine most people can figure out that you put the sticks into the vase, clip the photos onto the sticks. Done.
If you have an open space on a table top-that looks bare, this could be a perfect solution.
Thank you for taking a moment to pause by my twig-projects-filled blog! I hope you will check out the other posts I have done with twigs…or sewing…or…photo frames…
See you again soon!

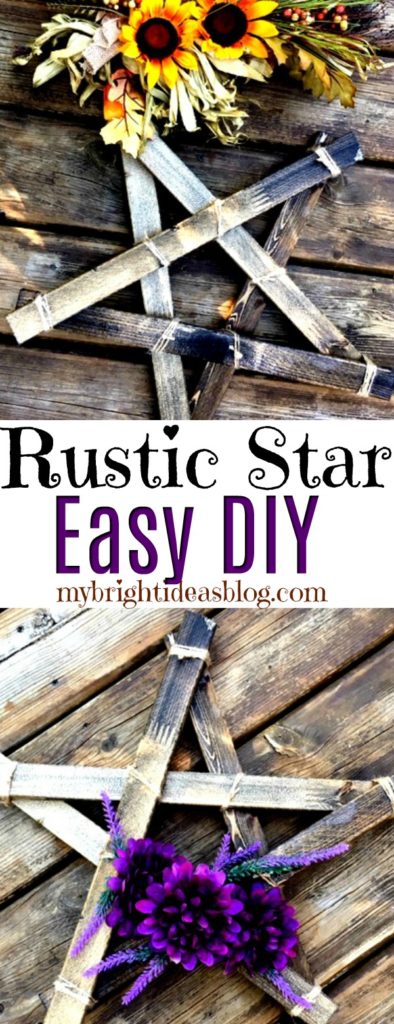
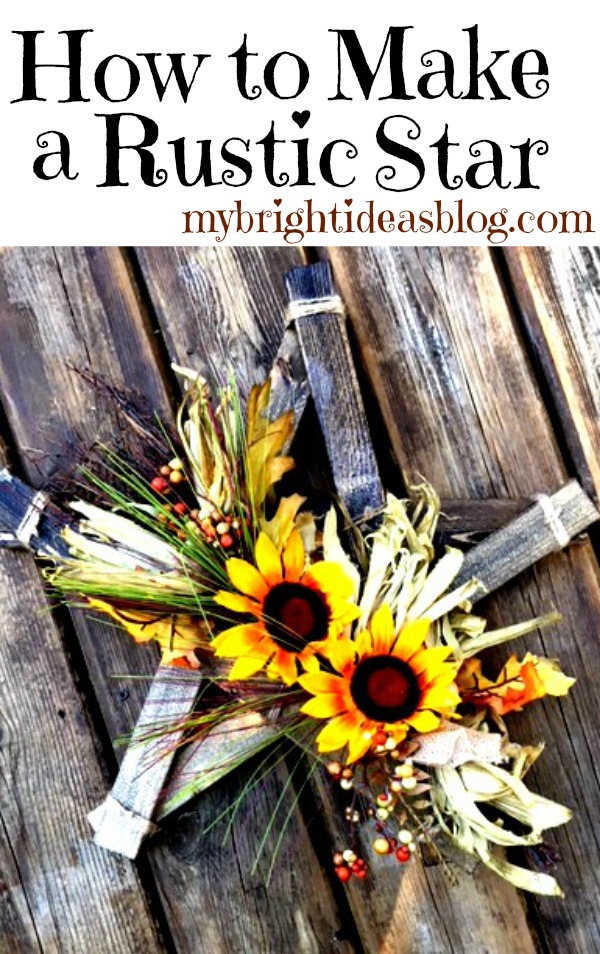
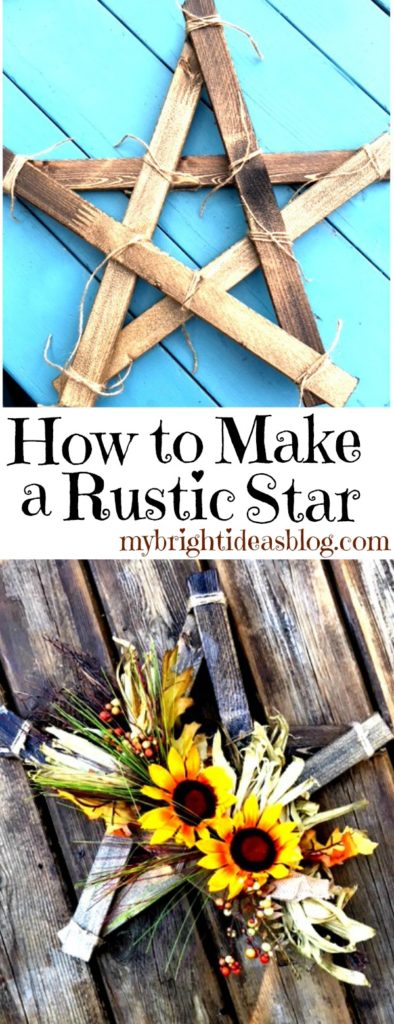
How to Make a Rustic Wooden Star
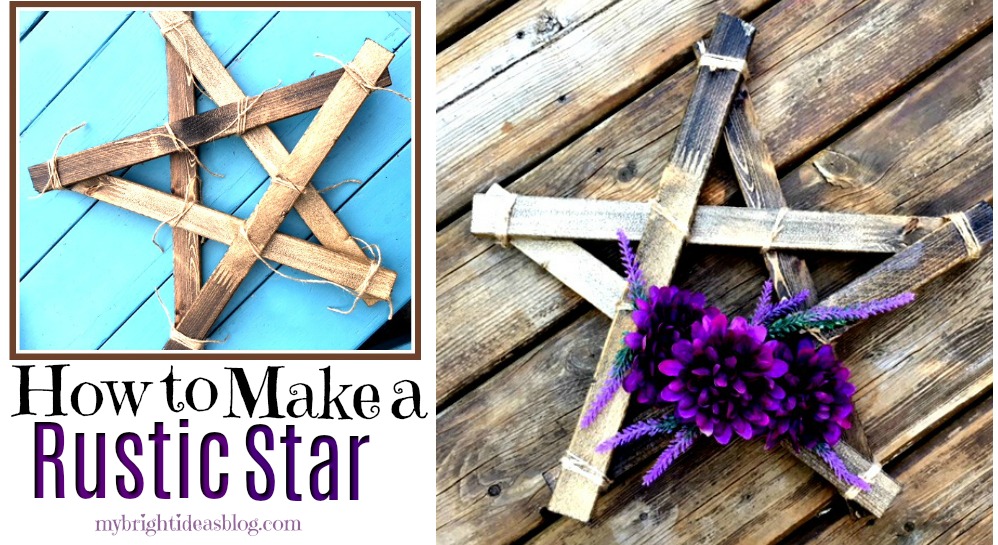
Have you seen these lovely rustic wooden stars and wondered, how hard can that be to make? Well let me tell you it’s ridiculous how easy it is to make this wood star.
Did I mention the wood cost is around $2.50? Say what….?!?!

You will need:
- 1×2 Board $2.50
- twine
- scissors
- stain or paint
- rag
- varnish
- paint brush
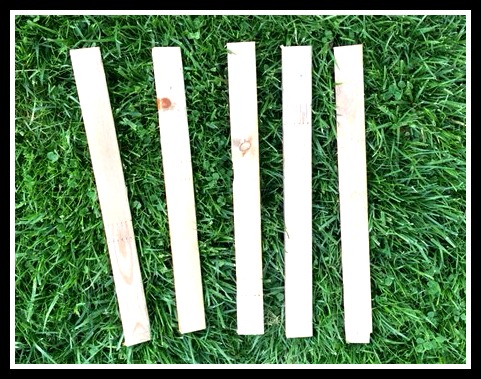
Cut the 1×2 lumber into 5 pieces 18 inches long. No wasted wood. Awesome!
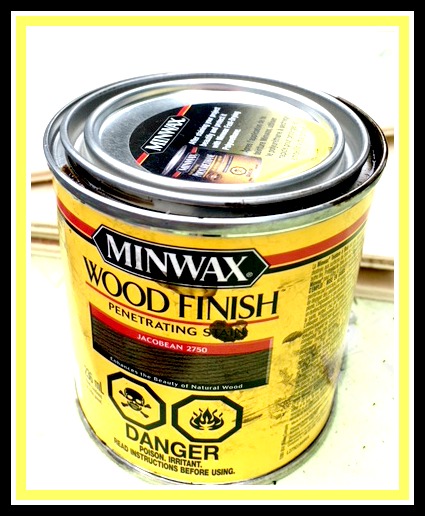
I used my FAVORITE wood stain Miniwax Jacobean – it has a dark walnut look to it that I just love! You could use paint instead. Dip a rag into the stain and rub it into the wood. Follow the instructions on the tin to leave it for the right amount of time to dry.
![]()
After allowing the stain to dry, I put on a coat of polyurethane. This adds a clear coat of protection if you plan to use it outdoors. If you intend to use it indoors like on a mantel you could skip it.
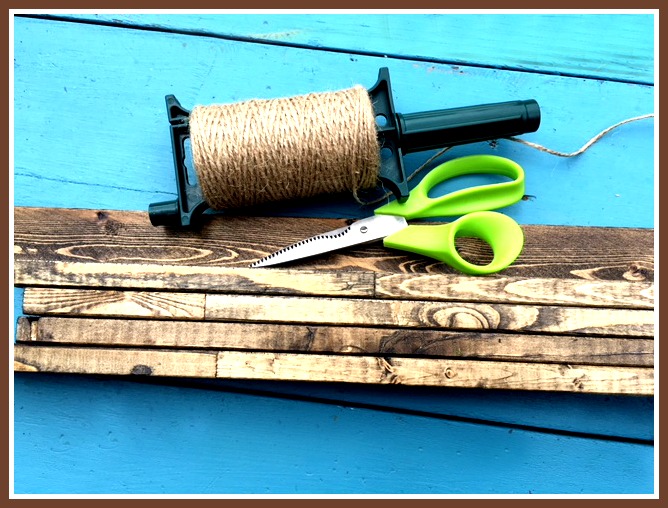
Gather your finished pieces, scissors and twine….
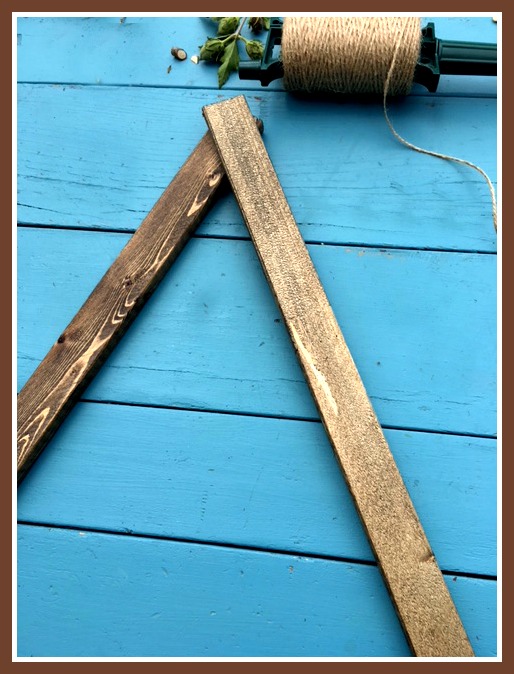
Place one piece on an angle to the left. Lean the second piece on top,angled to the right.
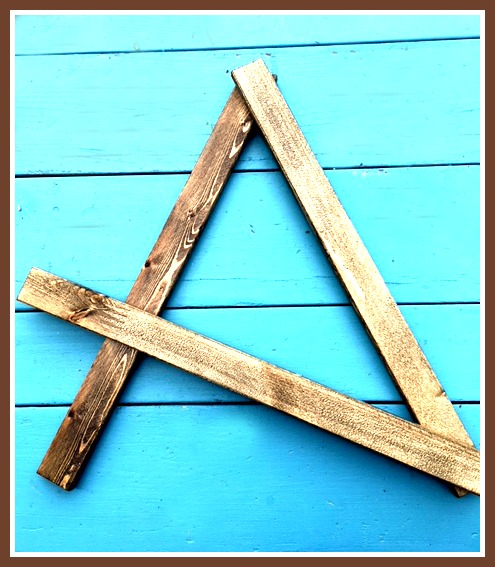
Add the third piece to the bottom right corner angled up.
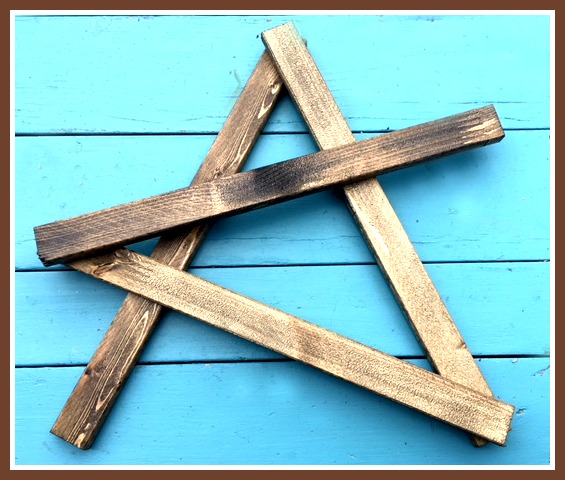
Next add the forth piece across….
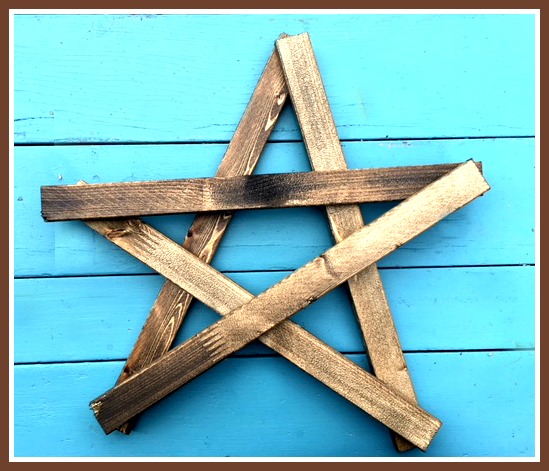
And lastly add the fifth piece of wood. If it doesn’t look exactly the way you meant it to, shift the corners a bit.
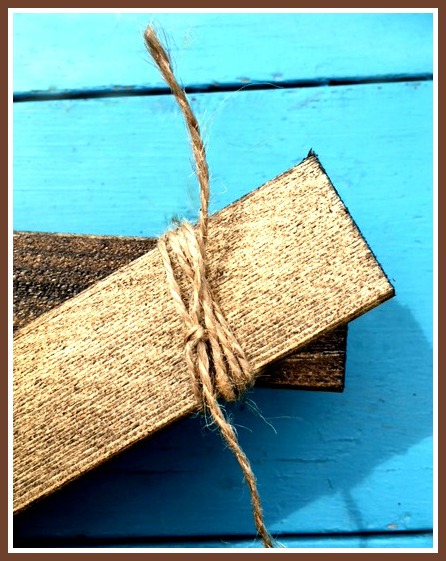
Tie twine around each end. You could also use industrial strength glue like E6000 with the twine, or skip the twine and use nails. I like the rustic look of twine.
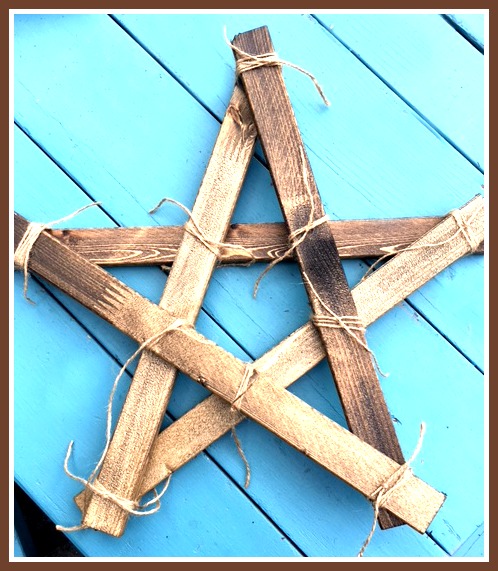
For extra reinforcement I tied more twine on the middle parts of the star. This extra twine made it very sturdy. Next use the scissors to snip the scraggly bits of twine close to the star.

I adore hydrangeas so I popped a few out of another arrangement and put it in on the star to test it out. Lovely, these are my favourite flowers.
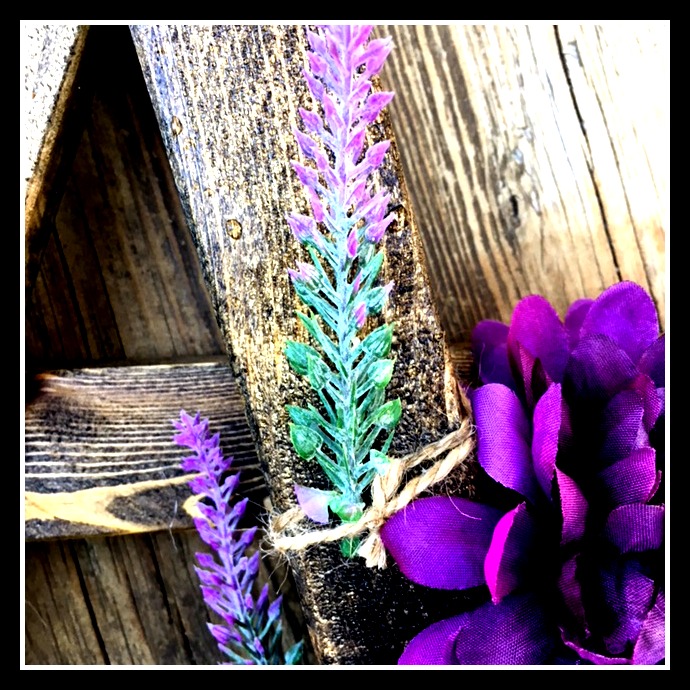
One nice thing about the twine is you can tuck your flowers into it and pull them out if you want to change flowers for the next season.
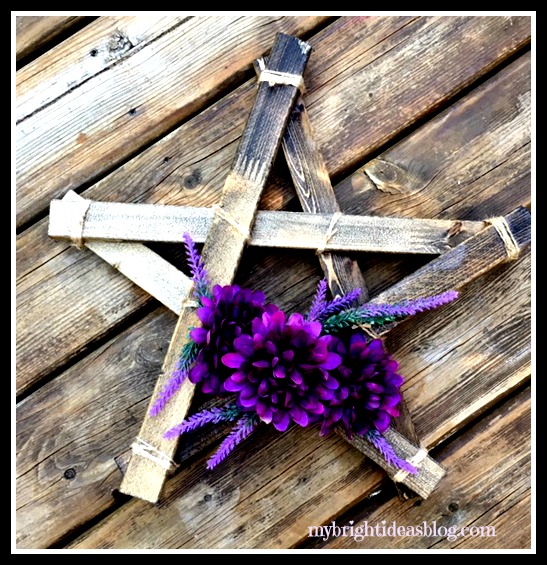
I picked up a bunch of purple flowers at Michael’s and took 3 flowers from the bunch and a few little wispy bits off to use for this one. This turned out to be the one I stuck on my living room wall.

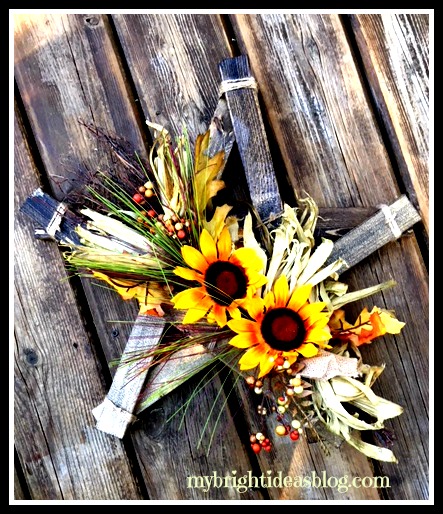
This is a dollarstore ($4) autumn decoration I just tied on for fall.
This is so easy! The only thing that takes any time is waiting for your paint or stain to dry. The lumber cost is $2.50. The only thing cheaper than that is the wreath I made for my neigbour out of twigs!
Thanks for reading to the end! I hope you’ll pin this on Pinterest or where every you network with friends.
…