I’m trying to be patient for spring to come but its just early March and it snowed all day….sigh.
Fortunately, I am hoarding craft supplies…including driftwood from trips to the shores last year. So let’s put it together for another rustic, nature craft.
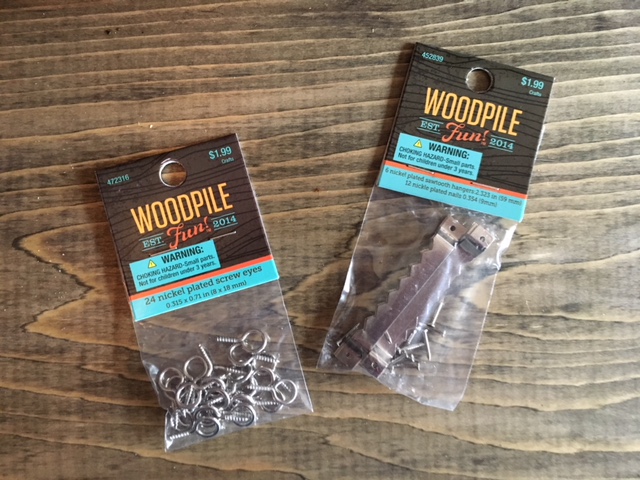
Gather your supplies.
You will need:
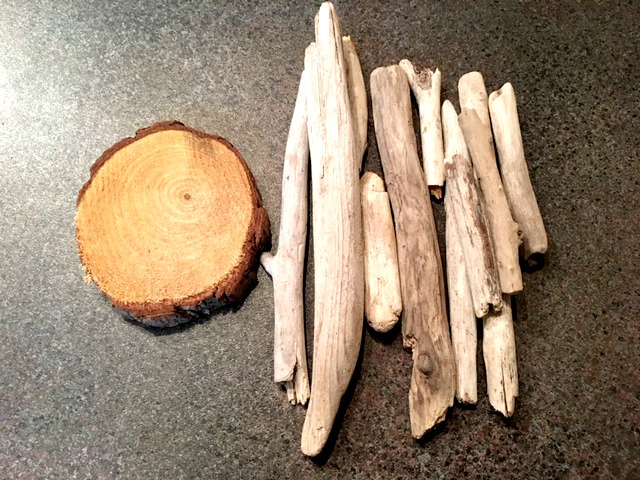
- Driftwood
- Wood Slice or Stones
- Wood Scrap
- Wood Stain
- Rag and Gloves
- Eye Hooks
- Twine
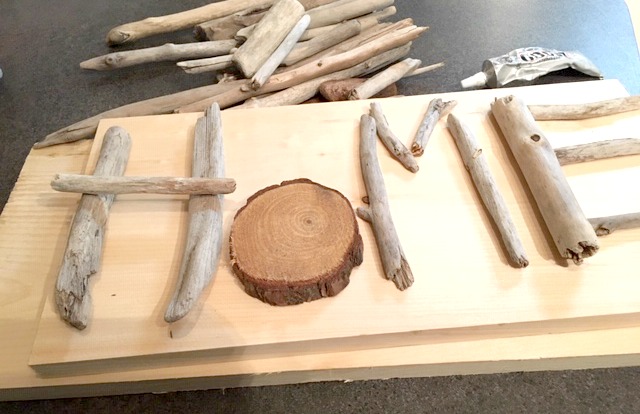
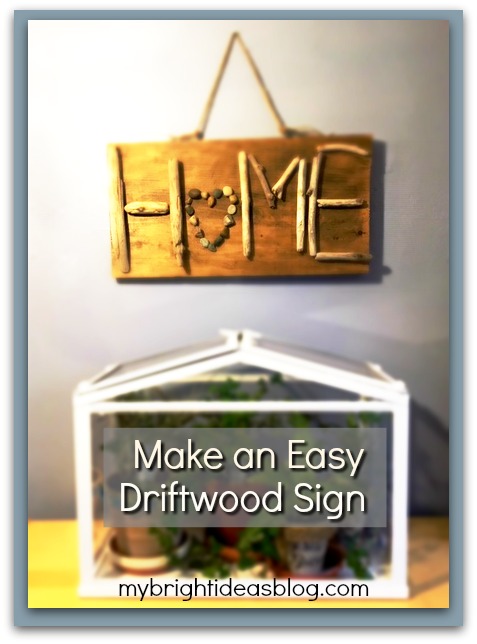
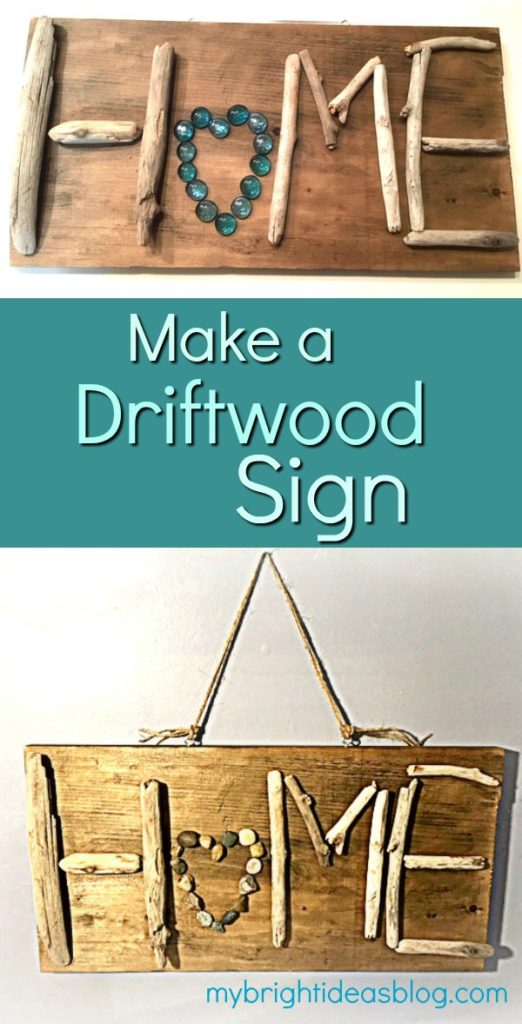
Start by finding a scrap piece of lumber that will match the size of your driftwood. Lay out your pieces of driftwood to arrange them and make sure they fit! My board is 9 x 18 inches (23 x 46 cms) and its a pretty good match for my driftwood pieces.
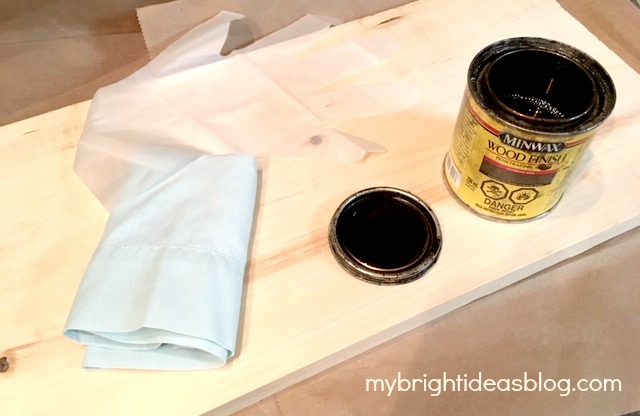
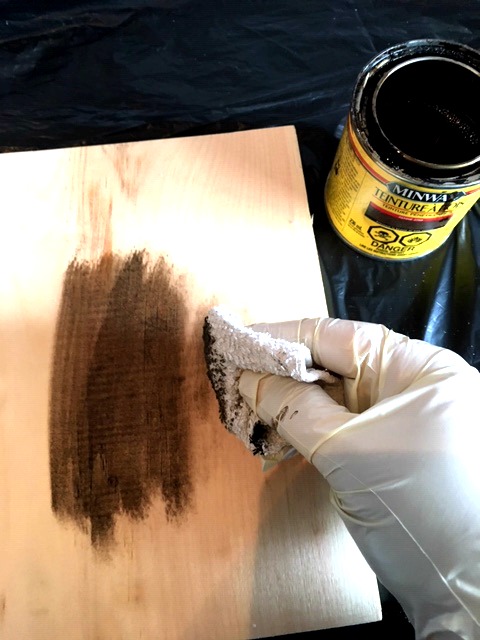
As always, I used my little pot of Miniwax Jacobean stain. I love this dark shade.
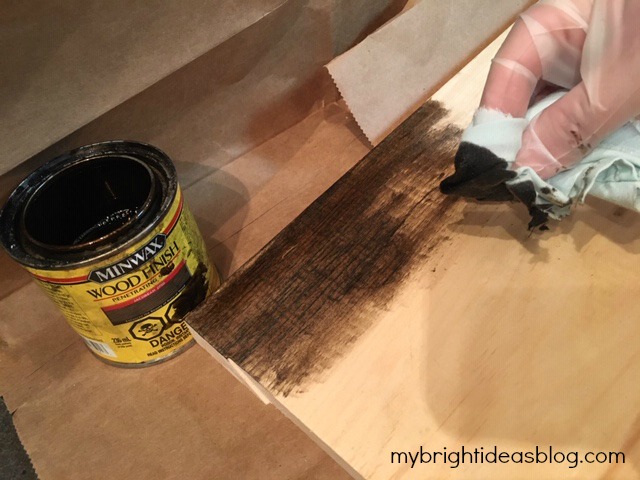
Apply with a rag or brush in the directions of the grain. Allow the wood to dry according to the instructions. My stain can says to wait 8 hours before applying a clear polyurethane. I didn’t add a clear coat because I like the mat finish.
Here I am playing with the driftwood while the stain dries. I’m so impatient.
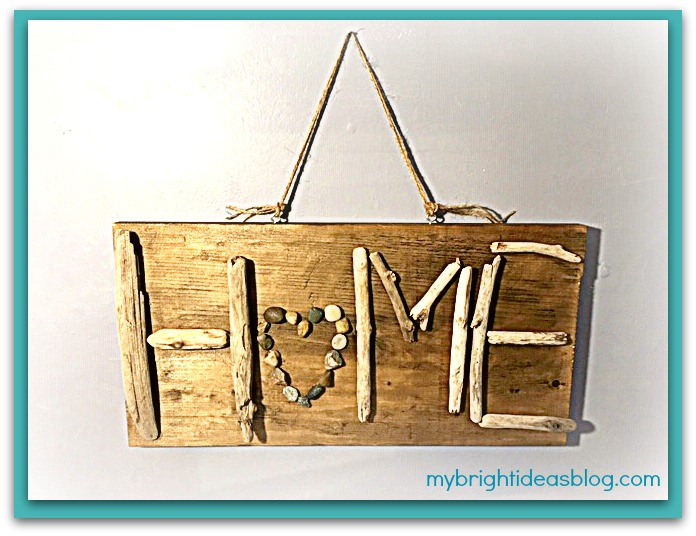
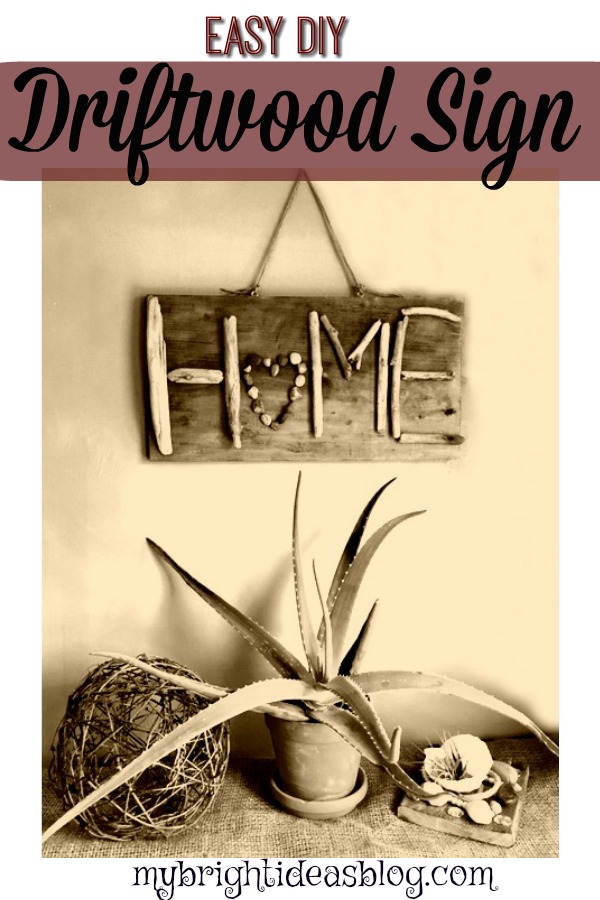
Now that its dry you should decide on how your going to hang the sign up.
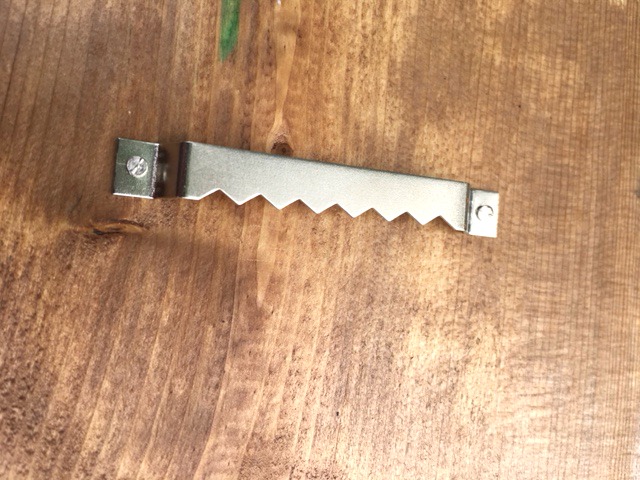
Hang it like a picture?
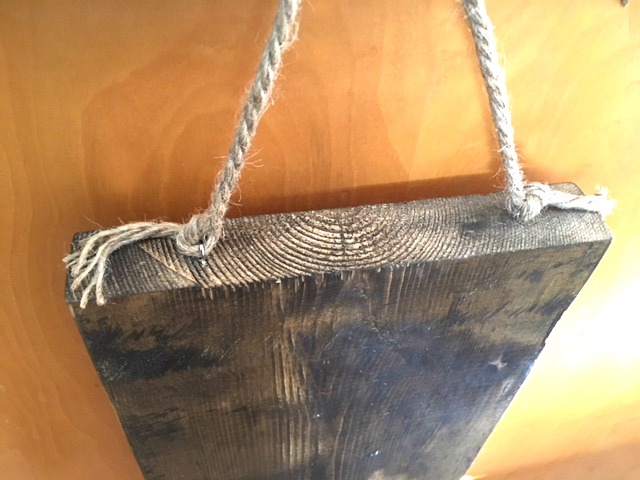
Or like a sign with screw eyes and a bit of twine or jute rope? I’ve used the above options on several projects.
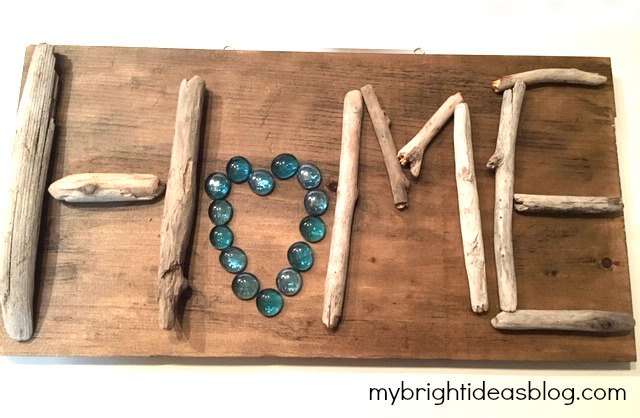
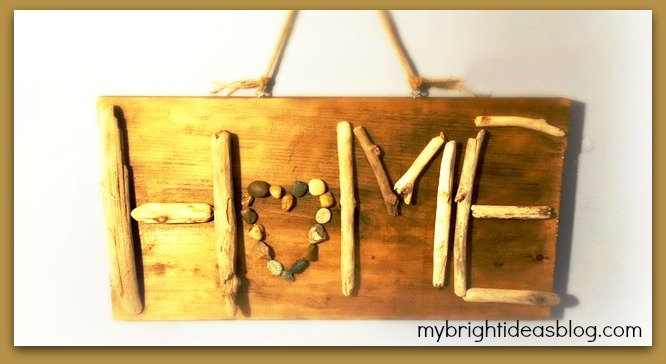
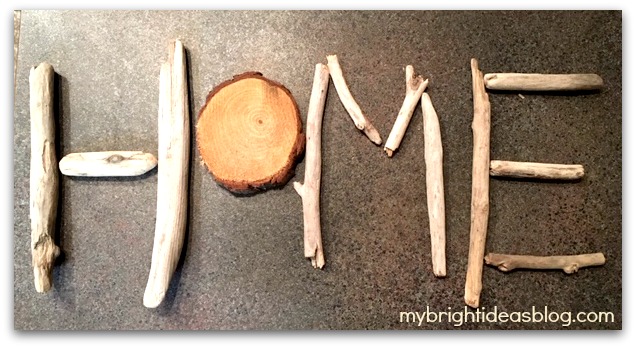
Now the stain is dry and I can pull it all together. I found some blue glass stones? Hmmmm. Tempting to use them but I wanted to have this look natural.
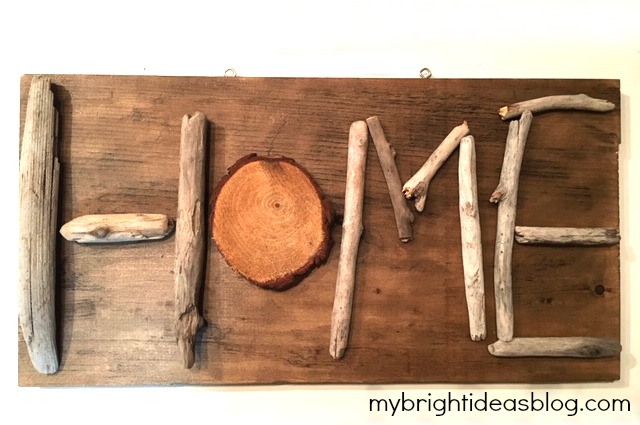
I also like the wood slice for the “O”. That is natural.
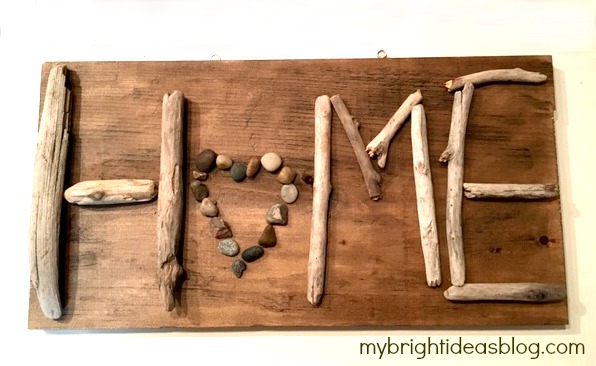
But after deliberations, I settled on small pebbles in the shape of a heart.
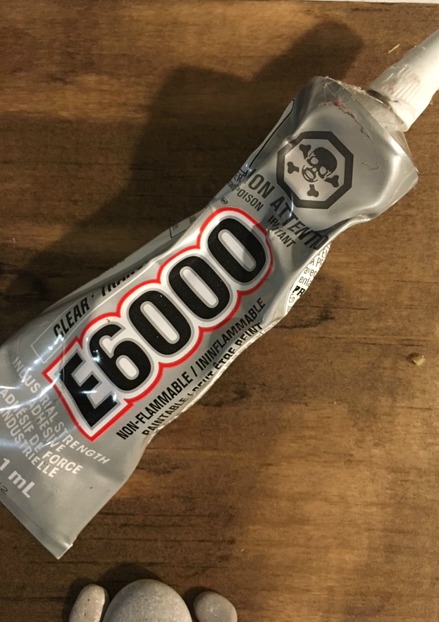
You can use your hot glue gun to attach the pieces to the wood. I might put this on the craft sale table at work so I used E6000 glue which is a very stinky permanent adhesive glue that will not pop off like hot glue can when it gets moved. Crack a window or work in your garage…it’s pretty strong smelling stuff.
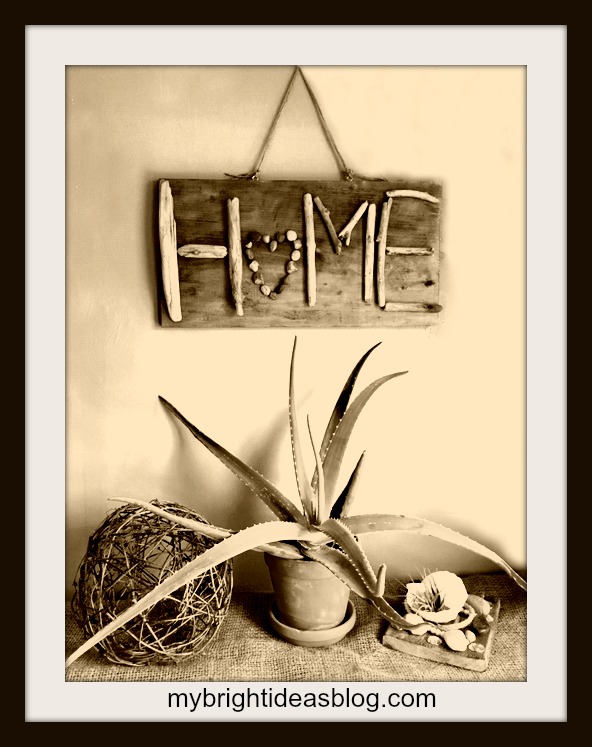
And that is all there is to it!
Here are some other similar projects I have posted you might like….
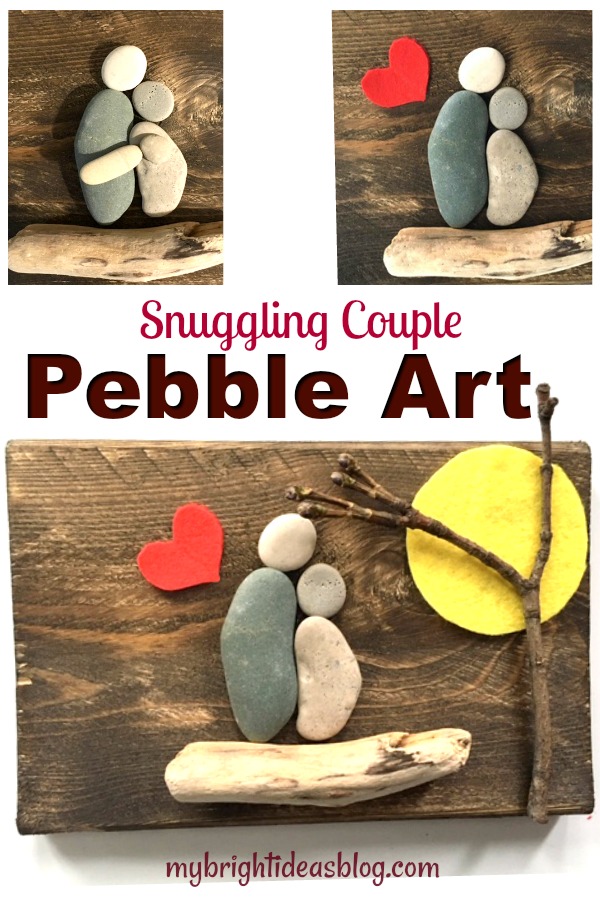
Pebble Art – A Snuggling Couple
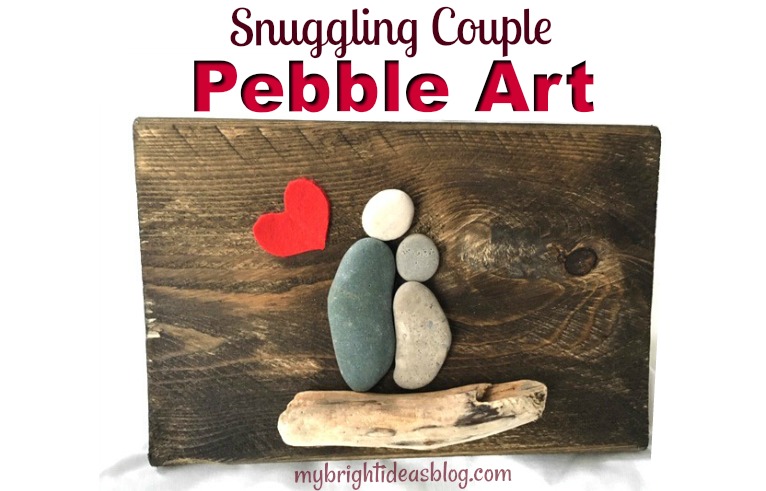
I got a nice collection of flat rocks when the weather was warmer. When you start becoming a beach pebble collector its hard to stop. Even now, although its freezing rain I still would love to escape to the beach…an hour drive away…to look for my favorite shapes of stones (hearts, ovals, circles). So I’ve stained a few small boards to turn them into Pebble Art.
I’ll show you what I made this time….
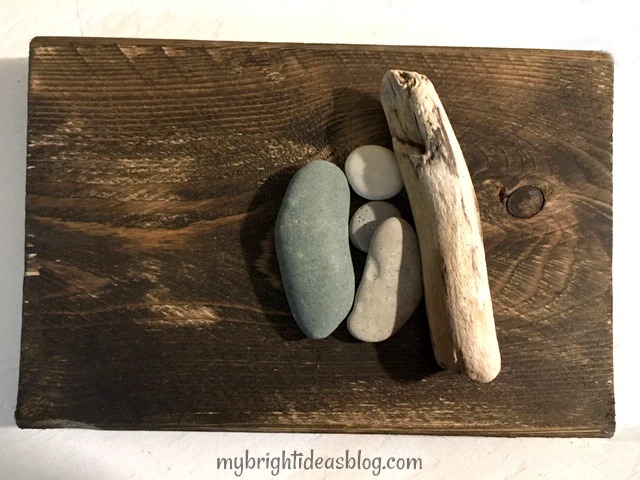
What you will need:
- 2 long pebbles
- 2 round pebbles
- small piece of drift wood
- red and yellow felt
- a twig
- a scrap of stained board or a plain canvas
- hot glue gun or E6000 glue
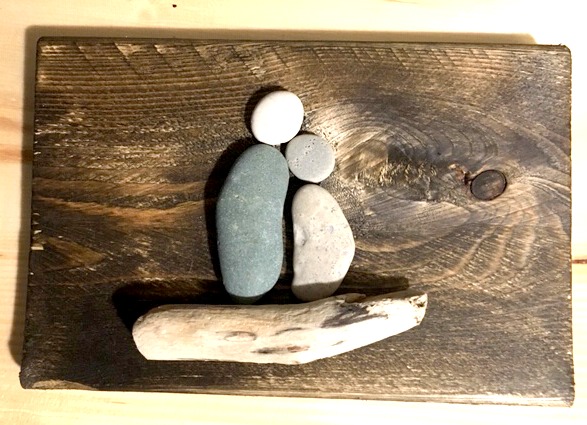
These two long rocks fit together perfectly for the bodies. Two round stones on top for the heads. A small piece of driftwood for them to sit on. Glue everything in place. You can stop with just these natural items or keep going to add some colour.
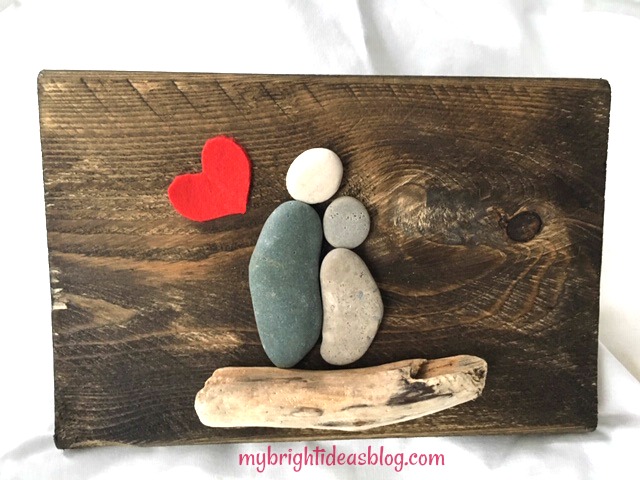
Here I took an inch of red felt and folded it in half and cut the shape of half a heart. I find this is the best way to get your heart shape. If I try to cut it freehand it turns out lopsided.
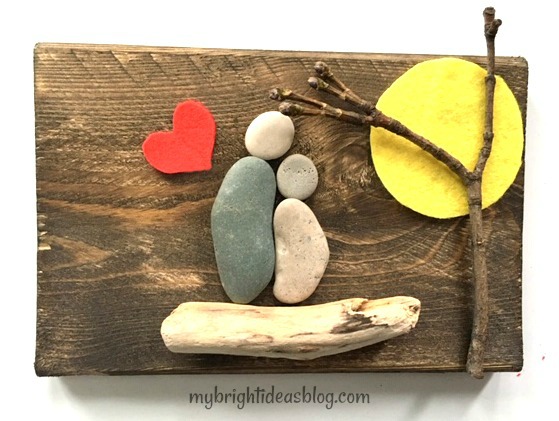
Trace a tin can from your pantry to make a felt round sun. Put a twig on the side and now its done.
Now it’s a couple having a snuggle at the beach, watching the sunset. Although, my 8 year old would like it to be a mother and daughter. Awe she is snuggler. I better make her one for her room!
Thanks for reading another one of my easy crafts….Have a look below for links to some of my other “Pebble Art” projects.
…
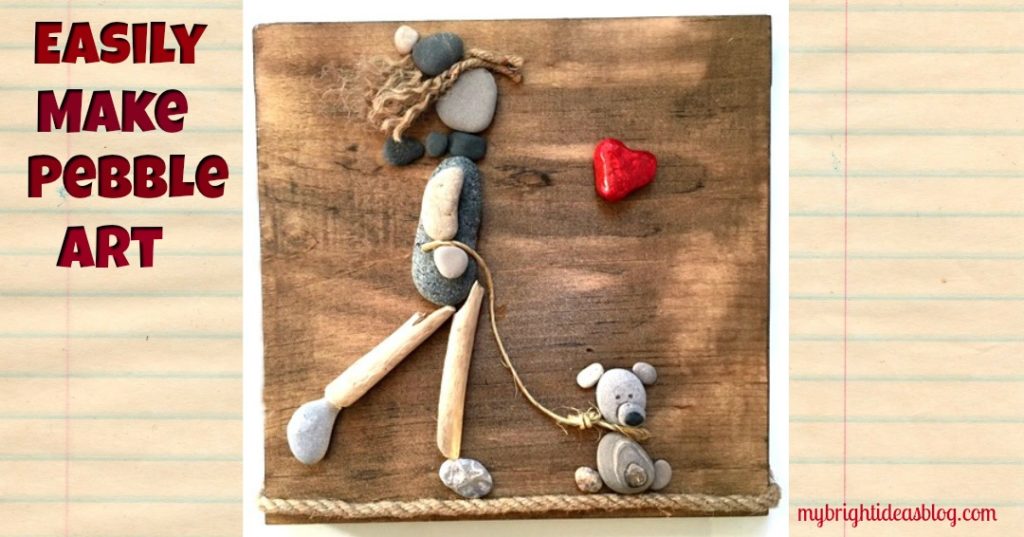
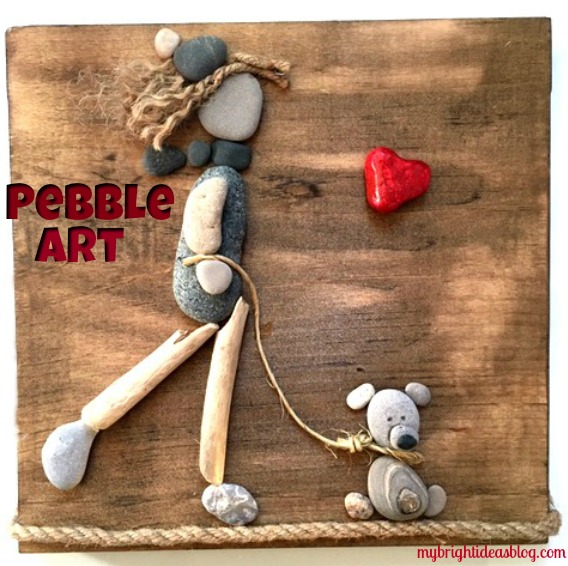
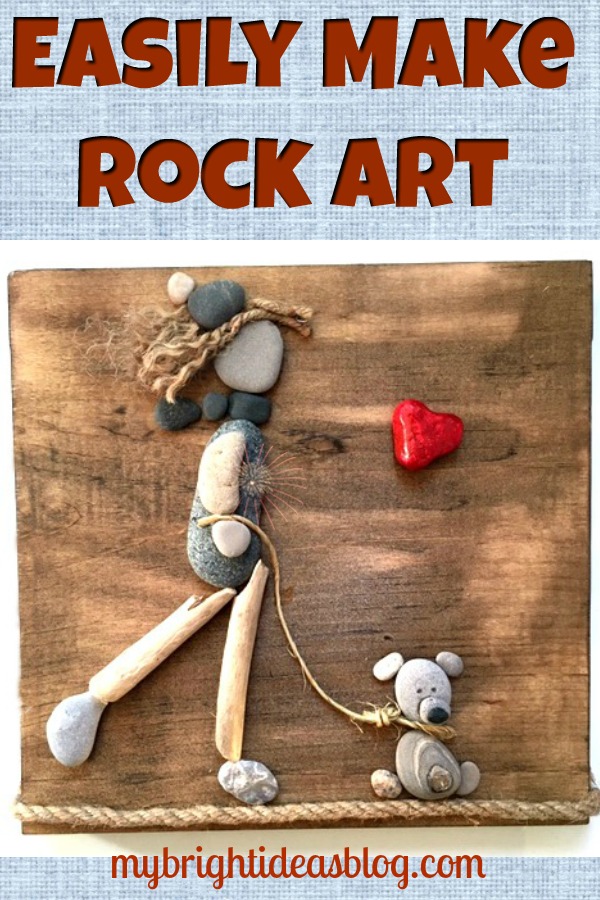
Pebble Art – A Girl and her Dog
I have been wanting to make pebble art for months but I’ve been nervous to get started. How silly is that? It’s just rocks glued to a board for heavens sake?! Well today I finally went for my first of many (hopefully) attempts to make pebble art.
You will need:
- a wood board
- sand paper
- paint or stain
- rag
- rubber gloves
- pebbles
- industrial glue or hot glue gun
- twine
- jute rope
- red craft paint and red glitter paint
Start by preparing the board. Use sand paper to smooth out rough edges. It doesn’t have to be perfect just make sure the rough corners are smooth.
Apply stain, wearing gloves, use a rag to wipe stain onto the wood. In this project I used my favorite. Minwax “Jacobean”. I waited 12 hours for this to dry.
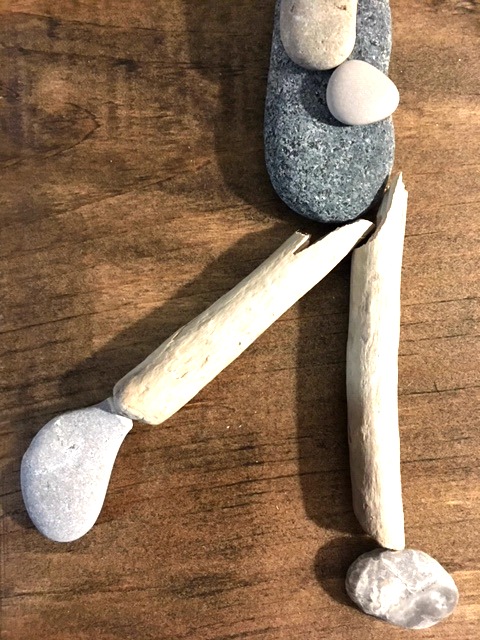
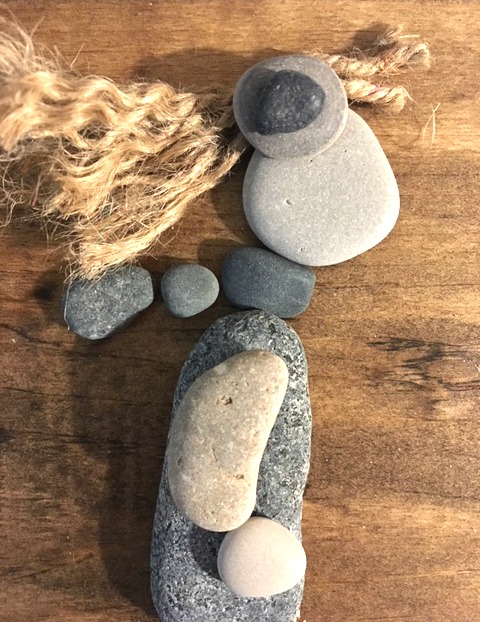
Next, lay out your stones to create your artwork. I broke a little piece of drift wood to become her legs. Rummaging through my treasured pebble collection I found a funny shaped rock for her foot.
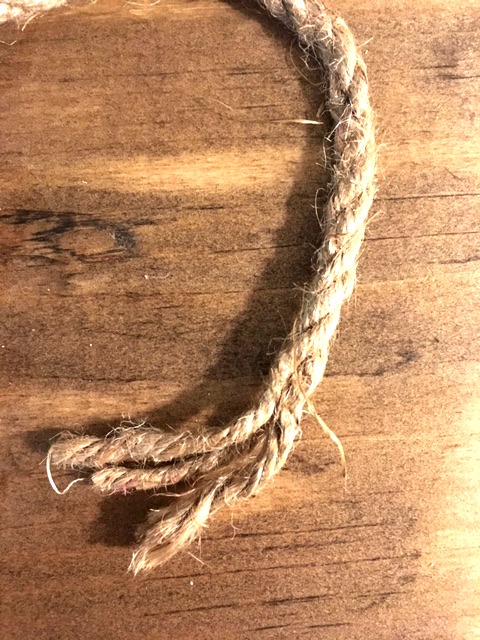
This piece of jute rope was a perfect scrap so I unravelled it to make hair for her.
I used industrial strength glue “E6000”. It’s so much stronger than a hot glue gun. But it is stinky and dries slowly. Use in a well ventilated area.
Did you crack a window?

I needed to put some other pebbles on and around the hair to hold it down while the glue dried.
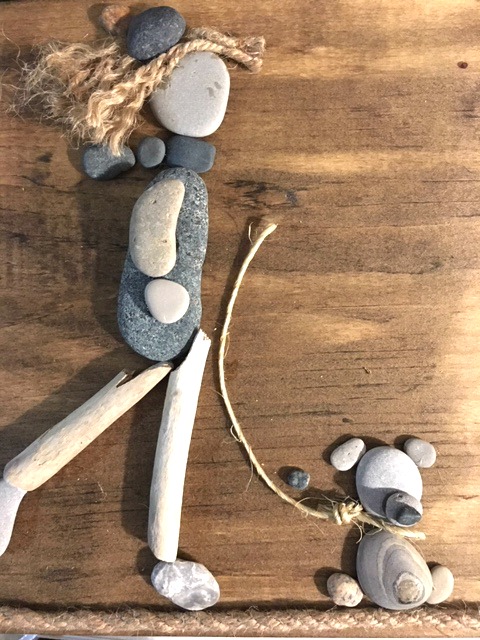
I tied a knot in a piece of twine and made it into the dog leash. At the bottom of the wood I glued a piece of jute rope to make a path for my girl and her dog to walk on. The ends were then tucked around the sides and glued down. (Okay, I confess, for this one part of the project I used the glue gun) I also added tiny dots for the dog’s eyes with a sharpie.
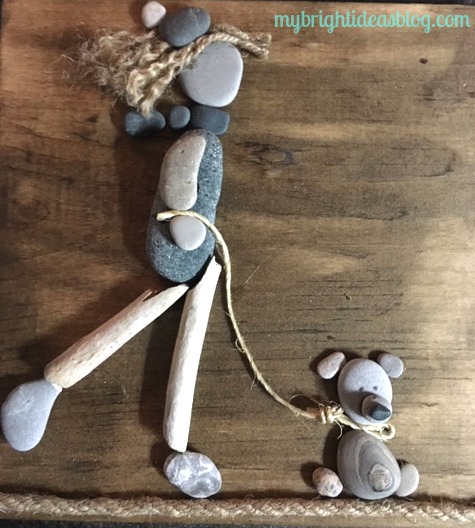
Notice how I just tucked the end of the twine in between the two pebbles to have her holding the leash.
I like the natural colors on this so far, so I found it hard to decide if I should leave it natural….or add a splash of colour.
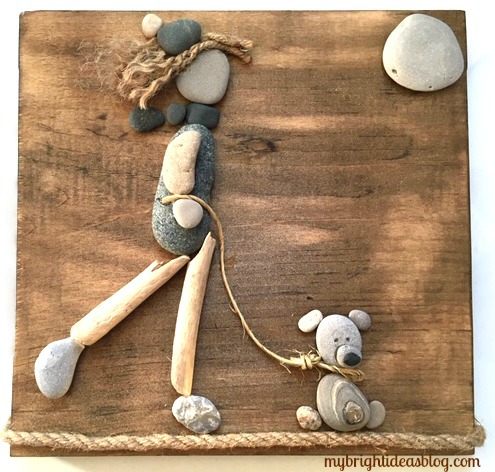
Here I tried out a natural big round stone for the sun or moon.
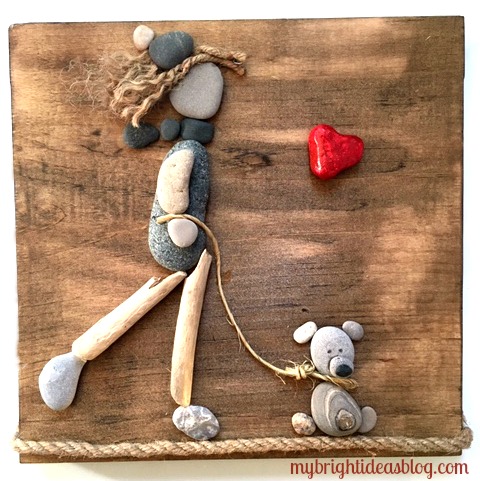
I love this red heart shaped stone that I had previously painted with red craft paint and a sparkly top coat. You could also use nail polish. Since I wanted to make this a gift for my daughter who loves her pooches I think this is a nice touch.
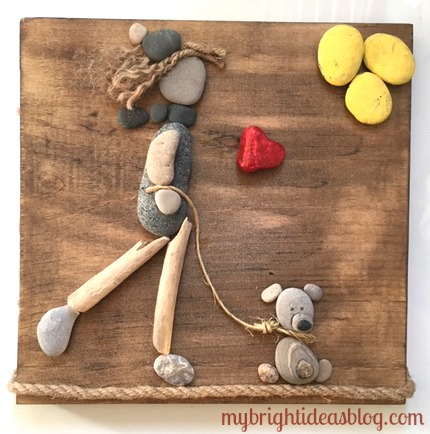
For this one I put in some yellow pebbles for the sun. Nothing is permanent until you glue it on, so you can tinker around with your design while you try out different options.
I loved making this and plan to make a lot more. It becomes a mixed medium art piece. It’s really exciting to try something new and see it turn out great! Since every stone is different it will be impossible to make a duplicate. This is a one of a kind gift idea!!

…..
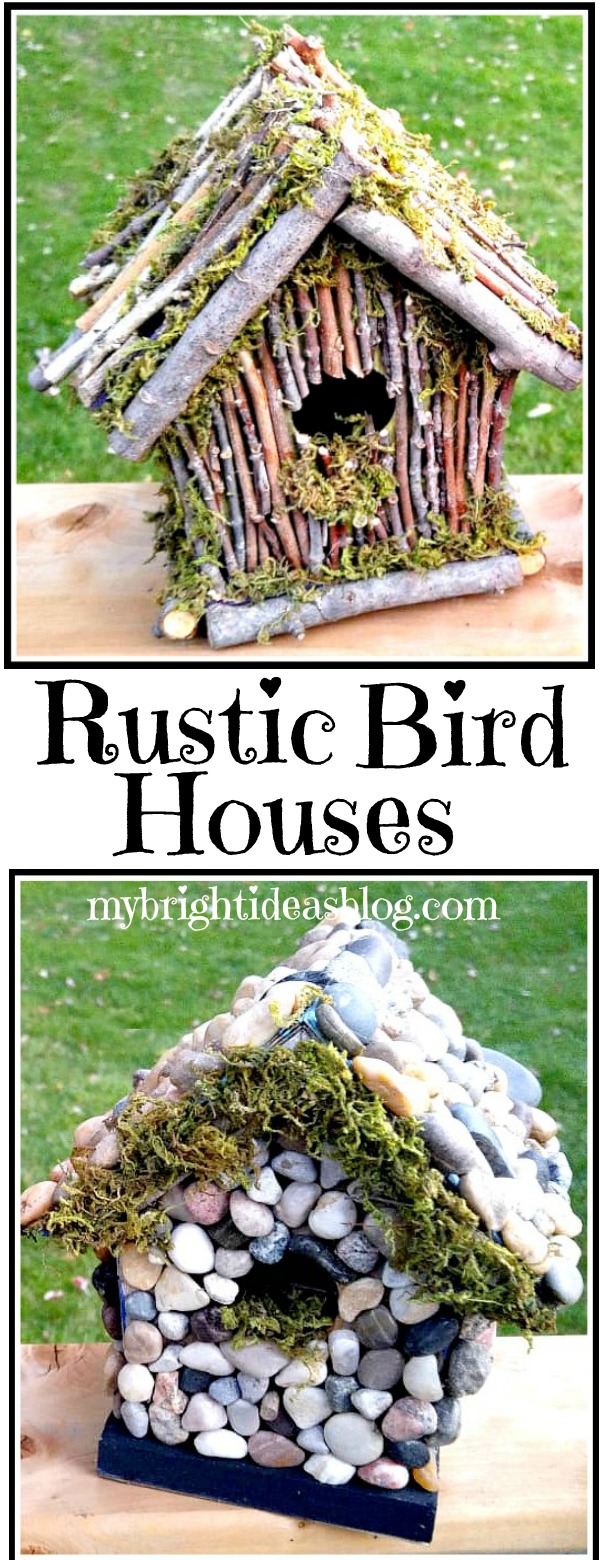
Rustic BirdHouse – Twigs and Moss
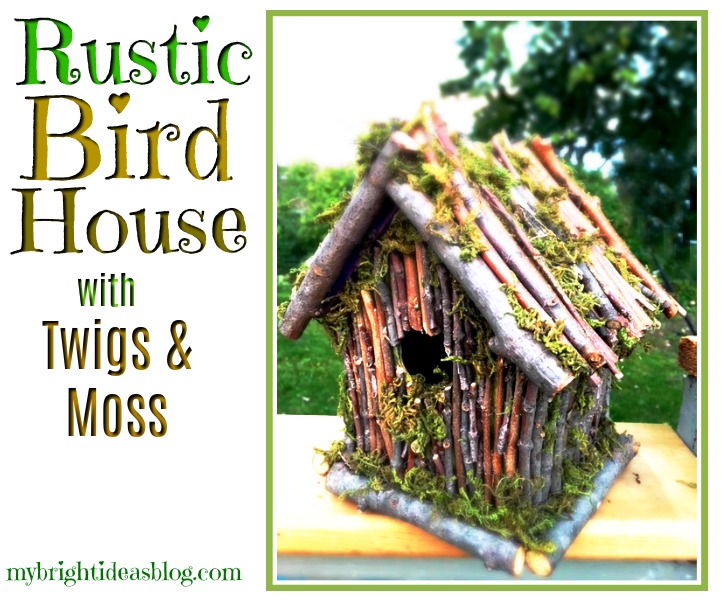
I’m loving sticks and twigs and rocks this year! So you’ll see a lot of these projects from this past summer and heading into the fall and winter. This is birdhouse project, I really enjoyed making and can’t wait to tell you about!
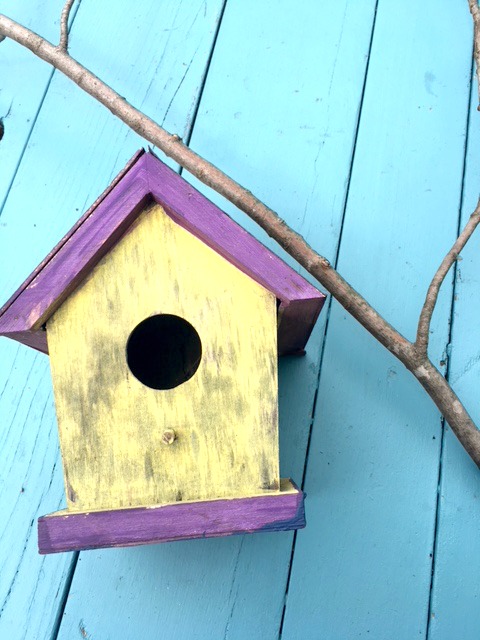
Two years ago my daughter and I painted a bunch of birdhouses and drilled them to the garage. It’s an old wooden garage with peeling paint so if we can distract your eyes from its sad, old, tired look we would! It should get knocked down and rebuilt but we would like it to last a few more years…so instead I’m decorating it.
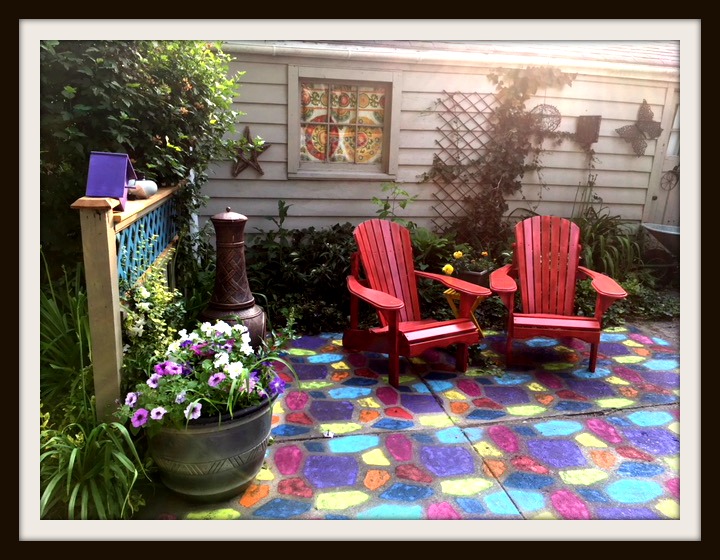
See what I mean…
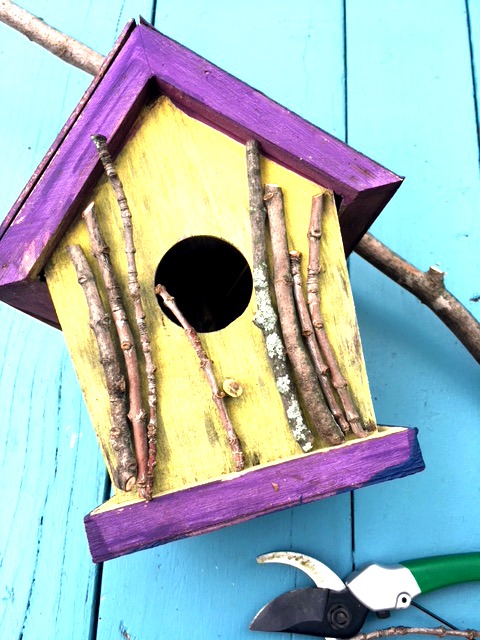
I apologize we got a bit sidetracked there. Back to the twig birdhouse. After two winters the birdhouse collection had gotten worn out and weathered. They were just cheap wooden ones from the dollar store and we didn’t think ahead to put extra clear coats over the craft paint to make them water resistant. That would have been sensible.
If you would like to try this you will need:
- a birdhouse
- outdoor paint or varnish to water proof it
- branches
- garden snips
- E6000 or other industrial glue
- natural moss
You can get inexpensive birdhouses at the dollar store but if you would like it last for years and years get the sturdy ones from the hardware store or make your own. Paint it or put a protective clear varnish so it will last a long, long time. I opted to use the old weather worn ones to try and upcycle it instead of throwing it out.
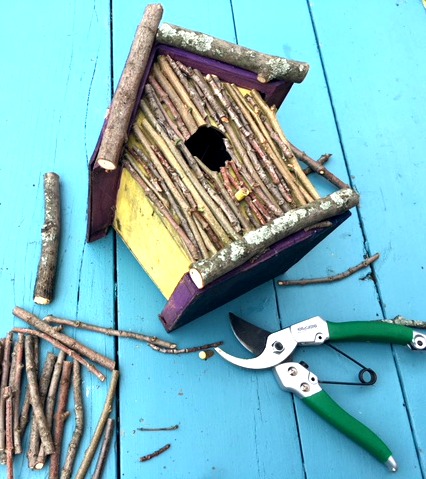
We needed to trim some out of control shrubs and some branches so this project was perfect timing. There was no measuring of the length just line up the twig to the area you want to put it and snip! When I had the area planned out I went back to glue it.
Using E6000 Industrial glue is stinky so I try to use it only outdoors. It is slow to dry but very secure. I have used a hot glue gun to secure sticks and pebbles to things like this before and within a few days it had pieces falling off. If your project is going to be indoors you could get away with quick drying hot glue.
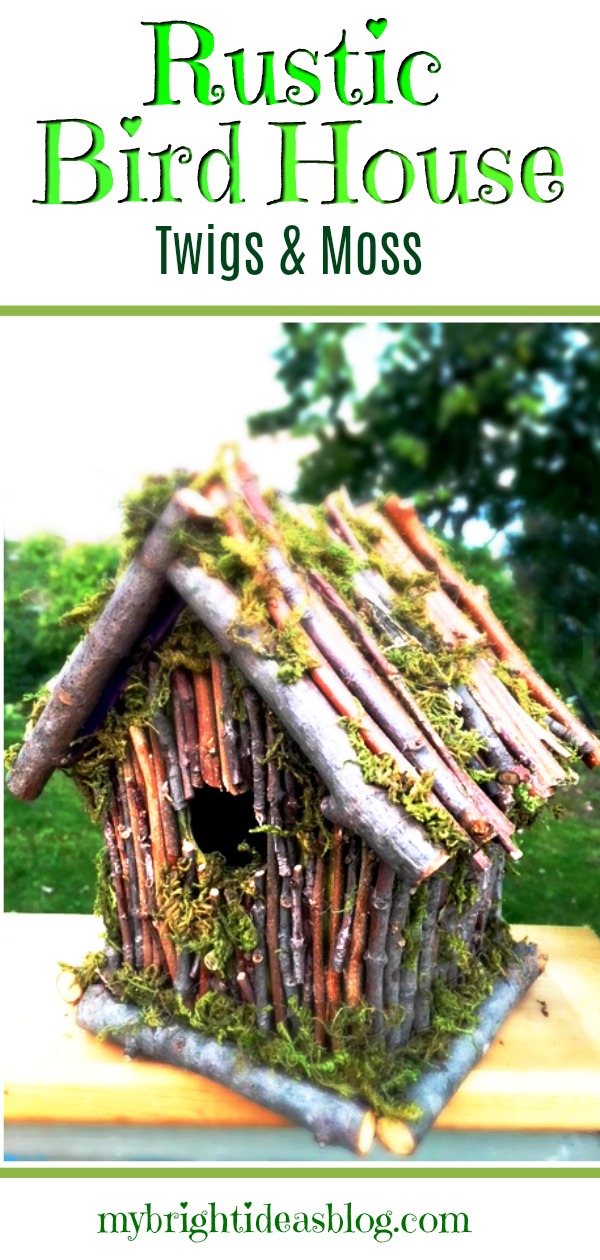
I attached the sticks all over one side of the birdhouse and left it to dry.
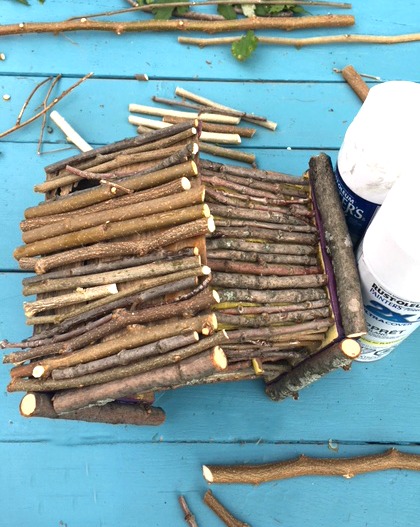
Each side needed several hours to dry. Then I came back to work on the next side. This really slowed down the process. It felt very relaxing making this natural project so I didn’t mind that it took me a few days.
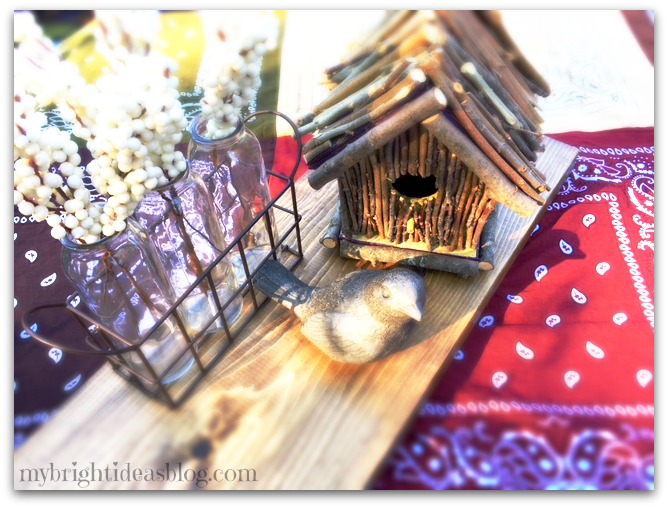
I was actually quite happy with it with just the sticks on the birdhouse. I took this picture a few weeks ago with my bandana table cloth post. It’s cute right!
But then….I had a vision of it with moss and the project took on its final stage….
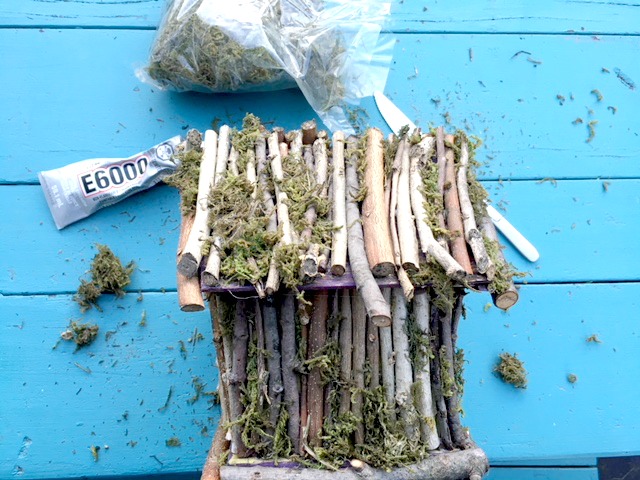
The moss is from the craft or dollar store and comes by the bag. It is quite loose and flakey so it will make a bit of a mess on your work space.
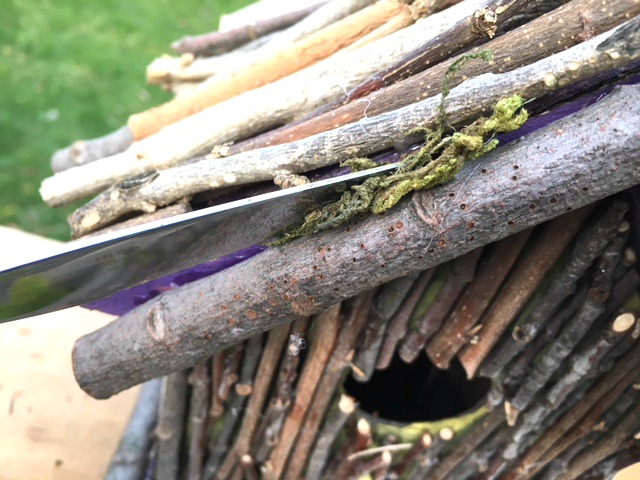
Anywhere I could see the old purple paint I put in some moss. This photo shows me sliding the moss in between each stick using a butter knife as a tool. I also used some dabs of glue plus jamming it in gaps between the twigs.
Heavy rains and wind may be hard on the moss. We will see how it lasts and maybe place it in a bit of a protected area of the garden. A covered porch would likely be ideal.

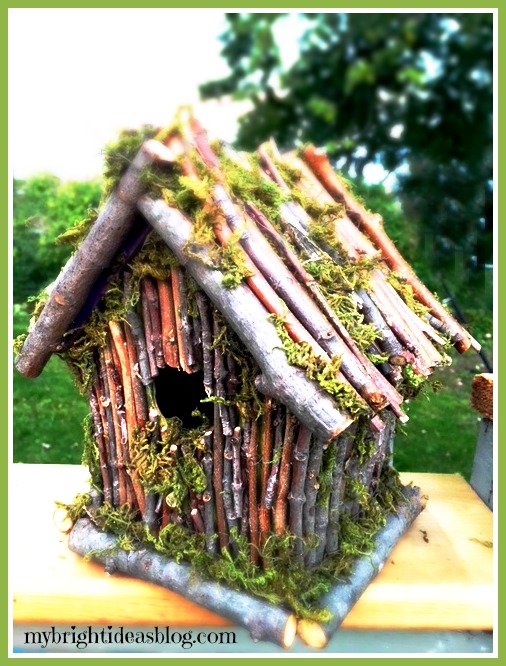
Isn’t that beautiful! I don’t know that any birds will actually want to use it but for a decorative addition to the garden I’m very pleased with it!
Thank you for reading to the end. I hope you enjoy your day. Before you go feel free to visit some of my other posts. Pin this to Pinterest or share it on your favorite social media.
…