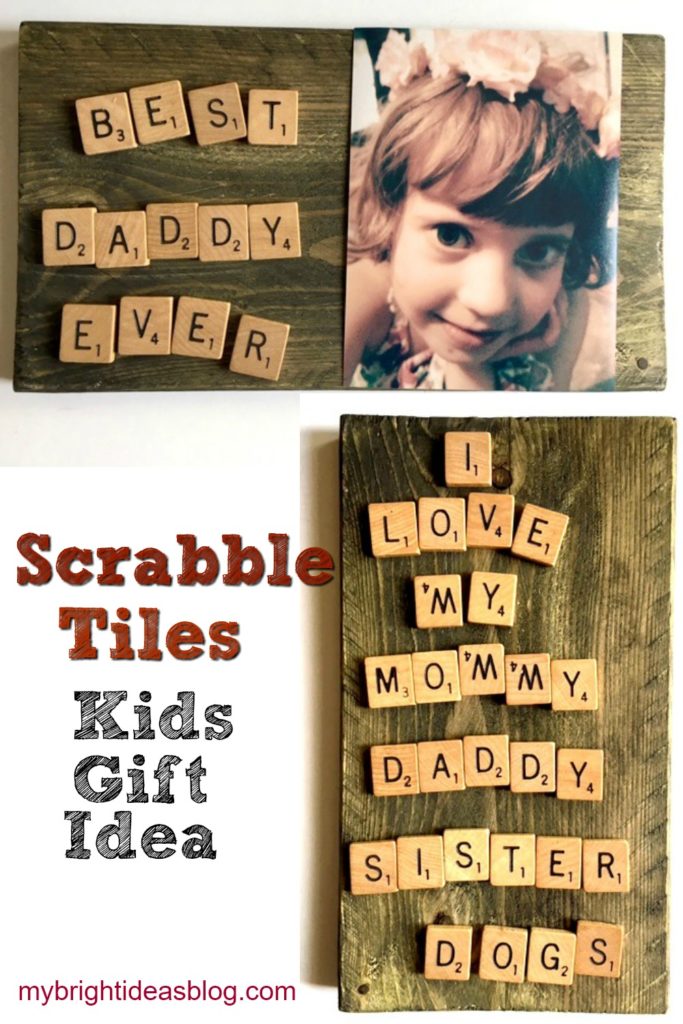
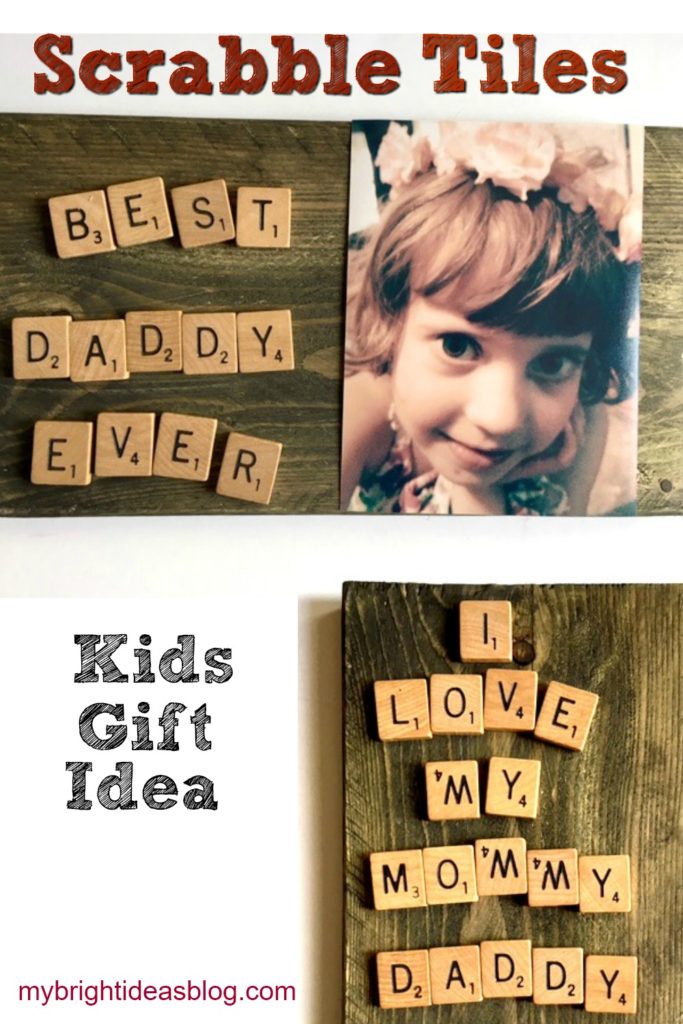
I have a sick kiddo at home (head cold, sneezy, wheezy) and she wants to use my craft supplies to make a gift for daddy’s desk at work. So here is what she came up with a love letter in Scrabble Tiles to Daddy and an old photo of herself.

Where can you get Scrabble tiles? From the board game of course silly! Or from a thrift store or online.
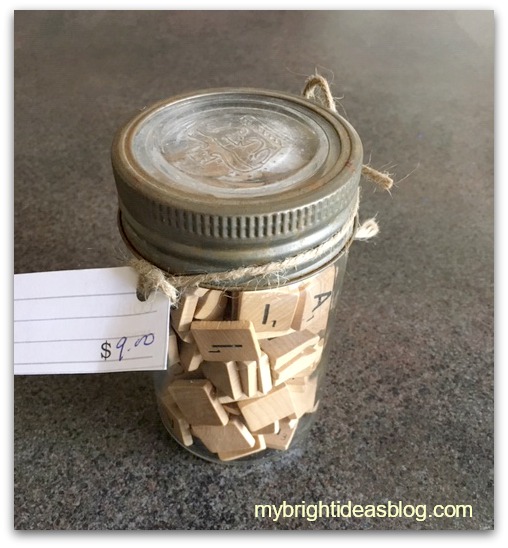
The other day I found myself parked next to an antique store I didn’t know existed. So I went in and found a gazillion things I would love to have and upcycle. The store was AMAZING! One of the items that I bought was a cool old mason jar filled with scrabble tiles.
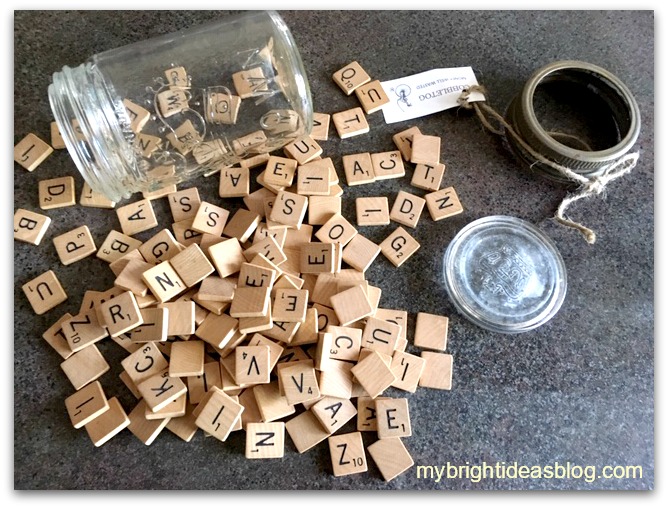
My sick little darling sorted out the letters into piles while I went rummaging for supplies.
You will need:
- scrabble tiles
- a piece of wood, picture frame or canvas
- white glue-for the photo (or to make it temporary use “sticky tack”)
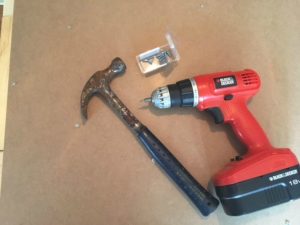
- hot glue gun-for the tiles
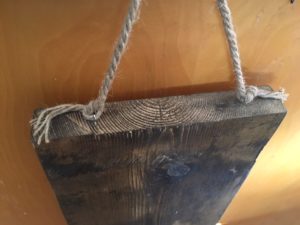
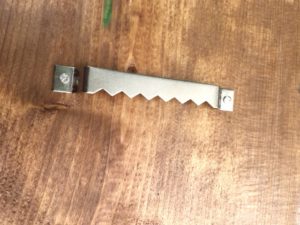
- hanging hook (optional)
![]()
I have scraps of wood and often will stain or varnish a few extra pieces in case I want to make a wooden plaque in a hurry. We chose out of scrap options a piece approximately 9 1/2 by 5 1/2. It was already stained with “Forest” Behr Semi-Transparent stain-which has a subtle green tinge to it.
![]()
Another option would be to use a blank canvas from the dollar store. You could paint with inexpensive craft paint in his favorite color or leave it white.
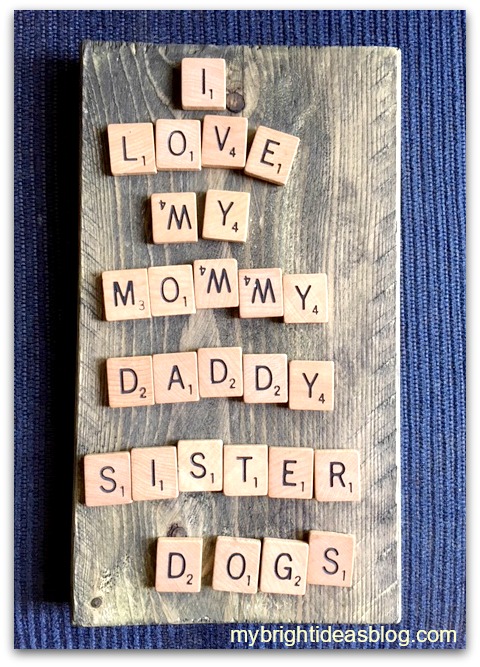
First she wrote out this…awe Mommy is at the top of the list!
I love that she is not bothered that 3 of her M’s are upside down W’s. When you see the letters are crooked its tempting to want to straighten them out but resist! It’s a child’s gift and adds character to the final product.
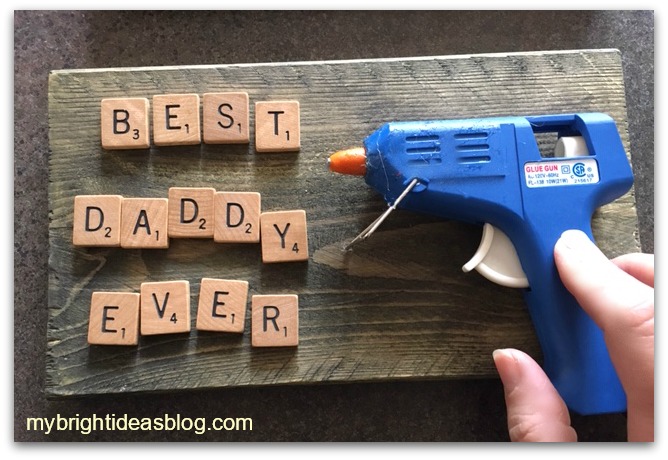
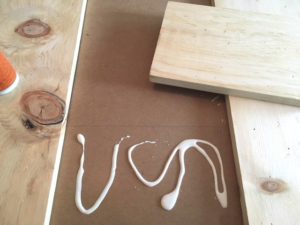
Arrange the letters and photo to your liking. Hot glue your scrabble letters to the wooden board.
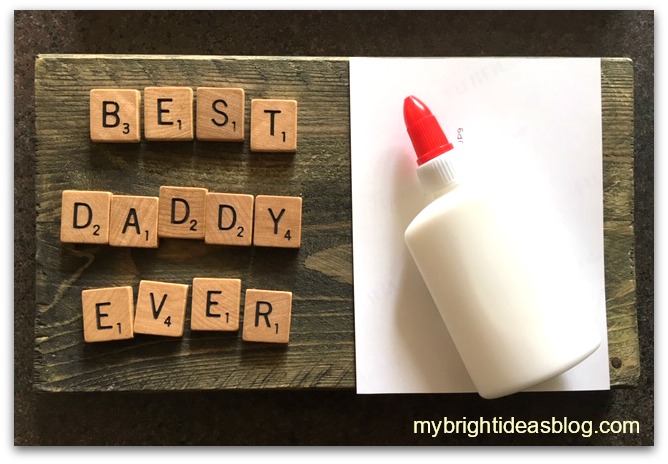
Have your child put a thin coat of glue on the back of the photo. Or if you want to be able to take the photo off later and replace it you could use sticky tack instead!
Would you look at those gorgeous eyes! This gift will melt his heart!
Crafts Using Burlap and Buttons – Easy Project that Looks Great!
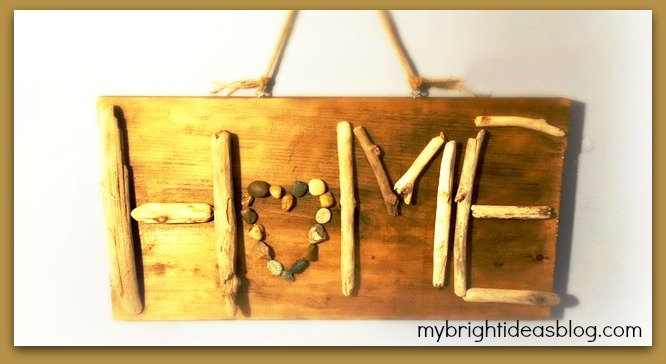
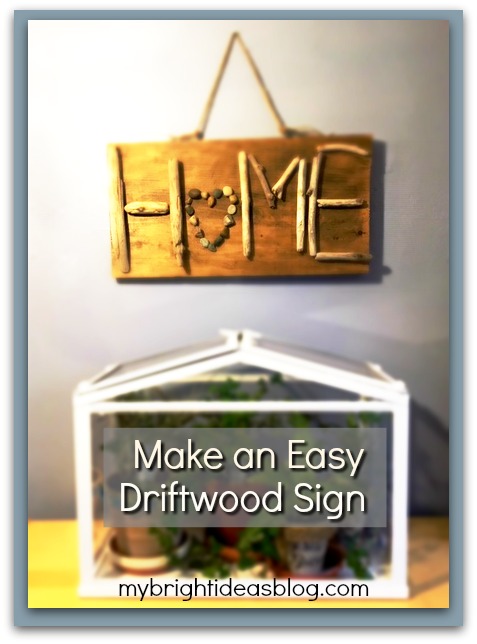
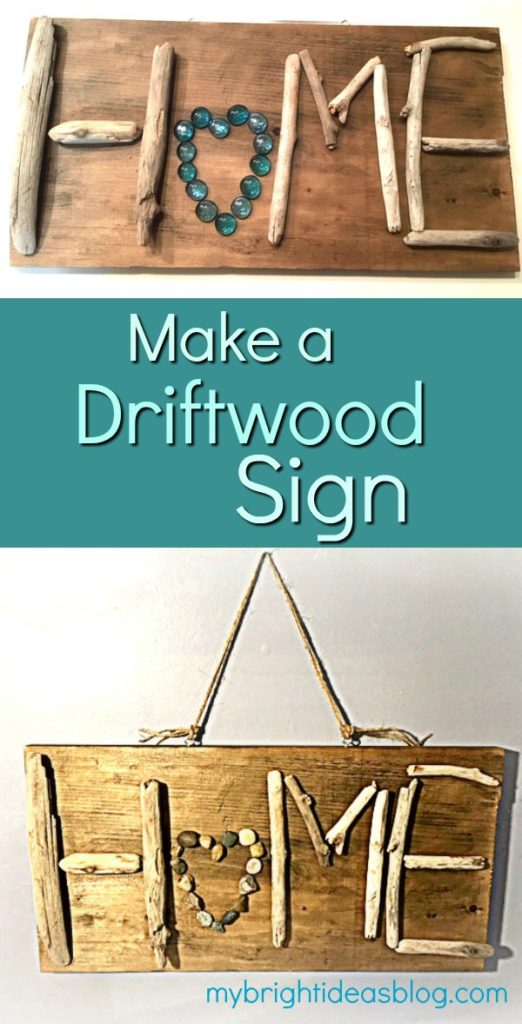
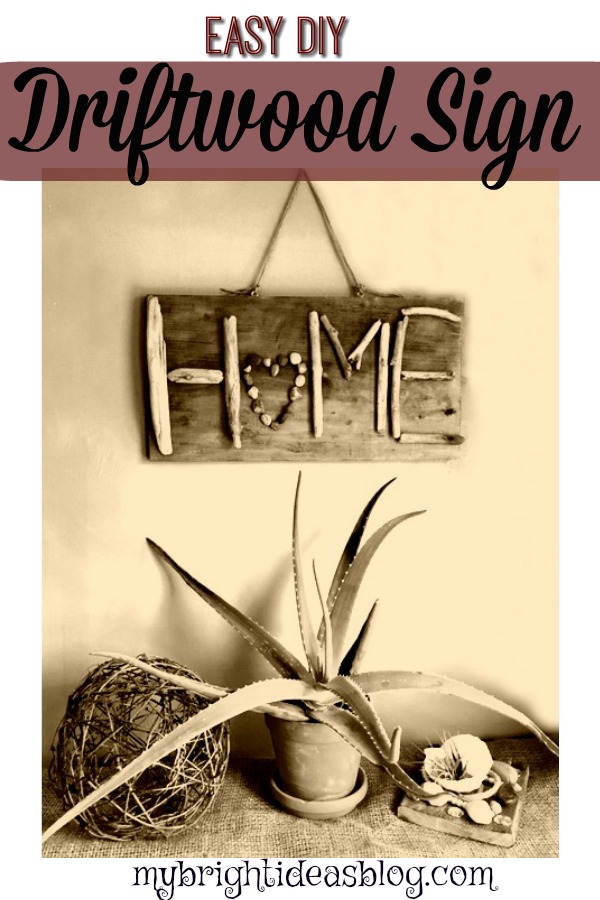
Make a Driftwood Sign – Home
I’m trying to be patient for spring to come but its just early March and it snowed all day….sigh.
Fortunately, I am hoarding craft supplies…including driftwood from trips to the shores last year. So let’s put it together for another rustic, nature craft.
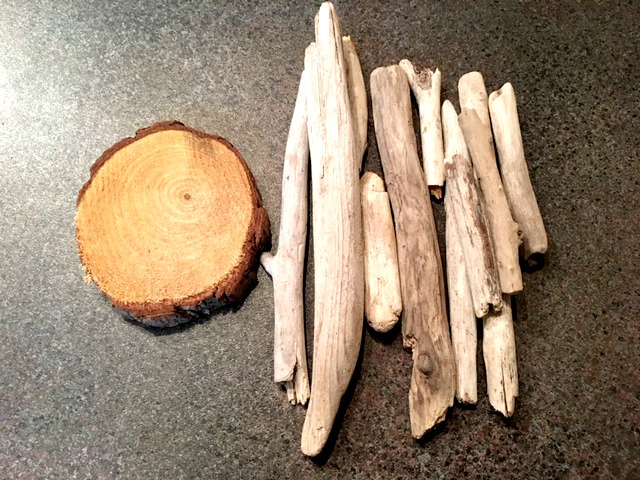
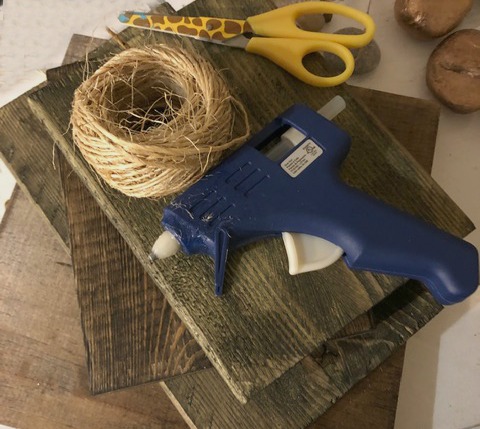
Gather your supplies.
You will need:
- Driftwood
- Wood Slice or Stones
- Wood Scrap
- Wood Stain
- Rag and Gloves
- Eye Hooks
- Twine
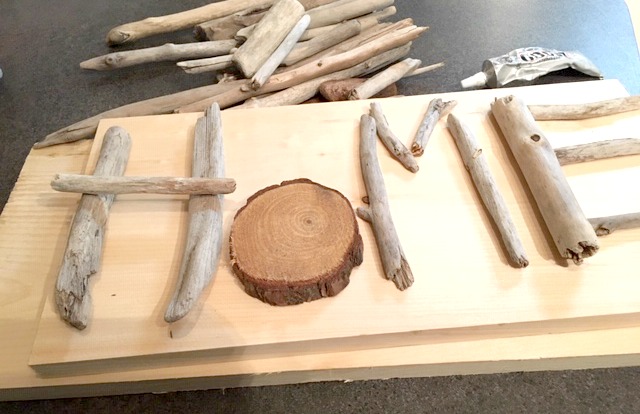
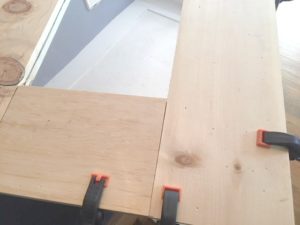
Start by finding a scrap piece of lumber that will match the size of your driftwood. Lay out your pieces of driftwood to arrange them and make sure they fit! My board is 9 x 18 inches (23 x 46 cms) and its a pretty good match for my driftwood pieces.
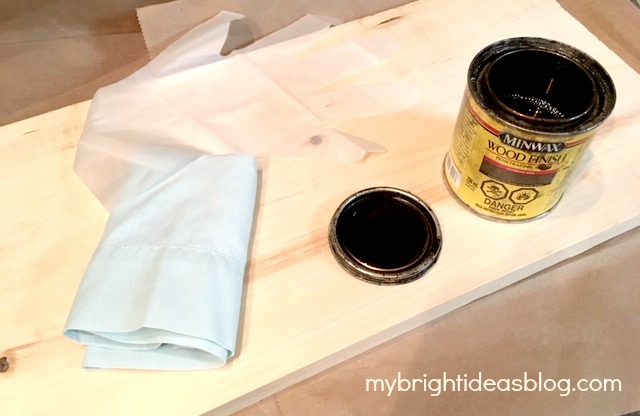
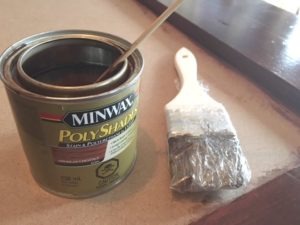
As always, I used my little pot of Miniwax Jacobean stain. I love this dark shade.
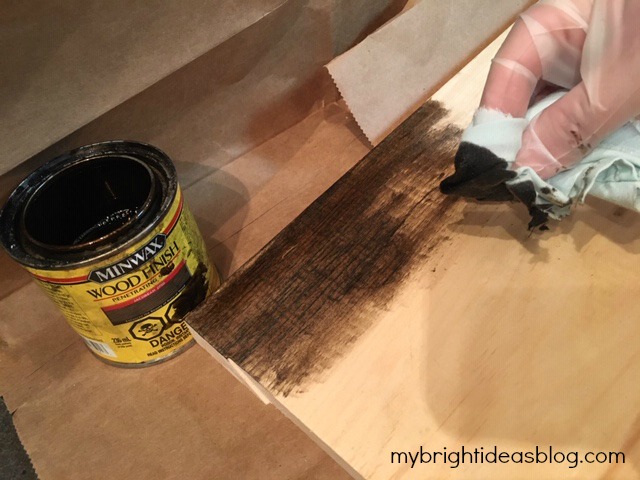
Apply with a rag or brush in the directions of the grain. Allow the wood to dry according to the instructions. My stain can says to wait 8 hours before applying a clear polyurethane. I didn’t add a clear coat because I like the mat finish.
Here I am playing with the driftwood while the stain dries. I’m so impatient.
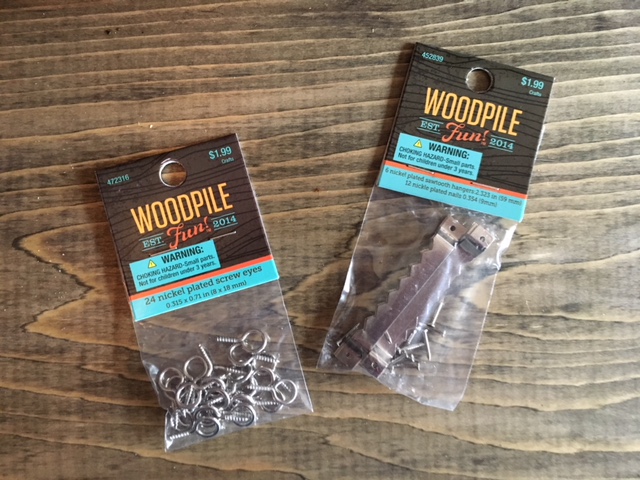
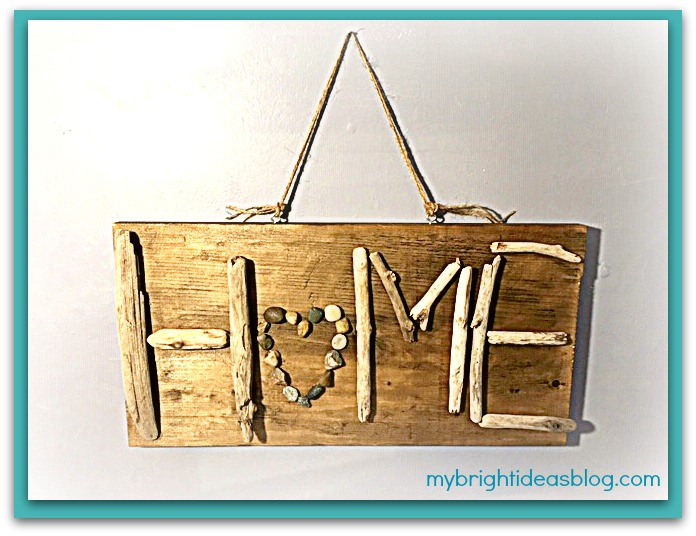
Now that its dry you should decide on how your going to hang the sign up.
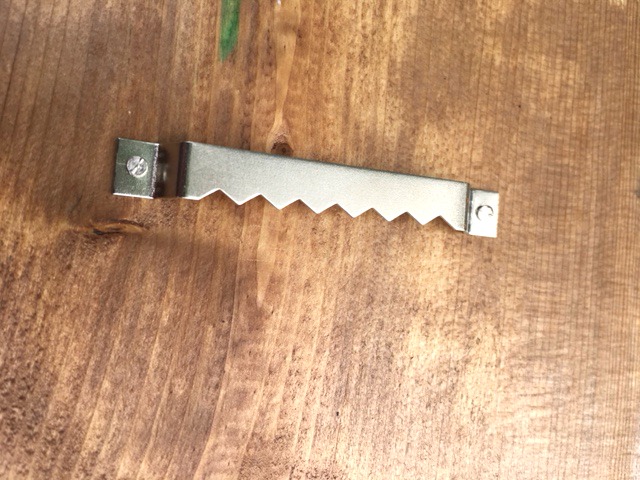
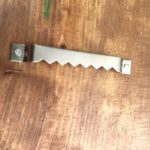
Hang it like a picture?
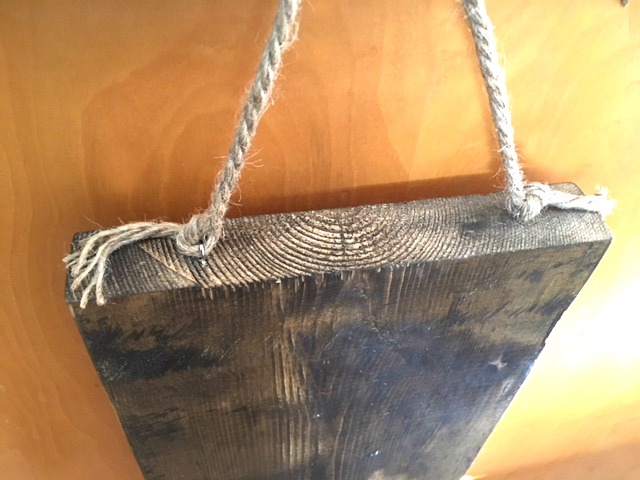
Or like a sign with screw eyes and a bit of twine or jute rope? I’ve used the above options on several projects.
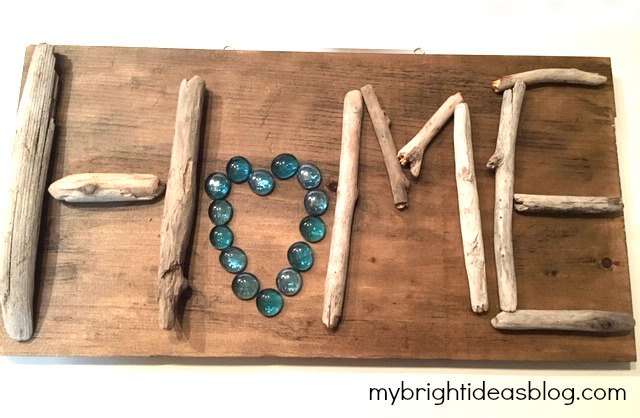
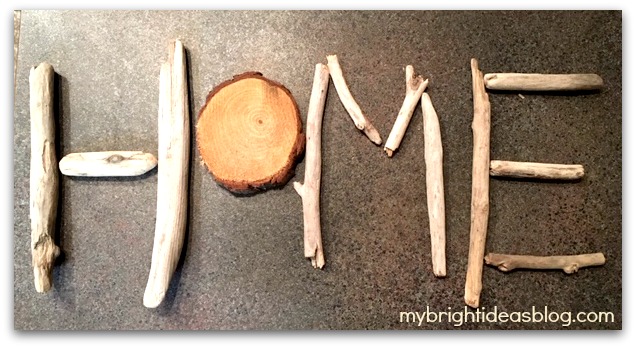
Now the stain is dry and I can pull it all together. I found some blue glass stones? Hmmmm. Tempting to use them but I wanted to have this look natural.
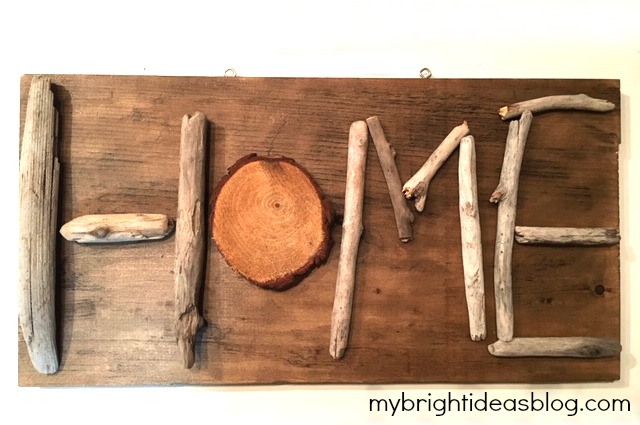
I also like the wood slice for the “O”. That is natural.
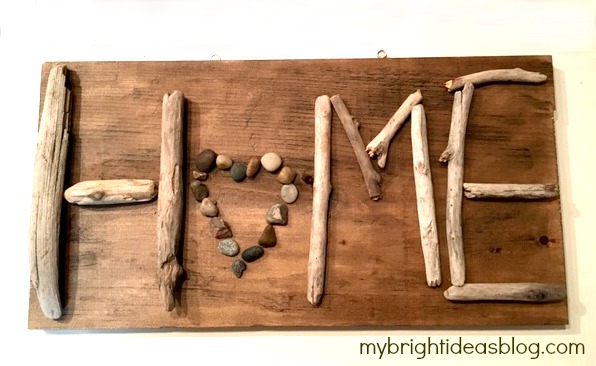
But after deliberations, I settled on small pebbles in the shape of a heart.
You can use your hot glue gun to attach the pieces to the wood. I might put this on the craft sale table at work so I used E6000 glue which is a very stinky permanent adhesive glue that will not pop off like hot glue can when it gets moved. Crack a window or work in your garage…it’s pretty strong smelling stuff.
And that is all there is to it!
Here are some other similar projects I have posted you might like….
Rose Gold Spray Painted Stone Heart Gift Idea
Rose Gold Spray Painted Stone Heart Gift Idea!
Love is in the air this week! We had a family wedding yesterday and it’s inspired another heart gift.

You may recall from previous posts that I have stack of cut wood scraps that I keep making into little plaques. Well, here is another one. This is so easy we could almost turn it into a kids gift if we used craft metallic paints instead of spray paint and white glue instead of the glue gun.
You will need:
- Krylon Foil Metalic Copper Spray Paint
- Pebbles
- Scrap of wood approx. 6 x 8 inches
- Dark wood stain and Rag
- Hot glue gun
- Picture hanger or eye screws and rope (optional)
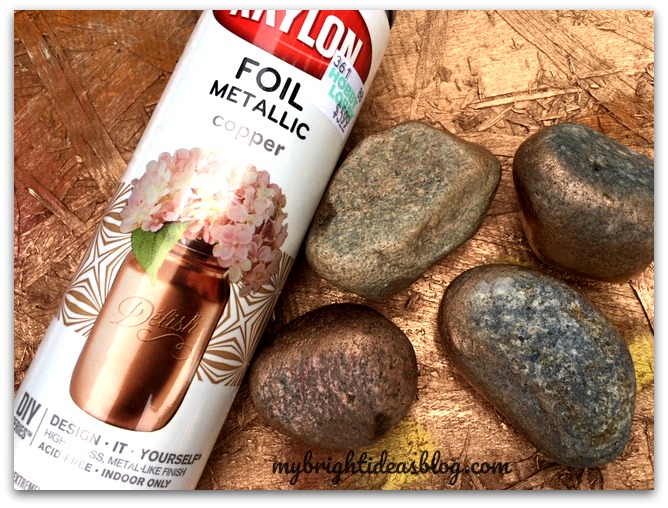
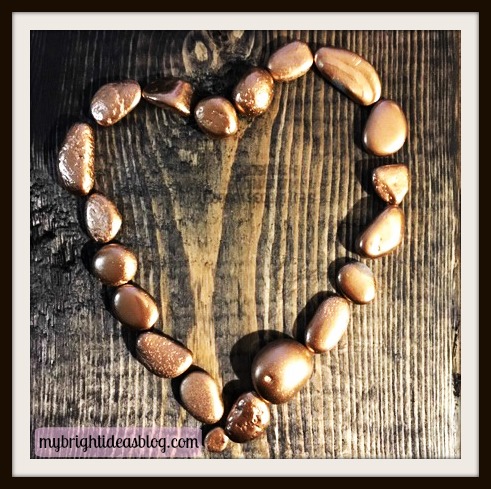
I picked up this pink gold Krylon paint from Hobby Lobby for $5.99. Rose Gold is such a pretty color. I love shoes and purses and cell phone covers in this color.
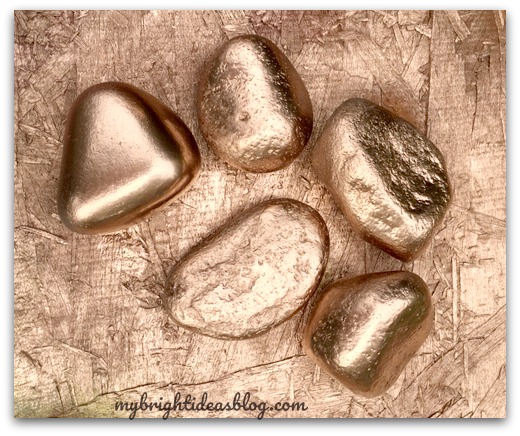
Spray paint the stones with pink metallic paint, allow to dry for 30 minutes and then check to make sure the sides are covered. Reapply to areas if needed.
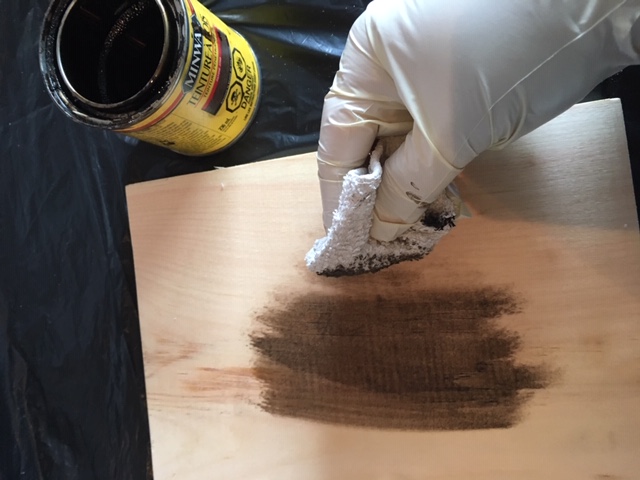
While the pebble are drying, grab a rag and your dark wood stain. I used Minwax Jacobean. If you have walnut on hand it will have a similar impact.
Before you go further you should consider if you want to hang this on a wall or just lean it on a shelf. If you decide to hang it you should put the hangers on now.
This option requires hammering tiny little nails into the back of the wood. Then it can hang on a nail.
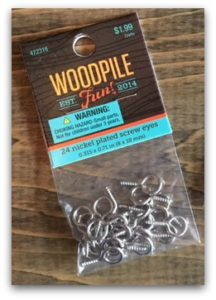
For a rustic looking alternative you could screw eye hooks into the top and hang it up by a rope.
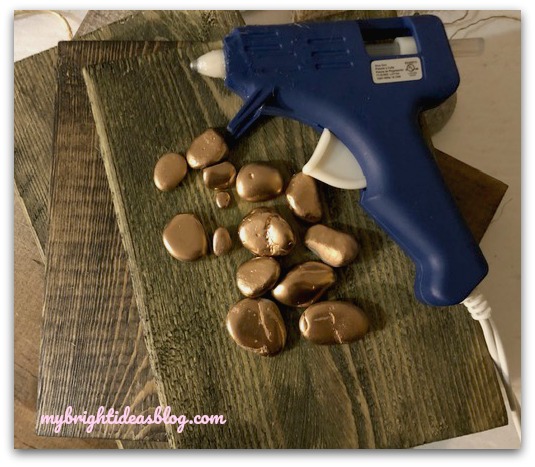
Lay out your pebbles in a heart shape and get your glue gun.
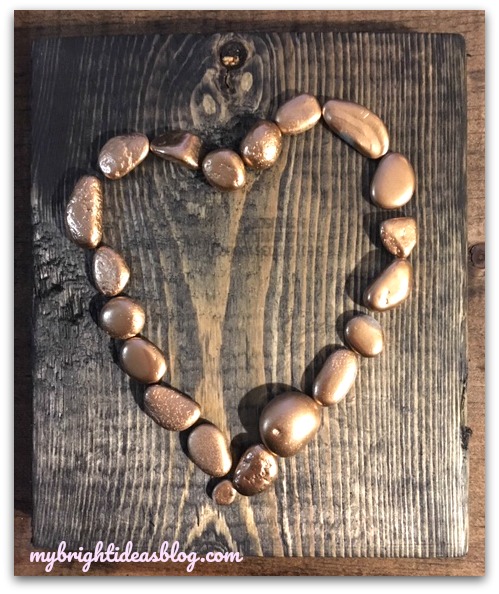
Using your hot glue gun, secure each pebble in place in a heart shape. That is all there is to it!

Scroll down to see some of my other wood and pebble art projects….

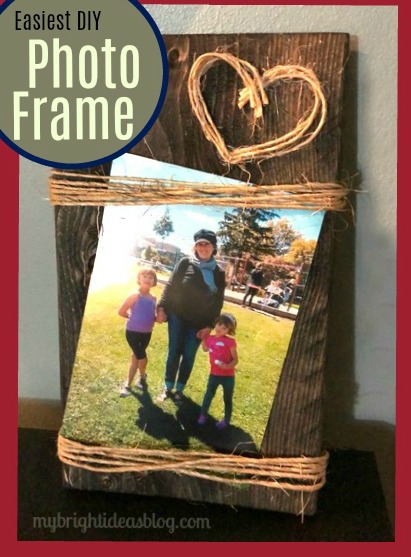
Easy Wood Photo Frame Idea
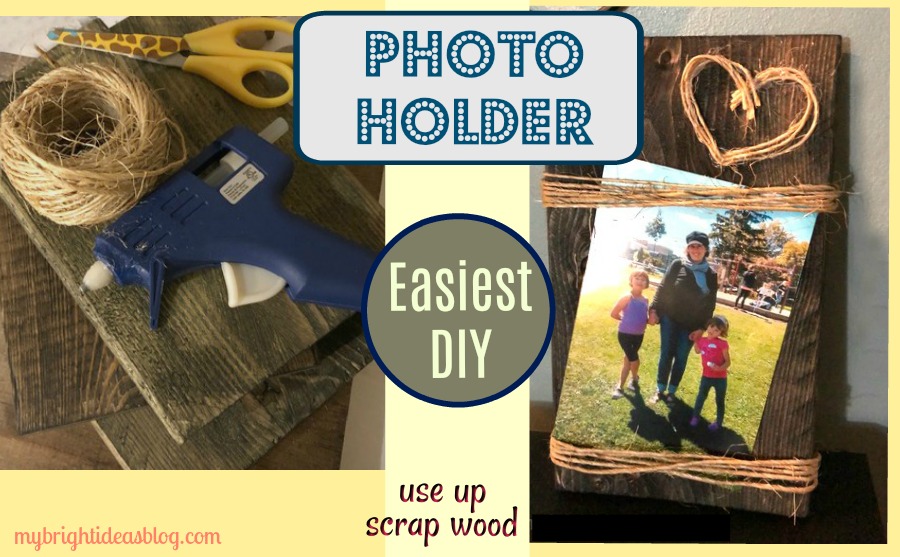
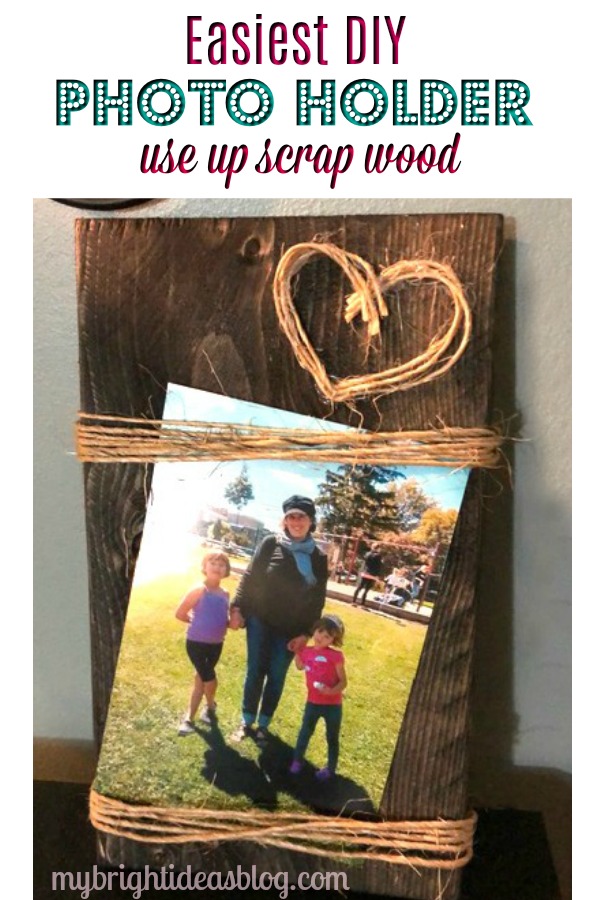
Let’s make a 5 minute craft that looks great-a rustic picture frame that holds a typical 4×6 photo.
Before the winter weather came in our direction I planned ahead for winter crafts by cutting up scraps of lumber and coating it with a bit of dark wood stain. You never know what sort of crafts could use a bit wood and hot glue gun. I’ll post some other wood scrap ideas at the bottom of the post.
Rustic Wood Photo Holder
You will need:
-
- a scrap of wood approx. 5 inches by 9 inches
- walnut wood stain
- rag
- basic twine
- hot glue gun
- ruler
- picture hook or eye screws
- 4×6 photo
The piece of wood I used was a 1×6 board originally. In actuality its more like 5 1/4 inches wide and 9 1/4 inches long (13cm x 24cm). Use what ever you have this doesn’t need to be exactly the way I did it.
Stain the wood with a rag dipped into a dark brown stain such as Minwax Walnut or Jacobean.
After the stain is dry, choose the better looking side to be the front. Turn it over and using a hot glue gun, glue the end of the twine to the back of the wooden board approx. 1 inch from the bottom.
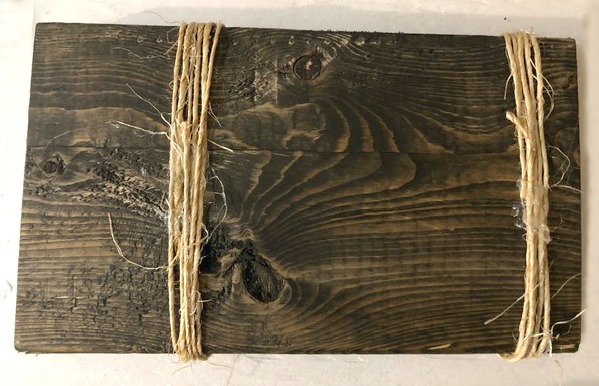
Wrap the twine around the board approximately 5 times keeping it fairly tight and adding more hot glue to secure each line of twine.
Repeat again 5 and 1/2 inches away from the first twine wrapped section. Have a 4×6 photo handy to test out the distance you would like the top and bottom of the photo.
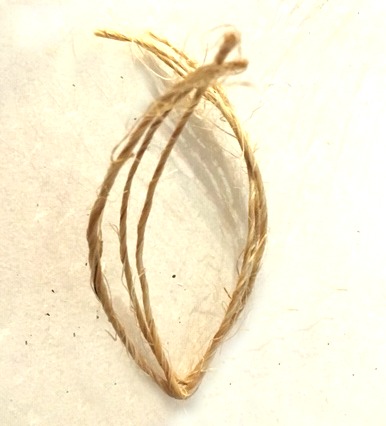
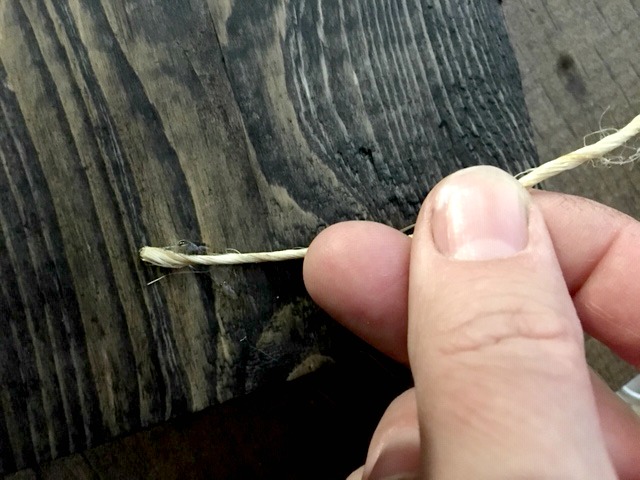
Take 2 or 3 strands of twine and cut to 7 inches long.
Bend the twine in half so there is a point for the bottom of your heart.
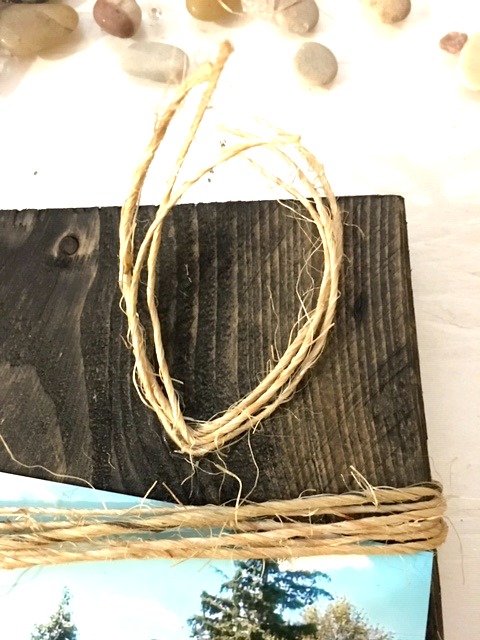
Add a dab of glue to the bent area of the twine and secure it onto the board. I added to the top right.
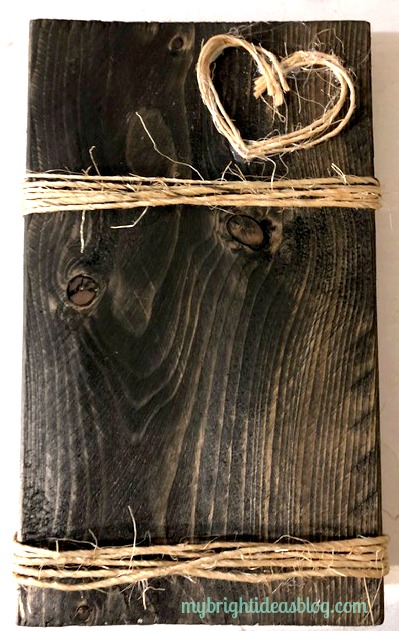
Add more small dabs of glue at the top of the heart. Use very little here because we don’t want it to dribble and show on the finished side.
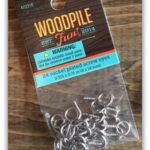
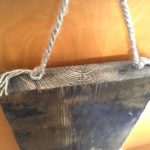
If you would like it to be able to hang up on the wall you could hammer in a picture hook. Another option is the screw in eye hooks and tie more twine or jute rope to hang it up.
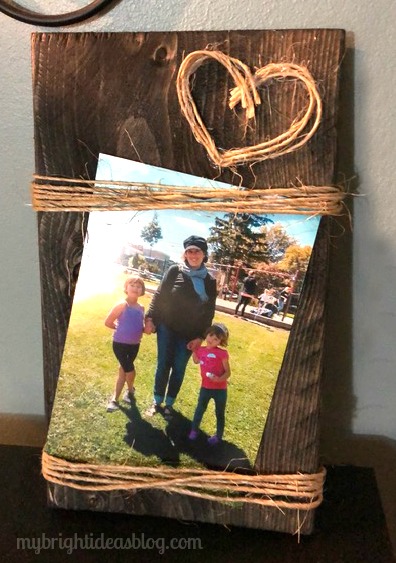
Add a special photo and give it as a gift.
I put this on the craft table at work and it sold right away! Fortunately, I have a stack of wood ready for more crafting. See the links below for more ideas for how to use up the little pieces of wood you have in your cut off scrap pile.
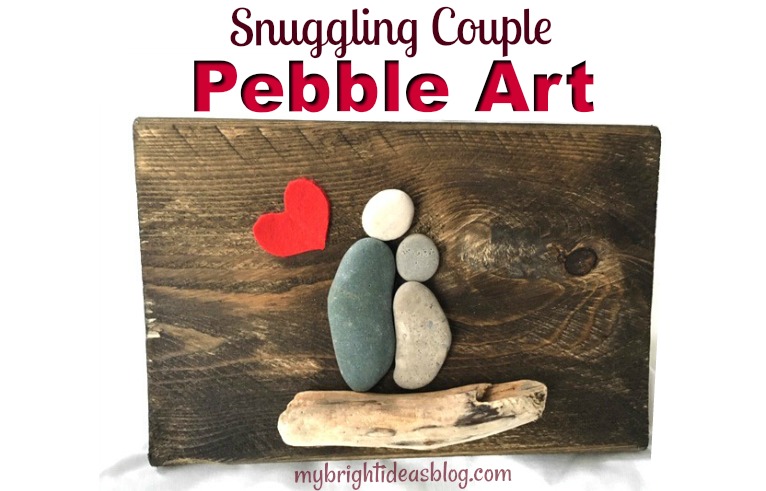
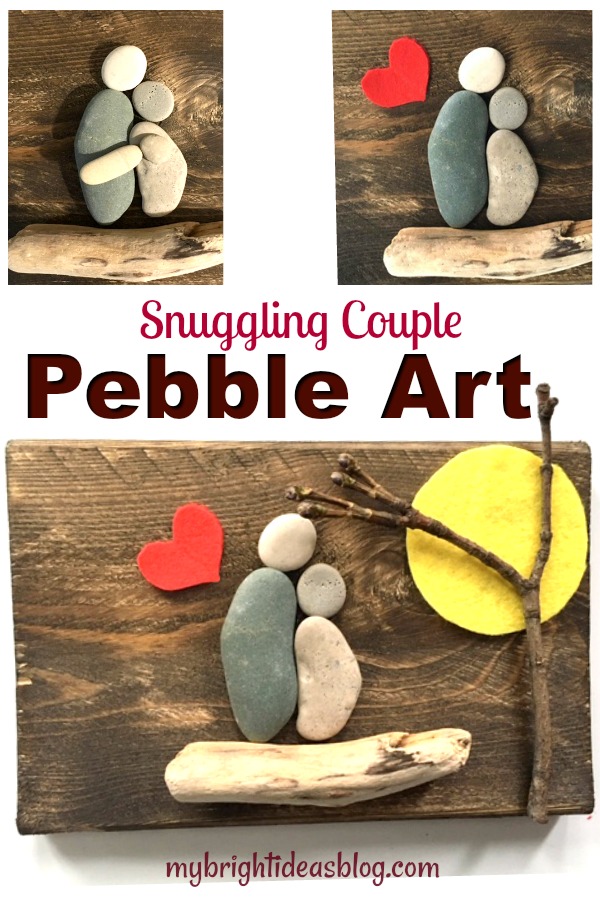
Pebble Art – A Snuggling Couple
I got a nice collection of flat rocks when the weather was warmer. When you start becoming a beach pebble collector its hard to stop. Even now, although its freezing rain I still would love to escape to the beach…an hour drive away…to look for my favorite shapes of stones (hearts, ovals, circles). So I’ve stained a few small boards to turn them into Pebble Art.
I’ll show you what I made this time….
What you will need:
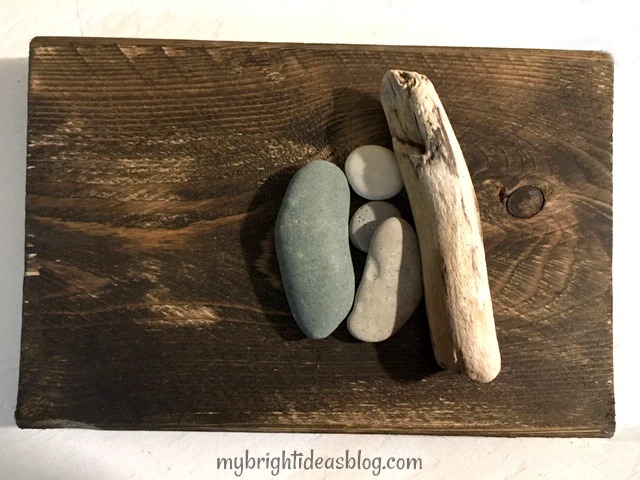
- 2 long pebbles
- 2 round pebbles
- small piece of drift wood
- red and yellow felt
- a twig
- a scrap of stained board or a plain canvas
- hot glue gun or E6000 glue
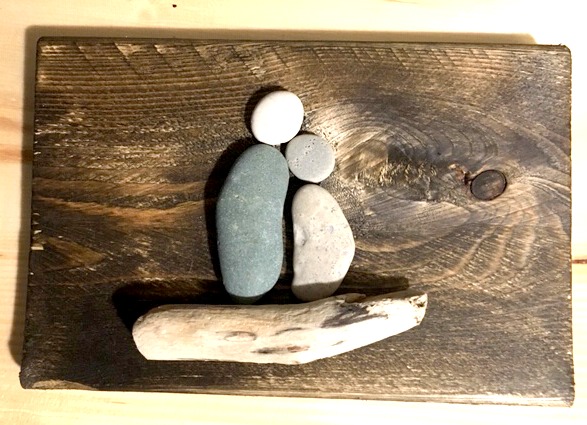
These two long rocks fit together perfectly for the bodies. Two round stones on top for the heads. A small piece of driftwood for them to sit on. Glue everything in place. You can stop with just these natural items or keep going to add some colour.
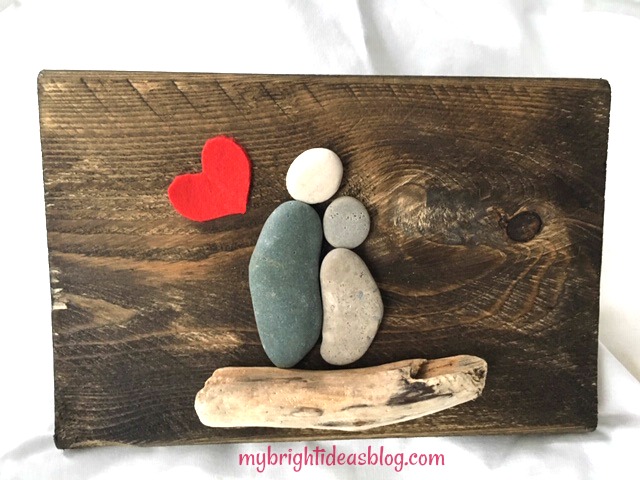
Here I took an inch of red felt and folded it in half and cut the shape of half a heart. I find this is the best way to get your heart shape. If I try to cut it freehand it turns out lopsided.
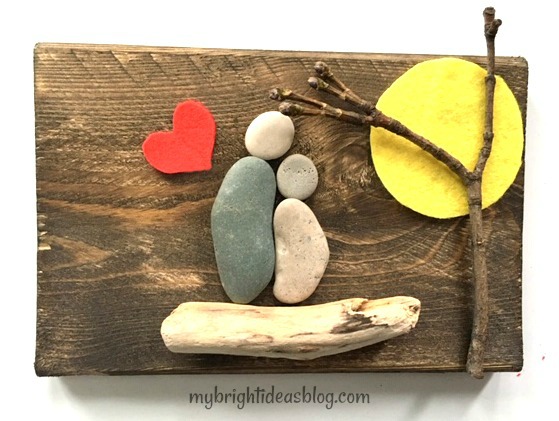
Trace a tin can from your pantry to make a felt round sun. Put a twig on the side and now its done.
Now it’s a couple having a snuggle at the beach, watching the sunset. Although, my 8 year old would like it to be a mother and daughter. Awe she is snuggler. I better make her one for her room!
Thanks for reading another one of my easy crafts….Have a look below for links to some of my other “Pebble Art” projects.
…
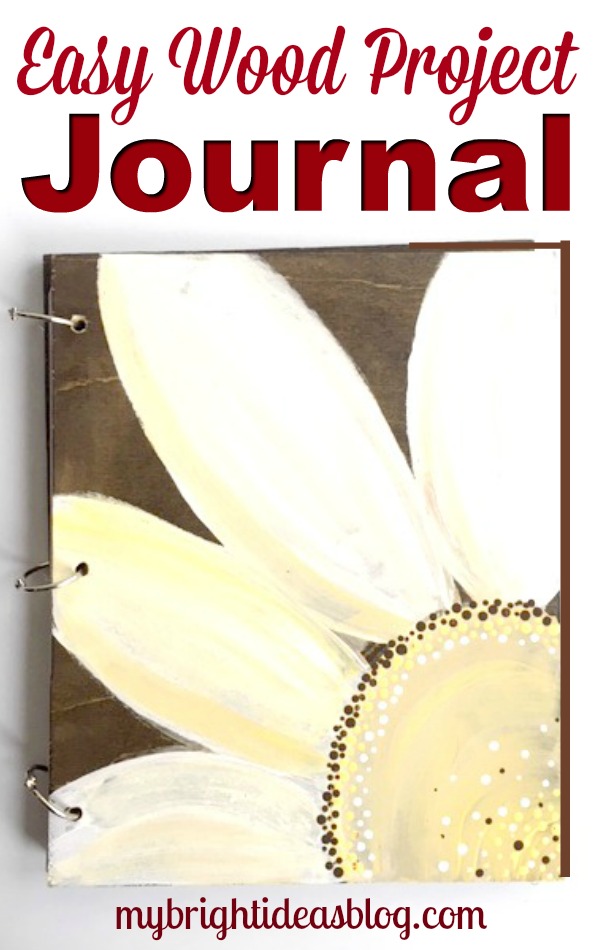
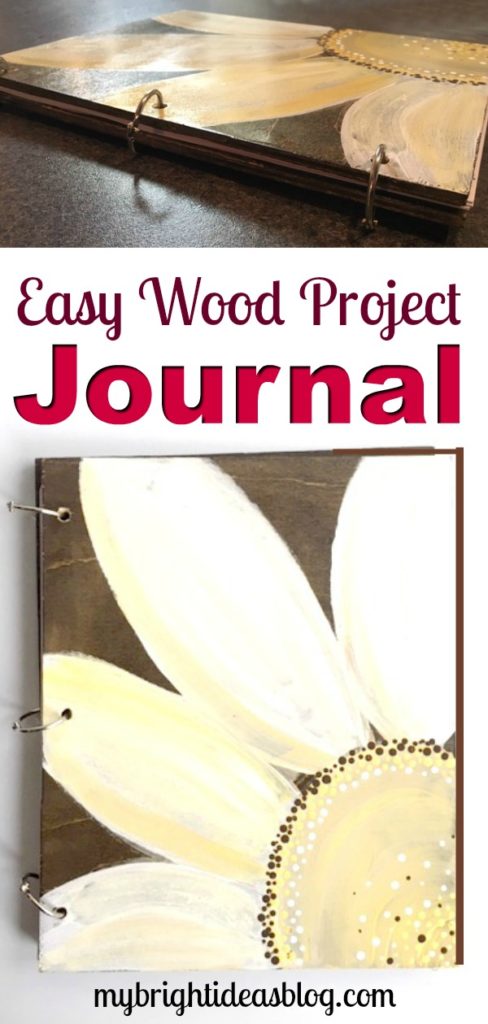
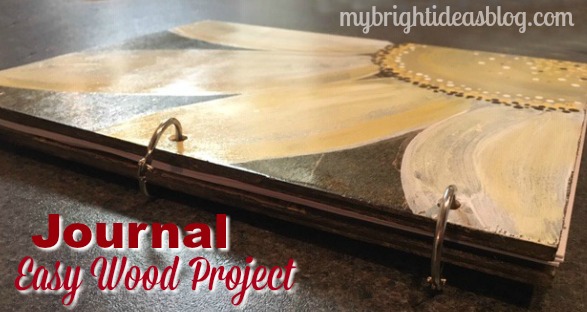
Make a Wooden Book – Original Journal Gift Idea!
Have you ever thought of making a journal with a wooden cover? I hadn’t until I stumbled across this on Pinterest….from ThriftDiving.com….
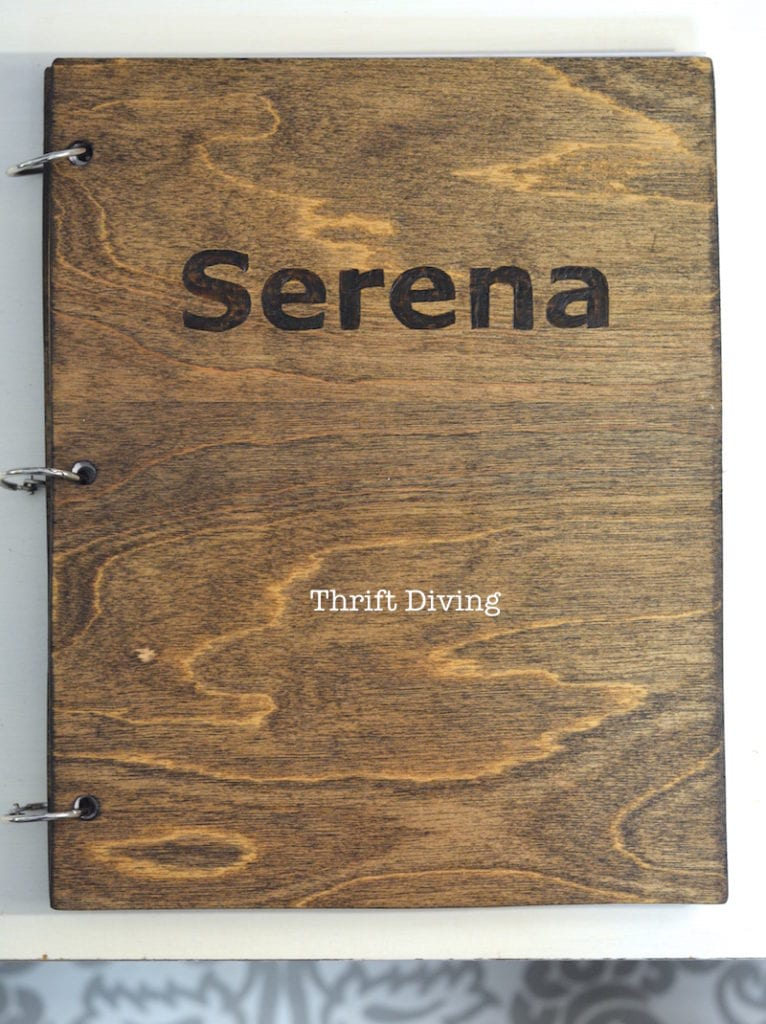
….it kept coming back to my mind that this is my woodworking skill level. I really should try this!
I’m really happy with how it turned out. Rather than wood burning like Serena did. I hand painted a daisy on mine.
You will need:
- 1/4 inch birch plywood
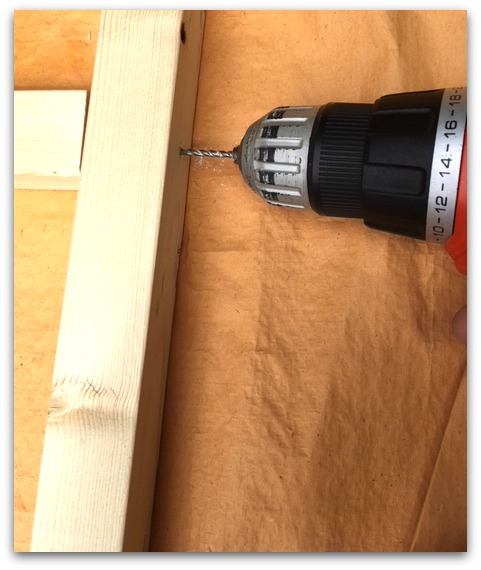
- drill and 5/16″ drill bit
- fine sandpaper
- stain and rag
- craft paint – yellow, white, brown
- clear coat varnish and brush
- binder clips
- computer paper
- 3 hole punch
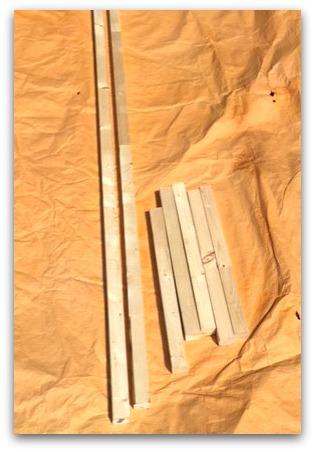
The thin birch plywood comes as a large piece that needs to be cut down. I don’t have a table saw-so I had the wood cut for me at Home Depot.
Each cover needs to be approximately 9″ x 11″. So do the math and try to get the most out of your wood board. Each book needs a front and a back cover. I was able to get 6 pieces from mine to make up 3 books and there is enough left over to make at least one more.
I stained the board and then drilled the holes. Next time I would drill the holes first and then stain the wood.

The cuts may cause some fraying of the thin birch veneer, don’t panic! Sand the rough parts smooth-the stain will also hide flaws. I used my favorite color Jacobean from MinWax.
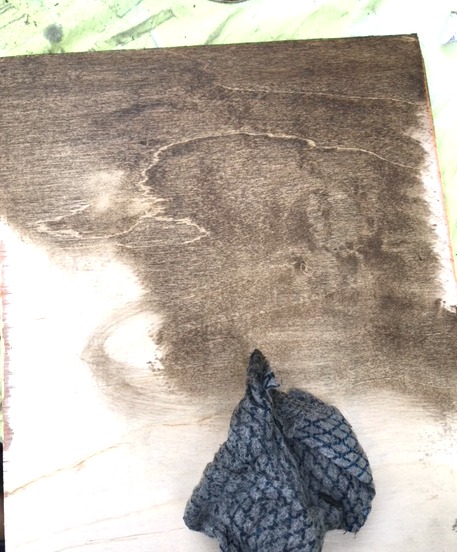
Using a rag, rub the stain into both sides of the boards. It’s quite a dark stain so I don’t use much and start light and work at slowly going darker. Allow the stain to dry overnight.
As I mentioned above, it would be sensible to drill the holes before staining. Doing it afterwards can mean you’ll do some touch ups with stain afterward.
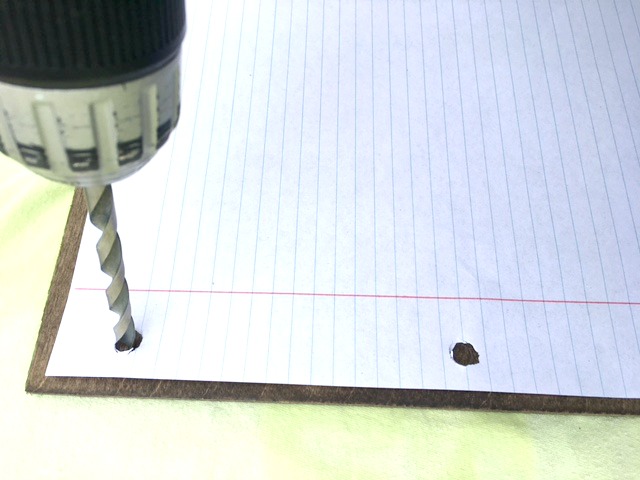
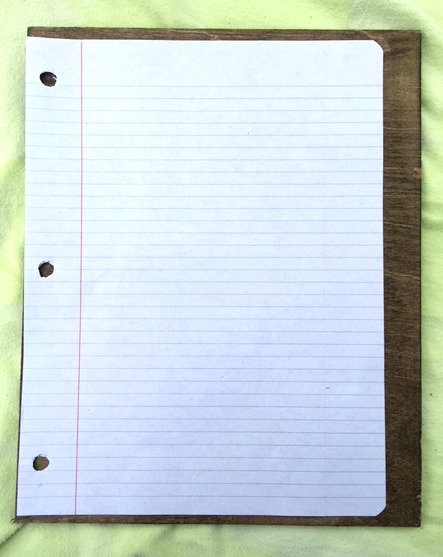
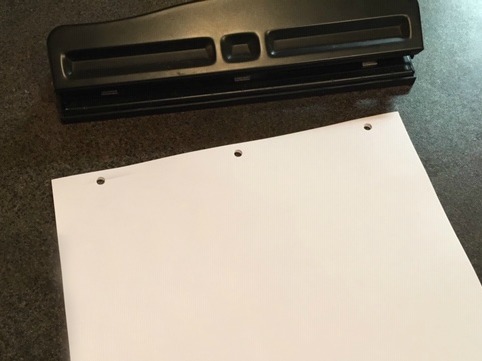
Use a page with holes as a template. Mark the hole with a pencil first.
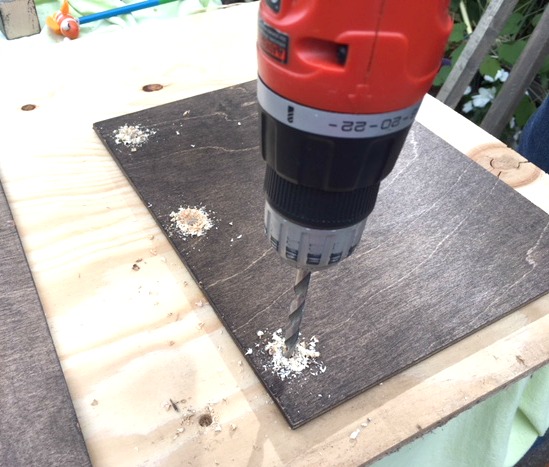
Place a scrap board under the journal cover before drilling. The journal cover will be damaged if you drill without scrap wood underneath…do don’t skip this step.
For the second piece of birch you could set it right on top and drill through both book covers to make sure they are matched up perfectly.
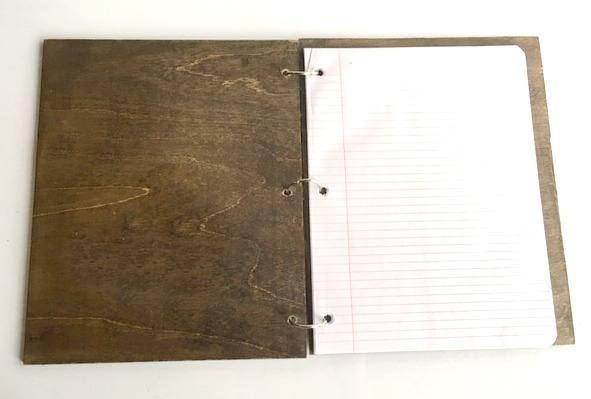
Put in the binder rings and see how it fits. Everything fits perfectly. So take the top cover back off and prepare to personalize and decorate the cover.
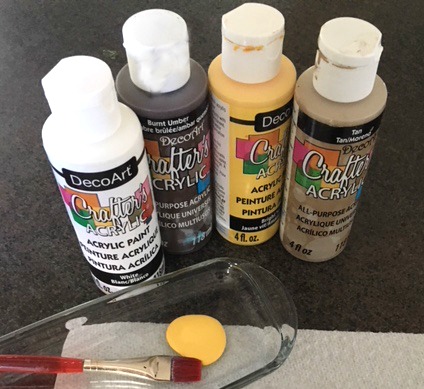
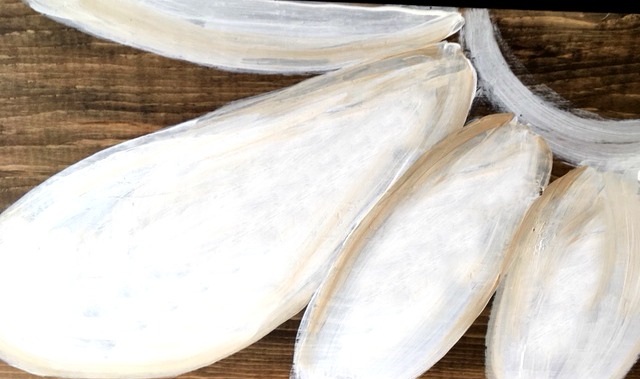
Using inexpensive craft acrylic paint, I painted the daisy on in white. Then I added some highlights with tan and yellow paints.
I used this exact same daisy idea on long boards for ways to use up scrap wood. I’ll include the link at the bottom of this post.
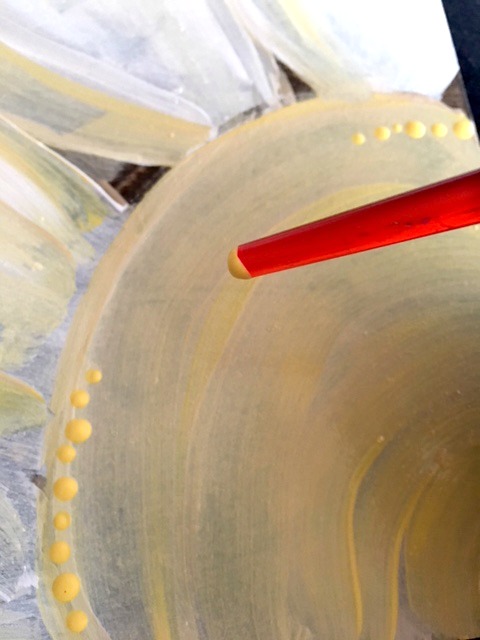
The last step is to turn the paintbrush upside down and dip it into the paint. I added rows of dots all around the edge of the daisy’s centre and some random ones in the middle.
Again allow to fully dry.
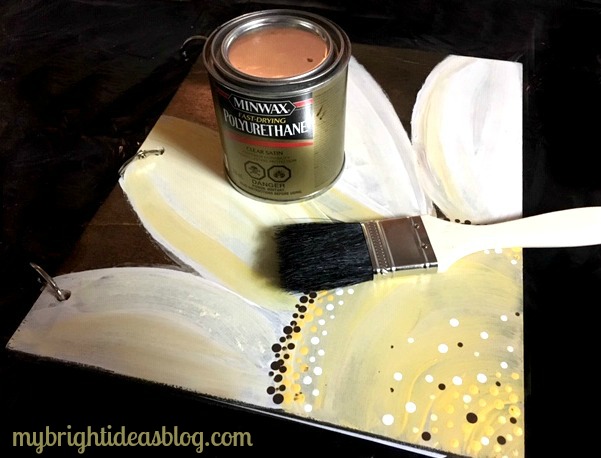
Put a coat of clear polyurethane for extra durability. Allow to fully dry overnight.
You can use lined paper or computer paper and punch the holes in it yourself. I like blank pages if you are going to give it as a gift. It looks like a sketchbook and how great would it be to sketch with a book with a wooden cover!

Thanks for reading this post! I hope you will share it or save it on Pinterest. See below for more easy woodworking ideas.
How to Build a Blanket Ladder – Easy Project!
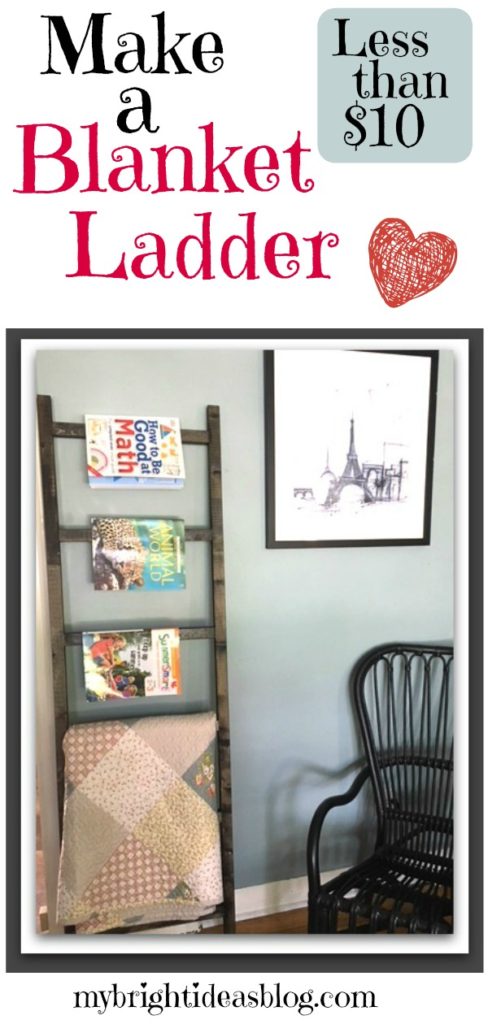
Blanket Ladder DIY
This project is one of the cheapest projects you could make. If you have the stain, varnish and screws left over from a previous project the great news is the lumber should be less than $10.
You will need:
- Lumber 3 – 8 foot 2×2 (3 x $2.50 each = $7.50)
- Power Drill, drill bit and screw driver bit
- Pencil
- Stain
- Sand paper
- Clear Coat Varnish
- 10 – 2 1/2 Wood Screws
 Cut 2 pieces to 6 feet long. Cut 5 pieces to 18 inches long. (This is the size I made)
OR
Cut 2 pieces to 5 feet long. Cut 4 pieces to 18 inches long. (Good if you have a small room)
![]()
Do you see that blue sky? 30 mins later the sky had dark clouds and I was hustling everything back into my garage to avoid a major thunderstorm.
![]() Lay out the wood and decide on your set up. I chose to put the first ladder rung 3 inches from the top. Then each one is set to be 12 inches below the next one. This left about 6 inches from the bottom of the ladder.
Lay out the wood and decide on your set up. I chose to put the first ladder rung 3 inches from the top. Then each one is set to be 12 inches below the next one. This left about 6 inches from the bottom of the ladder.
 I predrilled the holes to help the wood not split. That would ruin the wood-trust me I’m famous for doing this and having to head back to the store for a fresh piece of wood. Doh!
![]() I started to drill each screw into the wood to make the next step of adding the rungs easier.
I started to drill each screw into the wood to make the next step of adding the rungs easier.
![]() Use a square to ensure the rungs go on straight.
Use a square to ensure the rungs go on straight.
![]()
Do you want to have it super smooth finish or rough and distressed…decisions decisions…?
Smooth…then its time to go over it with sand paper or a hand sander.
Distressed…last chance to scratch it up a bit. Rub it with the side of a screw or key. You can even wack it with hammer.
![]() Even if you like it distressed you can almost skip all the sanding but do tidy up the ends with a quick rub using sand paper.
Even if you like it distressed you can almost skip all the sanding but do tidy up the ends with a quick rub using sand paper.
Now for the STINKY wood stain!
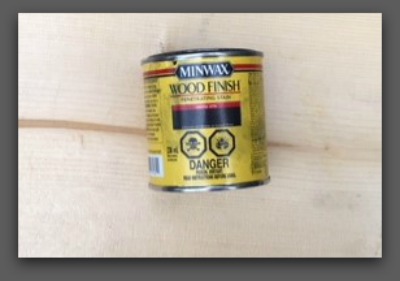
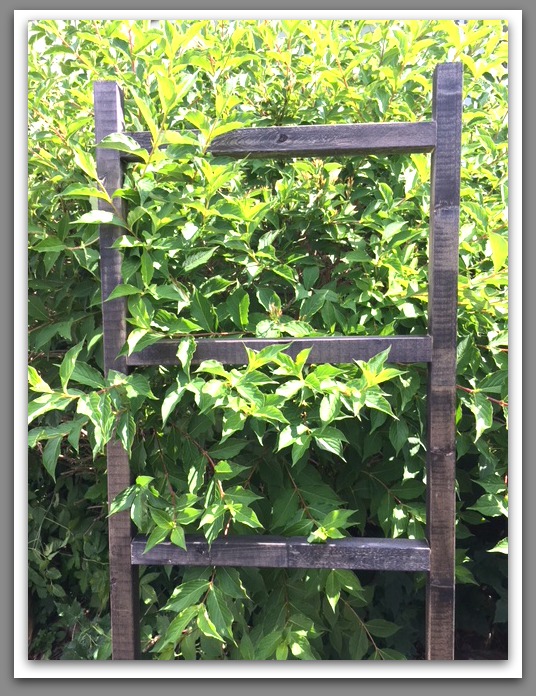
Next step is staining it. Choose a stain that will go with your décor. I really like a dark walnut finish but this blanket ladder is going into a room with a lot of black. So I used an ebony stain by Miniwax. If you are indoors open a window. If you can do it outdoors that is even better.
![]()
Watch the seams for areas where you have missed stained the first time. I used a craft paint brush to touch up the gaps and unintentional light patches.
After allowing it to dry, put a thin coat of clear protector over top. Keep in mind, clear coats come in a mat finish or glossy. I prefer glossy for the sake of smoother dusting my wood furniture but the mat finish looks really nice too. I chose to use a SPRAY clear coat.
This looks so nice next to the greenery. Maybe I should use it as a trellis instead!
![]()
![]()
This could double as a magazine rack too. I didn’t have any magazines around so I used the kids summer school work books. Tee hee…. :o)

This is such an easy project! Are you teaching your teenager some DIY skills?
What if a teenager used this ladder to set out their school clothes for the week…
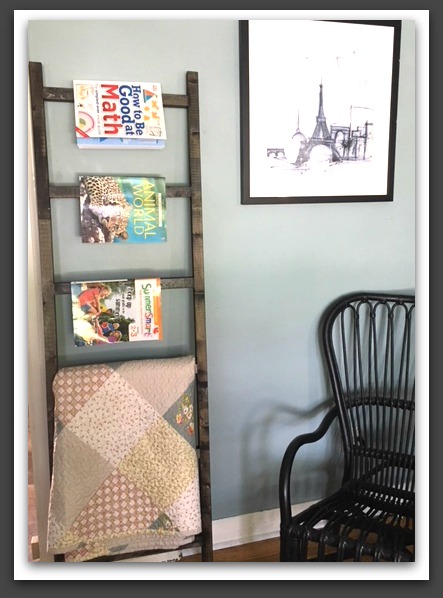
Add a blanket and what a nice housewarming gift this would make!
Crafts Using Burlap and Buttons – Easy Project that Looks Great!
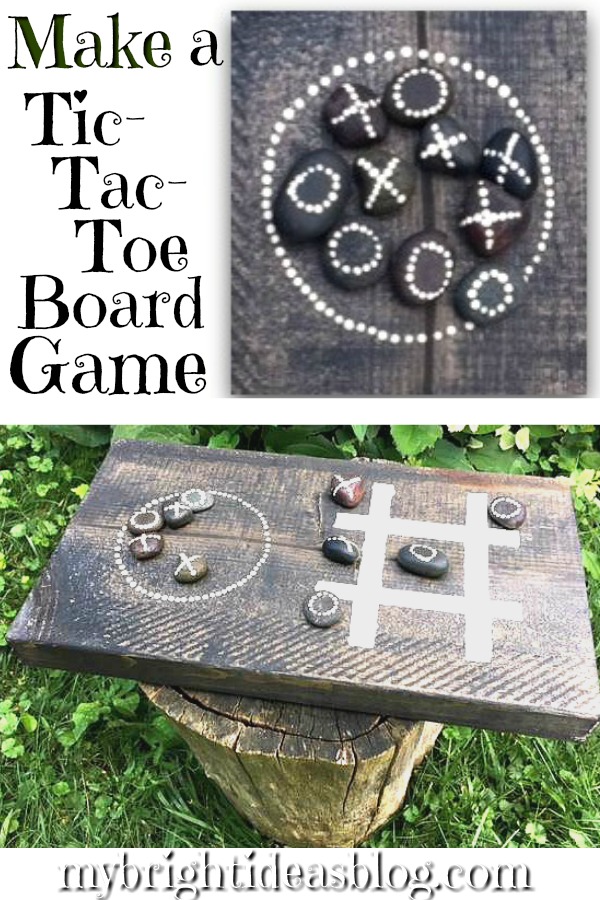
Make a Tic-Tac-Toe Board Game
Today I’ve got a SUPER EASY project you are going to love!
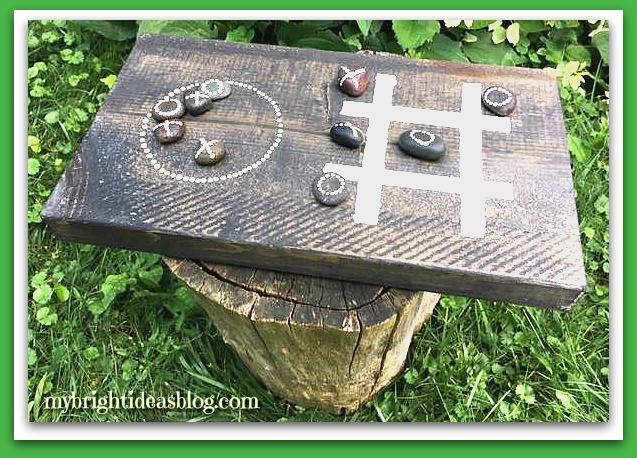
Outdoor Tic Tac Toe Board Game
I’ve been working on some of my wooden projects this week but every day we’ve had sun then clouds and then raining cats and dogs. One of my projects (a wooden sundial) to do with the kids requires a full day of full sun. So there, once again, we are running into the house to dodge raindrops with our sundial. What can you do but be patient and find another project to do. What funny summer weather!
I want to give credit to this bright idea….it was inspired by https://tarynwhiteaker.com/outdoor-tic-tac-toe-game/?m. When I saw her blog post, I immediately put it on my to do list. Outdoor games….hmmm it’s got me thinking about other giant outdoor games for summer family fun.
What you will need:
-
- 10 flat rocks (I used the bagged ones from the dollar store)
- a rectangle block of scrap wood
- wood stain and rag to apply it
- white/cream craft paint
- craft paint brush
- painters tape
- (optional) clear varnish (clear spray paint is handy for the rocks)
Lets Get Started!
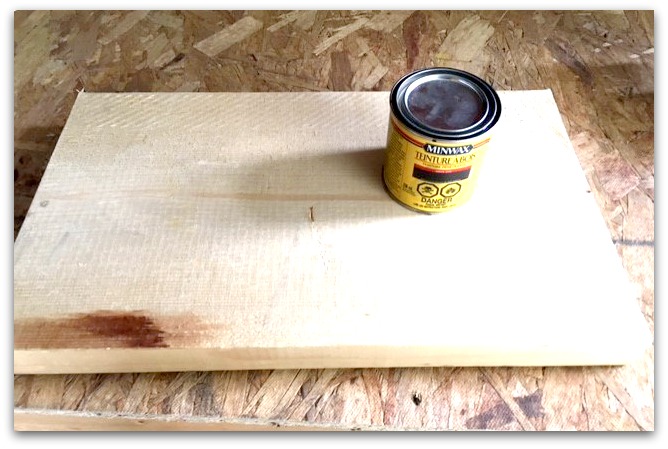 I hope you have a piece of wood left over from another project that you can use. The thickness and width and length is completely up to you. I had this piece of pine left over from a mirror project I made in the early spring. I will put a link to it at the bottom of this post.
The the scrap of wood was…9×16 (23cm x 41cm) and 2 inches thick.
![]() If there is any rough edges give the corners a bit of a sanding. We don’t want slivers. If you want it to be a smooth tic tac toe board, then you will need to put some more time into sanding it.
If there is any rough edges give the corners a bit of a sanding. We don’t want slivers. If you want it to be a smooth tic tac toe board, then you will need to put some more time into sanding it.
The stain I used is by MINIWAX called “Ebony”. If you put a thin layer on you get a grey/black effect. If you put on 2 heavy coats it will be nearly black. I used one coat for this project. I really like!
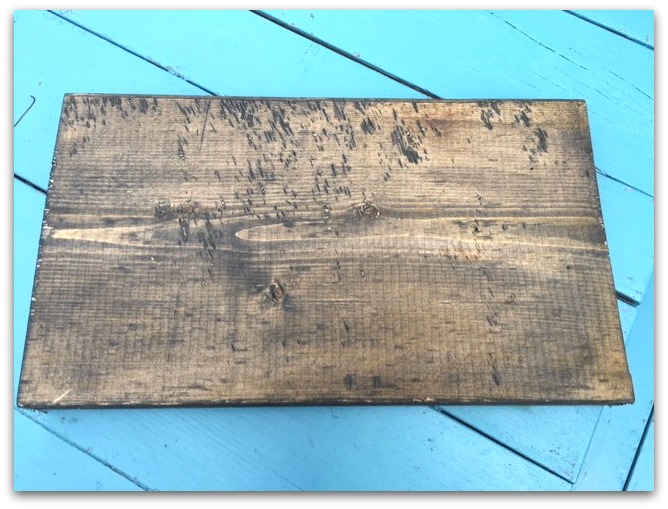
After the board is stained you will see that it’s quite banged up. I really like the rough, distressed lumber look.
You should give the stain plenty of time to dry before moving on to the next step. It started to rain so I abandoned this project until the next day.
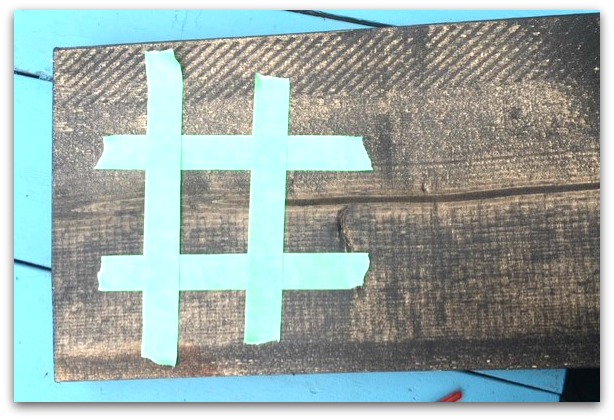 This photo shows me using painters tape to show me where I would want to paint the lines.
Grab Your Paint Brush!
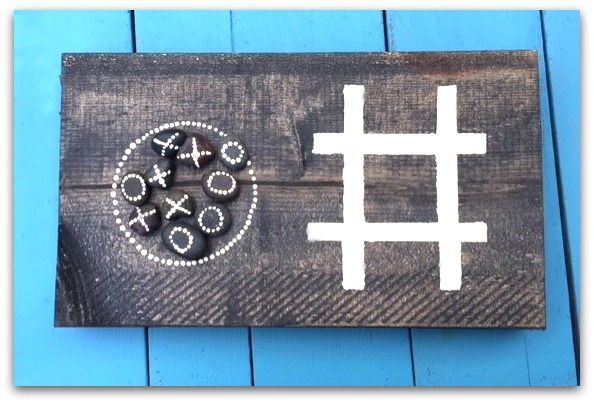
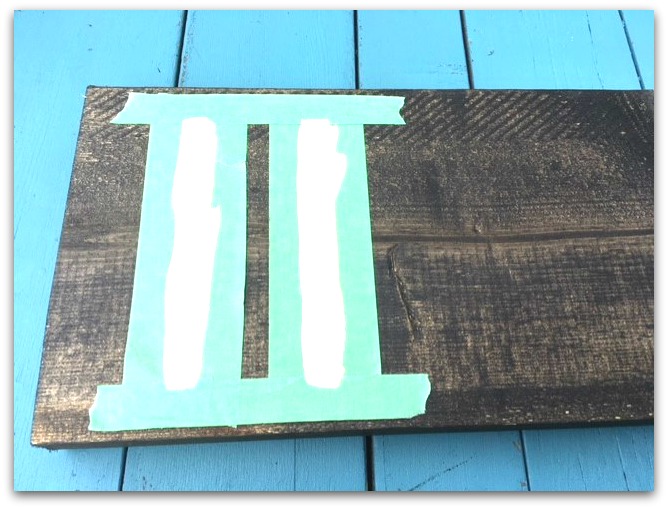 Using painters tape, mask out where to have the first two lines. Apply a coat of paint and wait 10 mins. It may need another coat of paint. Craft paint dries fairly quick but I gave it 45 mins and then was able to remove the tape and put in the opposite direction. Have a ruler handy to check the distance from the sides is equal.
If all of this is too tedious, you could just paint the lines on free hand. If you were doing your tic tac toe on paper or sand it would look more like the tape in the previous photo. Maybe I’ll try that next time. If you make a mistake you can wipe it off quickly with a wet cloth.
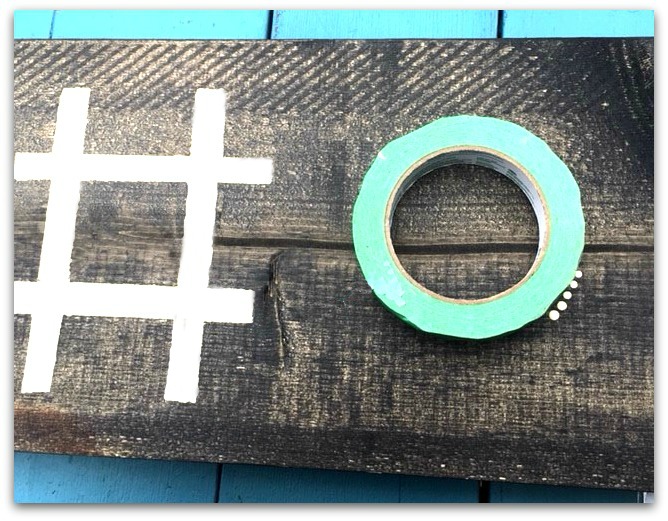
I was looking at the painters tape and thought hmmm…..why not paint a spot for the stones to rest. I love this technique for perfect dots. Dip your paintbrush handle into the paint and dab it on the surface 1-3 times and then reapply with paint and carry on.
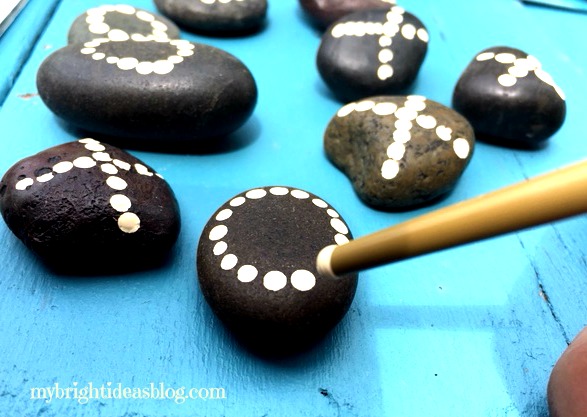
Originally I was going to use a stencil on the stones…..but that was not a success. Then I was going to free hand paint the X’s and O’s and that turned out ugly too. So my solution was to do the dabbed-dots again.
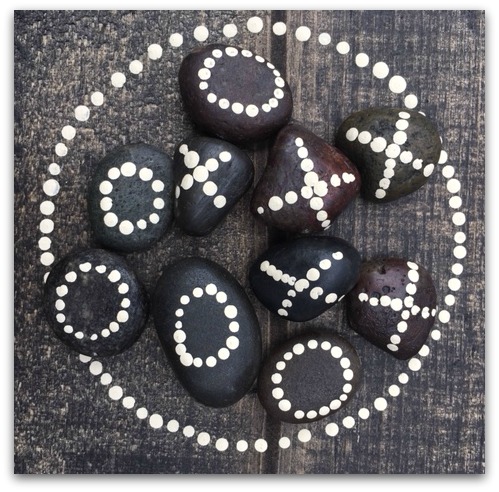
This looks so much better than the ones I hand painted. LOL!
 This is so easy I wonder if I should make some more for housewarming gifts….or maybe sell them at my work craft table. Several of my recent posts have made it to the craft table at work. Fridge magnets, wind spinners, the memory wire bracelets and all those items add some sparkle to the other fabric and knitted items.
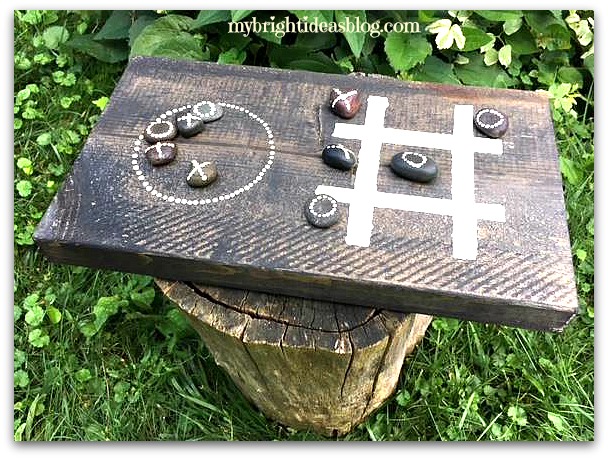 If you put a clear coat of varnish on the wood it will be ready to stay out doors all summer long come rain or shine. It adds an activity and rustic charm to the deck or patio.
(As an after thought, the rain lifted some of the dots off the stones so they should get a clear coat of spray paint.)
Thanks for reading! Enjoy your Sunday and get outside its going to be a beautiful day!


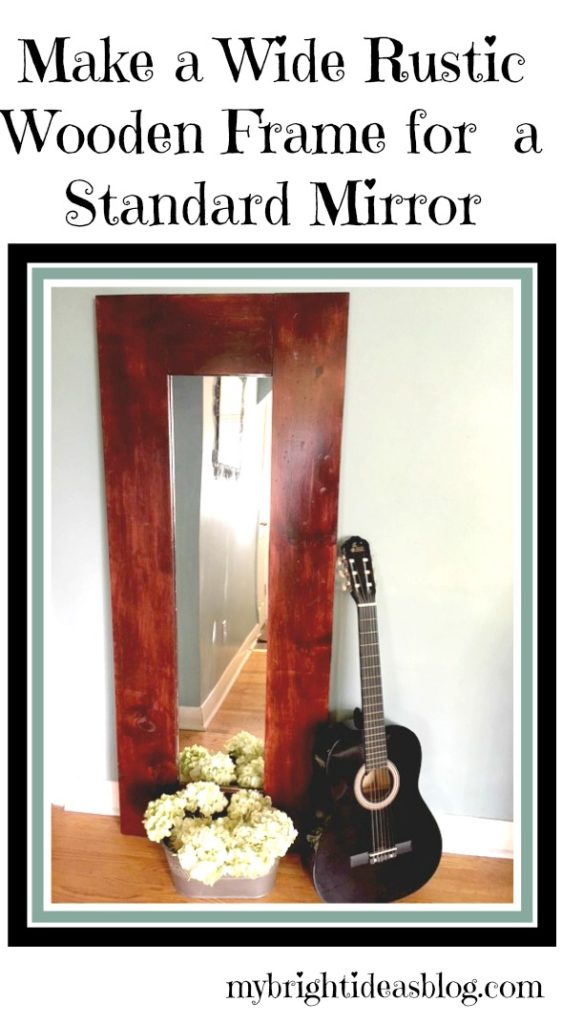
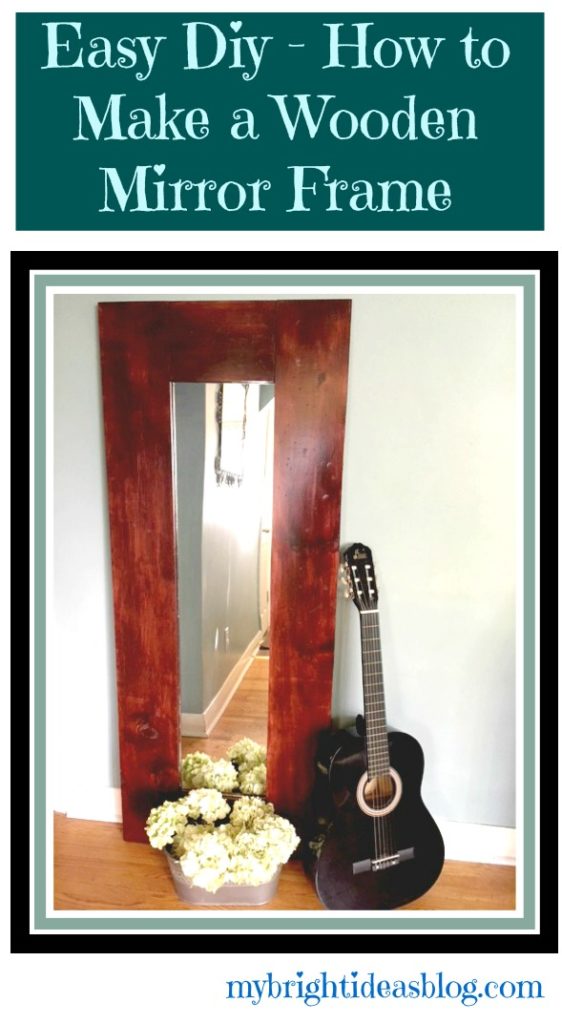
DIY Make a Wide Wood Frame for an Inexpensive Mirror
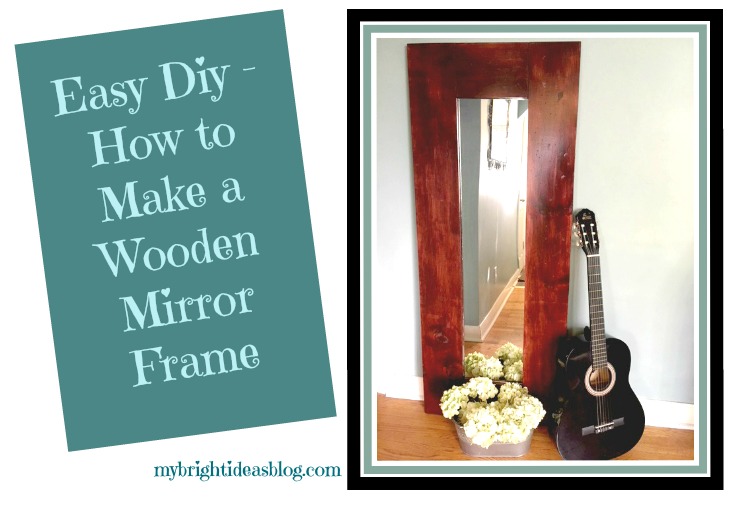
This week I got it into my head to take a cheap mirror and make it really substantial with a wood frame. Recently, I replaced all the doors to the bedrooms and closets and that was where most of our mirrors were. Hanging on the backs of doors. Now the doors are so new and lovely I can’t bear to attach anything to them. So I’m heading out the door not knowing if my skirt is stuck in the back of my tights…or any other possible wardrobe mistake is happening.
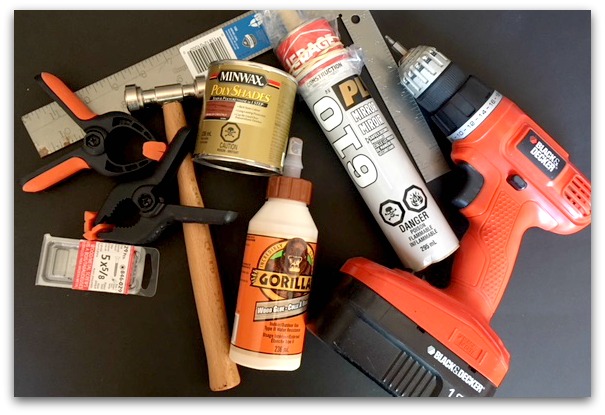
For this project you need:
- one 1/4 x 48 x 96 backboard cut down to size $21.40 (mine was 25 x 61 – but measure your mirror and pine pieces first) I had this cut done at Home Depot
- inexpensive pine boards (I needed 2 boards 1x8x6 $7.97 each) choose straight boards
- a mirror $13.99 – mine was 13×49 but when you take it out of the plastic frame it was 10 1/2 x 46 1/2
- exacto knife
- tools to bang up the wood if you want it distressed…hammer, saw, big nail
- stain and brush (mini wax polishade $11.97,this is an “all- in-one” stain and polyurethane so you brush it on)
- Wood Glue $5.27
- Clamps (at least 10)
- Screws $2.97 (5 x 5/8)
- Mirror Caulking $6.97 (LePage 610 Mirror) and Caulking Gun
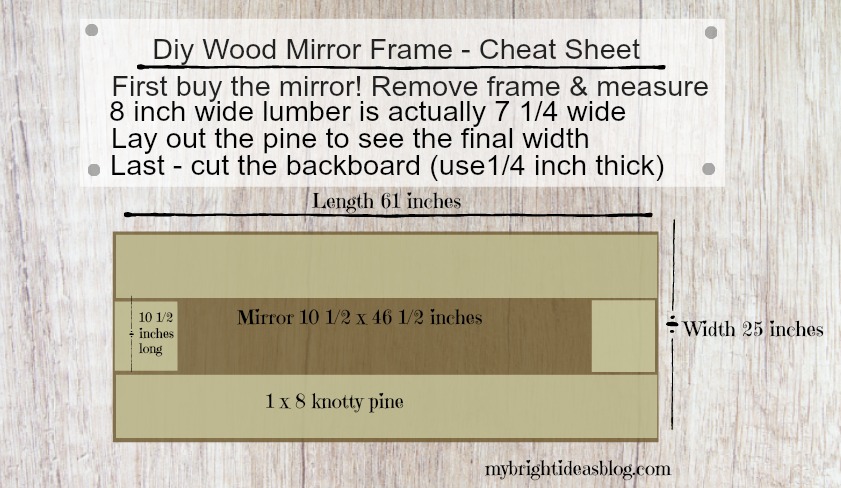
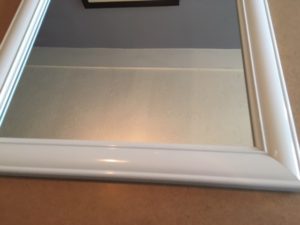
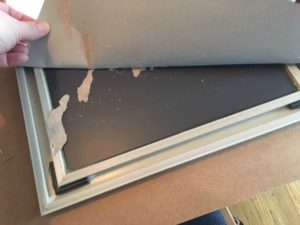
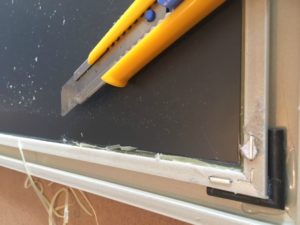
Carefully Dismantle the Mirror
The very first step before you cut your wood is buy the mirror. If you just follow my sizing for wood cuts you may have a different size mirror and have to recut or get new wood. Remove it from the frame by turning it over and tear off the paper on the back. Take an exacto knife and cut away all of the glue on the edges. The mirror is actually a lot thinner and delicate than you might think-so don’t assume it will pop out. It will break easily. I found I needed to slice the along the edge of the plastic frame and then turn the knife and cut at a different angle. This required a lot more time and patience than I expected.
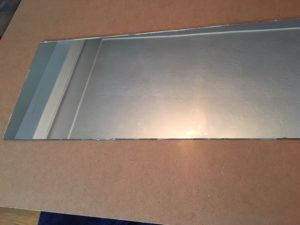

Very carefully lay the mirror on your surface and measure. I wanted to use a wide wood-you can go wider or narrower just adjust the size of your backboard. You may be able to find the right wood in the lumber area near the fence building supplies this will be less expensive. I went with the wood in the furniture building section because of the sizes available.
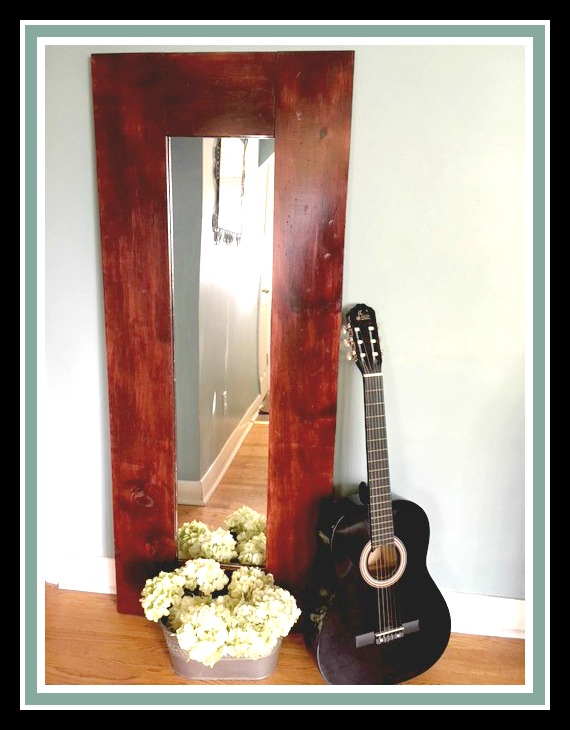
My mirror is 10 1/2 inches by 46 1/2 inches wide.
The pine boards were 1 x 8 x 6. But you must remember that they aren’t truly 8 inches wide. Its more like 7 1/4. That is why you need to lay things out measure to determine the needed width of the backboard. A bit too small is okay but it can’t be bigger than your finished project. That would look kind-a dumb.
The finished size of my mirror and pine is 25 inches by 61 inches so that is the size I need to cut the backboard. I had Home Depot cut this one because I don’t have a table saw and it will fit in the car easier!
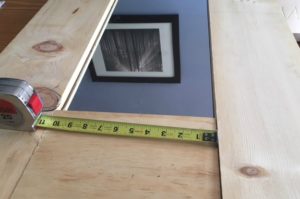
Place the mirror on the backboard and then see if your pine is exactly how you want it. My side pieces were 61 inches long and the cross pieces were 10 1/2 inches. Everything looking good? Now trace the mirror with a pencil on the backboard. Remove the mirror…carefully…and put it in a safe place. I put mine behind a cabinet. Since we put on 2 coats of the finish it could take 24-48 hours. Keep the kids away from that mirror.
Distressing the Wood-Optional
If you are wanting to make the wood look rustic this is when to do it. It feels a bit wrong ruining nice wood-like your keying a car. I used a hammer with several screw on attachments to bang in several different kinds of marks and also I dragged it across the wood to make a few lines. You could use a regular hammer, counter sinker and saw to make these markings.
Putting it all together
Now that the wood is nicely banged up lets put it altogether. Use the wood glue and put the 4 wood pieces where they belong on the back board. Clamp in place quickly-the glue makes the pine slip around. At this point I got out the mirror again. Do I need to say carefully again? I hate broken glass with kids and dogs in the house. I’m a worrier! I thought before everything was set I would double check that the mirror fit in. It did! Now get it back to its safe place behind the cabinet.
Put in a few screws into the bottom to keep the boards in place. This is awkward since you need to come from below with your project pulled a little off the table. The majority of screws went in after the glue had dried and I could flip it over.
Finishing Steps
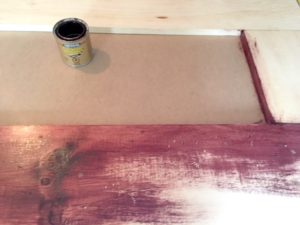
In this project I used Miniwax PolyShades “Stain and Polyurethane in One” with a paint brush. I originally chose a shade too red and sanded it down a bit and added American Chestnut for my second coat. If you have a stain only product, use a rag and not a paint brush.
Stir this product a lot. You can feel that the polyurethane part of the mixture separates and sinks to the bottom. Stir it mid project a few times just to be sure.
This called for a very thin coat, wait 8 hours, rub surface with steel wool, wipe off fine dust, apply another very thin coat until you have the desired color. So there is a bit of waiting involved on this project. I wrapped my paintbrush in plastic wrap between coats so it didn’t harden.
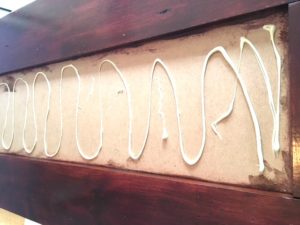
The final step is to glue in the mirror! Almost done! I used LePage 610 PL Mirror Adhesive. It doesn’t say on the package how long you need to wait for the glue to dry. The instructions say the first 10 minutes is key if you need to reposition the mirror. Don’t move it after 10 minutes. It should be a perfect fit. I applied the adhesive to the backboard and then placed the mirror on top. I gently applied even pressure to push the mirror into the glue. The website actually says that it is cured in 48 hours. Not realizing this until later I moved mine after only 3 hours because I needed the table it was on.
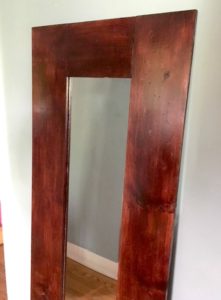
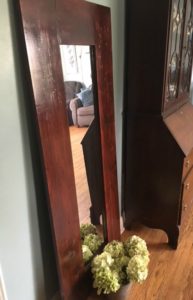
Mirrors are recommended to make a small room appear larger. That is great for our little house but mostly we just need it to make sure our clothes are on straight. The finished product is a bit heavy but could be attached to a wall to raise it up.
The cost of this project depends on if you have some basic supplies already. Home Depot will make all the cuts for free if you need it.
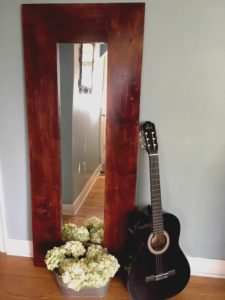
I purchased the pine and backboard, mirror, screws and mirror calking so the project cost approx. $65. I have enough backboard left over to make another one using an old mirror- this time I might just paint the frame black or white and put it in a bedroom. The only thing I would need to purchase for the second one is the pine boards for another $16. The best part is that their were no worrying about mitred corners. This project takes a bit of time but its pretty easy!
Let me know if I am missing any details. I’m happy to hear feedback if you have questions!
…
Build a Shelf Behind the Couch
 A shelf behind the couch supported by just a few pieces of wood makes a great place to put nic nacs. Just a couple of boards, screws, and painted black.
I was visiting a friend and her beautiful new baby-with the most perfect nose I’ve ever seen-and spotted something that I meant to ask her about but forgot to come back to it because she was in the middle of a hilarious story of all the mishaps at a wedding she had attended this past summer. I can’t get into to the details but lets just say romantic barn weddings do have their fire hazards. It was a close call but the hobby farm was safe and all was well.
Anyway, I left wondering what was it behind her couch that allowed her to put picture frames and nic nacs behind the couch? Was it like a British style radiator cover -like a box? Was it a shelf screwed into the wall? Next visit I will ask, but in the meantime I was getting supplies to remake my closet into a pantry when I thought lets see if we can’t invent a shelf that would go behind my couch so I have a place for a few pretty things too.
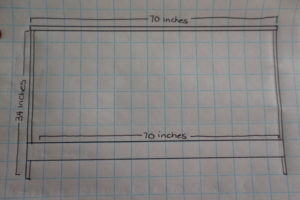
So I measured the height of the couch (34 inches) and the width (70 inches). I got 4 boards 1x6x6 (that will be 72 inches long so I cut off the extra 2 inches on 3 of the boards) the 4th board I cut into 2 pieces 34 inches long.e and 2 more boards the same length as stabilizers to the very skinny shelf. I predrilled holes into the top and put 2 screws on each end. Lay the structure on the floor and put in the first stabilizer wood across. Measure approximately 7 inches from the bottom…. 2 screws on each end should do it. Then gently flip it over so you can do the same on the other side.
If you are happy with how it looks then you can decide how to finish it. I have quite a bit of black in this room so I put on black paint but you could also put a stain and clear coat on it to match wood you have. The smoother the top the easier to dust so you should sand it smooth and wipe off the dust before painting.
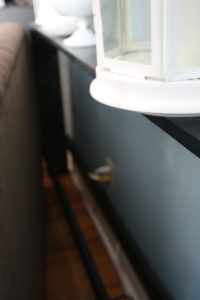
I felt like the room was so much cozier with my little shelf. Its a little room…in a little house, so we don’t have much space for pretty things. I like that this is also a space that a certain naughty puppy can’t grab things to chew on…unlike the coffee table. Also if your wee babe is starting to crawl and putting things in her mouth.
This project literally takes 15 mins to build if you have the pieces cut by the hardware store….only 5 mins more if you are cutting the wood yourself. An hour for the entire project plus remember to go back and do a second coat of paint. It’s that easy!
p.s. This won’t work if you have a recliner couch. Sorry.