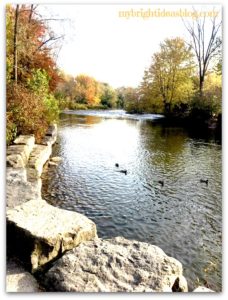
The Autumn season is here and the leaves are changing color and falling. This is a great time for a nature walk to collect and examine and reflect on the beauty of this season. Leaf Art!
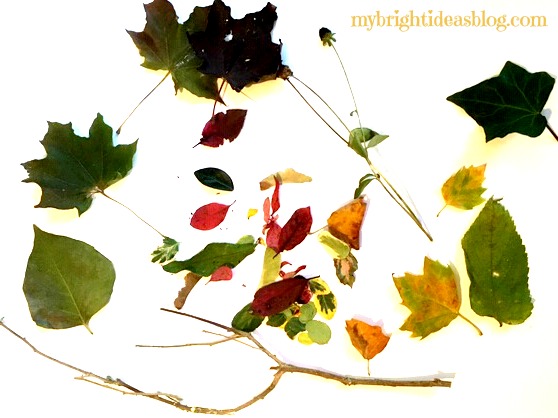
Start with some friends…any age will love this. Take a large clear bag and start to collect samples of nature.
What to look for:
- a variety of leaves
- pine cones
- pine needles
- acorns
- stones
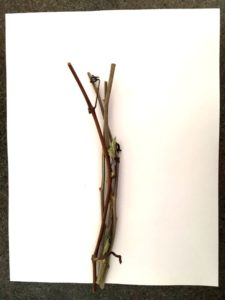
- twigs
- a handful of grass
- small flowers
If your friends are little you might just want to use a piece of cardboard and glue your collection to the board. Puncture 2 holes near the top and add a string to hang it on the wall.
For Older Kids!
I think the older kids could do better. If you are over 5 you can make some really cool art from your nature walk.
Pressing the leaves in books: If the kiddies or you need a nap after the big nature hike-don’t feel bad its the fresh cool autumn air! If you want to work on the crafting stage on a different day….You could put the leaves between book pages for a couple of days to make them flat and a bit dryer. If you just leave them out til tomorrow they will begin to dry up and curl.
We decided to make our crafts immediately before they shrivelled. I took pictures of each leaf masterpiece to print out an autumn nature photo album later.
We took some great photos of vibrant orange and red leaves as the sun hit them.
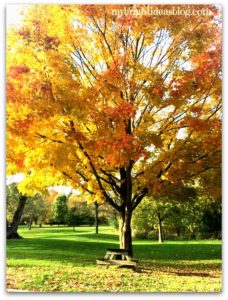

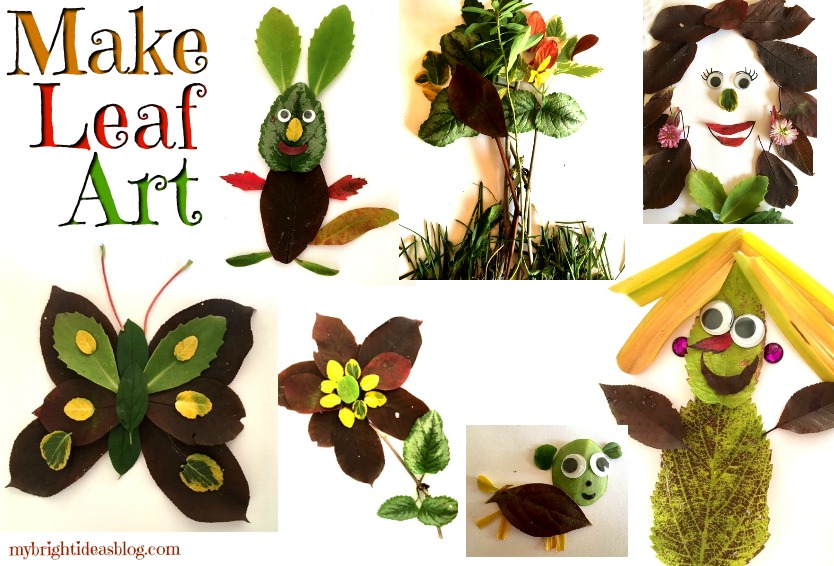
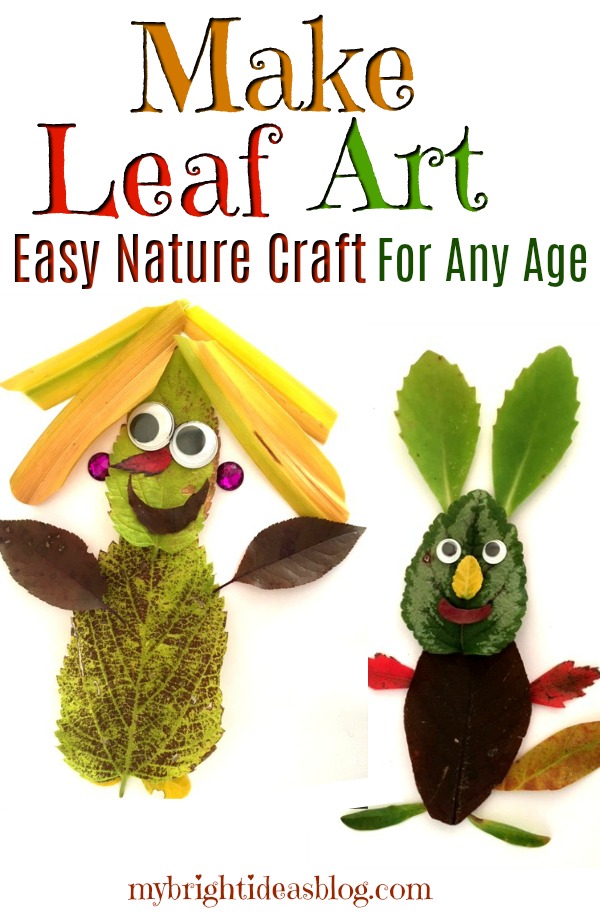
I love this time of year! Now let’s make some leaf art!
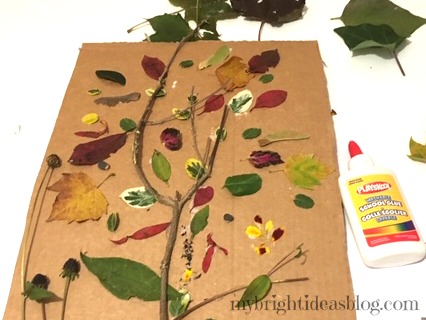
Making Trees!

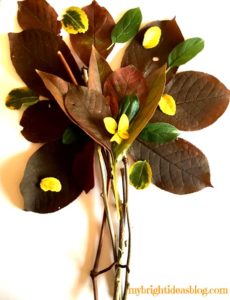
Put a few twigs as a trunk. Then add leaves to form a tree. You can glue the leaves or use double sided tape.
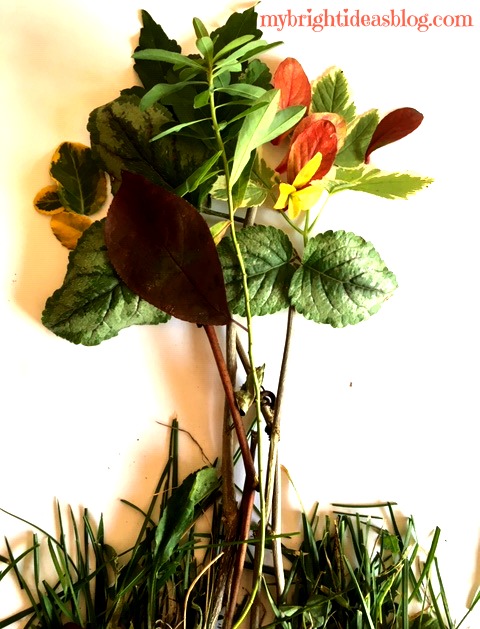
A collage of twigs and leaves make an easy tree picture. Change your leaves and your tree will look completely different.
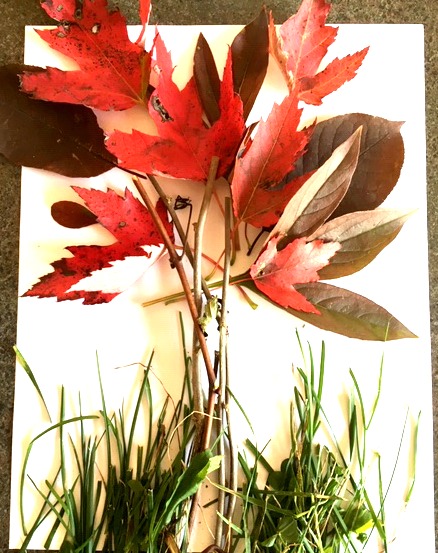
The grass can be trimmed with scissors.
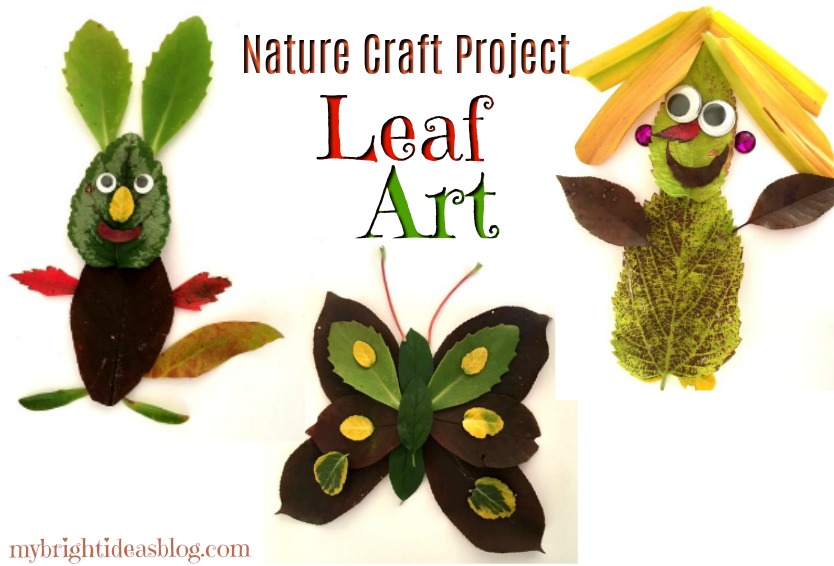
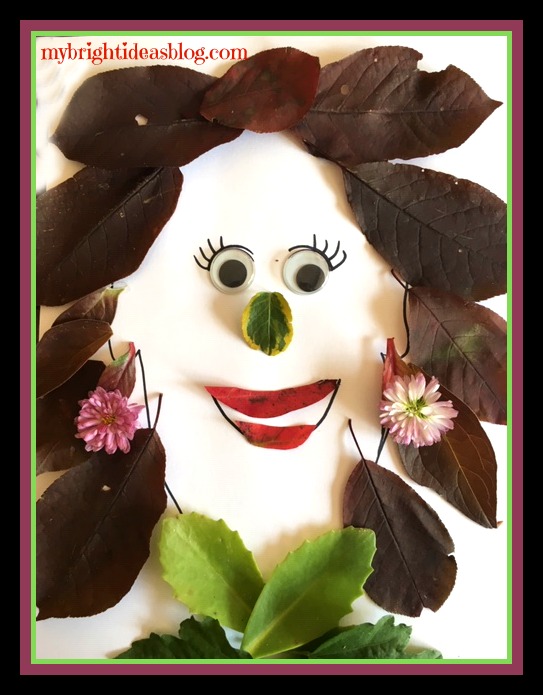
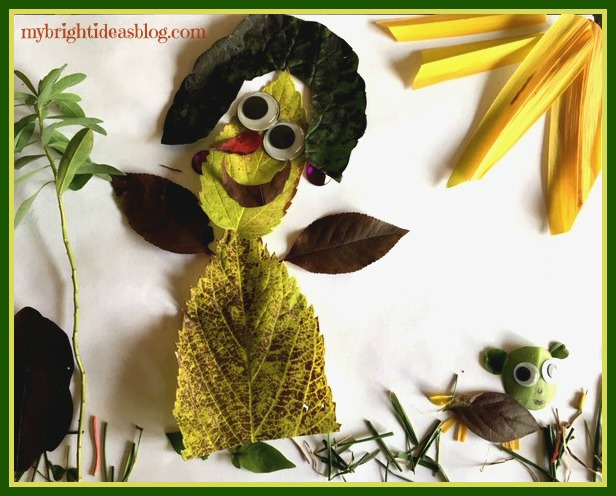
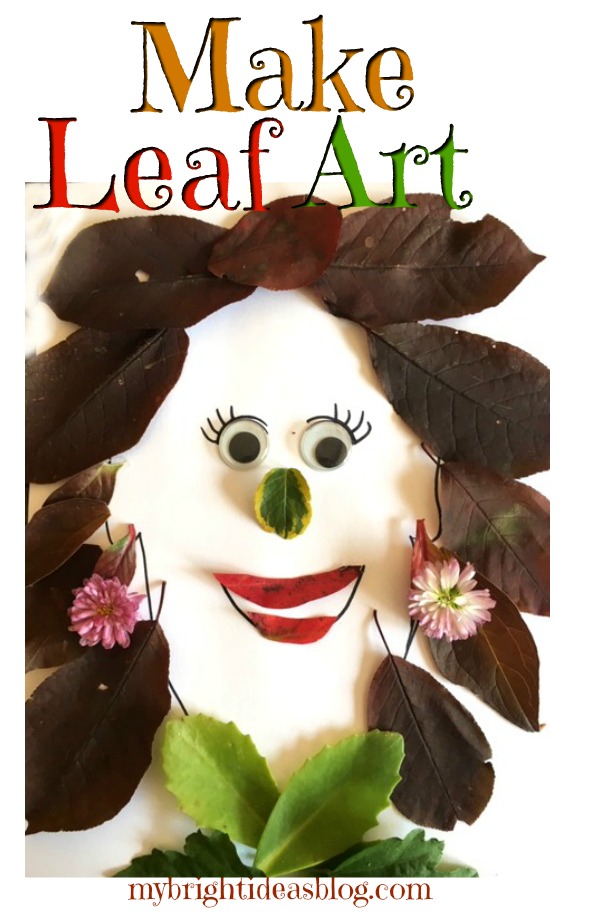
Making People!
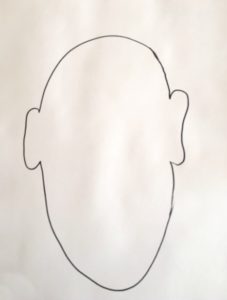
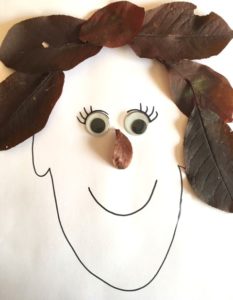
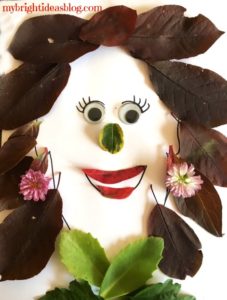
Draw a head on a page and then start making a self portrait. Huge googly eyes and flower earrings make this face stand out from the crowd.
Oh my days! It’s like looking in the mirror!
This one is for my 11 year older daughter who has lovely blonde hair and likes to have some sparkling earrings.
This one is for the youngest daughter. This is a picture of her and our little dog Gemma.
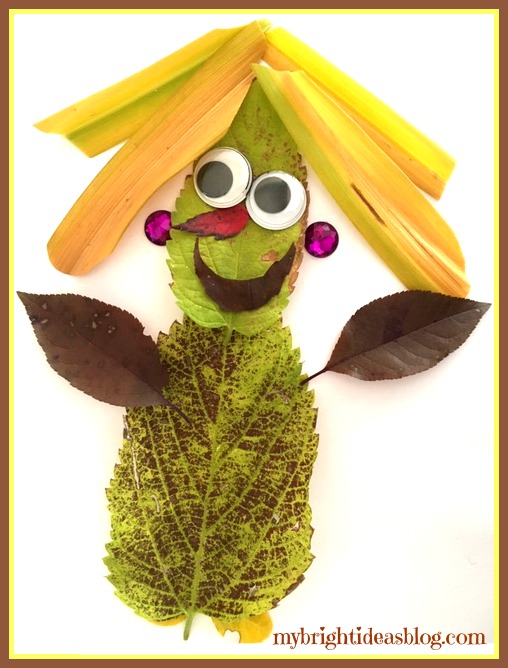
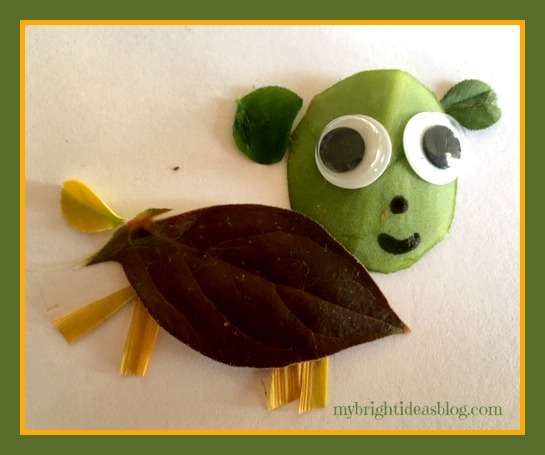
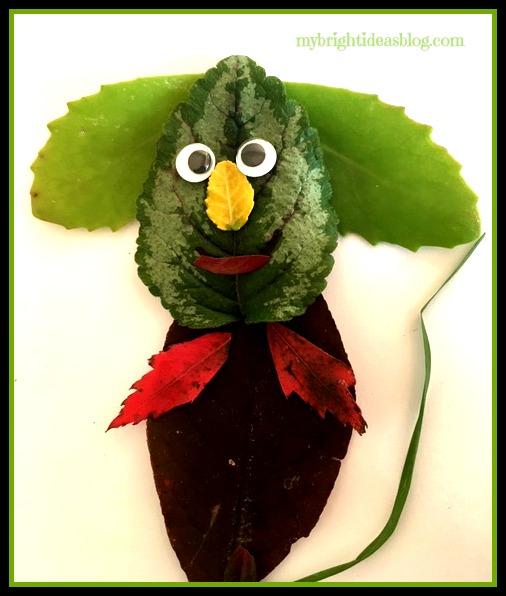
Making Animals!
This is Gemma our little dog. Made by my younger daughter. I love the dog’s little round ears. That is made out of clover leaves. Notice that we used a sharpie (permanent marker) to make the mouth and nose. I also used scissors to make a the little legs.
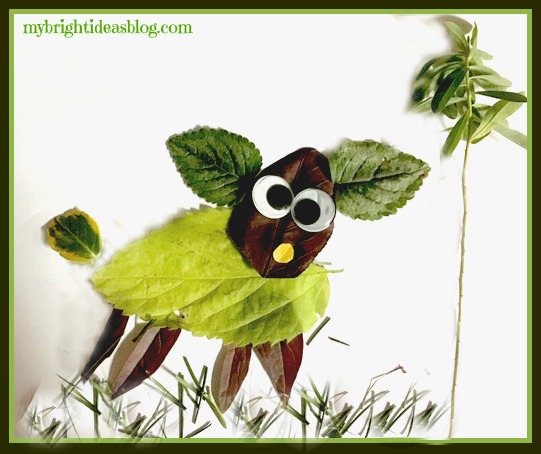
Our 11 year old made up this bit of art. It’s Gus our other dog. He looks like a surprised sheep! LOL!
I think I thought this looked like a mouse but now he looks like a koala bear. Its the nose.
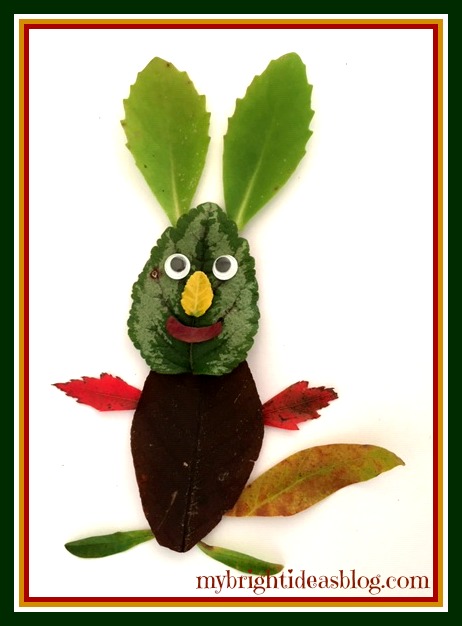
Turn the ears and it looks like a rabbit.
That is the highlights of today’s Leaf Art-Now to clear up the kitchen counter from these bits of nature so we can make lunch.
I hope you enjoyed this post. I had a great time making it.
If you are feeling stressed, get outside for a walk in nature and then craft with the leaves and twigs and grass you find. It’s my cure to melt away stress and have a blast with my family.
Have fun and see what you can make!
Here are some other NATURE craft projects!
Nature Craft – Perfect for Earth Day Activity – Clay Imprints with Plants and Flowers
…


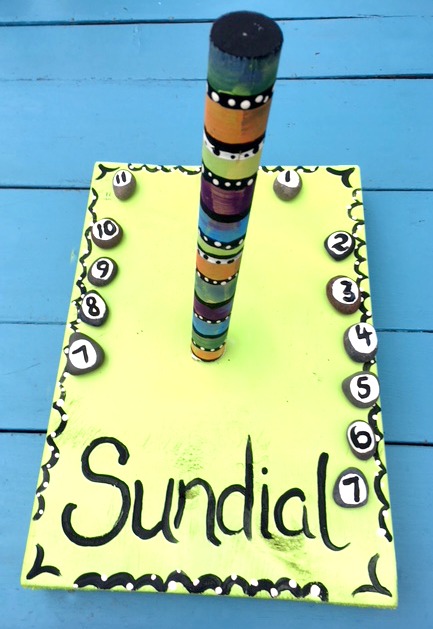
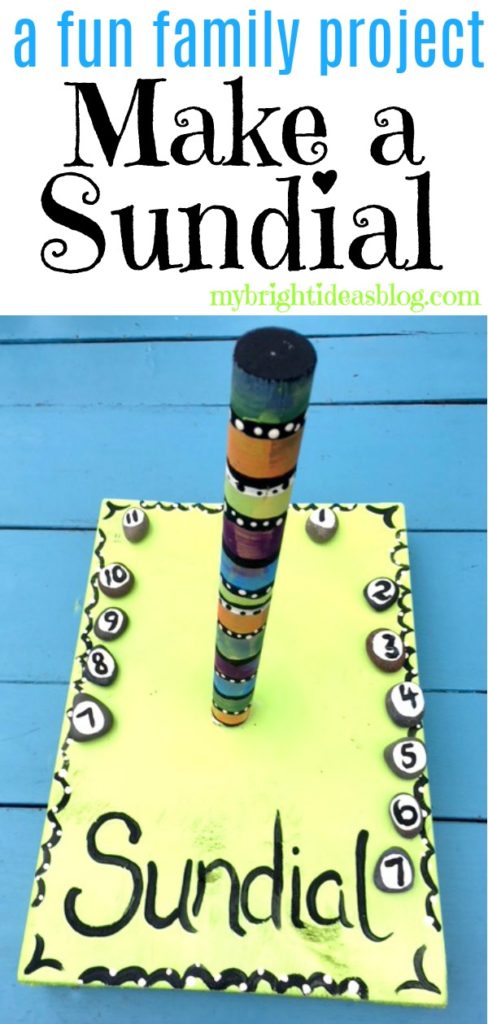
How to Make a Sundial
Are you looking for an outdoor family nature project? Here is a cool idea for a sunny day. Make a SUNDIAL.
A sundial is a device that uses the position of the sun to cast a shadow to tell the time. As the sun moves across the sky the shadow moves. According to Wikipedia the oldest sundial found by archeologists is dated around 1500 BCE. https://en.wikipedia.org/wiki/Sundial
When I started my project it was very cloudy so it got more decoration than I intended. It was going to be bare wood with a light clear coat. Our weather was cloudy and rainy for several days so I had to postpone it repeatedly. Grrr.
Technically you could make a quick sundial using a stick in the ground. Or you could use paper and a pencil stuck in playdough to make a sundial in a pinch. But if you want to make one like mine, here is the scoop.
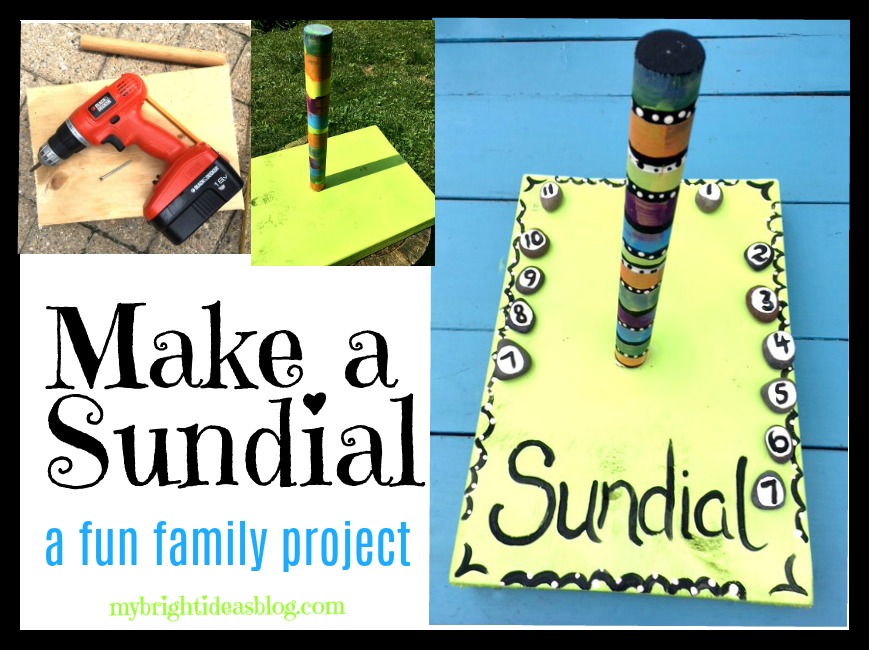
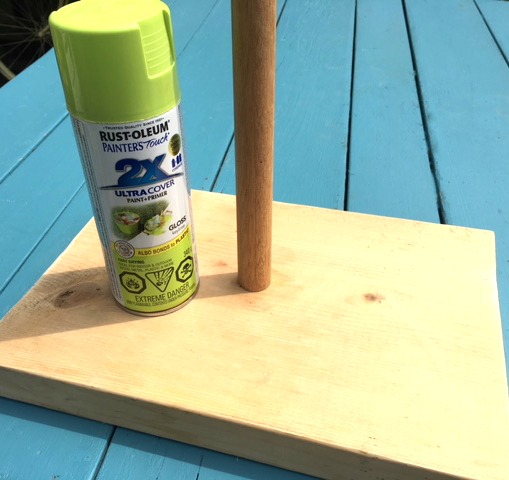
You will need:
- a scrap of wood (mine was 9 x 13 inches)
- dowel (mine was 10 inches)
- drill
- tape measure or ruler
- 12 rocks or gems
- 1 screw 2 1/2 inches long
- hot glue gun or other glue (optional)
- watch or clock with an alarm
- pencil
- spray paint or varnish
- craft paints and brush
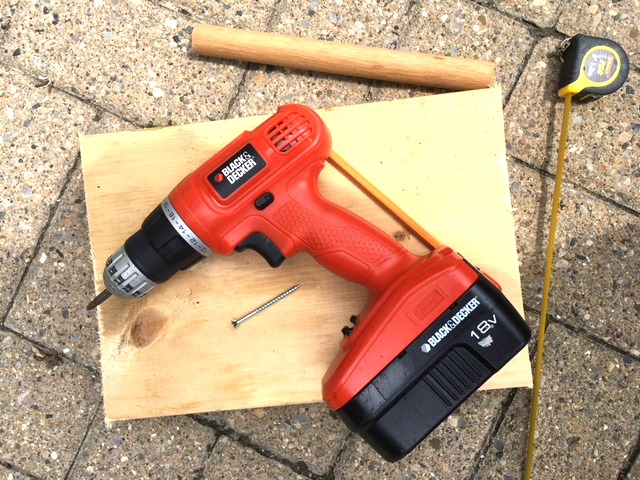
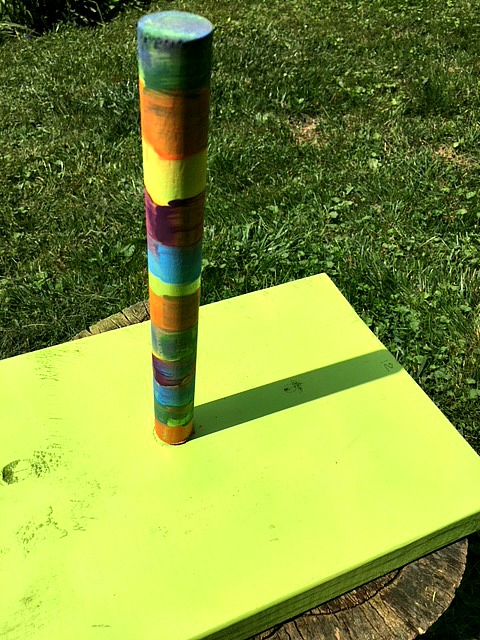
Cut the wood to a size you choose. I would have preferred a 12 x12 square but I had this scrap 9 x 13 left over so we used it. I also had this dowel that was a leftover and already 10 inches long.
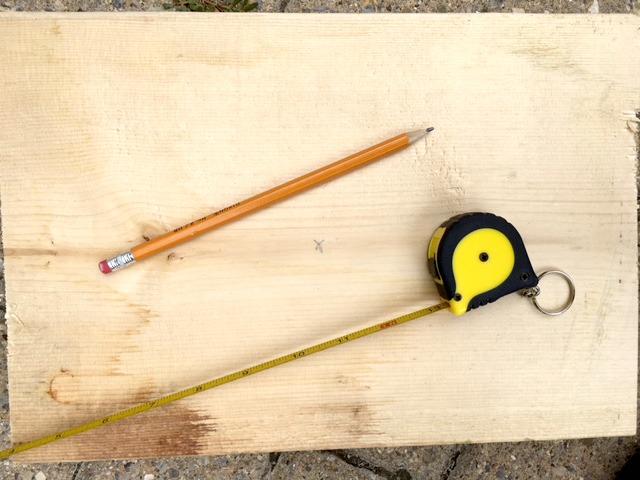
Measure and mark the centre of your board.
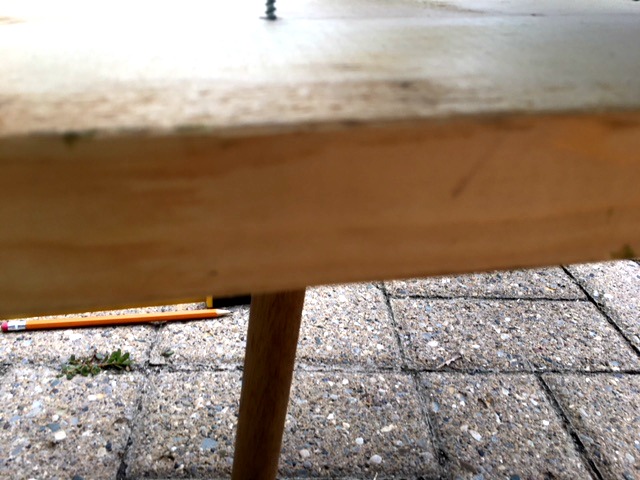
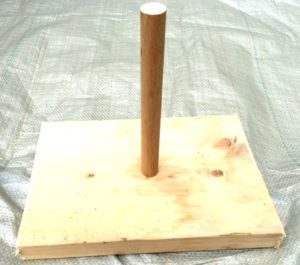
Screw the dowel into the centre of the wood. This was hard to take a photo of. Put the dowel on the ground, place the block of wood on top. Ensure the x marking the centre on the wood is right over top of the dowel. Drill the screw through both pieces.
We could see the clouds coming, so we decided to start the time markings the next day and for now paint the sundial to help it last longer outdoors. If you have a partial can of spray paint or wood protector…this project won’t take much.
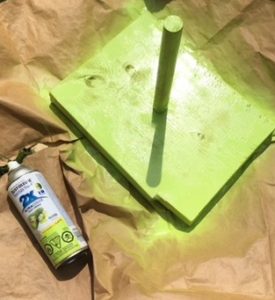

Spray the board and allow to dry. Tip over to paint the bottom and allow the bottom side to dry.
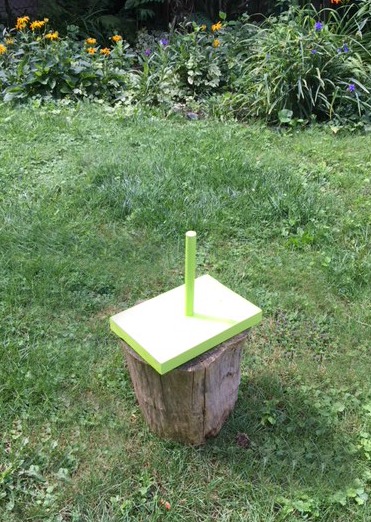
Once it is dry you can decide where you will have the most sun in your day. You could raise it up with bricks or a tree stump. We have a lot of shade in our backyard which normally we appreciate. But for this project it made things difficult.
Now seeing the giant rain clouds moving in. We decided to post pone and begin again tomorrow. In the meantime, we could jazz it up a bit.
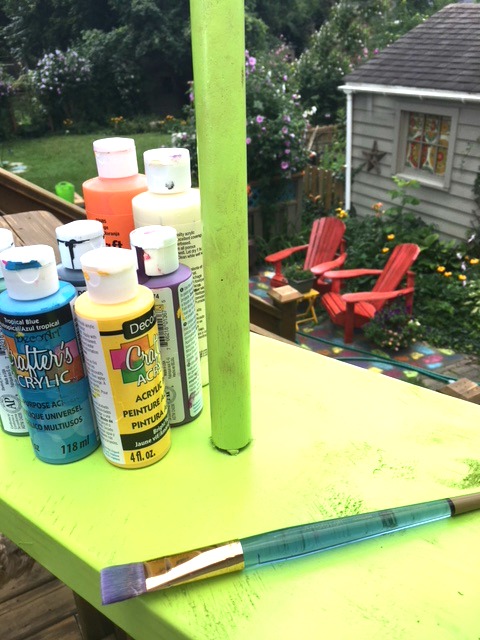
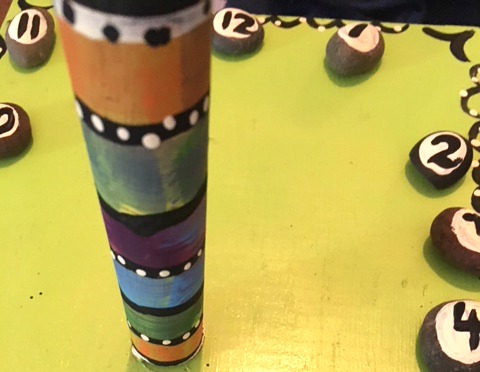
Using craft paint we put wide stripes on the dowel part of the sundial.
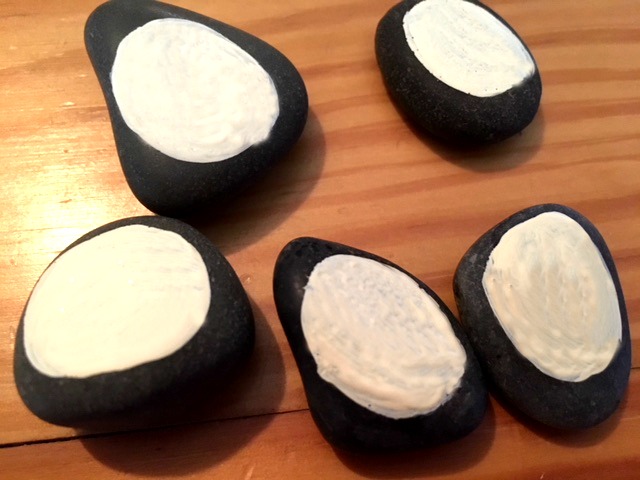
We had a package of dollar store polished rocks so we painted a white circle on each one. This will be our pretty markers for hours. Print the numbers: 7, 8, 9, 10, 11, 12, 1, 2, 3, 4, 5, 6, 7.
A SUNNY DAY FINALLY ARRIVES
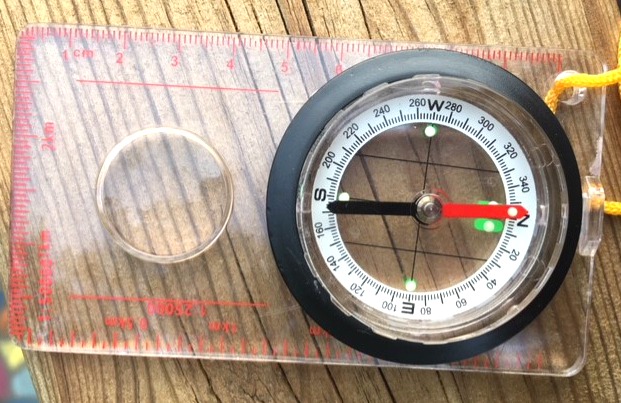
We did follow some of rules for making a sundial. Such as the pole needs to tilt slightly to the north. Use a compass to determine the north pole. I twisted the dowel to loosen it and put a tiny rock in that space to tilt it. If you are in the southern hemisphere you will need to use the compass to find the south pole and tilt the dowel to the south.
Just before noon put your sundial in a sunny place. The shadow of the dowel will be your first mark to write in the number “12”. I wanted that to be right at the top like a regular clock.
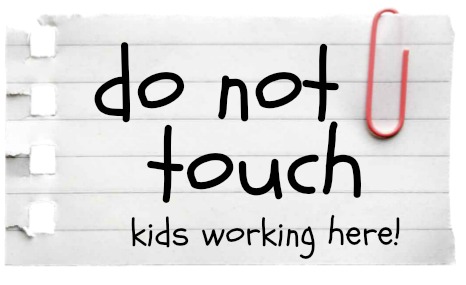
This is going to take more than one day to complete so make sure that no one moves it. Maybe add a note that says “do not touch” so it doesn’t move.
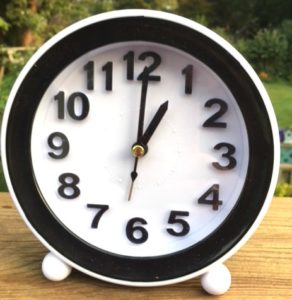
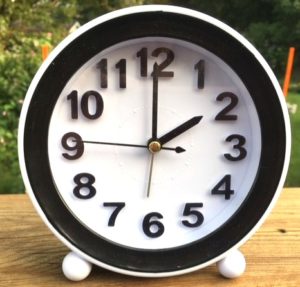
Next, set the alarm for 1’oclock and come back to write on the number where the shadow hits for 1pm. Write “1”. Set the alarm for 2pm and then 3pm and continue to repeat every hour until the sun sets.
After sundown, set the alarm for 7am so you can begin recording the morning time marks.
If you are going to leave your sundial outside and you haven’t already painted or varnished the sundial you should do that next to water proof it. A clear coat on the rocks is a good idea too. You don’t want the paint to shift off the stones. That can happen on polished stones.
After the times are all marked, you might want to secure the rocks so they don’t get carried away. You can use a hot glue gun (fast and easy) or E6000 glue (slow, stinky but stronger).
Our finished project does not look like a clock like other sundials. Maybe it was moved. If your kids are older you might want to do more research and see how the impact of the tilt of the earth’s access. It’s August now, will the shadows still line up in September? This project has the potential to be quite educational. Telling time, shadows, the earths axis, the solar system, using a compass,
This picture is linked to a nice pencil and paper sundial blog.
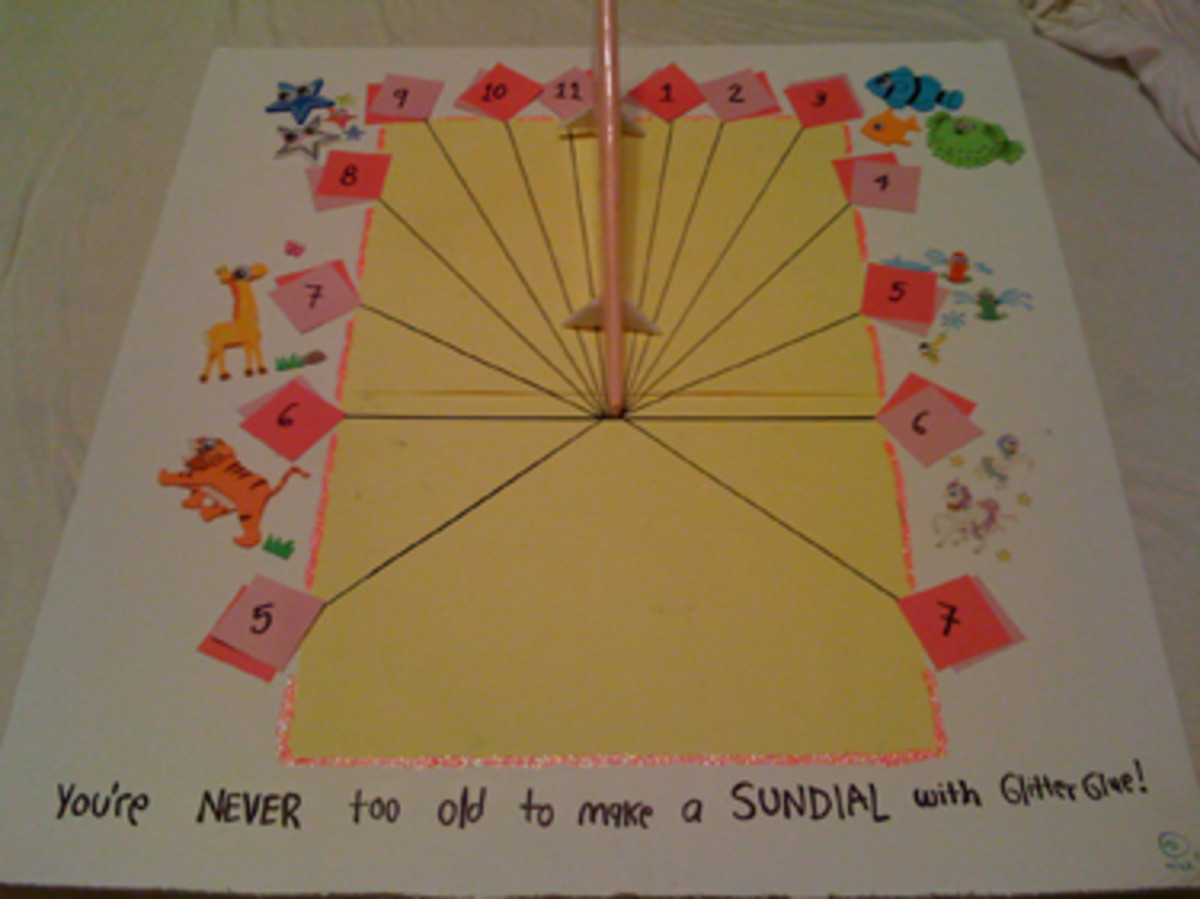
Children who spend time outdoors are more likely to be happier, healthier, problems solvers and more creative. Check out this blog post about a paper sundial. https://hubpages.com/education/Reconnecting-Children-With–Nature

https://otherwiseeducating.blogspot.com.au/2010/12/sundial.html

https://www.kcedventures.com/blog/how-to-make-a-sundial-for-kids
Here are some other posts of my projects you might enjoy!
Nature Craft – Perfect for Earth Day Activity – Clay Imprints with Plants and Flowers
Nature Craft – Perfect for Earth Day Activity – Clay Imprints with Plants and Flowers
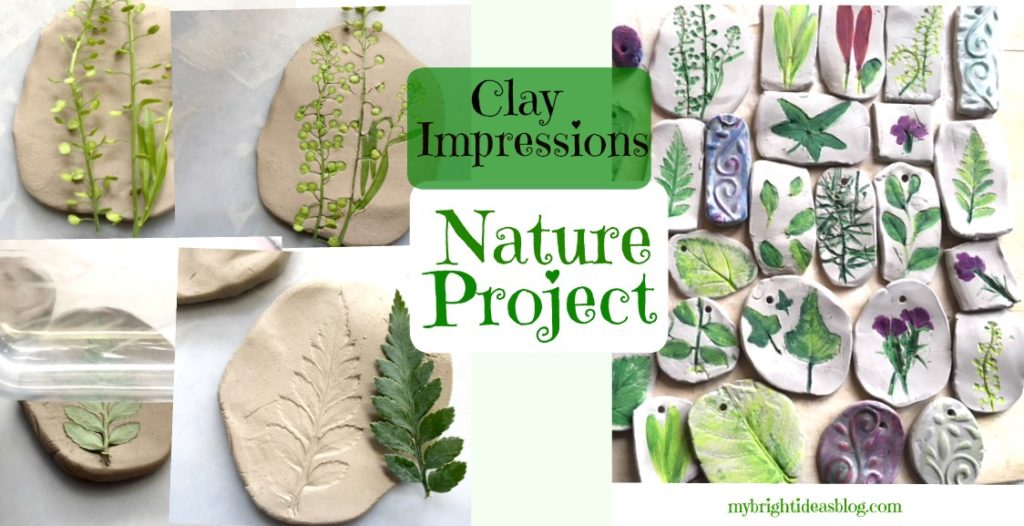
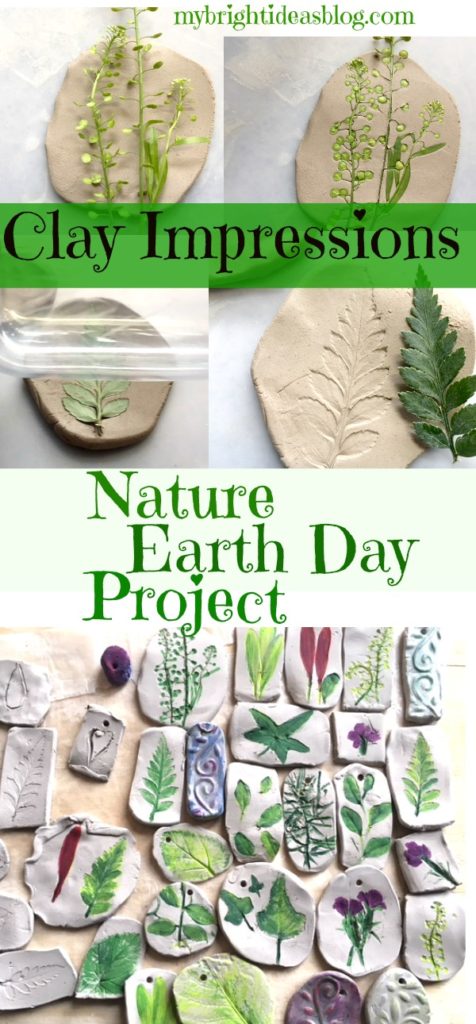
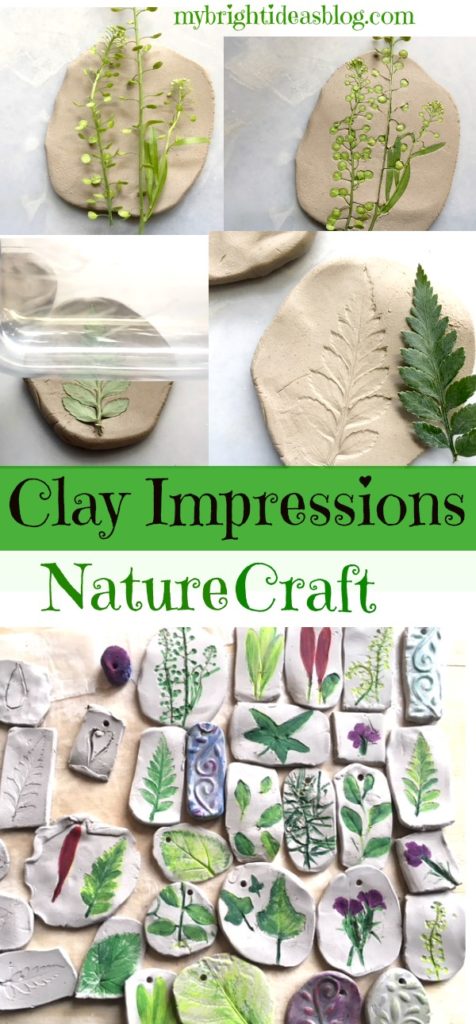
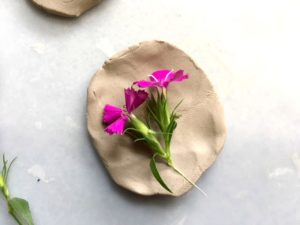
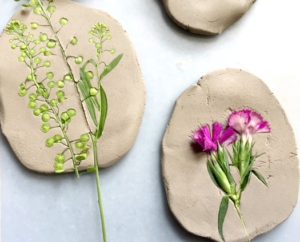
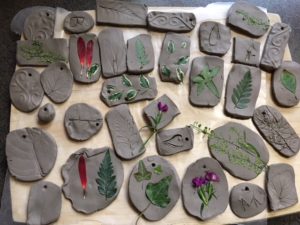
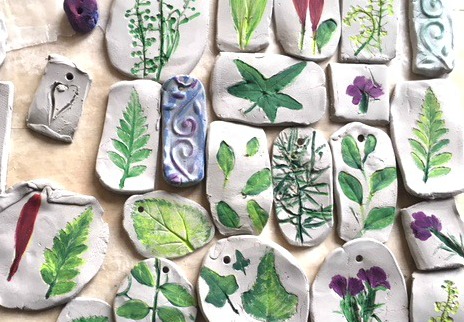
I wanted to blog about a natural craft for earth day and discovered clay impressions of plants and leaves and flowers. What a great idea! The only problem is that its just the very beginning of spring and the garden is ugly. Except for a few crocuses there is nothing nice around my home. I popped into the florist shop (Regency Florists) nearby and asked if they had any flower scraps like a bit of fern that we could use for this craft project. The lovely young lady made a little bouquet of scraps for free! How lovely is that! We are going to take her one of these lovely creations as a thank you gift.

Supplies
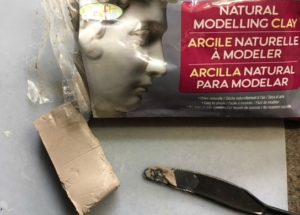
So you will need CLAY and a very smooth surface to work on. If you have a clear bit of plastic table cloth or a very smooth kitchen cutting board-either will work. You also need some flowers or plants, a rolling pin or water bottle that has smooth sides. Later when the clay is dry you may want to use some craft paint to add the green or flower color. Also if you want to turn it into a mobile or wind chimes you might need a chopstick or skewer to poke a hole in it.
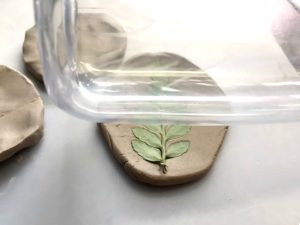
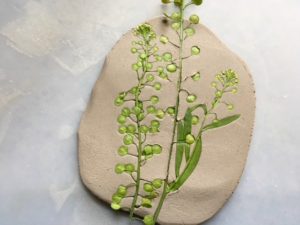
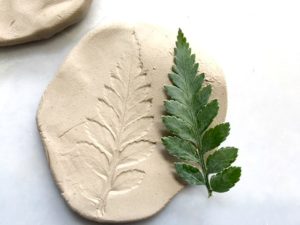
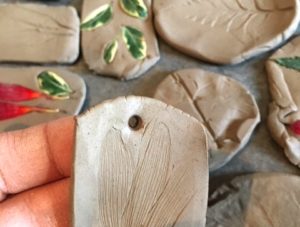
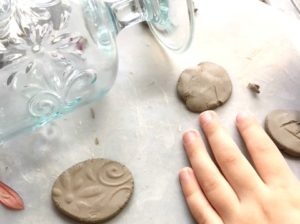
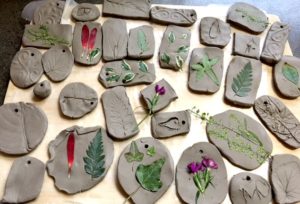
Our clay is from the dollar store craft aisle. We just slice off chunks and made different shapes with it. Then we rolled it flat. Next we place a bit of plant or flower onto the clay and rolled over it gently with a smooth water bottle. Pull the plant off the clay and admire the details now imprinted in the clay. If you want to add a hole-this is the time to grab your kebab skewer or chopstick.
Allow the clay to dry overnight. It should feel completely dry before you paint it. I just used regular craft paint.
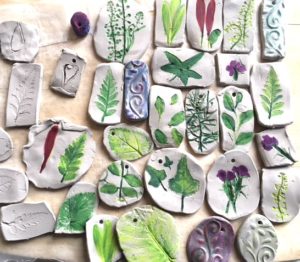
This would be a lovely gift from a child to a teacher or grandparent. Its a great craft for all ages though. I highly recommend for adults to give it a try. Its very therapeutic! This project has a lot of possibilities so let your imagine go wild. Find things around the house with interesting textures to imprint the clay.
Have fun!
…