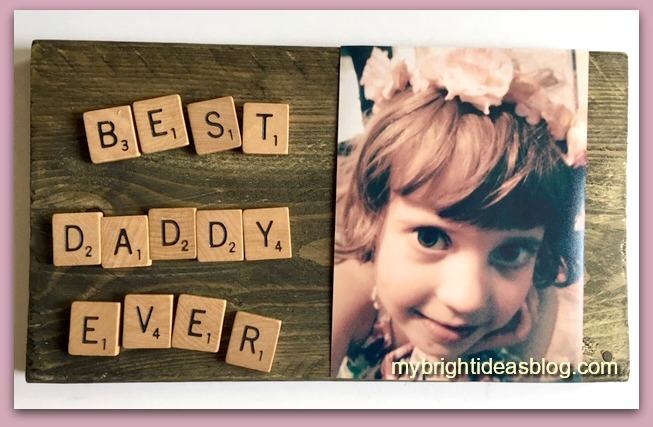
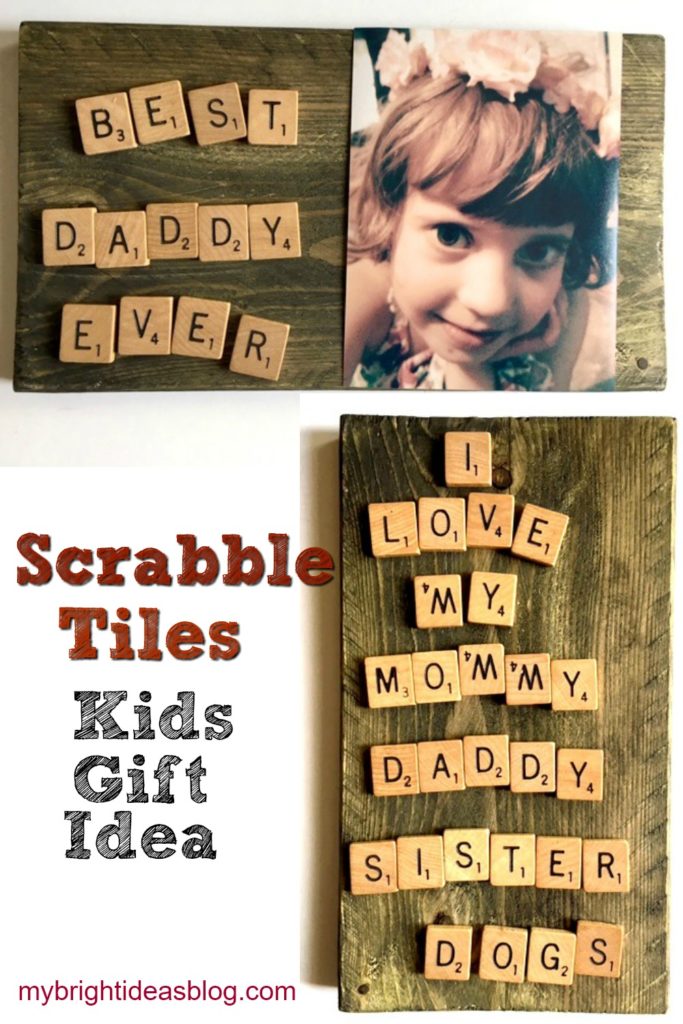
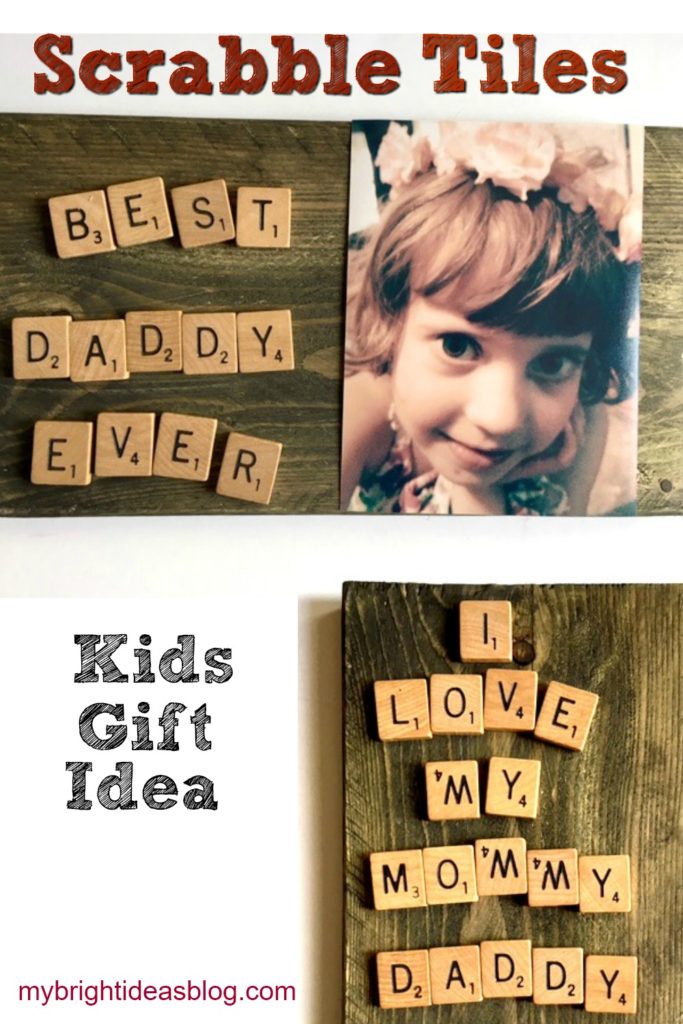
I have a sick kiddo at home (head cold, sneezy, wheezy) and she wants to use my craft supplies to make a gift for daddy’s desk at work. So here is what she came up with a love letter in Scrabble Tiles to Daddy and an old photo of herself.
Where can you get Scrabble tiles? From the board game of course silly! Or from a thrift store or online.
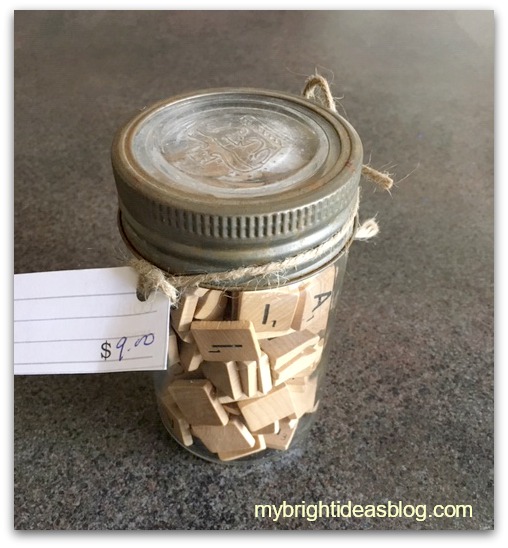
The other day I found myself parked next to an antique store I didn’t know existed. So I went in and found a gazillion things I would love to have and upcycle. The store was AMAZING! One of the items that I bought was a cool old mason jar filled with scrabble tiles.
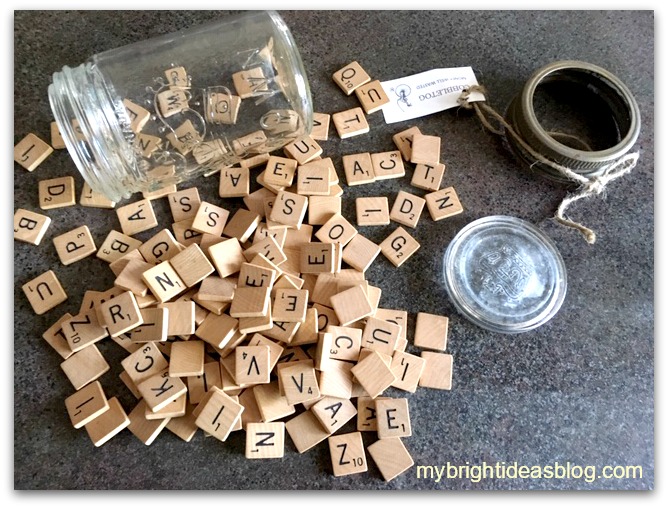
My sick little darling sorted out the letters into piles while I went rummaging for supplies.
You will need:
- scrabble tiles
- a piece of wood, picture frame or canvas
- white glue-for the photo (or to make it temporary use “sticky tack”)
- hot glue gun-for the tiles
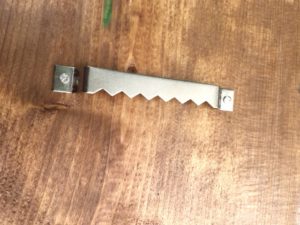
- hanging hook (optional)
![]()
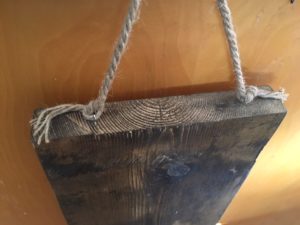
I have scraps of wood and often will stain or varnish a few extra pieces in case I want to make a wooden plaque in a hurry. We chose out of scrap options a piece approximately 9 1/2 by 5 1/2. It was already stained with “Forest” Behr Semi-Transparent stain-which has a subtle green tinge to it.
![]()
Another option would be to use a blank canvas from the dollar store. You could paint with inexpensive craft paint in his favorite color or leave it white.
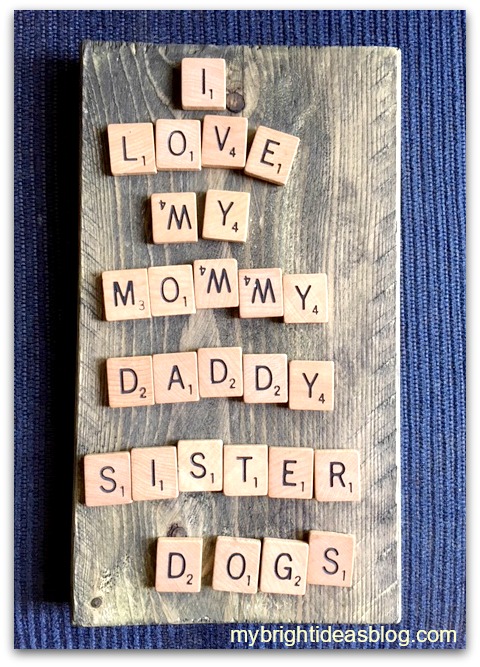
First she wrote out this…awe Mommy is at the top of the list!
I love that she is not bothered that 3 of her M’s are upside down W’s. When you see the letters are crooked its tempting to want to straighten them out but resist! It’s a child’s gift and adds character to the final product.
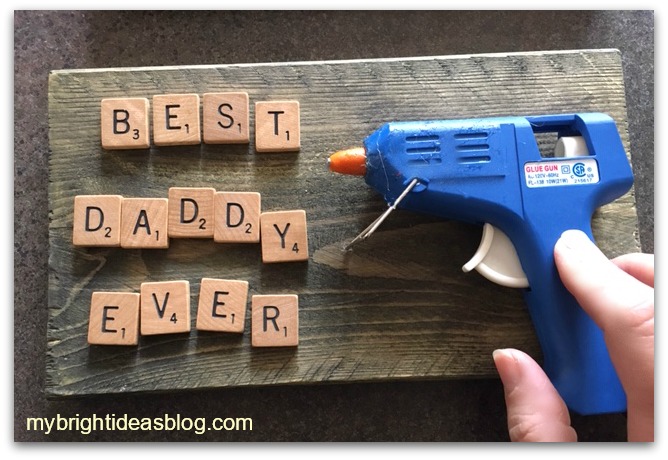
Arrange the letters and photo to your liking. Hot glue your scrabble letters to the wooden board.
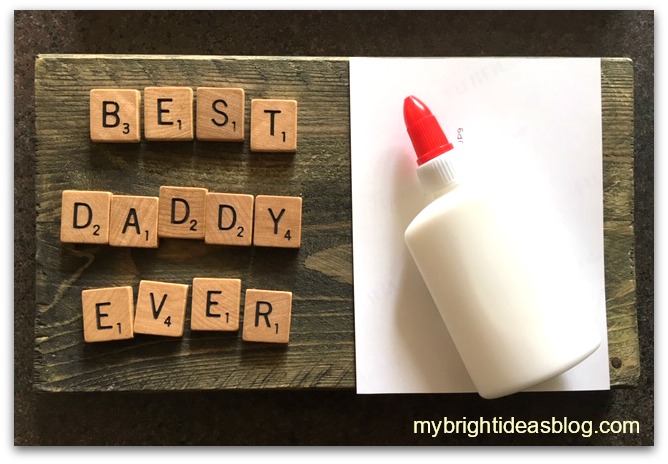
Have your child put a thin coat of glue on the back of the photo. Or if you want to be able to take the photo off later and replace it you could use sticky tack instead!
Would you look at those gorgeous eyes! This gift will melt his heart!
Crafts Using Burlap and Buttons – Easy Project that Looks Great!
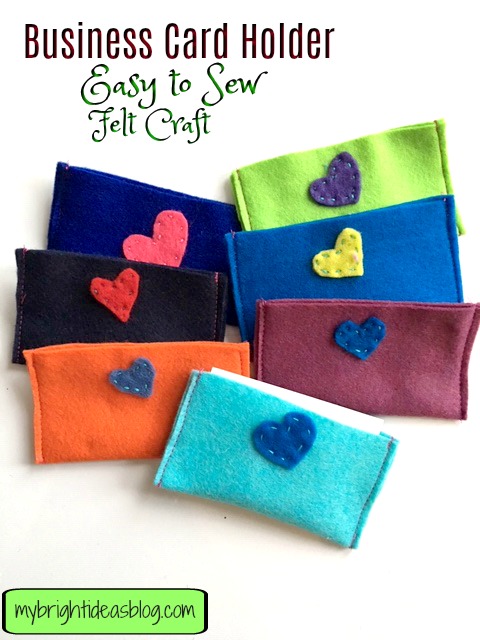
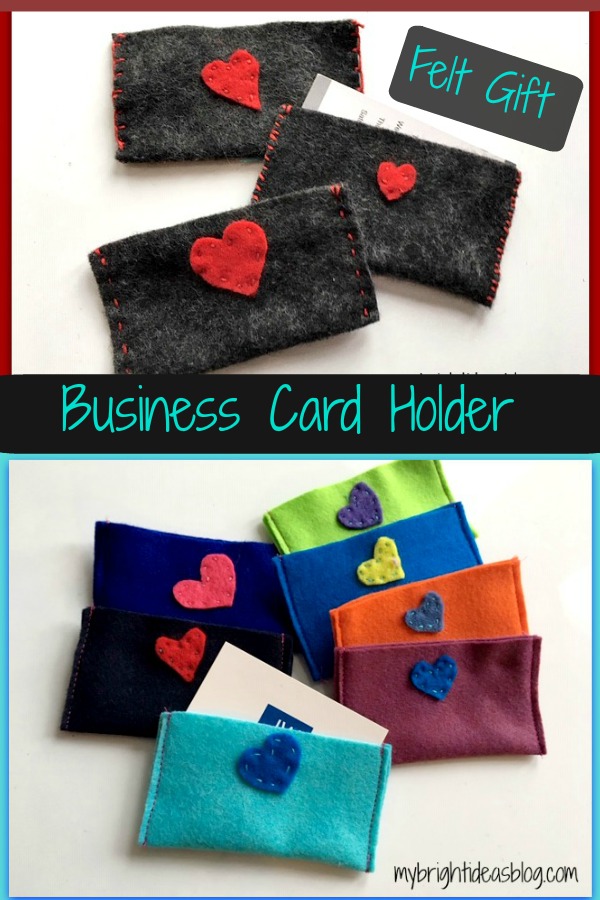
Felt Business Card Holder – Easy Kid’s Project!
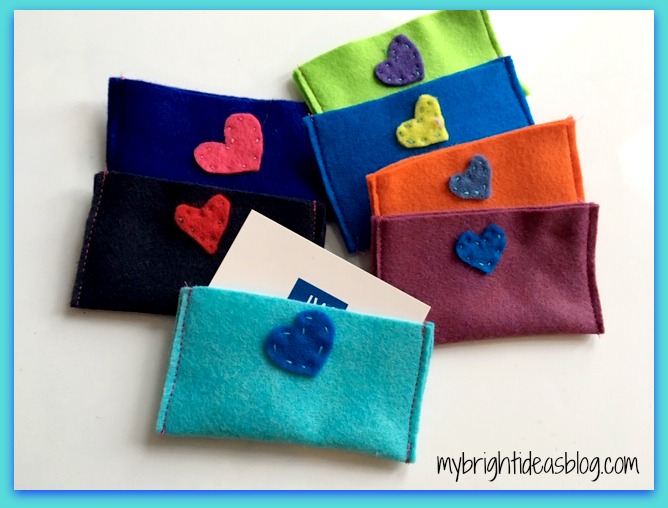
Learn how to make Business Card Holders out of Felt!
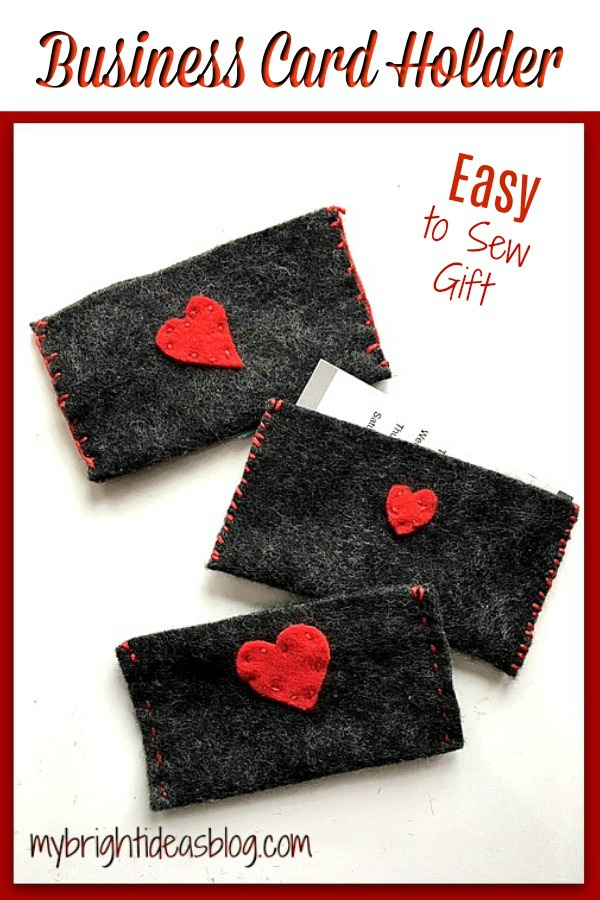
Looking for an Easy Sewing Project? Teach your child how to hand or machine sew with this quick gift idea. I’m going to show you how to make a felt business card holder with hearts or buttons for decoration and 3 ways to hand stitch.
We have a big event coming up where thousands of people from all over the world will be gathered and at the end swapping little gifts. So I have been searching for little homemade souvenirs for our family to give to the friends we meet. We might even get business cards printed-with our family email to put in the felt holder so we can become pen pals.
This seemed like an easy, fun, cute craft to make together. Plus teach some basic sewing skills…Brilliant!
You will need:
- 1 full piece of craft felt
- scrap pieces of felt for the heart
- scissors
- needle
- embroidery thread
- a business card
- sewing machine (optional)
- bright buttons (optional)
If you don’t already have felt and embroidery thread on hand you can get these from the dollar store, Walmart and craft stores.
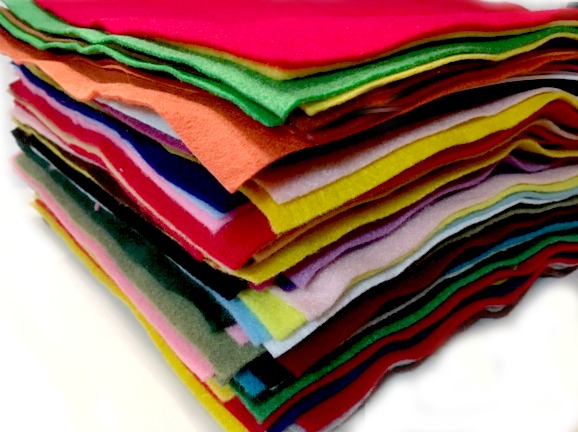
I must admit, I am a bit of a felt hoarder-so I have bought mine from several sources. I found the felt sold by Hobby Lobby for 33 cents was the best quality and value.
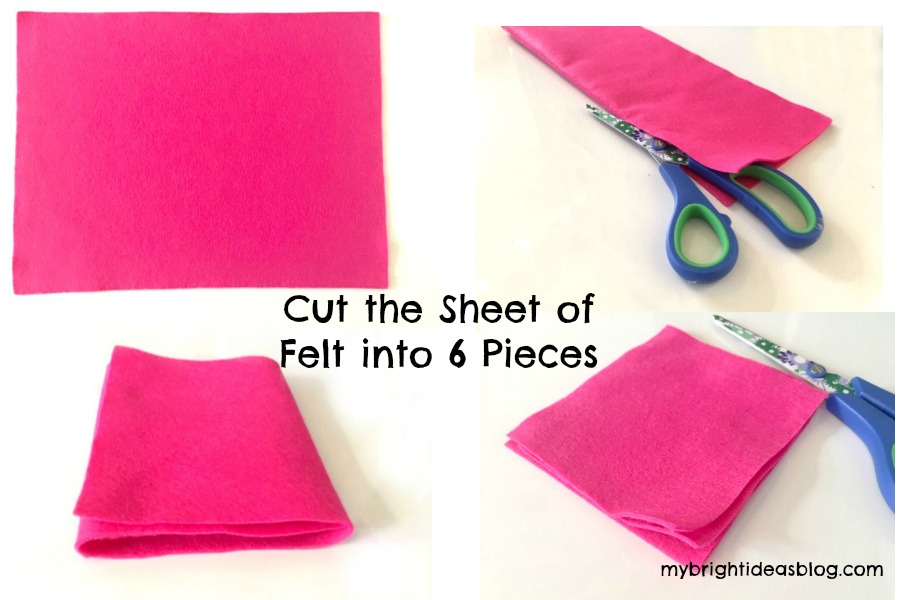
One sheet of felt is usually around 9 1/4 x 12 inches (24 x 30 cm). This is the perfect size to cut into 6 business card holders. Fold the sheet in half lengthwise and cut along the fold. Fold one of those pieces into thirds and cut on the fold. (bottom photos) In the end you should have 6 pieces 4 x 4 1/2 inches (10 x 12 cm).
Have a business card handy to make sure it fits.

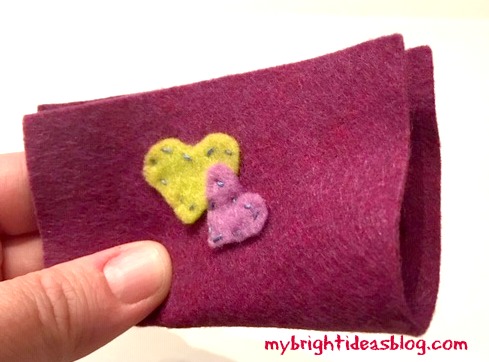
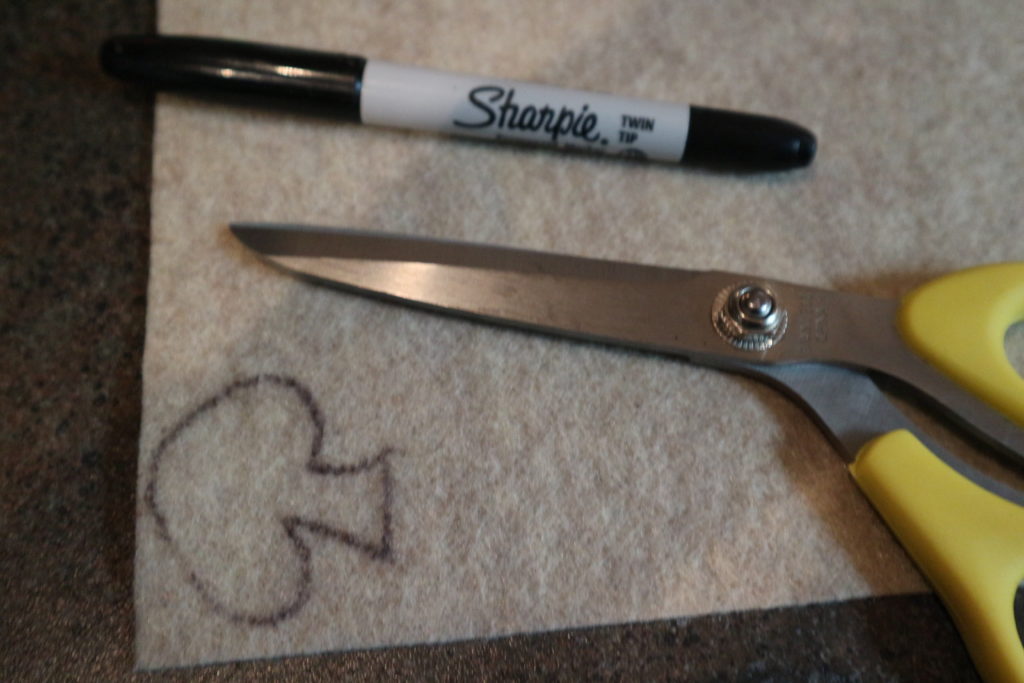
To get started cut small love hearts to decorate the outside of the card holder.
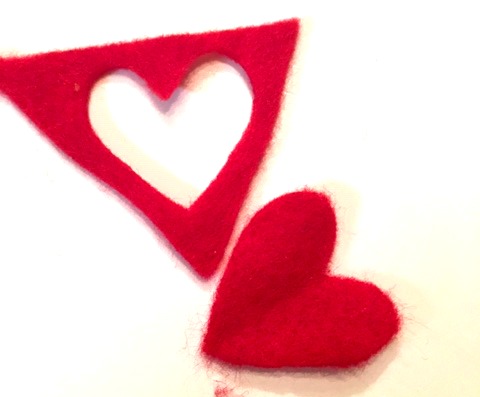
The easiest way to cut a heart is to fold the scrap of felt in half and then cut half the heart so both sides are the same.

Choose matching or contrast embroidery thread.
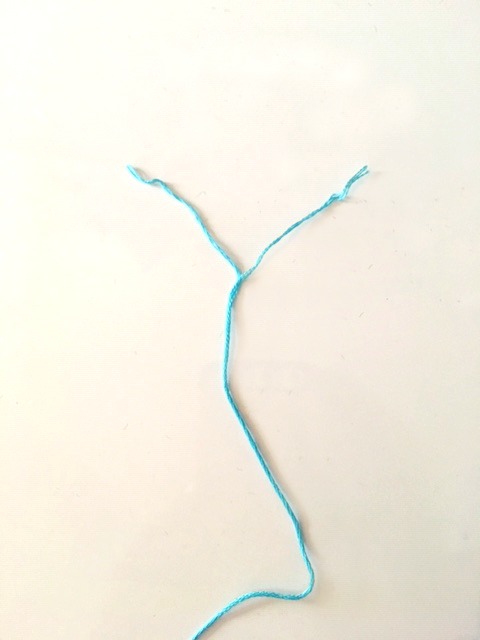
Divide regular embroidery thread into 2 sections of 3 strands each.
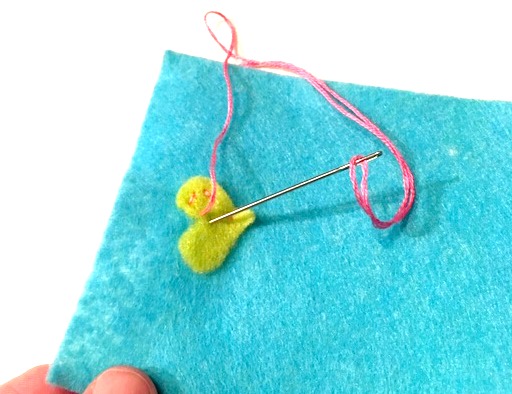
Knot the embroidery thread and begin sewing small stitches to attach the heart to the top of the felt.
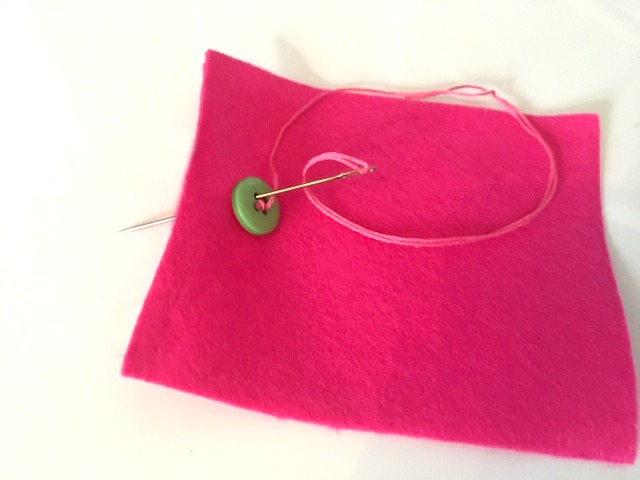
Another idea is just to sew a bright button on instead of a heart. Teaching your child how to sew a button on and a simple hand sewing could really be helpful later in life.
A side note: Would you believe that while I was proof reading this my hubby has handed me a pair of his work pants and a button that just fell off. That proves just my point-thanks dear!
Fold the felt in half to form the little folder to hold the business cards. Here are 3 options we tried for hand stitching.
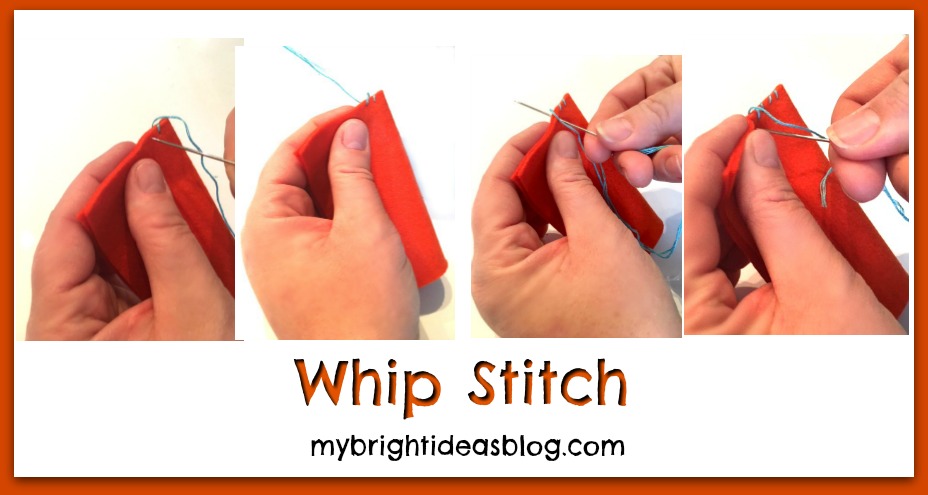
Whip Stitch: Knot the end of the thread and start on the inside of the fabric. Sewing in from the front and out the back and around. Back in the front a smidge to the left of the previous stitch.
![]()
Blanket Stitch: Start from the inside to hide the knotted end, then go through both layers. Stitches can be a bit further apart with the blanket stitch. Go in through the front of the fabric. As you pull the thread through, insert your needle through the loop and pull it securely to make your knot. Insert the needle into the front again the same distance from the previous stitches. At the final stitch go through a second time to make that knot and then insert your needle between the two layers of fabric and cut the thread.
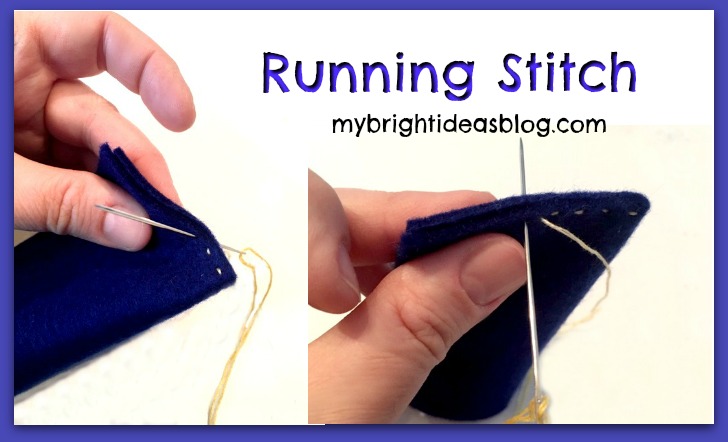
Running Stitch: Knot the embroidery floss and begin on the inside to hide the knotted end. Use a running stitch to go in and out all the way up both edges.
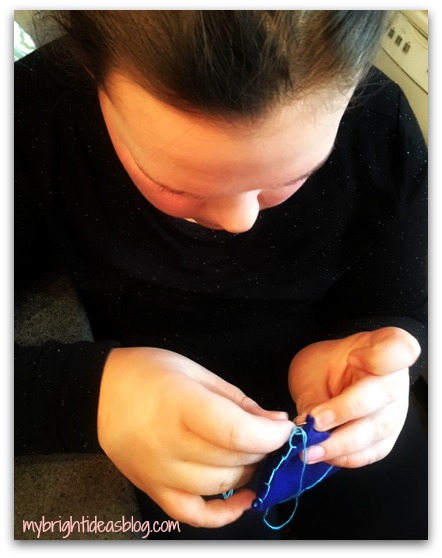
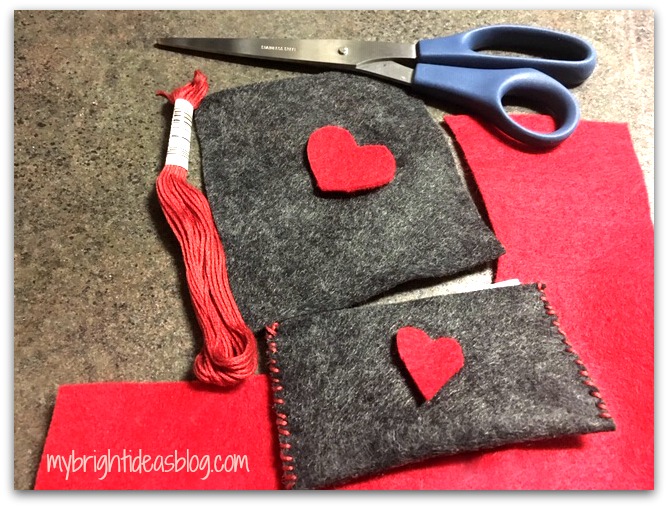
My 11 year old preferred the blanket stitch. Not bad for her first attempt.
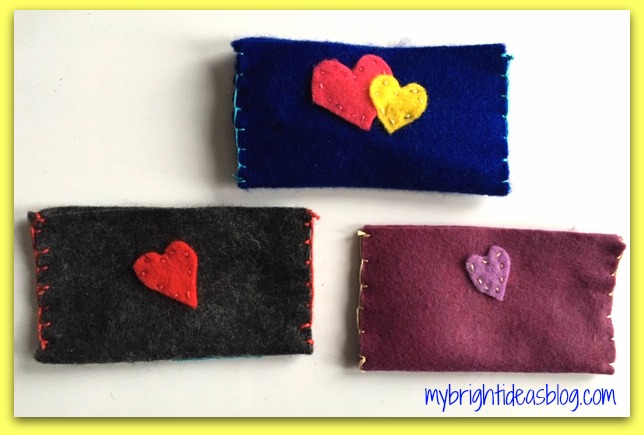
She also liked having one small heart over a larger heart.
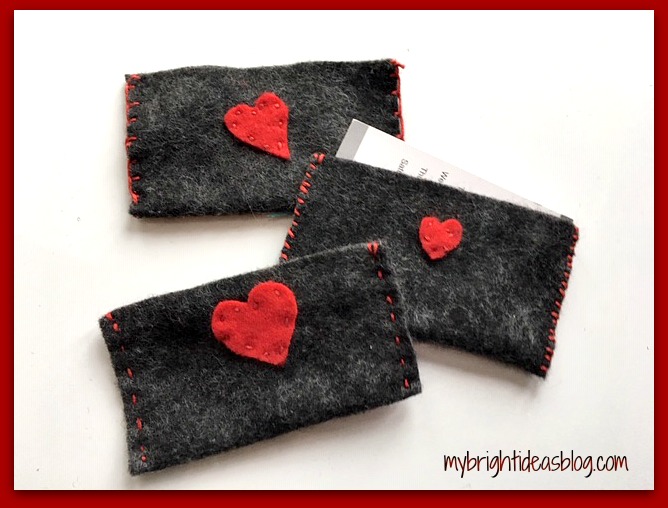
The grey felt with red hearts with red stitching looks pretty good!
Option 2
To make the process faster (as I mentioned we want to make a lot of them)…we sewed the hearts on first and got a little bit faster with each one.
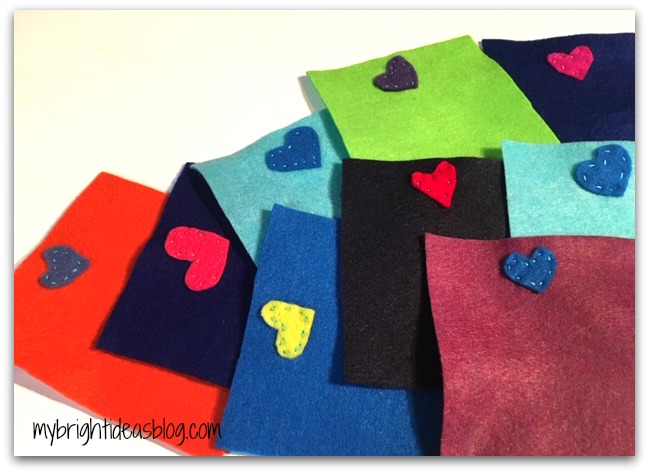
We hand sewed 10 hearts onto squares of felt and ran them through the sewing machine to make a tidy edge.
Could this get any easier! What a great idea…I want to thank my friend Ashley for sparking this idea over dinner last week. Great food, lovely ladies and a bit of craft talk snuck into to the evening…my favorite!
On this blustery, winter day you might be inspired to work with felt too! I have added links to a few of my posts from last year for you skim through and see if an idea is sparked for you too.
Sew a Super Easy to Make Felt Crown – Add to your dress up clothes!
100th Day of School Celebration-Glue Buttons on a shirt for a Gumball Machine
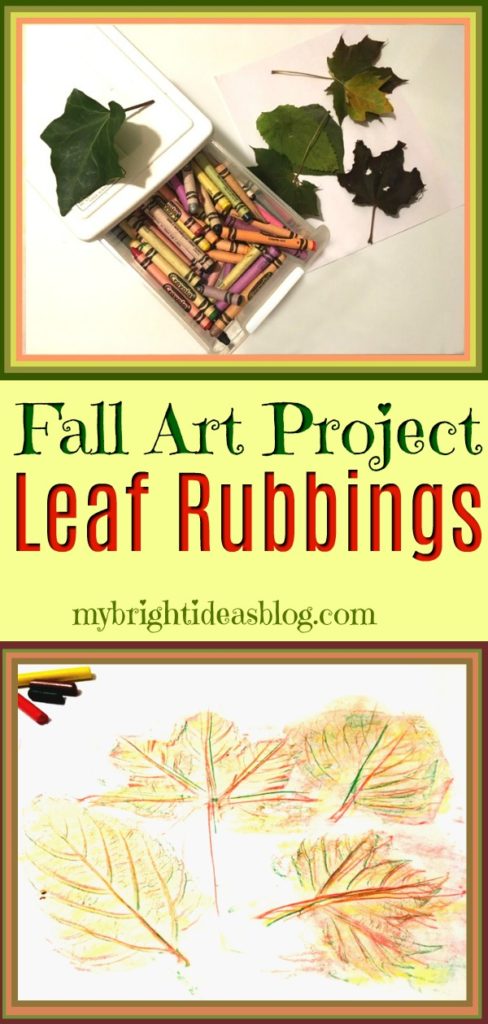
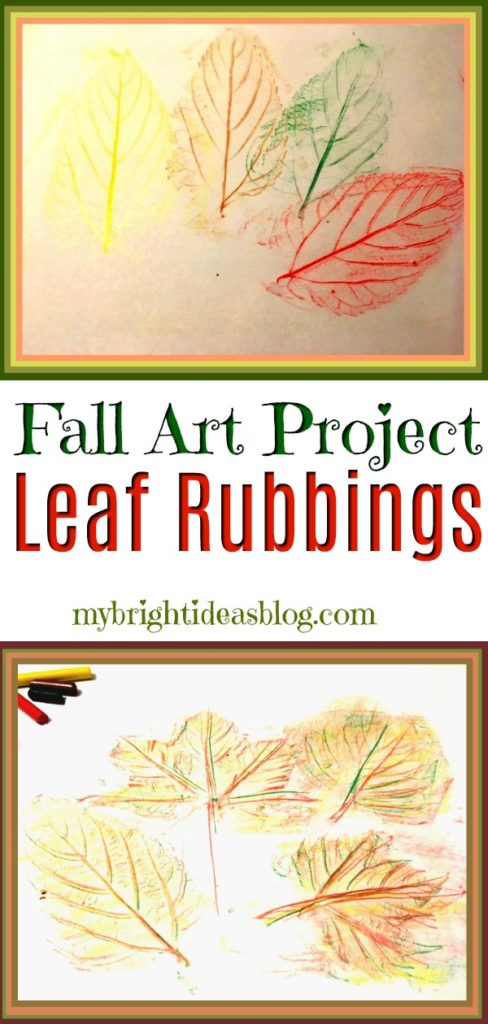
Fall Leaf Rubbing – Super Easy Kids Craft!
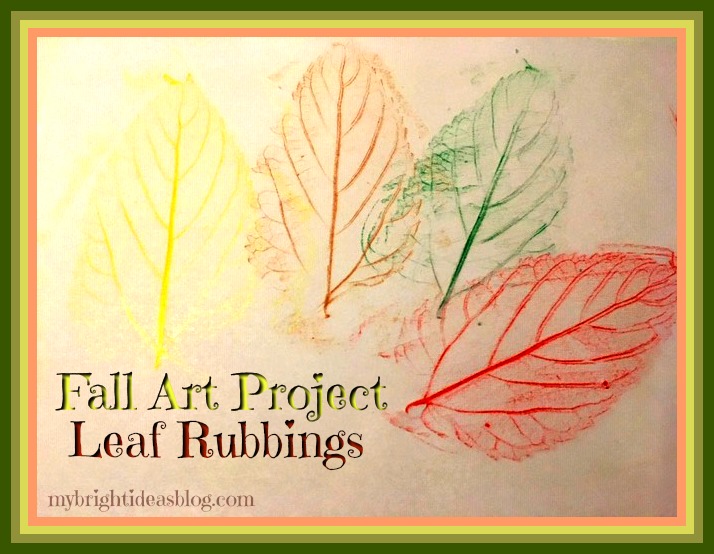
Remember doing Leaf Rubbings in the Fall when you were a kid? Well, Autumn is here again and its time for a nature walk to collect some leaves for this wonderful classic nature craft.
On your nature walk give the children (even young toddlers) a paper bag or large zip lock to collect their treasures.
Just in case they should ask the question…. Why do the leaves change color and fall off the trees?
Here is a quick answer….The leaves collect sunlight to feed the tree in the spring and summer. During the fall the tree goes into resting mode for the Winter. So the leaves turning color is the their way of getting ready for Winter.
There is much more to learn about it but that is the toddler explanation. If the kids are older why not do a research project to learn more. It’s quite interesting. For example, an oak tree’s leaves turn brown for a different reason then a maple tree’s leaves turning red. Chlorophyll and photosynthesis, glucose, oxygen and carbon dioxide-there is a whole factory in every tree we haven’t even noticed. Have a read through this website for a little lesson my 8 year old could handle..
https://www.sciencemadesimple.com/leaves.html
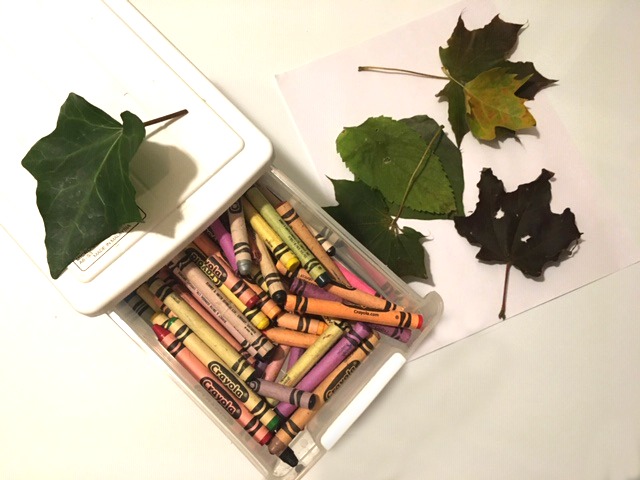
For this project you will need:
- Crayons…green, brown, orange, red, yellow
- Leaves
- Plain paper
Grab your crayons and paper and leaves. Peel the paper off your green, brown, orange and red crayons.
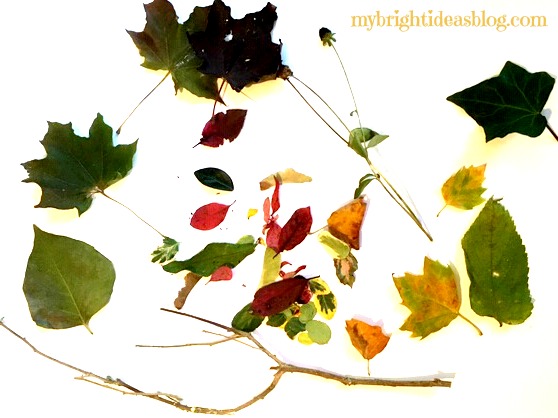
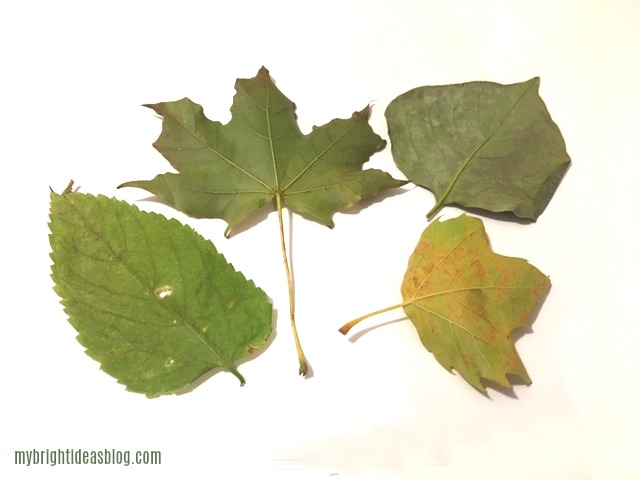
We have a nice collection of treasures from our nature hike-including stones, sticks and petals from my mums. For today’s project we just used the larger leaves. I’m setting the rest of the little treasures aside for another project.
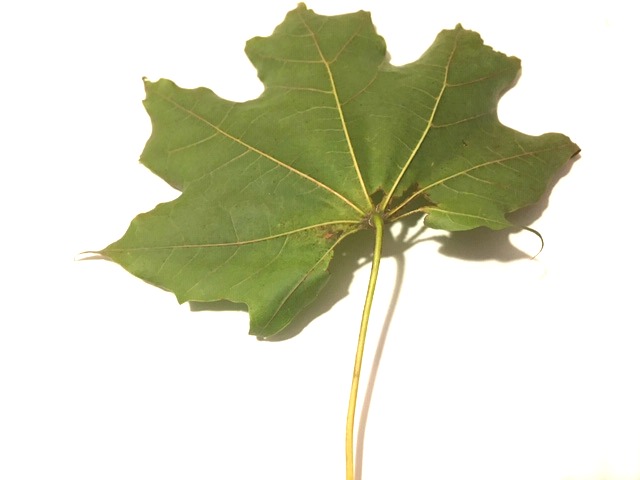
Take your leaf and turn it face down. Lay a blank page on top of the leaf. Turn your crayon on its side and rub on the leaf.
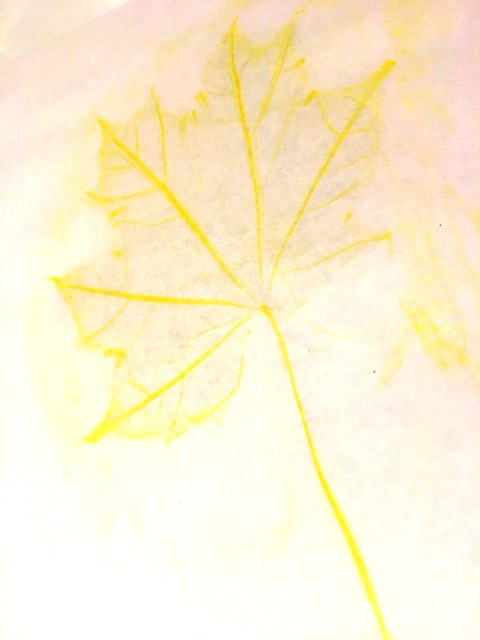
Yellow was one of my favorite colors to do rubbing but it doesn’t show up quite as well on photos.
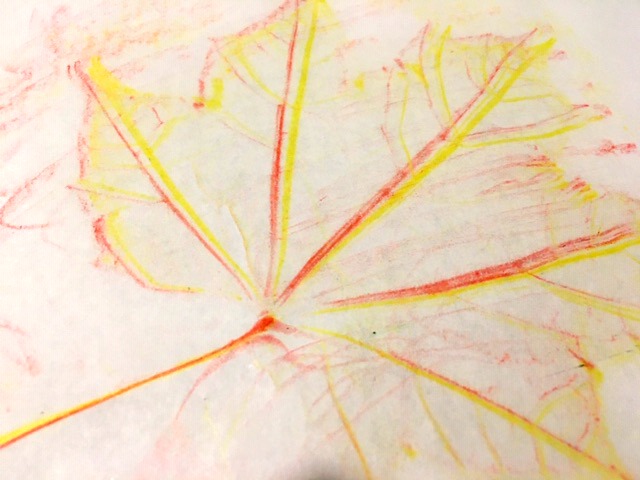
On this one we tried to layer red after the yellow but the leaf had moved a bit. It still looks cool though.
Were you able to collect a variety of leaves? If the weather didn’t work out for a proper nature hike in the woods, look around your yard and take a leaf sample of nearby shrubs and garden plants. They definitely have interesting leaves worth doing a leaf rubbing with too.
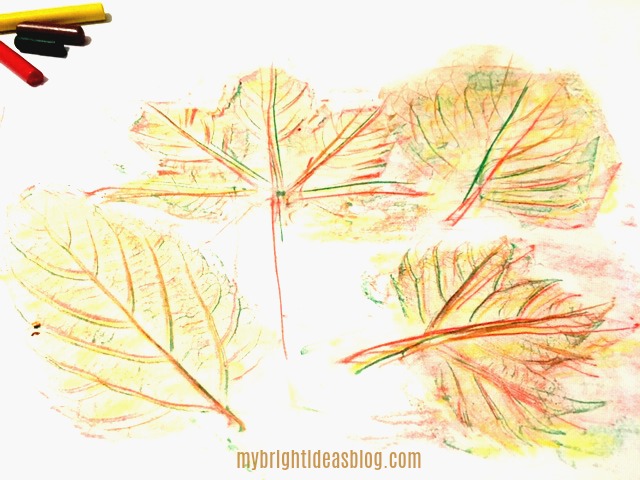
Here we tried all the crayon colors on each leaf.
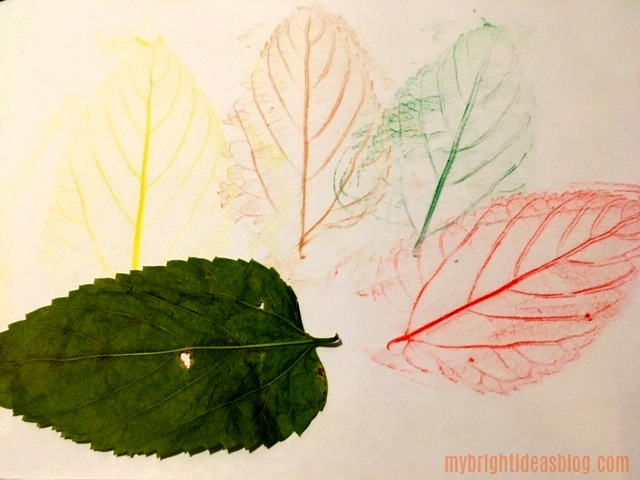
For this lovely art piece, we used only one colour on the leaf and then moved the leaf over and tried the next colour.
This is such a quick and easy autumn activity-it could be part of a yearly autumn tradition. If you have little ones in your life, I hope you can find a few moments to enjoy the Autumn changes of season and make some Fall art together.

Check out this post for a great nature craft using inexpensive clay!
Nature Craft – Perfect for Earth Day Activity – Clay Imprints with Plants and Flowers
…
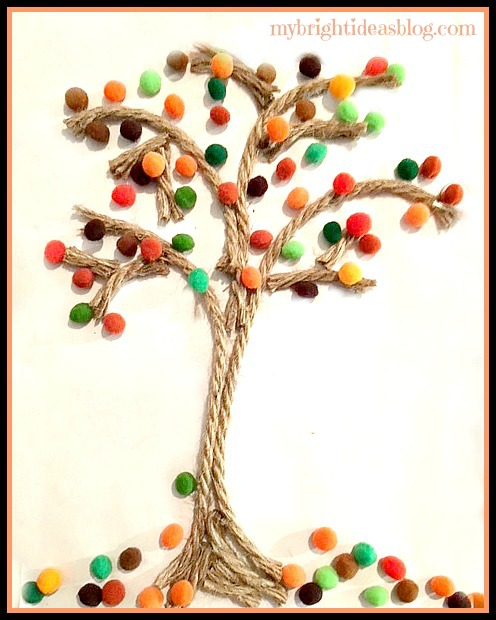
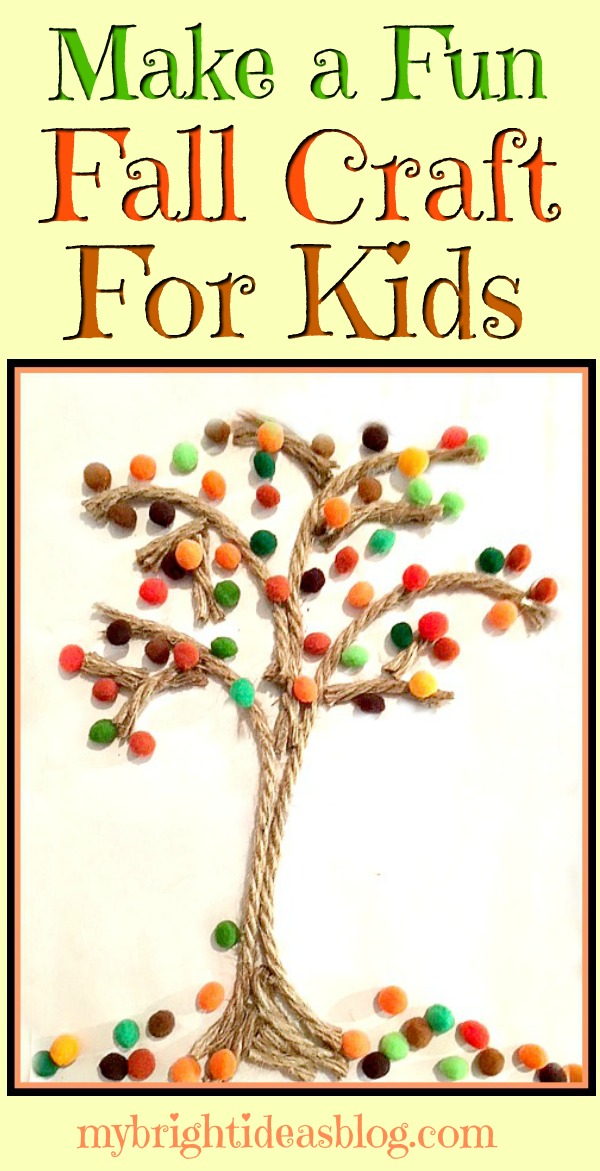
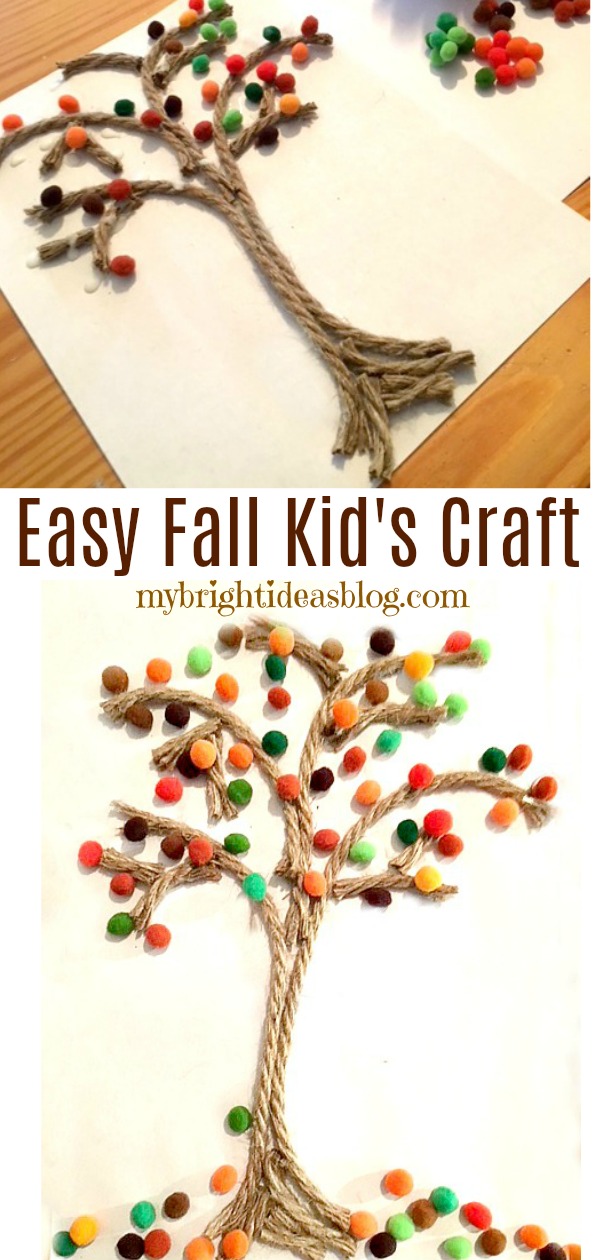
Easy Fall Kids Craft – Rope and Pompom Trees
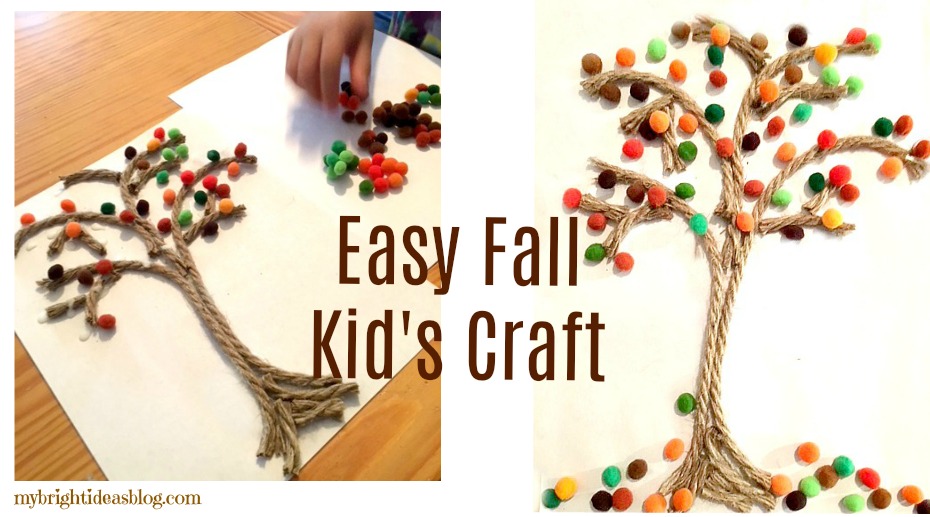
Today I was rolling through the dollar store….I only needed to pick up one item…but my shopping cart was full of crafts. As I perused the craft aisle, I stopped in my tracks when I saw the pompoms. Gasp! Packages of all sorts of colours! I got 6 packages…some for now and some for later. When I saw the package of multicoloured orange and yellow pompoms… I thought Fall Tree Craft! Whooohoo Start the Car!
I have neglected the kids crafts in favor of my DIY projects over the summer. So I’m brainstorming some kids projects for autumn before you know it winter will be here!
After my 8 year old got home from school we worked together on this easy kids craft. This is perfect for this time of year. Autumn colours of greens, browns, oranges and yellow.
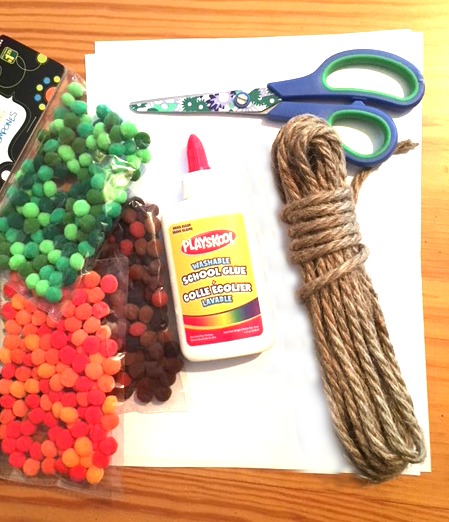
You will need:
-
- rope or natural jute
- small pompoms in fall colours
- white glue
- cardstock or a blank white canvas
I mention using cardstock or a white canvas because this ends up being quite heavy and regular paper will be floppy from the weight.
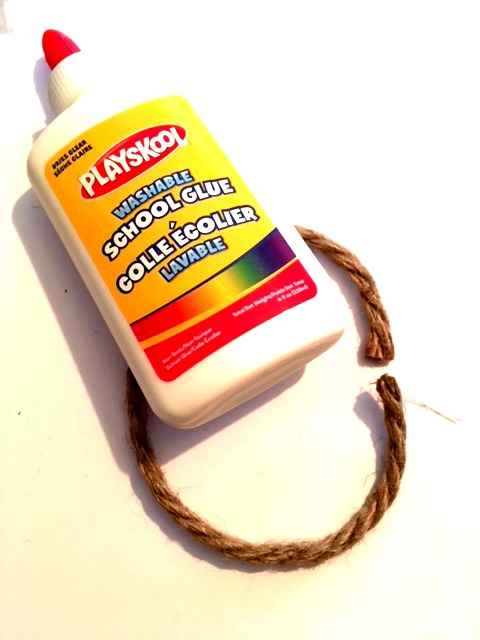
Start by cutting a piece of rope the length of your page or canvas.
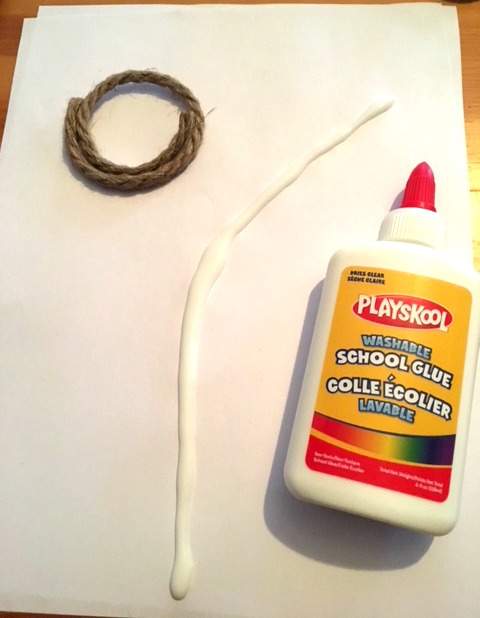
Make a line of glue starting from the middle bottom of your page or canvas running upwards and to the right to begin a branch.
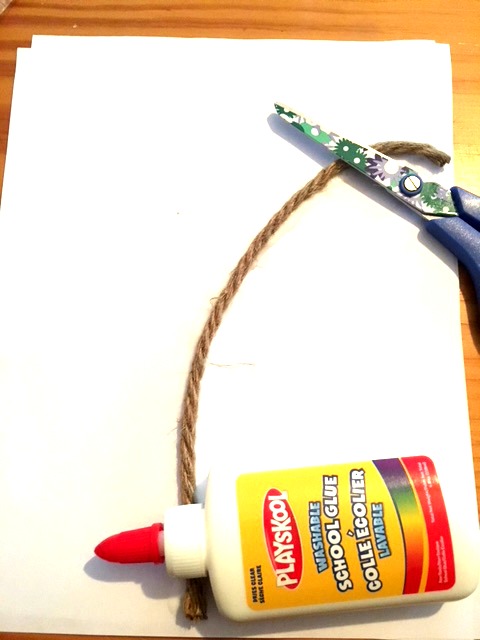
The ends of the rope seemed to pop up at first so I rested my glue and scissors for a few minutes until it began to stay flat.
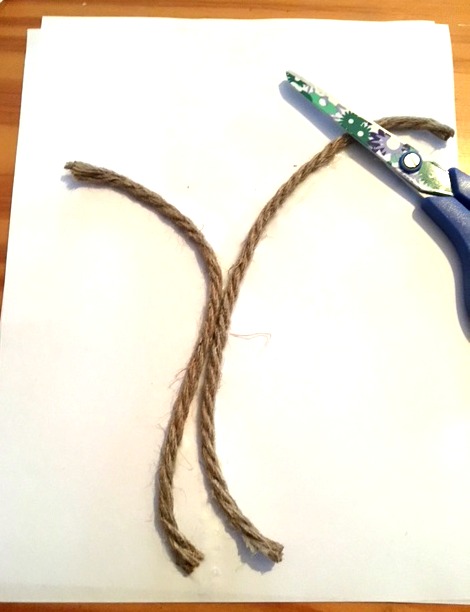
Add a second piece of rope that is the same length. Have that one turn to the left for another branch.
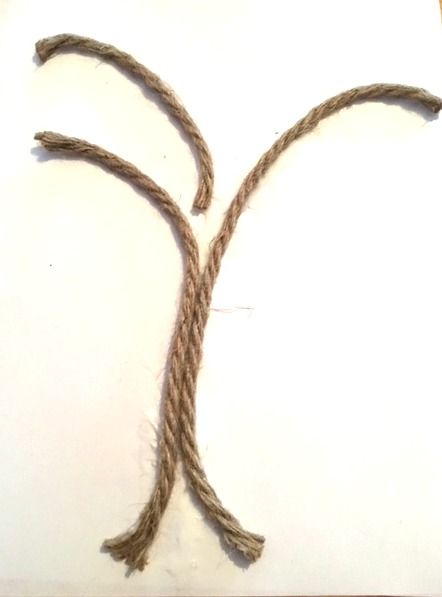
Begin cutting a few pieces to fill in some additional branches. Fill in the top of the tree by adding more 1 inch pieces of rope as smaller branches.
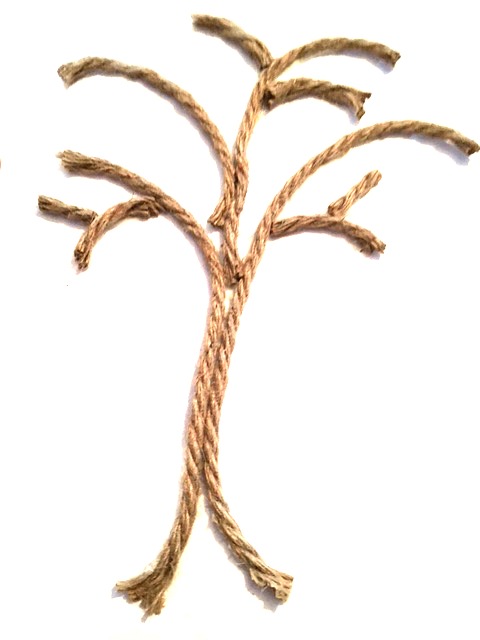
Next add small pieces of rope to thicken the bottom of the tree trunk.
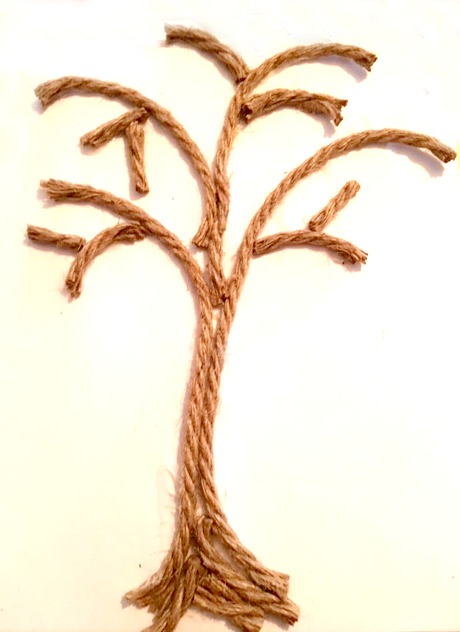
We were pretty happy with our tree trunk so we moved on to the pompoms.

Add a few dabs of glue on the rope and around the rope. Then add orange, yellow, brown and green pompoms.
Is it just me or do the colours of these pompoms make you think of Reese’s Pieces….is anyone else getting wondering if they have any chocolate hiding anywhere? Maybe its just me…focus on the craft…

I suggested we put some on the bottom of the trunk and on the ground. Miss M didn’t understand why we would want to do that. Um, darling look out the window. The wind has picked up and the leaves are swirling. By tomorrow the wind will have moved all the leaves from our lawn onto our neighbours lawn. Sorry about that sir.

Mother/Daughter craft time is good fun! This girl is always crafting something out of our recycling bin. She is just like me…always planning a project.
So there you have it! A super easy autumn craft perfect for this season. Beautiful fall colours in your tree art. Now maybe we should grab our rakes and head out to deal with the real leaves.
Thanks for popping by to see this fall craft! Pin it on Pinterest or share it with your favourite social media platform.
…
Plant Puns on Painted Potted Flower Pots – Adorable Gift Idea to Make Them Smile!
Nature Craft – Perfect for Earth Day Activity – Clay Imprints with Plants and Flowers
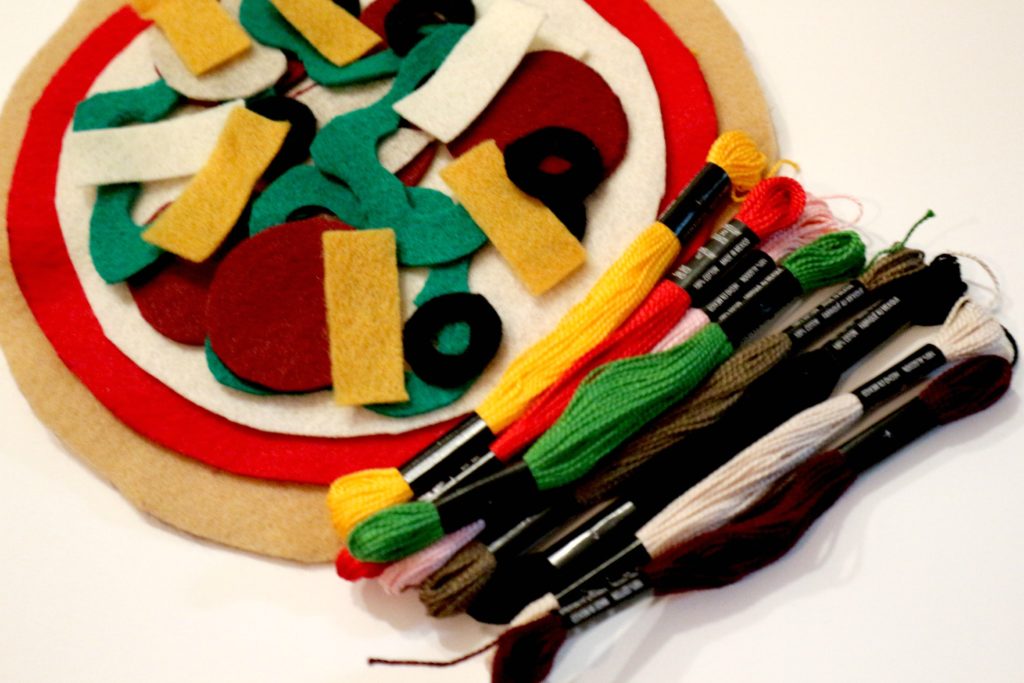
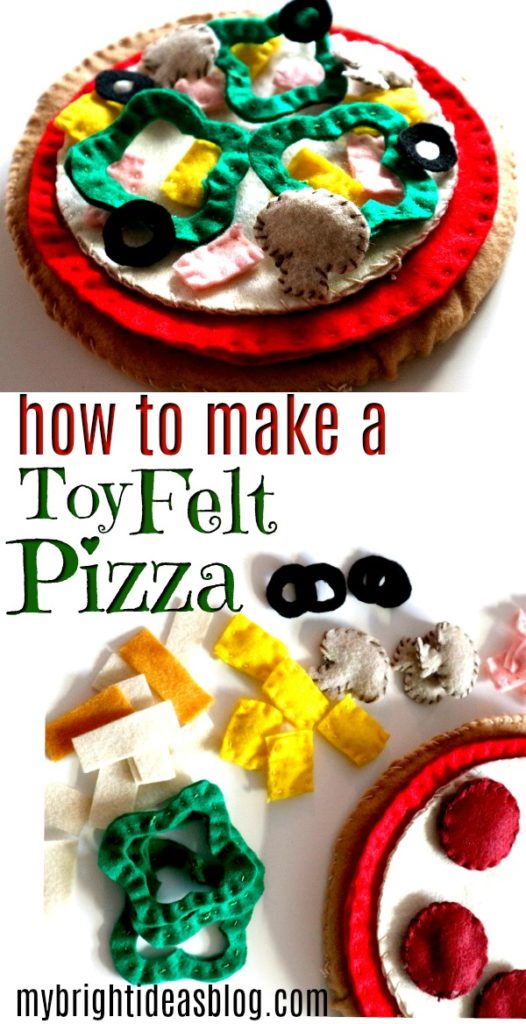
Cloth Pizza Toy Made From Felt
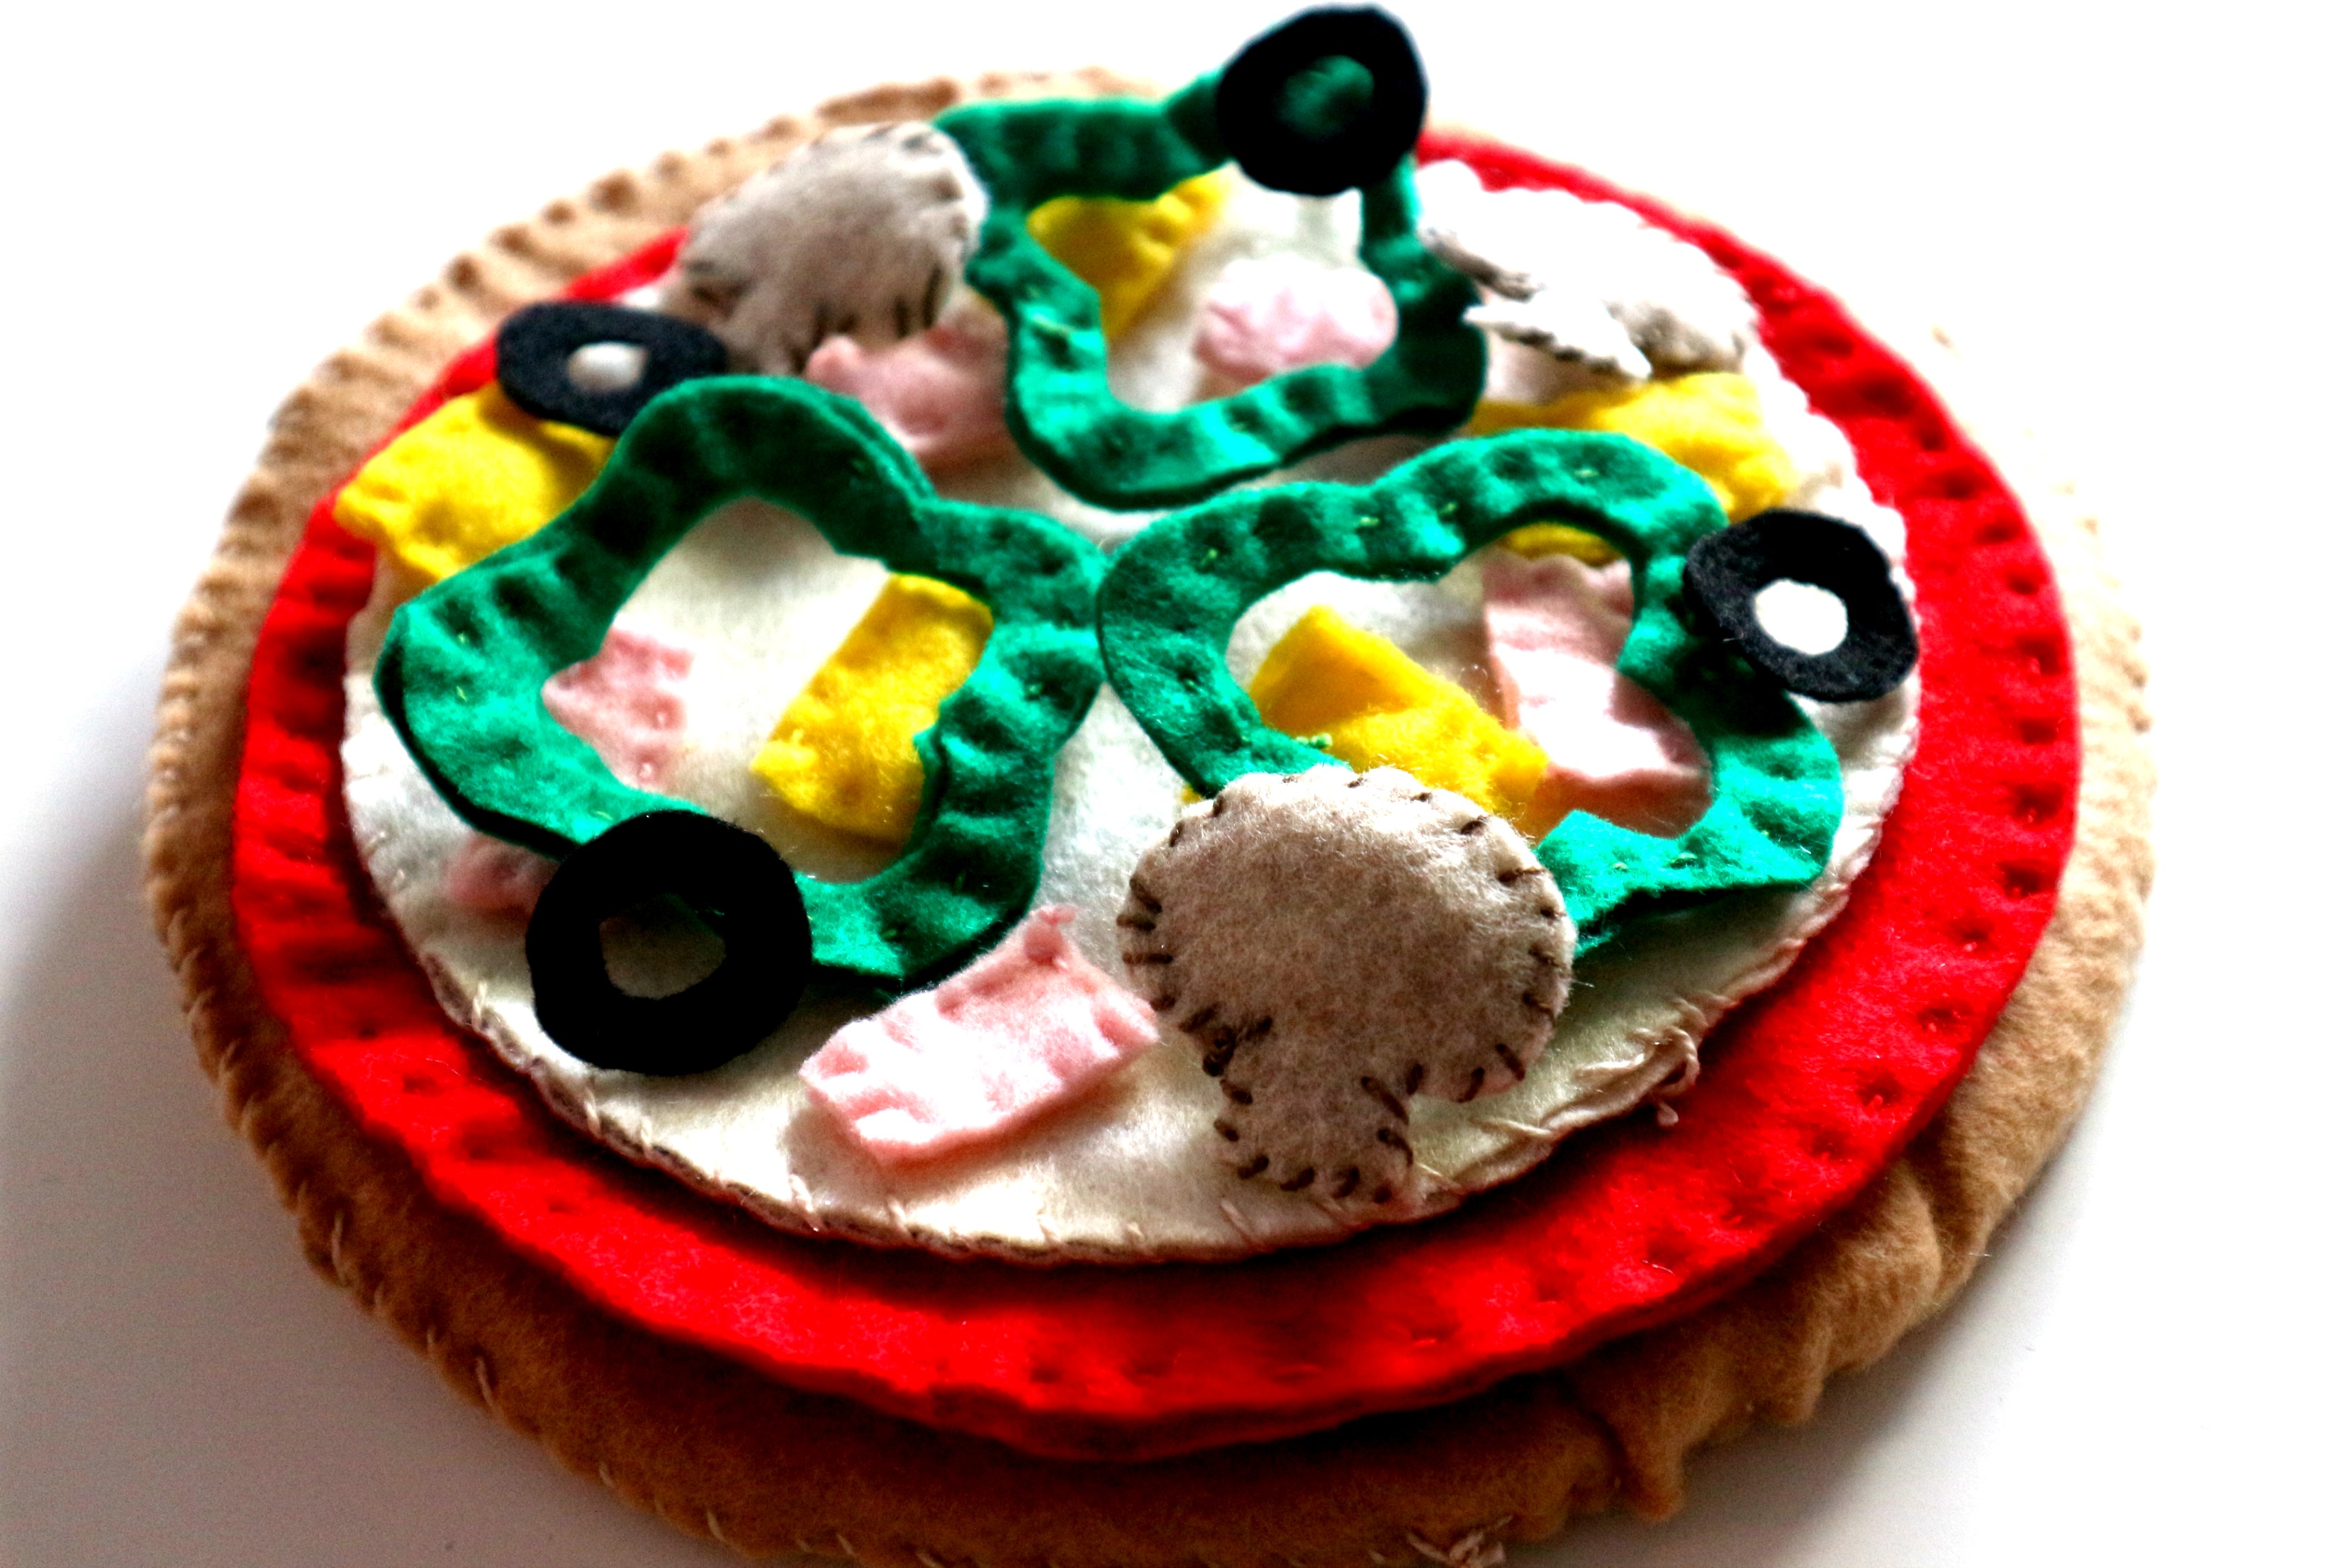
Kids love Pizza! Kids love to imitate their parents in the kitchen! Kids will love to play with this felt pizza.
This pizza toy/felt project can be made in 20 minutes with just scissors and felt or you can spend a few hours if you want to do a bit of hand sewing and add some stuffing.
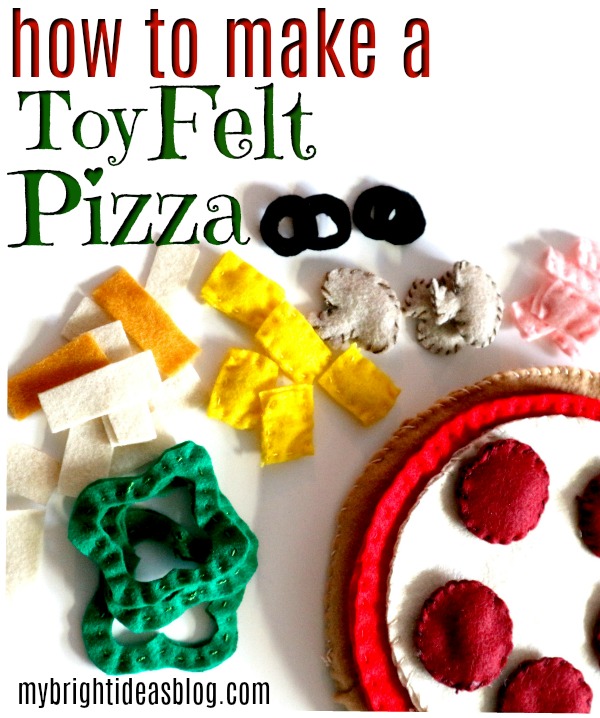
You will need felt in the following colours:
- 2 tan/light brown for the crust
- 2 red for pizza sauce
- 2 white/cream for mozzarella cheese
- 1 dark red for pepperoni
- 1 green for peppers
- 1 grey for mushrooms
- 1 pink for ham
- 1 black for olives
- 1 yellow for pineapple
- 1 orange for extra cheese
You will also need:
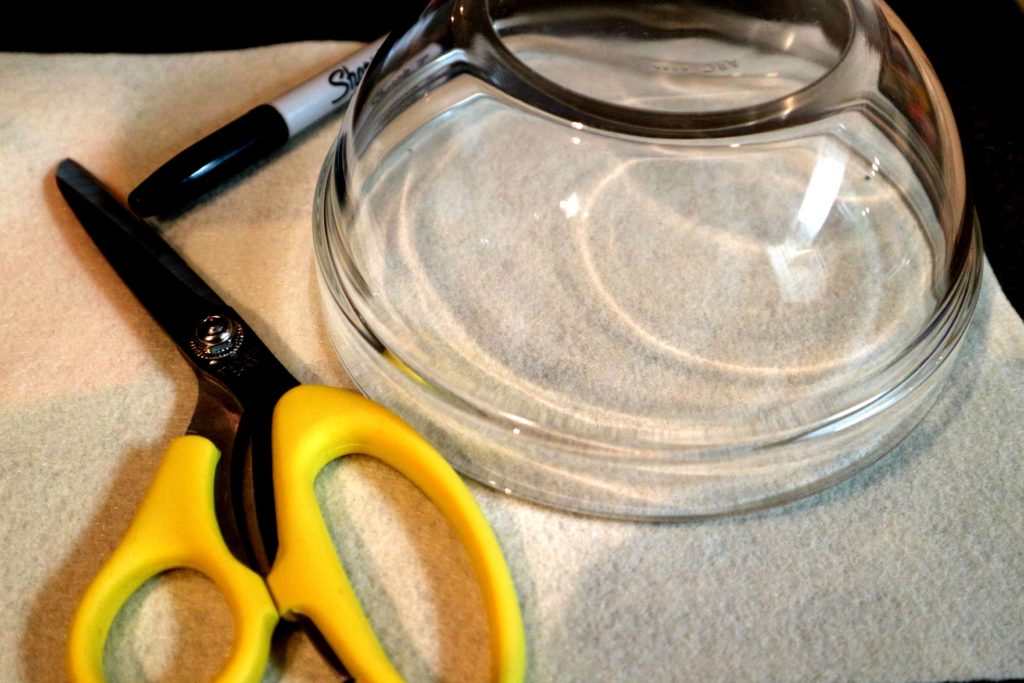
- bowls and plates to trace for big circles
- sewing needle
- embroidery floss (or thread)
- quilt batting or stuffing
Let’s Get This Pizza Party Started!
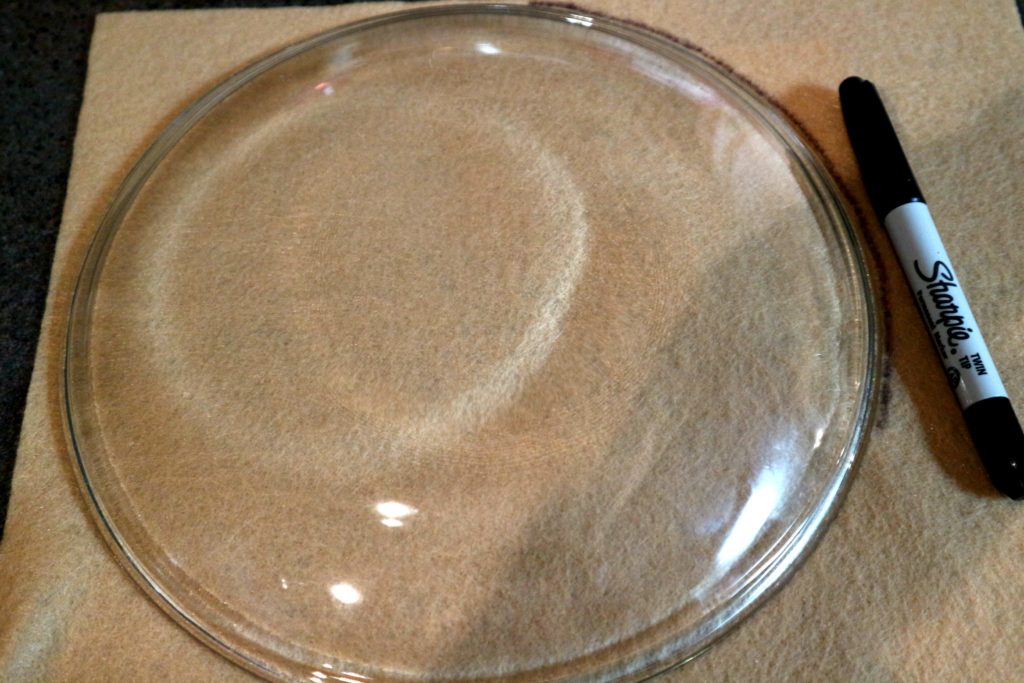
Beige Piece of Felt – Pizza Crust: Trace a large bowl or plate for your crust. Cut 2.
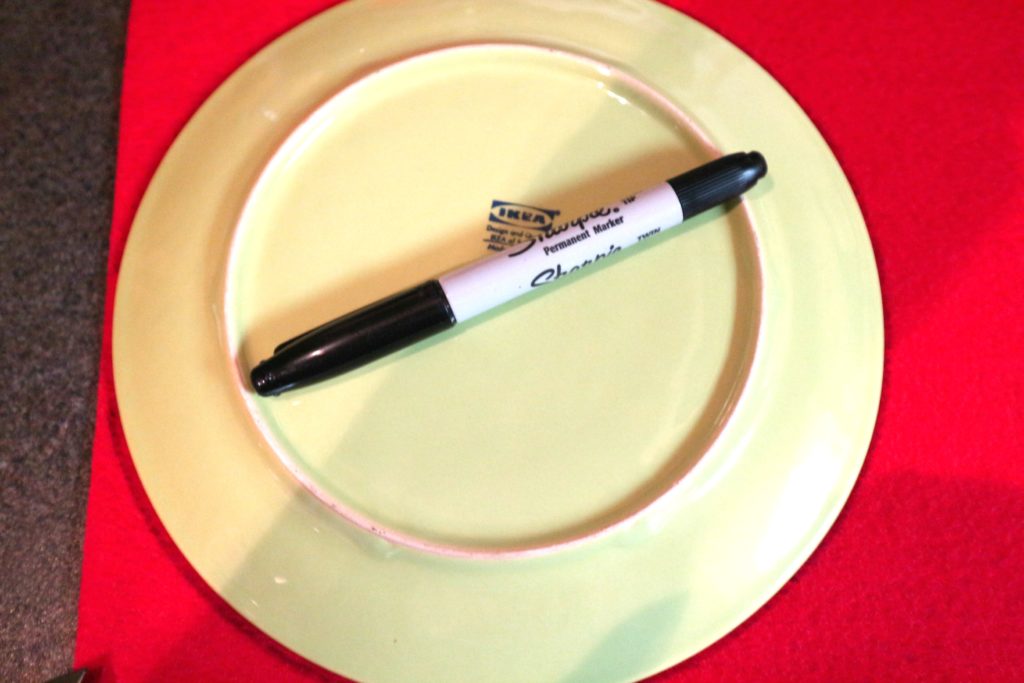
Piece of Bright Red Felt – Pizza Sauce: Using a plate or bowl slightly smaller than the last one, cut a slightly smaller circle than the crust pieces. Cut 2 red circles.
Cream or White Piece of Felt – Mozzerella Cheese: Cut the cheese…tee hee…out of a piece of white felt. Trace a slightly smaller plate or bowl than the piece of pizza sauce red felt. Cut 2 white circles.
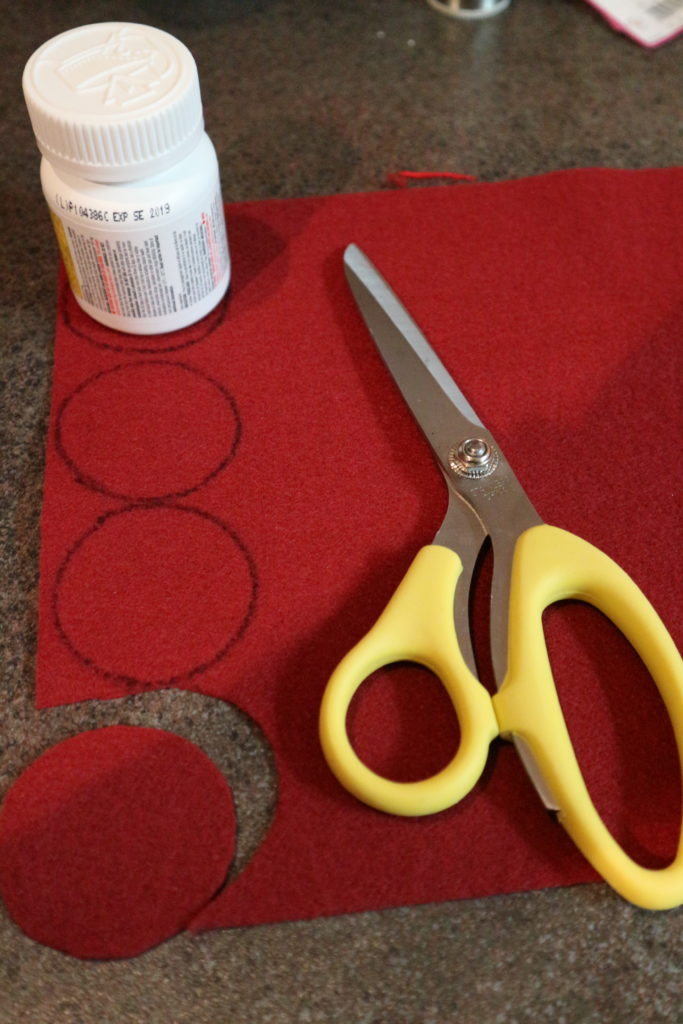
Dark Red Piece of Felt – Pepperoni: Cut 12 circles tracing something small like a vitamin bottle.
Grey/Beige piece of Felt – Mushrooms: Draw a mushroom shape and cut it out. Cut 10 mushrooms.
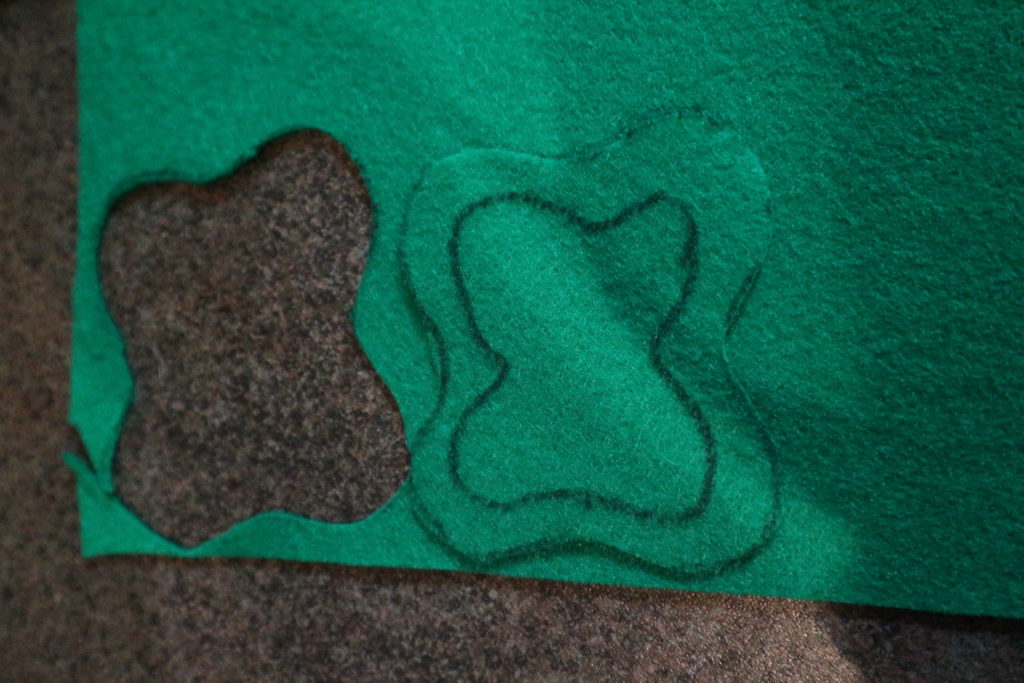
Green Piece of Felt – Peppers – It looks like a wiggly square, then outline it again and cut it out. Cut 8 peppers.
The rest of the toppings are up to you….
Black Felt – Olives: Cut a small circle and trace it a second time. Cut 8 olives.
Orange and White Felt – Grated Cheese: Cut long rectangles for some shredded cheese on top. Cut 6 of each.
Pink Felt Squares – Ham: Cut into squares-10 pink ham squares will be enough.
Orange/Yellow – Pineapple: This begins a great debate about whether you should have pineapple on a pizza. I’m for it! Hawaiian Pizza is my favorite. If you feel the same cut 10 pineapple pieces.
You aren’t a sewer? Then you could stop now and you can use this as a toy as it is. If you want to make it more 3 dimensional, find colors of embroidery floss that will closely match the colors of the felt.
Finishing the Pizza with Hand Sewing
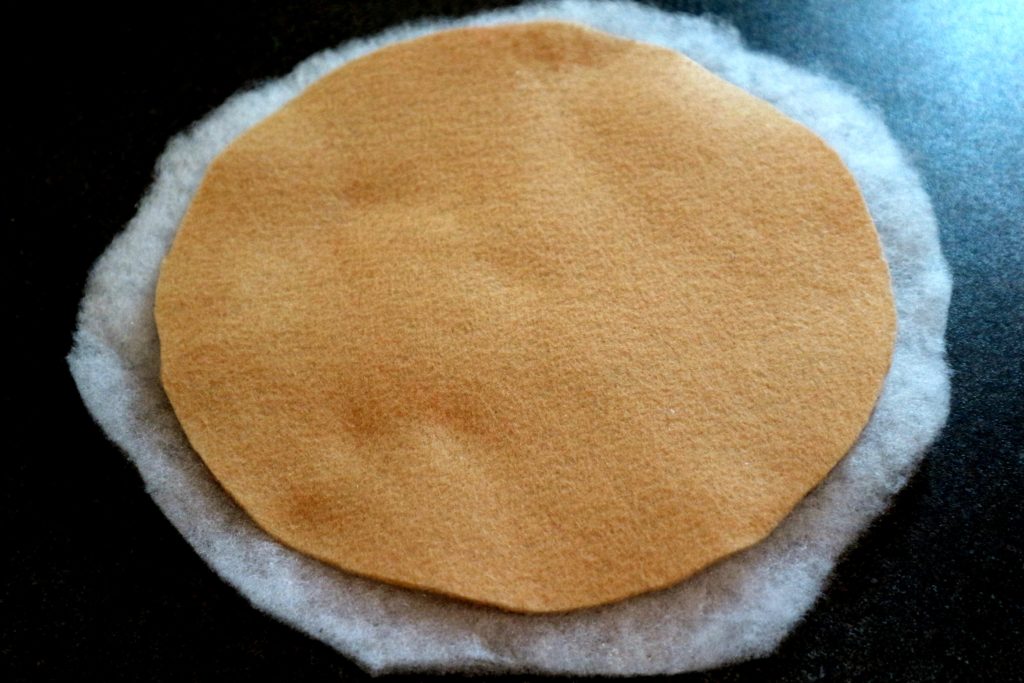
Finish the pizza crust: Cut a piece of cotton batting an inch larger than the pieces of beige felt. Sandwich the batting between the two pieces of beige felt.
Hand sew around the outside folding and tucking the excess inside the pieces of fabric. I think I used a whip stitch but you could also do a blanket stitch for this part.
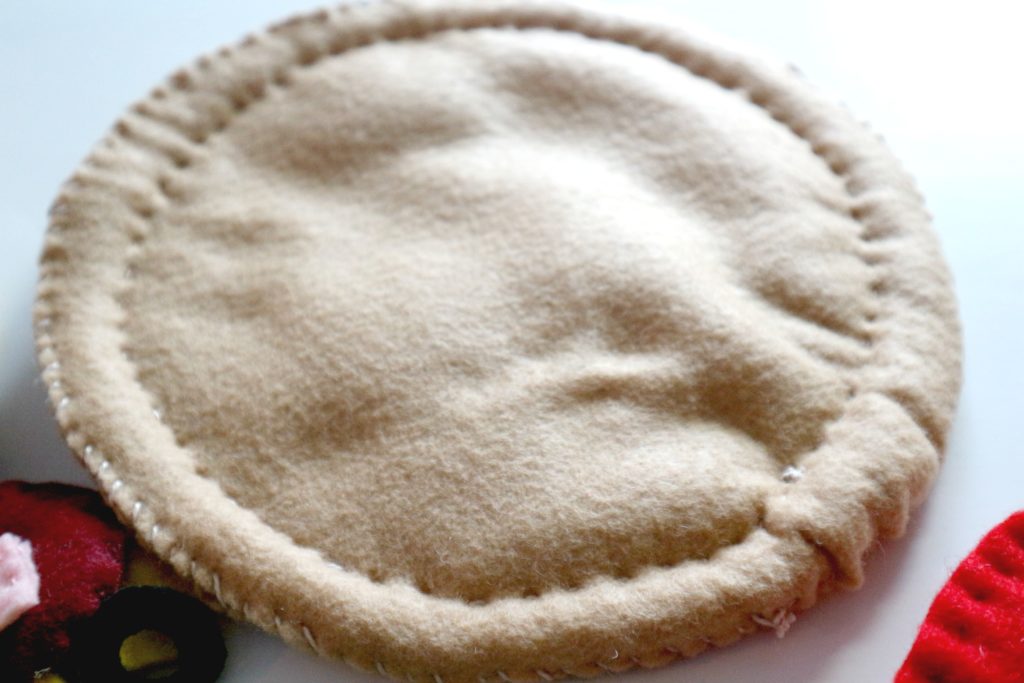
Sew around again an inch inside the seam to create the edge of the crust. For this I used a running stitch.
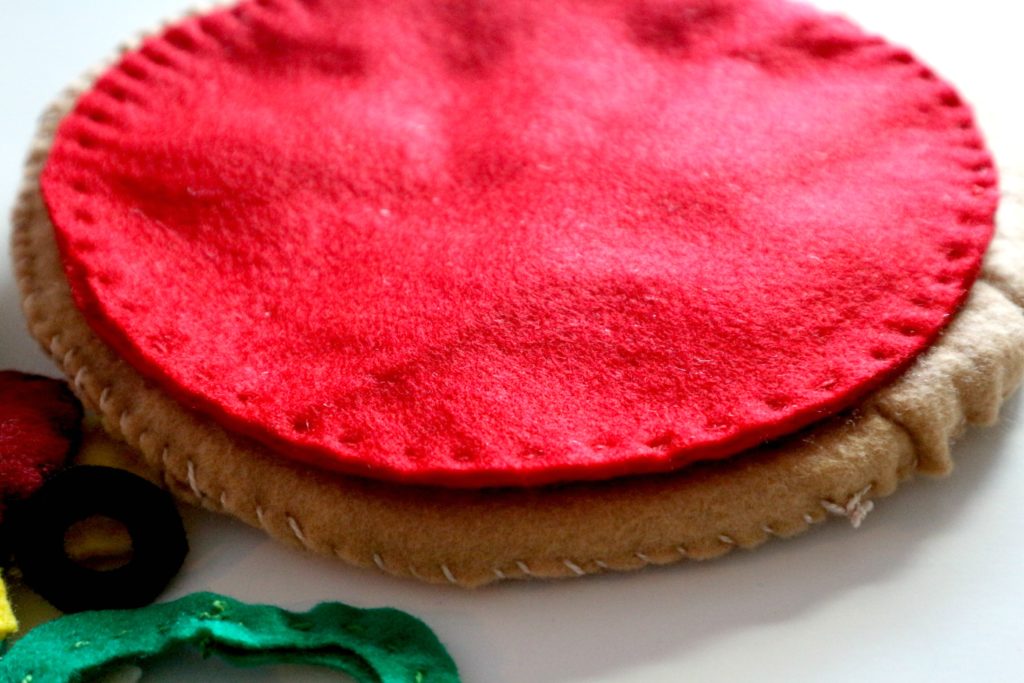
Stack the 2 pieces of red and sew around the edge with a running stich.
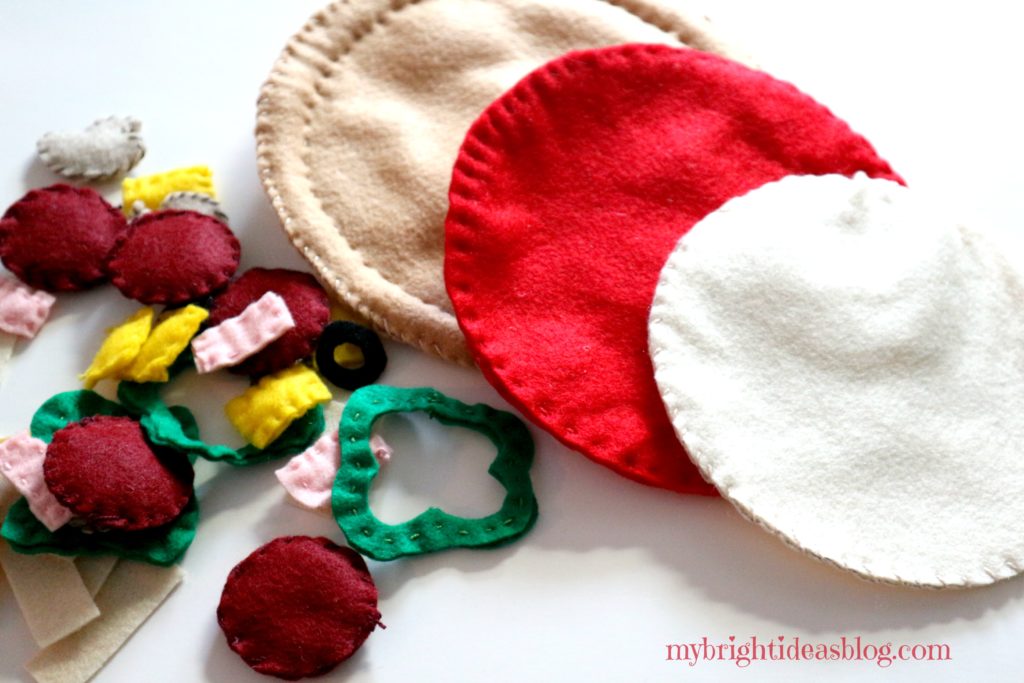
Next, put the two white pieces of mozzarella cheese pieces together and sew around the edge. Stitch each of the toppings together.
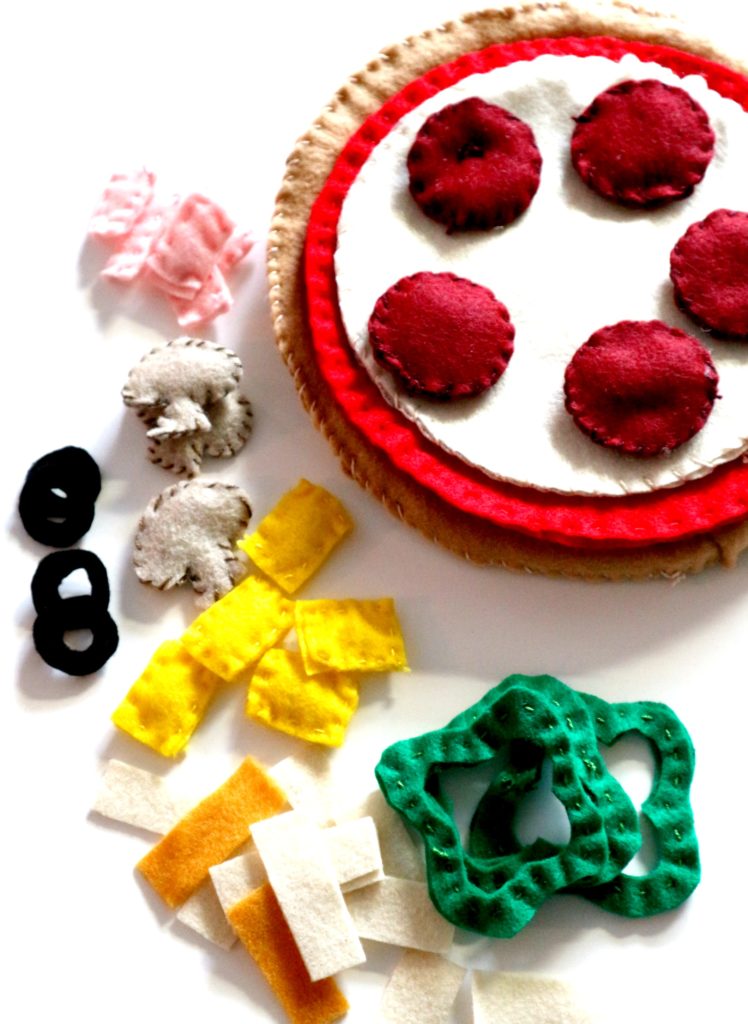
When sewing the pepperoni I added a little stuffing. The rest… mushrooms, ham, green peppers, pineapple were all sewn together….the olives and shredded cheese pieces I left as a single layer but you could double it and sew them together.
That’s all there is to it!
Store your pizza pieces in a large ziplock bag so you don’t lose the pieces. Have fun making this project for a little one in your life.
Here is the link to my previous post to make a no sew felt pizza.

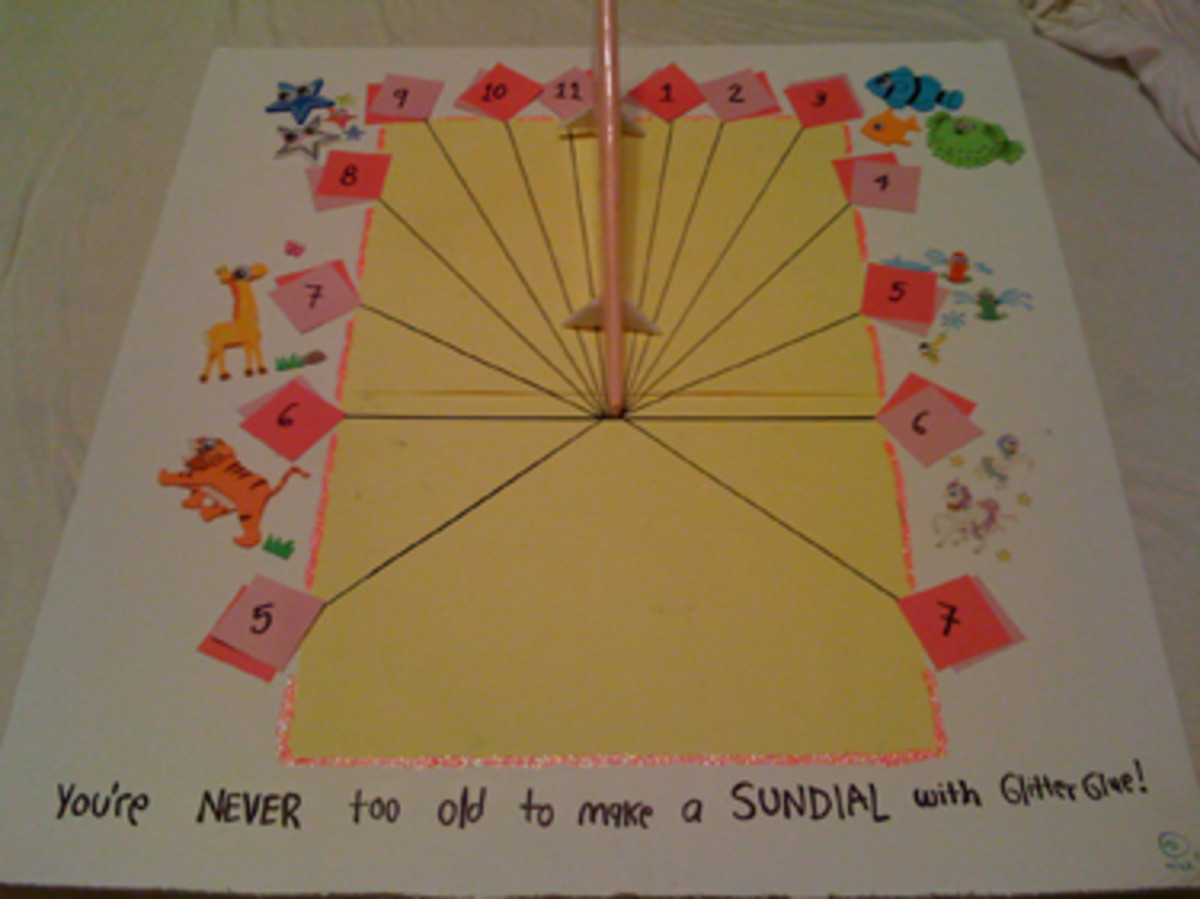
How to Make a Sundial
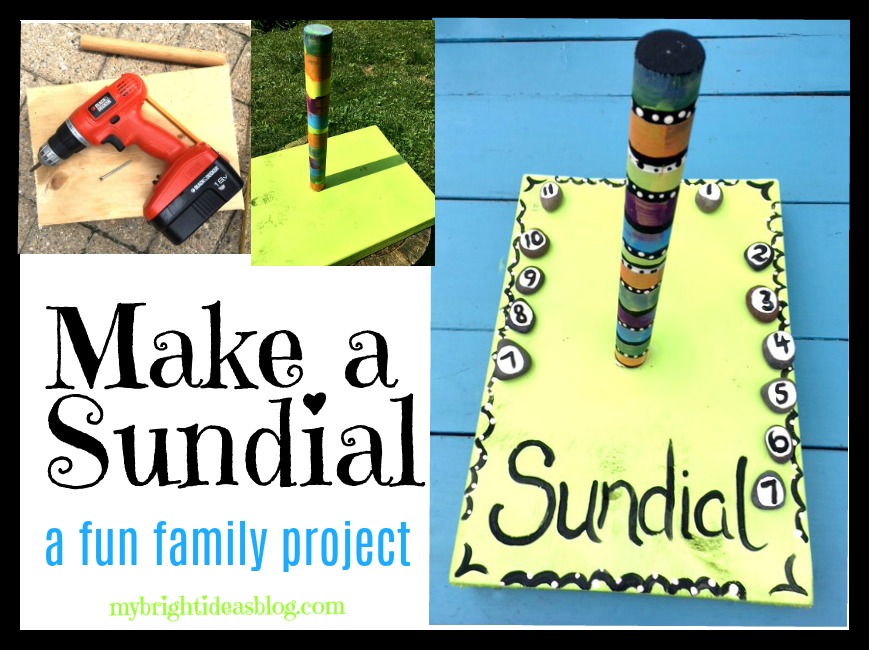
Are you looking for an outdoor family nature project? Here is a cool idea for a sunny day. Make a SUNDIAL.
A sundial is a device that uses the position of the sun to cast a shadow to tell the time. As the sun moves across the sky the shadow moves. According to Wikipedia the oldest sundial found by archeologists is dated around 1500 BCE. https://en.wikipedia.org/wiki/Sundial
When I started my project it was very cloudy so it got more decoration than I intended. It was going to be bare wood with a light clear coat. Our weather was cloudy and rainy for several days so I had to postpone it repeatedly. Grrr.
Technically you could make a quick sundial using a stick in the ground. Or you could use paper and a pencil stuck in playdough to make a sundial in a pinch. But if you want to make one like mine, here is the scoop.
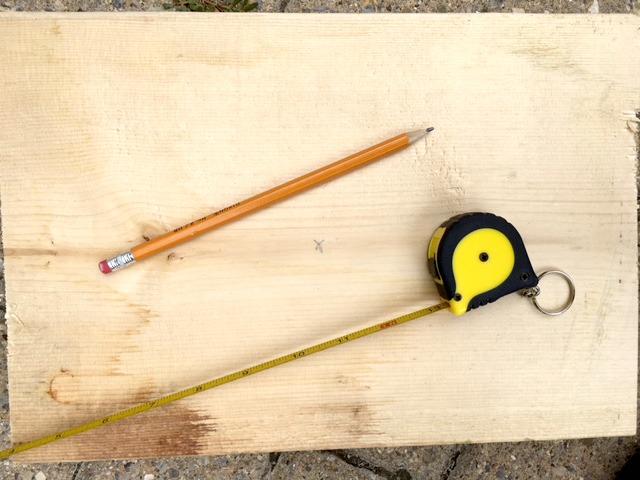
You will need:
- a scrap of wood (mine was 9 x 13 inches)
- dowel (mine was 10 inches)
- drill
- tape measure or ruler
- 12 rocks or gems
- 1 screw 2 1/2 inches long
- hot glue gun or other glue (optional)
- watch or clock with an alarm
- pencil
- spray paint or varnish
- craft paints and brush
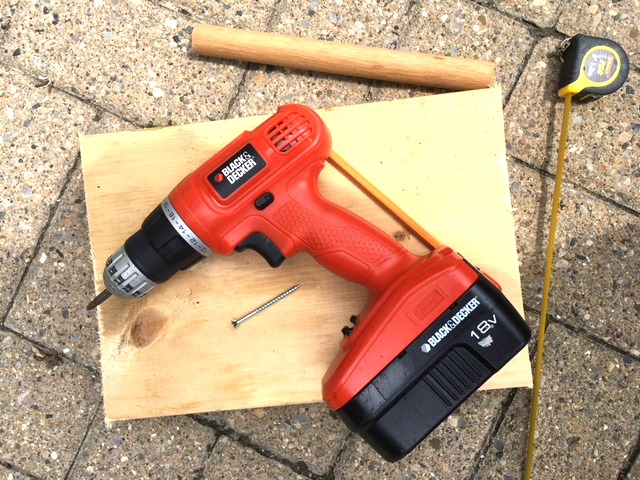
Cut the wood to a size you choose. I would have preferred a 12 x12 square but I had this scrap 9 x 13 left over so we used it. I also had this dowel that was a leftover and already 10 inches long.
Measure and mark the centre of your board.
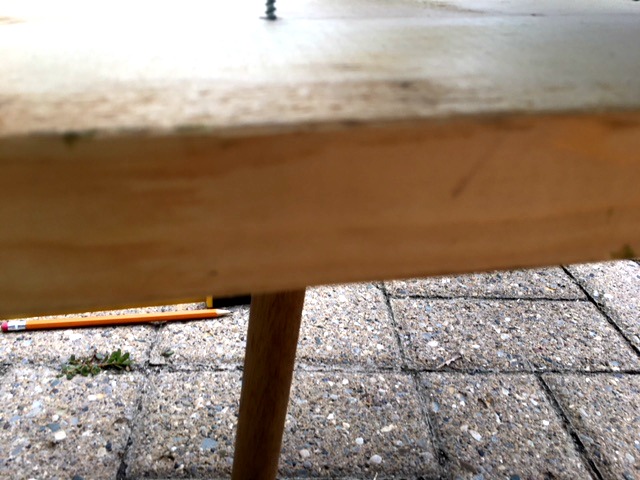
Screw the dowel into the centre of the wood. This was hard to take a photo of. Put the dowel on the ground, place the block of wood on top. Ensure the x marking the centre on the wood is right over top of the dowel. Drill the screw through both pieces.
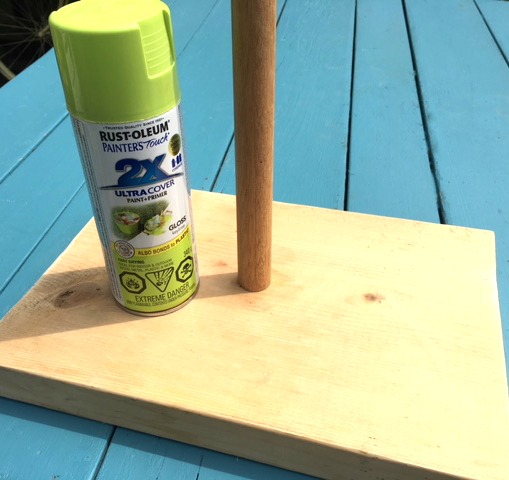
We could see the clouds coming, so we decided to start the time markings the next day and for now paint the sundial to help it last longer outdoors. If you have a partial can of spray paint or wood protector…this project won’t take much.
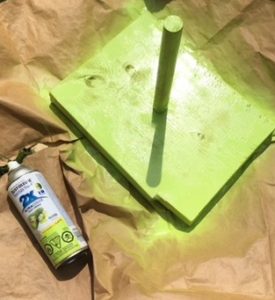

Spray the board and allow to dry. Tip over to paint the bottom and allow the bottom side to dry.
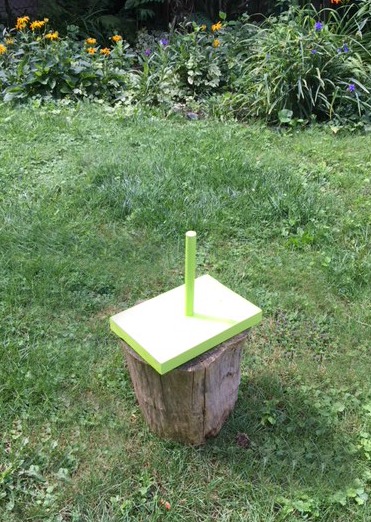
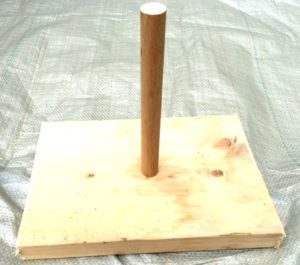
Once it is dry you can decide where you will have the most sun in your day. You could raise it up with bricks or a tree stump. We have a lot of shade in our backyard which normally we appreciate. But for this project it made things difficult.
Now seeing the giant rain clouds moving in. We decided to post pone and begin again tomorrow. In the meantime, we could jazz it up a bit.
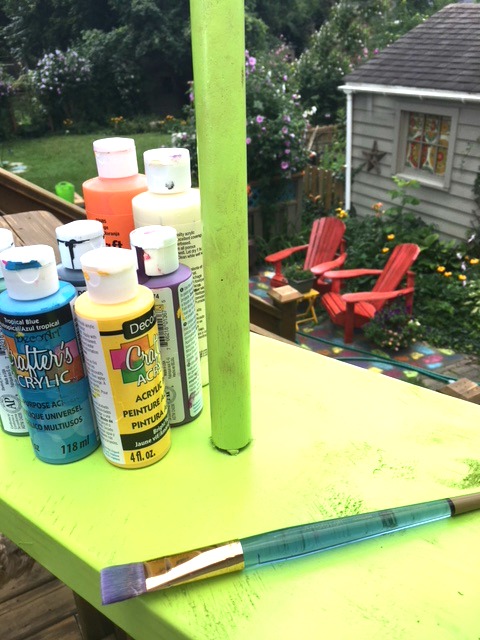
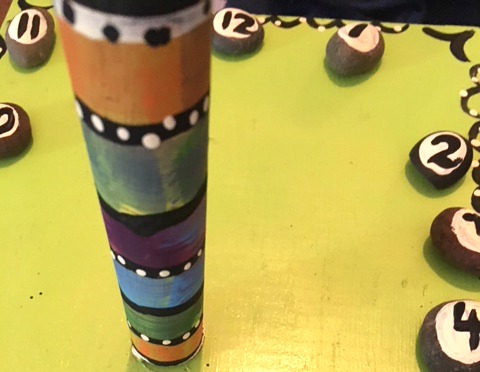
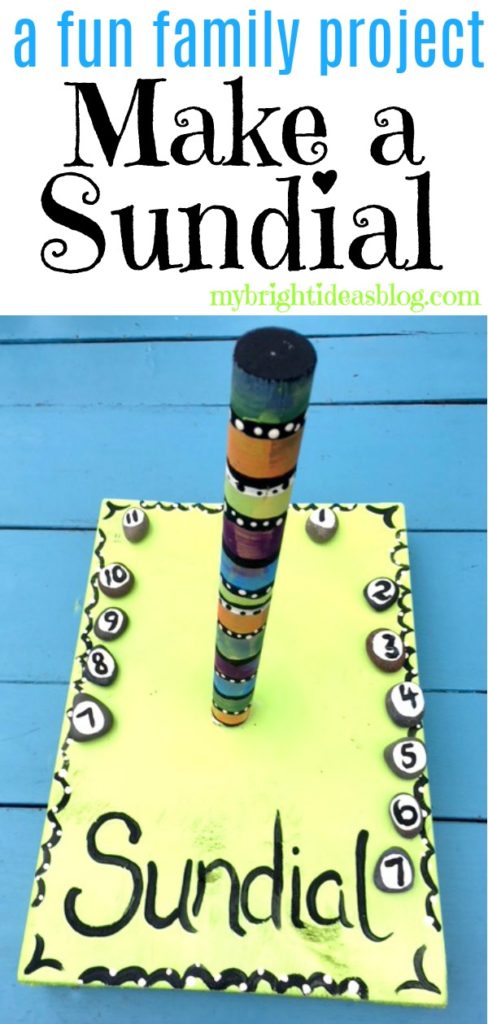
Using craft paint we put wide stripes on the dowel part of the sundial.
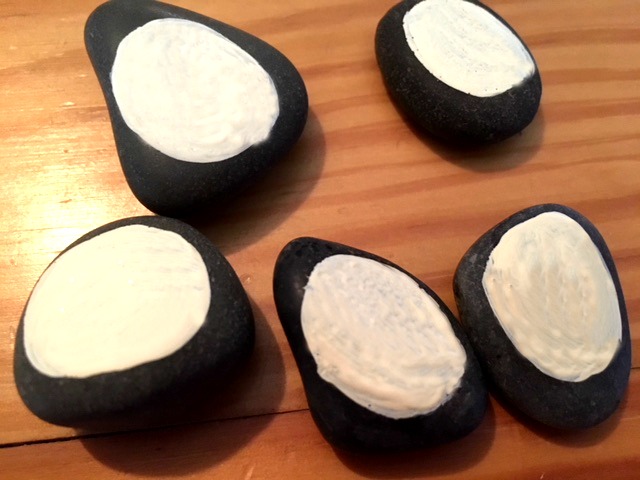
We had a package of dollar store polished rocks so we painted a white circle on each one. This will be our pretty markers for hours. Print the numbers: 7, 8, 9, 10, 11, 12, 1, 2, 3, 4, 5, 6, 7.
A SUNNY DAY FINALLY ARRIVES
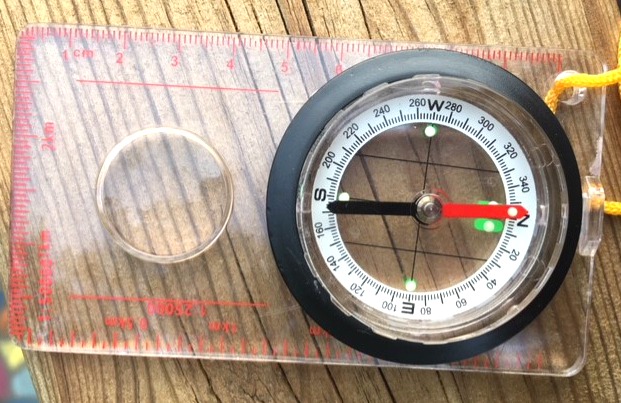
We did follow some of rules for making a sundial. Such as the pole needs to tilt slightly to the north. Use a compass to determine the north pole. I twisted the dowel to loosen it and put a tiny rock in that space to tilt it. If you are in the southern hemisphere you will need to use the compass to find the south pole and tilt the dowel to the south.
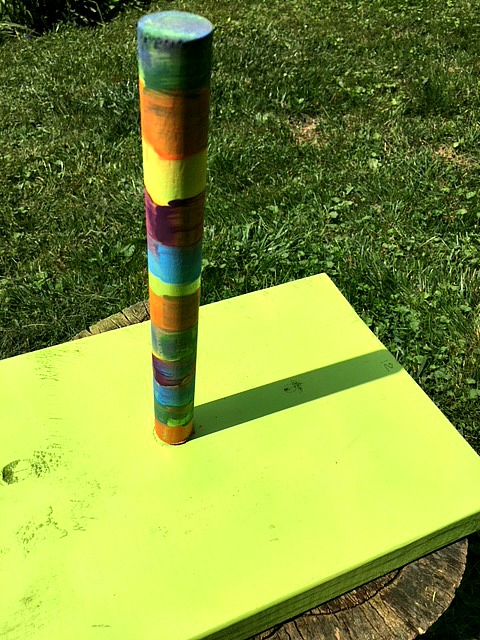
Just before noon put your sundial in a sunny place. The shadow of the dowel will be your first mark to write in the number “12”. I wanted that to be right at the top like a regular clock.
This is going to take more than one day to complete so make sure that no one moves it. Maybe add a note that says “do not touch” so it doesn’t move.
Next, set the alarm for 1’oclock and come back to write on the number where the shadow hits for 1pm. Write “1”. Set the alarm for 2pm and then 3pm and continue to repeat every hour until the sun sets.
After sundown, set the alarm for 7am so you can begin recording the morning time marks.
If you are going to leave your sundial outside and you haven’t already painted or varnished the sundial you should do that next to water proof it. A clear coat on the rocks is a good idea too. You don’t want the paint to shift off the stones. That can happen on polished stones.
After the times are all marked, you might want to secure the rocks so they don’t get carried away. You can use a hot glue gun (fast and easy) or E6000 glue (slow, stinky but stronger).
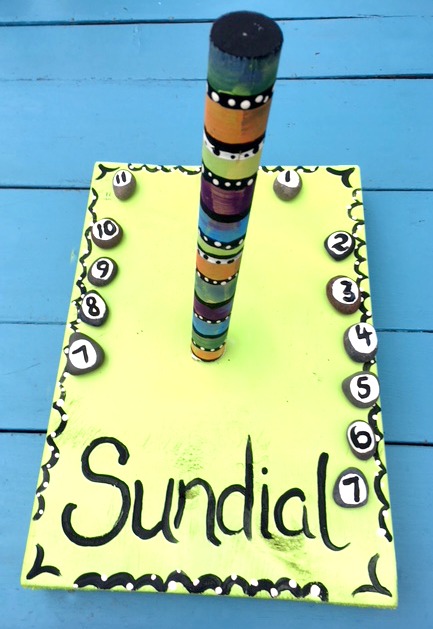
Our finished project does not look like a clock like other sundials. Maybe it was moved. If your kids are older you might want to do more research and see how the impact of the tilt of the earth’s access. It’s August now, will the shadows still line up in September? This project has the potential to be quite educational. Telling time, shadows, the earths axis, the solar system, using a compass,
This picture is linked to a nice pencil and paper sundial blog.
Children who spend time outdoors are more likely to be happier, healthier, problems solvers and more creative. Check out this blog post about a paper sundial. https://hubpages.com/education/Reconnecting-Children-With–Nature

https://otherwiseeducating.blogspot.com.au/2010/12/sundial.html

https://www.kcedventures.com/blog/how-to-make-a-sundial-for-kids
Here are some other posts of my projects you might enjoy!
Nature Craft – Perfect for Earth Day Activity – Clay Imprints with Plants and Flowers
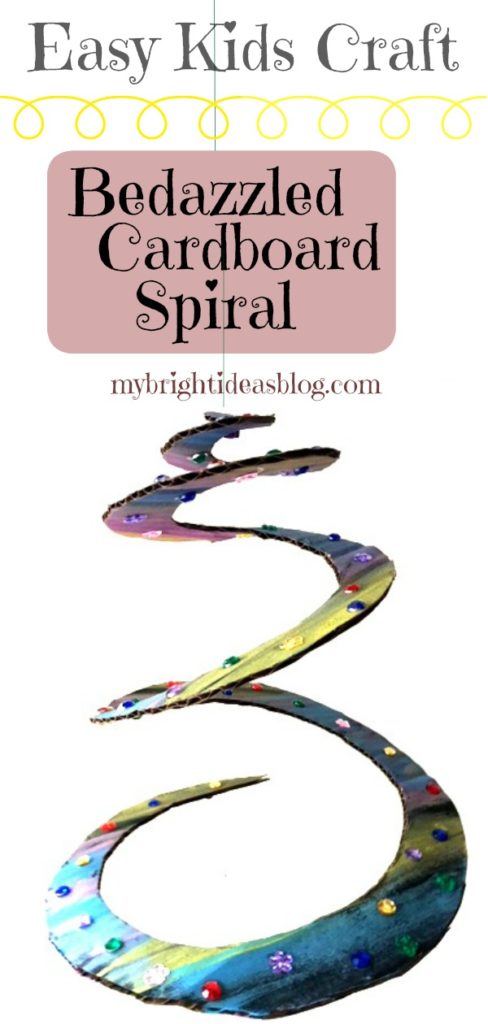
Cardboard Spiral Craft – Easy Kids Project
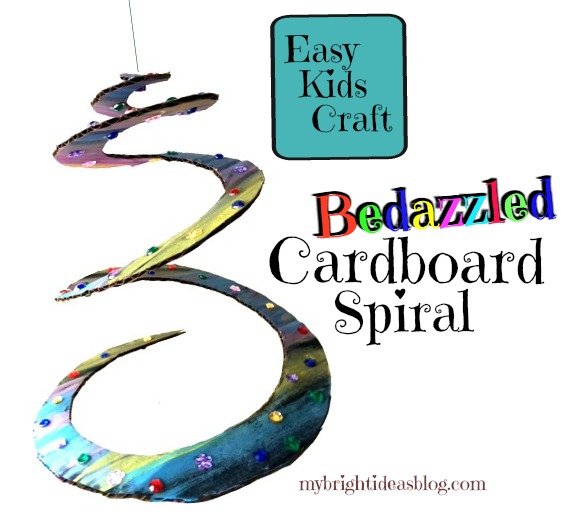
How to Make a Spinning Cardboard Spiral-Easy Craft!
This idea will be a hit with kids as young as toddlers to pre-teen. It’s likely you already have all the craft supplies in your cupboard which makes it the perfect anytime craft.
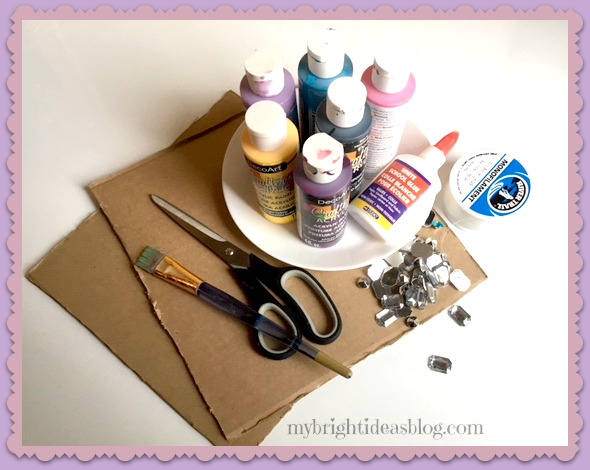 You will need:
- cardboard
- scissors
- glue
- paint
- paintbrush
- gems or stickers
- yarn or fishing line
- one pony bead or small bell
- pencil
- plate to trace the circle
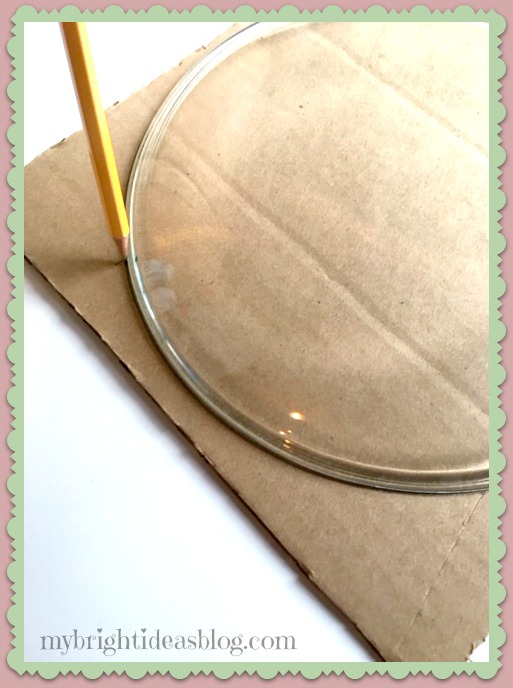 I started with a square piece of cardboard about 11 inches x 11 inches (27cm x 27cm) wide. Trace a 9 or 10 inch plate (20cm wide plate) on the cardboard for a perfect circle.
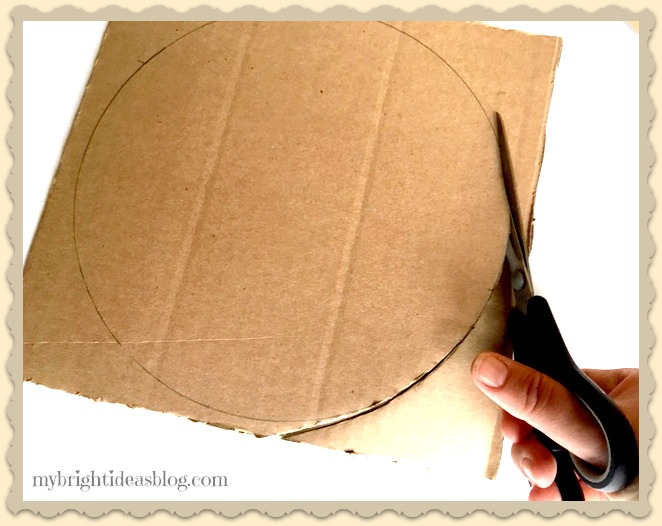 Cut the circle from the cardboard. This is not a job for the little kids. Big scissors and strong hands are needed for this part of the project.
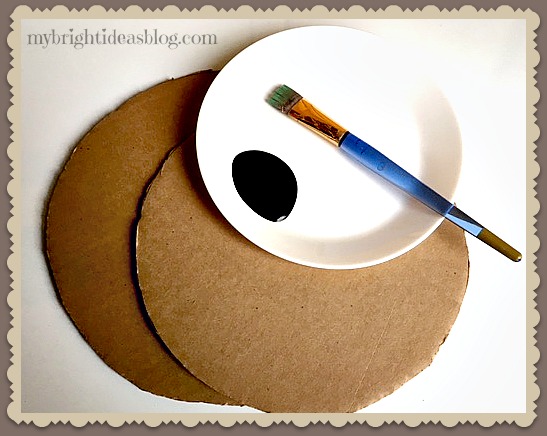 So that the brown cardboard doesn’t show through the I painted a black base coat.
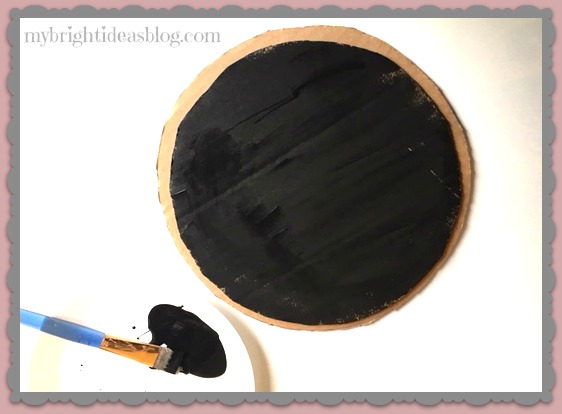
Paint both sides of cardboard and allow a few minutes for this to dry.
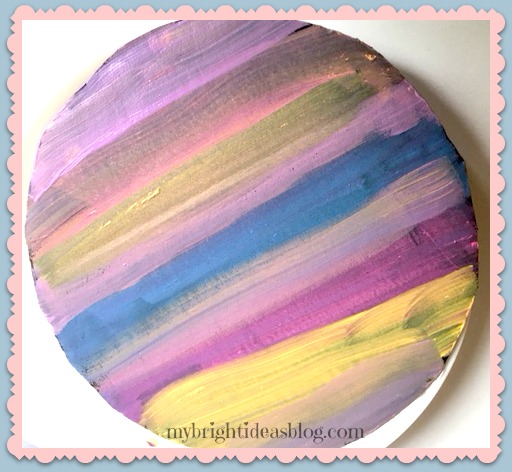
Now paint over the base coat with what ever design or colors you want. You will need to paint both sides again. Allow a good 10 minutes for this paint to dry before moving on to the next step.
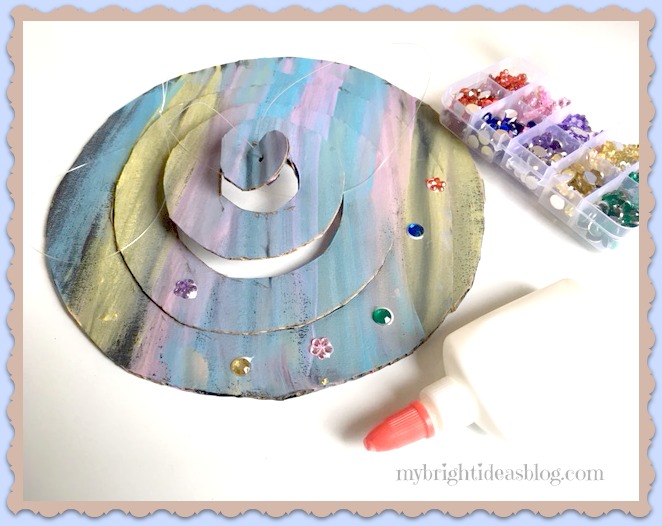
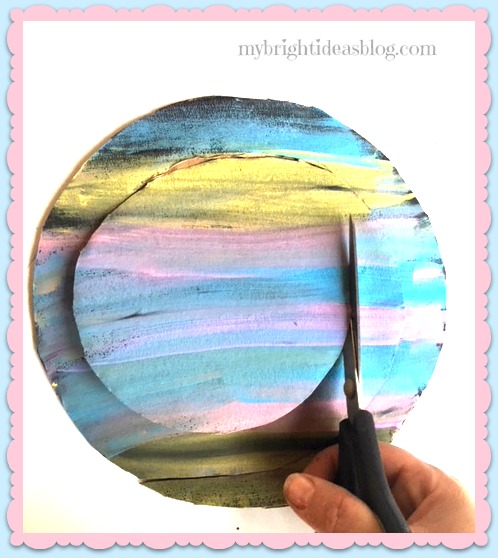 Again, the strong hands and big scissors are needed to cut a consistent spiral in the cardboard. Begin cutting around the circle 1/2 inch (1 cm) wide.
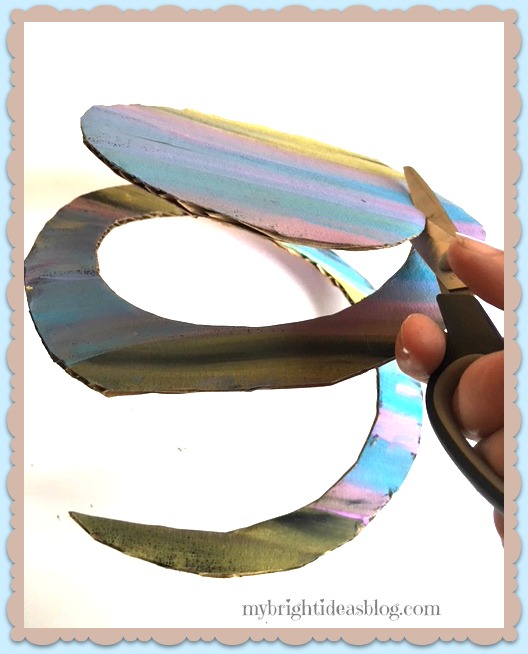
Keep on cutting in a circle until you get to the middle.
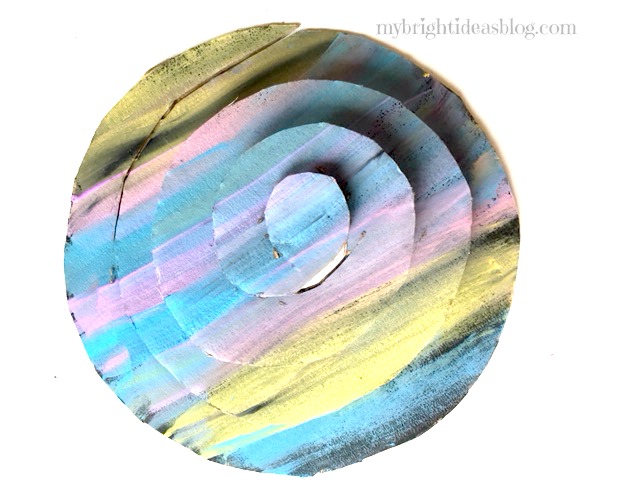 Voila! The spiral is complete.
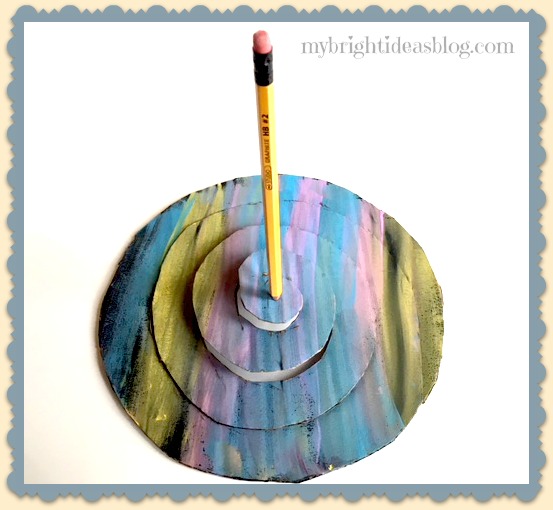 Use a pencil to poke a hole in the centre of the cardboard.
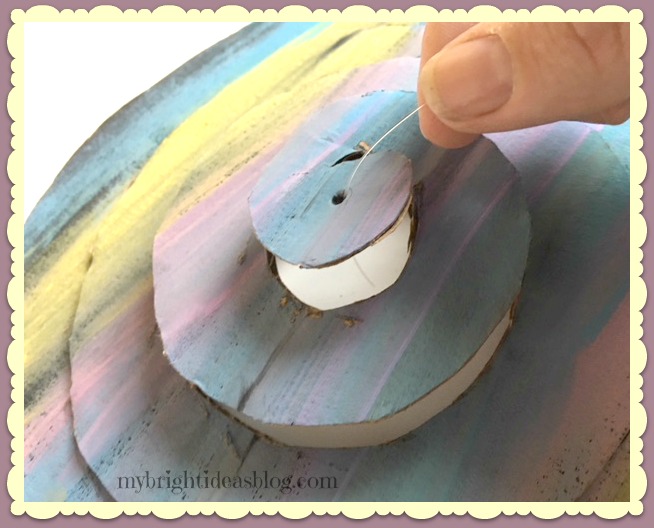
Loop some yarn or fishing line through the end. To make it spin the key is to loop a pony bead or a tiny bell under the hole and then pull the line back up through the hole.
I didn’t take a photo of this step so here it is afterward to show the pony bead. The fishing line is simply looped through the cardboard and then the bead and back out through the hole again.
This step allows for it to spin better than if you just tied a knot in the cardboard.
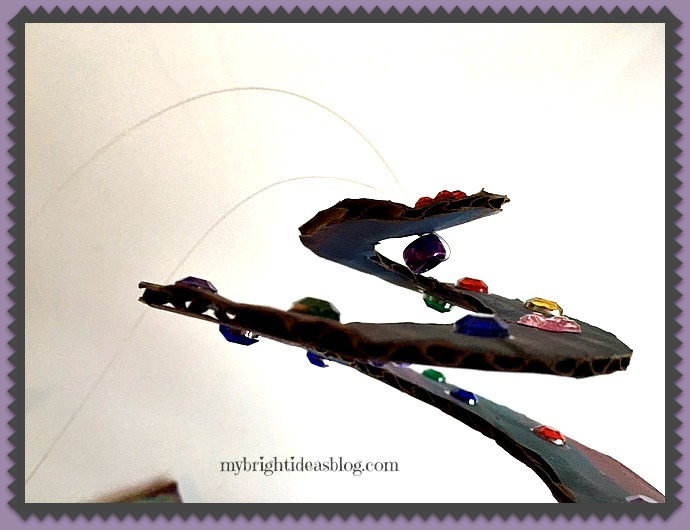
BEDAZZLE TIME!
Bedazzle: (verb) The art of taking ordinary things and making them EXTRAORDINARY by adding sparkles, rhinestones, glitter, stars, beads, etc.
This is the fun part!
Gather your gems, rhinestones and glue to decorate the spiral. The little box of gems in the photo above is from Dollar Tree for $1.25 – it looks small but there is enough to last a lot more projects! I love a cheap craft!
For toddlers you could use shiny stickers instead. Glitter glue would also jazz this up and hide some of the unintentional globs of glue that may end up drying on the project.
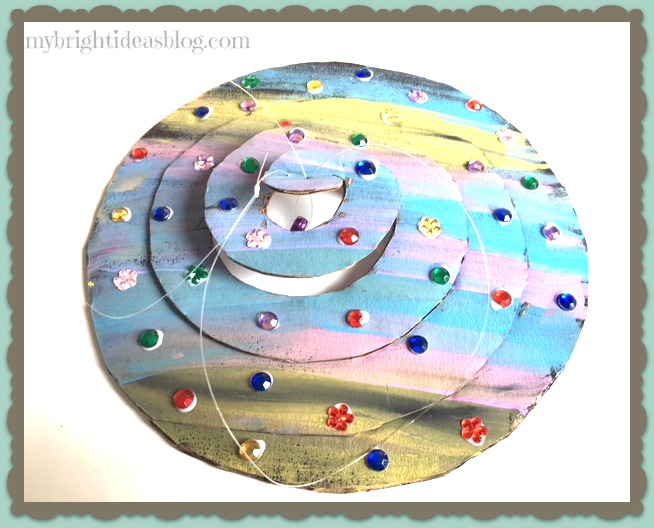
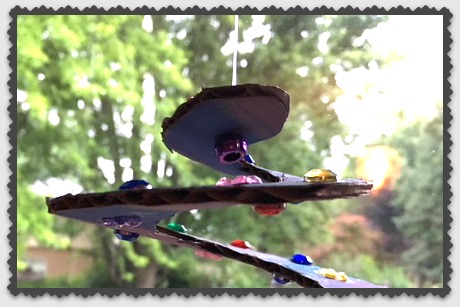
After the first side is dry, flip it over and repeat on the bottom side. This spiral is going to look great no matter what angle you are looking at it.
Allow it to fully dry.
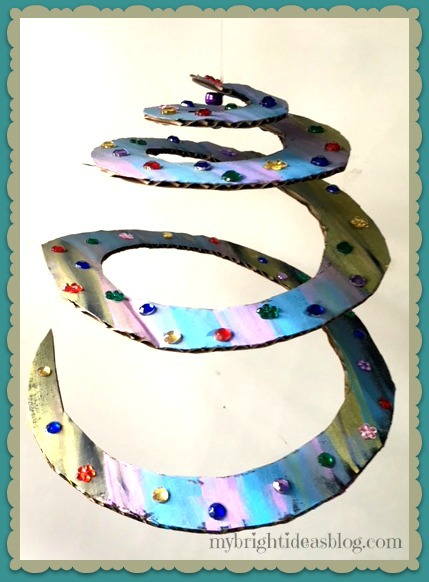
And you are done! Hang the spiral by taping the end of the string or line to the ceiling so it can spin. I used an S hook to hang it from a curtain rod.
Remember to Pin this on Pinterest!
Toilet Paper Roll Crafts-Use your loo roll tube for easy Crafts!
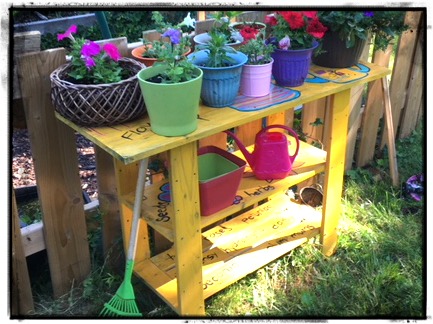
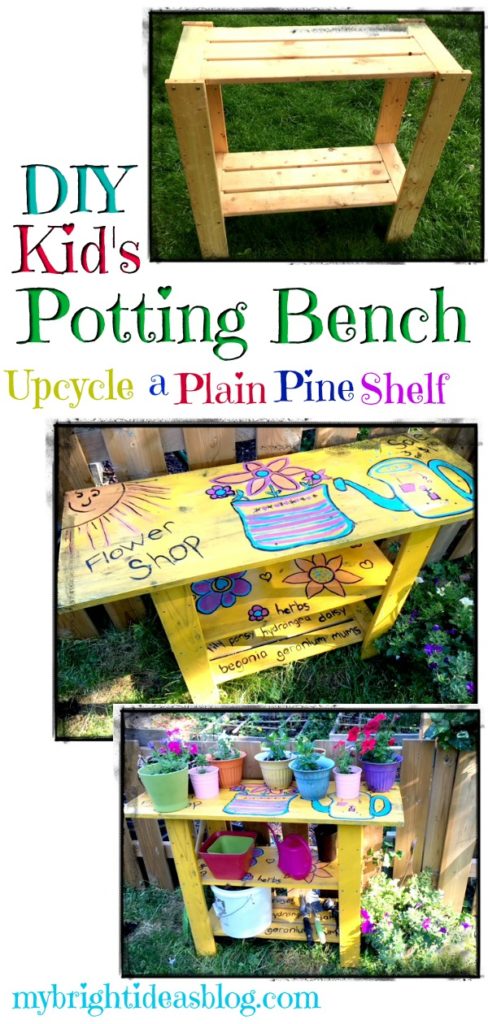
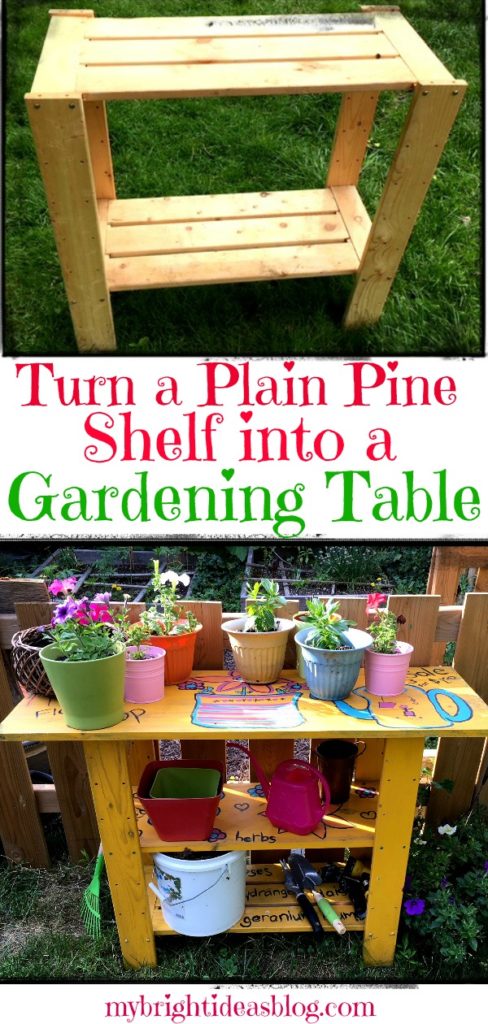
Make a Garden Work Bench / Potting Table

This is an easy DIY project for the inexpensive wooden pine shelves in the back of your closet that you’ve had for years. I was staring at mine thinking about getting rid of this plain old shelf and then I thought what if I added another shelf, made the top bigger and painted it a bright color and turn it into a garden potting station for the kids.
I have another one that I could turn into a lemonade stand using the same idea. I’ll let you know if that turns out!
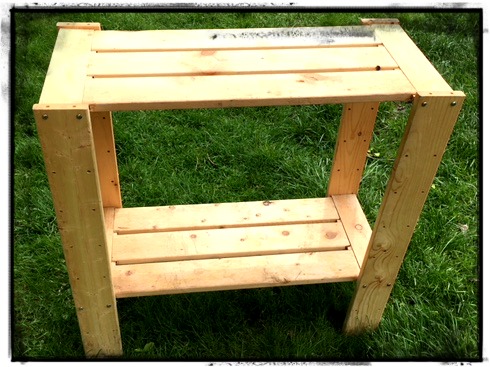
This is actually an old project I made years ago so some of the details are a bit foggy. This shelf was holding our camping gear. Its really only good to hold very large things on the bottom shelf because it doesn’t have a middle shelf. It turns out that its pretty easy to add a shelf by having a board cut to size.
You will need:
- a bare wood pine shelf
- pine cut down to 12 x 30 and 16 x 42
- 16 x 1 inch deck screws and a drill
- sandpaper
- outdoor paint
- paint brushes
As I said this project was done 3 years ago so I’m going by memory on the details.
The middle shelf on mine measured 12 by 30 inches (30 by 76 cm’s) …. Your shelf may not be exactly the same so measure yours before having the shelf piece cut.
The piece on top is 16 by 42 inches (40 by 107 cm’s). Hopefully you have some wood scraps you can use in your garage left over from another project. If not they will cut the boards for you at the hardware/lumber store.
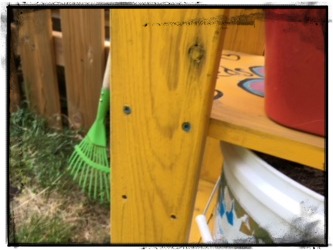
The boards will need to be drilled in place. I used the pre-drilled holes and attached the middle shelf with 2 deck screws on each corner. I put 8 deck screws in the top of the table to attach it to the vertical boards of the shelf. The nice thing about a work bench is it can be a bit rough-so I didn’t sink the screws and fill the holes.
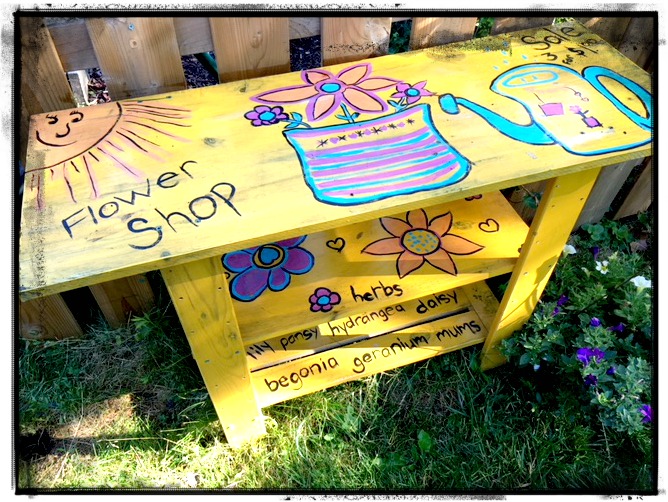
Next the entire shelf will need to be painted. Our shelf is outdoors all summer and is stored in the garage for the winter. I used left over paints in my basement that were meant for other projects. The bright yellow paint was a miss-tint that I bought for $8.00, several years ago. It needed a lot of stirring before I could get started. Follow the instructions on the paint tin.
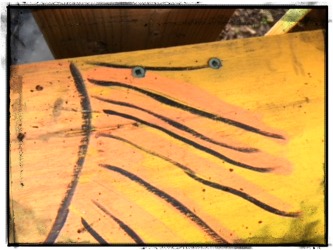
After I had done 2 coats of paint we were able to decorate it. The girls love to spend time playing flower store! When I purchase new flowers and vegetable plants at the garden centre they gather all the hand tools, seeds and the new plants and play at shop keepers for hours. I finally bought them some fake flowers from the dollarstore for their play store so I could get mine into the garden!
This year they were really involved in the planting of the newly purchased plants and not just pretending to sell them. Their planters are doing really well! We have to keep an eye on our potted plants since a few squirrels that are digging around
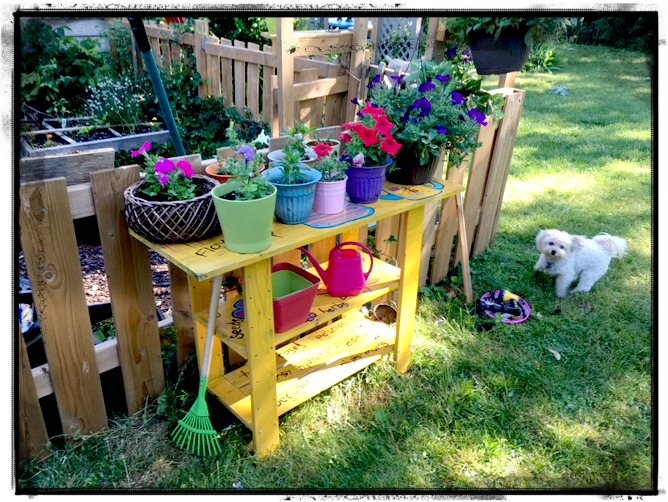
Gemma our Yorkie-Poo snuck into this photo. This photo shows the fence around our vegetable garden. This keeps the dogs from digging in the dirt. There are also some nice bunnies in there who nibble on the lettuce in the square foot gardens.
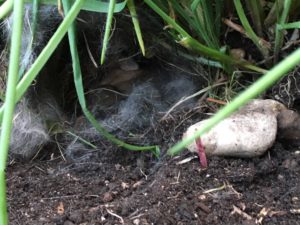
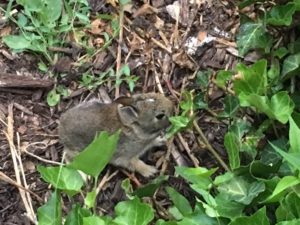
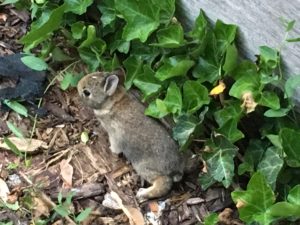
We have our own Floppsy, Mopsy and Cottontail!
Enjoy making yourselves a work bench. Come to think of there is lots we can do with these bare bones shelves. Next on my to do list might be a lemonade stand….
Enjoy your projects, til next time!
…
Plant Puns on Painted Potted Flower Pots – Adorable Gift Idea to Make Them Smile!


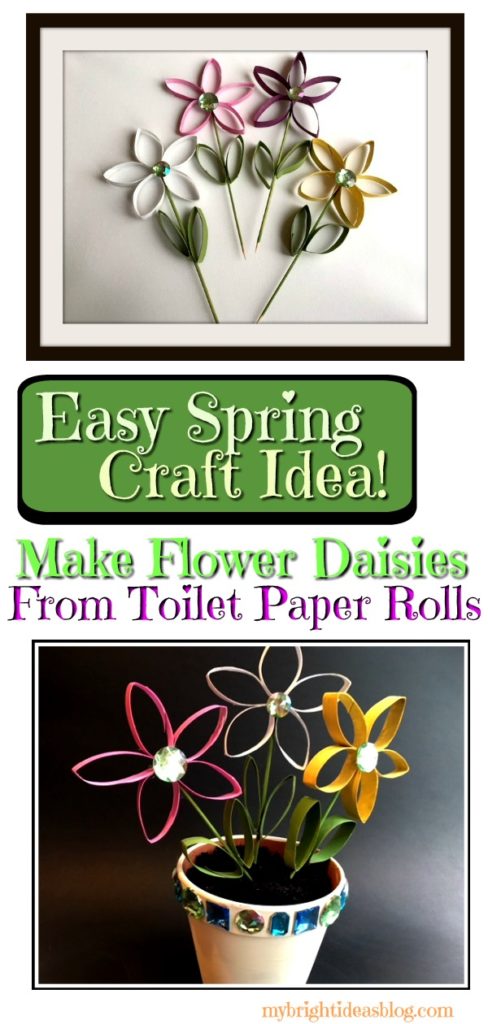
How to Make Spring Flowers Craft From Painted Toilet Paper Rolls
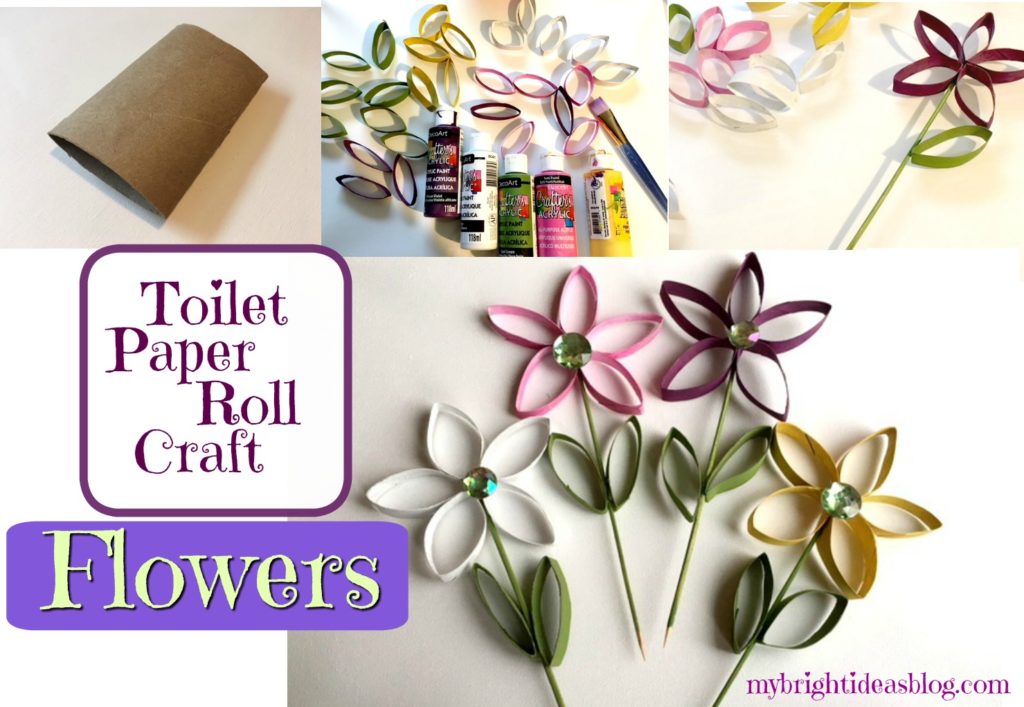
Looking for something to do with all those toilet paper rolls that your hoarding? Or am I the only one who doesn’t toss them directly into the recycle bin? Well all it takes is one toilet paper roll to make 5 flower petals and 2 leaves.
What a nice idea as we welcome Spring…ignore the fact that I’m posting this in mid April and we are shut in from an ice storm. Not to worry, Springtime will be back tomorrow.
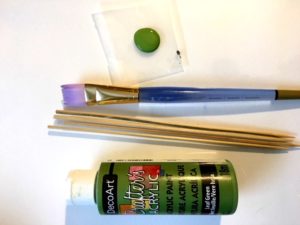
For each flower you will need: 1 toilet paper roll, ruler, scissors, glue gun, craft paint and paint brush. For the stem I used a wooden skewer but for safety sake you could use a popsicle stick. For the flower centre I used a big shiny gem but you could use a pom pom or button.
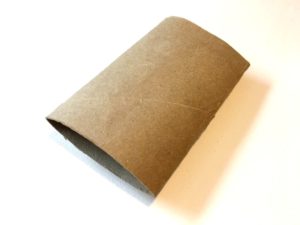
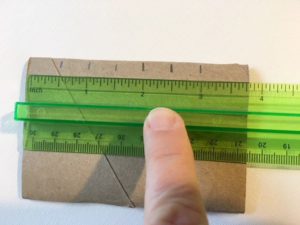
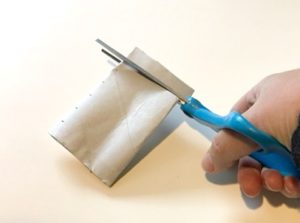
To begin you need to flatten your cardboard roll. Next measure and mark approximately 1 cm or 1/2 inch. It doesn’t have to be exact but we want to end up with it cut into 7 equal pieces.
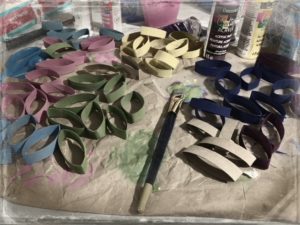
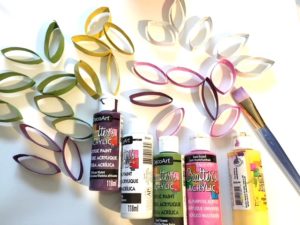
Take 5 pieces of the cardboard tube and paint them all the same color. This will be the flower petals. Paint the remaining 2 pieces green for leaves. I was surprised at how messy you can get trying to paint this. Paint the inside first then the outside. Then paint the stem skewers or popsicle sticks green. As I mentioned I did use skewers but my 8 year old was poking her big sister with it reminding me how dangerous this would be in a toddlers hands. So as a safer option I would choose a popsicle stick. They come in a few sizes-if you can get the long skinny type like they have at Starbucks that’s what I would choose but any kind would work. Now allow everything to dry thoroughly.
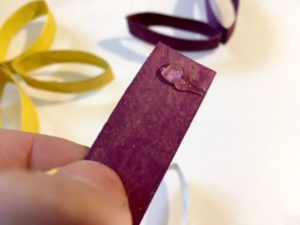
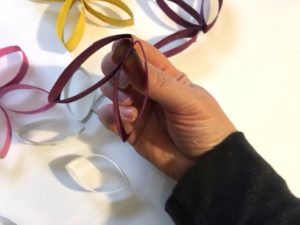
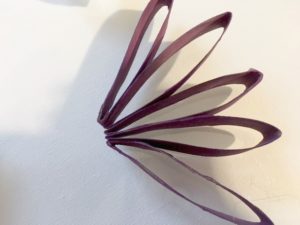
After the petals have had a chance to dry we begin to glue the first two together. Put a dab of glue on the end of one and pinch it with another while it dries. Add a dab of glue to the next one and pinch them together. Add on each one the same way until all 5 petals are glued together.
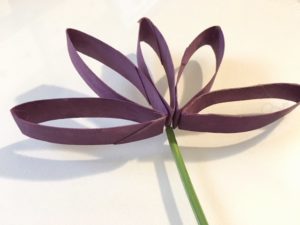
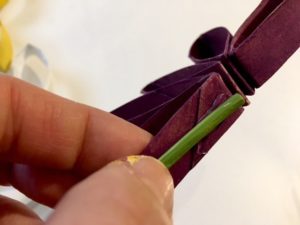
Place the stem in the middle of the petals and add a dab of glue to it. Pinch the daisy petal to the stem. Add a dab of glue on the other side of the stem and pinch the other petal to stem. This will complete the daisy shape. Put a dab of glue on the stem and place on the leaves-one at a time.
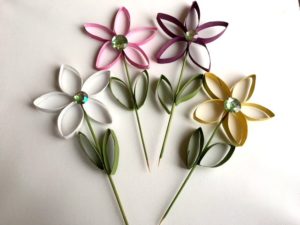
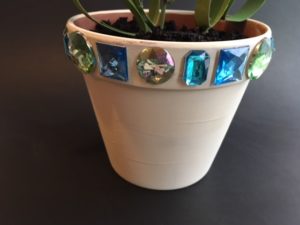
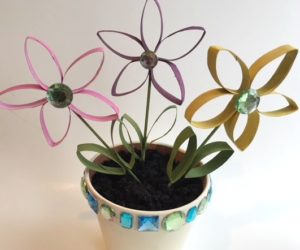
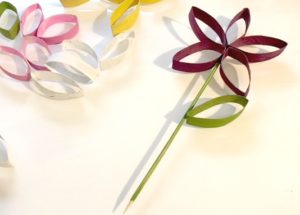
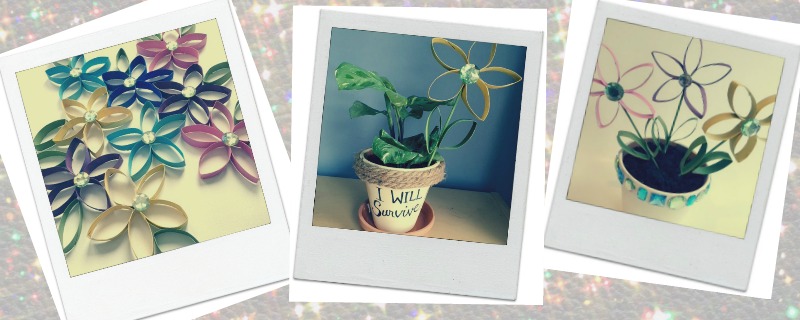
To finish it off glue the gem (or button or pom pom). Now you can pop it into a plant and give it away as a gift. I had extra gems and a flower pot handy so I hot glued the gems all around the flower pot too. It was so easy that I am in the process of making a bit of wall art out of the daisies.
Here is another post using toilet paper rolls.
Toilet Paper Roll Crafts-Use your loo roll tube for easy Crafts!
…

Nature Craft – Perfect for Earth Day Activity – Clay Imprints with Plants and Flowers
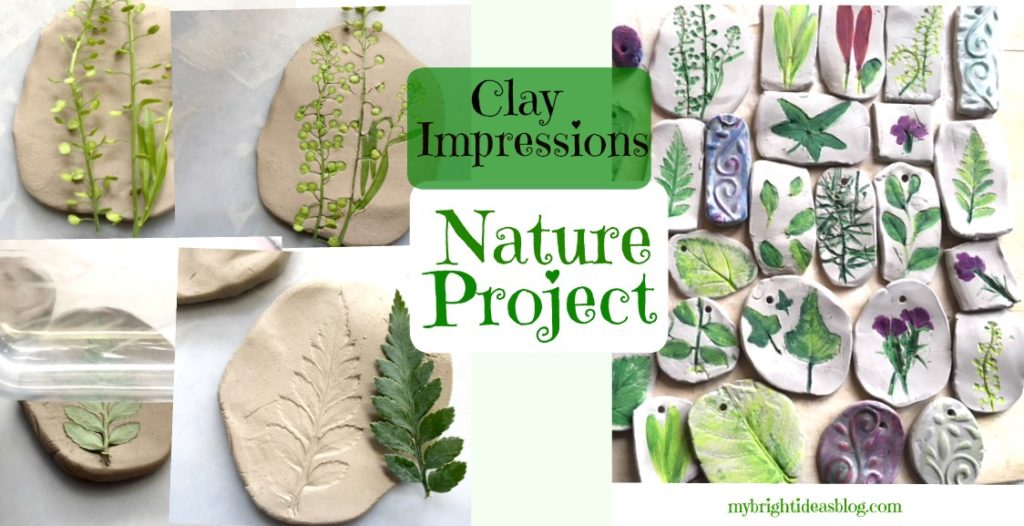
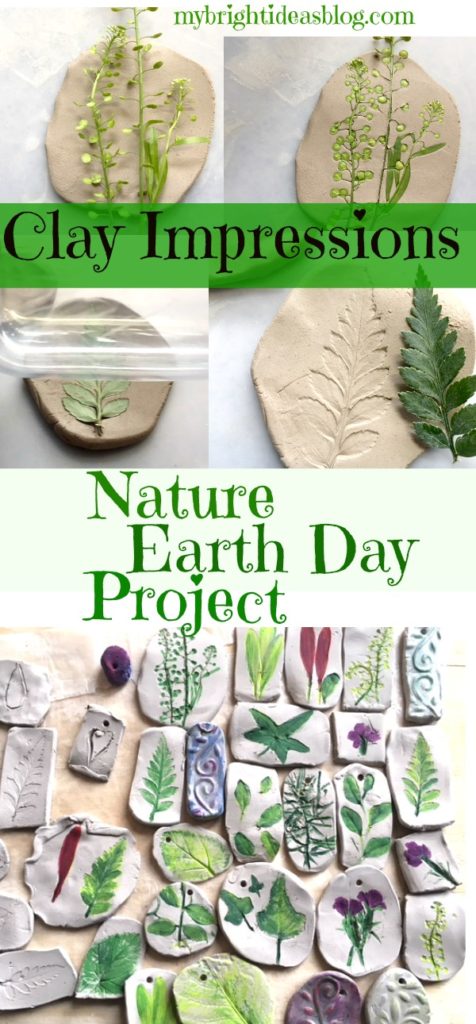
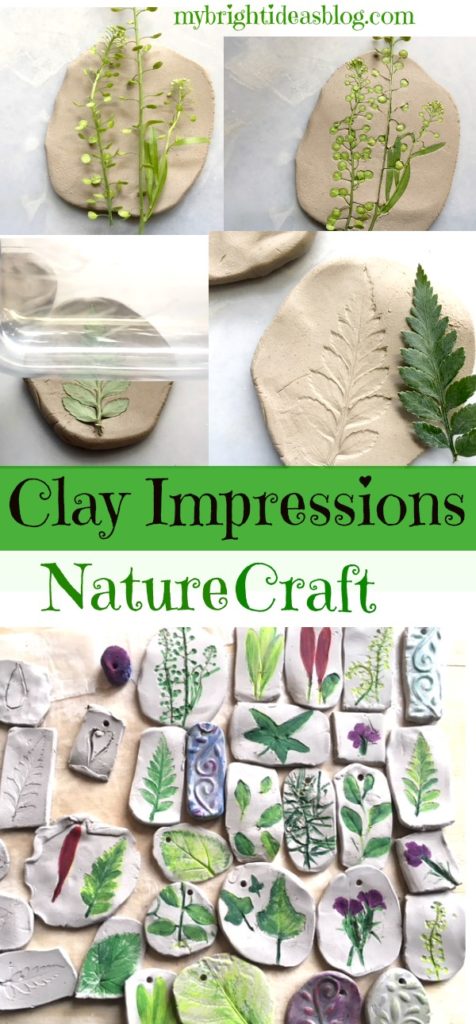
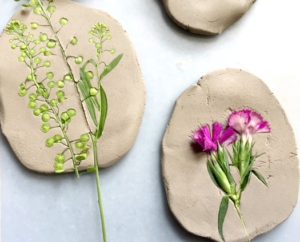
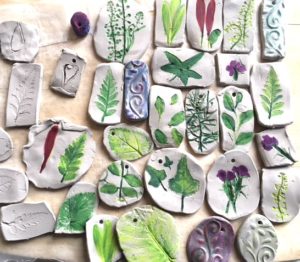
I wanted to blog about a natural craft for earth day and discovered clay impressions of plants and leaves and flowers. What a great idea! The only problem is that its just the very beginning of spring and the garden is ugly. Except for a few crocuses there is nothing nice around my home. I popped into the florist shop (Regency Florists) nearby and asked if they had any flower scraps like a bit of fern that we could use for this craft project. The lovely young lady made a little bouquet of scraps for free! How lovely is that! We are going to take her one of these lovely creations as a thank you gift.

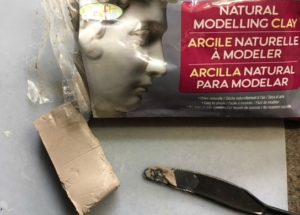
Supplies
So you will need CLAY and a very smooth surface to work on. If you have a clear bit of plastic table cloth or a very smooth kitchen cutting board-either will work. You also need some flowers or plants, a rolling pin or water bottle that has smooth sides. Later when the clay is dry you may want to use some craft paint to add the green or flower color. Also if you want to turn it into a mobile or wind chimes you might need a chopstick or skewer to poke a hole in it.
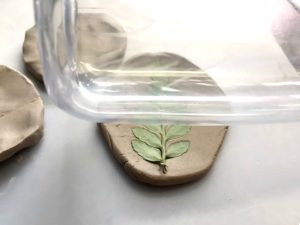
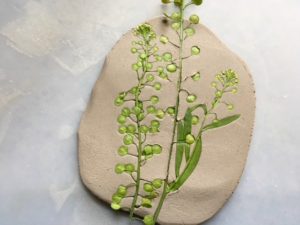
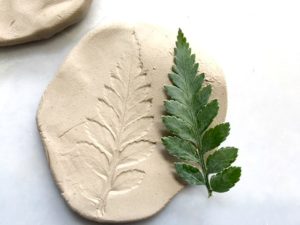
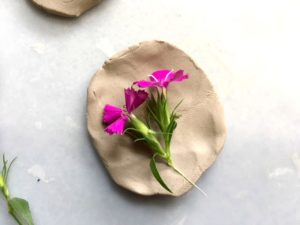
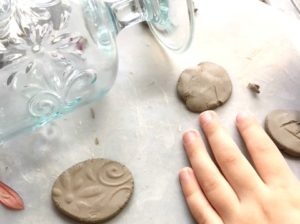
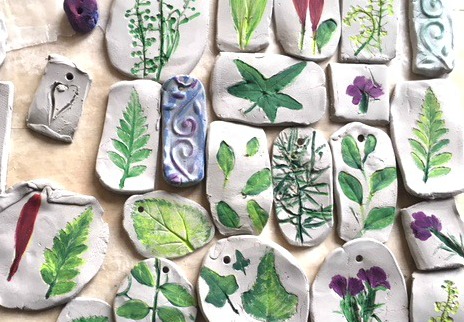
Our clay is from the dollar store craft aisle. We just slice off chunks and made different shapes with it. Then we rolled it flat. Next we place a bit of plant or flower onto the clay and rolled over it gently with a smooth water bottle. Pull the plant off the clay and admire the details now imprinted in the clay. If you want to add a hole-this is the time to grab your kebab skewer or chopstick.
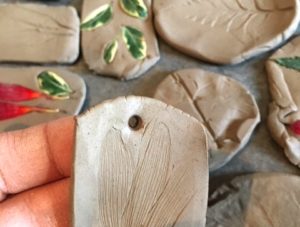
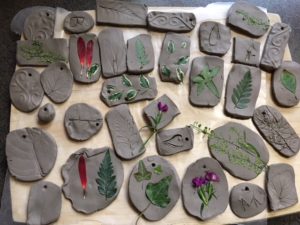
Allow the clay to dry overnight. It should feel completely dry before you paint it. I just used regular craft paint.
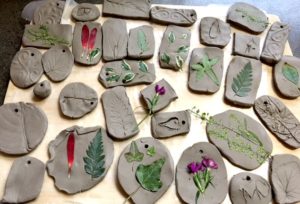
This would be a lovely gift from a child to a teacher or grandparent. Its a great craft for all ages though. I highly recommend for adults to give it a try. Its very therapeutic! This project has a lot of possibilities so let your imagine go wild. Find things around the house with interesting textures to imprint the clay.
Have fun!
…