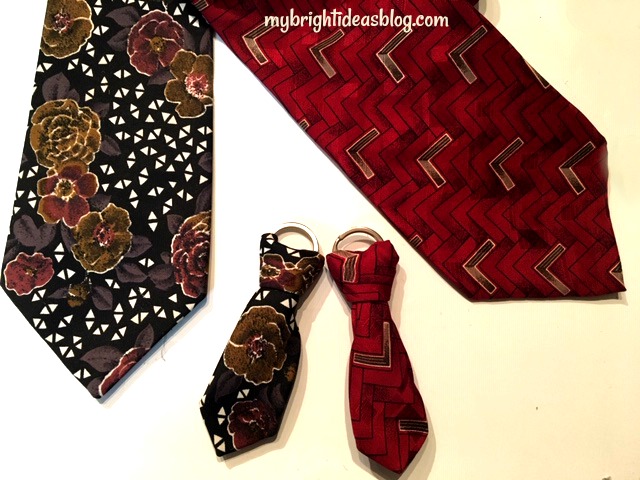
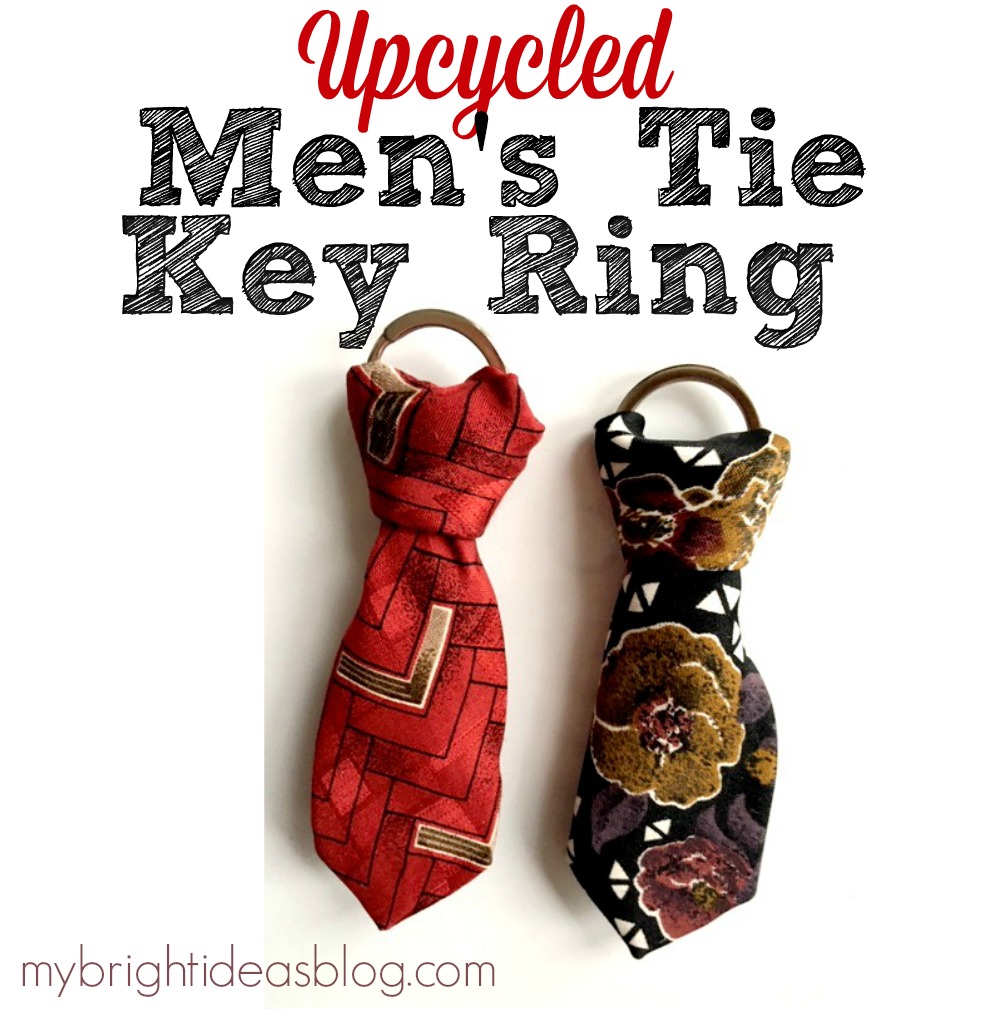
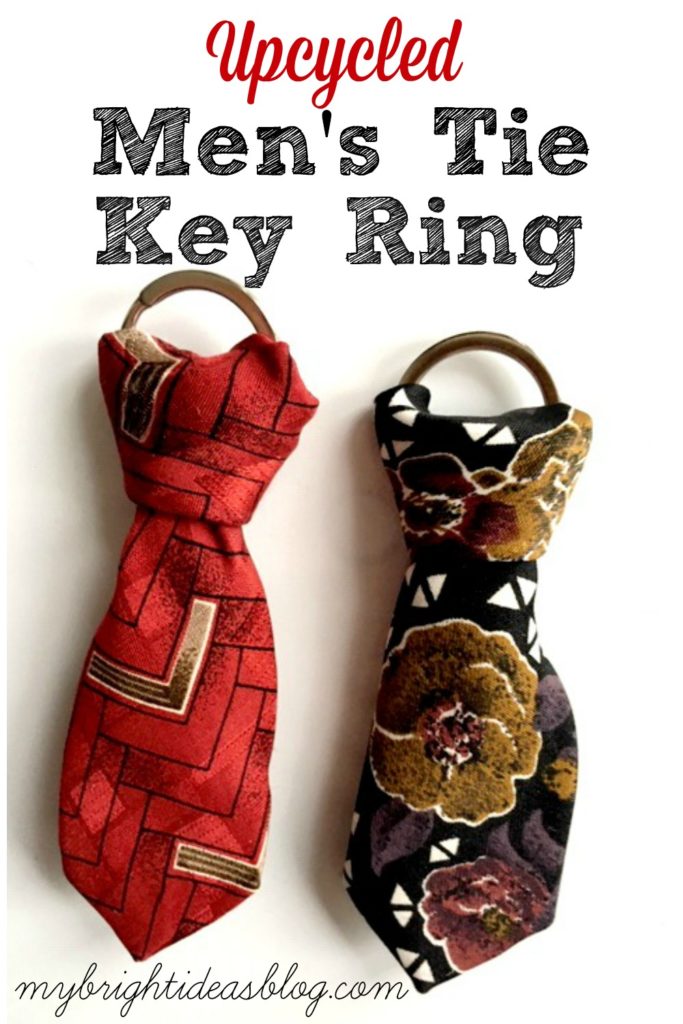
Looking for a fun way to upcycle a men’s tie? Here is an easy and super cute idea to turn it into a key ring.
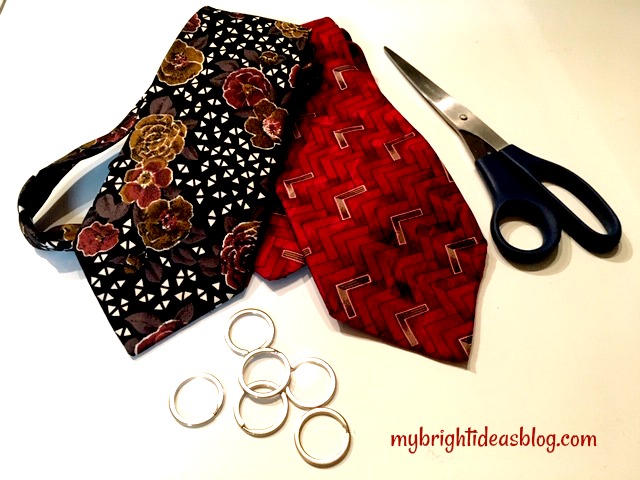
You will need:
- an old tie
- a key ring
- scissors
- needle and thread (or glue)
- ruler
My hubby happens to have a lot of ties so he was willing to sacrifice these two ties for my project. Thanks dear!
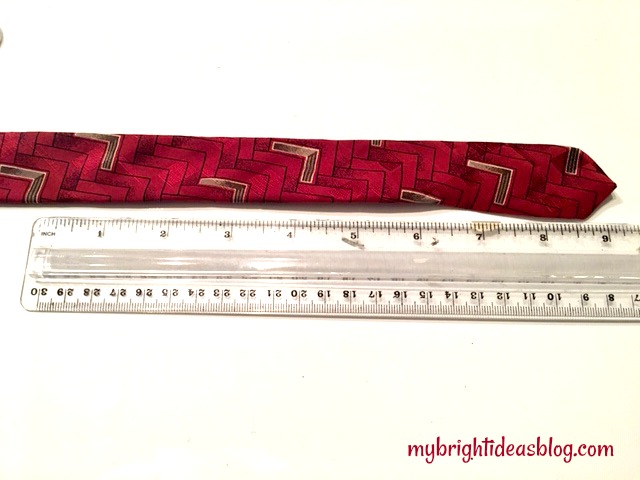
Cut the tie approximately 9 inches long.
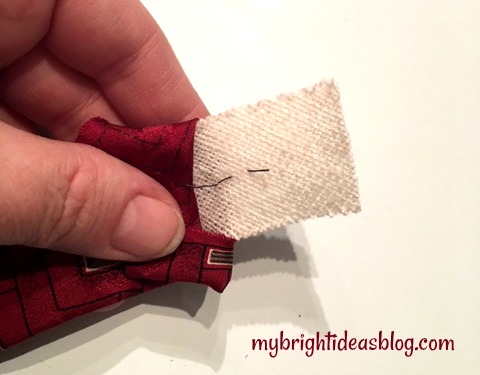
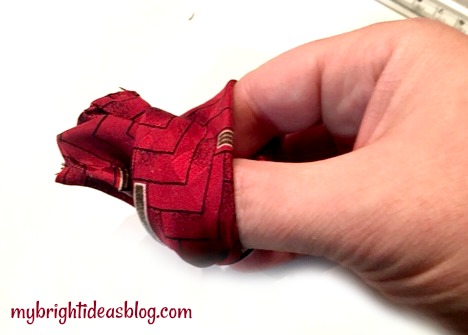
At the cut end, tuck the fabric out of the way and trim 1/2 inch (1cm) off interfacing that is inside.
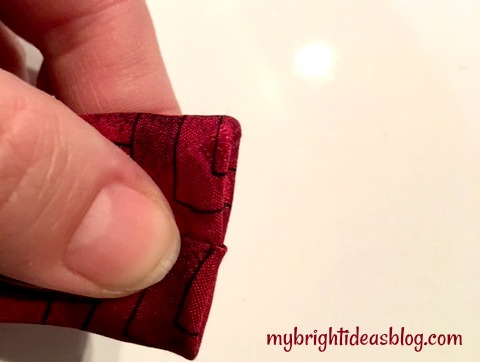
Fold inside and tuck the fabric inside. You could sew or glue this end to make a clean edge.
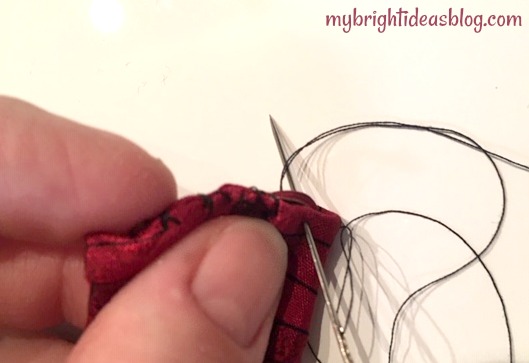
I sewed it with just a few stitches.
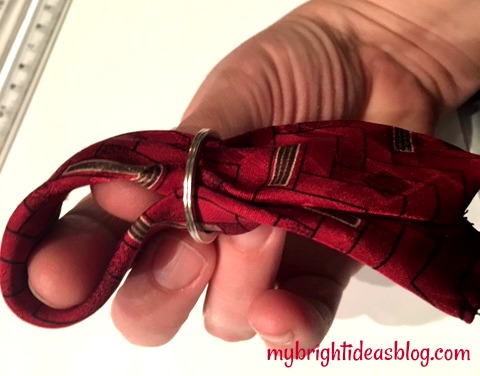
Next, fold the mini tie in half and slide it into the key ring.
Pull the ends through the loop to form a knot.
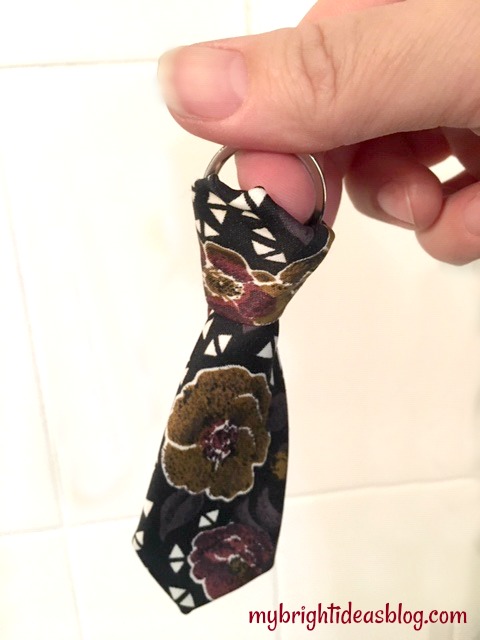
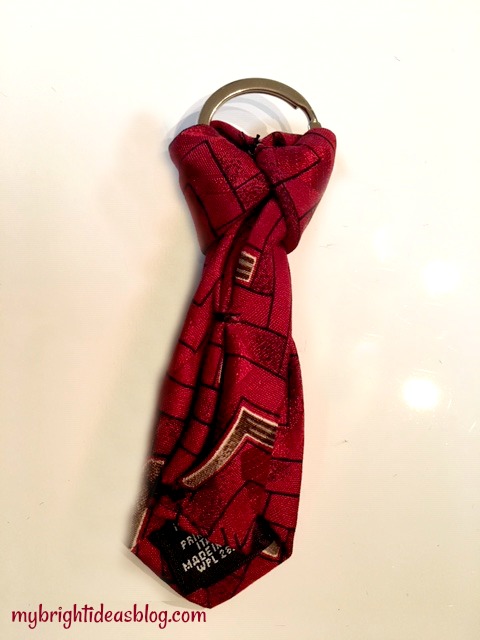
Pull the knot tight by tugging on the key ring. It looks like a proper tie knot without actually having to know how to tie it. The pointed end is perfect for the size of the key ring.
This is the back side of the tie. I added a few more stitches so the tie wouldn’t shift around, but that is optional.
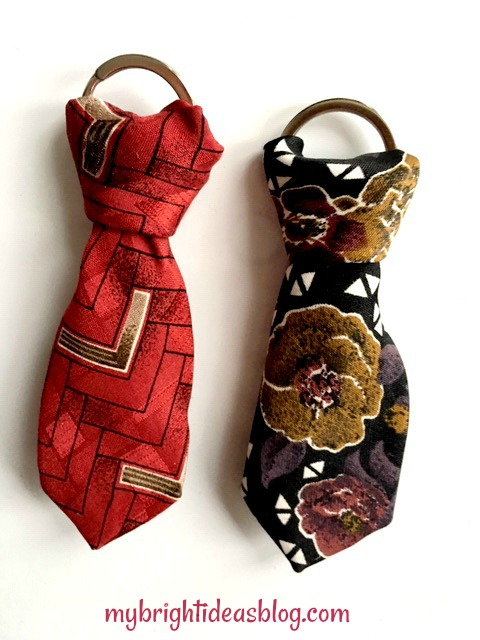
How cute is this?!?
Now there is still half of a tie left so I’m going back to Pinterest for some more ideas for tie upcycling. I will let you know how that goes!
…
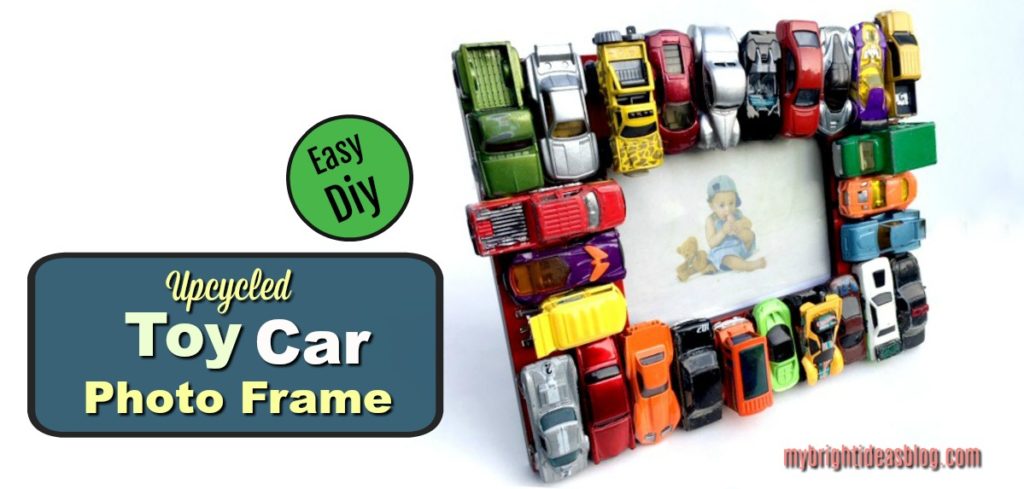
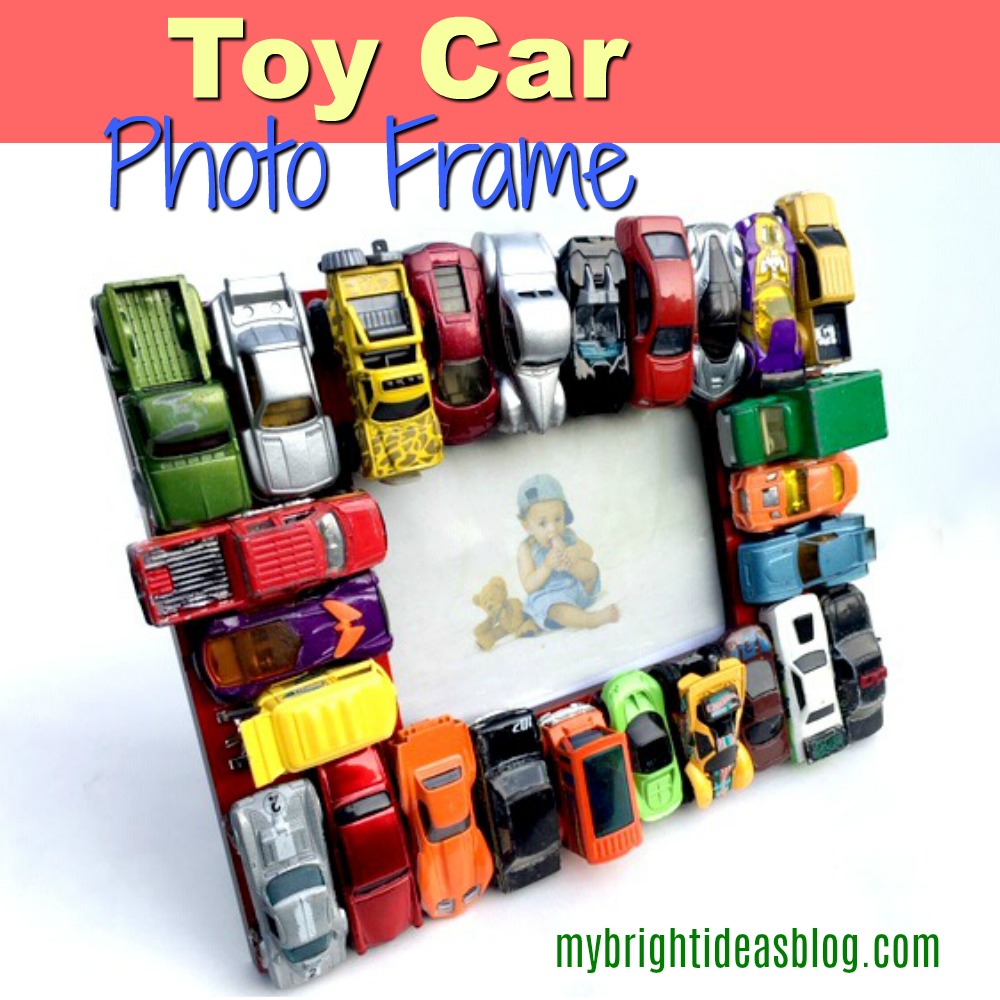
Upcycled Frame with Toy Cars
Ready for a super easy craft? You might have all of the supplies at home. If you don’t you can easily pick them up at your local thrift store.
To make an upcycled toy car photo frame you will need:
- toy cars
- picture frame
- spray paint
- hot glue gun and several glue sticks
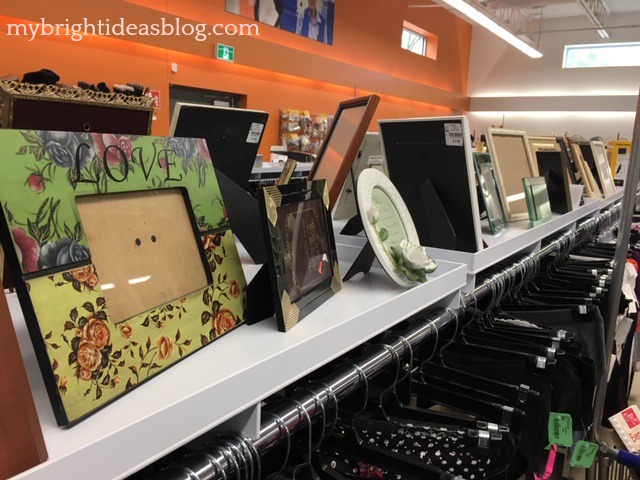
I wandered through a newly renovated Goodwill and that’s when I this idea hit me. Find a flat frame and glue something to it! Yeah! The frame I chose was really out of date with its flowers “Love” on the top. I thought it would be the perfect size to fit a parking lot of cars.
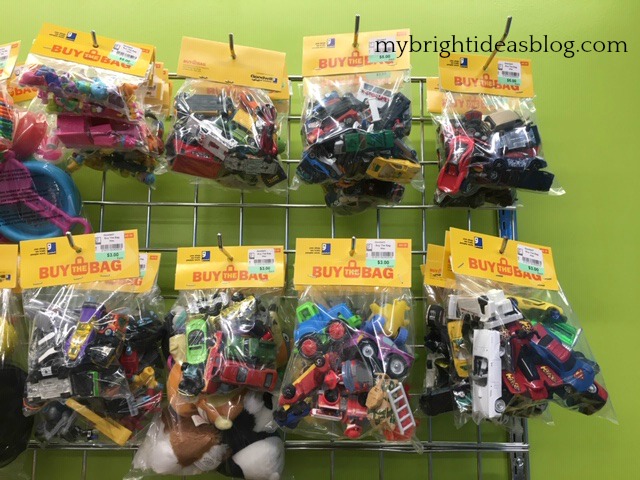
Then I went to bulk toy area and looked at the bags of cars! I chose 2 bags of cars for $3.00 each.
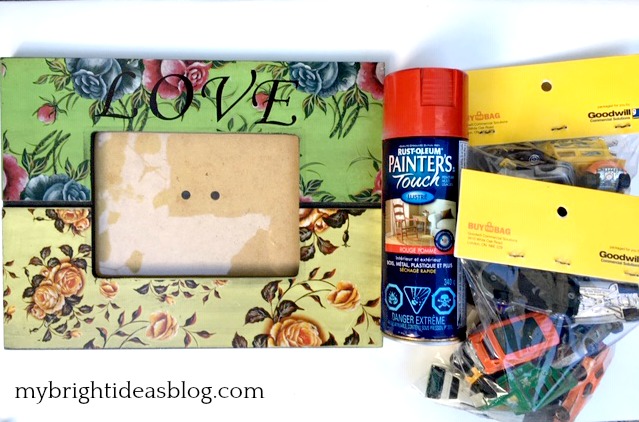
I brought everything home and admired it all….then located some left over spray paint in my painting stash. You don’t need much-so a bottle of spray paint left over from another project is perfect. I had a bright red Rustolium Painter’s Touch called “apple red”.
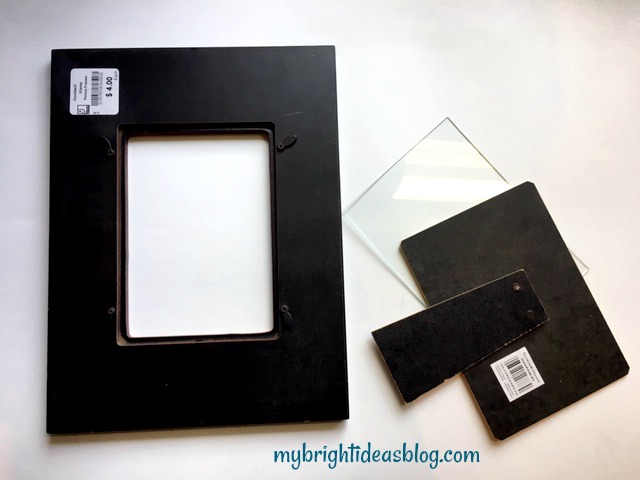
Take the backing and glass off of the frame and wipe it down with a damp cloth.
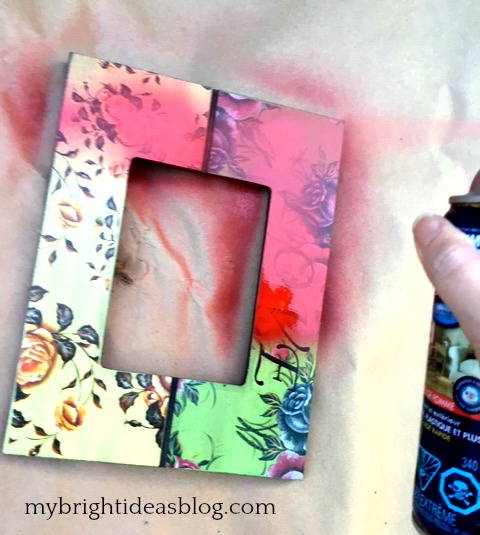
Shake up your can of spray paint and lay down some cardboard or news paper. Always spray paint outdoors on a day where there is barely any breeze.
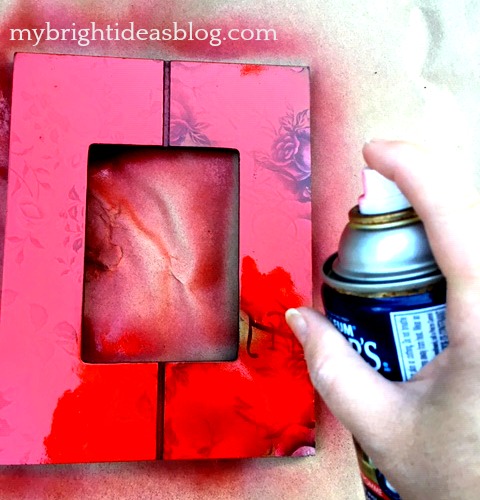
Follow the instructions on your paint as to when to do a second coat. The pattern on this frame wanted multiple coats. It is black on the sides and back so I just spray painted the front. It wasn’t perfectly covered with 2 coats but since we are covering it with cars I didn’t bother with a third coat.
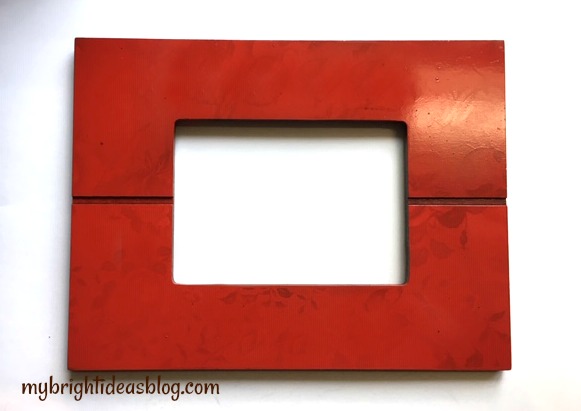
Allow it to fully dry before you begin the next step. I let it dry overnight. You can use that time to wipe down your model cars if they are dusty or sticky.
Now the fun part!
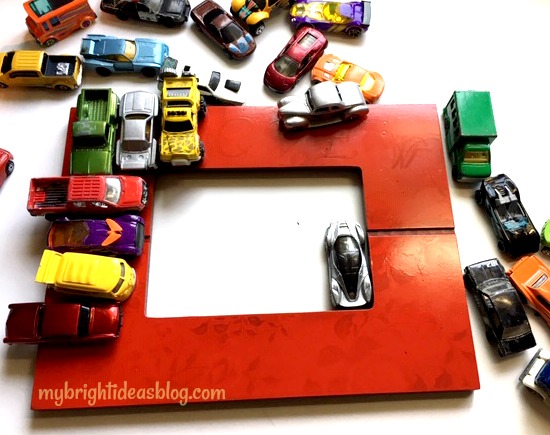
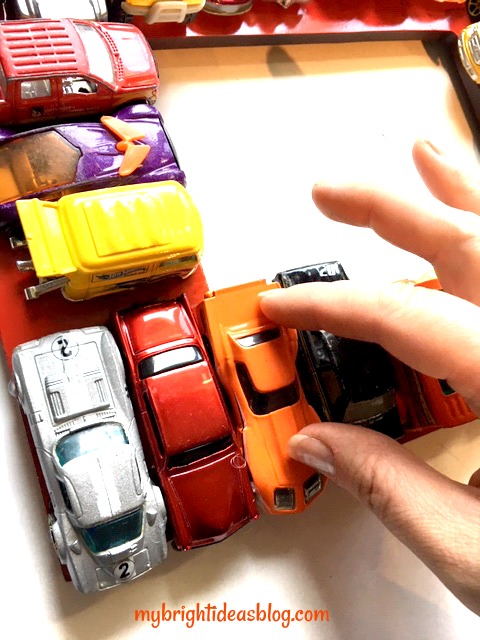
Arrange all the cars around the frame. I used 26 cars in total and would you believe my goodwill bags had 27. If your frame was narrower you could have them hood to bumper around the perimeter of the frame…like a traffic jam. This wide frame was a perfect for my parking lot.
Watch for variety in color as you place the cars around the frame.
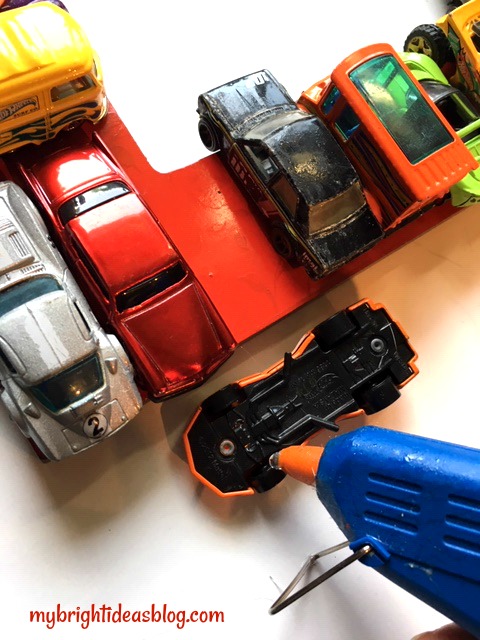
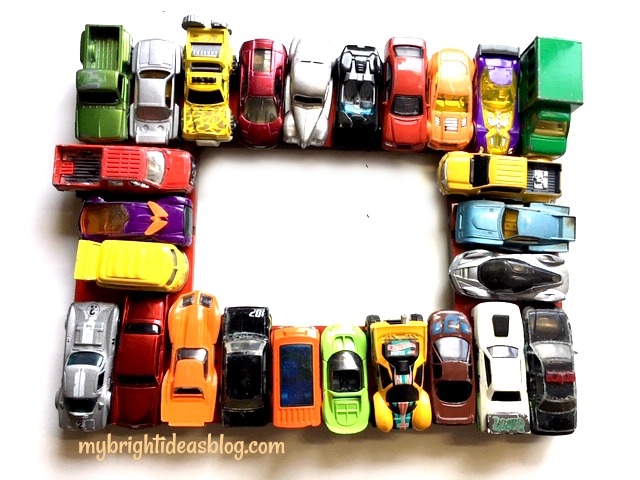
Next, you are ready to glue the toy cars onto the frame. Place a dot of hot glue on each wheel. These will be part of the car making contact with the frame.
Put the car back in its place and press firmly. After attaching the toy cars and trucks all around the frame check each one again to make sure that they are secure.
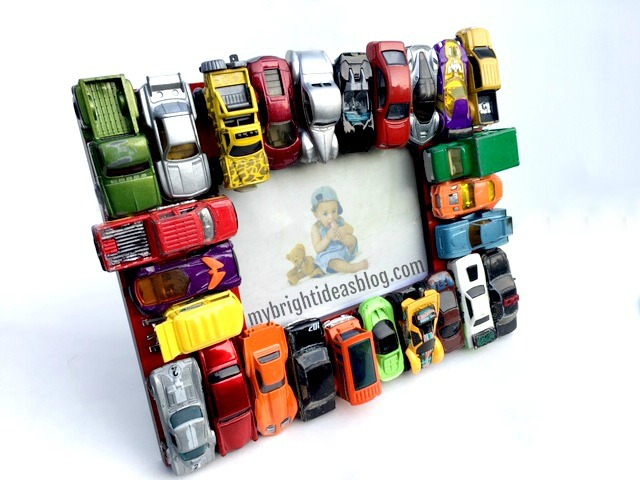
Since this frame will be sitting on a shelf I made sure that the bottom of the cars lined up closely on the bottom with no overhang. Otherwise it could be wobbly. Also, I should mention, that the frame is actually really heavy with 26 cars on it. Put it in a place where it won’t get knocked and fall on a toddler.

That is all there is to this project! Have fun!

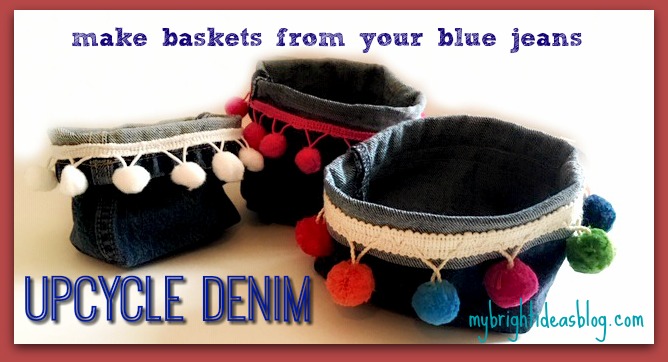
Upcycle Denim – Decorative Baskets made from Jeans
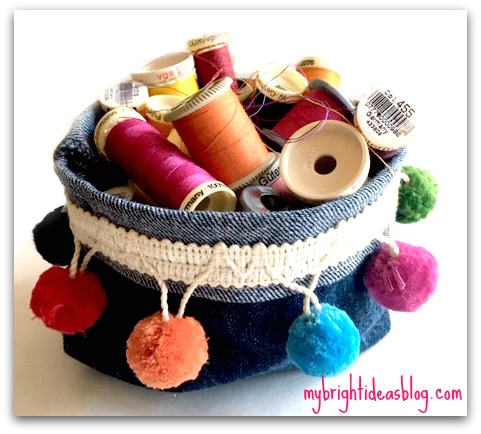
I’ve been working on another denim upcycle. If you have some blue jeans to cut up for an upcycle, you can turn it into a basket for your desk or craft area.
You will need:
- old jeans (I used kids jeans for a narrow basket)
- scissors
- trim
- sewing machine (or needle and thread)
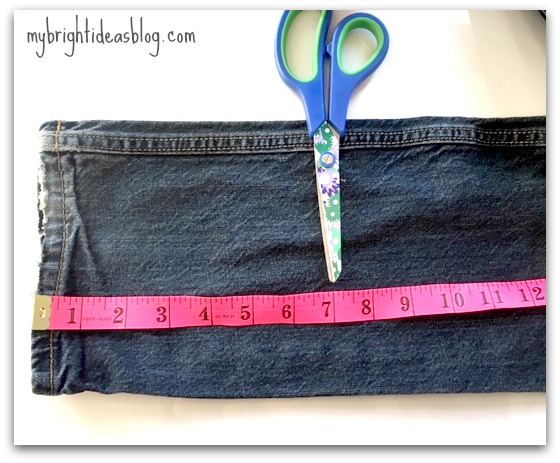
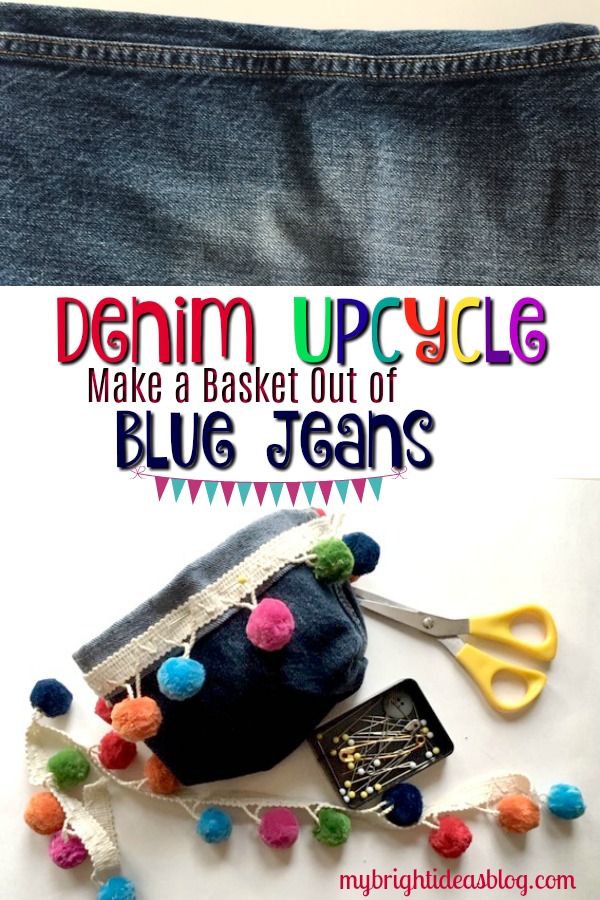
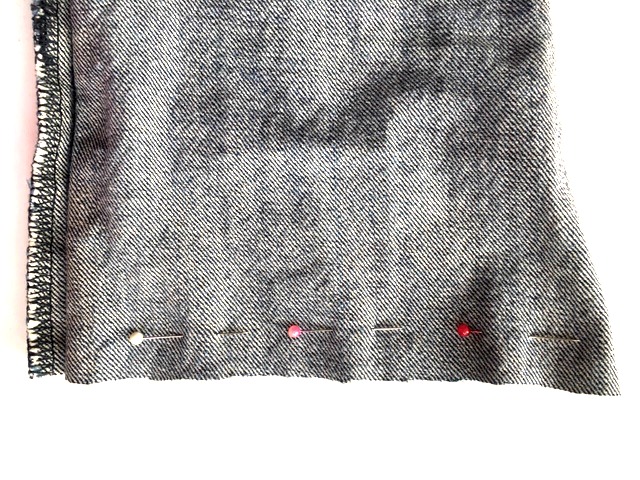
First of all, I cut the jeans off around 7 inches from the bottom. I don’t mind the rough bottoms as long as the jeans are clean before you start. I think the frayed bottoms look good too!
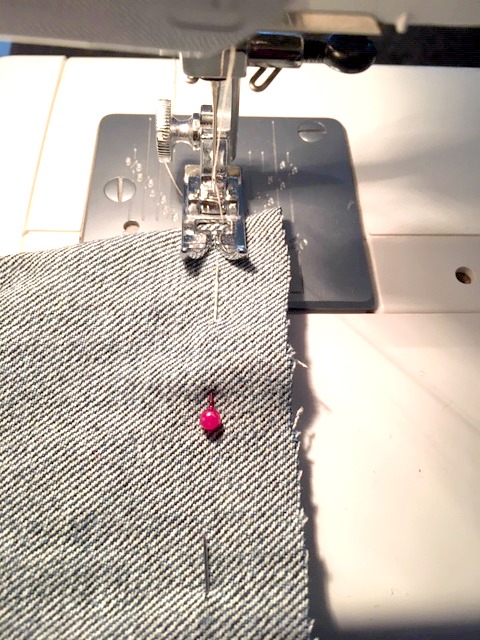
Turn the piece inside out. Sew straight across the bottom 1/2 inch or 1 cm from the cut edge. You could hand sew this if you don’t have a sewing machine.
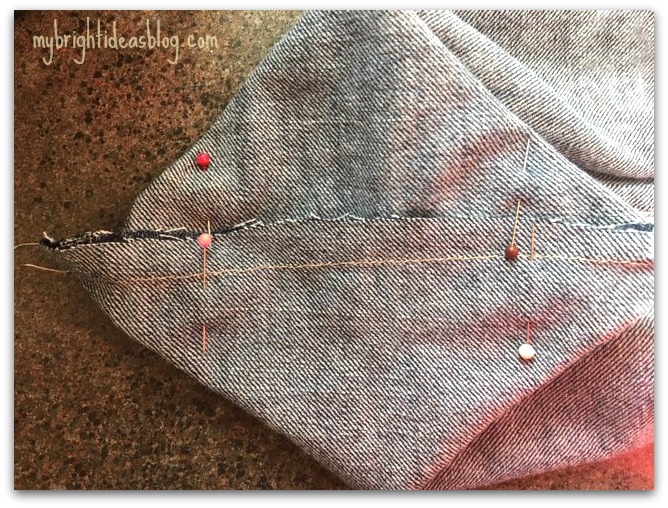
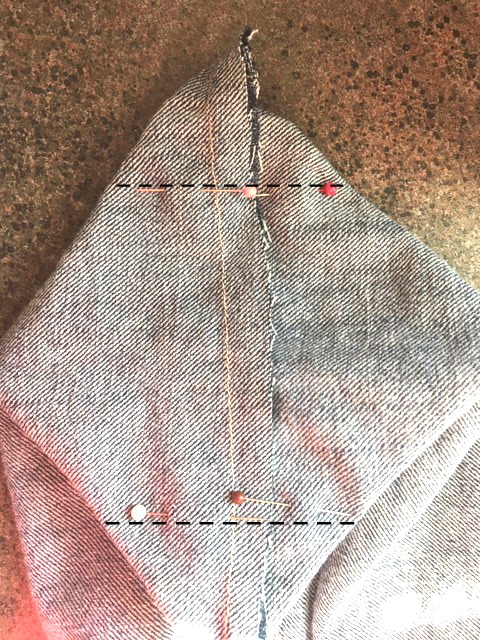
Now flatten the bottom and pin 1 inch (2.5 cms) from each corner. This will make your basket more boxy at the bottom and easier to stand up.
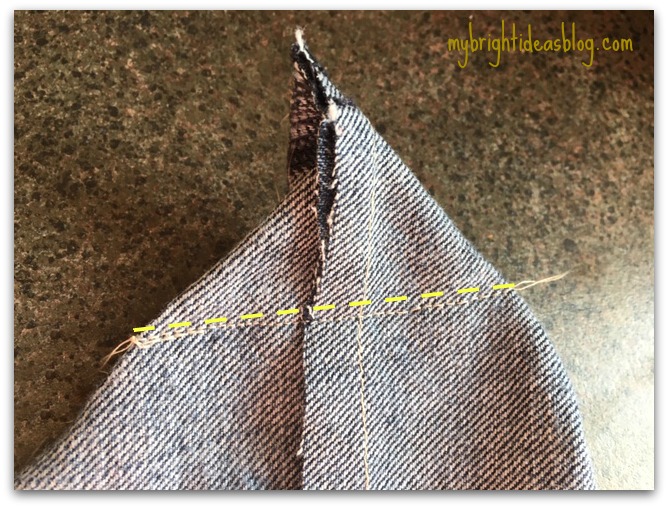
Stitch across the line.
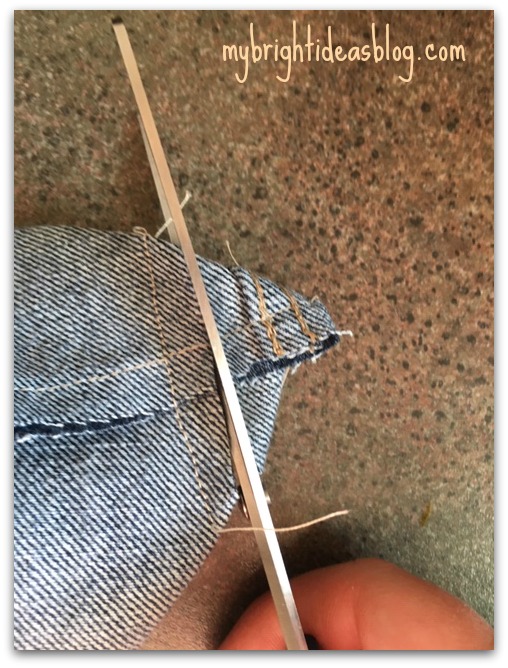
Cut off the triangles on the outside of your last stitch.
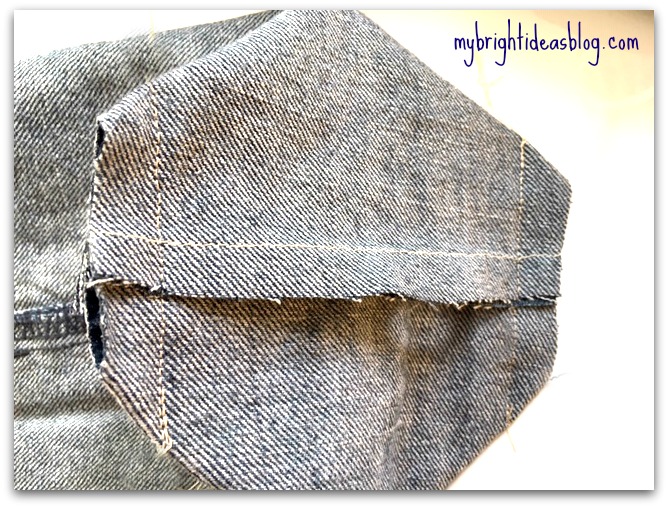
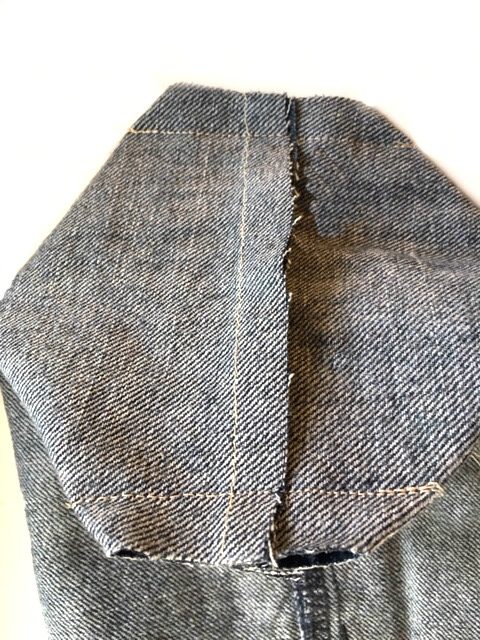
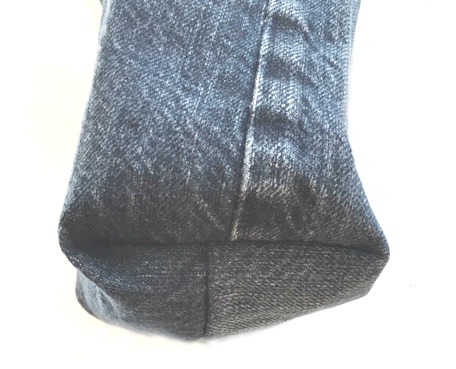
Turn the basket inside out.
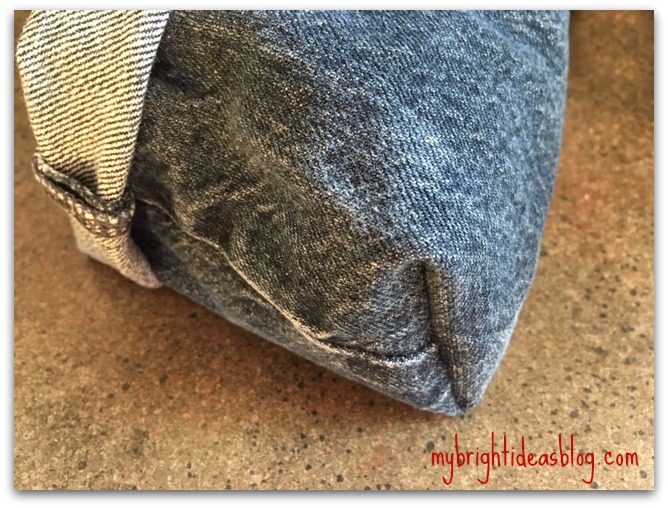
The square corners that you just created will help it to stand up. You can roll over the edge once or twice.
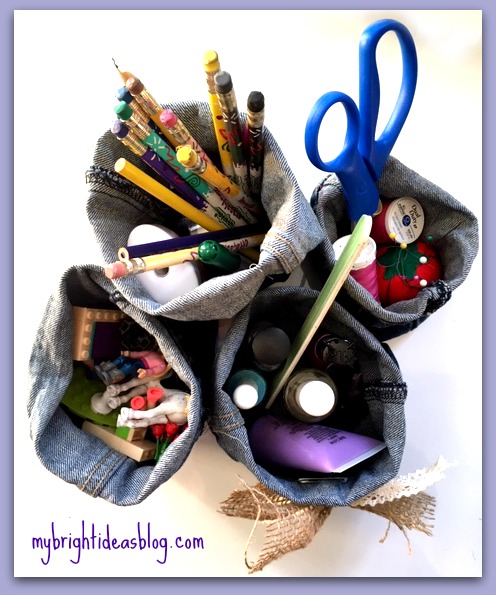
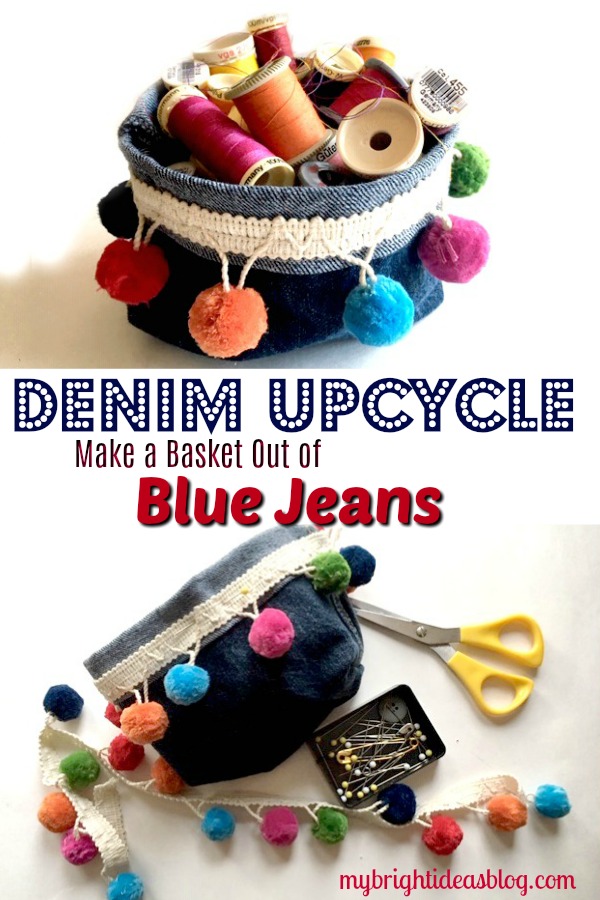
So you can stop there and fill up your baskets with small toys, pens, sewing items, nail polish etc….or…add some garnishes.
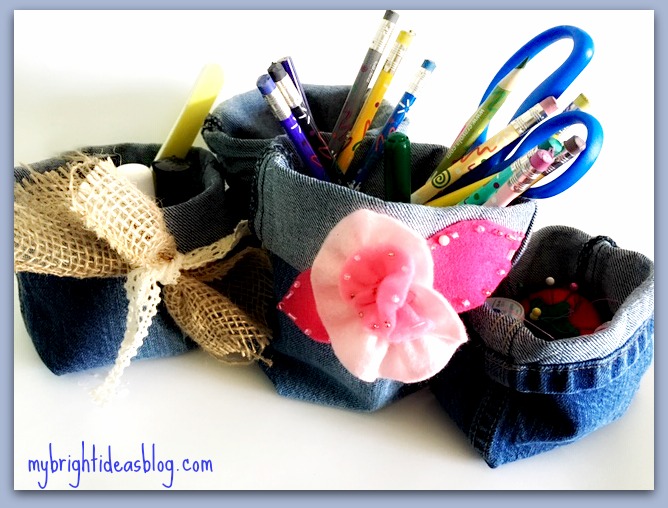
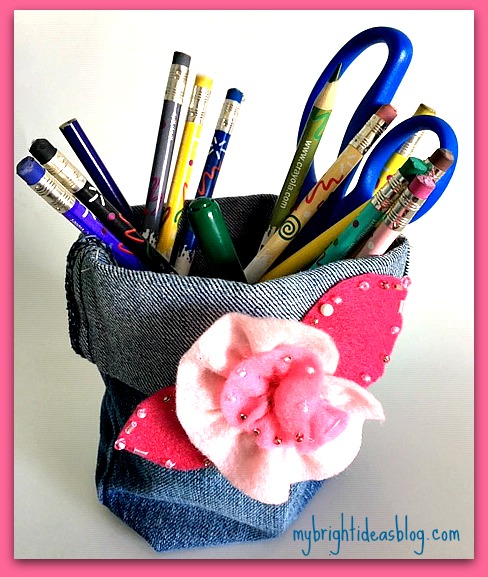
I pinned a bow on one but decided to add more color…. I added a felt flower left over from coffee cup warmers (see the link below).
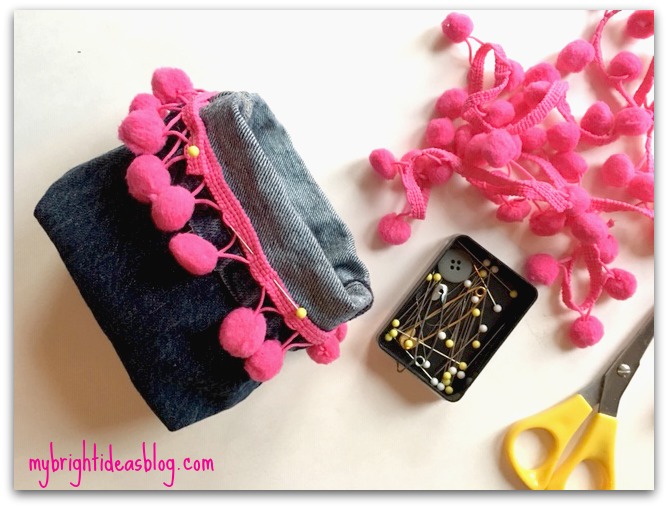
Then I thought of some trim…maybe with some pompoms. The kind sold in the drapery part of the fabric store. Yes!
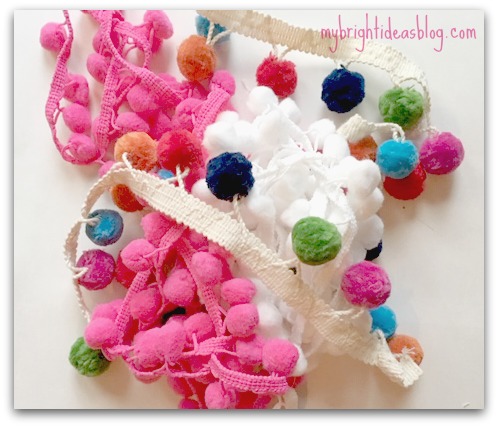
The solid white and pink trims cost approx. $2 per yard but the colourful larger trim was $8.99 per yard. Ouch! Fortunately it was on sale for 50% off so I got a yard.
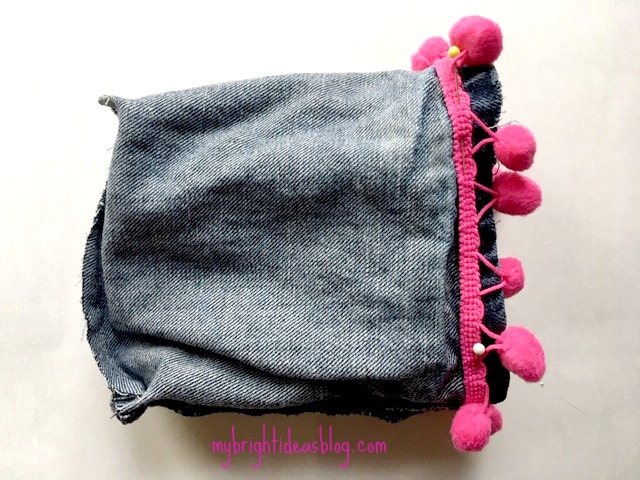
Turn the basket inside out to pin the trim in place.
Before sewing, turn the basket right side out again to check out how it will look.

Here is my colorful pompoms too. They make me so happy!
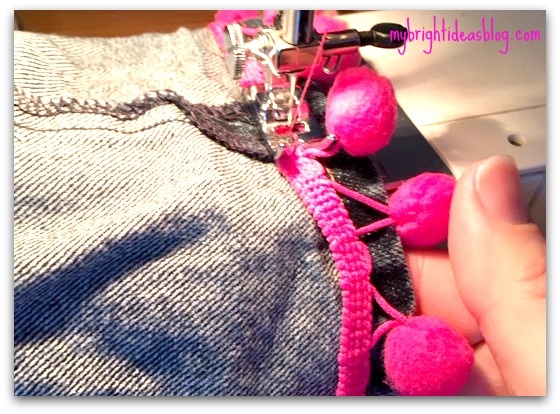
Take it slow while you are sewing on the trim. The pompoms keep trying to get in the way.
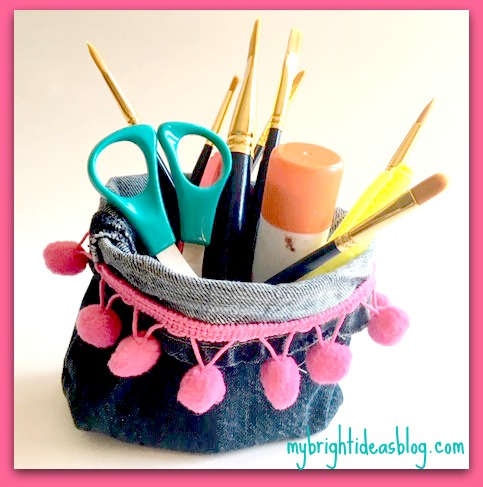
There you have it!
I used children’s jeans so that the basket would be small to hold a bunch of nail polish, sewing supplies, Lego or pens. If you use adult jeans and the area higher on the pant leg you could use it to hold magazines Fill the bin with craft supplies, bigger toys, or whatever things need gathering up to keep your place tidy!
Below I have put some more upcycle projects that I posted in the past year. Have a look!
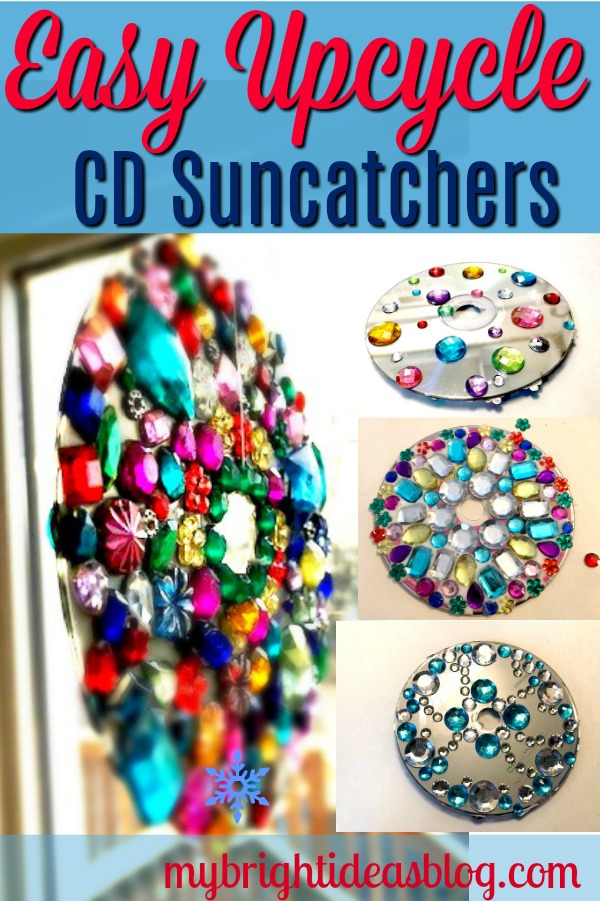
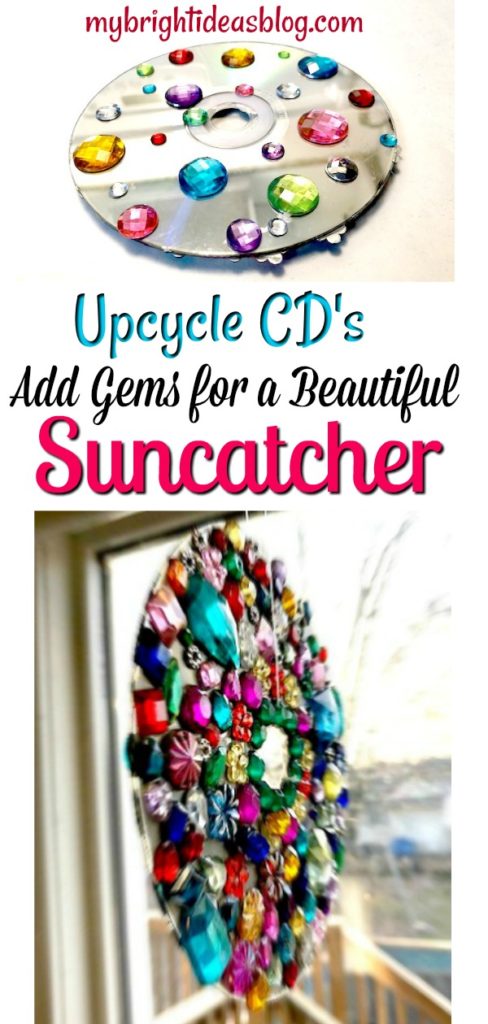
Upcycle CD’s into a Gem Covered Suncatcher
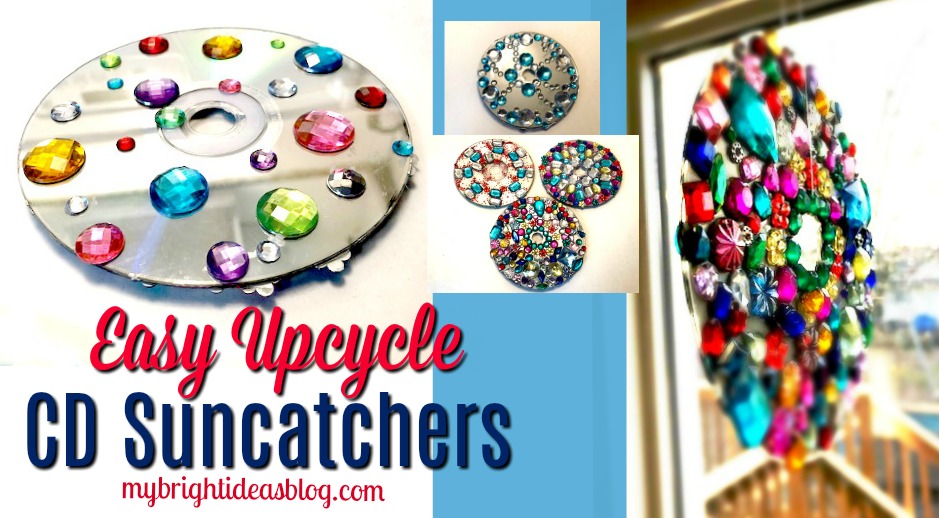
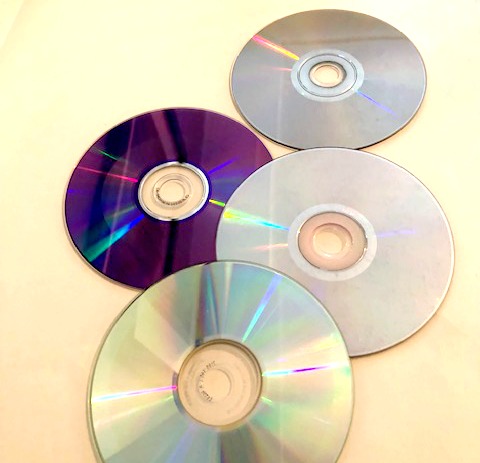
Have you got a collection of CD’s and DVD’s that you no longer need? Make a craft with them! There are loads of CD Upcycle ideas out there. Today we are going to turn a few old disks into beautiful suncatchers!
It’s midway through the Winter break for the kids, so we are looking for easy kids crafts. You will likely already have all the supplies for this craft in your cupboards.

You will need:
- Gem Stones
- Old CD’s or DVD’s
- Craft Glue
- Fishing Line
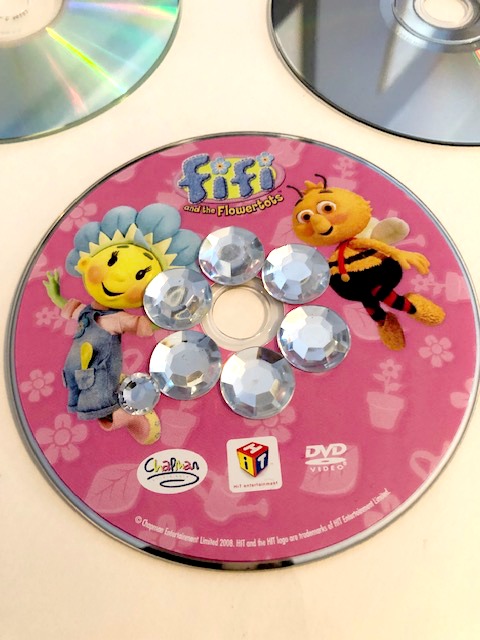
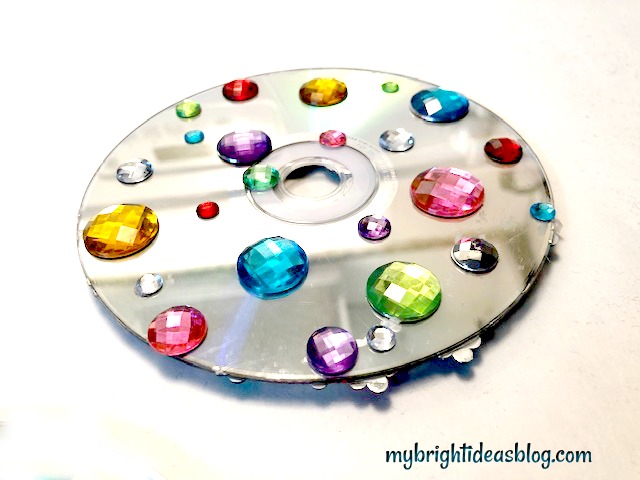
Have you seen Fifi and the Flowertots? It’s a super cute British kids cartoon. This DVD was sent to us from family in England. We watched it for years. We decided we are finished with this disk and it’s the first one to get glamourous.
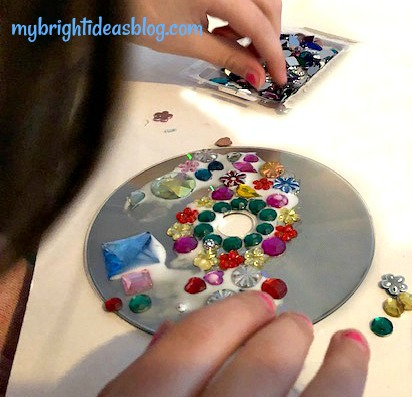
This disk has pink showing through which makes it original. Simply glue your gems to the CD.
It looks really pretty if you can make a pattern with the gems.
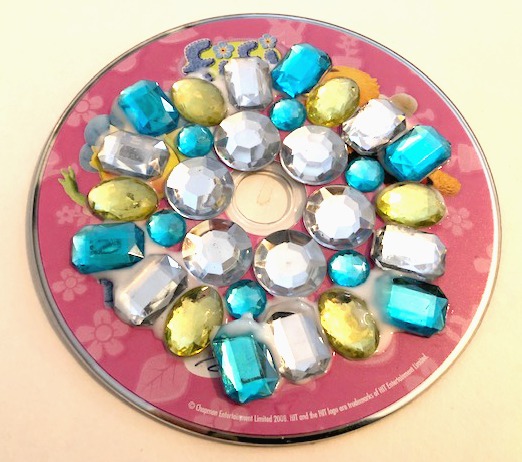
This one started out organized but then things got very random.
The sparkle of the CD’s plain silver side will look fantastic spinning in the sun. Adding the gems makes a beautiful combination.
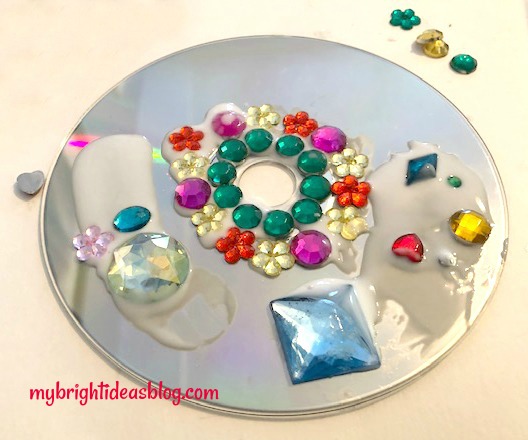
Okay it looks like a mess here but when it’s done its dazzling!
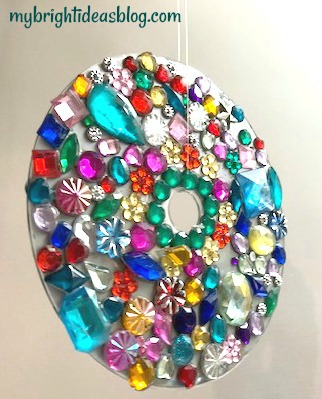
This is full of variety in sizes and random colours and it looks beautiful!
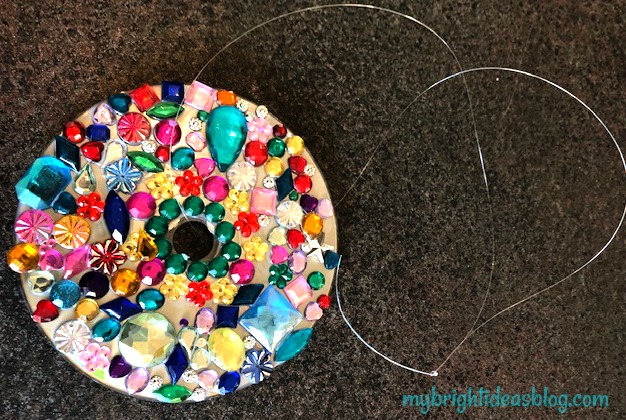
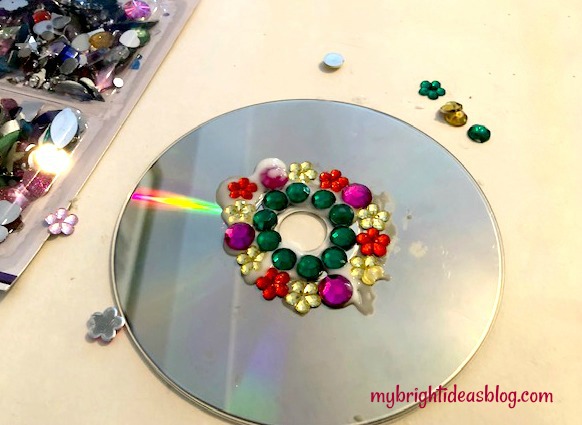
There is no need to drill a hole to tie it up. It already has one! Cut an arms length of fishing line, insert it through the Cd’s hole and tie a knot.
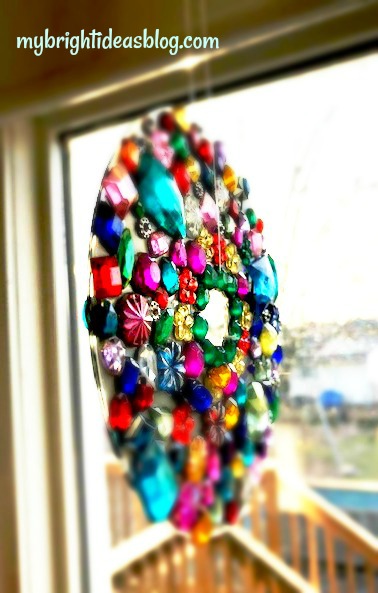
Hang it from the kitchen window and wait til you see the sun hit it!
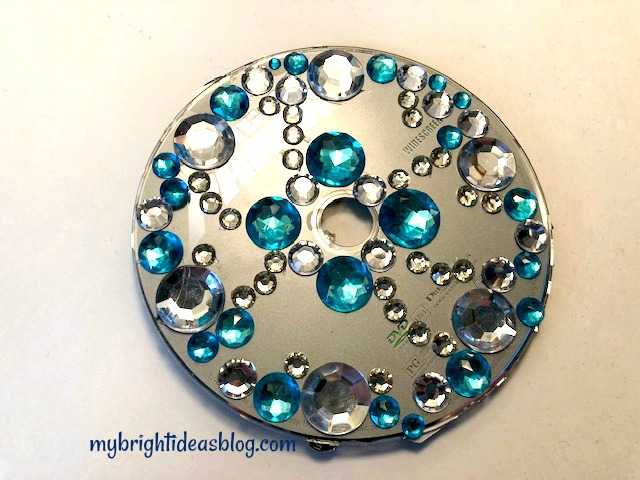
This shows that your CD upcycle doesn’t need to be full of gems to look good. This one required no glue since the gems came on a page of gem stickers. No mess! Also, its quick-no need to wait for glue to dry.
Flip it over and decorate the other side.
This could be a great craft for a camping trip! Gem stickers, old CD’s, and ribbon or fishing line.
This was done with stickers also. Do you have a pre-teen who babysits? This would be a great craft for the babysitter to take to their babysitting job. I loved it when we had a young babysitter arrive with projects and crafts for the kids. Very good business plan kids!
This CD and DVD upcycle craft is a project you will really enjoy doing with your kids! I could see this given as a gift from the kids to their grandparents….or a sick friend or a teacher gift.
Have a look at some other suncatchers I’ve already done.
Upcycled Jeans – Sweatshirt Refashion


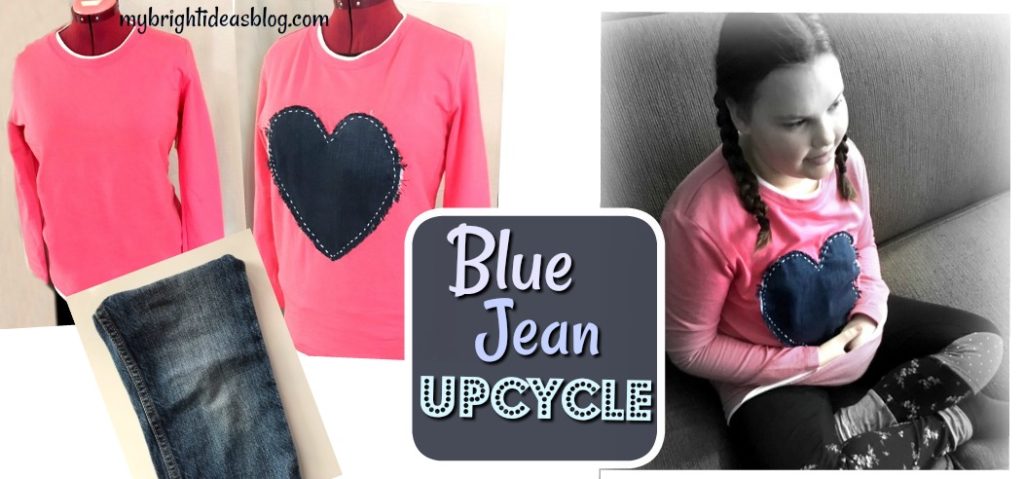
On a previous post we took the leg of a pair of jeans and turned it into a wine bottle gift bag. (See below for a link on that!) Today we have another upcycle project for those jeans that we are cutting up for parts. We are going to upcycle a plain shirt and add a love heart made out of old jeans.
You will need:
- t-shirt or sweatshirt
- old blue jeans (actually just a leg)
- needle
- thread or embroidery floss
- scissors
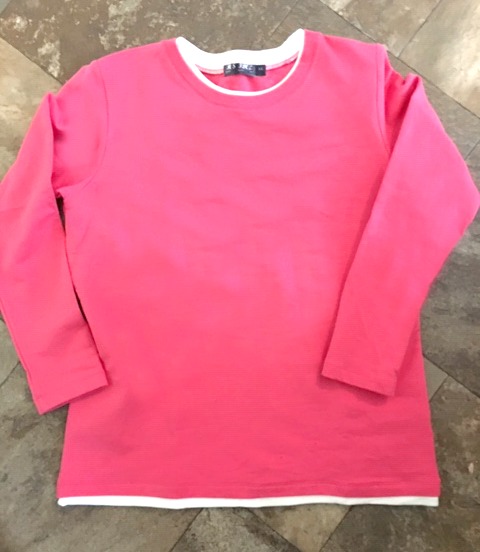
I found this shirt on a clearance rack for $7.00. Perfect for my project. You can use an old t-shirt or sweat shirt you already have in the closet. Or, this is an awesome solution to a favorite shirt with a stain on the front.
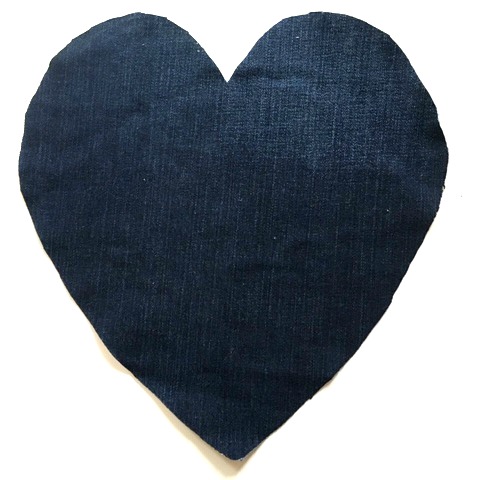
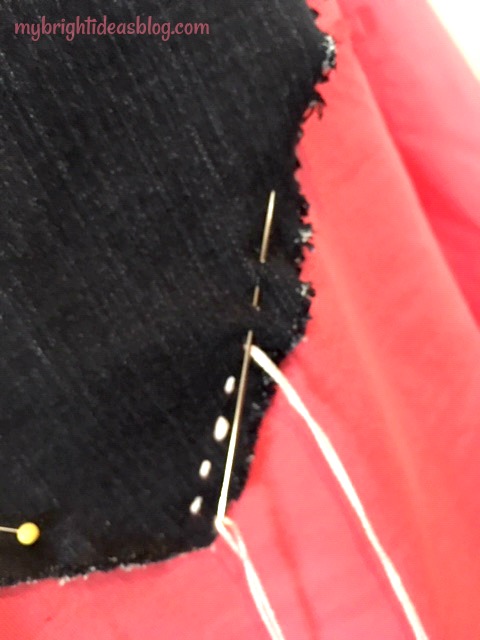
I just realized I didn’t take a photo of the jeans before cutting them into the heart. To make the perfect heart, find the widest part of the pantleg and cut out a square piece the maximum size you would want your heart to be. You can always trim it down if you cut it too big at first. Fold the square in half with right sides facing in. Draw a half heart onto the back of the denim with a white chalk. Cut through both layers of fabric so its perfectly matching.
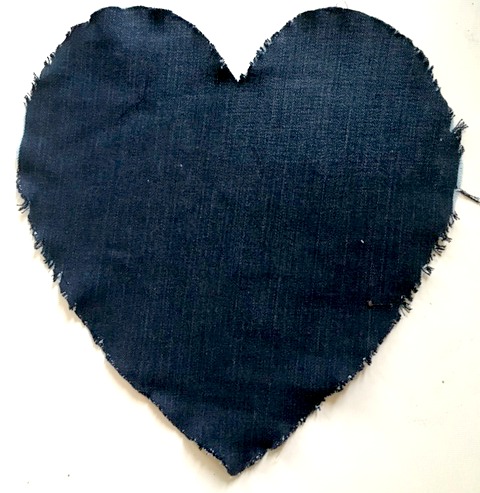
It’s a shame to ruin the perfect heart but we want to make it a little frayed. Using your fingers, pull on the edge pieces of the denim heart so the threads begin to pull away.
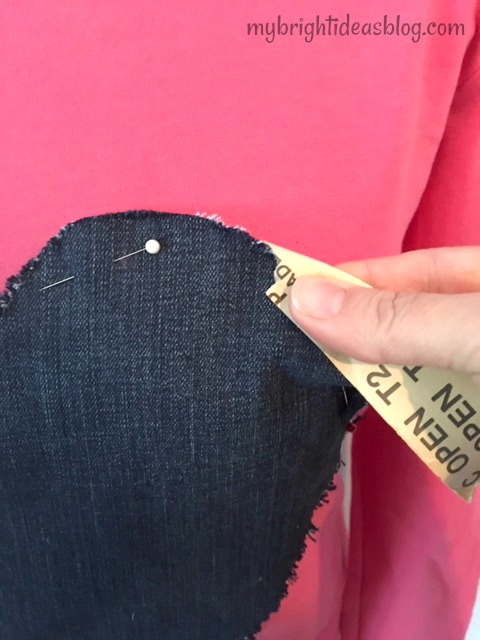
After pinning the heart in place I decided I wanted it a bit more frayed than it was. I pulled the edges again with a scrap of sandpaper and pulled some more on the edges. This works surprisingly well.
Sewing on the Heart
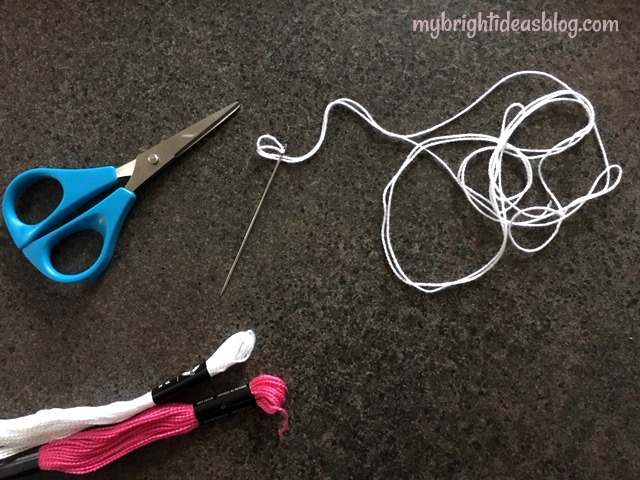
Choose a colour for your embroidery thread. I decided to go with white. Thread your needle and knot the end.
Start from behind and pull the needle through the shirt and denim heart. Continue in and out doing a running stitch. Try and make your stitches the same distance apart all the way around the heart.
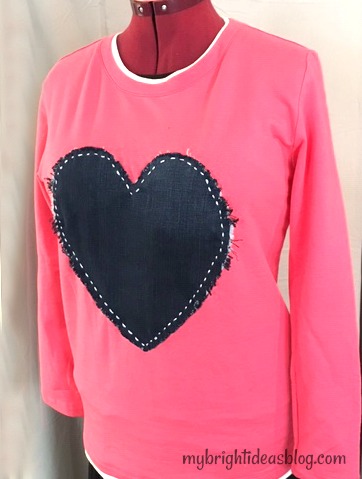
Finish by knotting it on the inside. Could it be any easier!?!?!
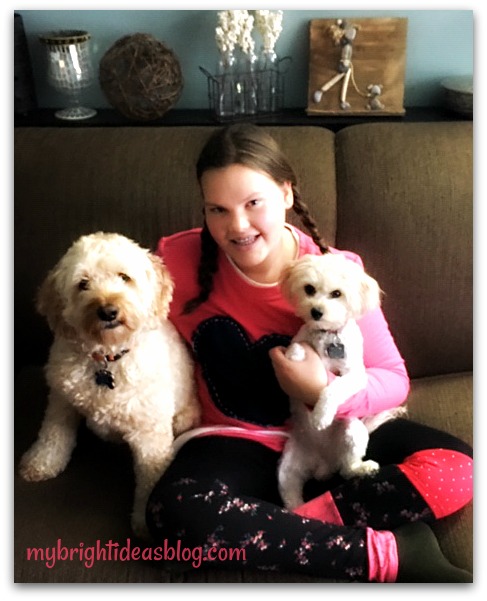 Here is Gus and Gemma with the upcycled shirt’s new owner. It was a surprise gift to my daughter B and she seemed really touched by it. Her pants are also an upcycled idea using strips of old leggings to sew onto a new pair. See the link below-they turned out pretty fun!
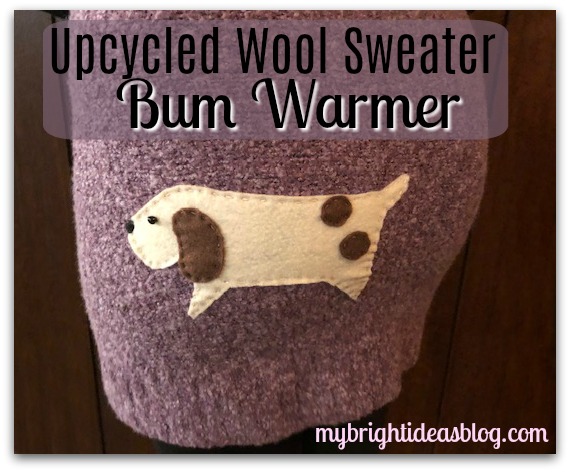
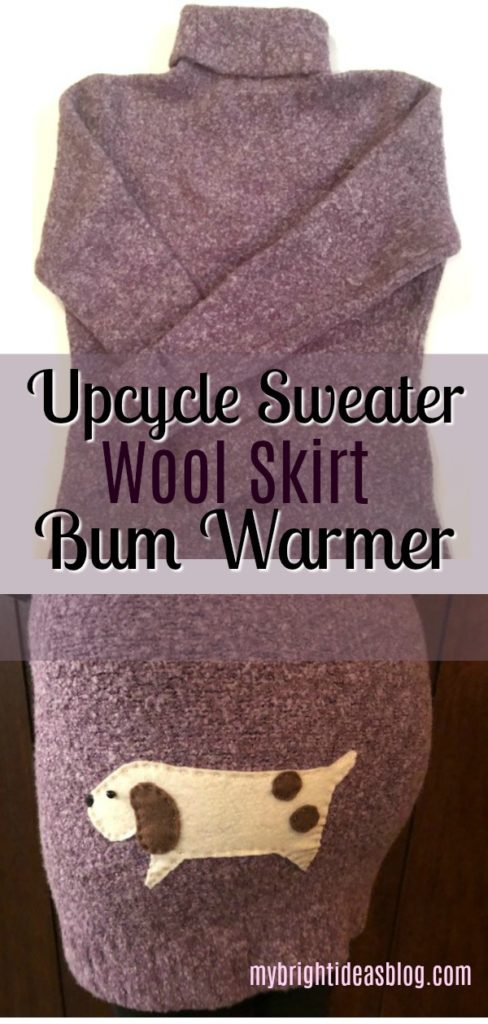
Upcycle Sweater into a Wool Skirt or Bum Warmer for Winter!
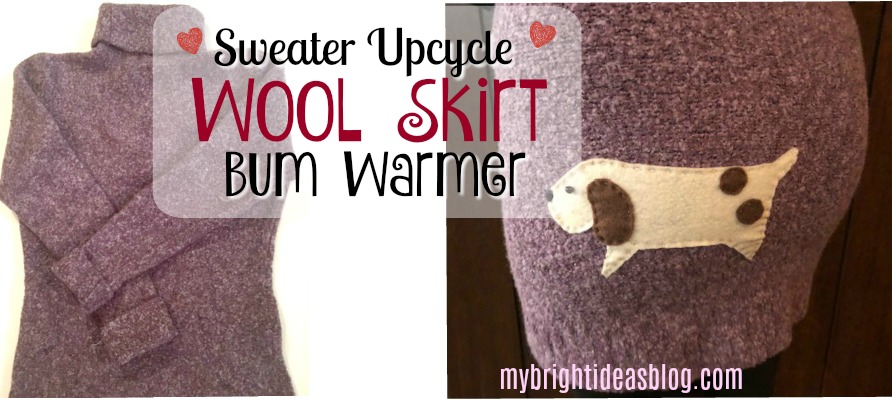
Have you been ice skating or waiting for the bus and felt a cold gust on your behind? Can you get your hands on a wool sweater you don’t mind chopping up for parts? Keep reading and I will tell you how to make an upcycled skirt or BUM WARMER and if you like…put a dog applique on it.
You will need:
- a wool sweater
- scissors
- sewing machine
- elastic
For the optional Dog Applique-you will need:
- embroidery floss (brown, black, cream)
- needle
- felt (cream and brown)
- paper and pencil
- scissors
- 1 black bead (optional, you can do with out a bead and sew a black dot on)

Do you remember the wool sweater above? It’s been upcycled before and now we are cutting it up for more parts! You might already know this but knit sweaters will unravel if you just cut them. So you need a sweater with wool in it. When you wash the sweater in hot water and put it in the dryer it will shrink and “felt”. This prevents it from unravelling. Now we can cut it like it’s fabric.

The sleeves are already gone to the dog, now we are going to use the best part! The area below the armpit could be made into so many things! A purse, tea cozy, slippers, mittens, big dog sweater….So many ideas so little time. If you would like to see what we did with the sleeves scroll to the bottom of the post.
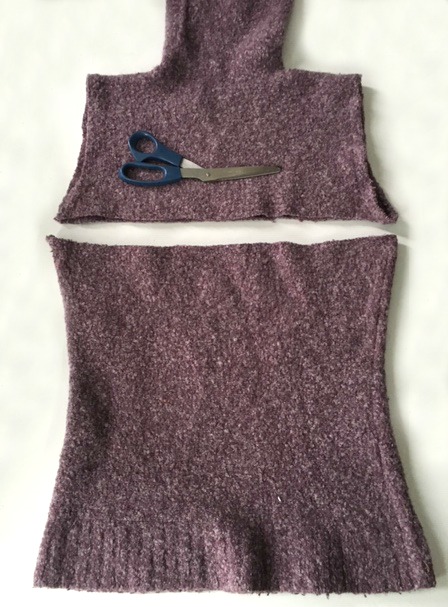
Cut straight across the sweater.
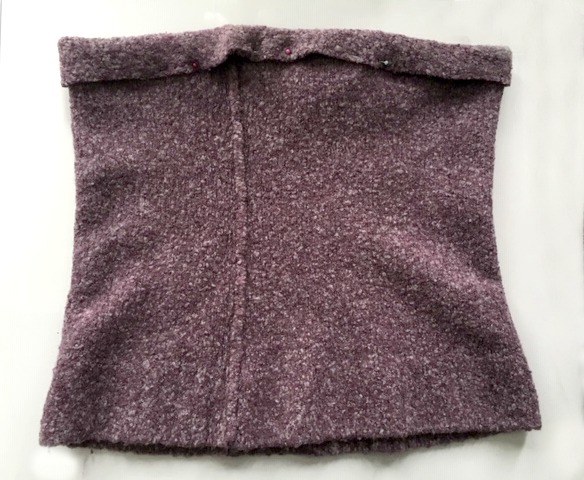
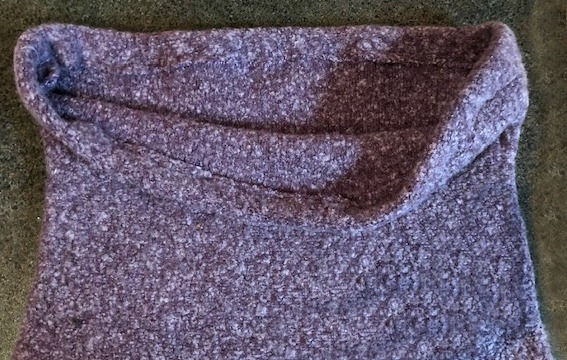
Fold over the top one inch (2 cm), and pin in place.
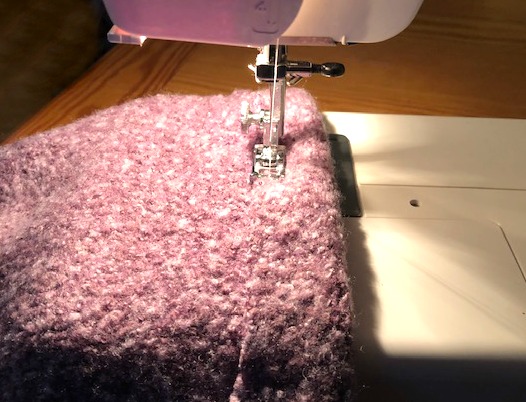
Sew almost all the way around to make a casing. Leave a 1 inch gap to slide the elastic inside.
If you don’t put on the applique and decorate it with felt then slide the elastic in now. However, since I wanted to add something fun to the booty of the bum warmer, I’m going to insert the elastic as the final step.
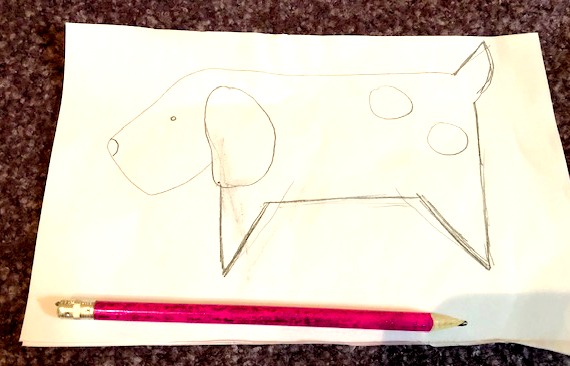
Cut a page in half. Find a photo of what you would like to applique on the bum. I recommend a flower or an animal that is really simple. This dog was found when I searched for dog felt projects or how to draw an easy dog. I tried to copy the simple dog I found.

Pin the page to your felt and cut out the dog applique.
Try on the bum warmer and pin the applique into the area you would like to have it. It can go on the front or the back.
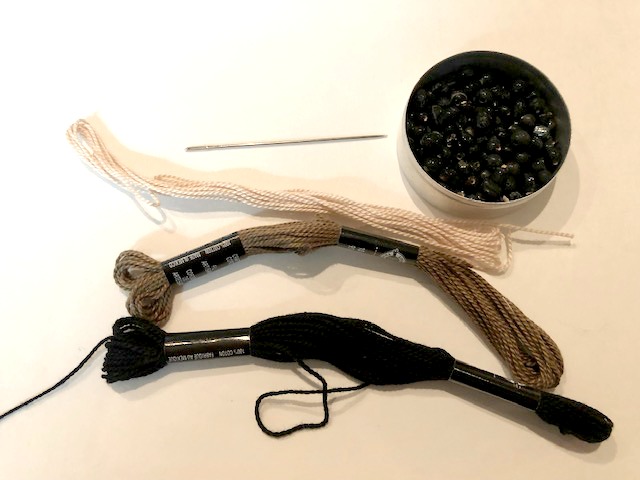
Grab your embroidery floss, needle, scissors and black bead.
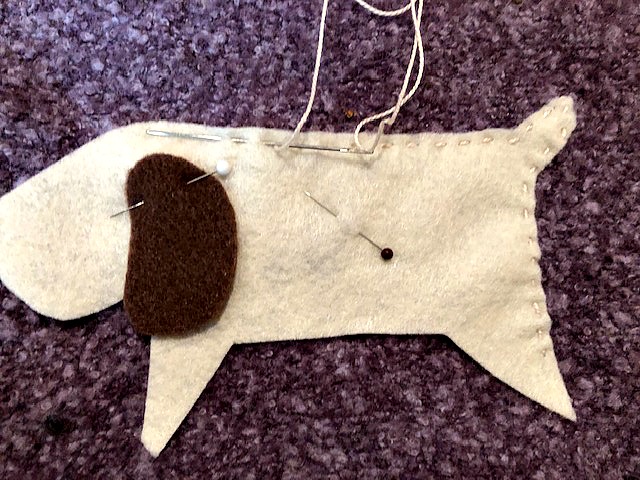
Hand sew the applique on using embroidery floss. I used matching thread but you could make it stand out by using a contrasting thread. I just did a very quick running stitch to attach the dog to the skirt.

Then I added the ear and too spots to his behind.

The last step is to insert your elastic. I like to put a huge pin on the end of the elastic and insert it into the 1-2 inch gap we left. Then wiggle it through the casing. When you get it all the way around the waist area and back to the gap, pin it to the other end. Check to make sure that the elastic didn’t get twisted. Adjust to the desired width. Try the skirt on again and test out the size. If you are happy sew the elastic together and remove the safety pin. Machine sew the casing closed.
This sweater will fit a preteen daughter to an adult XL woman. As long as the elastic is comfortable, the wool will stretch with your size. I could have tightened the elastic and made it a skirt for my 8 year old too. If you find its getting a bit stretched out just wash it again. Use warm water instead of hot and warm dryer so it doesn’t shrink too much.
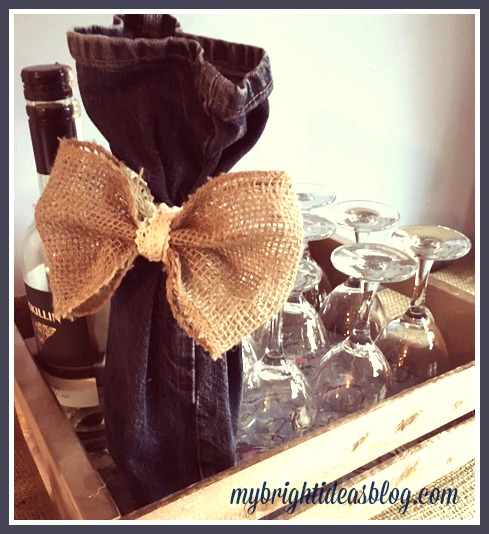
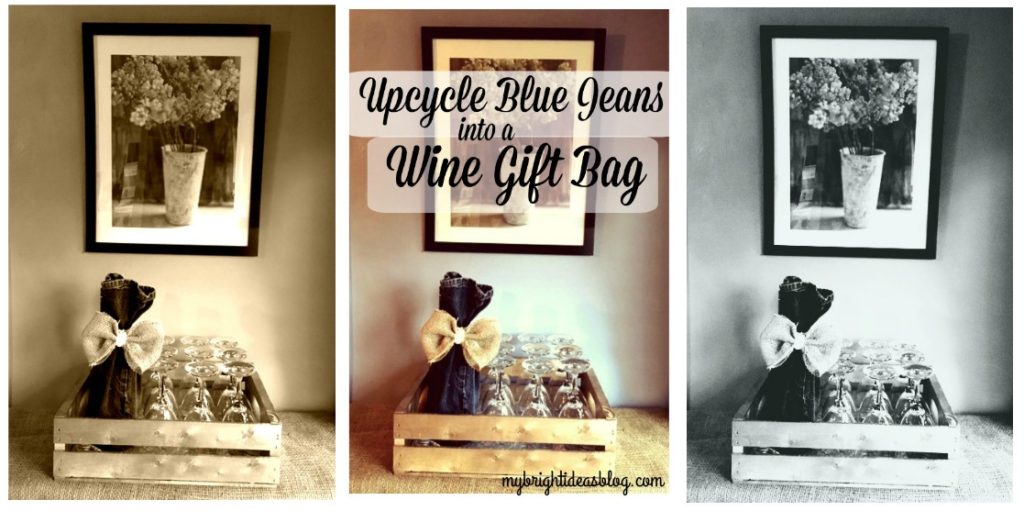
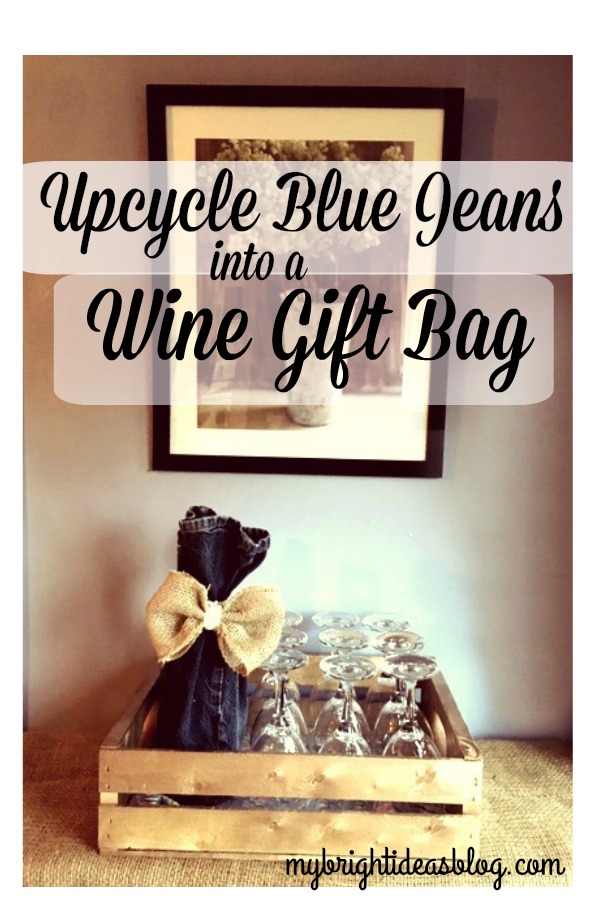
Upcycle Jeans into Wine Gift Bags!
Repurpose Jean Pant Legs Into Wine Bags!
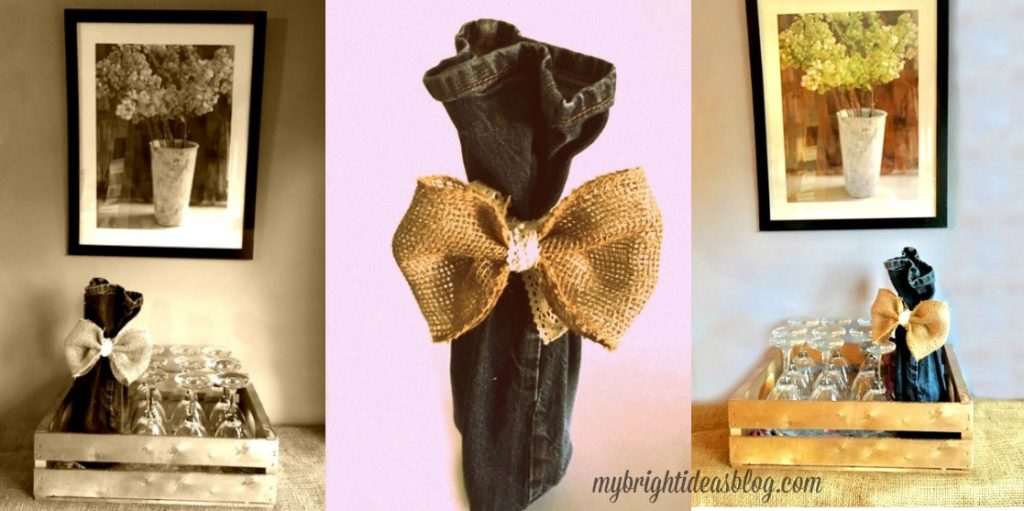
Want to bring an original hostess gift to a casual dinner party? Dress up your wine bottle with a pair of old blue jeans!
This will get your mind inspired for other upcycling and gift wrapping ideas too!
You will need:
- Blue jeans you don’t mind cutting up (child’s size would be ideal)
- Sewing machine or needle and thread
- Ribbon/String/Twine
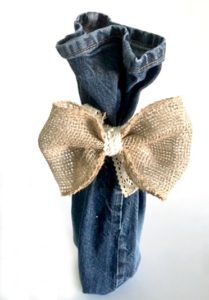
- Burlap for bow or something else you can add to embellish
As long as the jeans are freshly washed it doesn’t matter if there is fraying on the cuff. We want the bottom of the jeans to be at the top so it can add character.
The pant leg opening should be around 6 inches (15cm) wide. So skinny jeans or children’s jeans are perfect. I picked up 4 pairs of kids jeans from my goodwill for around $3 each. I will be making more blog posts out of the scraps and pockets too. Save any decent leftovers when you are done.
If your jeans are adult size, no problem you can trim the pant leg width and make a seam.
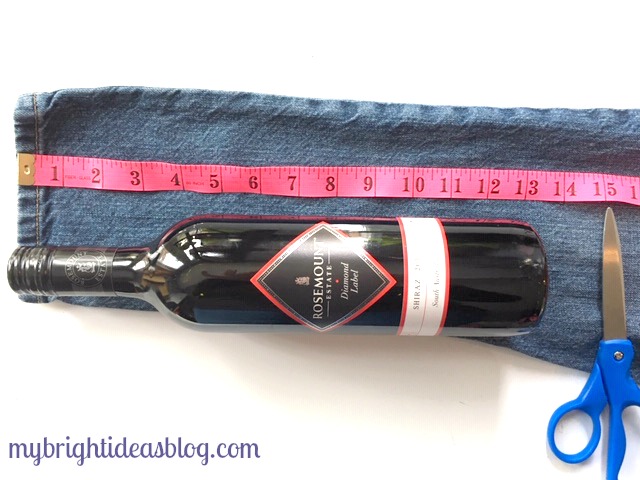
Cut the pant leg approximately 15 inches (or 38 cm). This will give you a bit extra for the seam on an average 13 inch bottle.
Turn the pant leg inside out and pin closed.

Sew straight across the bottom 1/2 inch or 1 cm from the edge. You could hand sew this if you don’t have a sewing machine.
Now flatten the bottom of the bag and pin 1 inch (2.5 cms) from each corner. This will make your bag more boxy at the bottom and easier to stand up. Stitch across this line.
Cut off the triangles on the outside of your last stitch. Turn it right side out again.
 See what I mean? Boxy on the bottom to help it stand up.
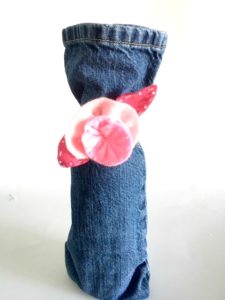
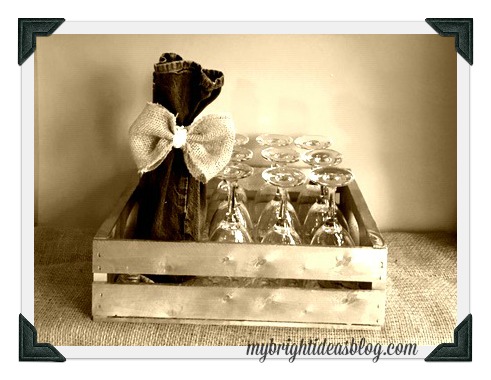
Now decide how you would like to decorate it. Put the bottle of wine in the bag and tie a ribbon or piece of twine.
If you like the felt pink flower in the photo on the left have a look at my cup cozy project link at the bottom of this post. http://mybrightideasblog.com/easy-to-make-felt-coffee-cup-cozy/
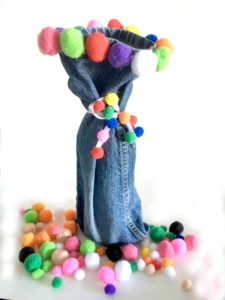
I also went a bit nuts with hot glue gun and pompoms in the photo on the right. Maybe you should save that for friends with a great sense of humour. Your accountant friends might think its a bit ridiculous! (no offence to the accountants)
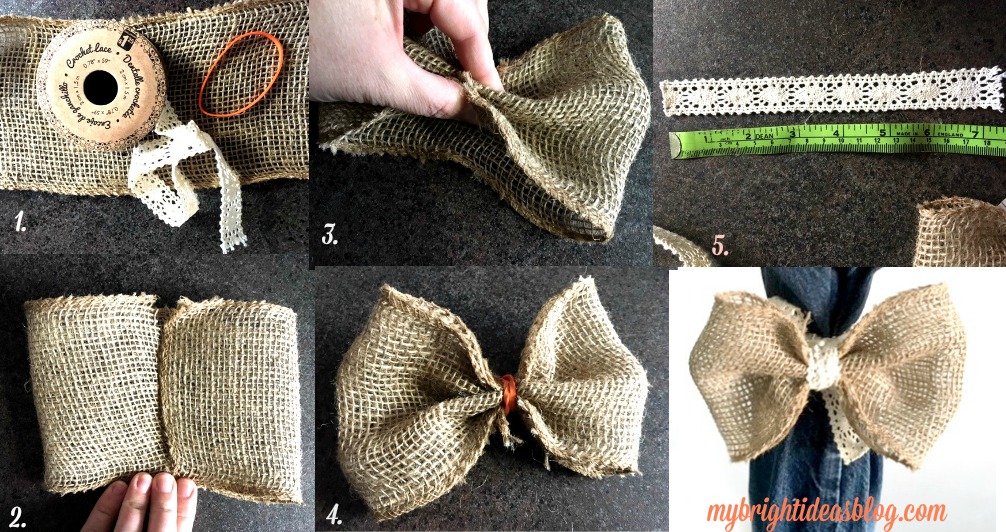
This bow is so easy to make and versatile for other project too!
I hope this has inspired you to dazzle up a hostess gift of wine!
….
Easy to Make Fleece Hat with Flowers – Simple Sewing Project
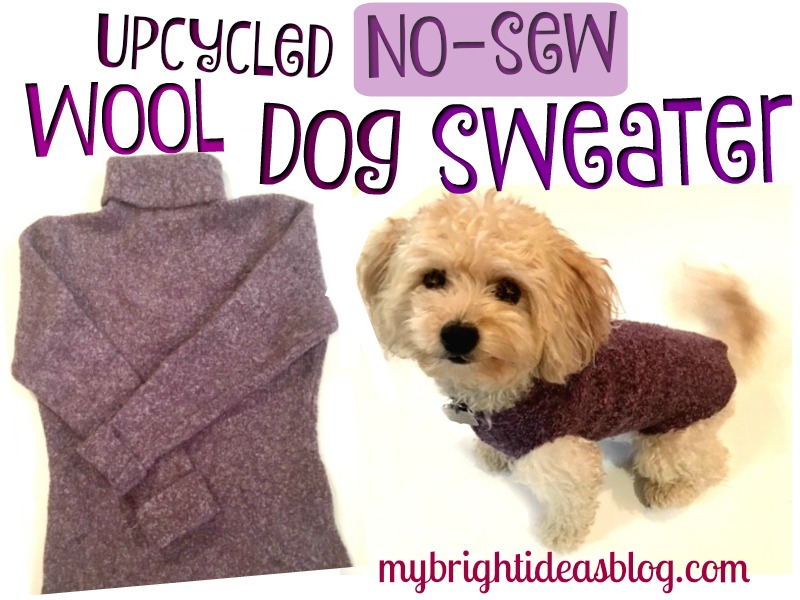
Easy Dog Coat from an Upcycled Sweater
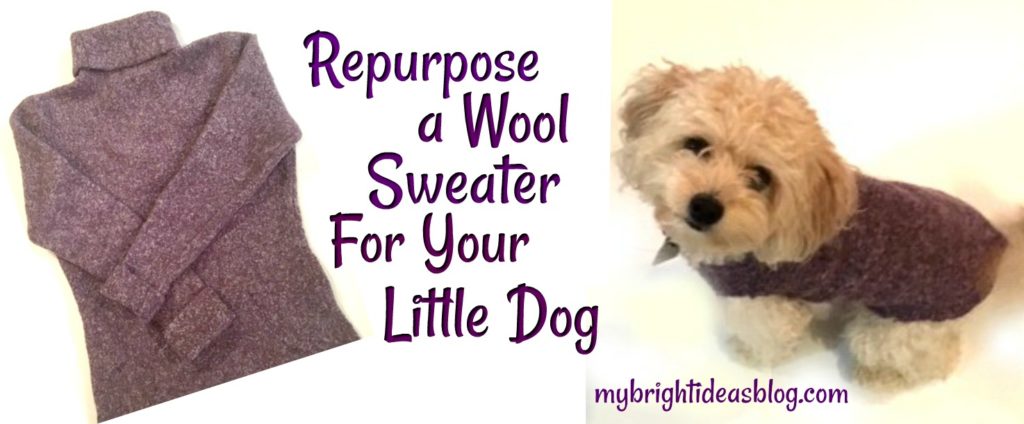
Make your little dog an easy winter sweater by repurposing one of your own!
You know how you should never, ever wash a wool sweater in hot water or put it in the dryer? Well that is exactly what you need to do today to make a little dog a wool coat.
We have a little girl named Gemma who is a Yorkie/Poodle mix. This is the perfect size for her. She is 9 lbs and loves to share your toast. She gets chilled easily so she loves it when her momma makes her a new coat or sweater.
You will need:
- a wool sweater (or wool blend with at least 50% wool)
- scissors
- tape measure or ruler
Start by washing your wool sweater in hot water and machine dry it. This will shrink the wool and “felt” the stitches of the sweater so that it will not unravel when we cut it. You could wash and dry the sweater a few times to further shrink it.
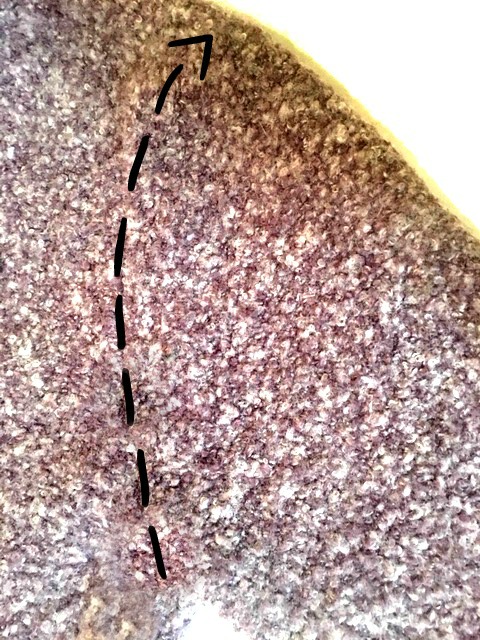
Lay the sweater on a flat surface and cut the sleeve off at the shoulder seam.
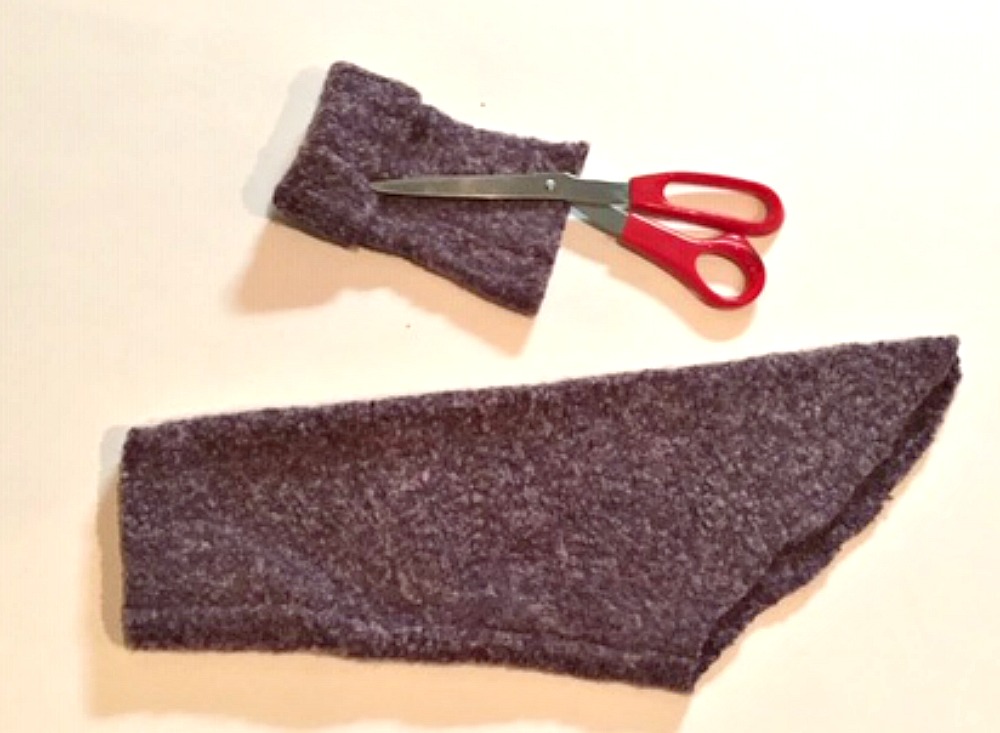
Also cut off the cuff.
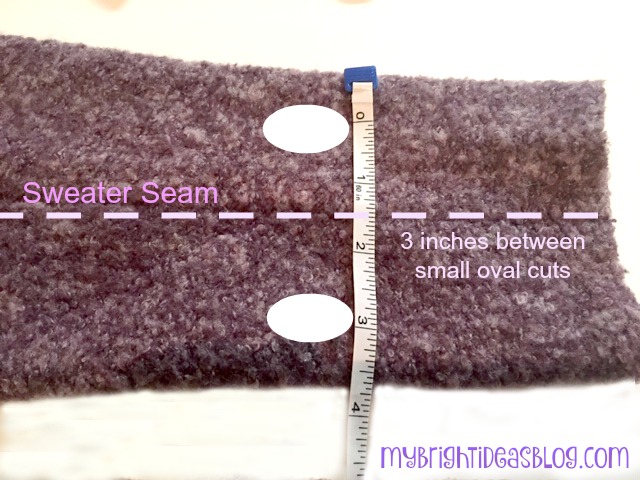
Lay the sleeve flat with the seam in the middle facing upwards. I cut 2 small leg holes 3 inches apart.
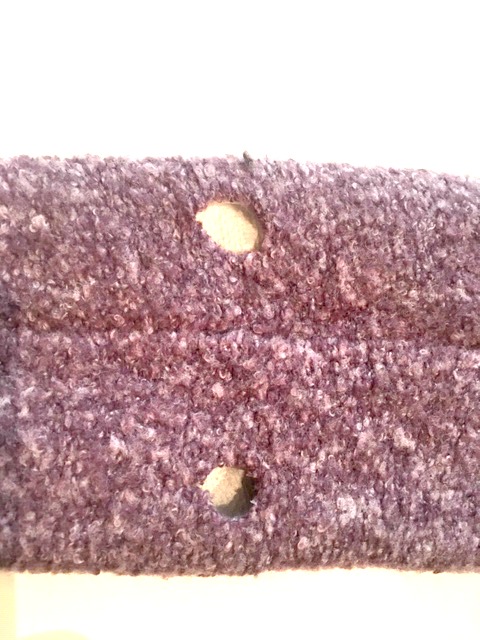
Cut the holes small because the sweater will stretch after a day or two of wearing it.
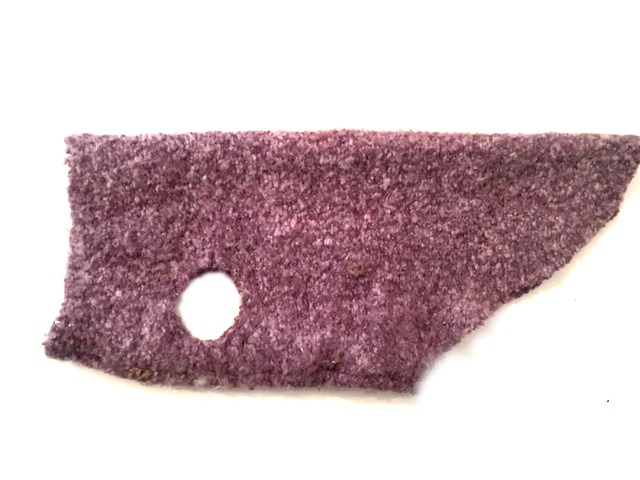
This photo shows a much bigger hole after Gemma wore it for 3 days. She gets cold with the weather changing so she sleeps in it at night too.
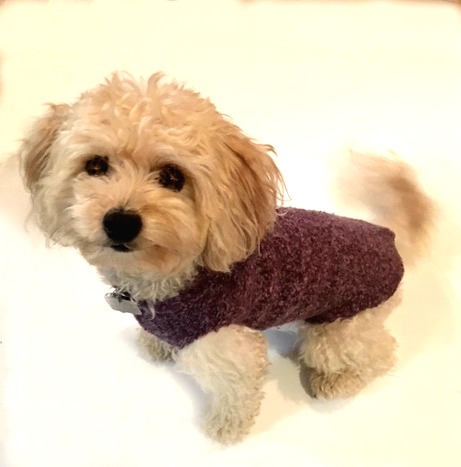 This photo shows her right after I made it. Her fur is very scruffy and adorable….but matted. So we took her to the groomer.


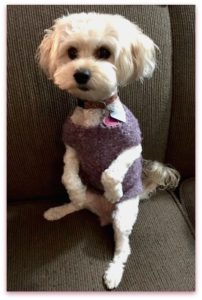
And here she is after grooming and smelling like cookie shampoo. She is so darling. The sweater size looks bigger because of her haircut and because of stretching. When we toss it into the washer and dryer it shrinks back to perfect size again.
That sweater had two arms, of course, so we can make a second one for her to wear on laundry day! Hurray!
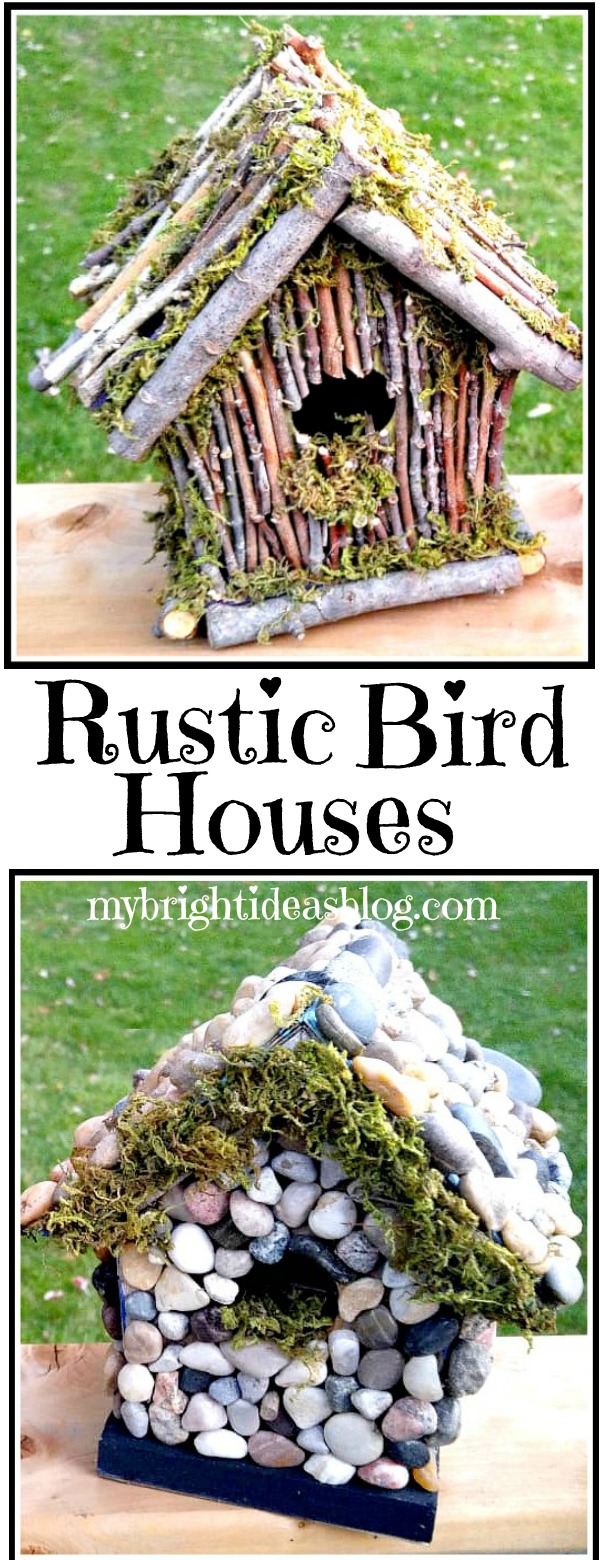
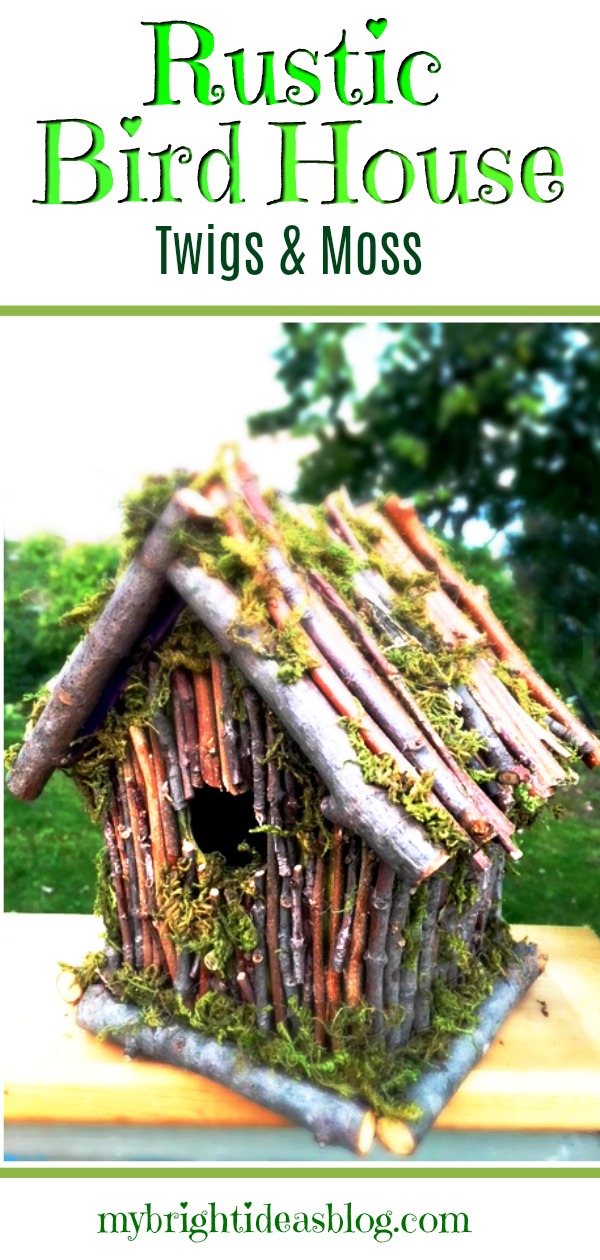
Rustic BirdHouse – Twigs and Moss
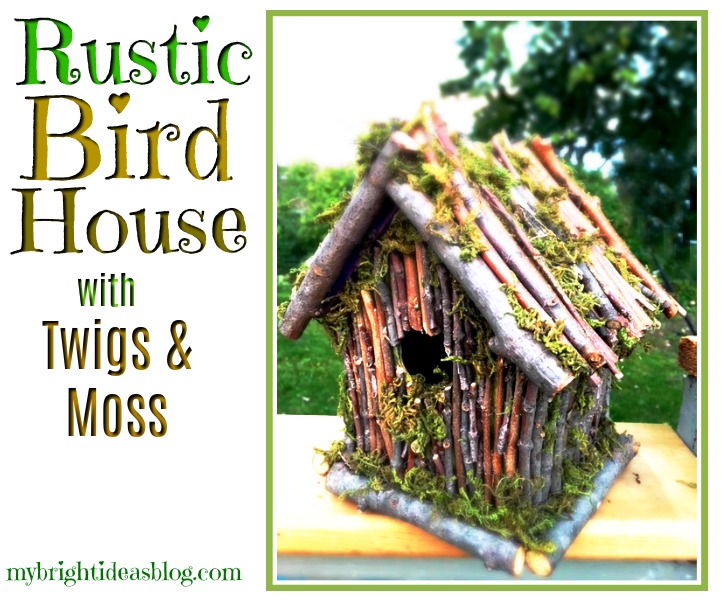
I’m loving sticks and twigs and rocks this year! So you’ll see a lot of these projects from this past summer and heading into the fall and winter. This is birdhouse project, I really enjoyed making and can’t wait to tell you about!
Two years ago my daughter and I painted a bunch of birdhouses and drilled them to the garage. It’s an old wooden garage with peeling paint so if we can distract your eyes from its sad, old, tired look we would! It should get knocked down and rebuilt but we would like it to last a few more years…so instead I’m decorating it.
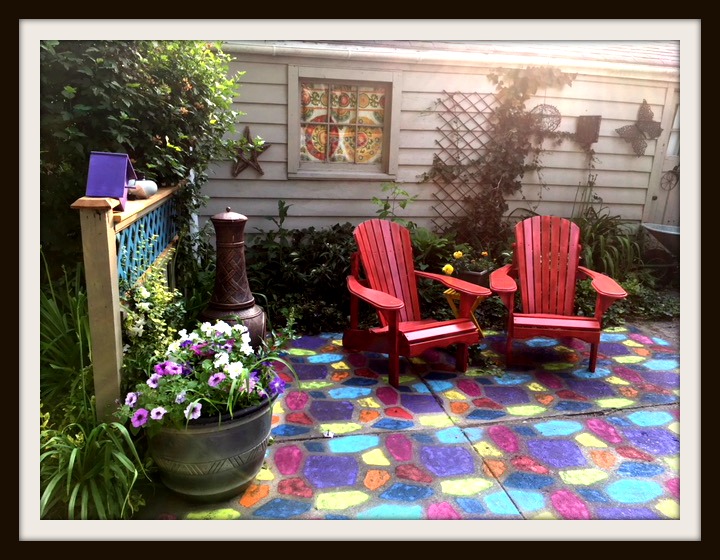
See what I mean…
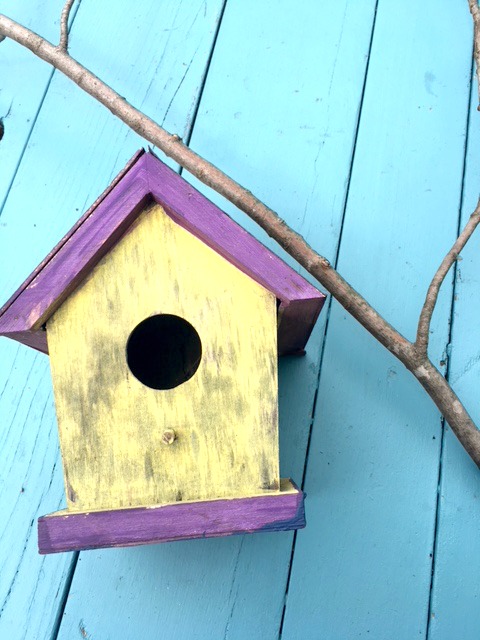
I apologize we got a bit sidetracked there. Back to the twig birdhouse. After two winters the birdhouse collection had gotten worn out and weathered. They were just cheap wooden ones from the dollar store and we didn’t think ahead to put extra clear coats over the craft paint to make them water resistant. That would have been sensible.
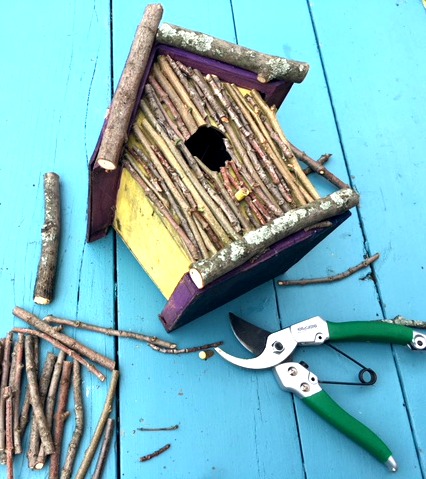
If you would like to try this you will need:
- a birdhouse
- outdoor paint or varnish to water proof it
- branches
- garden snips
- E6000 or other industrial glue
- natural moss
You can get inexpensive birdhouses at the dollar store but if you would like it last for years and years get the sturdy ones from the hardware store or make your own. Paint it or put a protective clear varnish so it will last a long, long time. I opted to use the old weather worn ones to try and upcycle it instead of throwing it out.
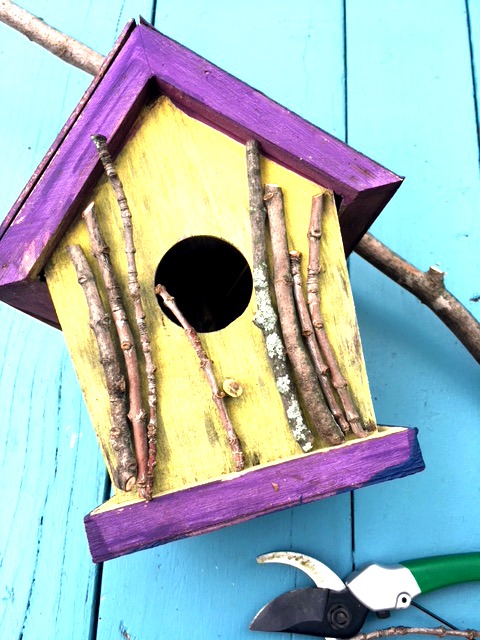
We needed to trim some out of control shrubs and some branches so this project was perfect timing. There was no measuring of the length just line up the twig to the area you want to put it and snip! When I had the area planned out I went back to glue it.
Using E6000 Industrial glue is stinky so I try to use it only outdoors. It is slow to dry but very secure. I have used a hot glue gun to secure sticks and pebbles to things like this before and within a few days it had pieces falling off. If your project is going to be indoors you could get away with quick drying hot glue.
I attached the sticks all over one side of the birdhouse and left it to dry.
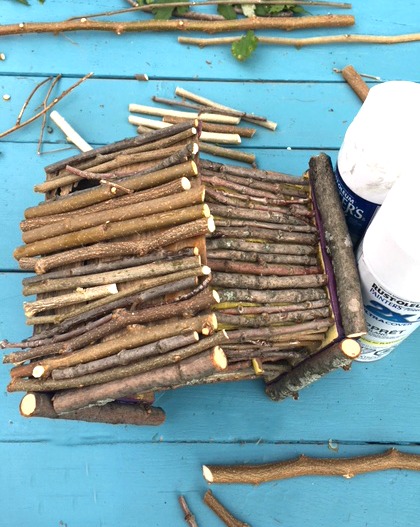
Each side needed several hours to dry. Then I came back to work on the next side. This really slowed down the process. It felt very relaxing making this natural project so I didn’t mind that it took me a few days.
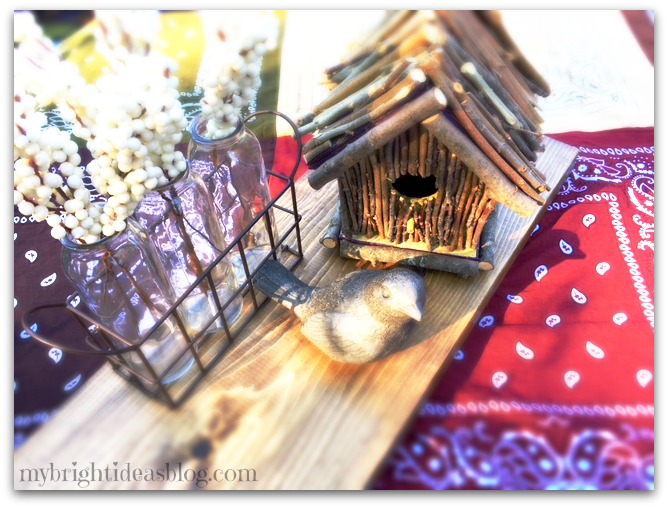
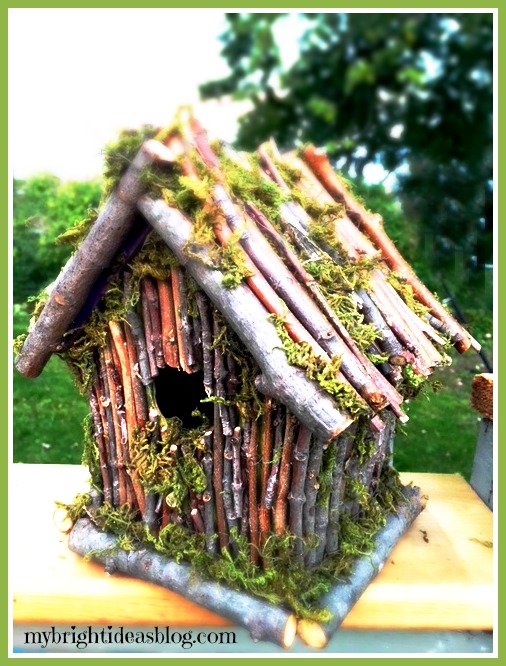
I was actually quite happy with it with just the sticks on the birdhouse. I took this picture a few weeks ago with my bandana table cloth post. It’s cute right!
But then….I had a vision of it with moss and the project took on its final stage….
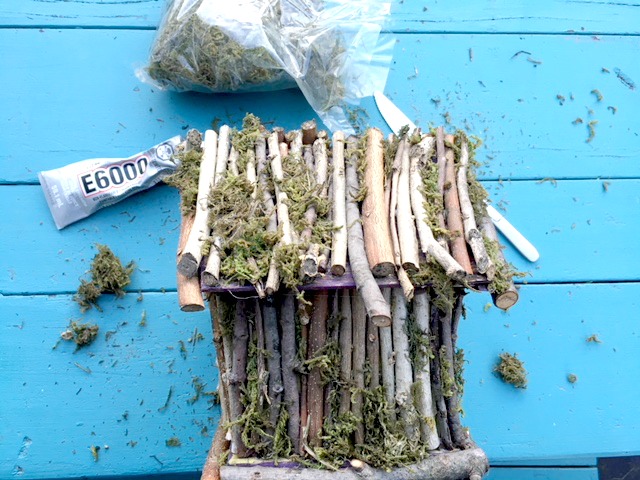
The moss is from the craft or dollar store and comes by the bag. It is quite loose and flakey so it will make a bit of a mess on your work space.
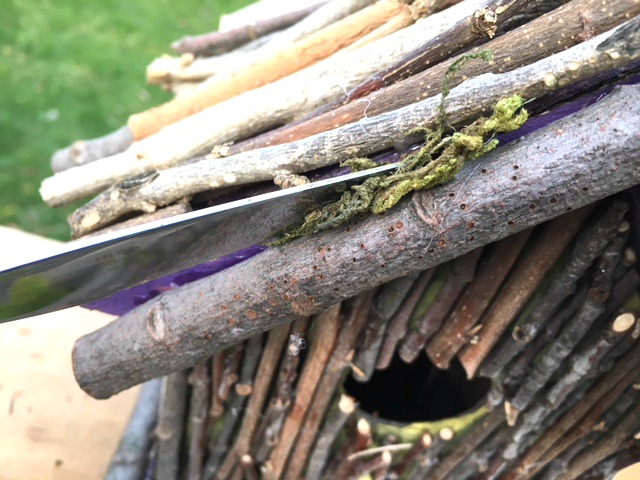
Anywhere I could see the old purple paint I put in some moss. This photo shows me sliding the moss in between each stick using a butter knife as a tool. I also used some dabs of glue plus jamming it in gaps between the twigs.
Heavy rains and wind may be hard on the moss. We will see how it lasts and maybe place it in a bit of a protected area of the garden. A covered porch would likely be ideal.

Isn’t that beautiful! I don’t know that any birds will actually want to use it but for a decorative addition to the garden I’m very pleased with it!
Thank you for reading to the end. I hope you enjoy your day. Before you go feel free to visit some of my other posts. Pin this to Pinterest or share it on your favorite social media.
…
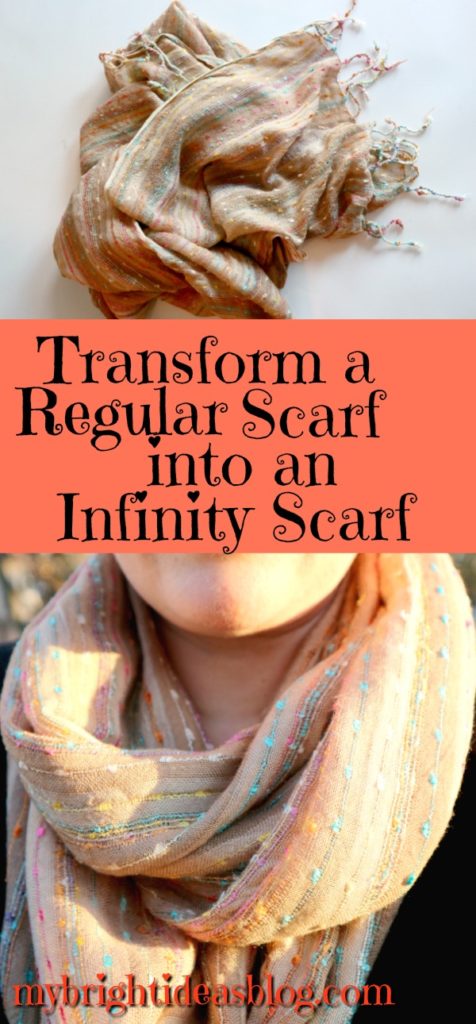
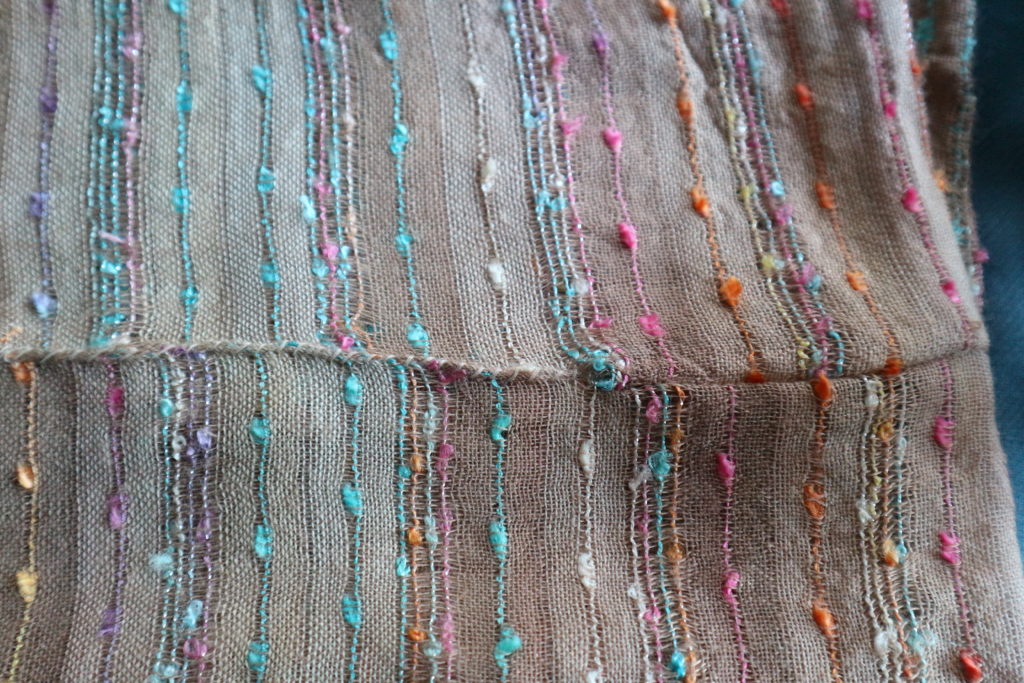
How to turn a Pashmina into an Infinity Scarf
![]()
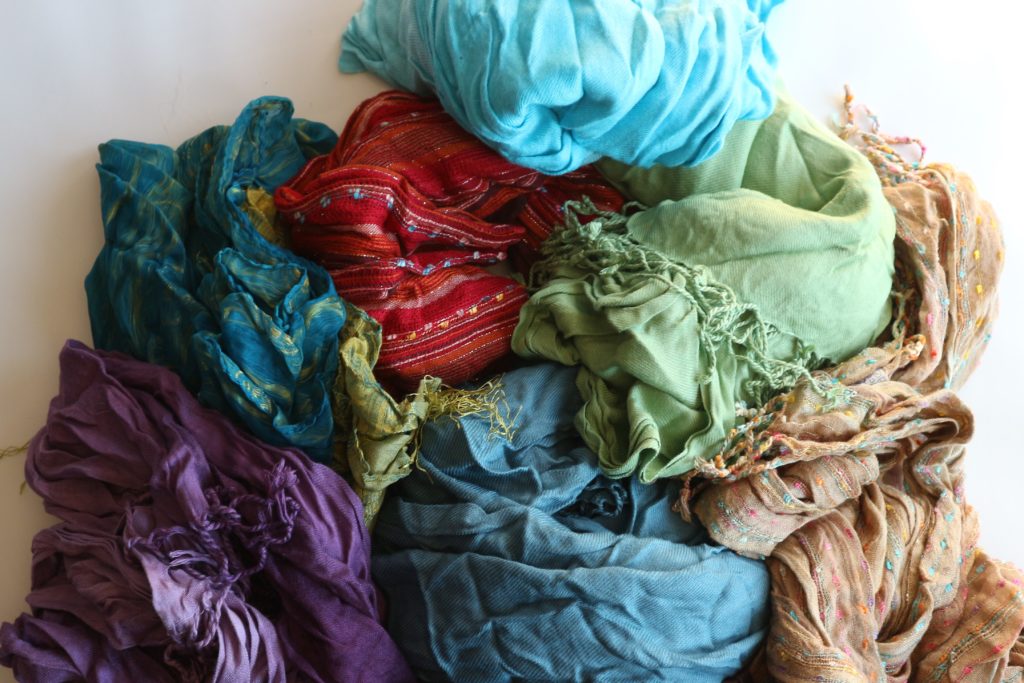
I really, really, really love scarves! Over the last 15 years I have accumulated quite the collection. I’ve dreamt about scarves being on sale and me carrying bags of $5 scarves and pashminas out of the store. Sometimes, I even wear a scarf in the heat of the summer.
This tutorial is how to make an infinity scarf out of a pashmina or regular scarf. I will also give you some details if you are just using new fabric.
You will need:
- an old scarf/pashmina or piece of fabric (20″ or wider x 80″ approx.)
- scissors
- pins
- needle and thread
- sewing machine (optional)
- iron (especially if your scarf has been neglected for a while and crumpled like mine)
Do you like to upcycle?
You can make an infinity scarf out of old clothes, bed sheets, a soft blanket or scarves or new fresh fabric.
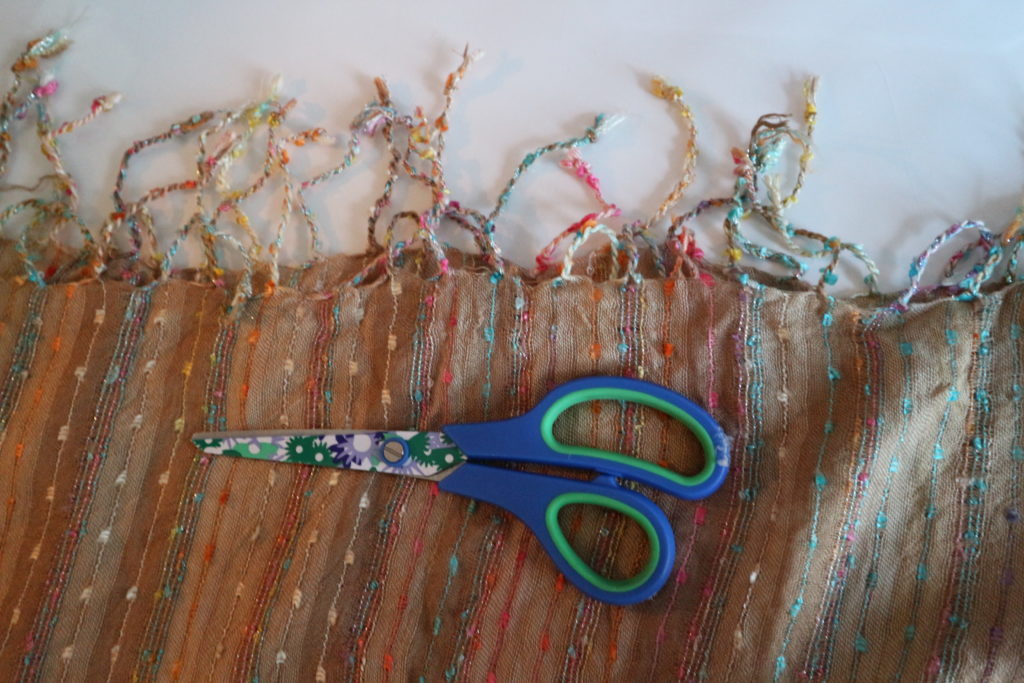
Iron and Measure
Start by ironing the creases out of the fabric/scarf.
If you are using new fabric for this project use a piece that measures at least 18 x 70 inches (45cms x 177cms).
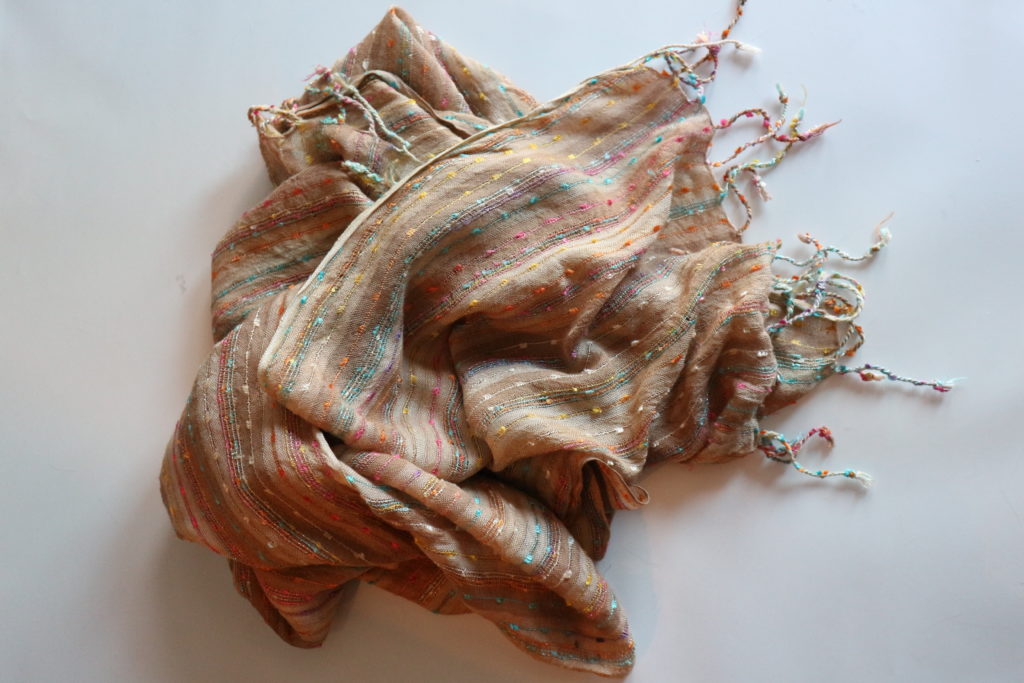
My scarf was 26 x 69 inches (66 cms x 175 cms). It was even shorter after I trimmed off the fringe and I think its a great length-finished its 66 inches long. I prefer it to be extra wide too.
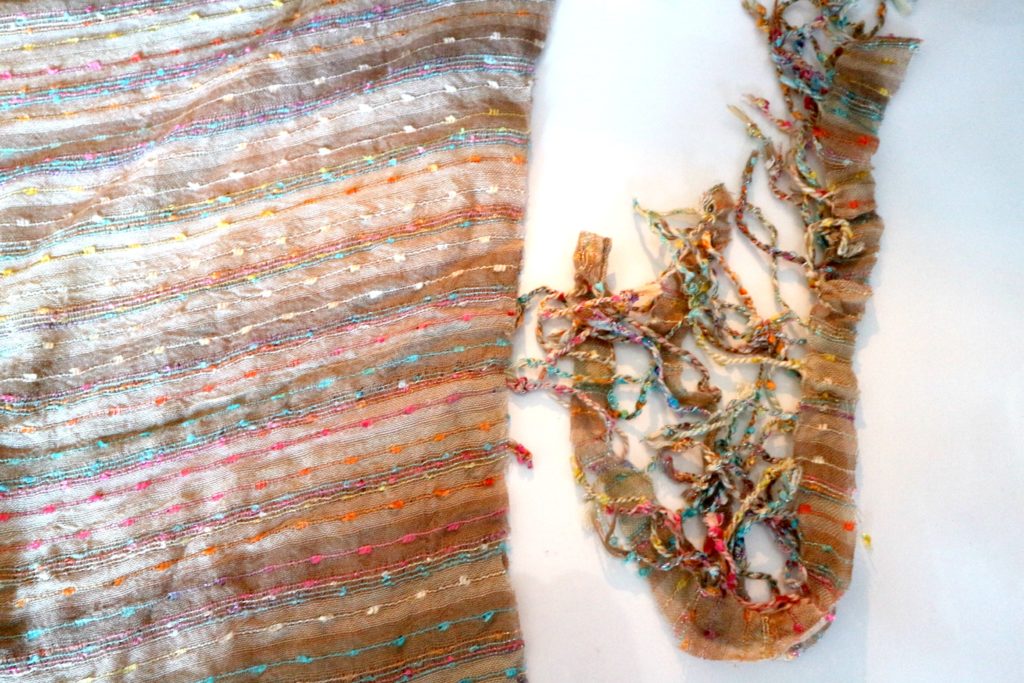
Trim off the tassel bit on the end if your scarf/pashmina had trim.
Fold the fabric in half lengthwise with the good side facing inward.
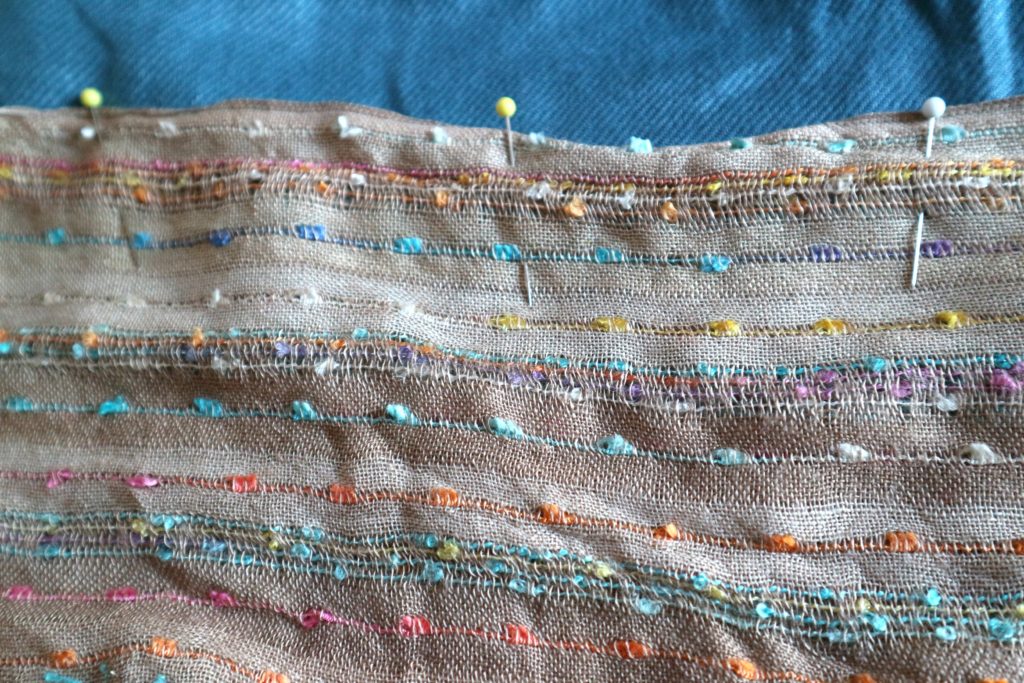
Pin the fabric along the edge of the long side.
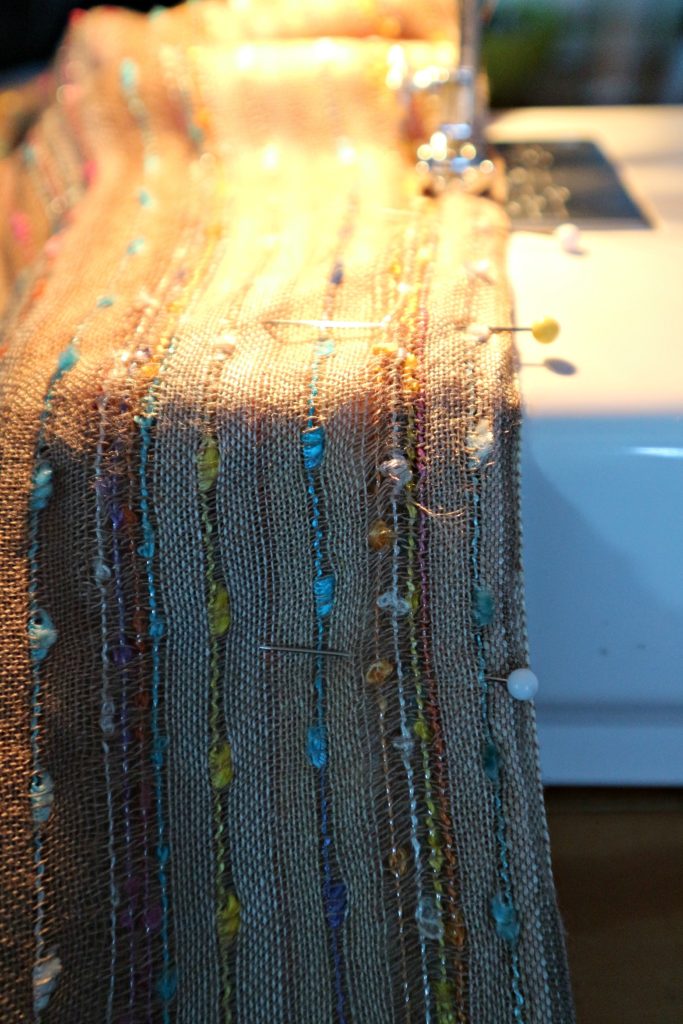
Sew the length of the long side.
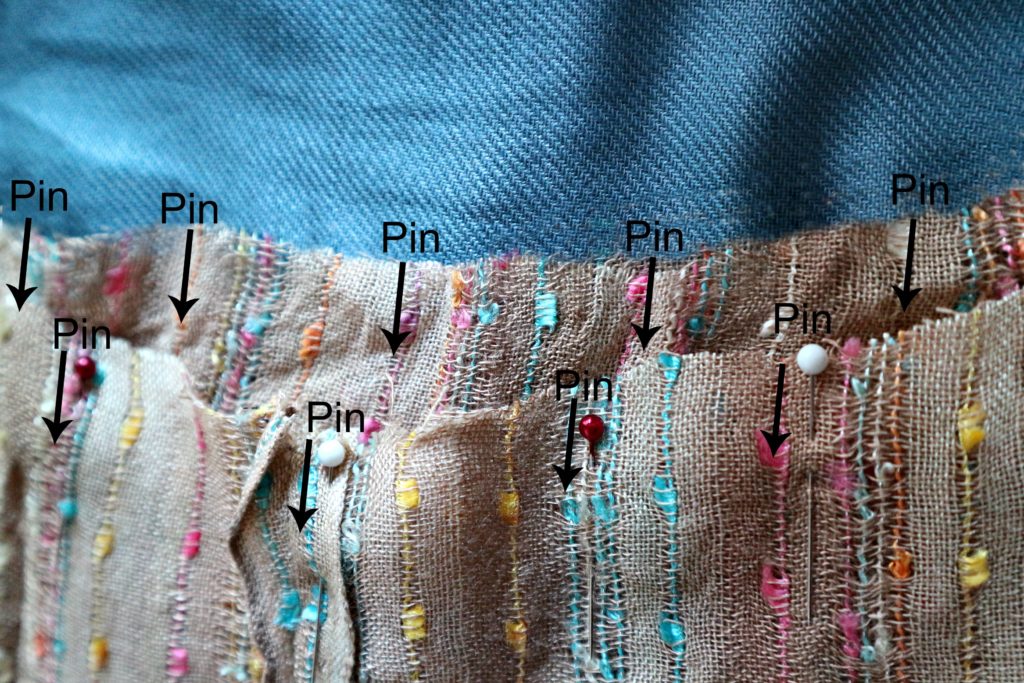
Pull one end of the tube through to meet the other end and match up the seams. Next, pin the ends together to make the tube into a circle. Be sure to only pin through two layers.

Sew around the top, but don’t sew it closed. Leave a gap of a few inches to pull the scarf through.
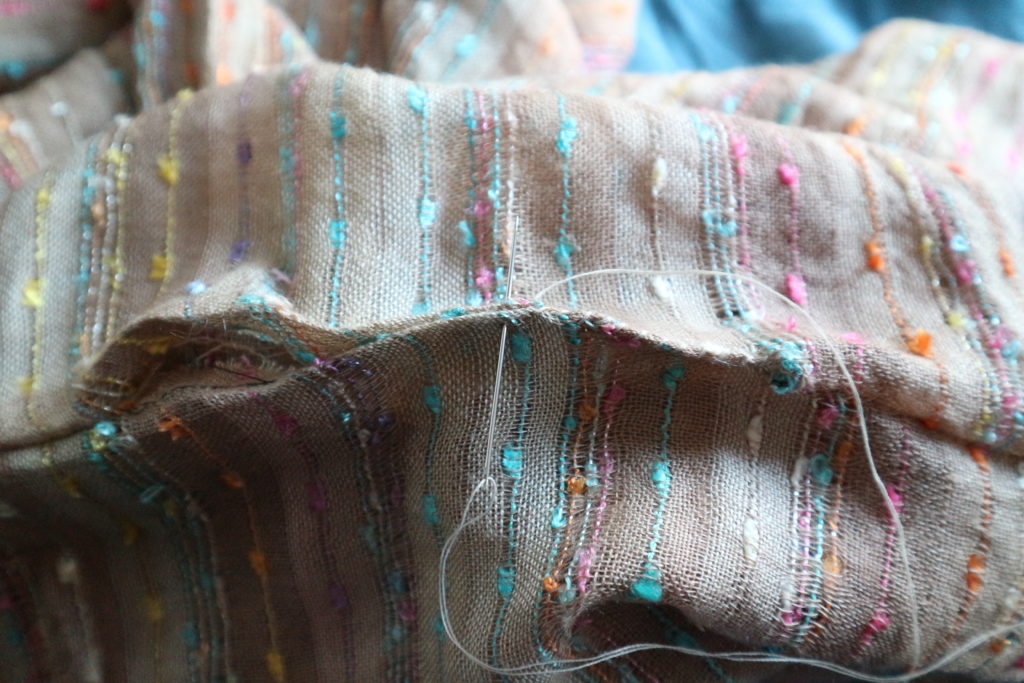
After you pull the scarf through that small gap, get your needle and thread and hand sew the gap closed.
Now its ready to wear. Get the dog leash and take your dog out for a walk. Show your gorgeous new scarf upcycle to your neighbourhood!
I really enjoyed reinventing my scarf! Thanks for reading this post, feel free to comment if you need more detail!

Have you seen this post from last winter?! I made a similar scarf but with a zipper pocket to hide your cell phone or passport. Great idea for travelling!
How to Make an Easy Infinity Scarf with Zipper Hidden Pocket