Have you gotten on board with the Air Plant craze? Air plants, are small aerophyte plants that do not need soil to grow. They absorb moisture from the air and indirect light for sustenance. The perfect plant!
Since air plants have no need to be in a pot of soil they can be put almost anywhere. Just so long as you remember to dip them in water once a week and allow the water to drain off.
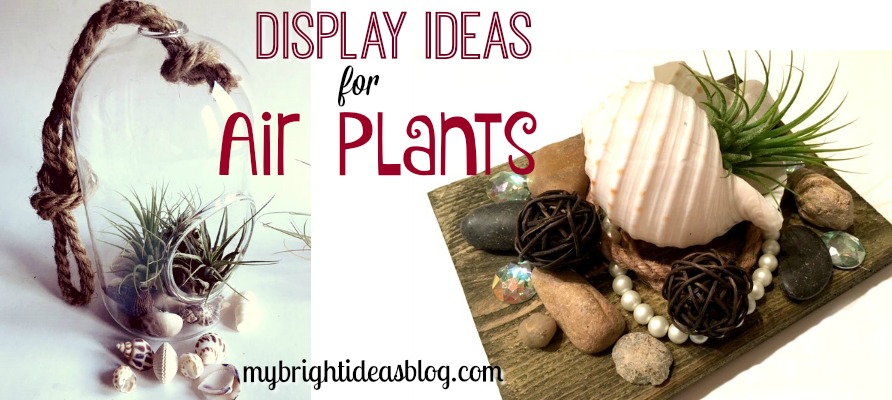
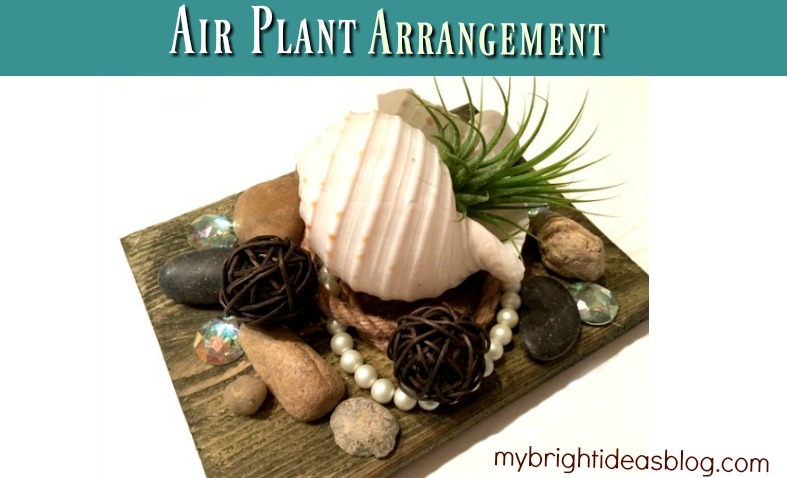
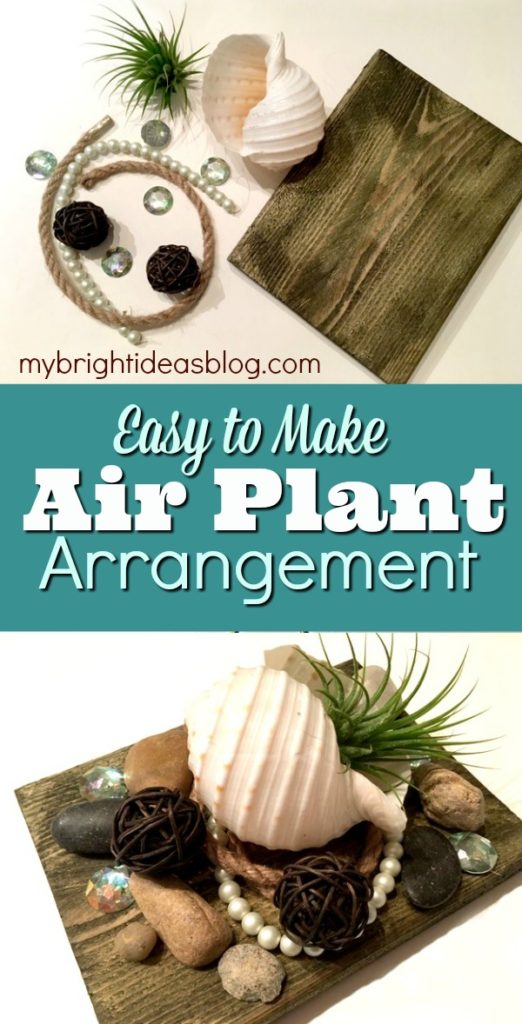
Today I’ll show you how to make an easy arrangement that looks a bit nautical by putting the air plant into a sea shell and accessories on wood or a plate.
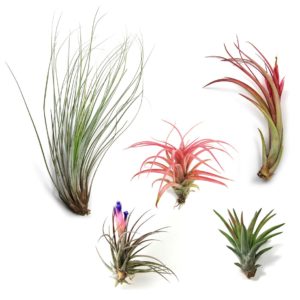
I found my first air plants at the garden centre this past summer and then spotted a shop in the local mall selling them. The ones I have access to sell for $4-$10 each.
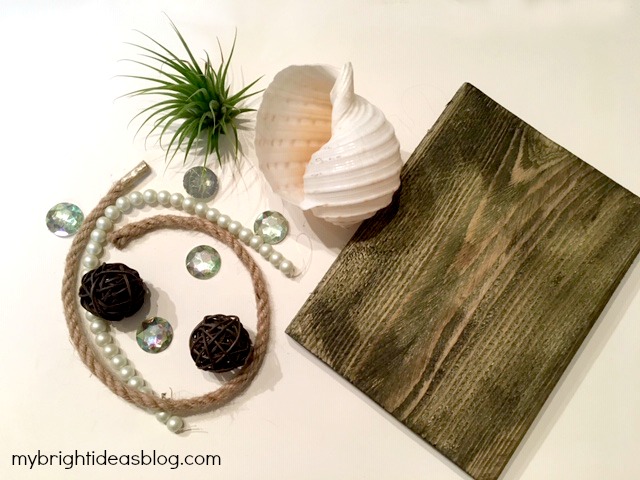
To make this you will need:
- an air plant
- a big shell
- nautical themed items: rope, glass gems, pearls, stones
- a block of wood, plaque or glass plate
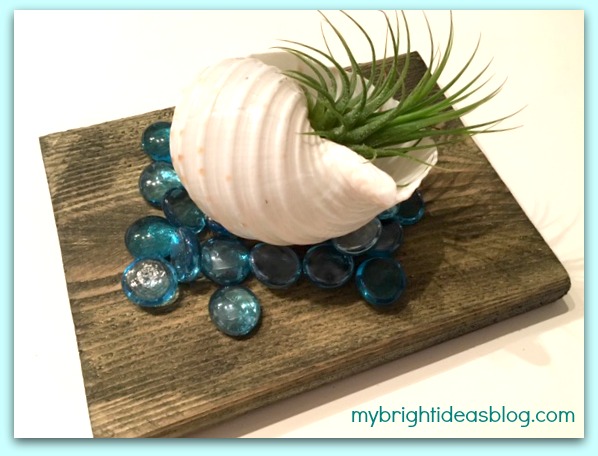
I always have scrap pieces of wood around in case of a sudden project inspiration. For this project I used a scrap approximately 6 inches by 6 inches. If you have a pretty plate you could easily use that too. I am tempted to check the thrift store for a beautiful, antique plate. For this first photo I just used turquoise glass gems.
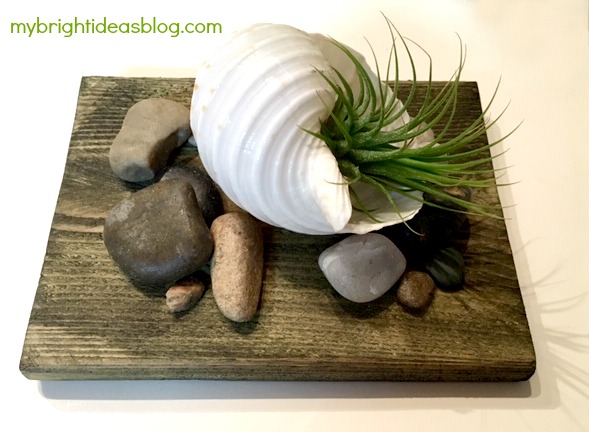
For this attempt I used river stones around the shell. I got them from the dollar store and the same with the gems.
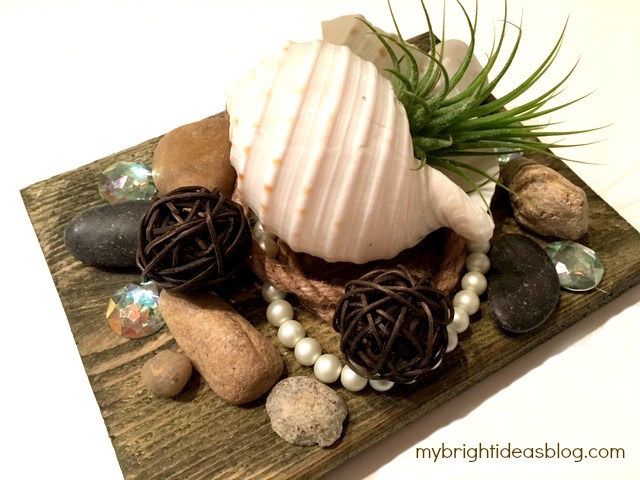
By adding pearls and rope with craft gems and stones I thought it turned out really nautical. Since none of these are attached to the board we can re-arrange them into another craft if I get tired of this one.
Here is another idea!

The photo above shows 2 popular air plant display options. The one on the left is plastic and from the dollar tree for $1. I wish I had bought 10 at that price since they were hard to find again. The one on the left is glass and from the garden centre for $8.99.
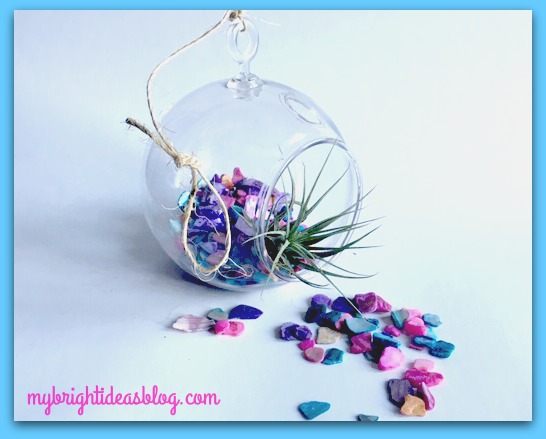
I used chips of shells that have been dyed for this one. Air plants make great gifts. Since this is plastic and needs very little care it would be easy for a child to care for or a friend in senior care.
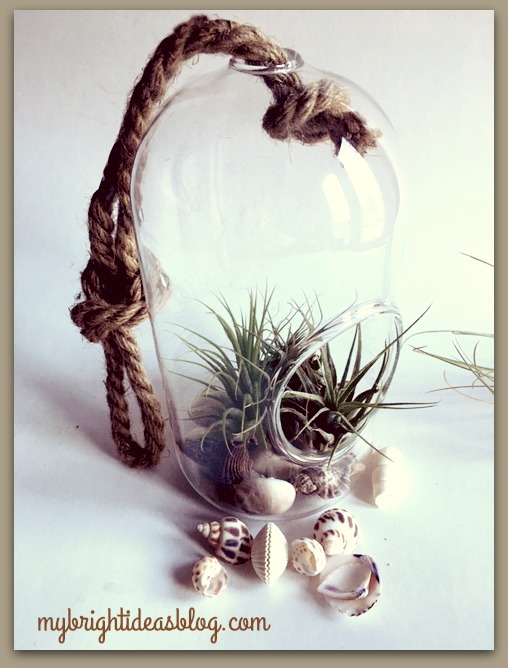
This one I used random shells in the base of the glass dome. I love the chunky rope and shells together-its very beachy.
I’m really excited to try some of the other plant ideas. I’ll let you know if they turn out well! Below are links to some of my other projects!
Nature Craft – Perfect for Earth Day Activity – Clay Imprints with Plants and Flowers
Plant Puns on Painted Potted Flower Pots – Adorable Gift Idea to Make Them Smile!

Make Adorable Pet Rocks – Easy Kids Craft!
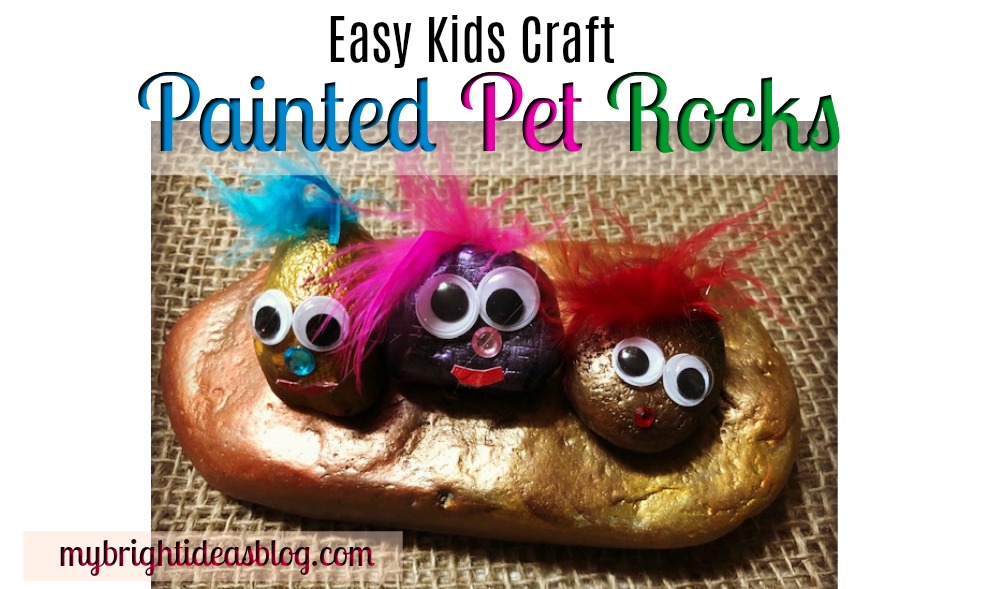
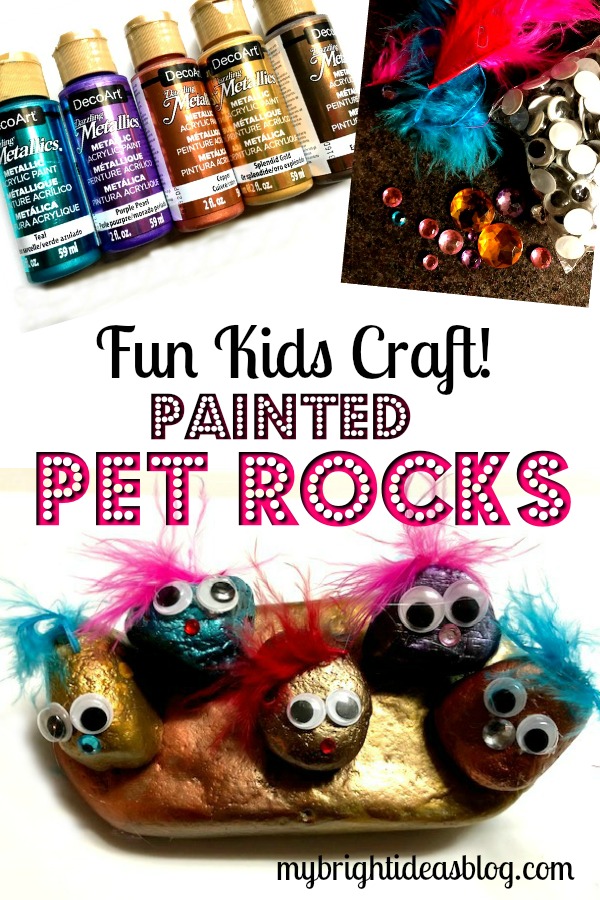
Okay so we have a few more days until the kids are back to school. Is anyone getting stir crazy yet? Not to worry I have a craft idea for their entertainment. Grab a few stones and basic craft supplies and turn them into PET ROCKS! It turns out quite cute actually, the grown ups might want to join in for this project.
You will need:
- rocks
- paint preferably glossy (or better yet metallic!)
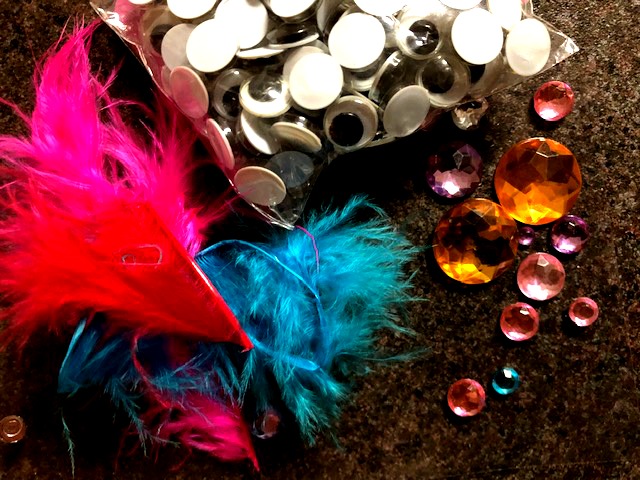
- gems
- glue (hot glue or white craft glue)
- feathers
- a scrap of red paper or felt
- googly eyes
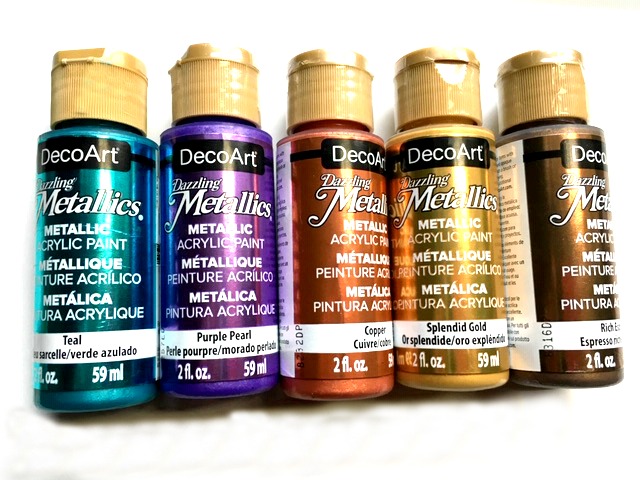
I’m in love with these metallic paints. They look great on rocks!
For today’s project you can use any craft paint but I prefer glossy!
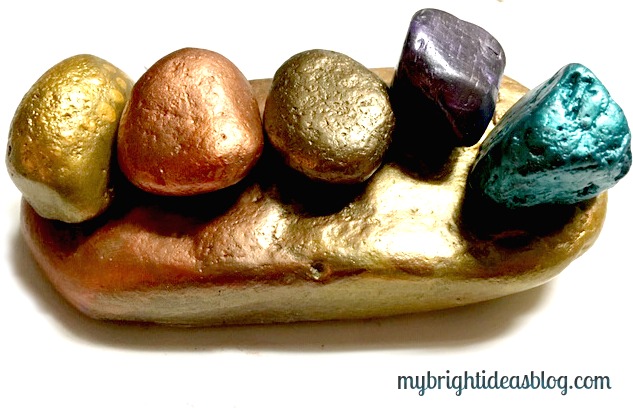
I found this huge flat stone in our rock collection and painted it gold. Then I painted each stone a different colour.
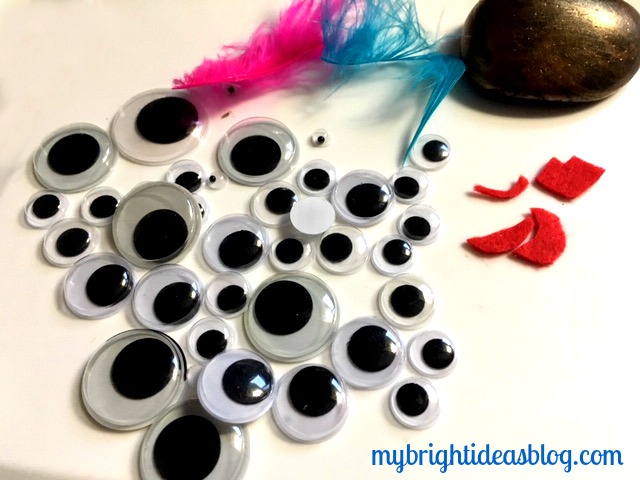
Googly eyes! I have probably over a thousand googly eyes in my craft cupboard. I have no idea why there is so many….today I will use another 10. LOL!

I’m impatient for white glue to dry so I use hot glue to attach the googly eyes on.
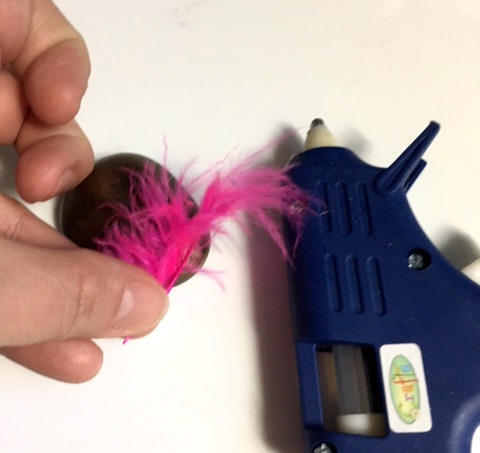
The feathers that I used are just small scraps that had fallen out of feather boas. You just need a tiny bit of something for the hair. Yarn or twine could work if you don’t have feathers. Look around your craft cupboards and see what you already have to embellish your pet rocks.
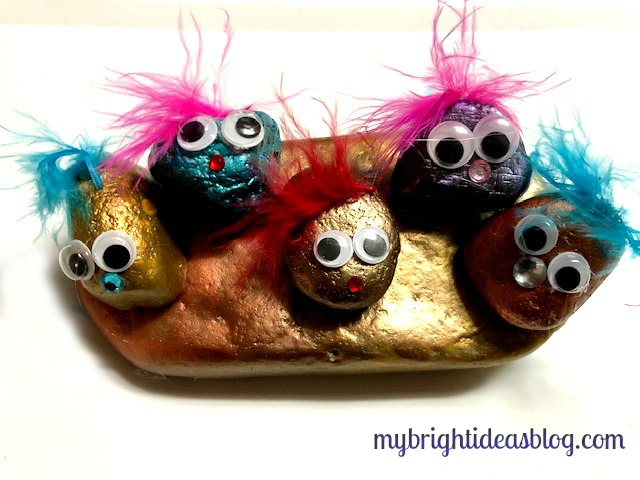
Add a gem for the nose. Or try a pompom nose…they make cute noses too.
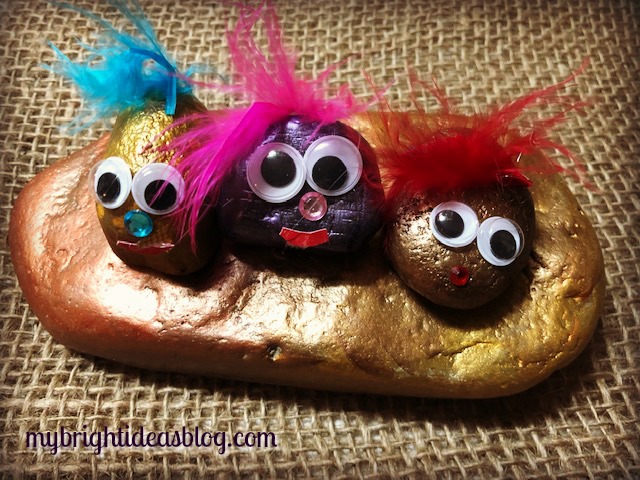
For the mouths you could draw on a smile with a sharpie or if you can’t find where you put your permanent marker….like me. You could just cut out a tiny smile on red paper or felt and glue it on.
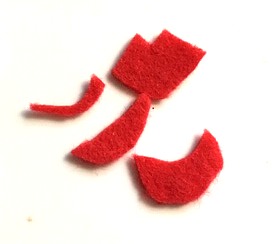
Felt is tricky to cut something so small. You may need to help your little ones with the mouth using small sharp scissors. Or just use paper.
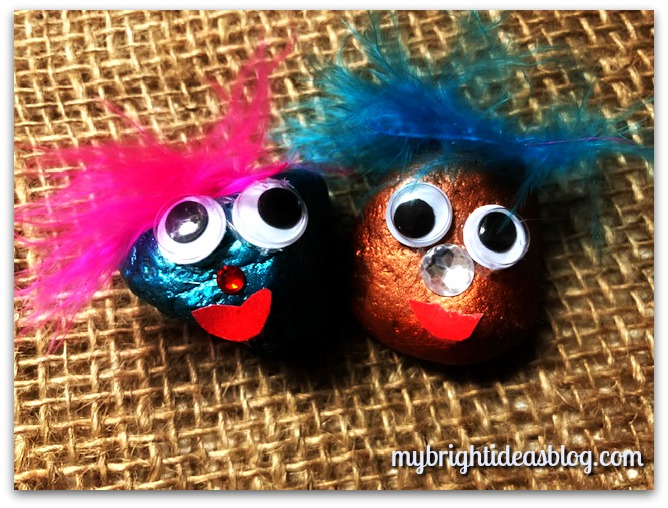
I get a kick out of gluing googly eyes on things. Suddenly they become a little person.
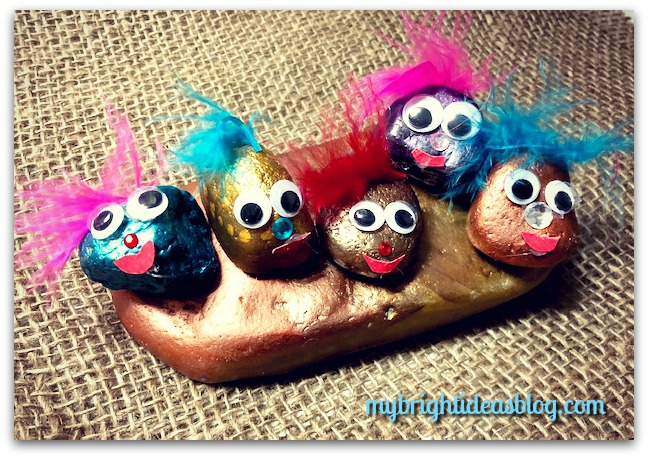
I hope you enjoy making Pet Rocks. Have a look below at a few links to previous posts I have done for crafts with personality!

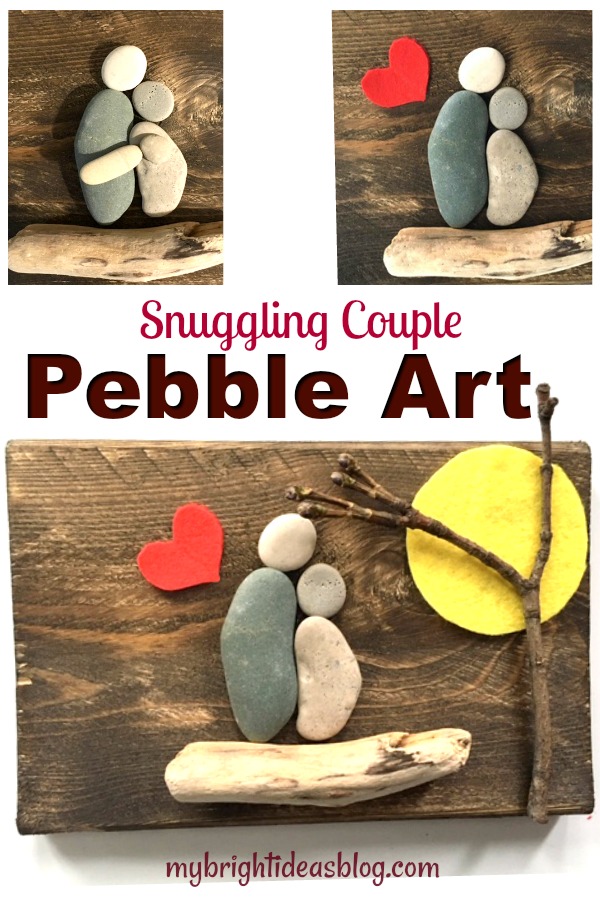
Pebble Art – A Snuggling Couple
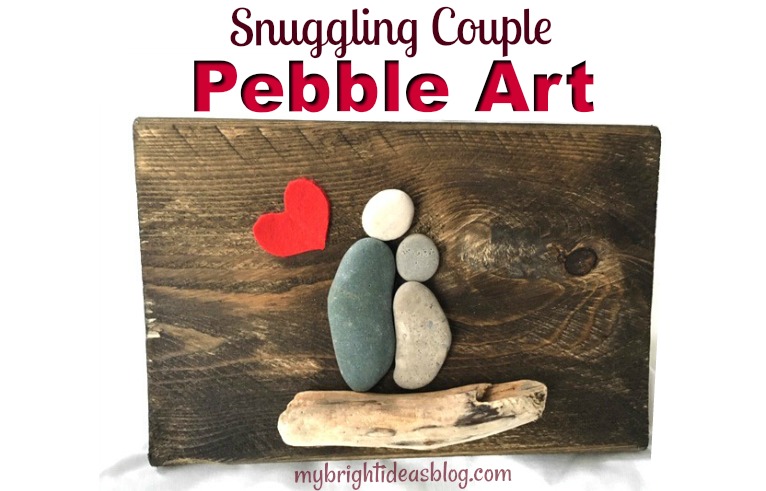
I got a nice collection of flat rocks when the weather was warmer. When you start becoming a beach pebble collector its hard to stop. Even now, although its freezing rain I still would love to escape to the beach…an hour drive away…to look for my favorite shapes of stones (hearts, ovals, circles). So I’ve stained a few small boards to turn them into Pebble Art.
I’ll show you what I made this time….
What you will need:
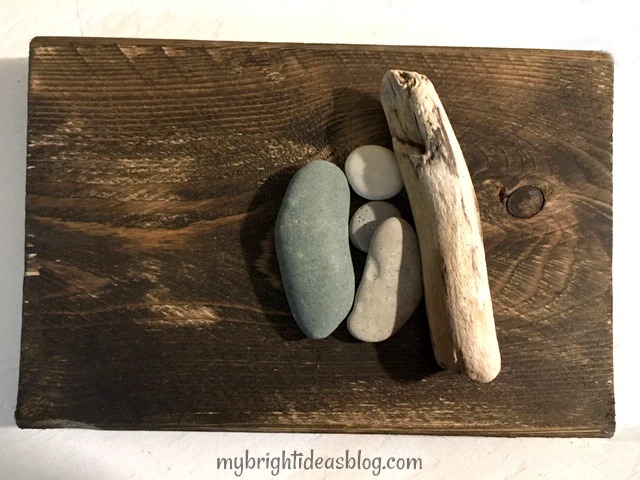
- 2 long pebbles
- 2 round pebbles
- small piece of drift wood
- red and yellow felt
- a twig
- a scrap of stained board or a plain canvas
- hot glue gun or E6000 glue
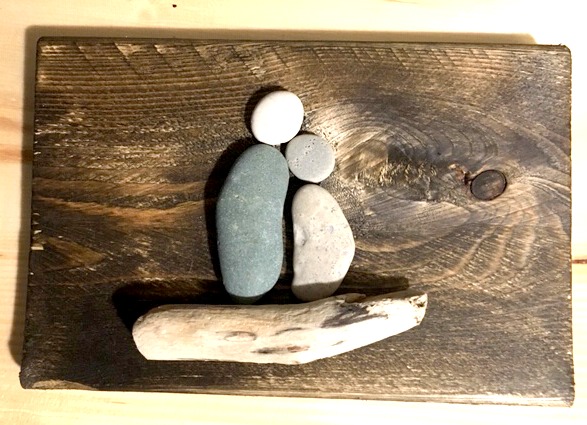
These two long rocks fit together perfectly for the bodies. Two round stones on top for the heads. A small piece of driftwood for them to sit on. Glue everything in place. You can stop with just these natural items or keep going to add some colour.
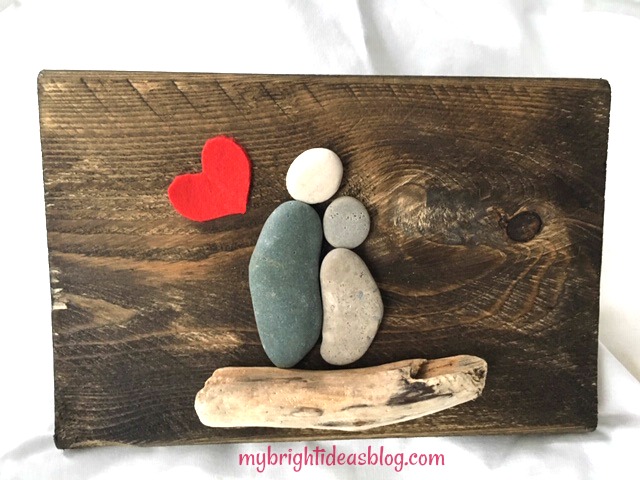
Here I took an inch of red felt and folded it in half and cut the shape of half a heart. I find this is the best way to get your heart shape. If I try to cut it freehand it turns out lopsided.
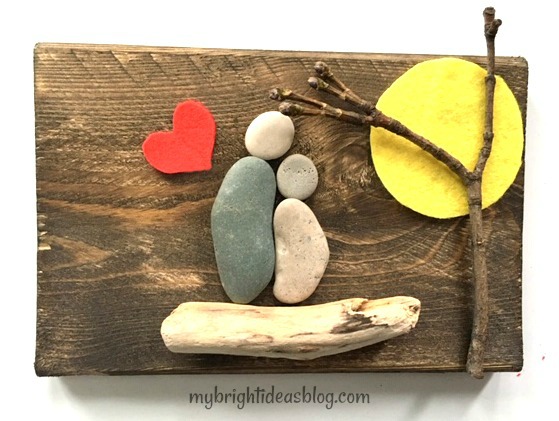
Trace a tin can from your pantry to make a felt round sun. Put a twig on the side and now its done.
Now it’s a couple having a snuggle at the beach, watching the sunset. Although, my 8 year old would like it to be a mother and daughter. Awe she is snuggler. I better make her one for her room!
Thanks for reading another one of my easy crafts….Have a look below for links to some of my other “Pebble Art” projects.
…
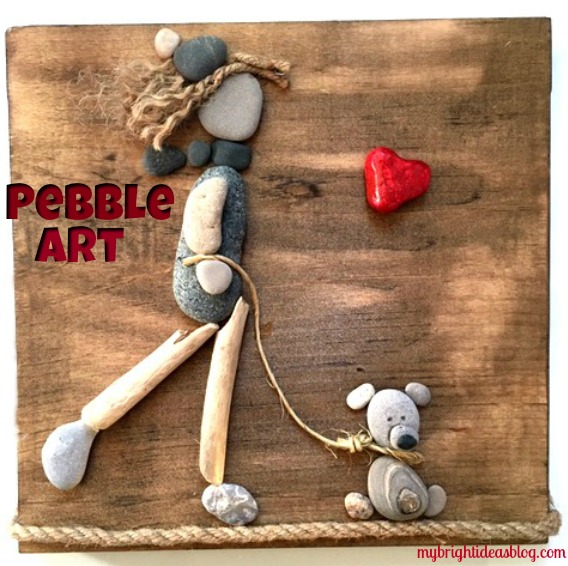
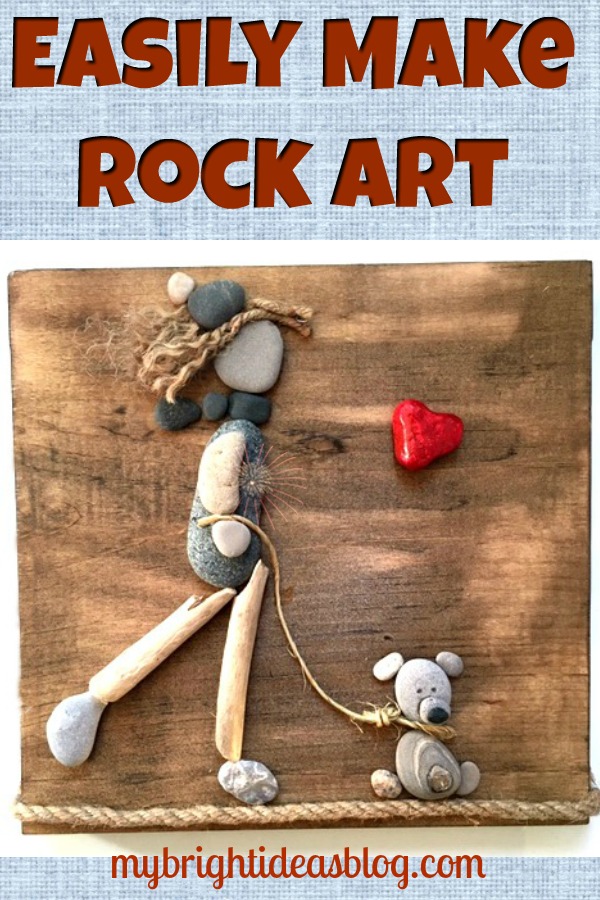
Pebble Art – A Girl and her Dog
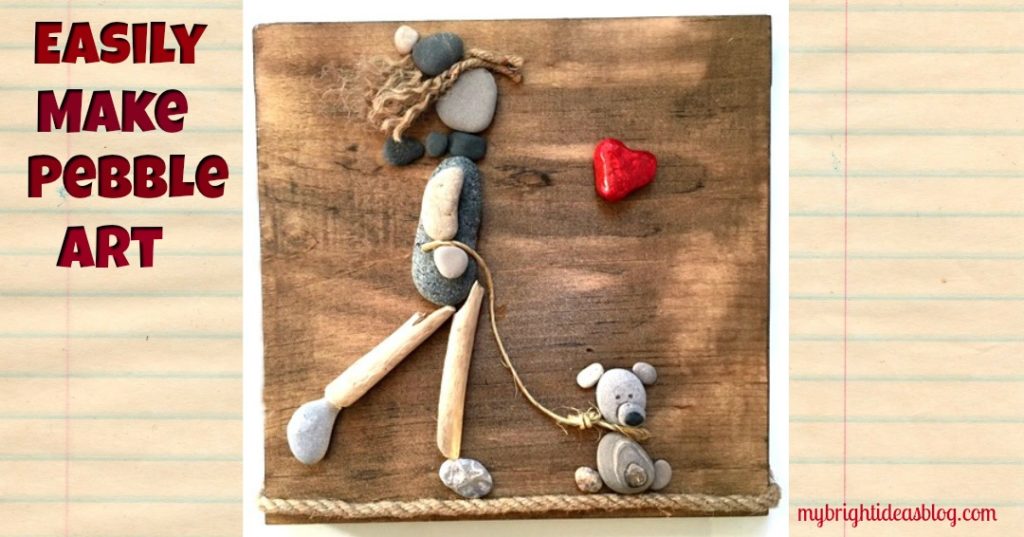
I have been wanting to make pebble art for months but I’ve been nervous to get started. How silly is that? It’s just rocks glued to a board for heavens sake?! Well today I finally went for my first of many (hopefully) attempts to make pebble art.
You will need:
- a wood board
- sand paper
- paint or stain
- rag
- rubber gloves
- pebbles
- industrial glue or hot glue gun
- twine
- jute rope
- red craft paint and red glitter paint
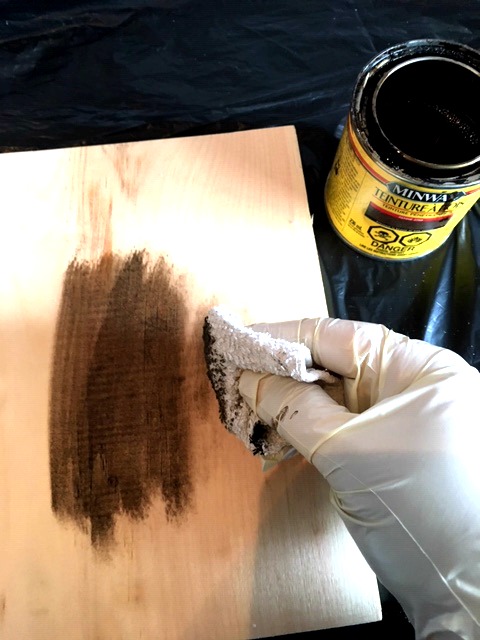
Start by preparing the board. Use sand paper to smooth out rough edges. It doesn’t have to be perfect just make sure the rough corners are smooth.
Apply stain, wearing gloves, use a rag to wipe stain onto the wood. In this project I used my favorite. Minwax “Jacobean”. I waited 12 hours for this to dry.
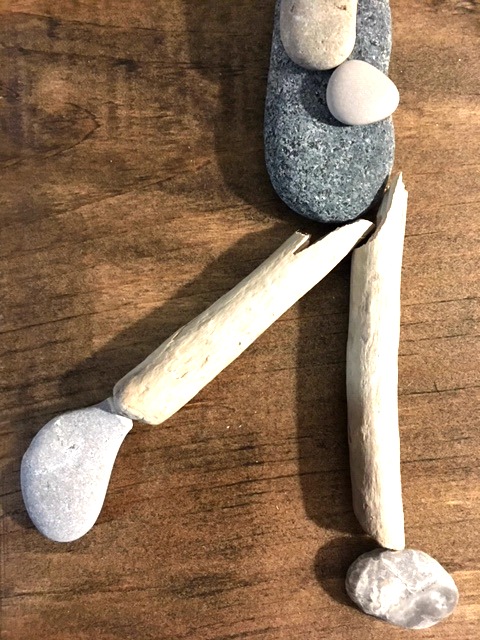
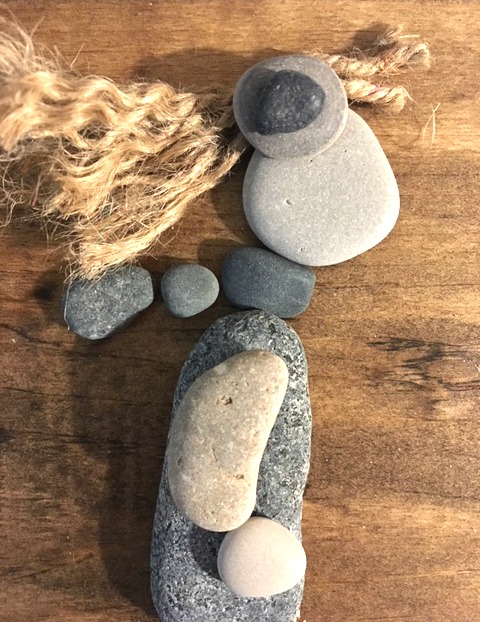
Next, lay out your stones to create your artwork. I broke a little piece of drift wood to become her legs. Rummaging through my treasured pebble collection I found a funny shaped rock for her foot.
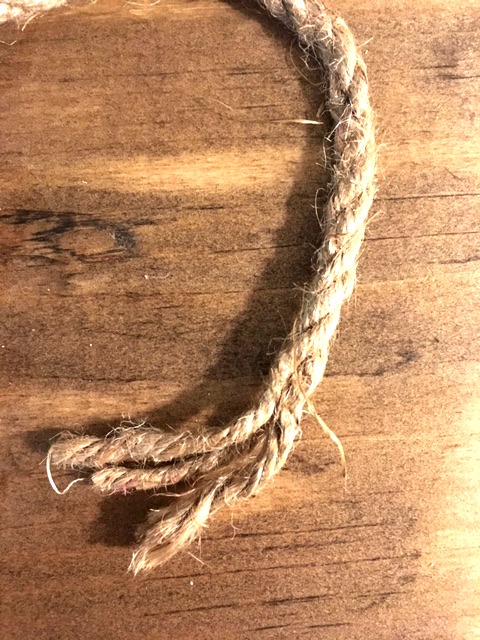
This piece of jute rope was a perfect scrap so I unravelled it to make hair for her.
I used industrial strength glue “E6000”. It’s so much stronger than a hot glue gun. But it is stinky and dries slowly. Use in a well ventilated area.
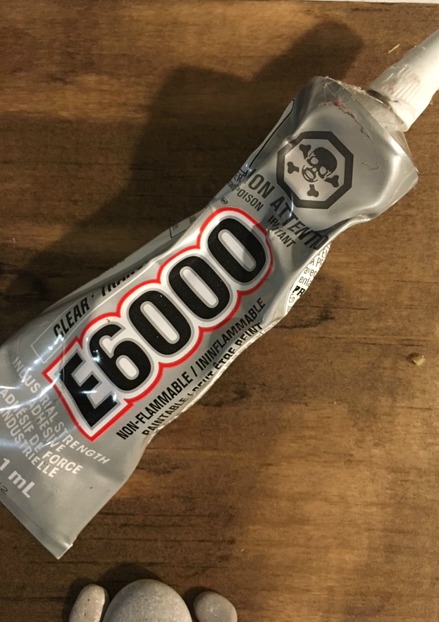
Did you crack a window?

I needed to put some other pebbles on and around the hair to hold it down while the glue dried.
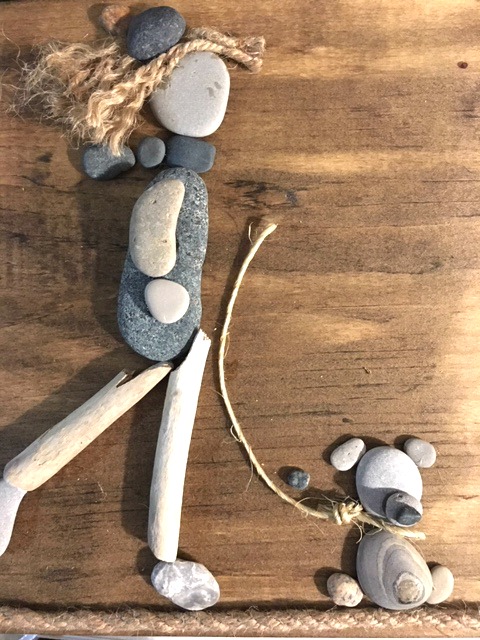
I tied a knot in a piece of twine and made it into the dog leash. At the bottom of the wood I glued a piece of jute rope to make a path for my girl and her dog to walk on. The ends were then tucked around the sides and glued down. (Okay, I confess, for this one part of the project I used the glue gun) I also added tiny dots for the dog’s eyes with a sharpie.
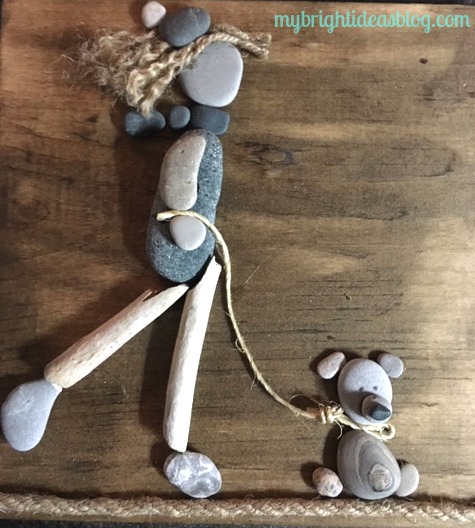
Notice how I just tucked the end of the twine in between the two pebbles to have her holding the leash.
I like the natural colors on this so far, so I found it hard to decide if I should leave it natural….or add a splash of colour.
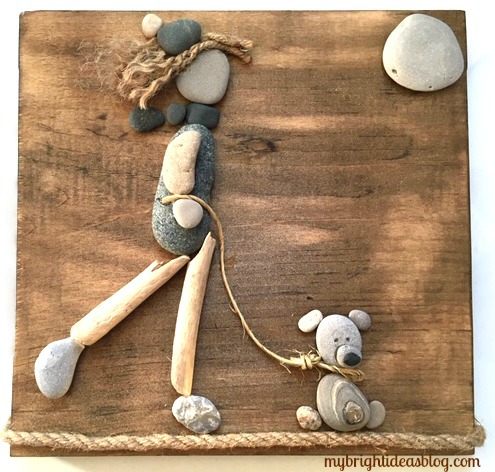
Here I tried out a natural big round stone for the sun or moon.
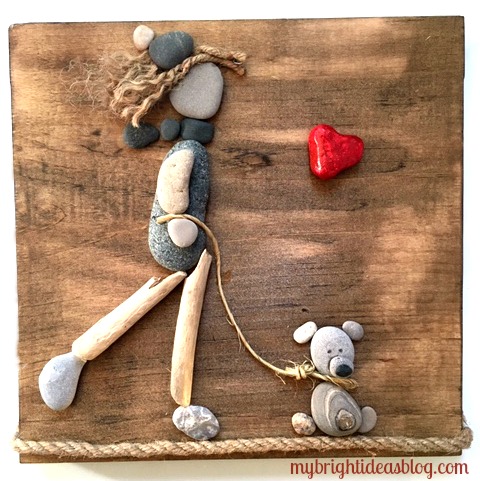
I love this red heart shaped stone that I had previously painted with red craft paint and a sparkly top coat. You could also use nail polish. Since I wanted to make this a gift for my daughter who loves her pooches I think this is a nice touch.
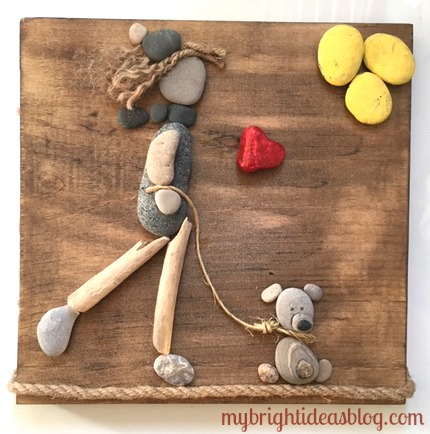
For this one I put in some yellow pebbles for the sun. Nothing is permanent until you glue it on, so you can tinker around with your design while you try out different options.
I loved making this and plan to make a lot more. It becomes a mixed medium art piece. It’s really exciting to try something new and see it turn out great! Since every stone is different it will be impossible to make a duplicate. This is a one of a kind gift idea!!

…..
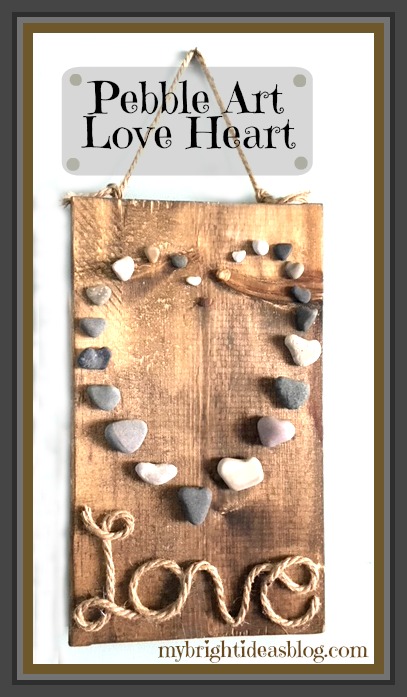
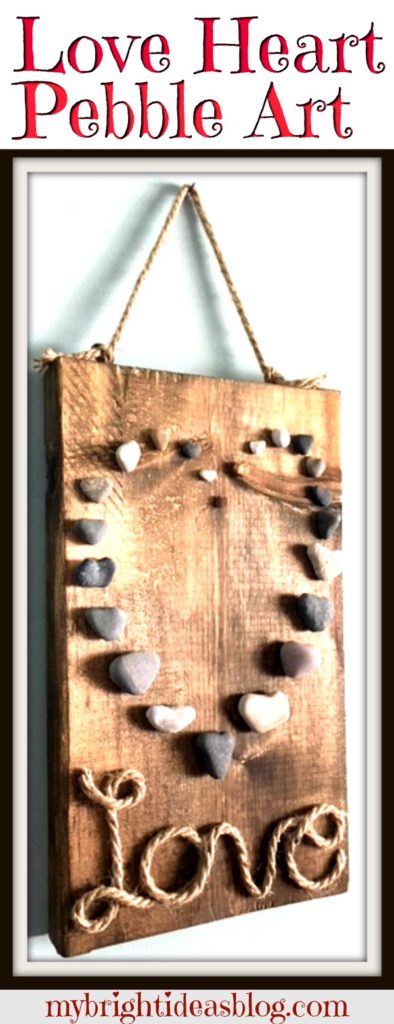
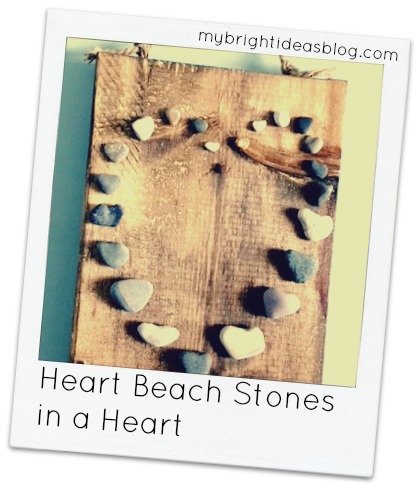
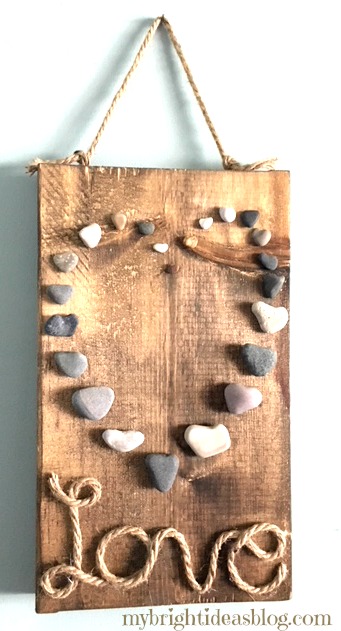
Heart Shaped Beach Stones – Pebble Art
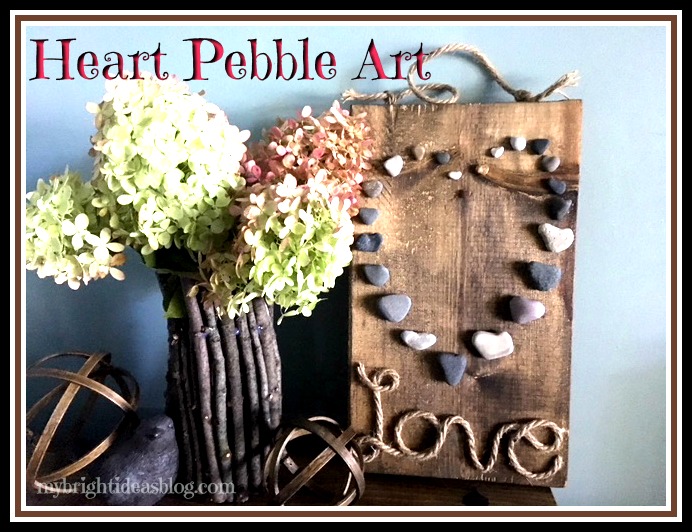
Make heart shaped pebble art with a collection of beach stones and natural rope on wood.
We have gone to the beach twice in October. The cool thing about going to the beach in the Fall is that no one else is there. The beach-that is typically packed with families with picnics and sunscreen….well….is empty. Have you ever had an entire beach to yourself? It’s amazing!
Our home is about an hour’s drive away from Lake Huron. If you aren’t familiar with the Great Lakes allow me to explain….
The Great Lakes
The Great Lakes aren’t your typical lakes. There are 5 and they are huge! Each looks like a sea, with rolling waves, winds, strong currents, great depths and distant horizons. According to Wikipedia if you put all 5 of the Great Lakes together the surface would be the size of the United Kingdom. Lake Huron is where we would head to see a gorgeous sunset.
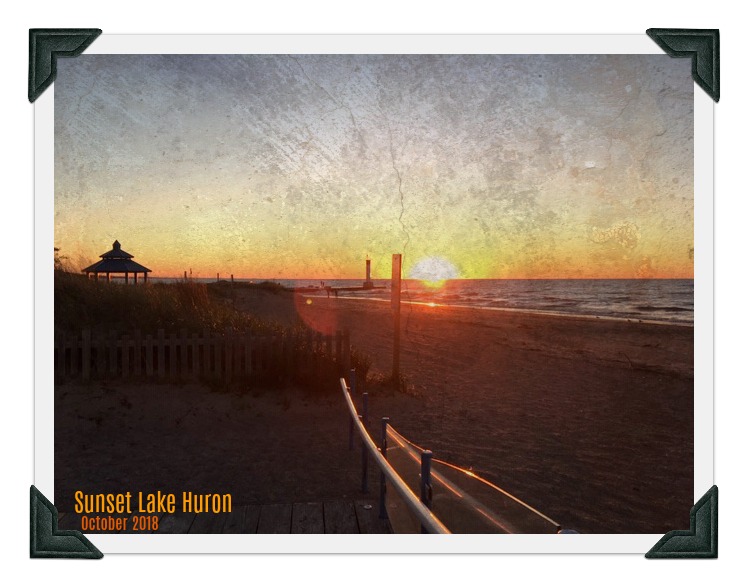
If we drive an hour in the opposite direction from home, we will be at Lake Erie. If you are a morning person you can watch a beautiful sunrise on that side. Yawn…..
The Great Lakes are the largest group of freshwater lakes on Earth. 4 out of 5 are on US Canadian Borders (Superior, Ontario, Huron and Erie). Leaving Lake Michigan the only one that is located completely in the US. According to Wikipedia “they form a single, naturally interconnected body of fresh water”.
Well that is enough of our fun facts for today! Moving back to our craft project and a trip to the beach.
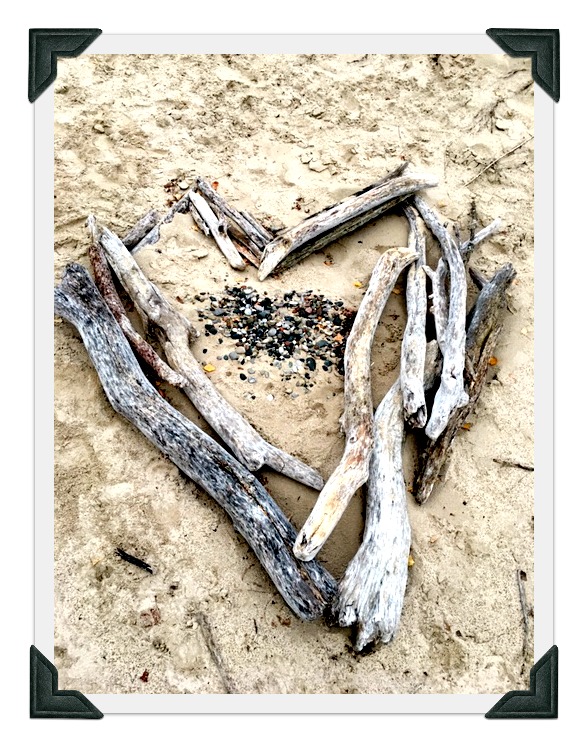
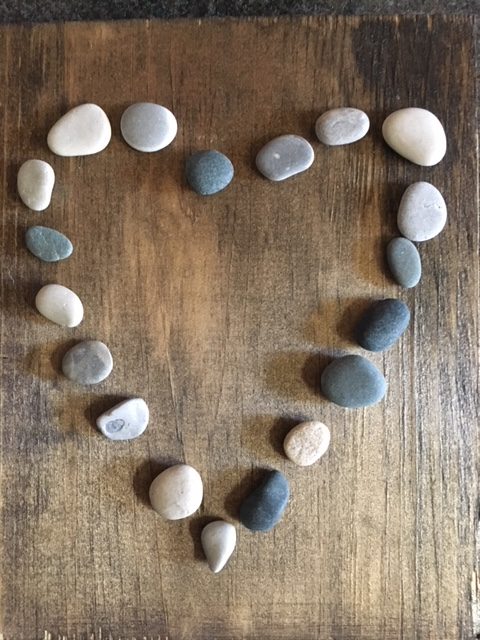
With my eyes on the ground looking for awesome rock treasures I always marvel at how beautiful the stones are wet, sparkling in the sunshine. As we walked along looking for interesting shapes-especially hearts! What did we find but this heart made out of drift wood. Awe isn’t it Lovely!
If you look at the beach for odd shaped stones, you suddenly see how very many there are in the shape of a heart.
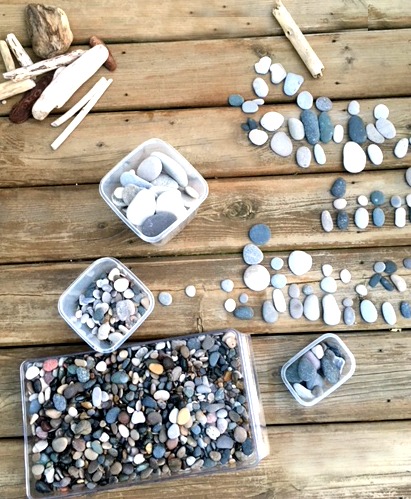
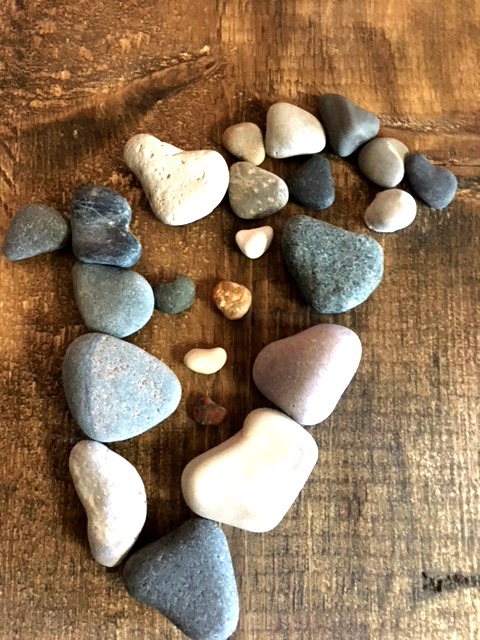
We came home with a nice collection of smooth stones that I sorted into a few containers for different crafts I have planned.
Circles, Oval, Hearts, Big Flat ones and some that were just wonky shapes.
If you are just buying a bag of stones from the dollar or craft store you probably won’t find heart shaped ones, but you can make a heart shape with any natural pebbles and it still looks great.
A month ago, I was spray painting things and I threw in some stones and painted them. If you have already my previous projects from the summer you will soon see that I love to spray paint things! My daughter noticed that I had painted a random stone orange but it was a really cool heart shape. This started my fixation on heart shaped stones.
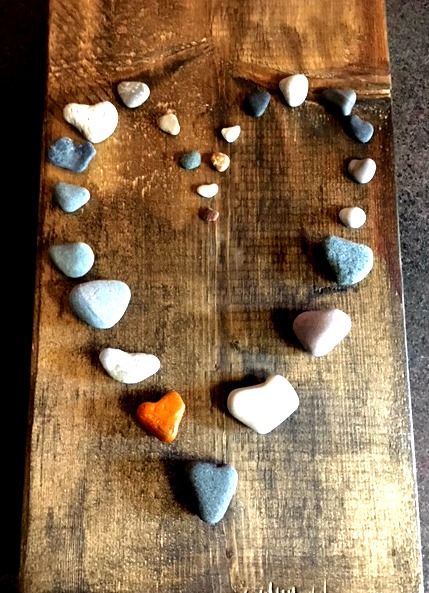
On our next trip to the beach we specifically made a search for hearts, circles and long oval pebbles of any size. Bring on the rock projects!
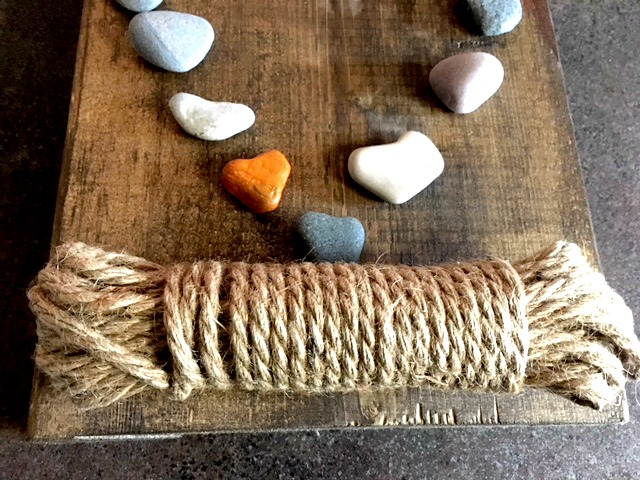
To make this you will need:
- heart shaped stones (if you can’t find them smooth pebbles are fine)
- wooden board (I had already stained this 9 x 16 board with Miniwax Jacobean)
- jute natural rope
- hot glue gun
- 6 glue stick refills
- 2 eye hooks
To get started, I organized my love heart shaped rocks to see how big it would be on my wooden board. I didn’t glue it to on yet. Instead, I took a photo of it on my phone in case I needed to refer to it. Then I got my jute natural rope.
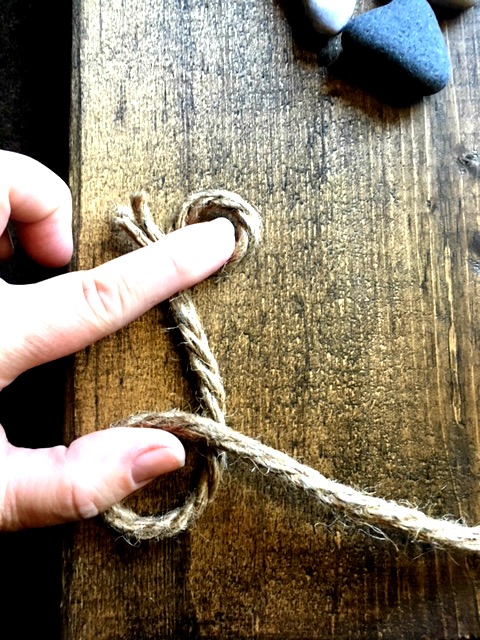
To decide on your letter size use your fingers to make the shape of the L. I usually “eyeball” my projects instead of measuring. Holding the rope down I wrote out the letters of the word Love on the wood.
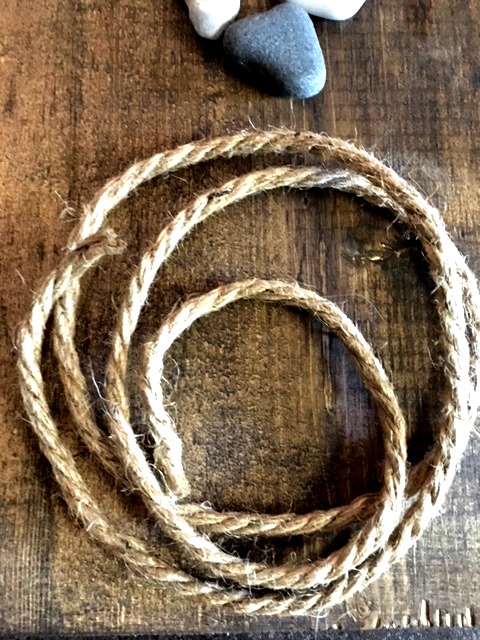
I cut the rope ahead of time because it was quite big to work with. You might choose to leave it on the spool until the end. That’s cool too!
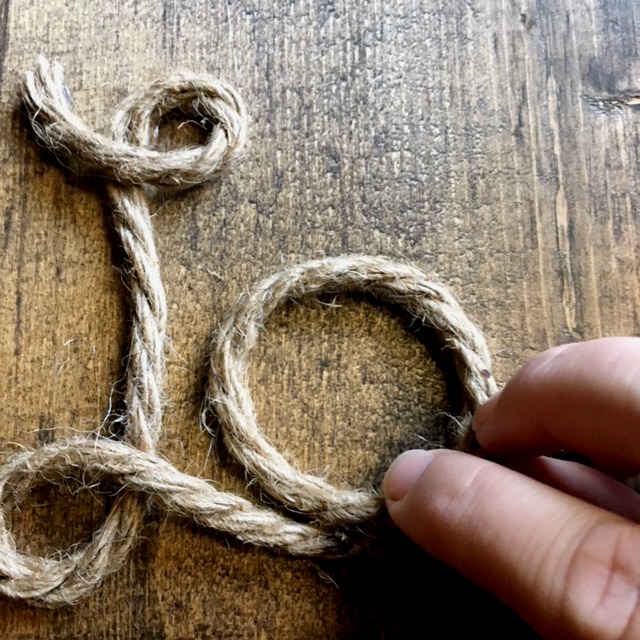
Using a hot glue gun put a few dabs at the top of the loop of your letter L and guide it into the shape of the letter using dabs of glue as you go along. Move on to the letter O and then join into a V and finally an E.
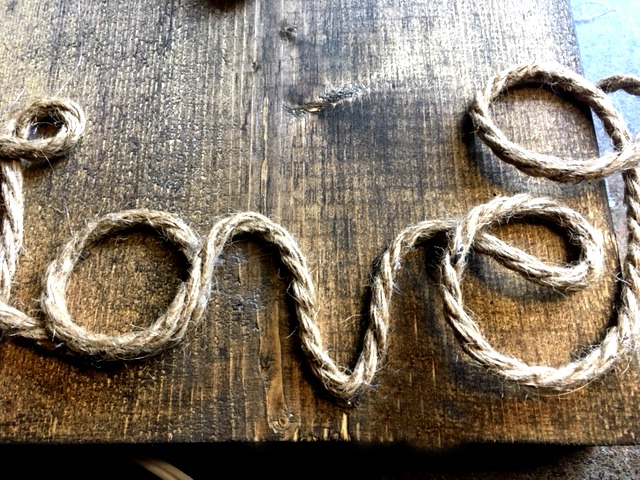
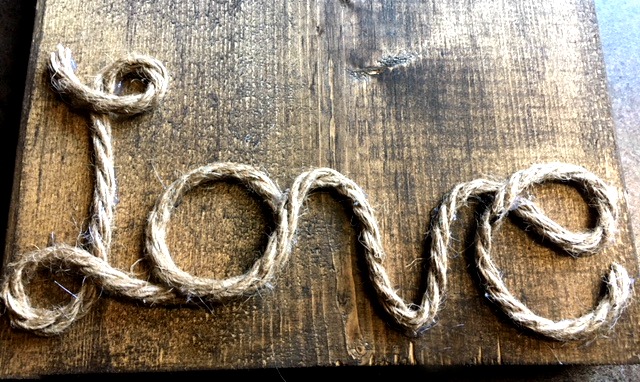
After the E is glued down trim the rope. Make sure the end of the E is secured so that the rope doesn’t fray and lift up.
Perfect! Next lay out the rocks in the heart shape again.
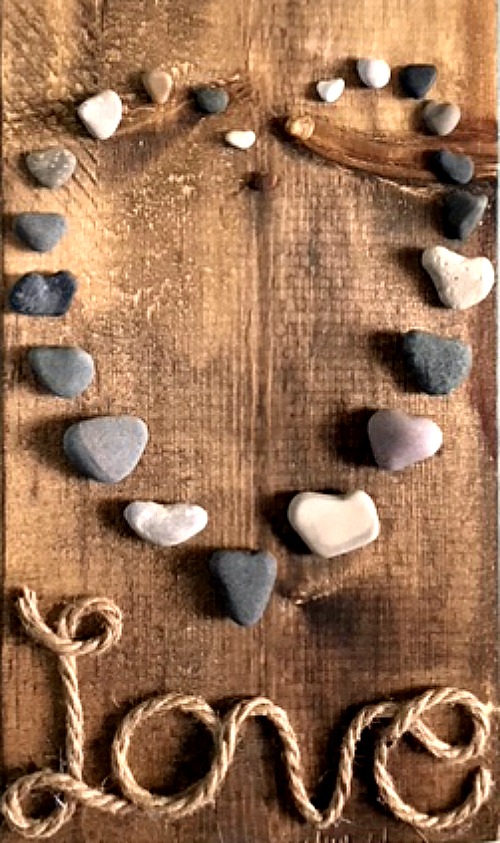
When you have the stones just where you want them. Remove each one and put a dab of hot glue on each pebble and then put in back in its place.
This craft would look good without the rope if just the stones on the wood appeals to you.
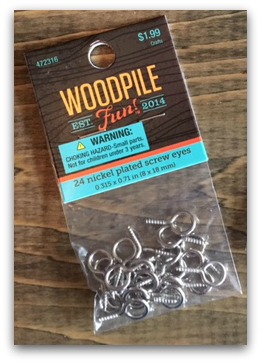
I picked up this package of screw eyes at a craft store but you can find them at the hardware store and dollar stores too. I chose the humble eye hooks so that I could have the rope on the top of the project match the “Love” at the bottom.
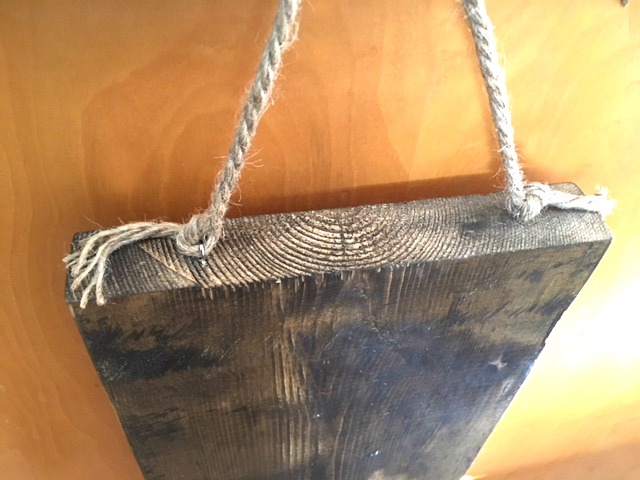
Simply screw these into the top of the board and tie jute rope in a knot. Now it can hang on the wall.
This is a super easy gift idea. You could really personalize it by writing your last name instead of love, or something else…maybe “faith”, “hope”, “smile”, “dream”….something that will inspire or make you smile. You could also make this any size or paint the wood board instead of staining it. Get creative!
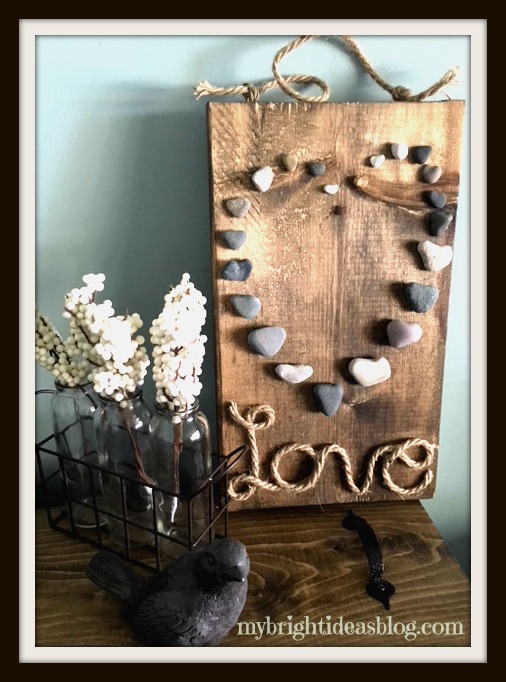
Thanks for reading this post and checking out another one of my crafts. I have posted several rustic/wood home décor projects recently, so I’m linking them to this message for you to pop over and see too.
Please pin or share with your social network of friends.
…