Have you gotten on board with the Air Plant craze? Air plants, are small aerophyte plants that do not need soil to grow. They absorb moisture from the air and indirect light for sustenance. The perfect plant!
Since air plants have no need to be in a pot of soil they can be put almost anywhere. Just so long as you remember to dip them in water once a week and allow the water to drain off.
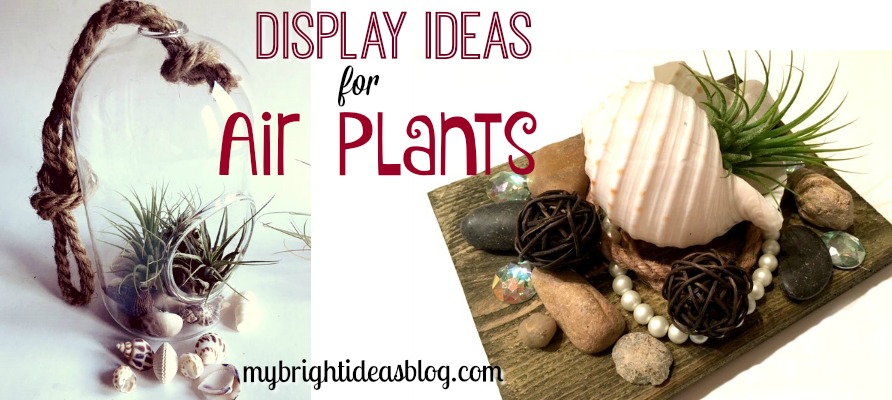
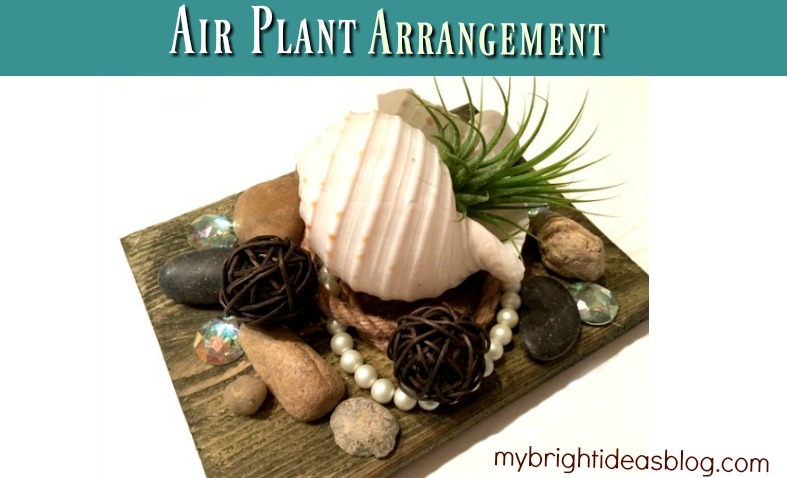
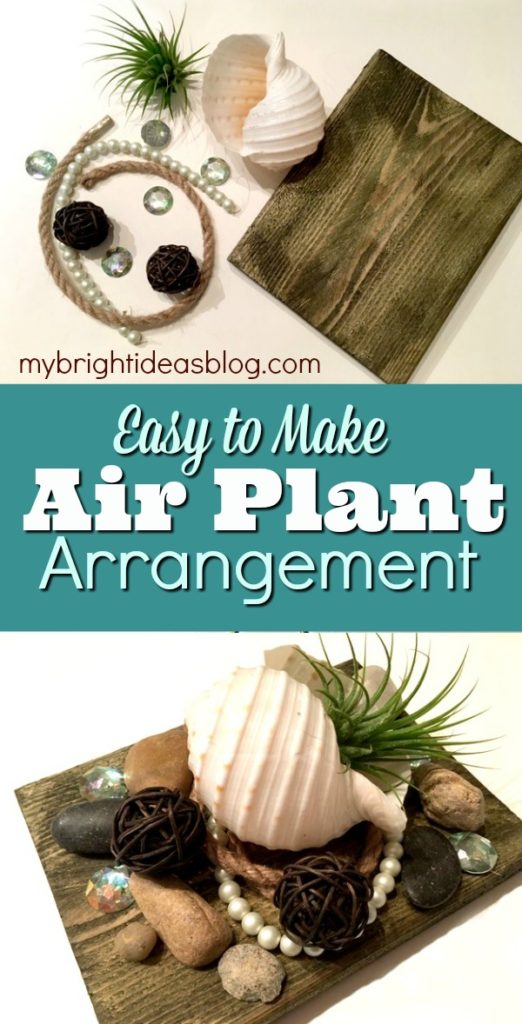
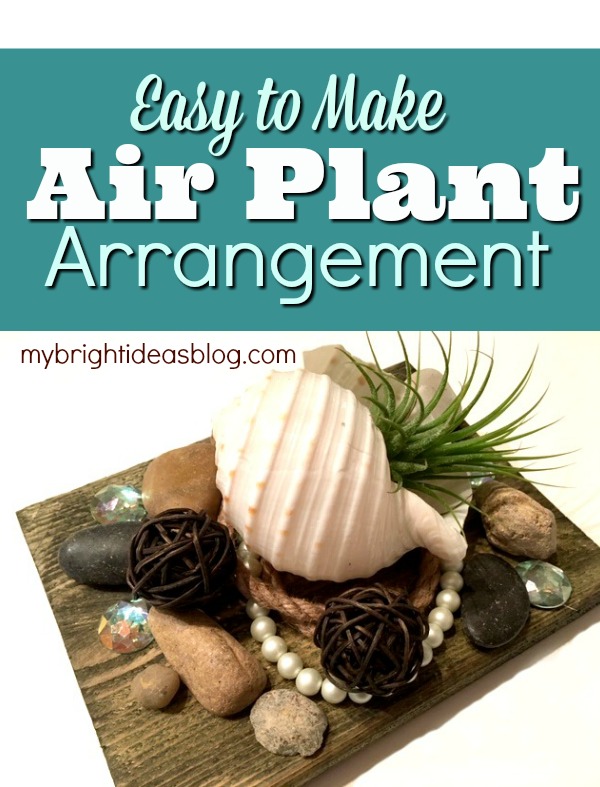
Today I’ll show you how to make an easy arrangement that looks a bit nautical by putting the air plant into a sea shell and accessories on wood or a plate.
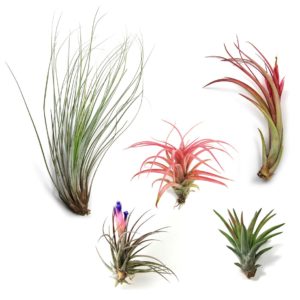
I found my first air plants at the garden centre this past summer and then spotted a shop in the local mall selling them. The ones I have access to sell for $4-$10 each.
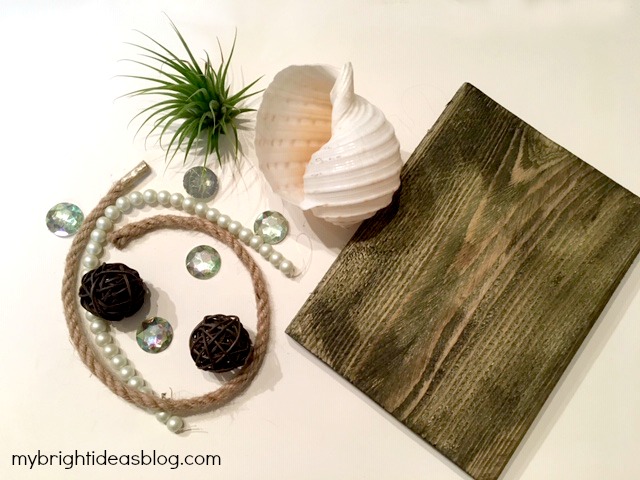
To make this you will need:
- an air plant
- a big shell
- nautical themed items: rope, glass gems, pearls, stones
- a block of wood, plaque or glass plate
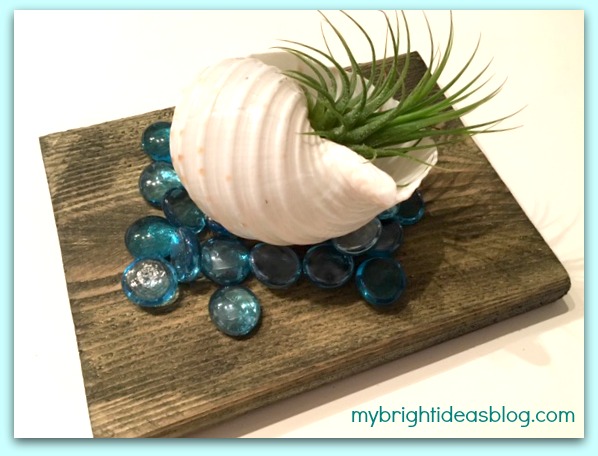
I always have scrap pieces of wood around in case of a sudden project inspiration. For this project I used a scrap approximately 6 inches by 6 inches. If you have a pretty plate you could easily use that too. I am tempted to check the thrift store for a beautiful, antique plate. For this first photo I just used turquoise glass gems.
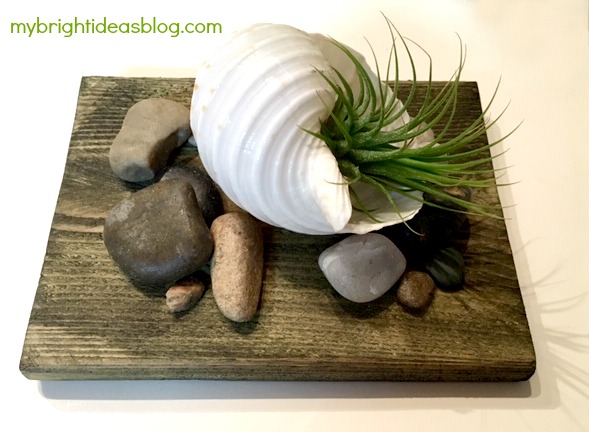
For this attempt I used river stones around the shell. I got them from the dollar store and the same with the gems.
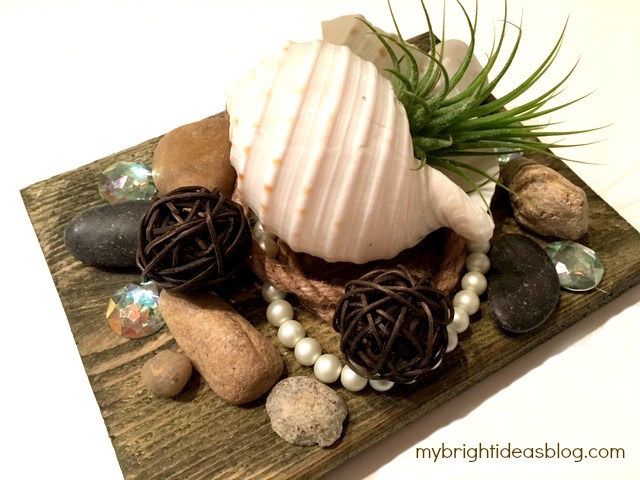
By adding pearls and rope with craft gems and stones I thought it turned out really nautical. Since none of these are attached to the board we can re-arrange them into another craft if I get tired of this one.
Here is another idea!

The photo above shows 2 popular air plant display options. The one on the left is plastic and from the dollar tree for $1. I wish I had bought 10 at that price since they were hard to find again. The one on the left is glass and from the garden centre for $8.99.
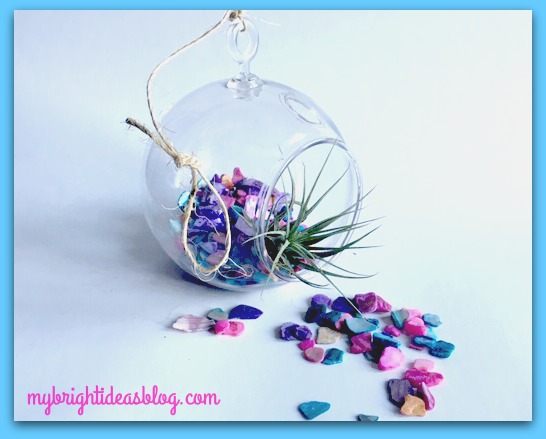
I used chips of shells that have been dyed for this one. Air plants make great gifts. Since this is plastic and needs very little care it would be easy for a child to care for or a friend in senior care.
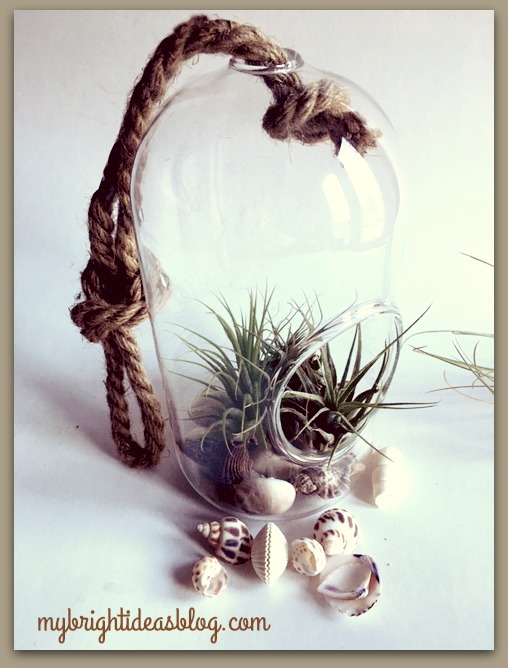
This one I used random shells in the base of the glass dome. I love the chunky rope and shells together-its very beachy.
I’m really excited to try some of the other plant ideas. I’ll let you know if they turn out well! Below are links to some of my other projects!
Nature Craft – Perfect for Earth Day Activity – Clay Imprints with Plants and Flowers
Plant Puns on Painted Potted Flower Pots – Adorable Gift Idea to Make Them Smile!
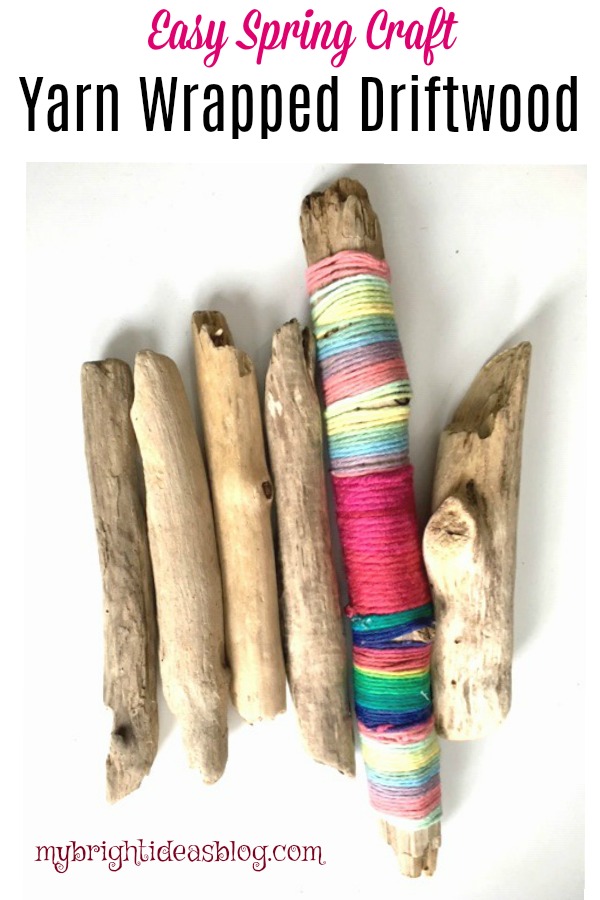
Yarn Wrapped Sticks – Easy Spring Craft
Want to add some spring colours to your home? Why not try wrapping yarn around some sticks?
Part of my inspiration:
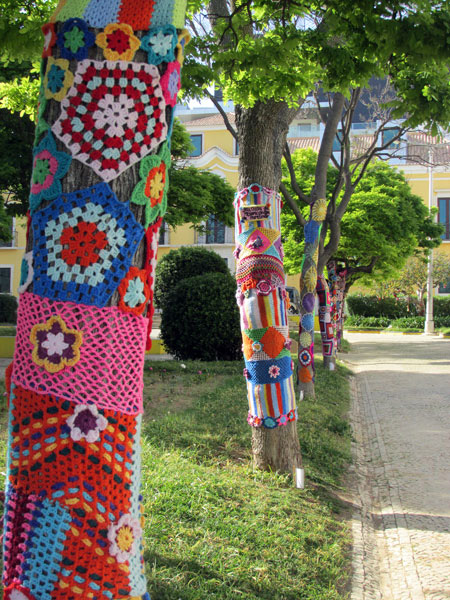
Have you heard of yarn bombing? If you haven’t you really should google it. It’s hilariously amazing! People are knitting or crocheting a sort of non permanent graffiti. You might find a park bench, bike, phone booth or a tree that is literally wearing a perfectly fitting, bright coloured sweater! Sometimes the crafter that does it wants to make a point and sometimes it just adding color to something grey and sterile like a light post.
https://algarveblog.net/2014/05/05/yarn-bombing-in-portimao/
Here is just one cheery photo so you can see what I mean!
Anyhoo the photos people have posted make me so happy but I can’t knit or crochet ask my friends Lana and Gen who just attempted to teach me how-they were patient but it didn’t take I’m afraid. Someday I will give it another try but for now here is my happy alternative.
It’s so easy and cheerful you are going to love this craft idea!
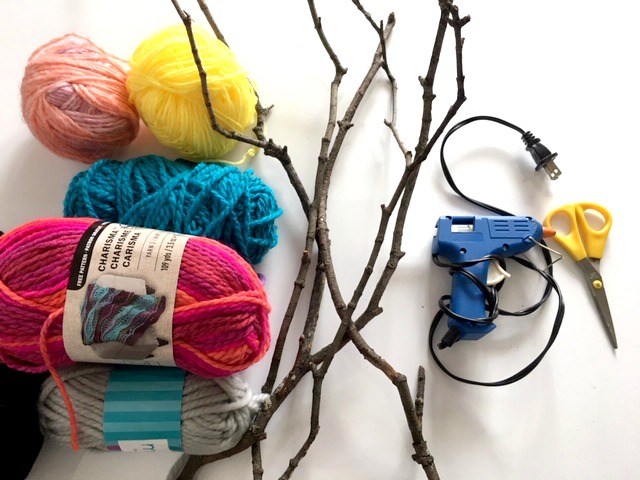
You will need:
- sticks
- yarn
- hot glue (optional)
- scissors
- vase
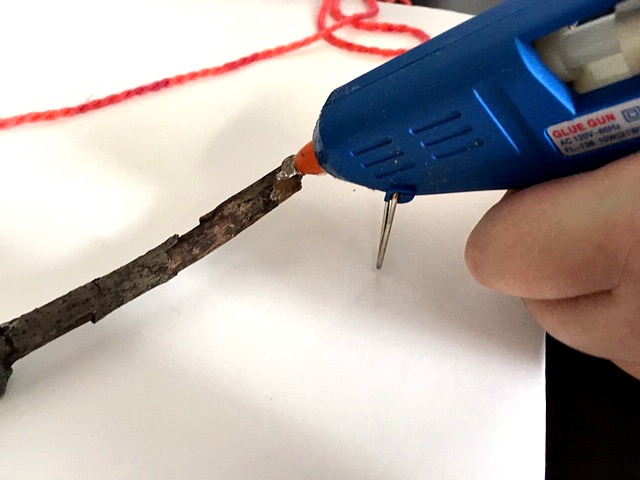
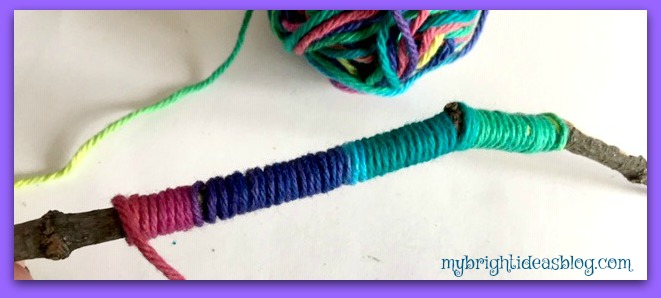
If you love your hot glue gun (as much as I do) start by adding a dab of glue to secure the end of the yarn.
If you don’t want to use hot glue then just tie a loop around the end of the stick and tuck the tail in-as you wind the yarn around the stick.
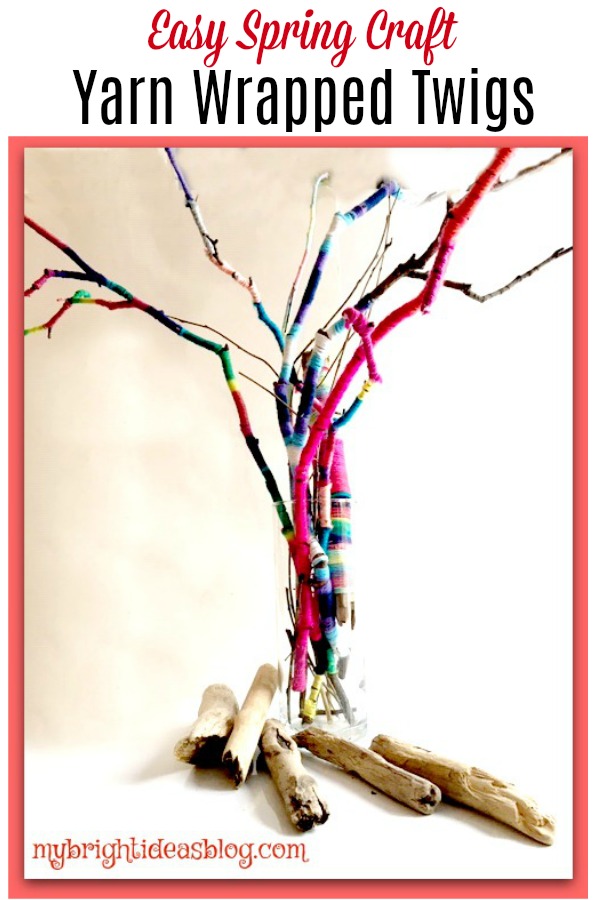
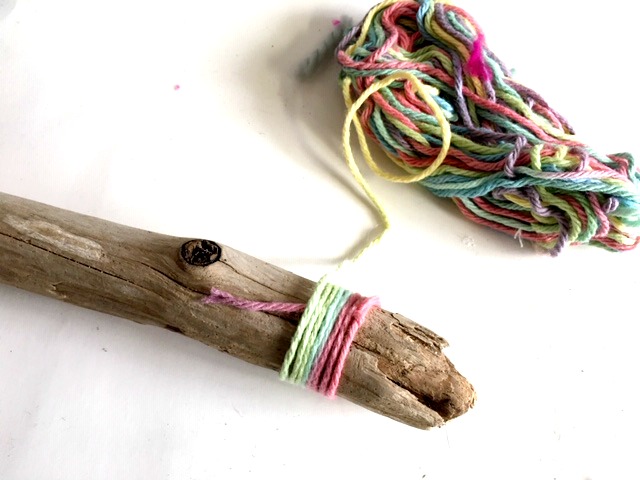
I really love the yarn that transitions the colours as you go. Its very smooth looking and only need to deal with the end at the beginning and the end.
If you don’t have yarn on hand that transitions you can use several colors and just change them as you get an inch down the branch.
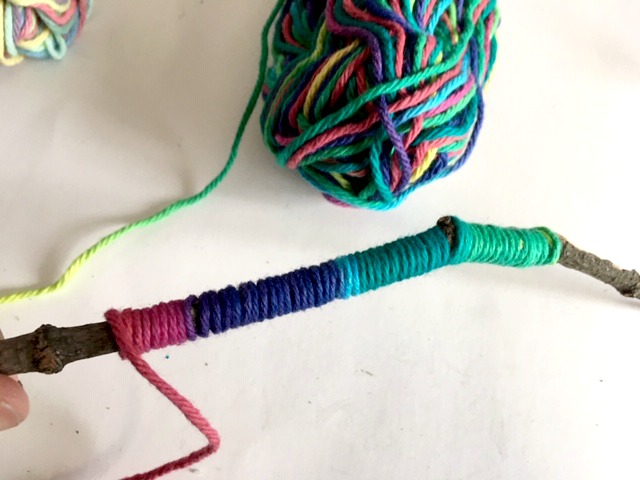
When you are done just snip the stray ends.
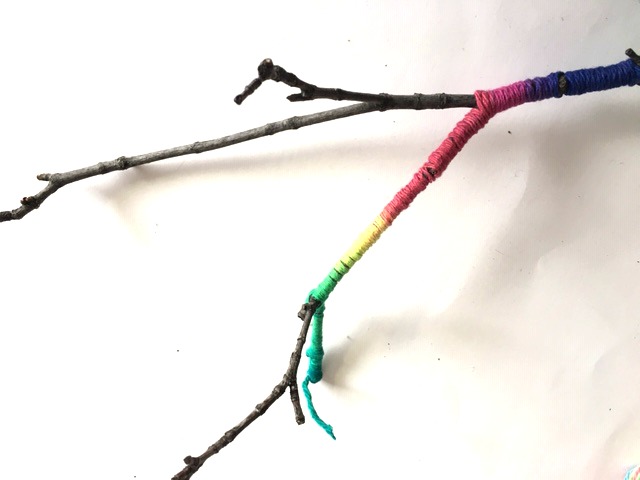
When you get to a split in the twig’s branches continue down one side and then go back to complete the other stems.
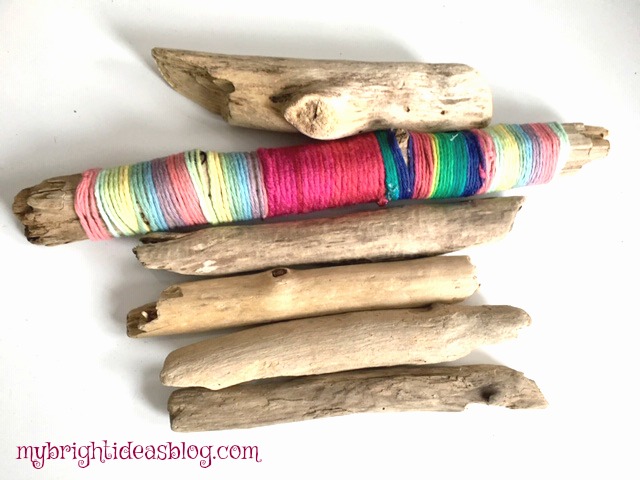
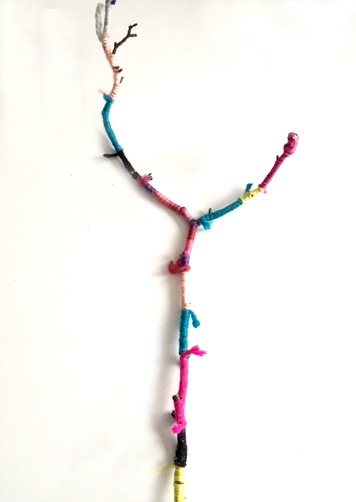
Using drift wood is even easier to manage.
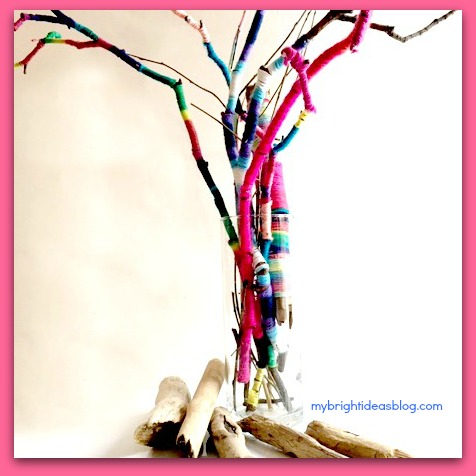
This took my 11 year old daughter and I an hour to do all of the sticks in the vase. We both enjoyed doing this. It was kind of an easy, soothing craft. It made a great mother daughter moment to stop and talk about things on our minds.
The results are very cheery decorative sticks with springtime colors that will go on a shelf or mantle.
Have a look at the other crafts linked below. I seem to enjoy the stick/twig projects. Mostly because they are free-out of the garden and something always need trimming.
Happy crafting!