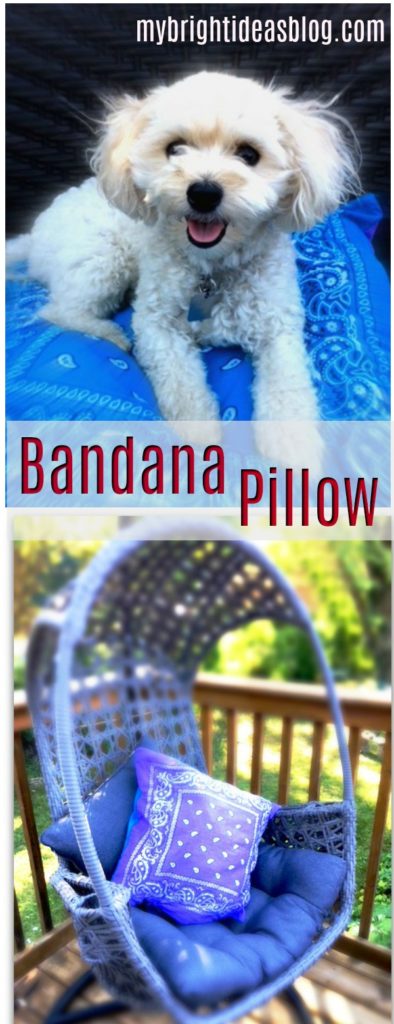
So a month or two ago I purchased way too many bandanas. Since then I’ve been looking for ideas to use some of them in projects. Today I’ll show you how to use 2 more! Let’s make a pillow for the bed, couch, or dog.
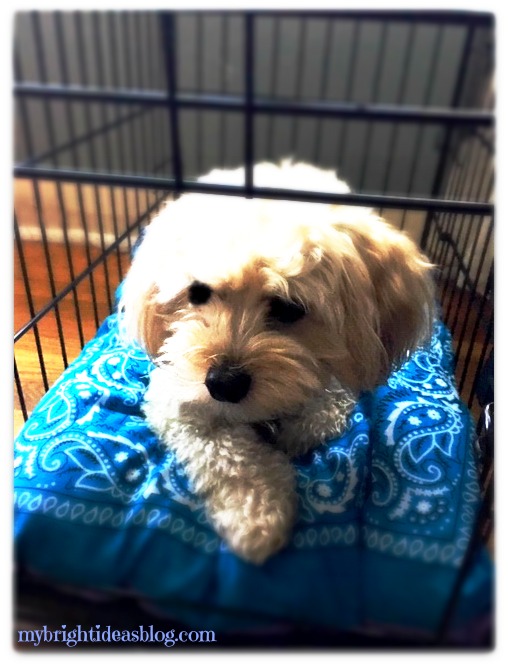
This is the beautiful Gemma. She is our 2 year old Yorkiepoo (Yorkshire Terrier mixed with Poodle). She loves to share my chair when I’m using the computer. Gemma stays up as late as I do and then sleeps in behind the bend in my legs. She is quite yappy to the squirrels but she is a dream dog at home. One of her favorite places to nap is in her crate. So let’s make her a new pillow.
You will need:
- 2 bandanas/handkerchiefs the same color or complimentary colors
- sewing machine
- needle and thread
- pins
- pillow or stuffing
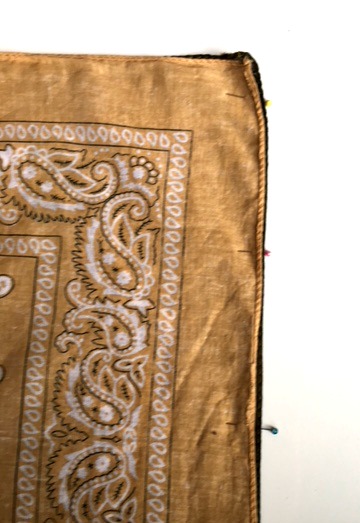
With right sides together, match up the corners and pin them. They don’t make handkerchief/bandanas all the exact same size. So don’t get frustrated. When you sew them together you will be able to correct their wonky sides.
See what I mean. The purple one is not cut straight or is slightly bigger, so it’s sticking out. Sewing them together with a straight line will disguise the mismatch.
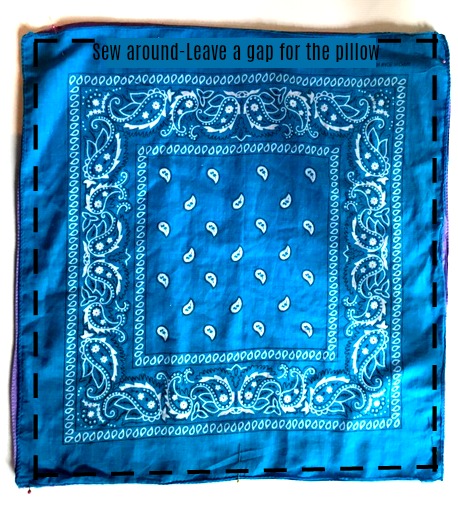
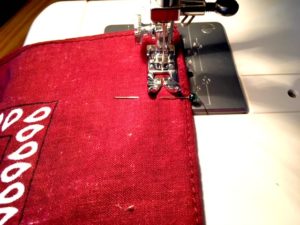
Sew almost all the way around leaving a wide gap on one side.
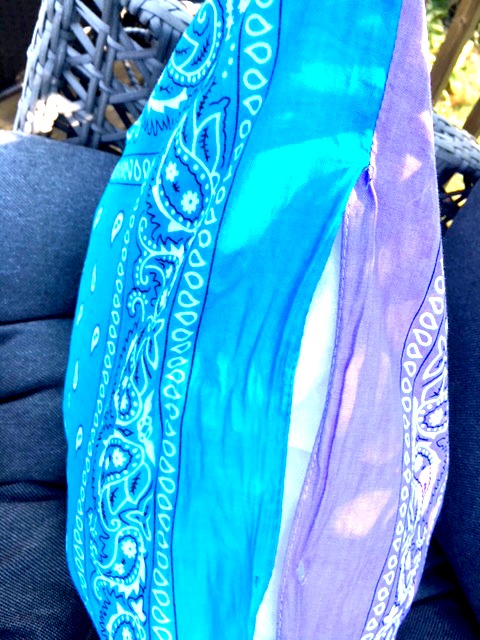
Turn the pillow case inside out and insert the pillow. Since this will be used for Gemma’s crate I didn’t buy a new pillow form. Instead, I used a cheap, old limp bedroom pillow that was wasn’t very fluffy anymore. It easily fit into this pillow case.
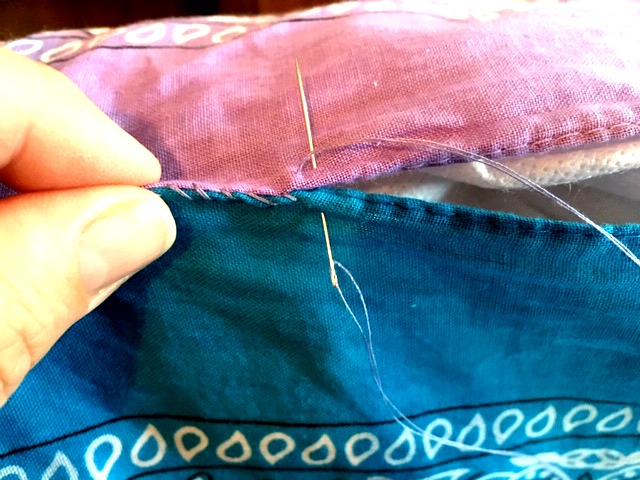
Next, take your needle and thread and hand sew this opening closed.
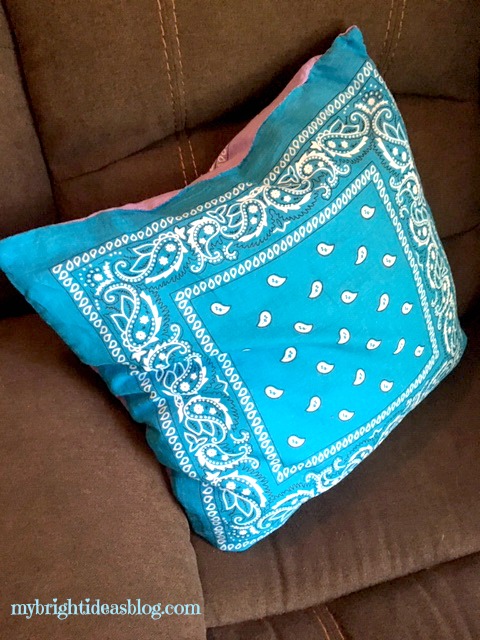
You could use this on the couch, on a bed, outdoor furniture, in the car or……
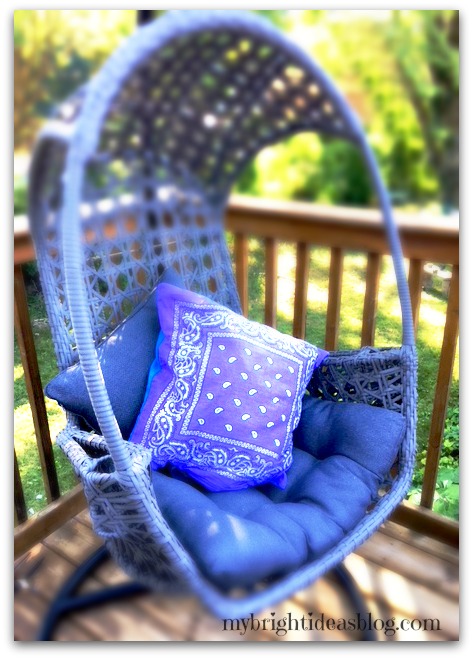
…..for your sweet puppy dog.
Thanks to Gemma for being a gorgeous model for this little photo shoot.
Feel free to comment with suggestions for what to do with the other 15 bandanas I still have left over. Did you see the Fall table cloth I made last month? Have a look.

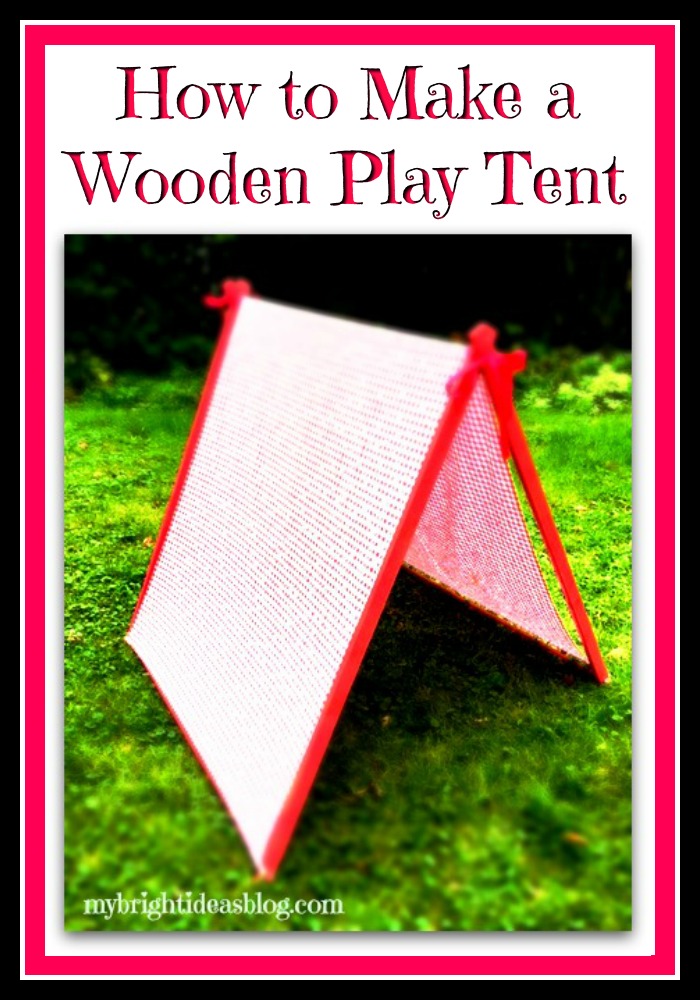
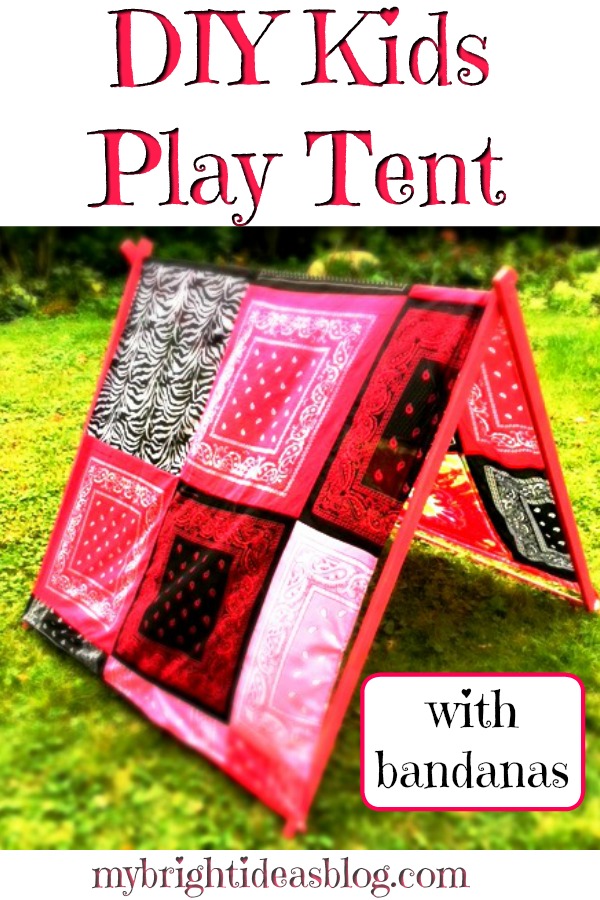
Make a Wooden Play Tent for the Kids!
Here is a tutorial for a DIY Kids Play Tent! This won’t take much time or money to build. It would be an easy woodworking and sewing project for kids to help with. Why did I wait so long to make this!?!? The kids love it!
My daughters have always loved building tents. It’s fun for kids to steal the cushions and blankets and chairs to build a tent….sometimes even begging to fall asleep in it. I just wish they would put the cushions and blankets back when they are done….but that’s another story.
For the tent frame, you will need:
- 3 – 1/2 inch wide dowel (4 ft long) (approx. $8)
- 2 1x2x8 wood boards (cut in half) (approx. $5)
- power drill
- 1/2 inch drill bit
- tape measure
- pencil
- paint (optional)
For the tent fabric, you will need:
- fabric 45 inches wide x 90 inches long (115 cms wide by 230cms)
- scissors
- ribbon (2 pieces 30-40 inches/75-100cms long)
- thin elastic (4 pieces 5 inches/13cms long)
- safety pins (6)
- needle and thread or sewing machine (optional)
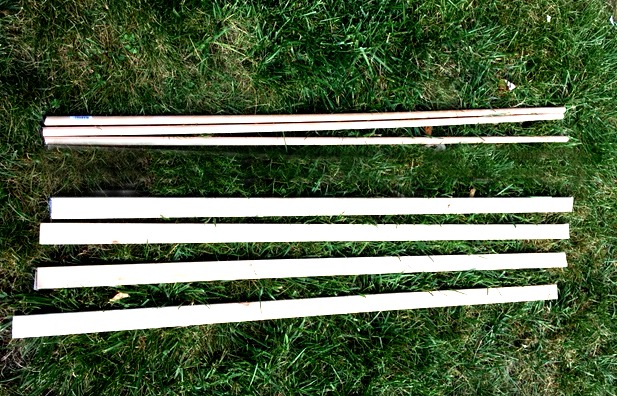
This is literally all you need, 3 x 1/2 inch dowels. They come from the store 4 feet long so there is no cutting here. Also, 2 boards 1×2 cut in half-so you have 4 pieces of 1×2. You can ask them to make this cut at the hardware store if you don’t have a handsaw or mitre saw.
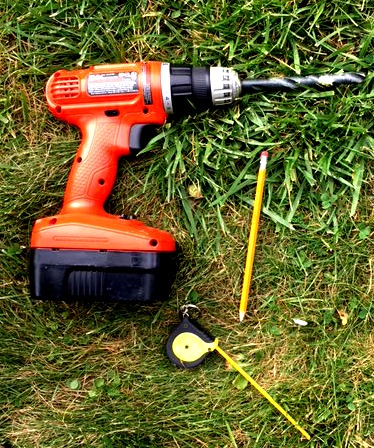
Gather your drill, tape measure and pencil.
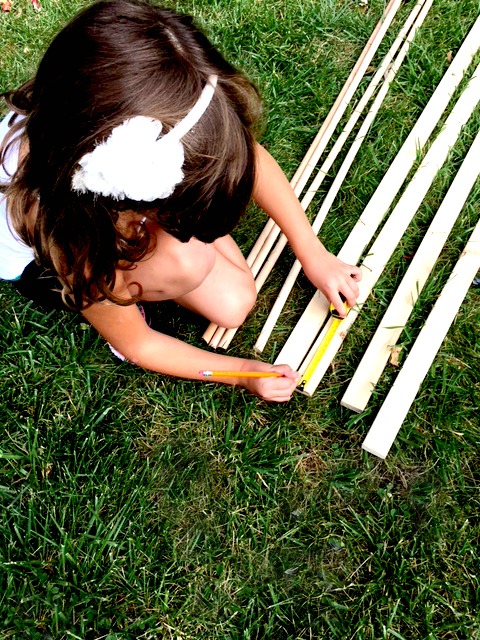
Measure and mark 2 inches from one end and 1 inch from the other end.
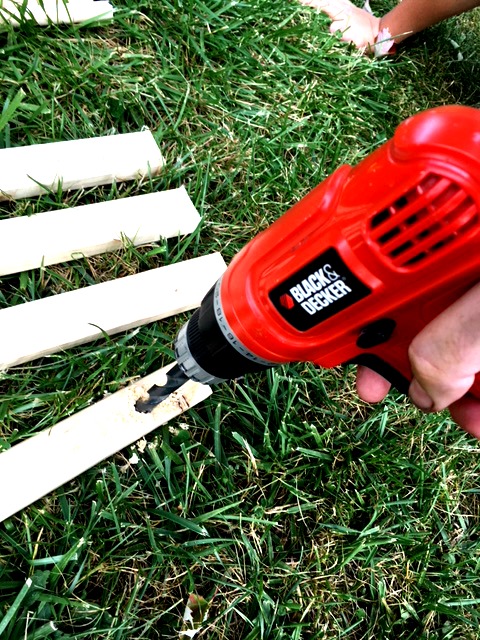
Drill the hole with a 1/2 inch drill bit. Test to see if your dowel will fit through the hole. You need it to be able to slide in fairly easily. I found it too tight and frustrating to put together when tight fitting so I ran the drill through the hole again in and out, in and out, to make it slightly bigger.
The top is the end that has a hole 2 inches from the top. The bottom has a hole 1 inch from the end.

Slide the first piece of dowel through the top holes of two of the 1×2’s The second piece of dowel can be inserted into the bottom holes.
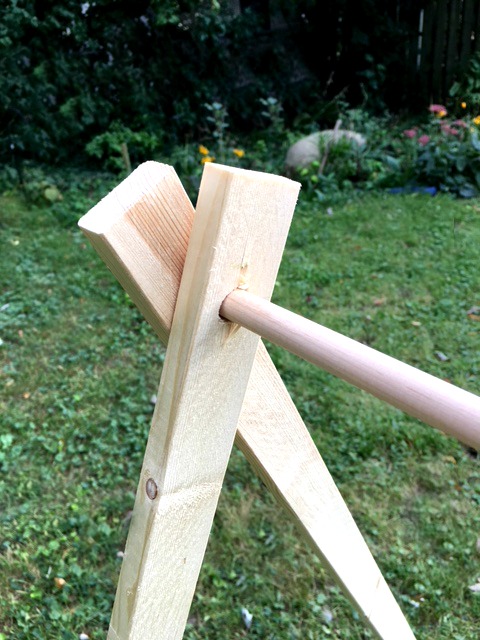
Add the next piece of 1×2 onto the top dowels to make an A.
Slide the third dowel into the bottom end of the 1×2’s.

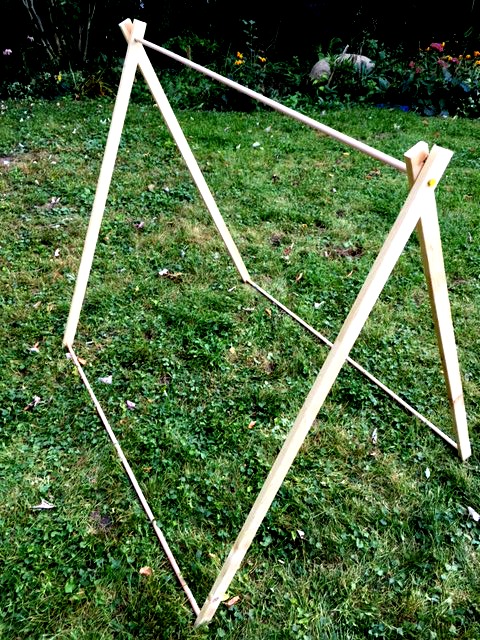
That’s it for the tent frame. Now for the tent fabric.…
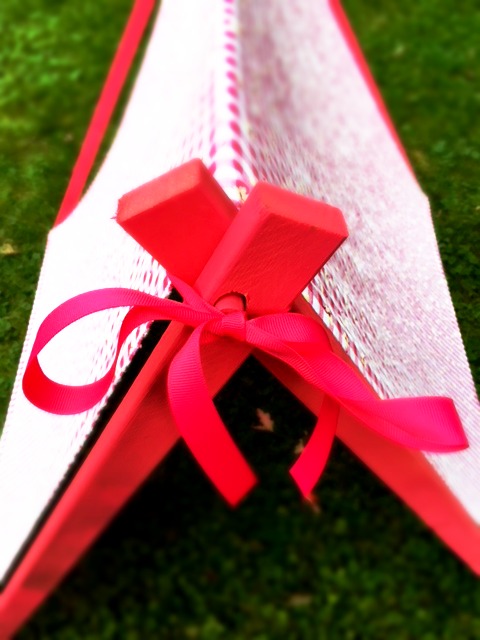
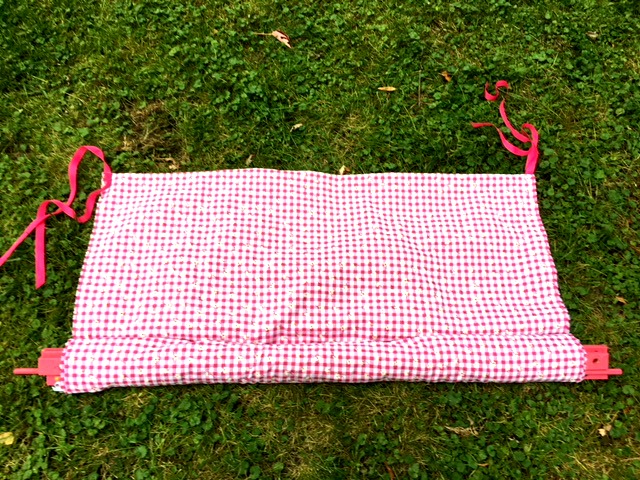
Slide your fabric over the top of the A frame. Pin a ribbon to the front and back ends.
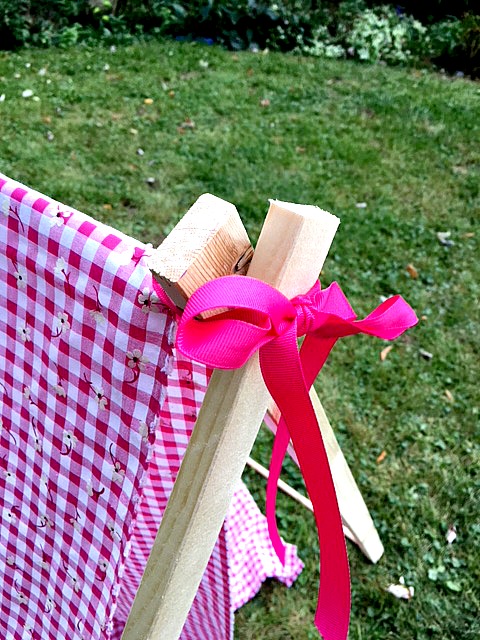
This ribbon isn’t essential but it does look nice and it will be helpful ties when you are storing the tent away.
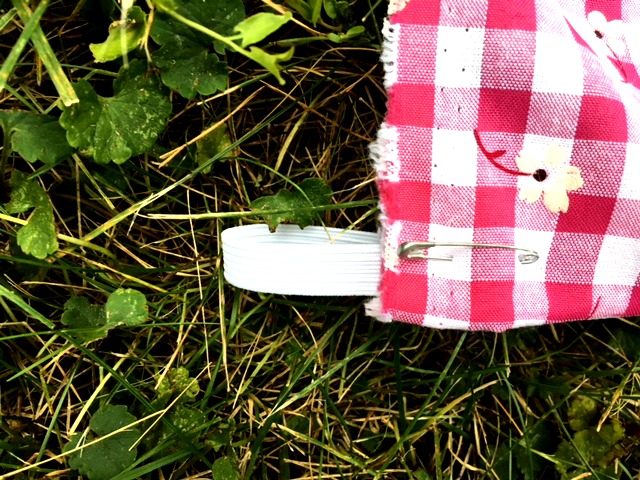
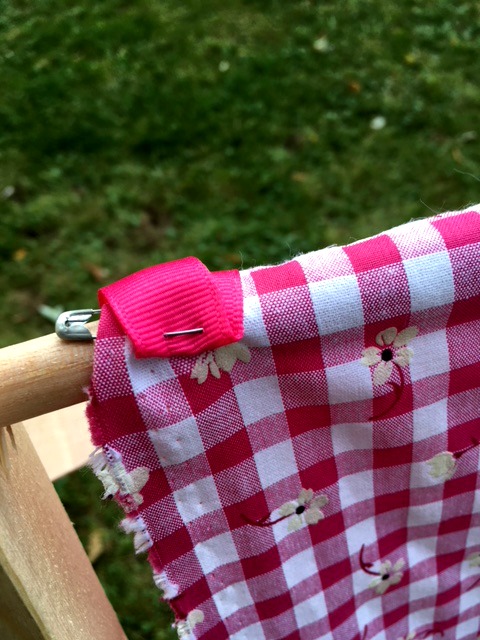
Pin a small piece of folded elastic onto all 4 of the bottom corners of the tent fabric.
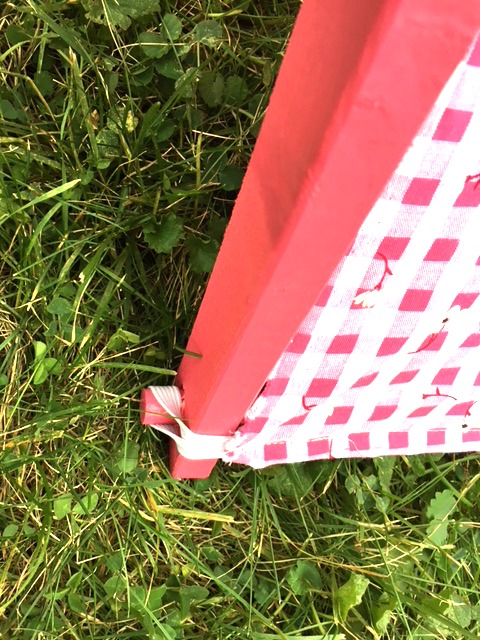
Hook the elastics over the ends of the bottom dowels.
It looks fine with just pins holding everything in place. You may want to hand or machine sew the ribbon and elastics in place. I did sew those in permanently and also hemmed the bottom of the fabric. It’s looking good enough to give away as a gift!
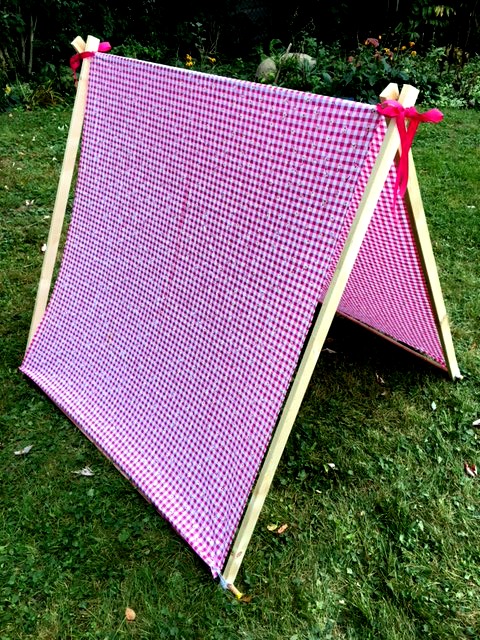
After this sweet picture was taken we decided the only thing to make it better is to paint it pink.
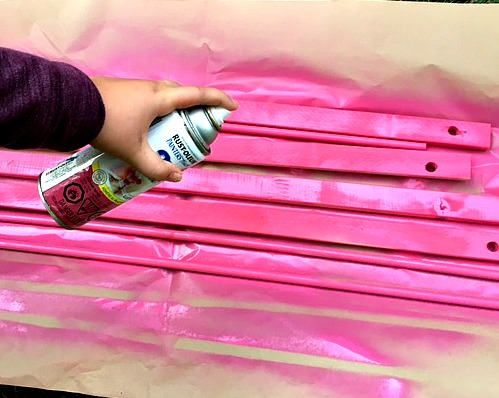
I already have loads of spray paint….because I love to change the color of things. See my previous posts and you will find I used a lot of spray paint this summer. This project doesn’t take much paint so its a great way to use up leftovers.
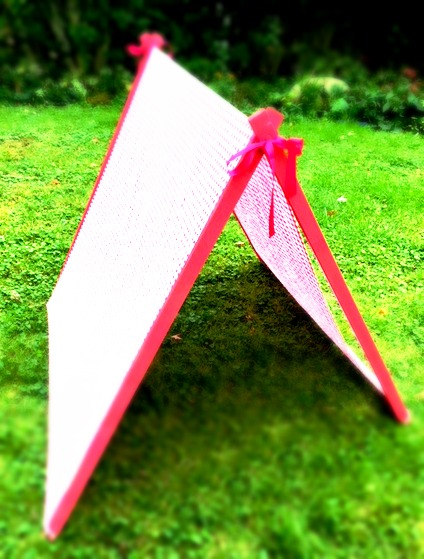
After allowing it to dry put it all together. Admire your handy work!
Did I mention that this is super easy to pack up?
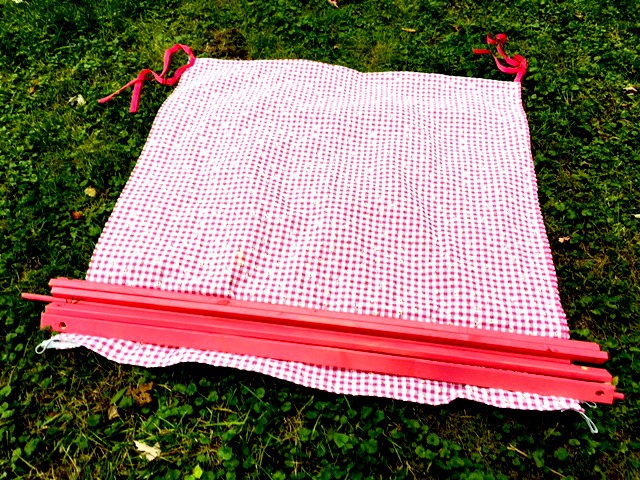
Fold the tent fabric in half. Next, place all the wooden tent parts on the end of the fabric.
Roll up the fabric into a tube to hold the wood pieces together.
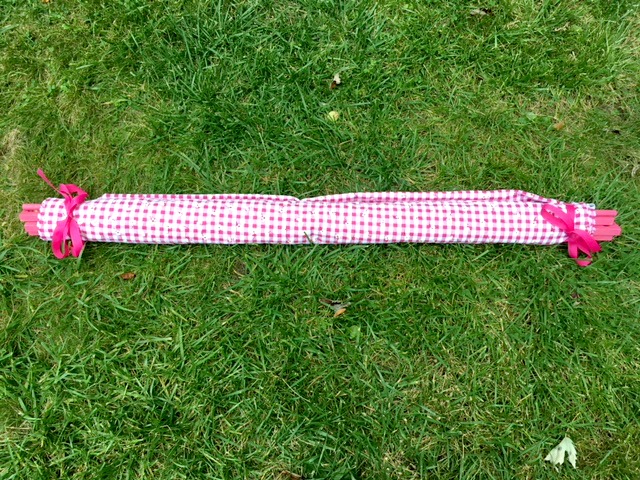
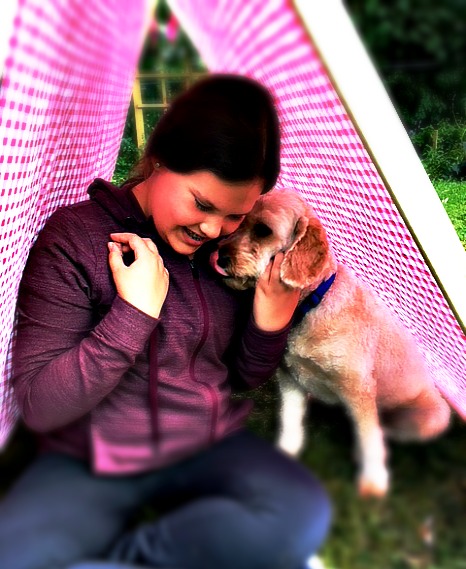
Lastly, tie the ribbons to keep it compact for storing or travelling. Remember when the babies were tiny and you wanted a place for them to nap that was in the shade at the park or beach? This would have solved the problem!
This was so easy to make. I can’t believe I didn’t do it when my kids were smaller.
Please pin or post this to facebook and share this easy DIY with your friends!
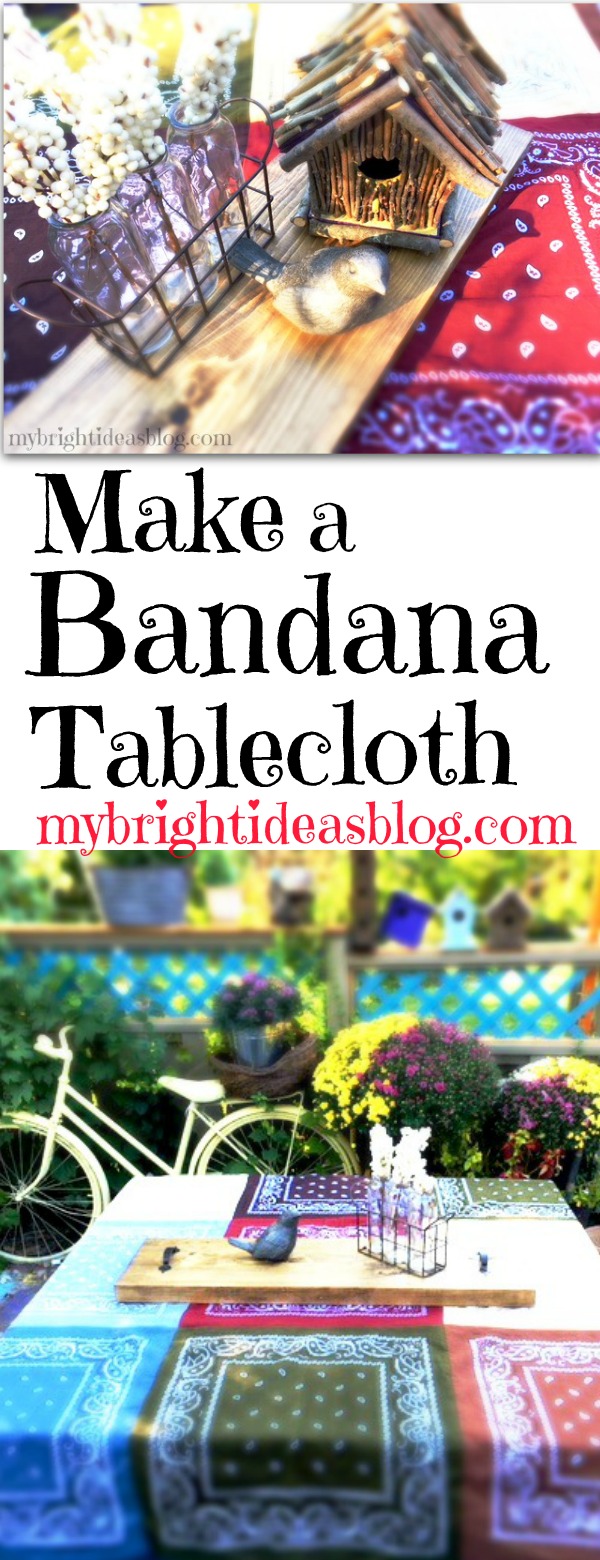
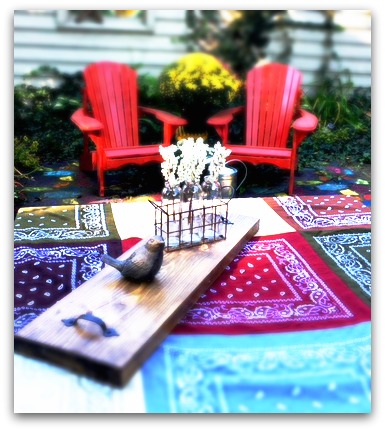
Make a Fall Table Cloth – From Bandanas
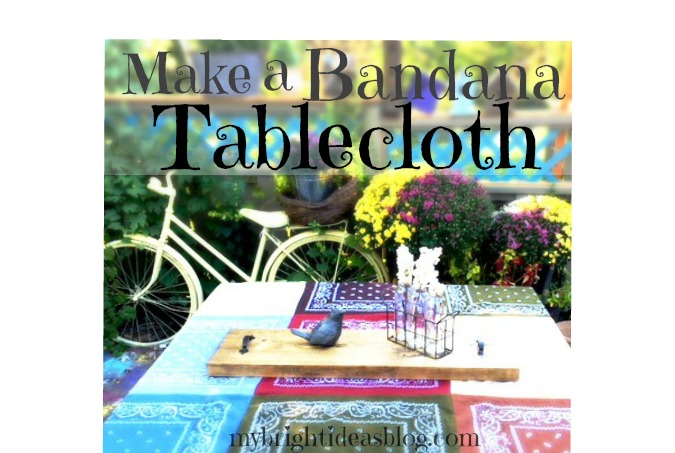
Signs of fall are everywhere. The flowers are scraggly and need to be pulled. Its all very sad to see the colour disappear. So my solution is to buy some bright mums and sew a bandana table cloth for the picnic table (or kitchen table).
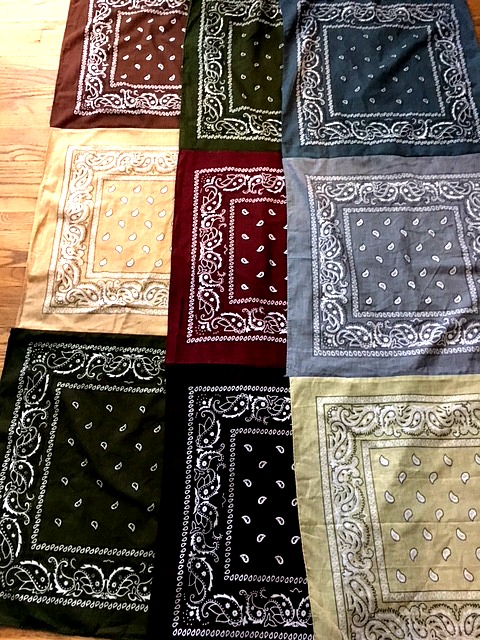
 I was able to find an amazing collection of bandanas at “a Buck or Two”-its a sort of dollar store where things can cost several dollars. You can also buy bandanas (or search for hankerchief or handkerchief) online. I bought way too many so there will be several more projects to come!
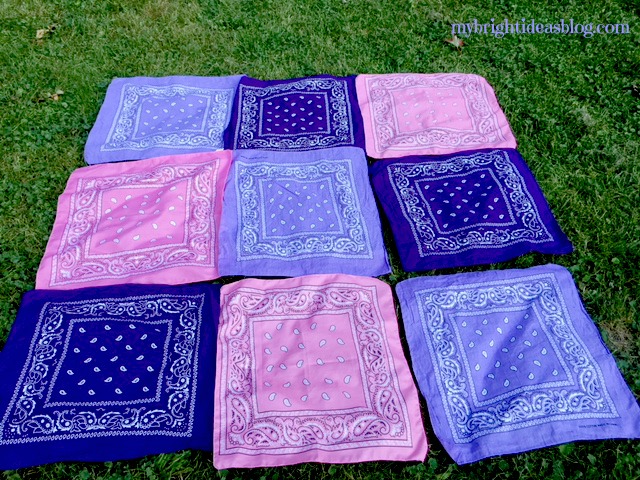
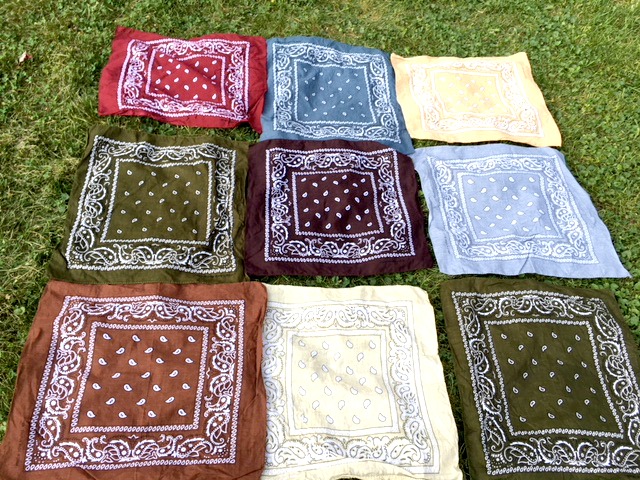
I wanted an autumn theme so I chose greens, beiges, maroon, blue and brown. It might be a good idea to lay out the squares and take a photo if you want a specific layout. As you stack them up they can get a bit shuffled.
 They come folded and they are cotton so they really should be washed and dried before sewing to prevent shrinkage and bleeding colours.
You will need:
- 9 bandanas
- sewing machine
- pins
- scissors
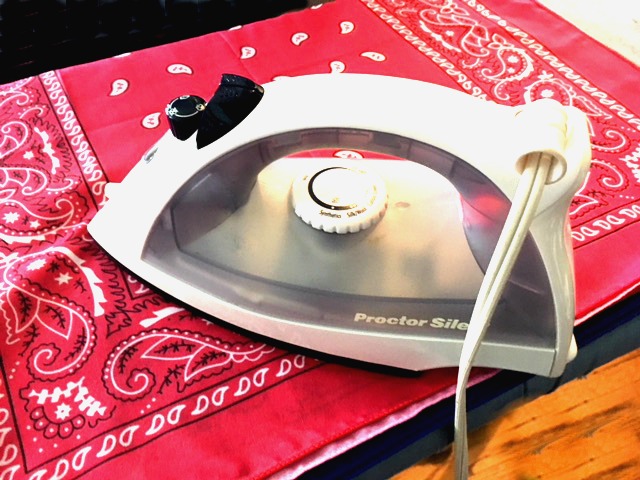
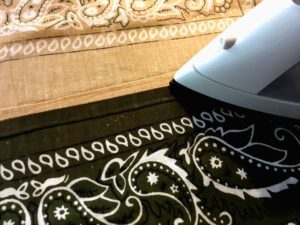
Get out the iron! Iron all the bandanas. Or find a kid who likes to iron….tee hee….
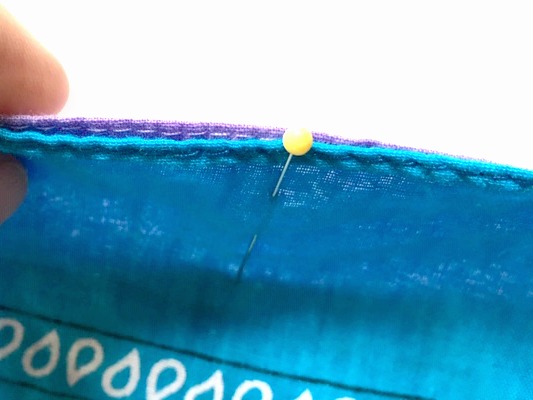
Start by pinning the first two bandanas, right sides together. Bandanas seem to have a slightly longer side. Mine were 20×21. Make sure they are all facing the same direction so are the same width. They are often not sewn straight or square. Fortunately, this project is very forgiving.
Hey who ironed this beige one!? Slacker!
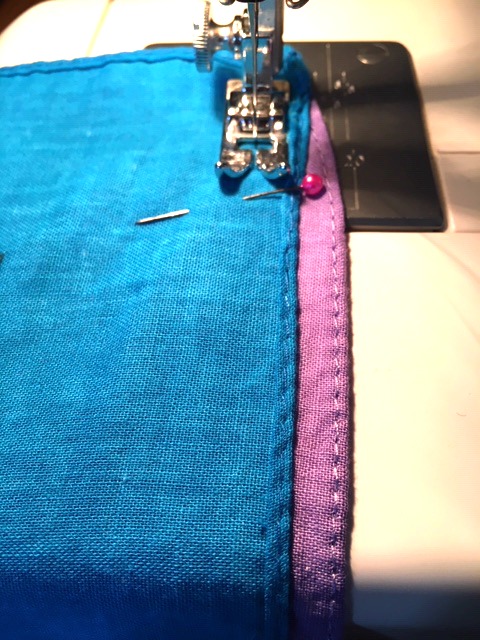
Sew along the edge.
 Iron the seems flat.
 I started by pinning the top sets of 2. (1/2)
 Next, I sewed the 3rd square onto the bottom of the pair (2/3).
 As you can see, now I have three strips of three bandanas.
Start by pinning the left line to the middle line. Match the centre seem/corners. Sew the strips together.
 Finally, line up the middle corners of the last line of squares to pin it to the last line of squares. Sew them in place to complete the tablecloth. Finish by ironing it.
Now your done! If you are detailed oriented you could fold over the edge of the tablecloth and sew a hem. But as you can tell I’m not that sort of gal and the bandanas are all finished so there is no edges to fray. If your squares didn’t line up hemming it could correct a jagged edge. Happily mine matched up this time!
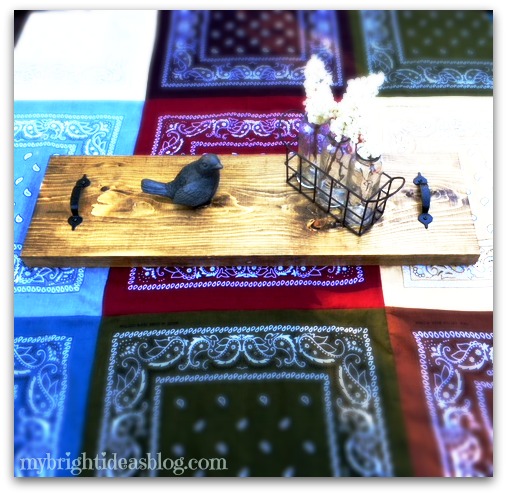
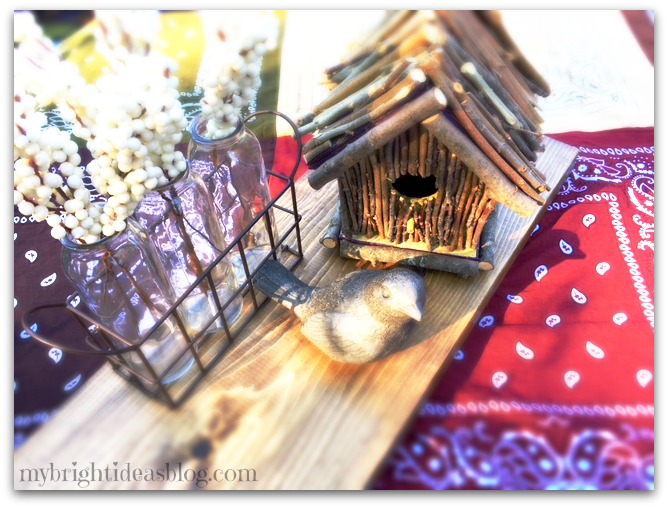 Isn’t this little bird adorable. I got it at Canadian Tire! Never overlook your local hardware store’s garden centre. You never know what you’ll find.
 Thank you for reading to the end! Please pin this on Pinterest and follow me on your favorite social media!
Below are a few more of my projects you might want to look at.
…