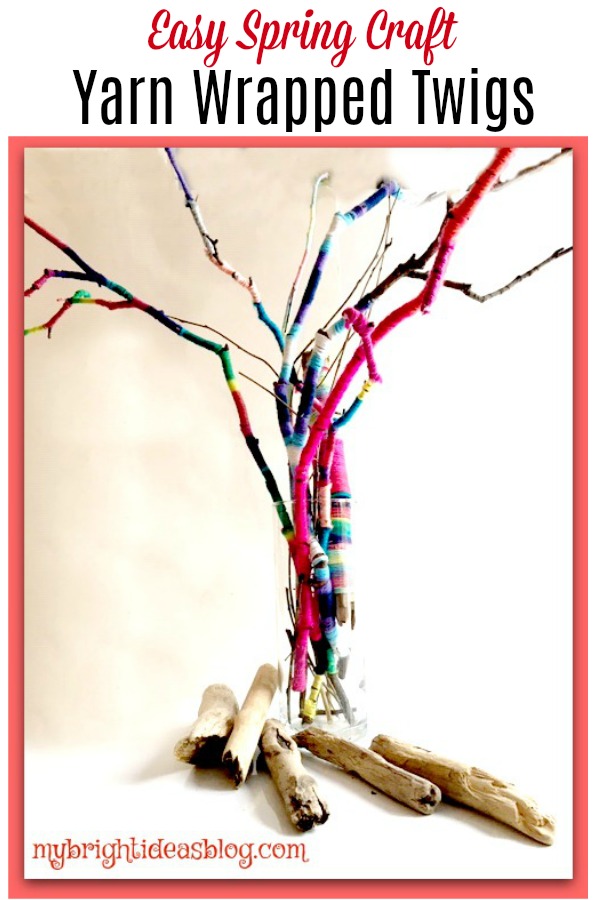
Want to add some spring colours to your home? Why not try wrapping yarn around some sticks?
Part of my inspiration:
Have you heard of yarn bombing? If you haven’t you really should google it. It’s hilariously amazing! People are knitting or crocheting a sort of non permanent graffiti. You might find a park bench, bike, phone booth or a tree that is literally wearing a perfectly fitting, bright coloured sweater! Sometimes the crafter that does it wants to make a point and sometimes it just adding color to something grey and sterile like a light post.
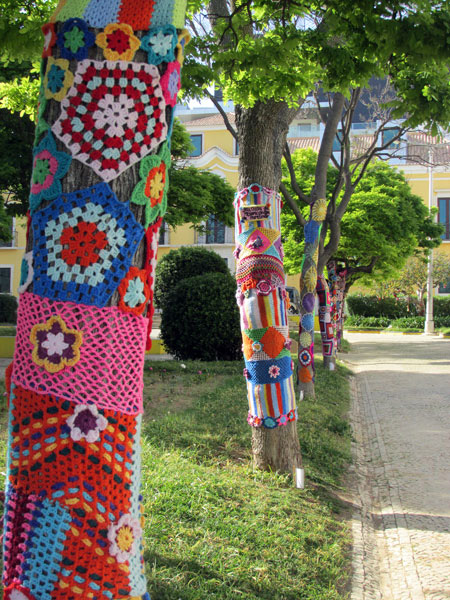
https://algarveblog.net/2014/05/05/yarn-bombing-in-portimao/
Here is just one cheery photo so you can see what I mean!
Anyhoo the photos people have posted make me so happy but I can’t knit or crochet ask my friends Lana and Gen who just attempted to teach me how-they were patient but it didn’t take I’m afraid. Someday I will give it another try but for now here is my happy alternative.
It’s so easy and cheerful you are going to love this craft idea!
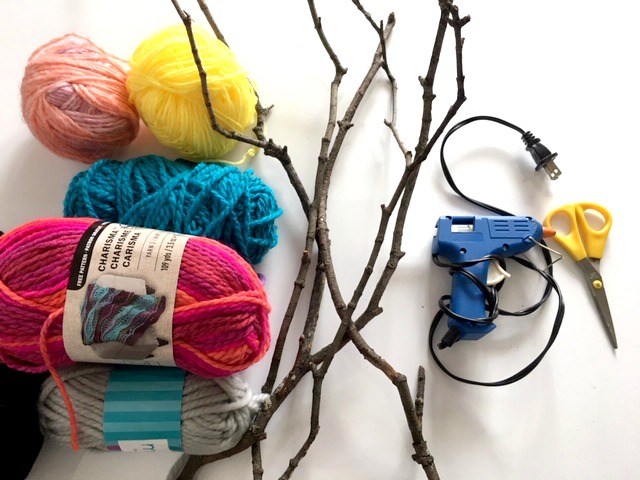
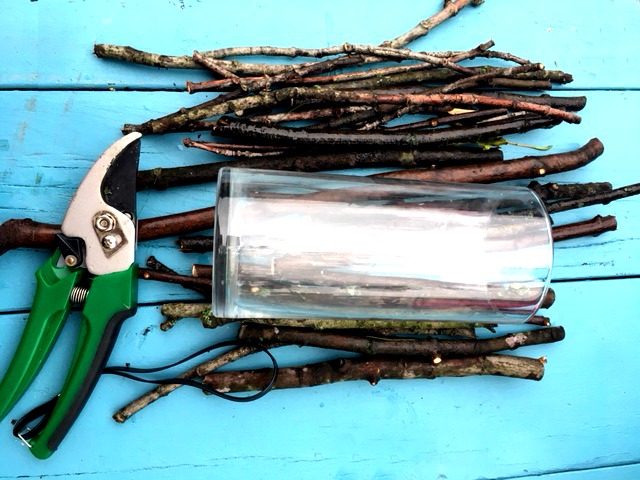
You will need:
- sticks
- yarn
- hot glue (optional)
- scissors
- vase
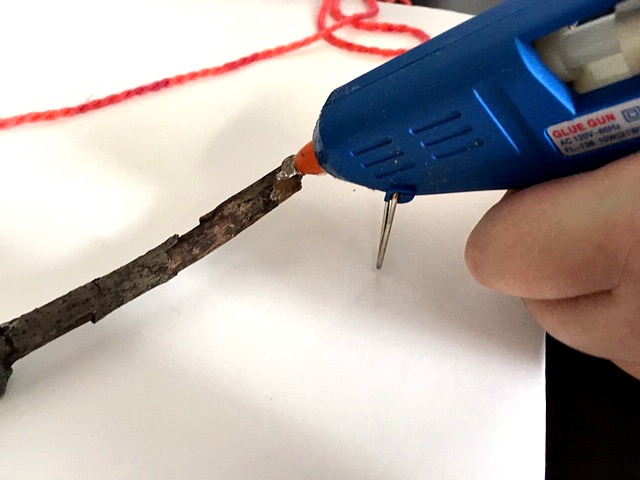
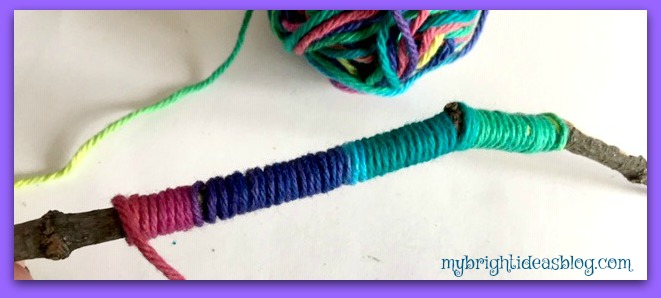
If you love your hot glue gun (as much as I do) start by adding a dab of glue to secure the end of the yarn.
If you don’t want to use hot glue then just tie a loop around the end of the stick and tuck the tail in-as you wind the yarn around the stick.
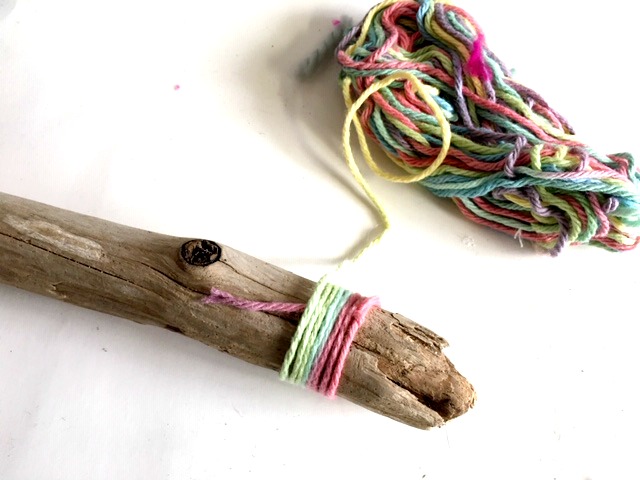
I really love the yarn that transitions the colours as you go. Its very smooth looking and only need to deal with the end at the beginning and the end.
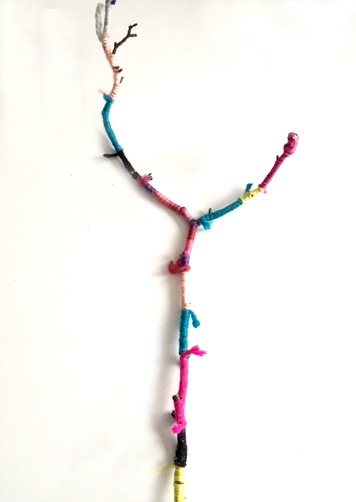
If you don’t have yarn on hand that transitions you can use several colors and just change them as you get an inch down the branch.
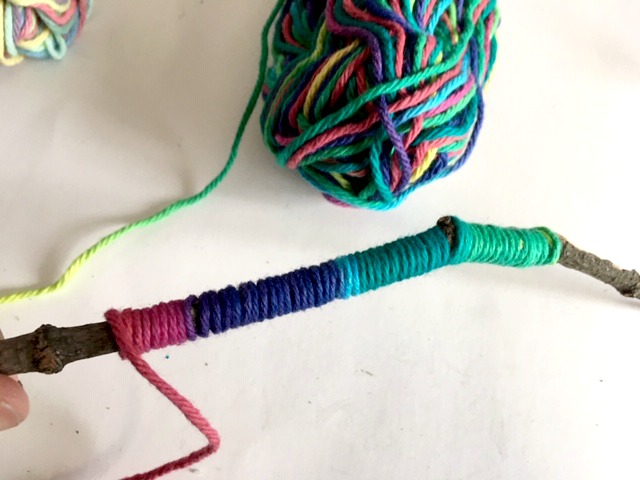
When you are done just snip the stray ends.
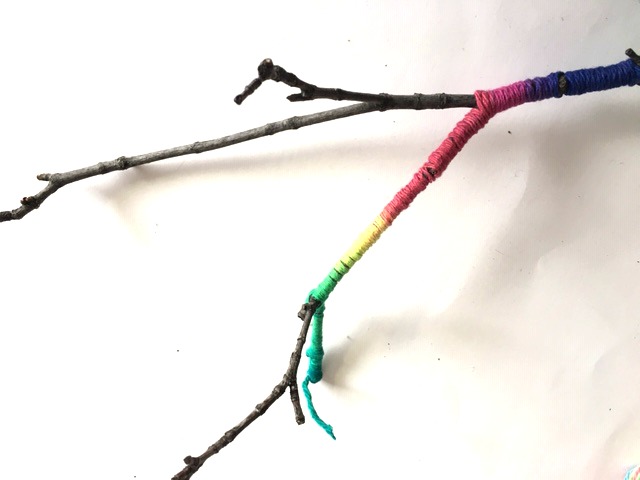
When you get to a split in the twig’s branches continue down one side and then go back to complete the other stems.
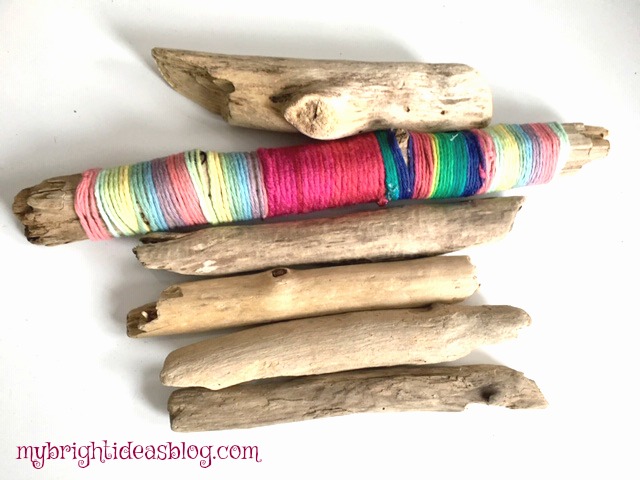
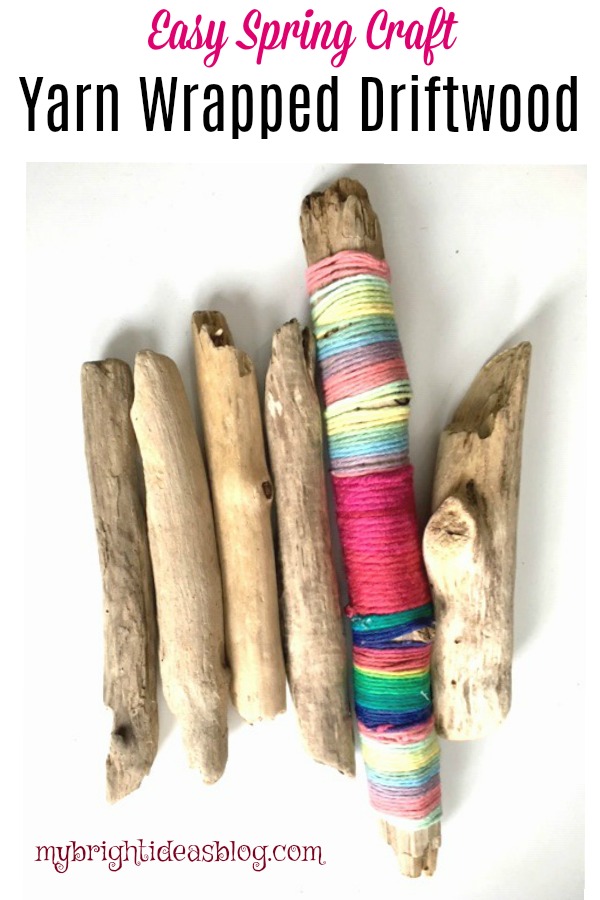
Using drift wood is even easier to manage.
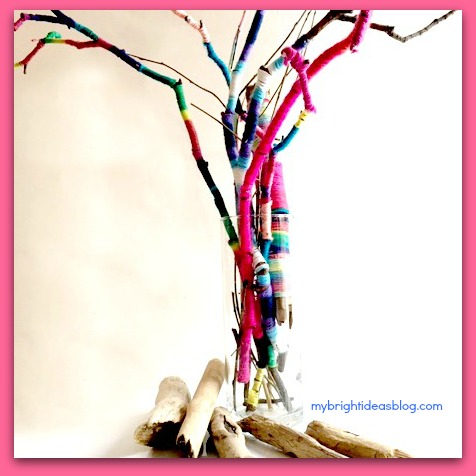
This took my 11 year old daughter and I an hour to do all of the sticks in the vase. We both enjoyed doing this. It was kind of an easy, soothing craft. It made a great mother daughter moment to stop and talk about things on our minds.
The results are very cheery decorative sticks with springtime colors that will go on a shelf or mantle.
Have a look at the other crafts linked below. I seem to enjoy the stick/twig projects. Mostly because they are free-out of the garden and something always need trimming.
Happy crafting!
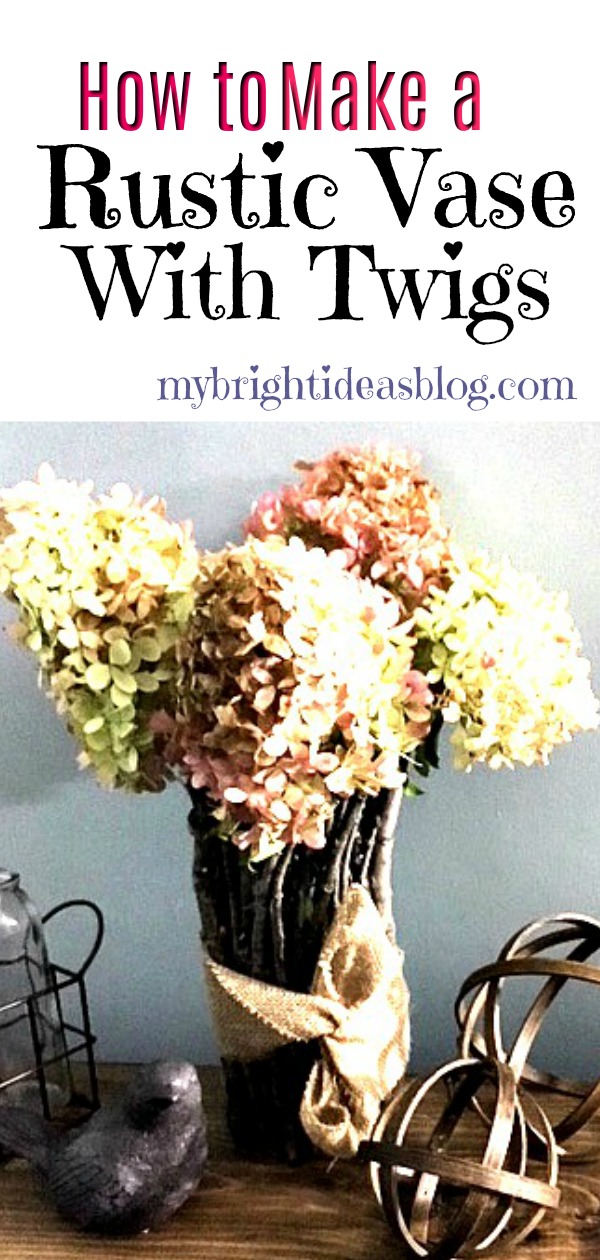
Make a Twig Vase – Super Easy DIY!
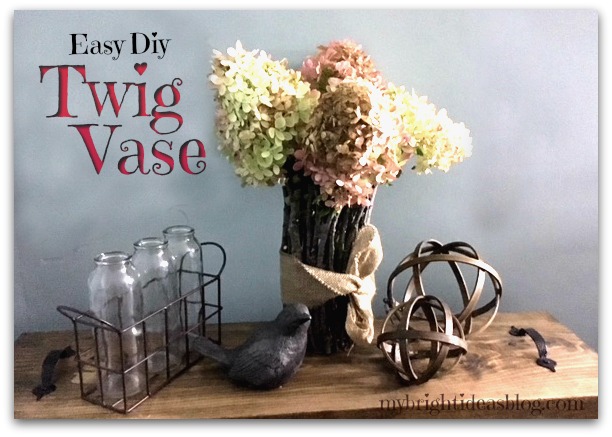
Here is a super easy, super rustic, super pretty twig vase! I am loving using twigs and sticks in crafts. It’s free! It’s also time to do some trimming in the backyard gardens so I get the job done and a craft project to do when the work is done!
You will need:
- an inexpensive straight vase
- twigs
- snips
- hot glue gun
- 6 or more hot glue sticks
- burlap or raffia
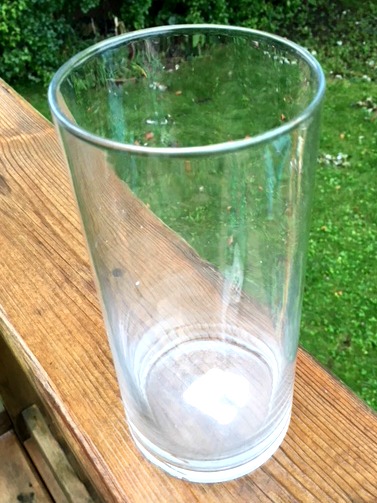
First, choose your vase. If you don’t have a tall straight vase already in the back of your cupboards then pop over to the dollar store, or a thrift store you will definitely find them there. I had this vase on hand. The Dollarama sticker was still on the bottom. $1.25. That is the total expenses on this craft if you already have the glue gun and glue supplies.
I love me a cheap craft!
Using sharp shears, cut twigs in different lengths taller than your vase. Choose sticks that are as straight as possible. Trim off any side twigs as short as possible.
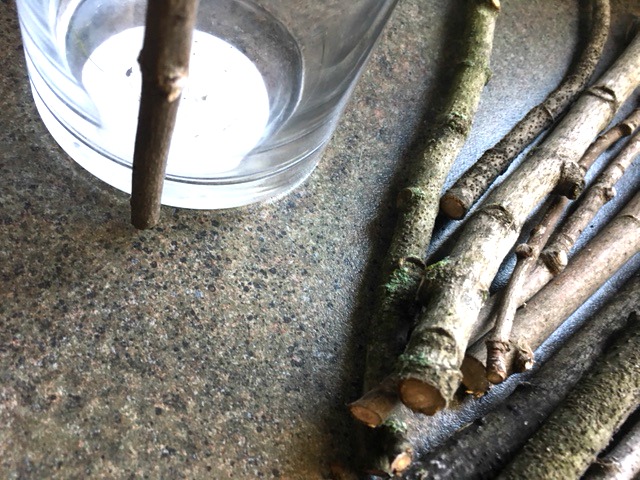
Plug in your glue gun. Set the twig in place and see where it will make contact with the glass of the vase. Add the glue in those contact places. I do this instead of running a line all the way down the stick. That is a lot of waste. Hold the twig in place 10 or 20 seconds while the glue cools. Mind your fingers!
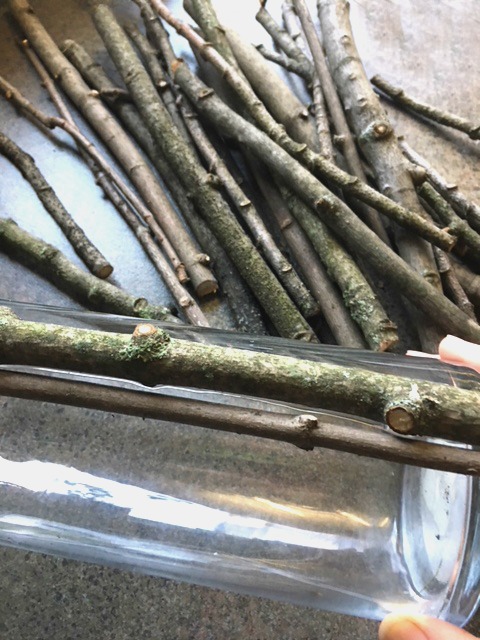
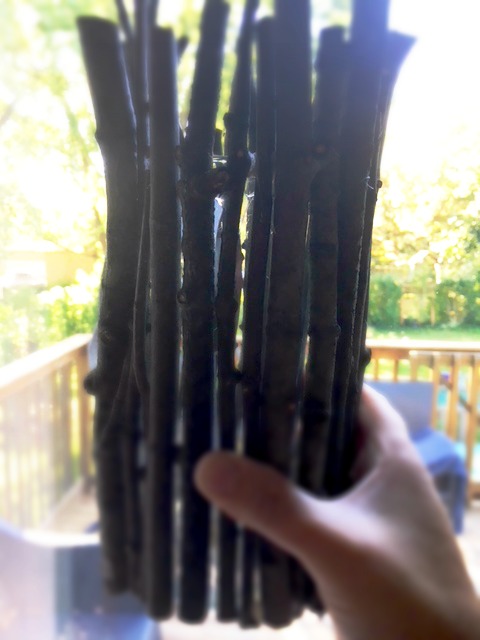
Work around the vase with each twig fitting tightly next to the previous twig. If there are spaces you can put a thin twig in later to fill in the gaps.
You will notice that the light does pass through the gaps. If that bothers you, cut a brown or black paper down to the vase size and slide it inside.
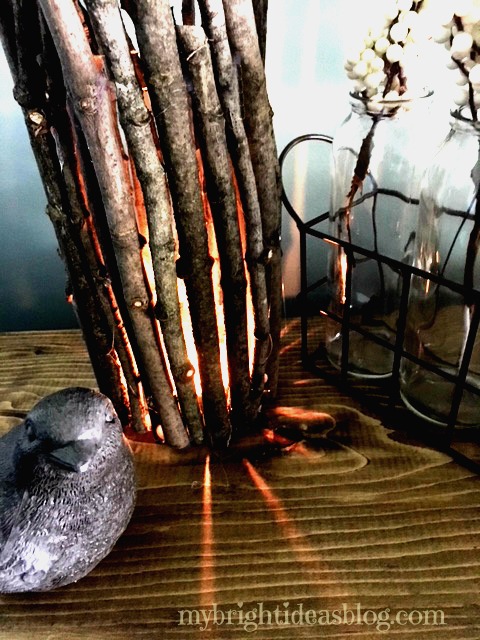
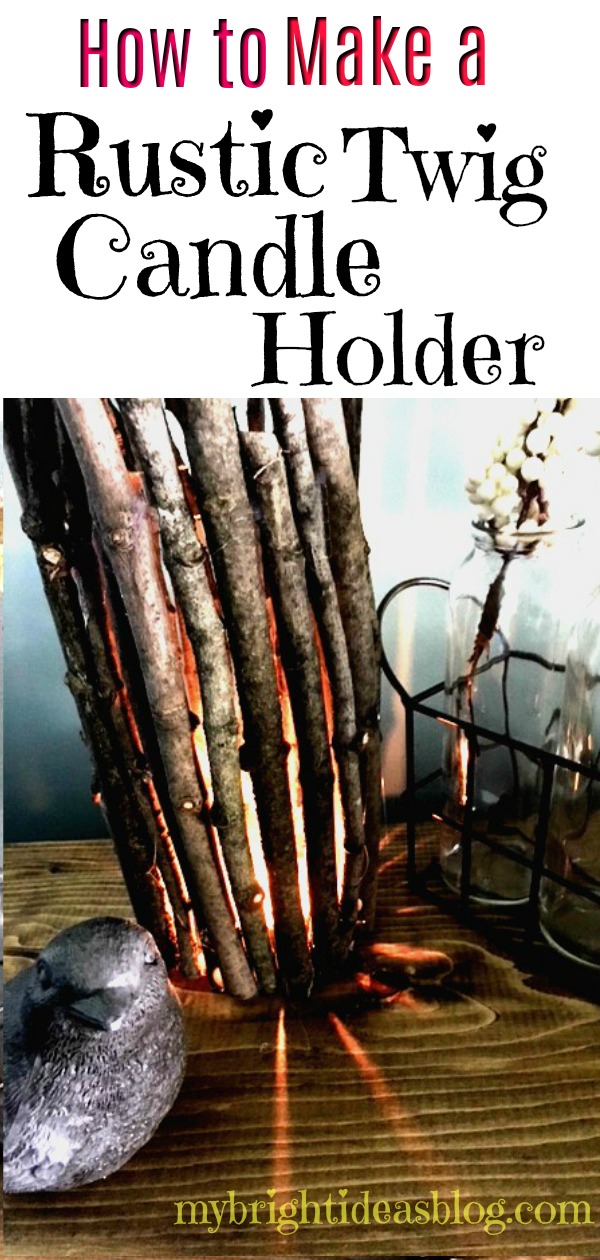
OR…you could embrace these gaps and use it as a candle holder. If you go this route please do not put paper in your vase. You will surely start a fire. Eek!
I didn’t mind the gaps in the vase so I skipped the paper and can use it with a tea light or with dried or artificial flowers.
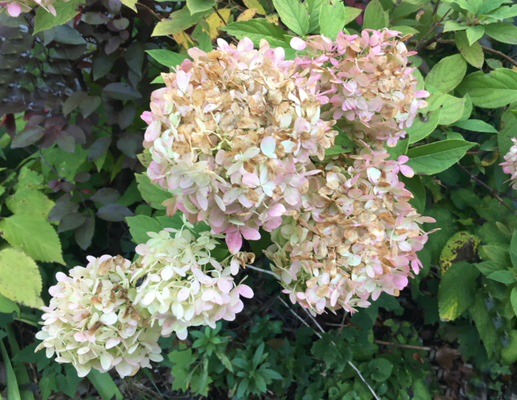
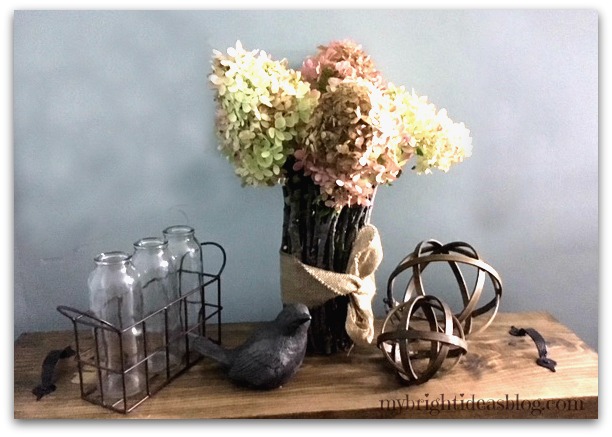
So to the garden we go for some flowers. I cut these hydrangeas. These are going to dry nicely in the vase and look the same for months and months.
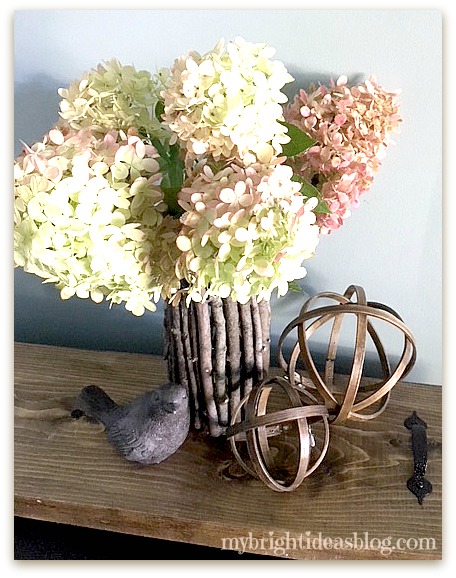
Isn’t that lovely? I hope you enjoyed this rustic twig/stick project. I really love making things with twigs.
Wait! Oh my days!!!! I forgot to put on the bow!
Cancel the photo shoot and back to the craft counter….
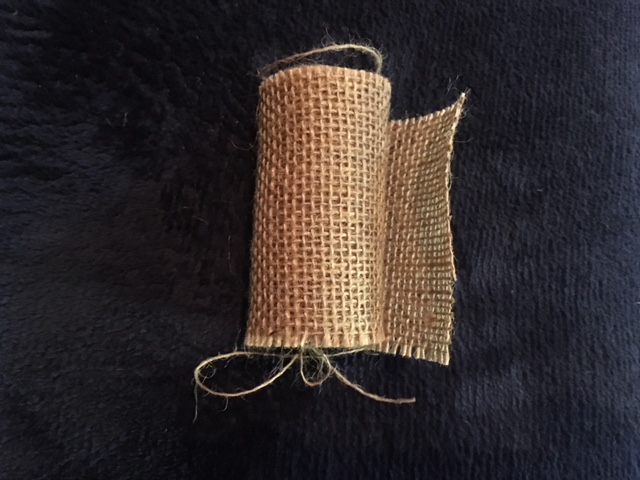
I know I have raffia somewhere but I can’t remember which craft bin I put it in. So instead I used this 3 inch wide burlap roll from the dollar store and wrapped it around the vase.
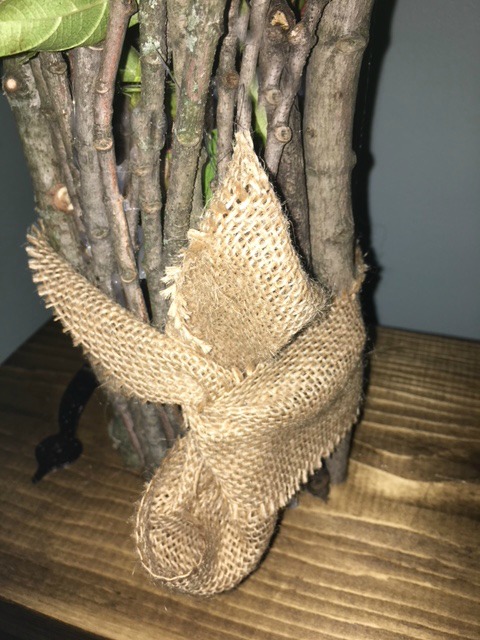
After tying it in a knot I tucked the ends under the centre. It looks like a bow but less bulky.
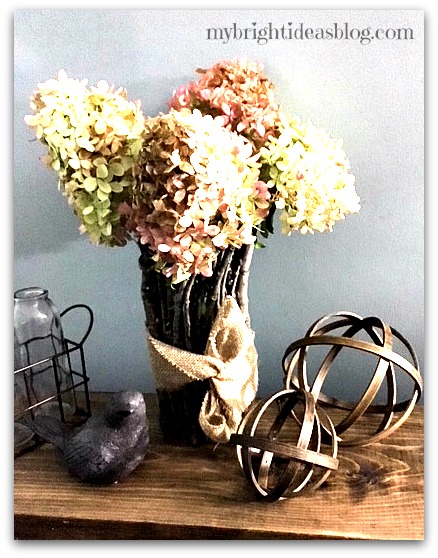
There now that is better! Its a lovely rustic vase perfect for this time of year!
I really appreciate you reading to the end and hope you will remember to pin this or share it on your favorite social media site.
If you would like to see how I made the orbs or wood tray in the photo above, click the links below.
Till next time!
…
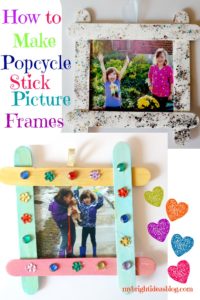
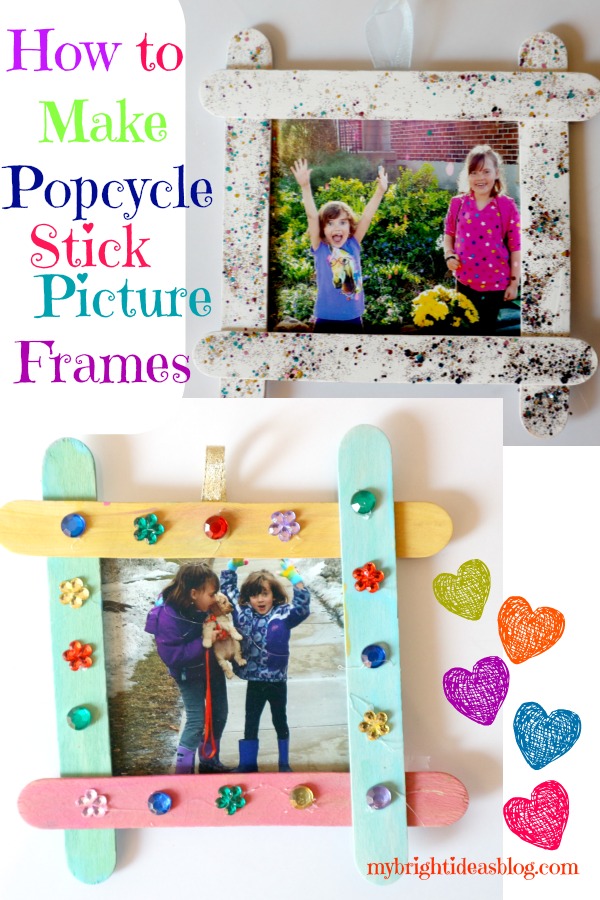
Popcycle Stick Picture Frames -Easy Kids Crafts
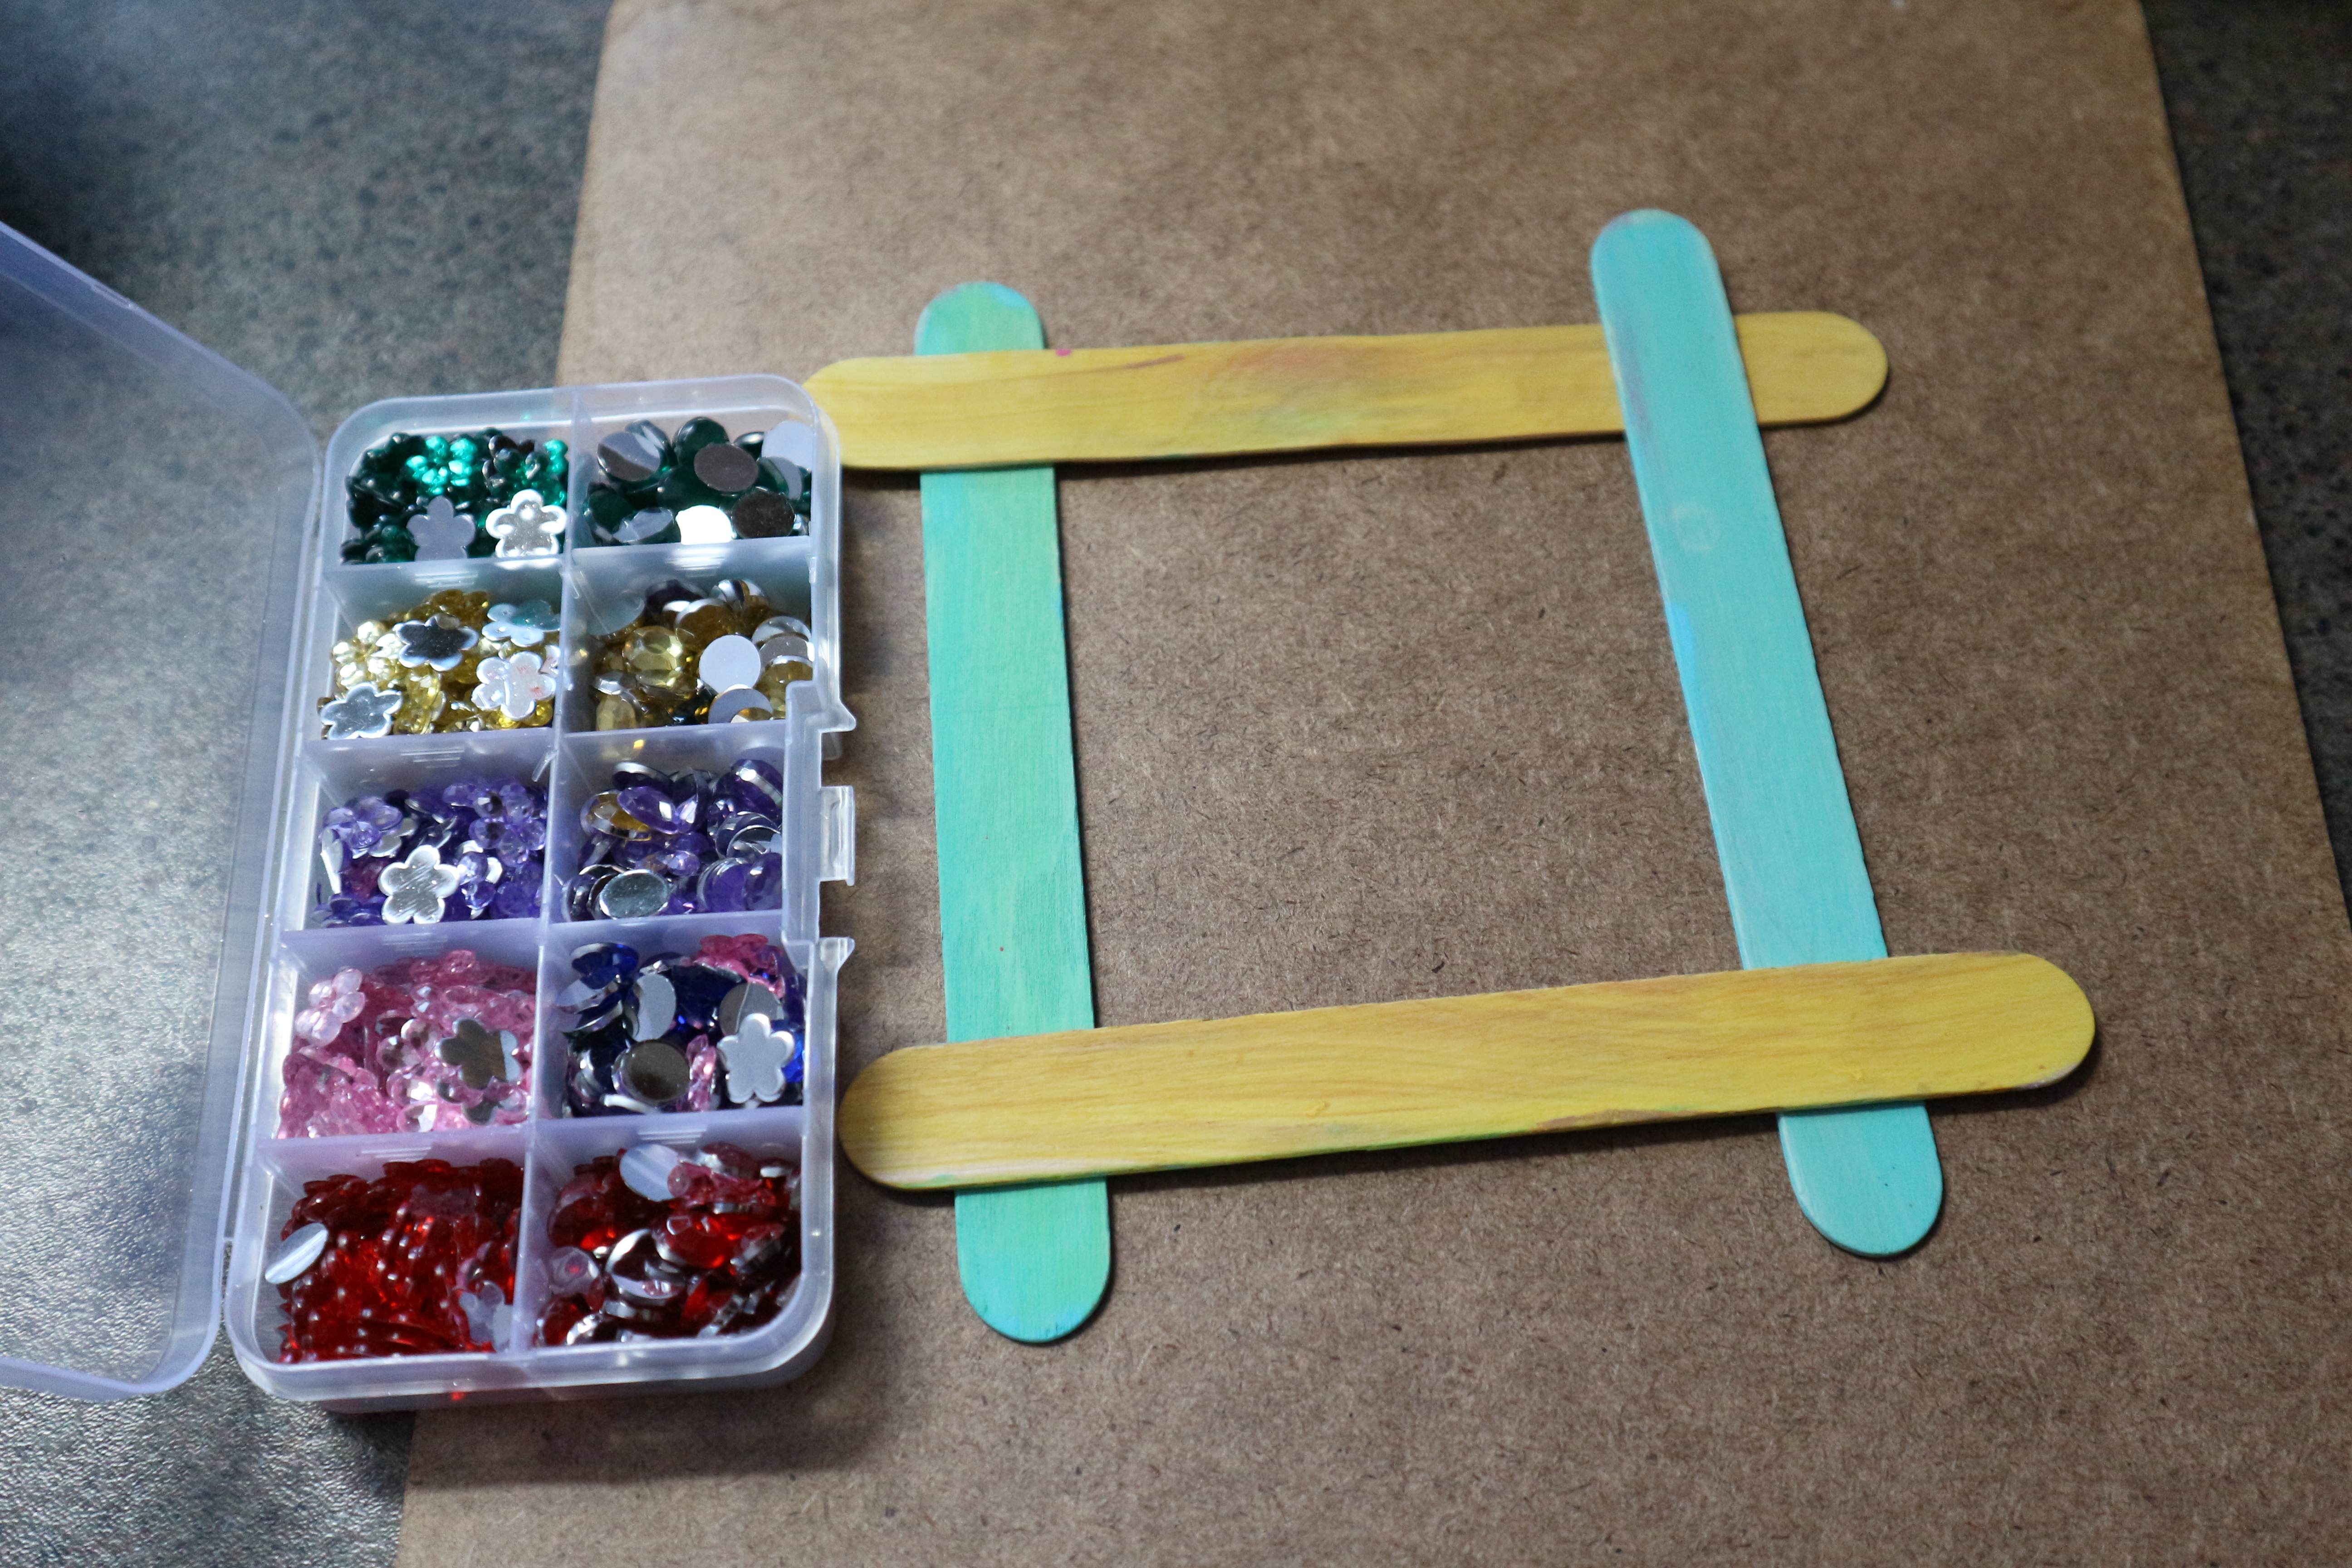
 What could be easier than this popcycle stick picture frame. Paint and decorate the popcycle sticks. Glue together to fit the photo you will use. Hot glue works quickly to attached the square of popcycle sticks. Hot glue a piece of ribbon on the back. OR strips of magnets if you would rather this be a fridge magnet.
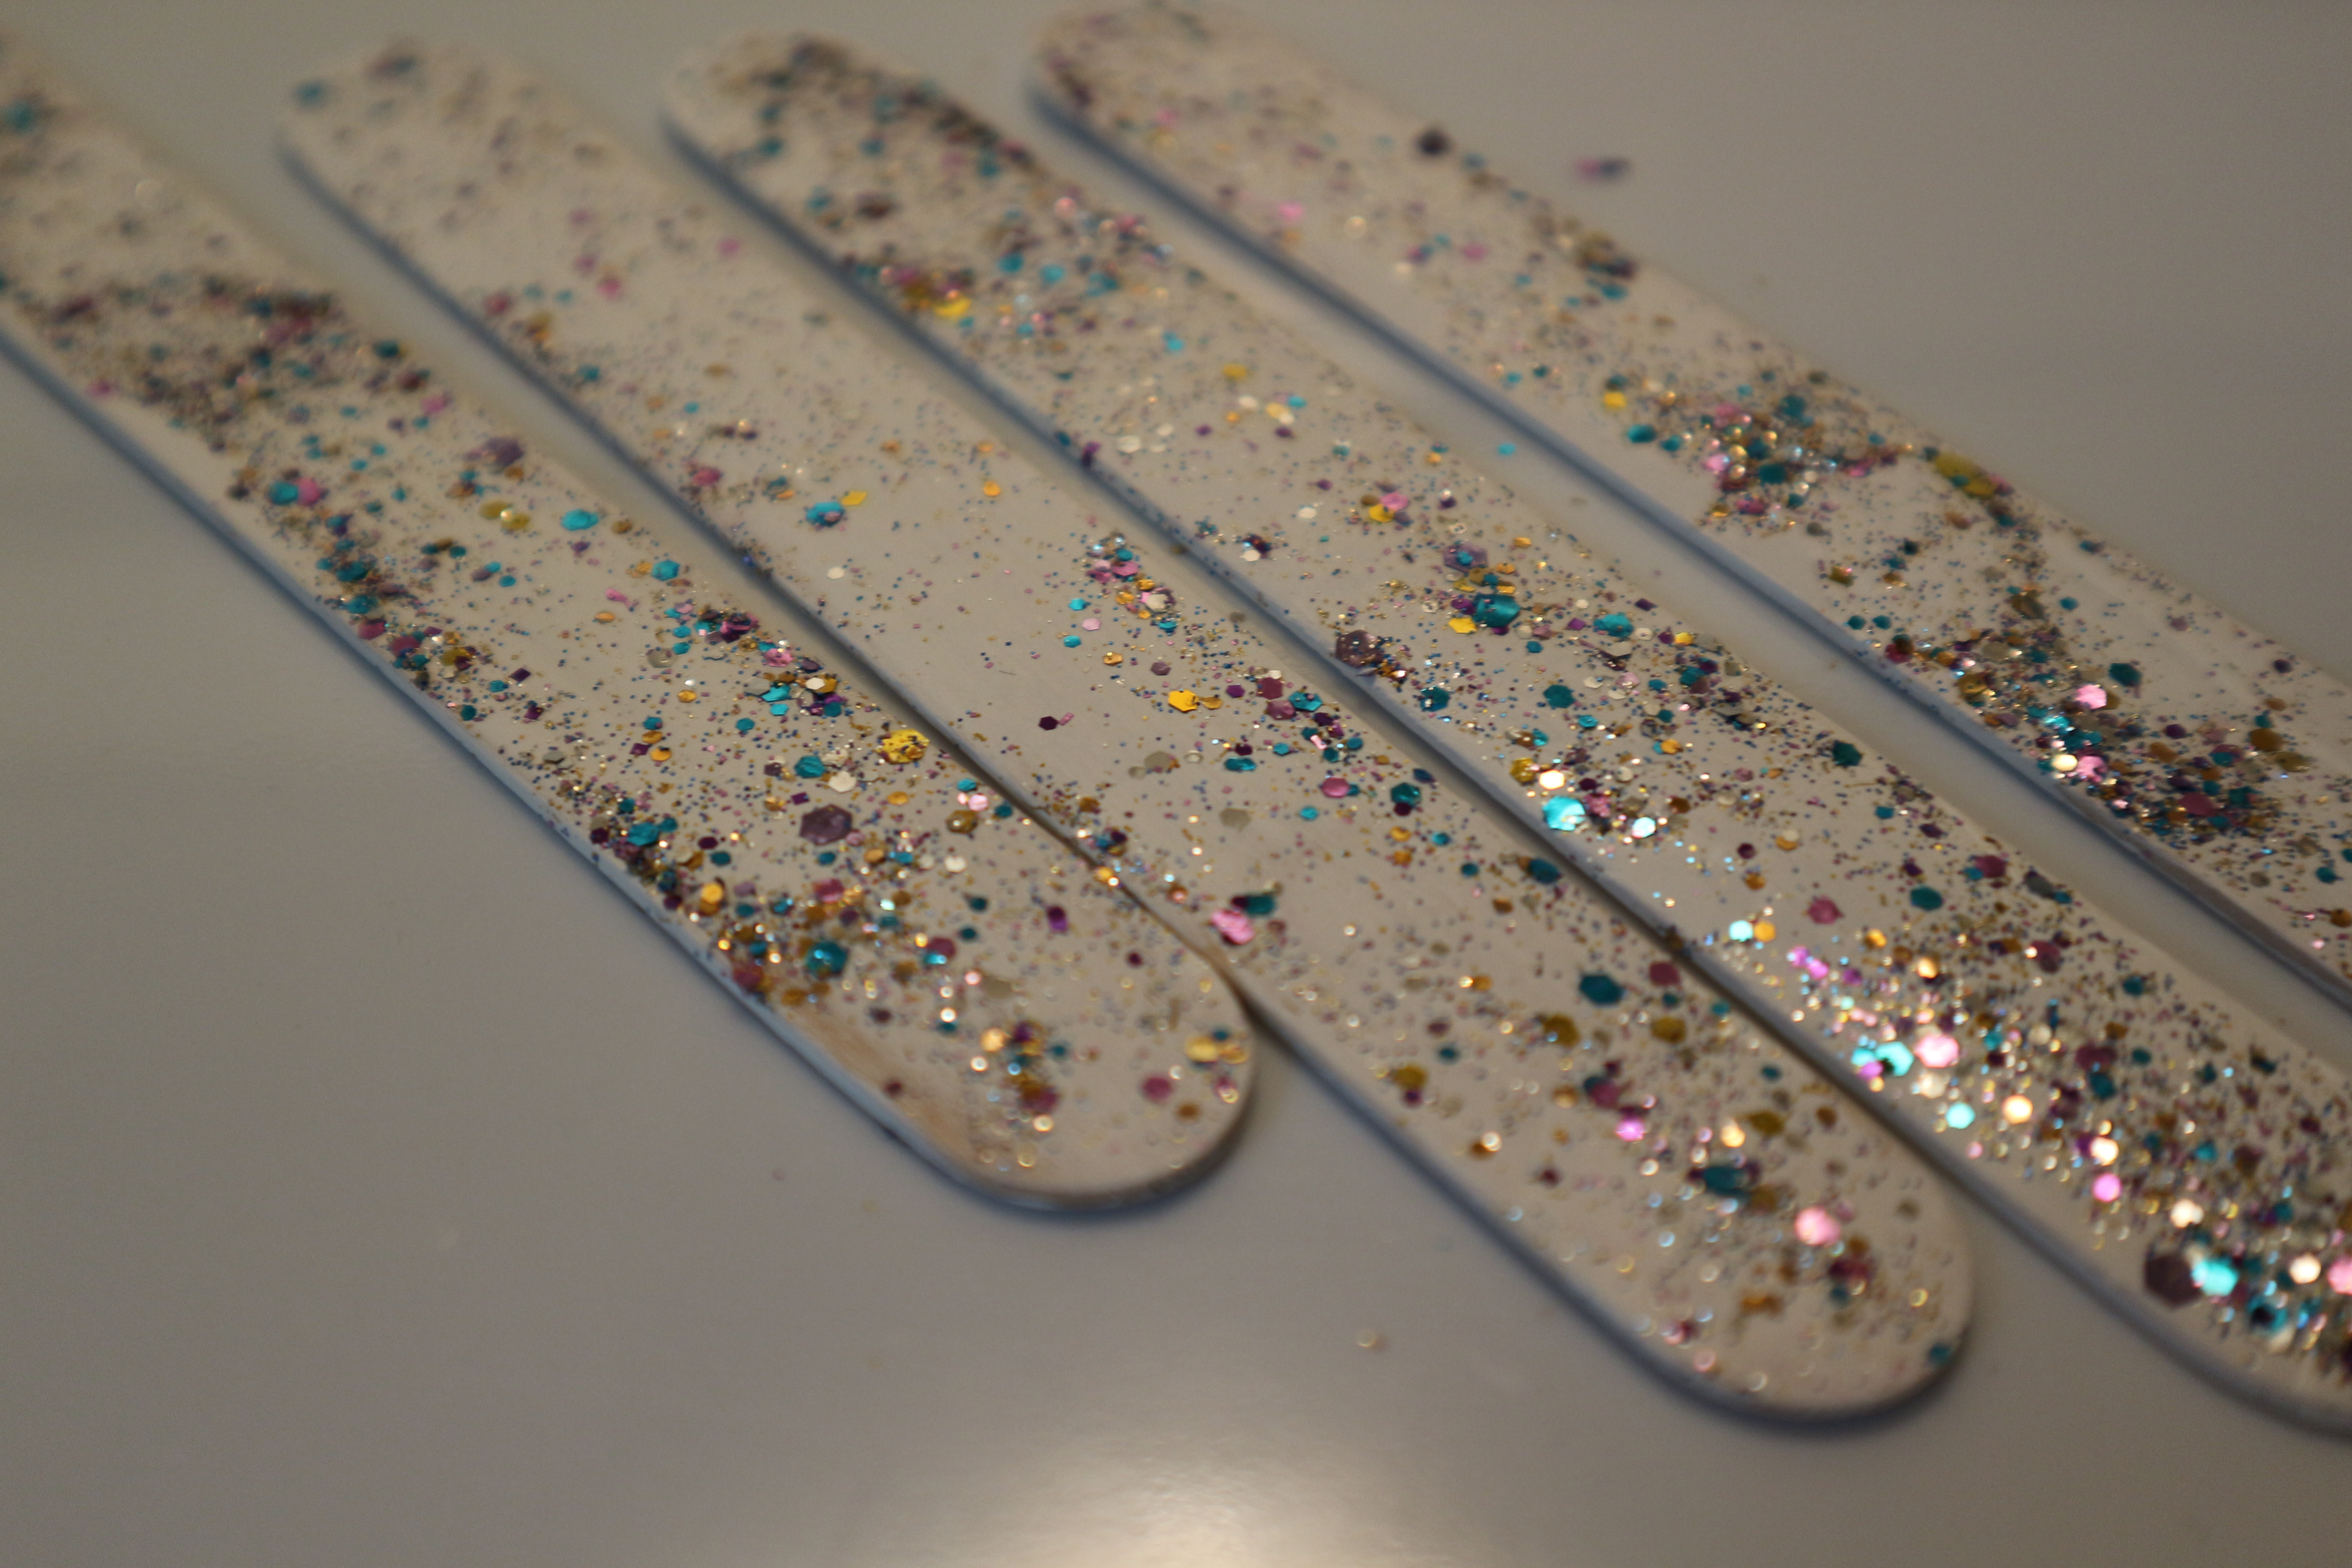
You will need: wide popcycle sticks, glue or glue gun. Glitter glue, gems depending on how decretive you want to get-you could just let a toddler finger paint it.
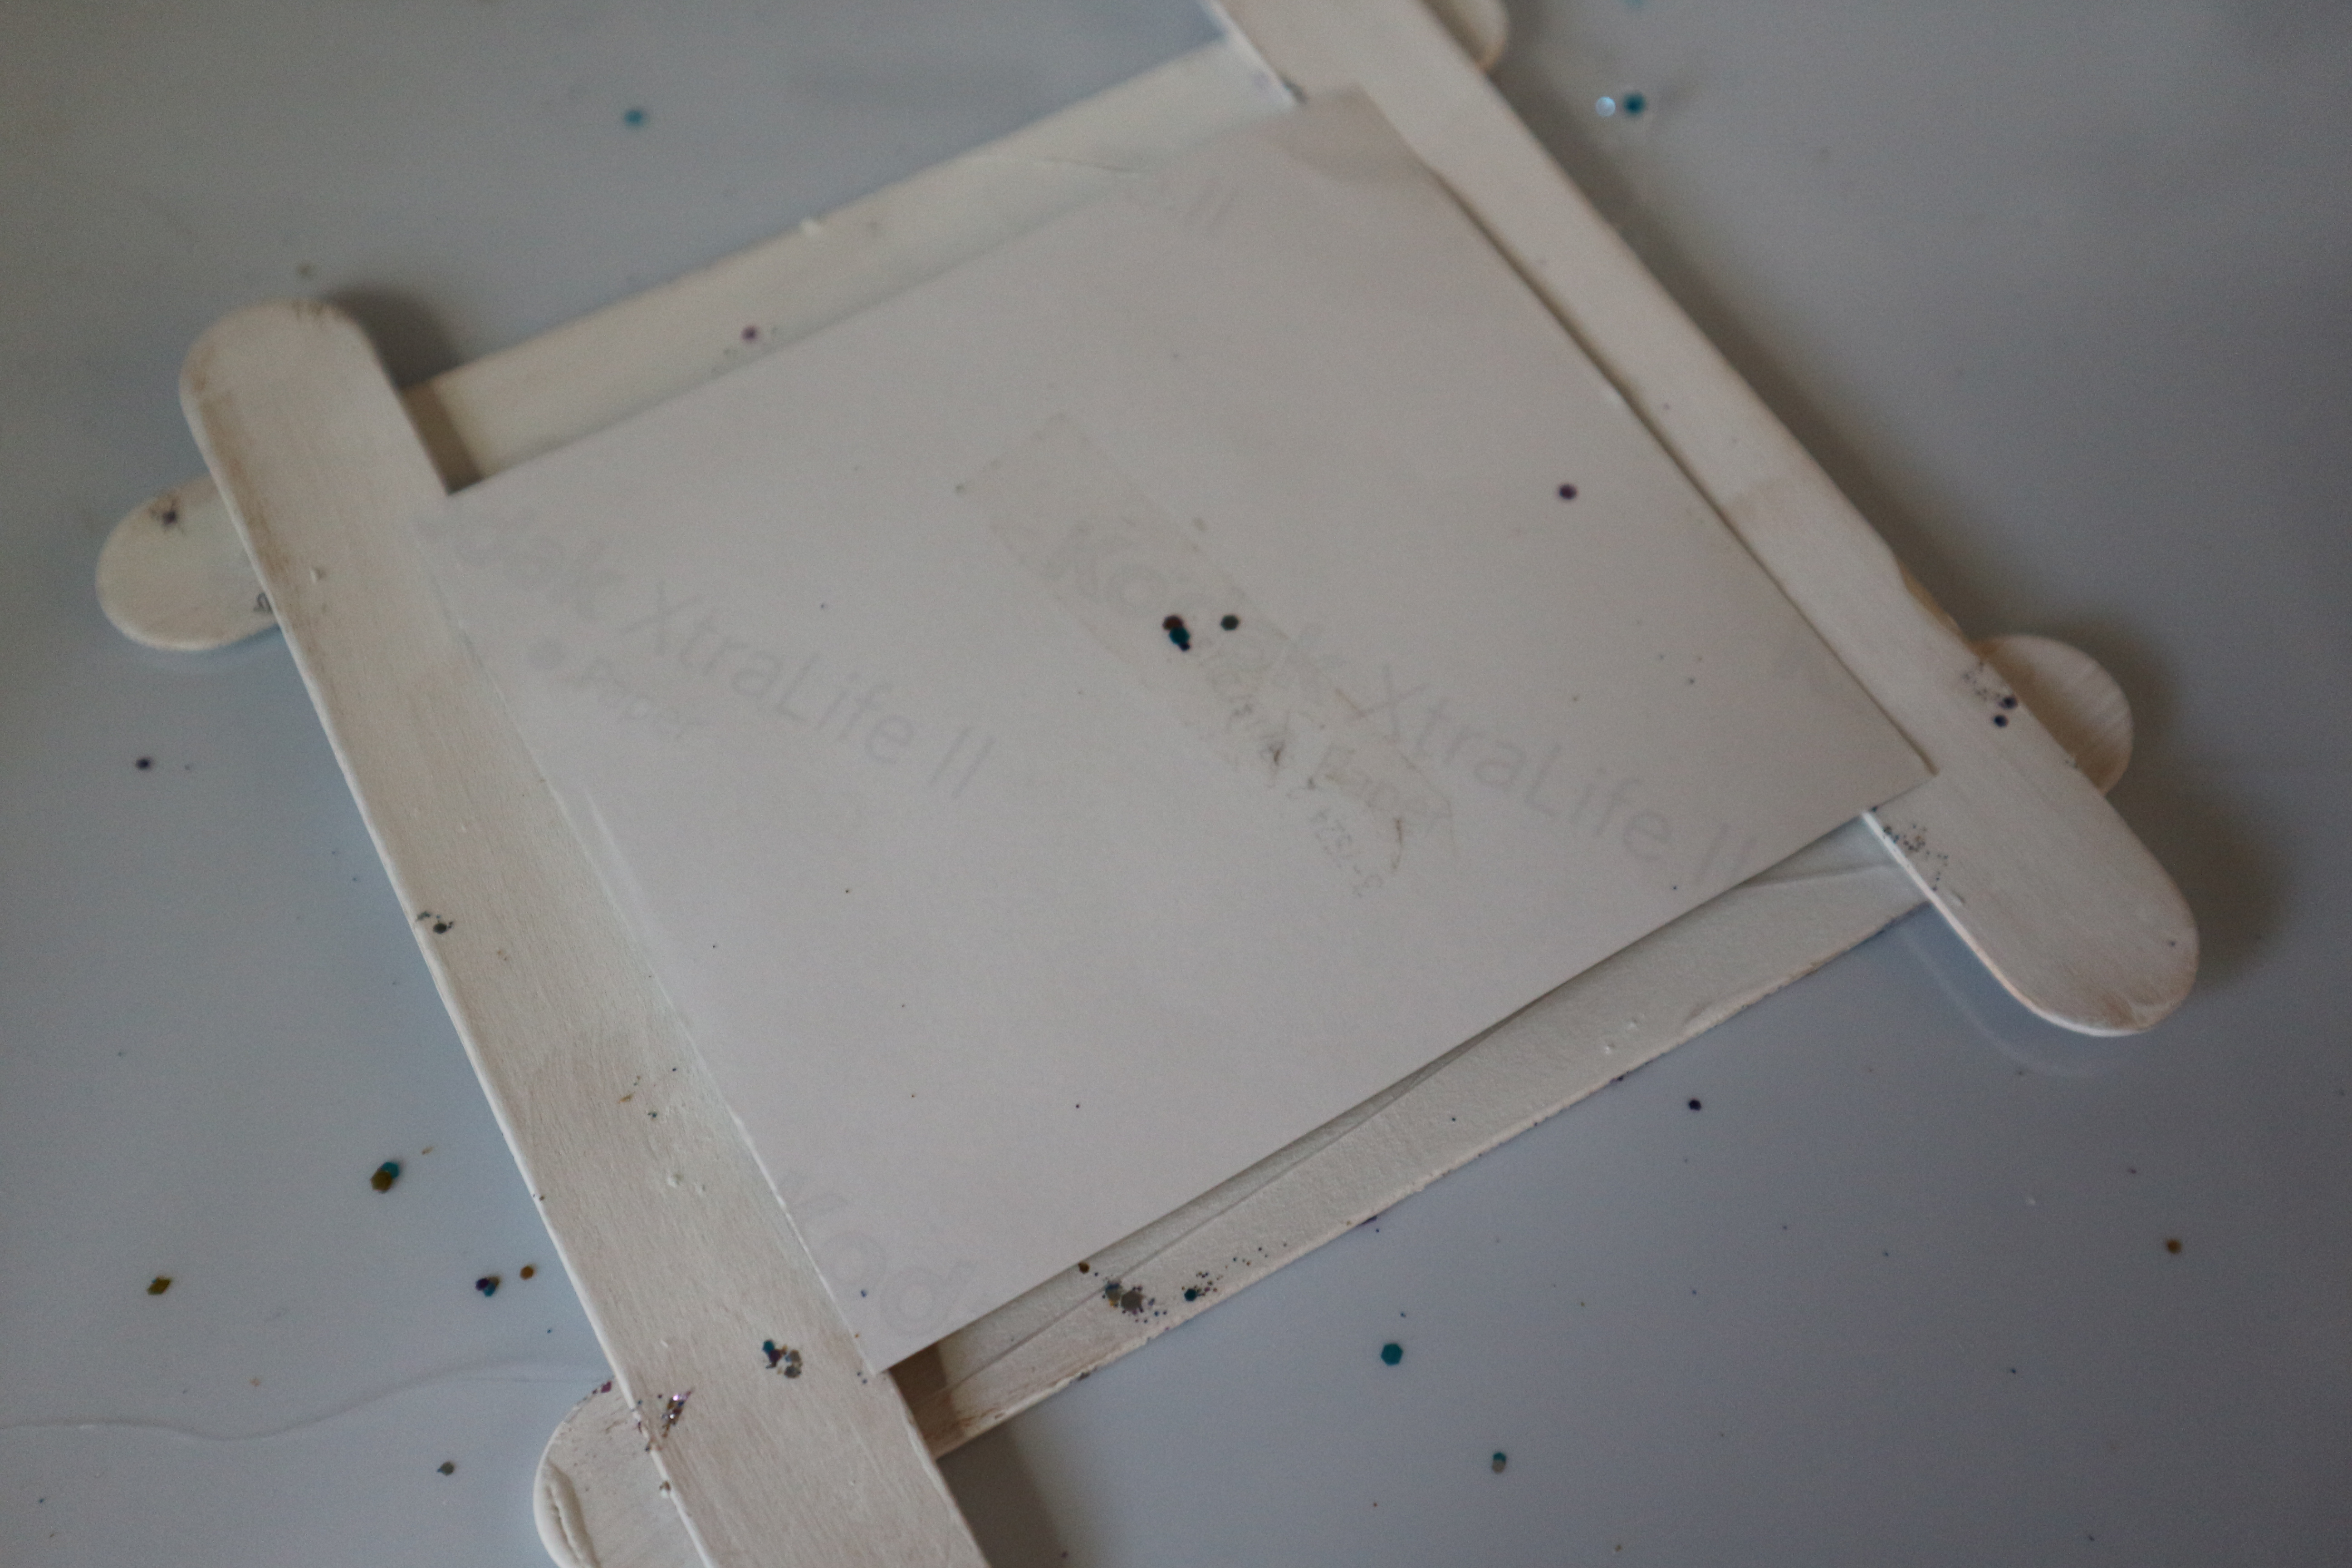
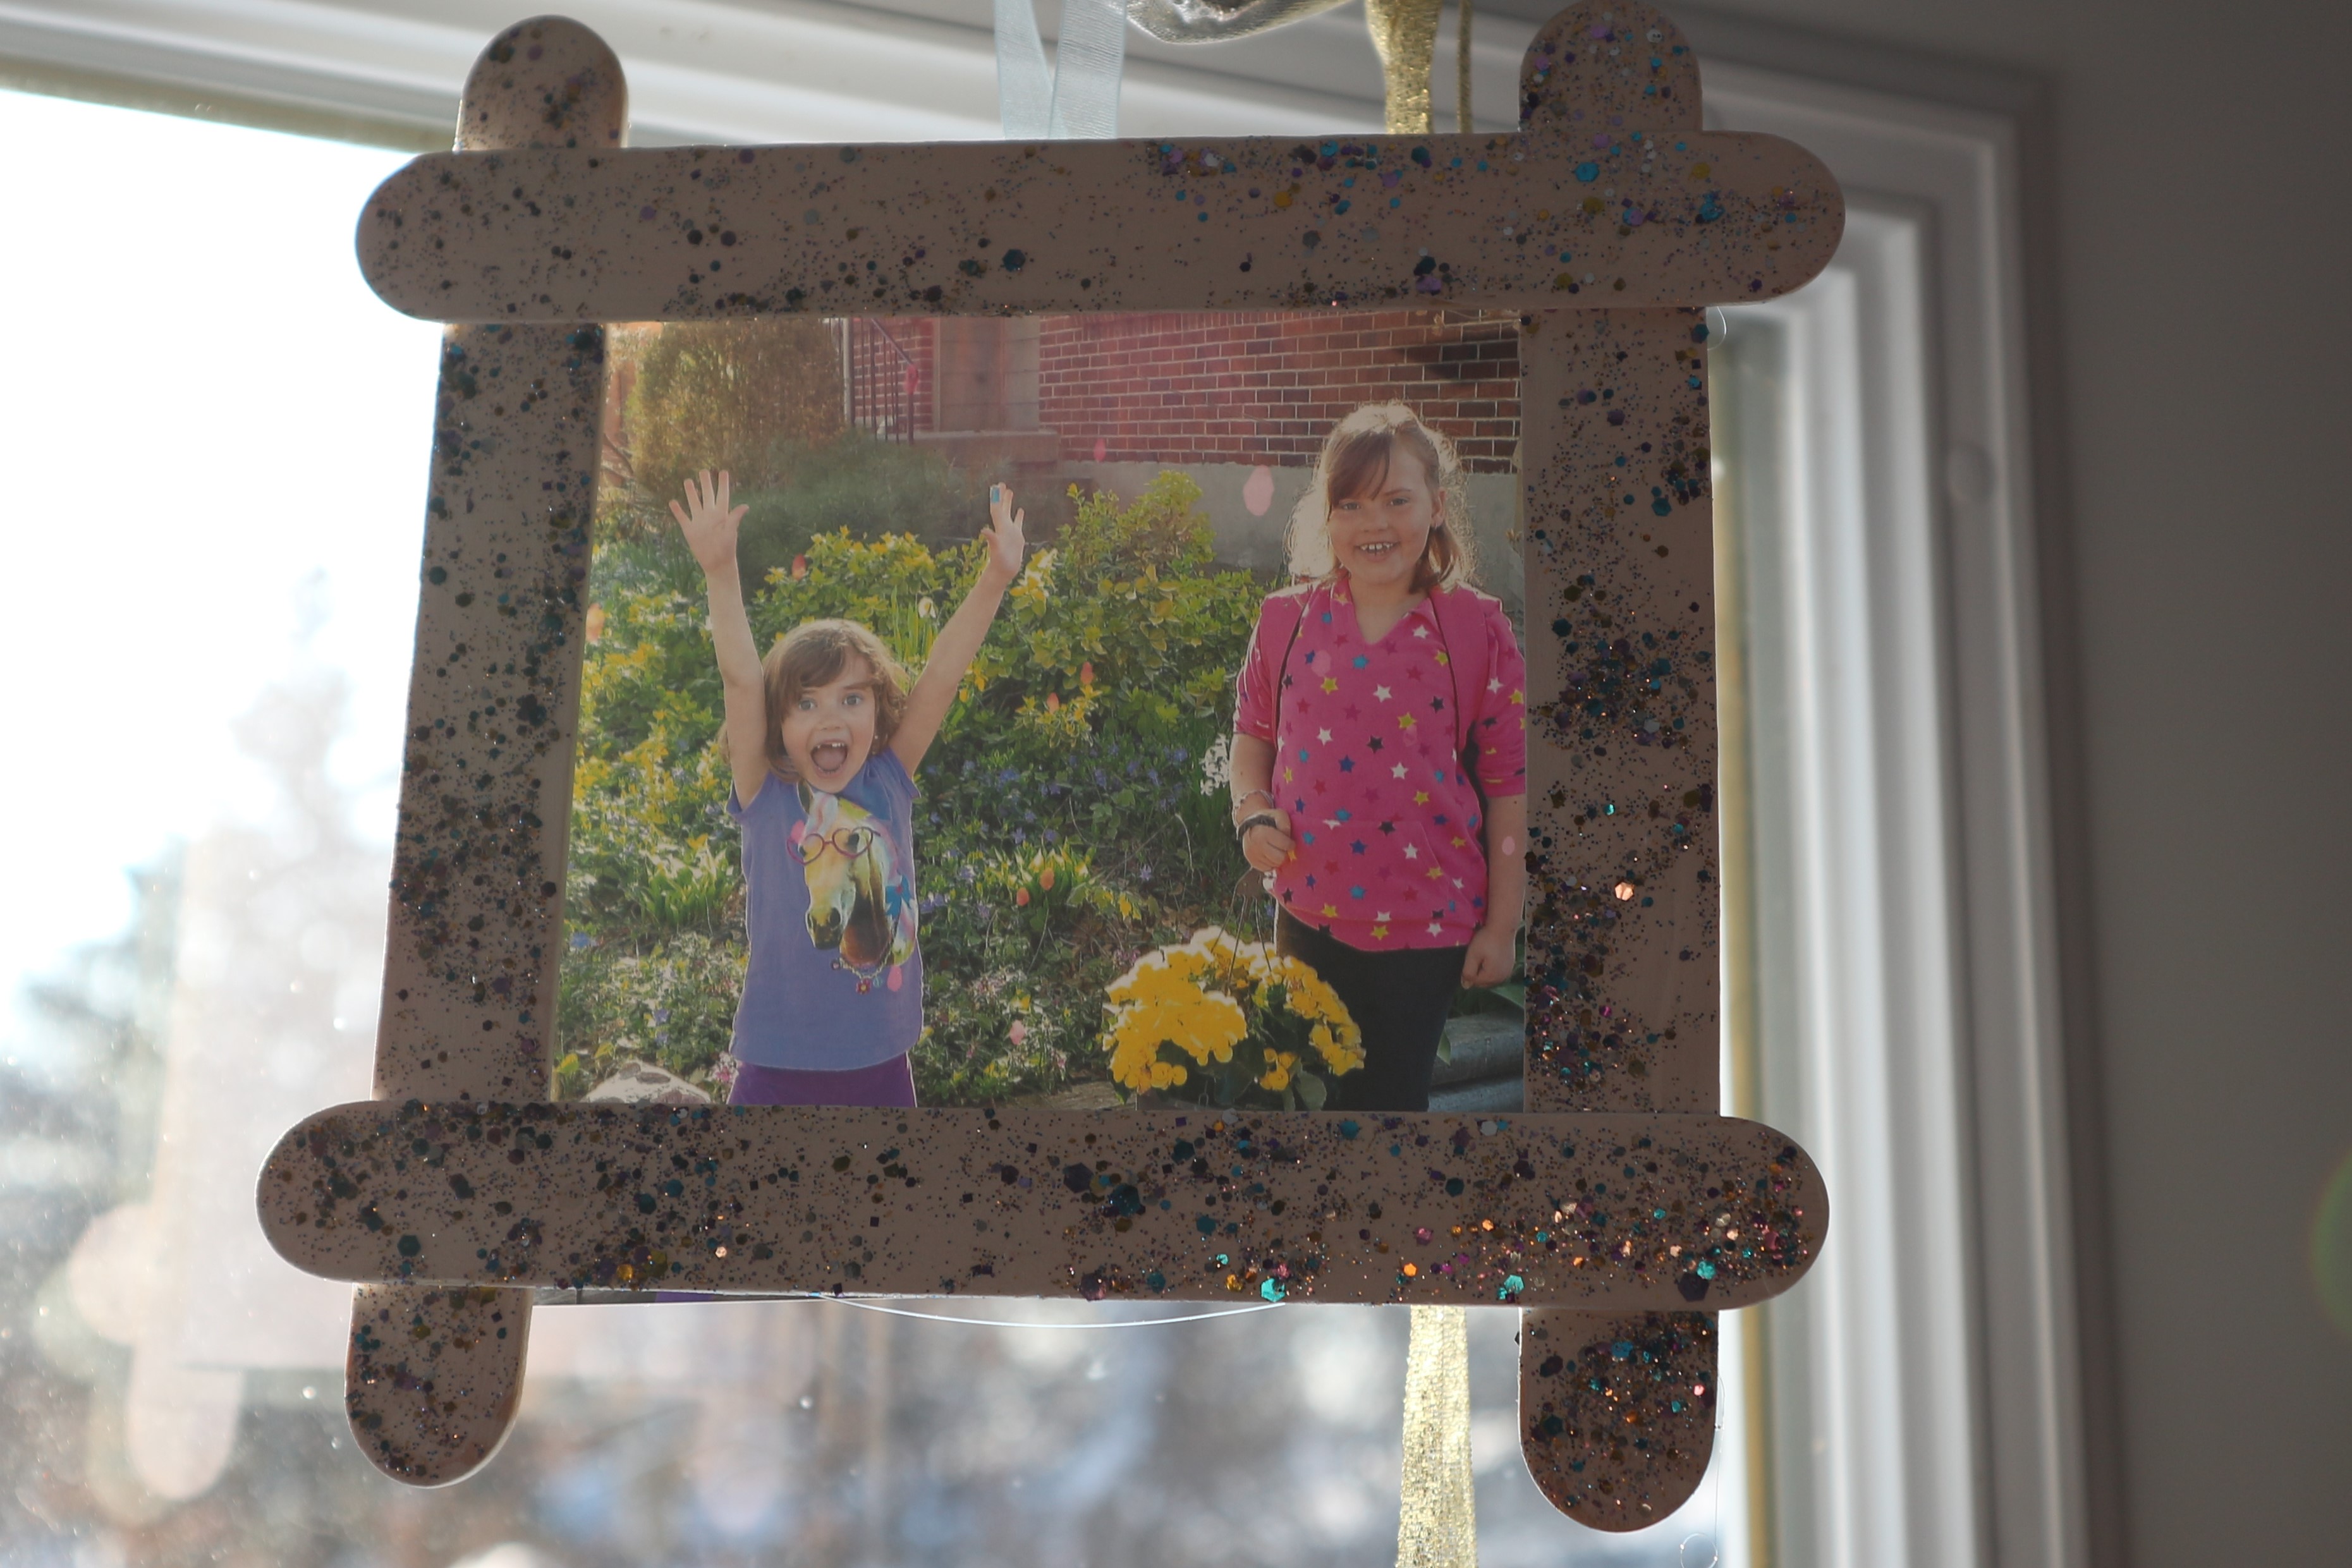
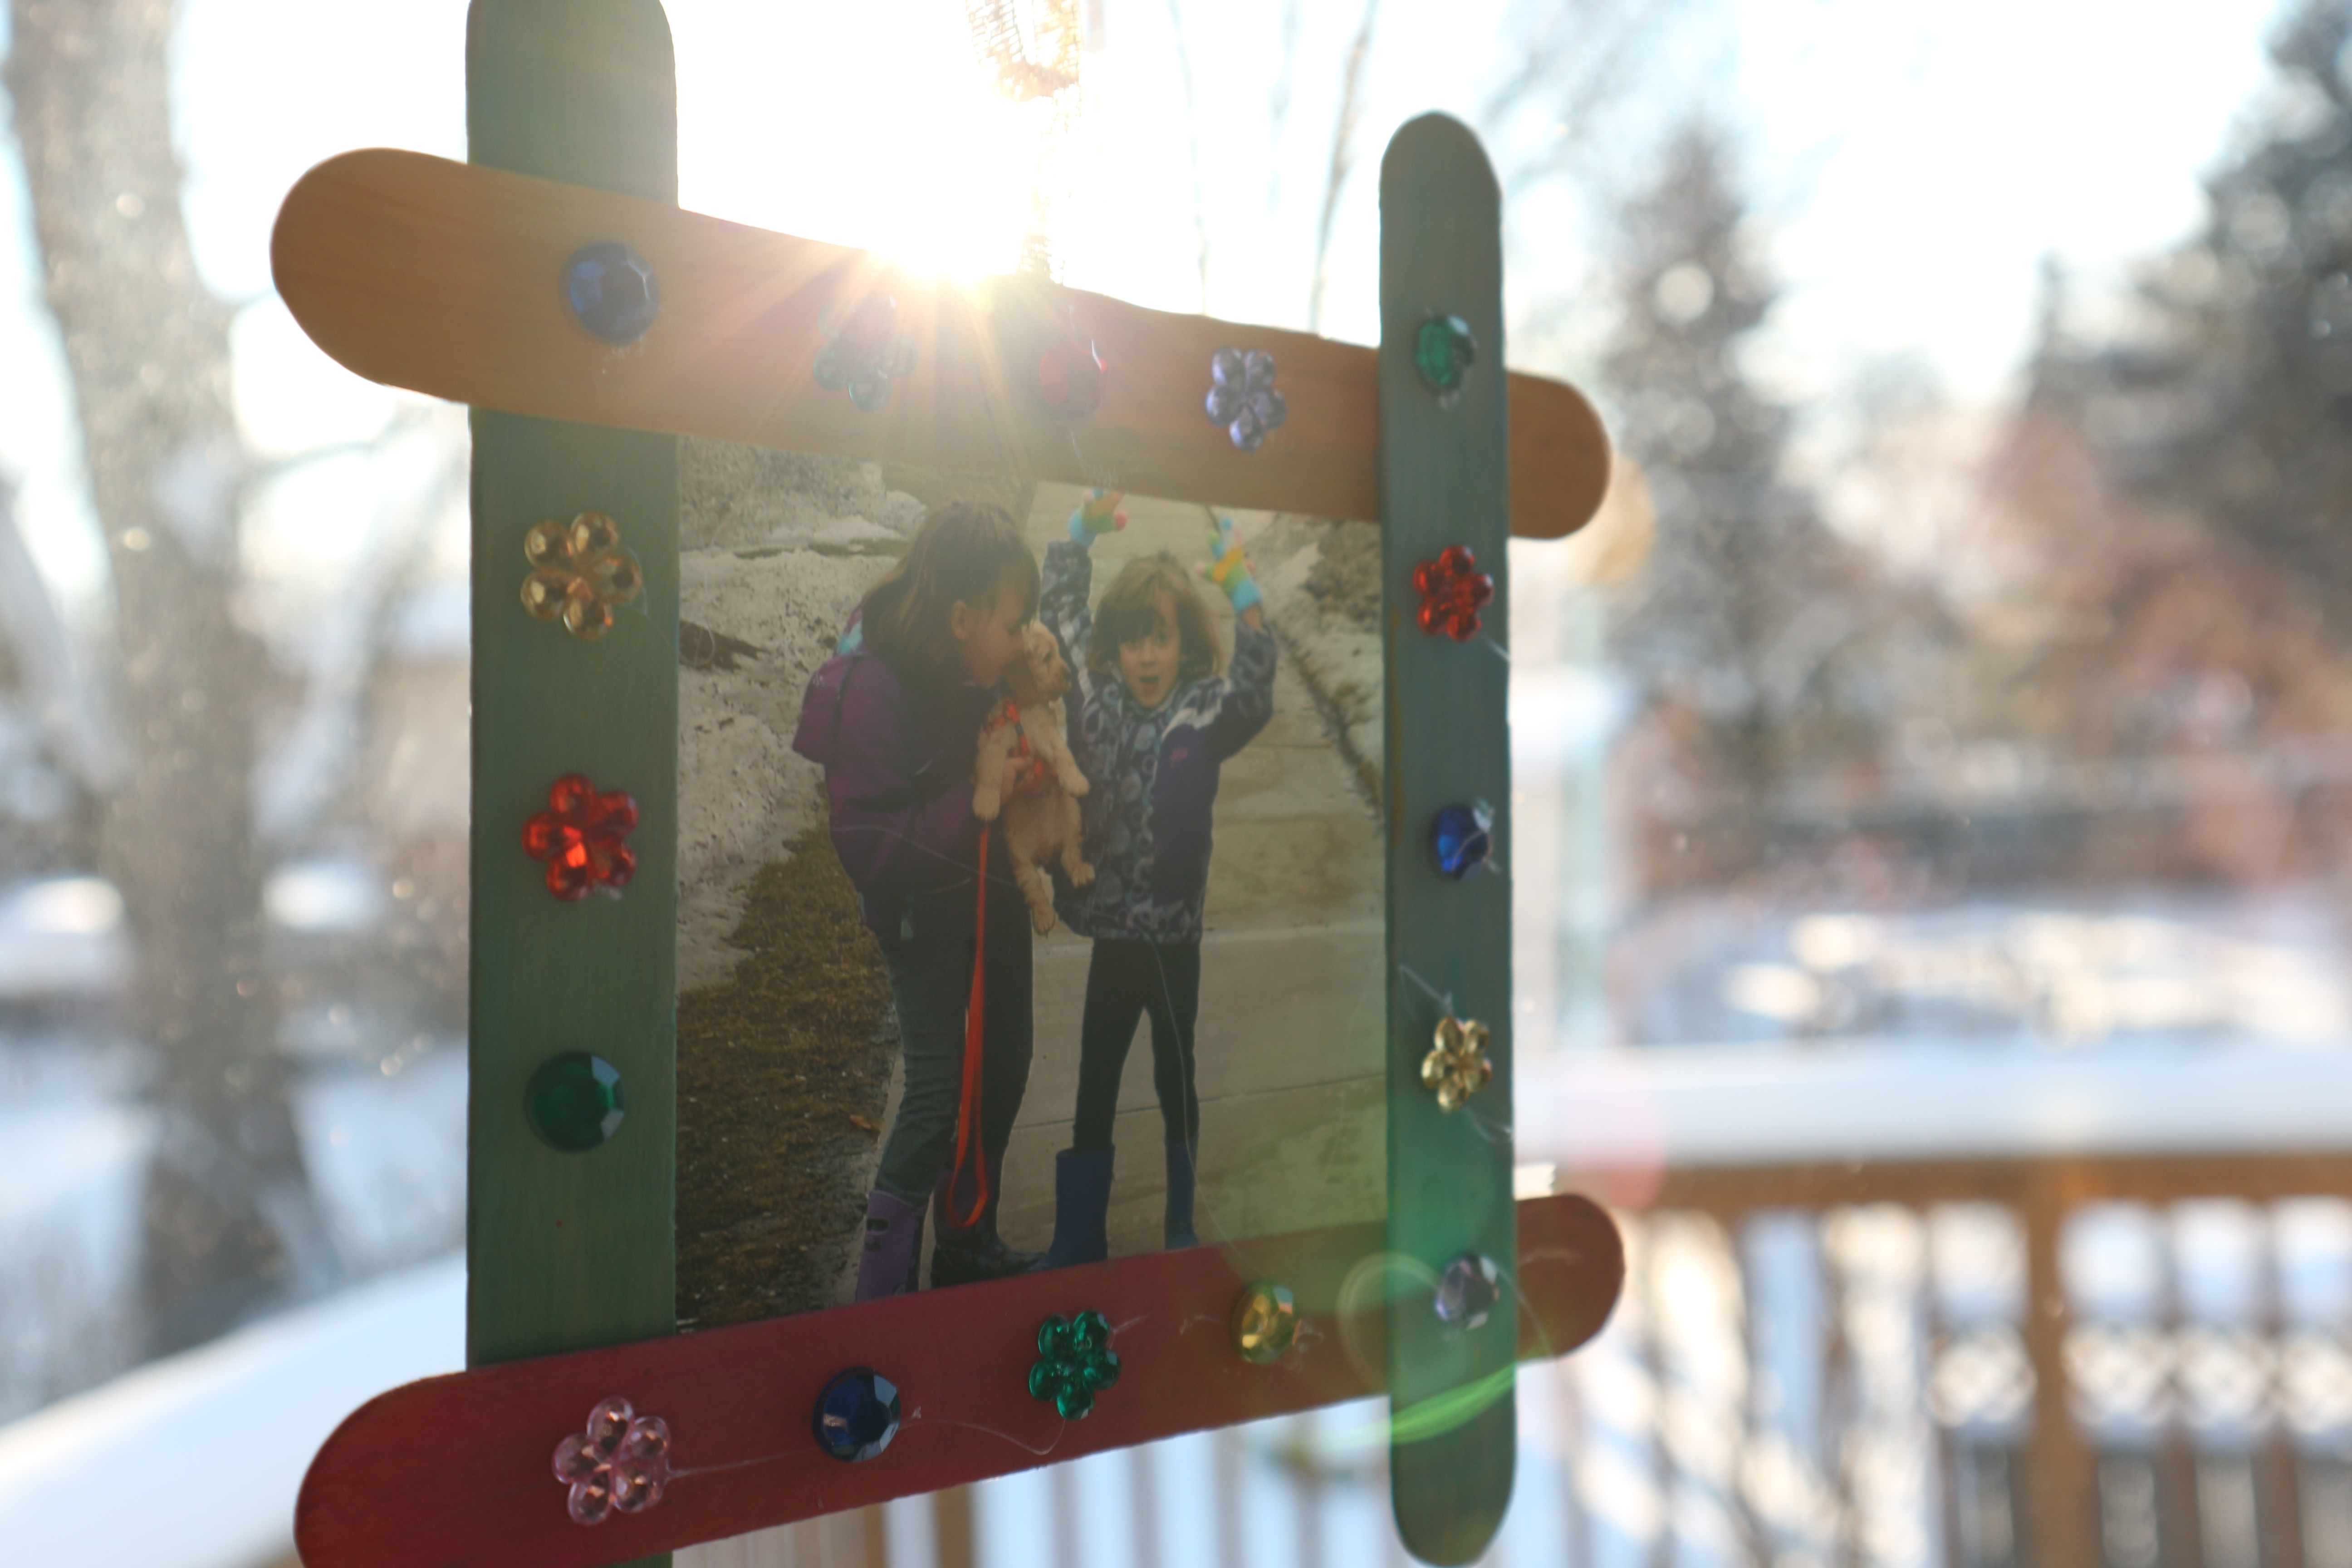
Secure the photo in place with a few pieces of tape. Hang it up and enjoy!
I did this for all of my daycare children back when I ran a home daycare. I strung them all across a string that was fastened to 2 screws so it looks like a bit of a clothes line. It had a really sweet effect. The kids all worked on their own frame and when it was time for them to leave my care and become school kids they took it with them and a scrap book of art I had saved. Ohhh…sentimental pause….. I wonder how my little friends are growing up…..sniff sniff…
…