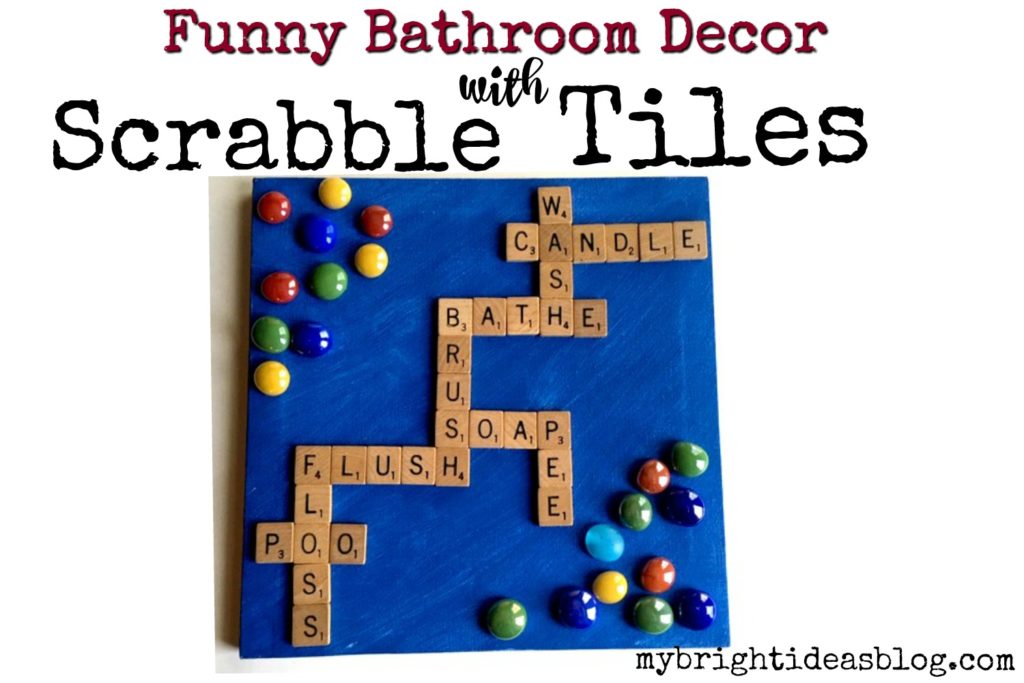
Here is a fun idea for using scrabble tiles to make a bathroom sign that will make your guests chuckle!
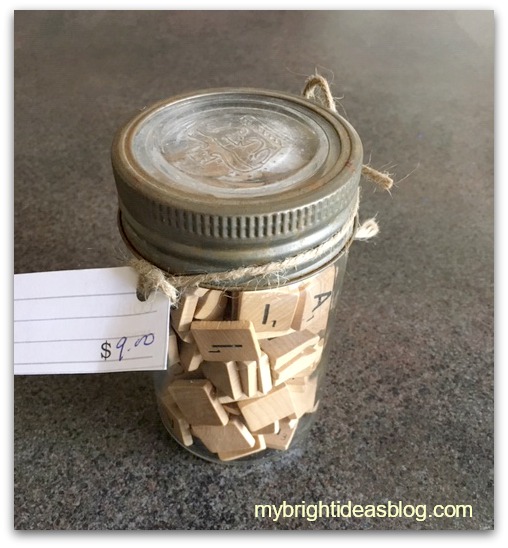
A while ago, I found this jar of scrabble tiles at an antique store. I could probably find scrabble tiles for a cheaper price in an old board game box at a thrift store but this cool old jar reminded me of my mom’s canned peaches…so I bought it.
For this craft you will need:
- scrabble tiles
- blank canvas
- craft paint and paint brush
- hot glue gun
- glass stones or other decorative items
![]()
I used a 12×12 blank artist canvas from the dollar store. Nothing but the best! Tee hee.
It would be sensible to paint your canvas right away so that it’s got time to dry.
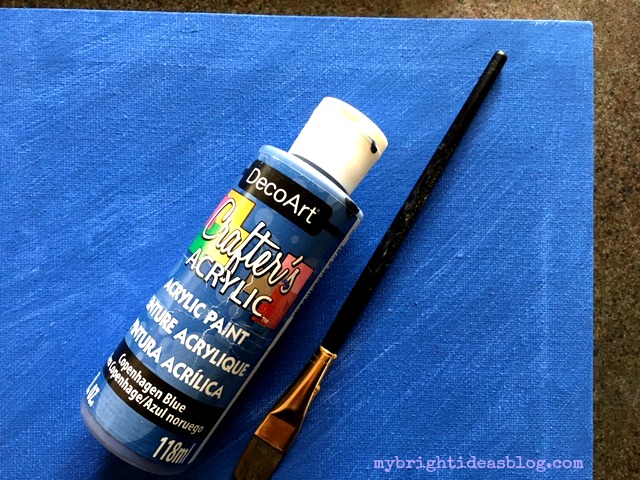
“Copenhagen Blue” craft paint, my brush, canvas, hot glue gun and glue are all dollar store supplies. I was really tempted to leave mine white so I didn’t paint it right away. But later I changed my mind. This meant that I needed to slide all the tiles off and paint it before I could glue it on.
Now for the fun part!
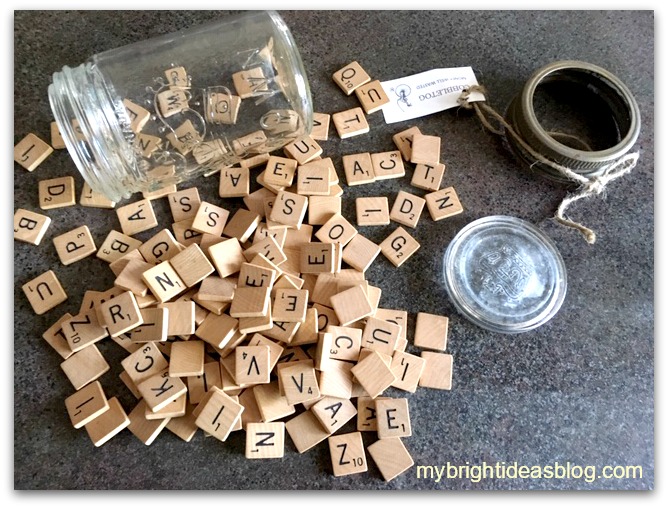
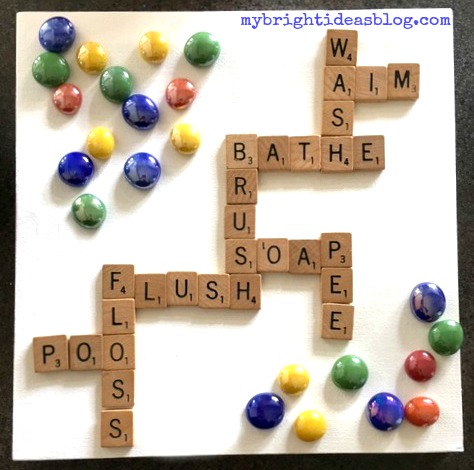
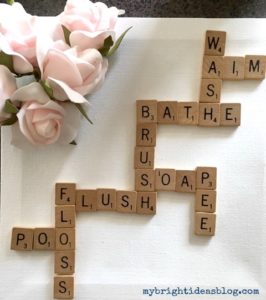
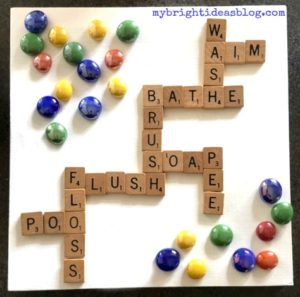
Spread out your tiles and see what sort of bathroom words you can find.
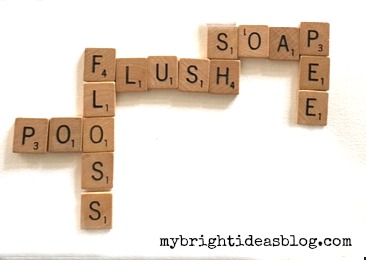
Pee, poo, aim and flush are my best toilet words. Shower, wash, bathe (or bath), soap, bubbles, shampoo, tub etc. for the bathtub words. Brush, floss, gargle, spit for the dental hygiene words.
After you have found the letters to your favorite words you need to make them line up with other words on your canvas or board. This can be a bit frustrating.
I tried some random craft supplies before I settled on the bright glass stones and blue paint.

Since I hadn’t painted it yet I needed to carefully remove the tiles and set them aside while I painted my canvas blue. It dries very quickly.
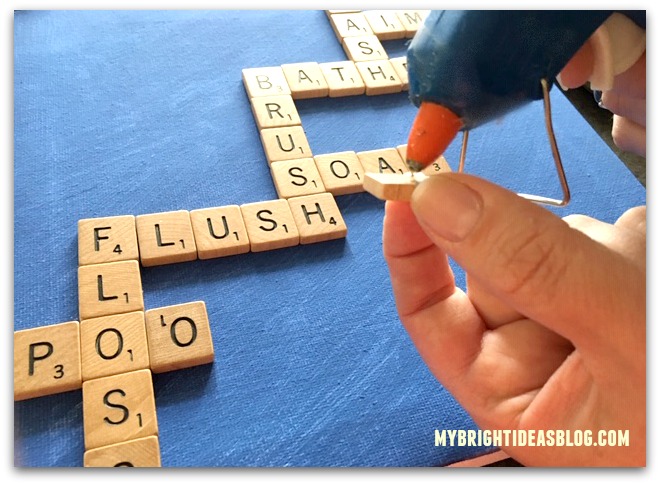
Then I recreated the words in the right order and using a hot glue gun, glue each peice into place.
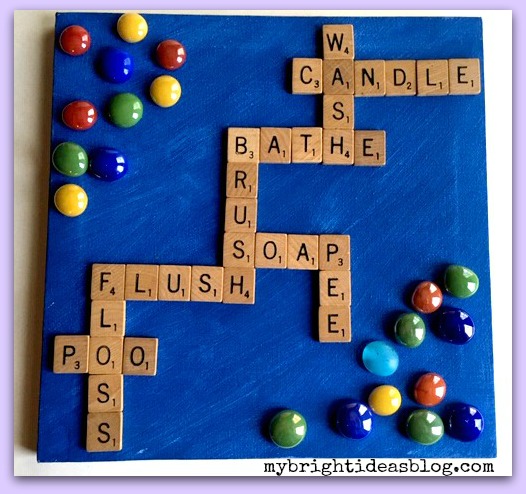
And there you have the final product! I thought the blue represented water and the glass stones were bubbles.
…
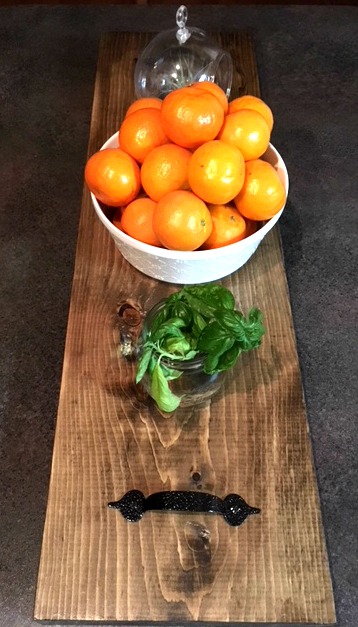
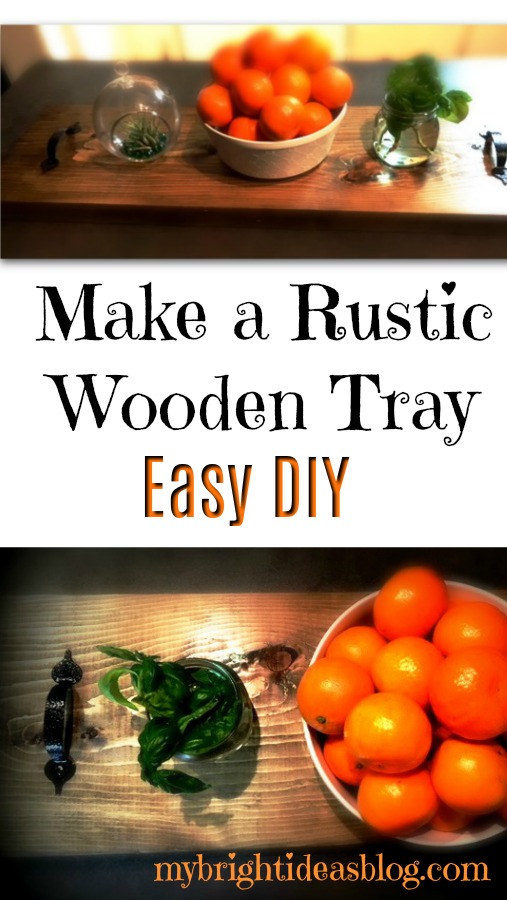
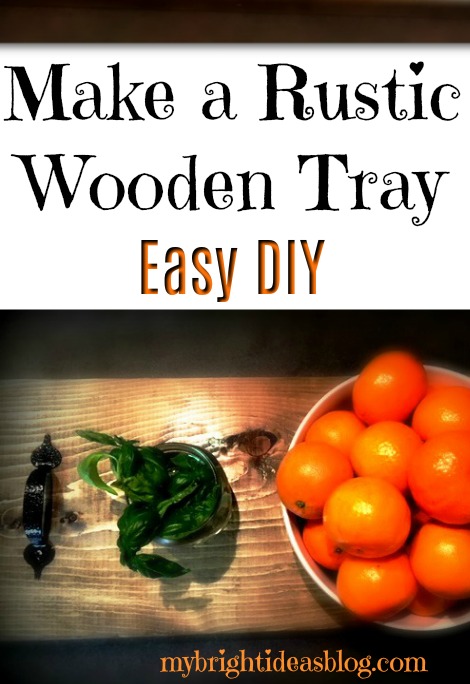
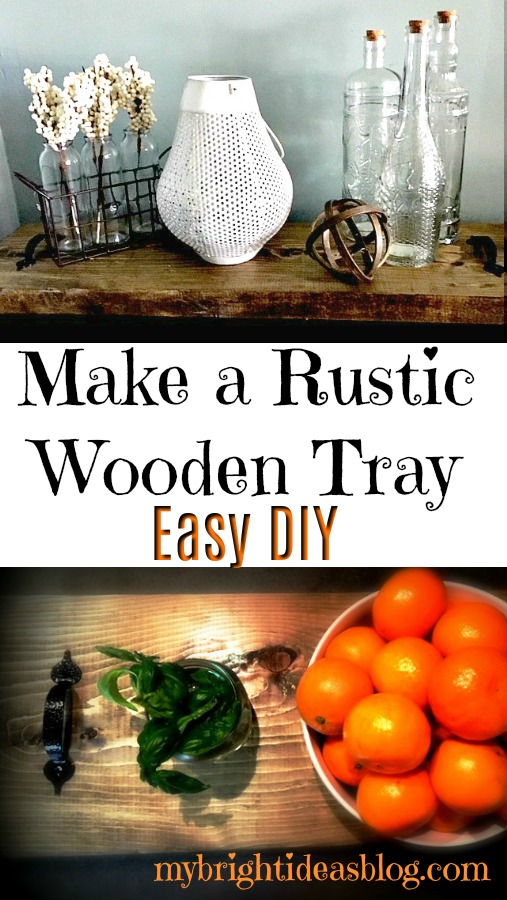
Make a Dark Stained Rustic Wood Tray – Easy DIY!
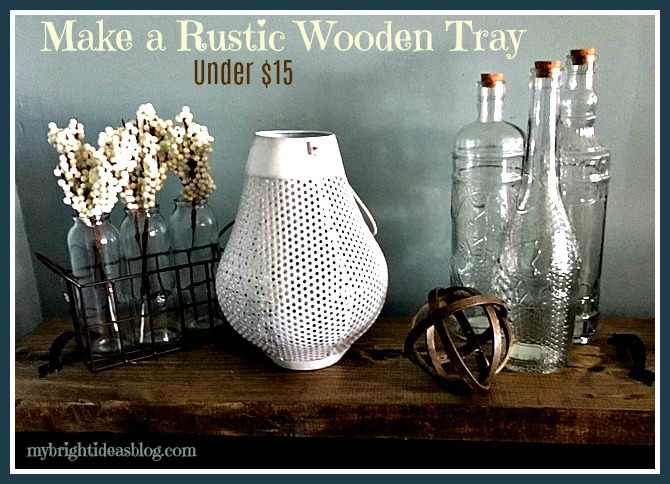
Shortly after making this rustic wood tray I had it placed out on the table with my bowl of clementines and we had company over. My friend Tina’s eyes lit up and said that looks like a Charcuterie Board! I had no idea what she was talking about.
Apparently, these boards are French named partly because harcuterie is the French word for smoked, dry-cured or cooked meats. So during a cocktail party or anytime your entertaining you put out a sampler of all sorts of meats on a wooden board. Cheese and crusty bread or crackers, dips and olives could also be intermingled on your board.
They can be the size of a large wooden cutting board.
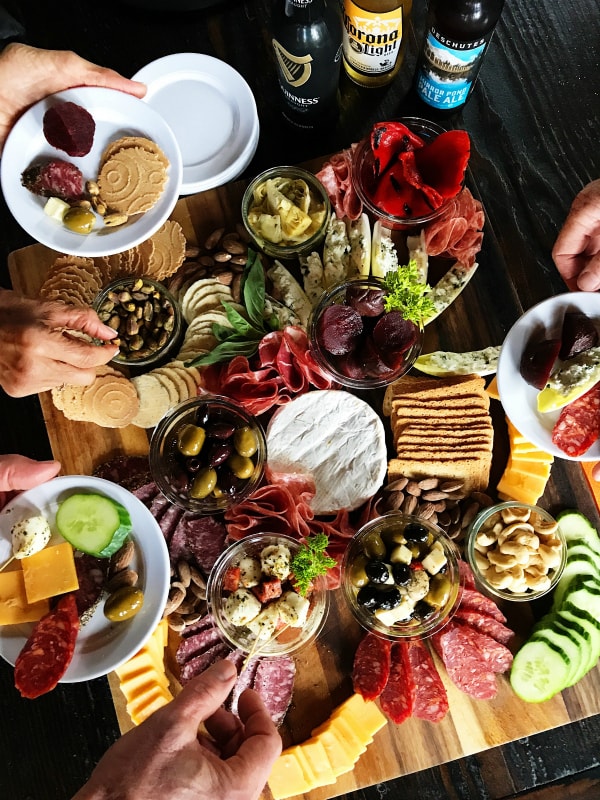
reluctantentertainer.com
Or as big as the table top!
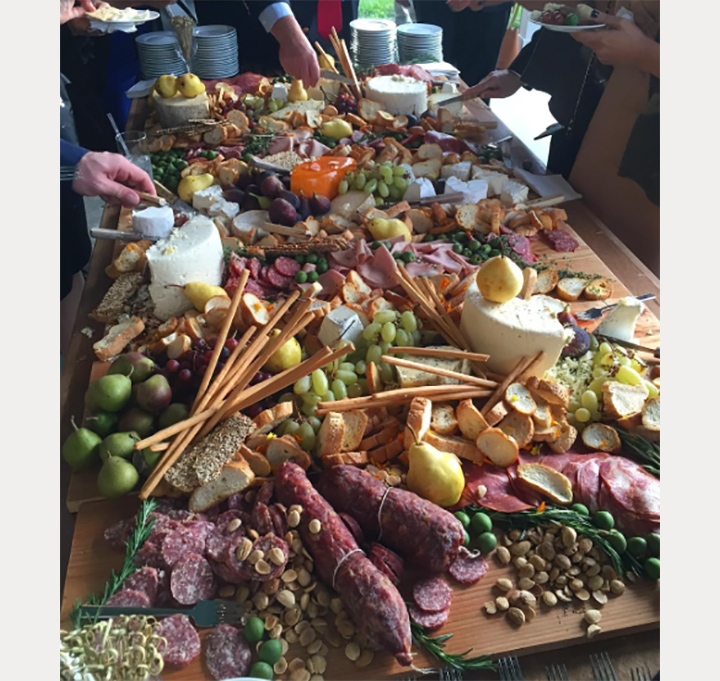
moncheribridals.com
The above photo is wedding spread!
Now this is not a blog about entertaining and making beautiful food. I’m a crafter and DIY-er so I’m going to be telling you about how I made my ridiculously easy to make serving tray.
You will need:
- 1 board 2x10x8 (this is long enough to make 3!)
- 2 handles ($3 each)
- sand paper
- stain
- rag
- clear varnish or polyurethane
- paint brush
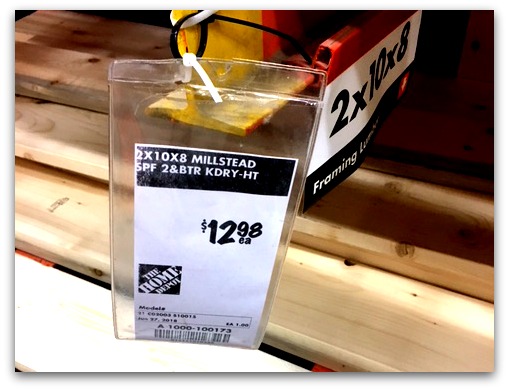 The board above is 2x10x8 cut into three pieces-so you can 2 away as gifts-That makes the lumber approximately $4.50 per tray!!!! That is amazing. When you look at these in the stores and online they can cost $50 to 100.
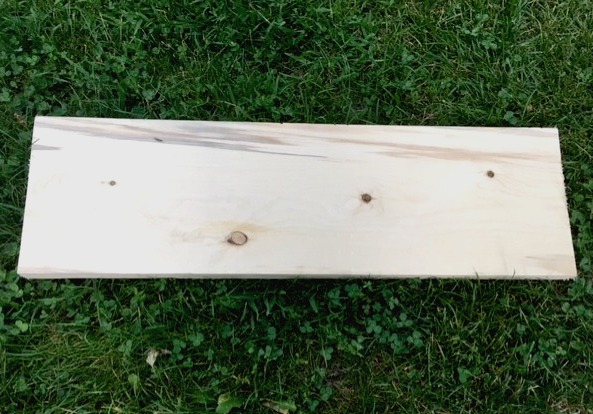
Cut the board into the lengths you prefer. The one I show in the photo was 31 inches long, the second one I made was 30 and the last one was 35 inches. I would recommend that you measure the side table you are going to put this on. Are you planning to make this to be a centre piece in the middle of the dining room table? Then 35 inches is great! But, if its a dresser that is 30 inches wide you don’t want to make it wider than 30 inches.
If you prefer your wood smooth, then you could sand it. If you like it very rustic then you could bang it up a bit with some random tools. I skip the sanding step usually unless there are frayed slivers on the ends of the boards.
With your stain and rag apply the color to your wood.
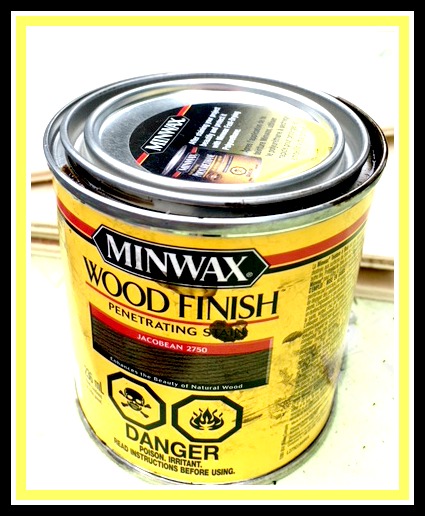
I used my favourite Miniwax color Jacobean 2750. I made the other pieces of board other colors (grey and ebony) but my favorite is always Jacobean.
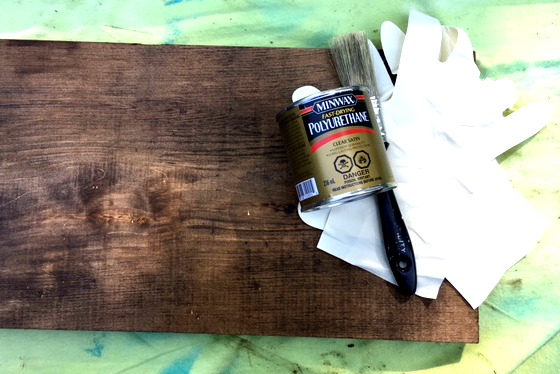
Since I don’t plan to put any food directly on my tray I used my usual clear coat over the wood to protect from wear and tear. This means I could even leave it outside in a rain storm and it would be fine.
If you do want to place food right on top of the tray there are many food safe options. They are not as durable (don’t leave it outside in a rain storm). Food safe options: Pure tung oil, raw linseed oil, mineral oil, walnut oil, beeswax, carnauba wax, shellac. One website suggested a mixture of mineral oil and beeswax. Here is the recipe…. https://www.finewoodworking.com/2006/08/01/food-safe-finishes
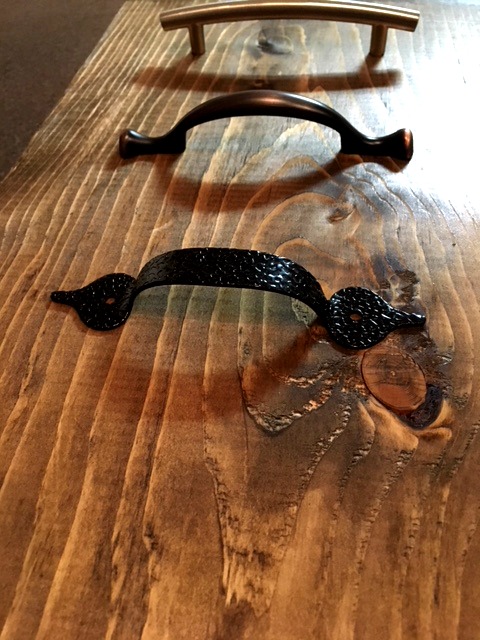
I picked up 3 of the cheapest handles the hardware store had. Each is $3-5 dollars making the cost of the project $11-15 each-assuming you already have the stain and varnish in your DIY stash of essentials. If you find some handles in the craft or specialty shops or even vintage handles by all means use them. They will be on top of the tray so it could be quite the conversation piece.
I chose this one because it screws in from the top. This is actually a good point. If you put on handles with screws that go in on the bottom you may need to counter sink the screw so they don’t scratch your table top. Or you could put 2 slim pieces of wood under the wood to lift it.
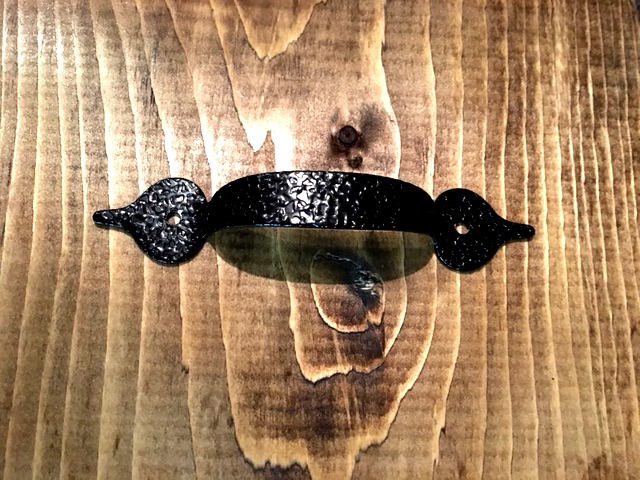
If like me, you chose handles that screw in from the top this isn’t a problem. Put the handles on the board and see where you would like them to be permanently. I put mine 3 inches from the ends (this board is 30 inches long).
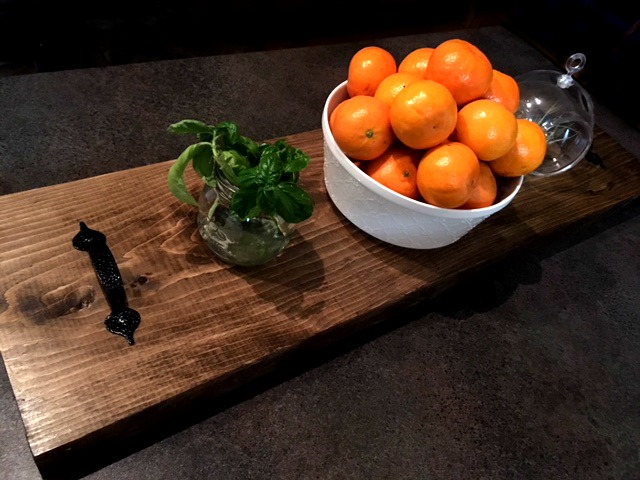
Voila it was that easy…its a simple board with handles.
This would look great on a side table with a few nicknacks between uses. If you do want to use this to lay out meat and cheese, olives and antipasto you could put down paper doilies, little bowls and plates or wrap the board with cling wrap. I would do this even if you use a food safe finish for faster clean up.
If you find this too long or the wood too thick cut the boards shorter to suit you and your space.
This goes to show that if you see something so awesomely simple, see if you can make it yourself for a fraction of the price.
I hope you give it a try!
…..
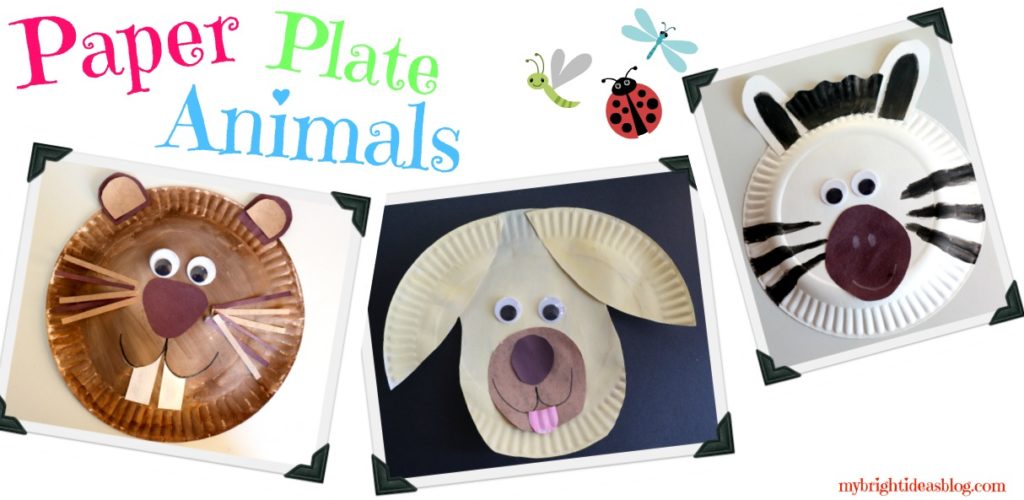
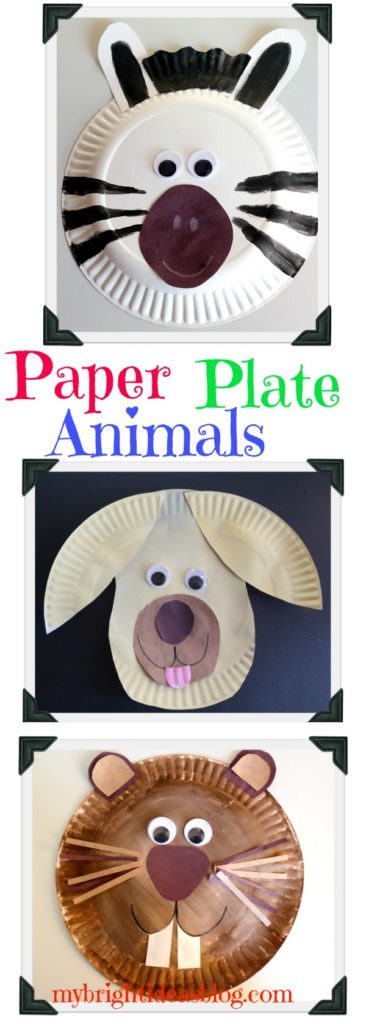
Paper Plate Animals Groundhog Zebra Dog
It’s March Break this week! That means it’s time to look around the house for easy, inexpensive crafts using things we already have. My favorite go-to craft items are paper plates, lunch bags and coffee filters. There is so much you can do with these basic household items-and no trip to the craft store is required. Endless possibilities!
Today lets talk about the sturdy paper plate! For crafts, I like the thin ones that makes you nervous at a picnic that your coleslaw and hot dog are going to fall off the plate and onto your sandals. EEK! They might not be great for dinner in the park, but that is what makes them so perfect for crafting.
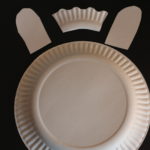
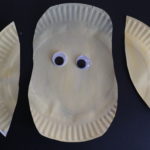
For these three crafts we have used a thin paper plate, paint and brush, construction paper, scissors and glue, big googly eyes and a black marker.
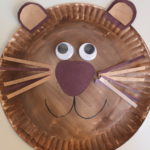
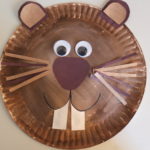
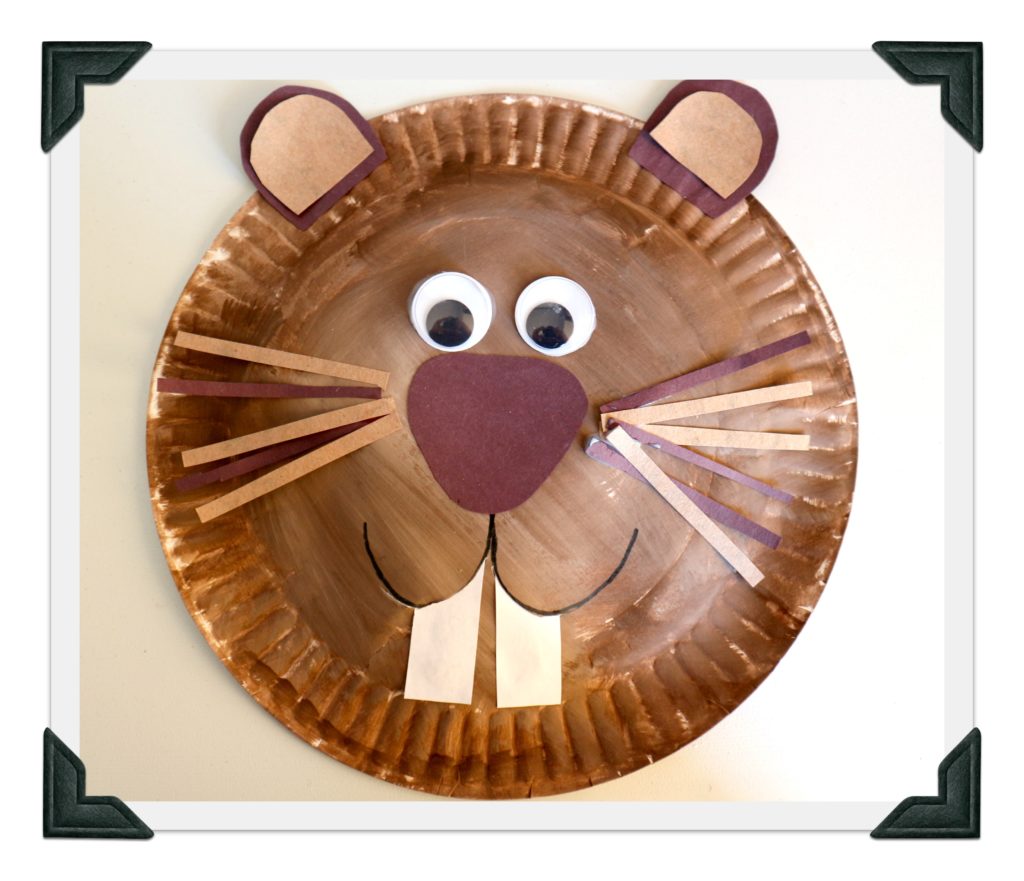
This brown paper plate animal was meant to be a beaver, but it could easily be a bear or groundhog if you want it to match a hibernation theme or a book you have read. Here I used 2 shades of brown for the ears, slivers of paper for the whiskers a brown nose that looks like a triangle with soft edges. After drawing on the mouth, you can slice a slit thru plate along the mouth line to slide the white teeth through and add a dab of glue on the back to keep them in place.
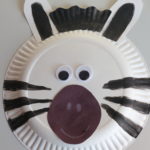
This is a paper plate zebra. Just add a scrap off of another plate, paint it black to be his mane and some ears. Add black stripes with a marker. The nose is sort of an oval/diamond shape. Use a white crayon or pencil crayon to make his mouth and nostrils. I love big googly eyes to add to my crafts but you could draw on eyes if you’re out of googly eyes.
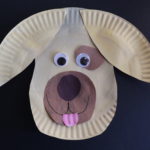
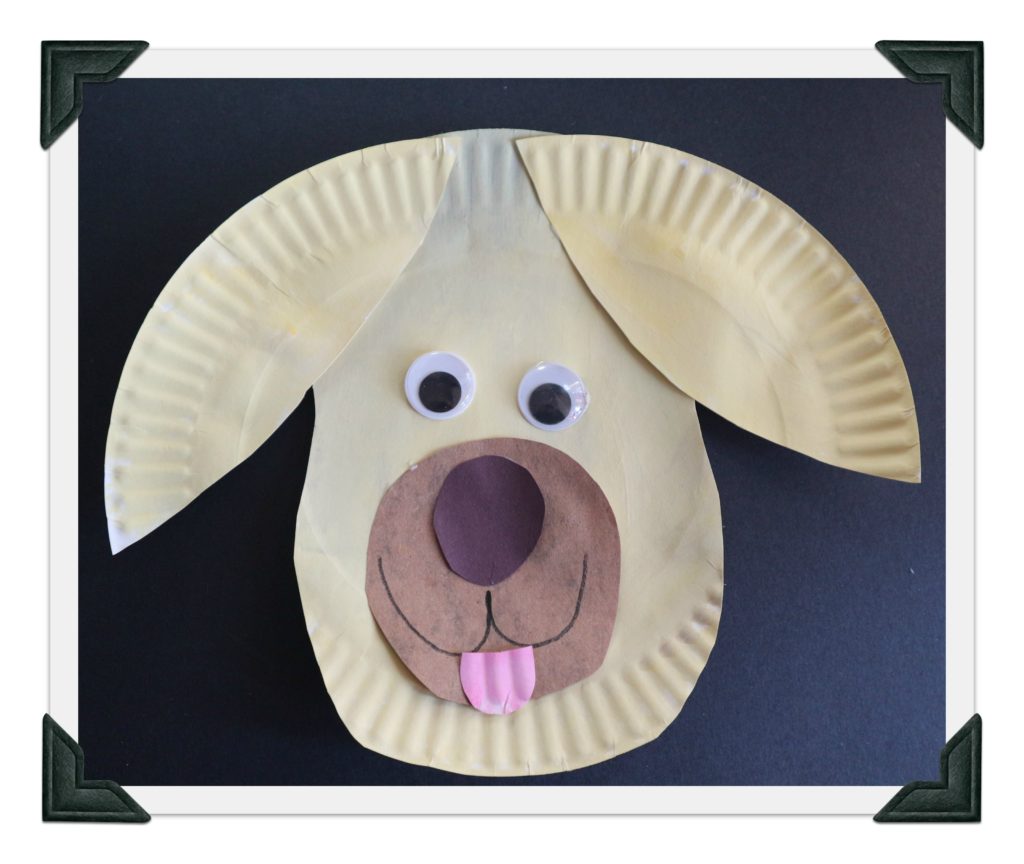
This dog looks like our Gus. Gus badly needs a haircut at the moment-he is bringing in all sorts of dirt.
For this dog paper plate craft we painted him a creamy yellow and added a big, round, brown snout cut from construction paper. The nose is simple circle of black paper…but a big pink or black pom-pom would be cute too. We put a brown patch under the googly eye and had his tongue sticking out. Again you could slice a line in the paper plate to have the tongue look like its coming out of his mouth.
Have fun with your kids and crafts this March break!
…

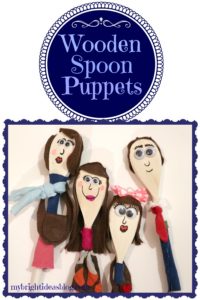
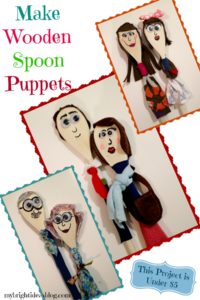
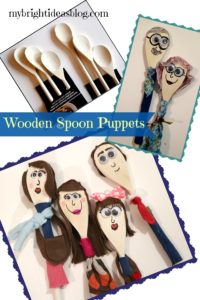
Wooden Spoon Puppets! Easy Fast Fun Inexpensive!
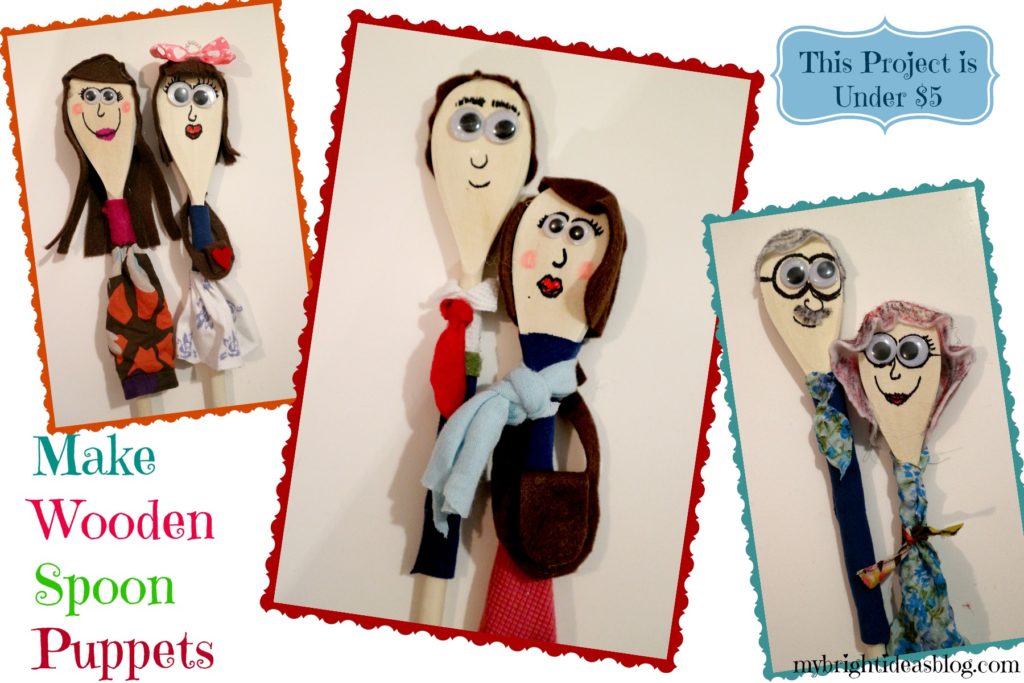
I was researching some puppet theatres to make and came across the easiest puppet idea ever! All you need is some wooden spoons, a sharpie, scraps of fabric, googly eyes and your hot glue gun.
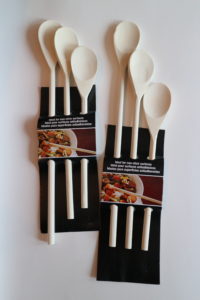 The wooden spoons I used were 3/ $1.50 making this an inexpensive craft. The shape of the spoon makes a perfect head shape. Some spoons have wide handles too that would be great for drawing on the clothing but these cheap and cheerful spoons were very skinny.
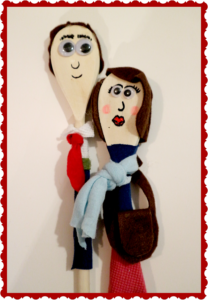
First I added googly eyes and then I drew on the rest of their faces. The hair was a bit tricky. I used pieces of felt for it although you could use yarn or sewing trims.
Clothes are pretty easy just cover up the spoon with a scrap of fabric and hot glue it in place. Its actually easier than you might think to make a shirt and tie.
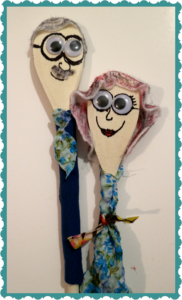
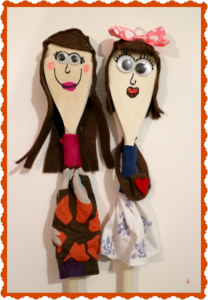
This is the sort of craft that will actually stick around a long time after you make it. You have made an actual toy. I was thinking this is the sort of thing you could take on a camping trip instead of Barbie’s or dolls with all the little bits and pieces that you might lose.

..