

Have you got a great shirt that has gotten too small and you aren’t ready to say good-bye to it? Adding a bit of lace to the bottom is so easy and will make all the difference on how much longer it will work for you. Great for growing girls….also helpful for adults…I have a 100% cotton tank top that is going to have a similar extension as it now is a crop top…just from regular laundering it shrunk inches!
For this project you will need:
An awesome shirt you want to save
A piece of stretchy lace that will be as wide as the top
Sewing machine, thread, tape measure etc etc

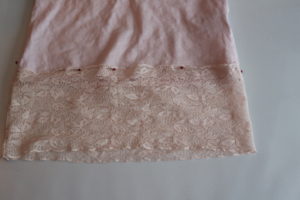
Iron the t-shirt and the lace before you start. This lovely, shimmery, sequin butterfly top is 14 inches wide (36 cms) along the bottom seam when laying flat. So the lace would need to be 28 inches (73 cms) wide plus one extra inch (2.5 cms) for a seam allowance. Check to make sure this will be a good match in width.
 Fold the lace in half and sew the edges together. Turn it inside out.
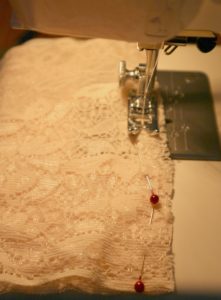
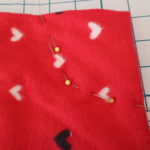
Lay the lace on the bottom of the t-shirt and decide if you would like to sew it on top of the bottom edge or underneath. My lace has a nice look to the top so it didn’t need to be hidden. Lay the lace down flat and put a pin on each end…this will help you to line up the pin to the side seams.
I pinned the lace on top of it all around the top. After I took this photo I decided that the t-shirt would be on the left of the sewing machine so all the pins needed to be turned around. Since the t-shirt and the lace have some stretch you can pull and stretch it a bit if things aren’t lining up well. After you sewed all the way around you are done. Try it on. Can you believe that only took you 10 minutes!?!? Well done!
We love this sequin butterfly top enough that we would probably cut the butterfly off and sew it onto another shirt when its just too small.


Build a Shelf Behind the Couch
 A shelf behind the couch supported by just a few pieces of wood makes a great place to put nic nacs. Just a couple of boards, screws, and painted black.
I was visiting a friend and her beautiful new baby-with the most perfect nose I’ve ever seen-and spotted something that I meant to ask her about but forgot to come back to it because she was in the middle of a hilarious story of all the mishaps at a wedding she had attended this past summer. I can’t get into to the details but lets just say romantic barn weddings do have their fire hazards. It was a close call but the hobby farm was safe and all was well.
Anyway, I left wondering what was it behind her couch that allowed her to put picture frames and nic nacs behind the couch? Was it like a British style radiator cover -like a box? Was it a shelf screwed into the wall? Next visit I will ask, but in the meantime I was getting supplies to remake my closet into a pantry when I thought lets see if we can’t invent a shelf that would go behind my couch so I have a place for a few pretty things too.
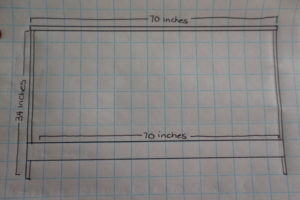
So I measured the height of the couch (34 inches) and the width (70 inches). I got 4 boards 1x6x6 (that will be 72 inches long so I cut off the extra 2 inches on 3 of the boards) the 4th board I cut into 2 pieces 34 inches long.e and 2 more boards the same length as stabilizers to the very skinny shelf. I predrilled holes into the top and put 2 screws on each end. Lay the structure on the floor and put in the first stabilizer wood across. Measure approximately 7 inches from the bottom…. 2 screws on each end should do it. Then gently flip it over so you can do the same on the other side.
If you are happy with how it looks then you can decide how to finish it. I have quite a bit of black in this room so I put on black paint but you could also put a stain and clear coat on it to match wood you have. The smoother the top the easier to dust so you should sand it smooth and wipe off the dust before painting.
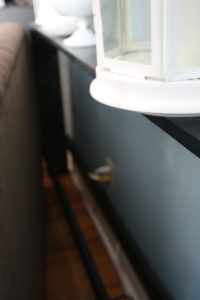
I felt like the room was so much cozier with my little shelf. Its a little room…in a little house, so we don’t have much space for pretty things. I like that this is also a space that a certain naughty puppy can’t grab things to chew on…unlike the coffee table. Also if your wee babe is starting to crawl and putting things in her mouth.
This project literally takes 15 mins to build if you have the pieces cut by the hardware store….only 5 mins more if you are cutting the wood yourself. An hour for the entire project plus remember to go back and do a second coat of paint. It’s that easy!
p.s. This won’t work if you have a recliner couch. Sorry.


Wooden Window Shelf-Easy Diy Plant Display
Looking for a place to put some potted plants in the one window with all the sun. This super easy DIY- Do it yourself project for a shelf that goes over the sink.
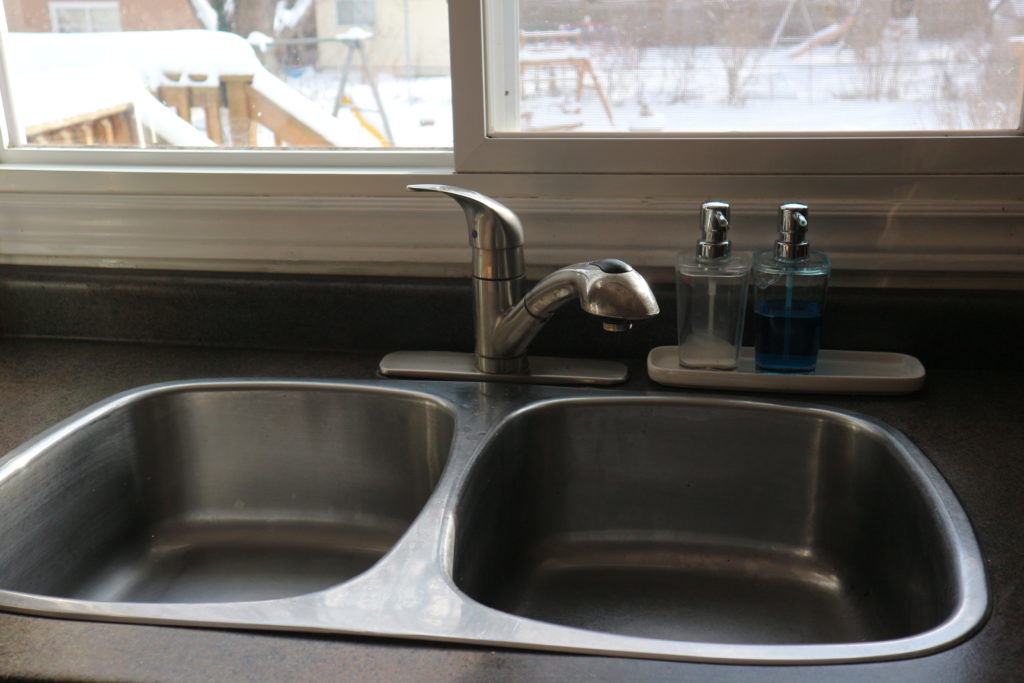
Tidy Sink…But so Boring….
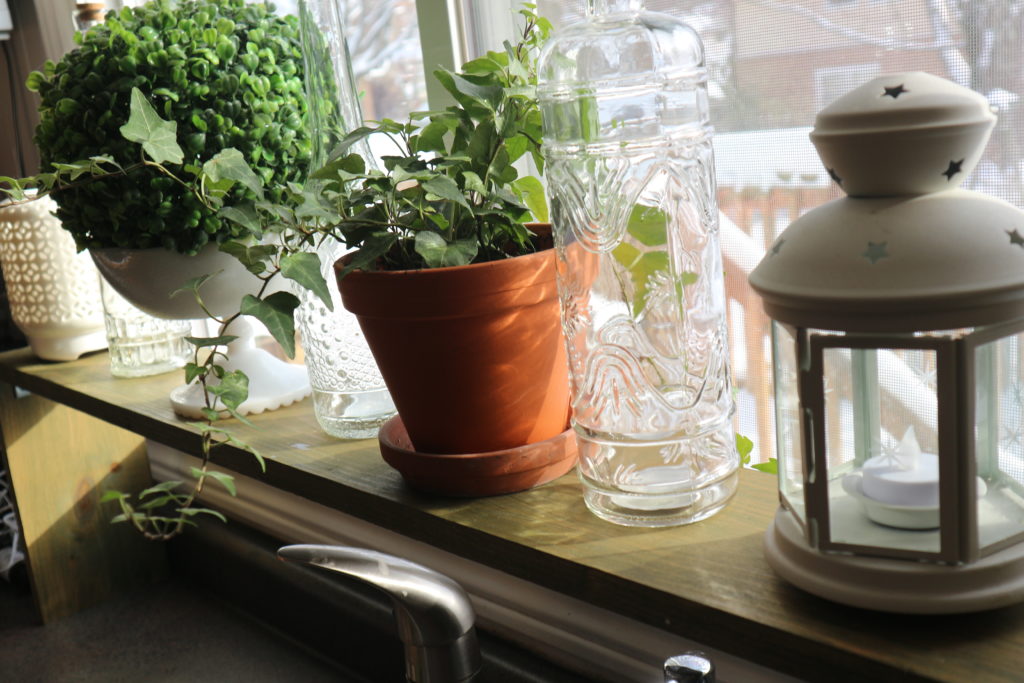
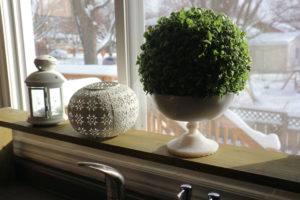
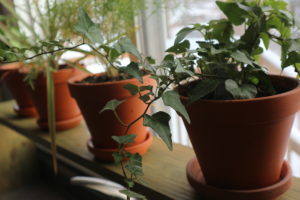
I’m writing this post about a year after I built this and I still love it. Especially in the winter when its the only sign of plant life. I usually put herbs in this window and then in the spring put them on the deck.
All you need is a board of wood and some brackets to attach them and a wood stain.
I cut my board to the size of my window but I could have cut it to the size of my sink instead if I wanted to have less shelf and more counter top. Its important that you figure out what height you need for your sink faucet to function normally.
You’ll need a 1×6 pine board – I cut my pieces 2 at 10 1/2 inches long and 1 at 45 1/2 inches long but you will need to measure your own window and sink widths and height of faucet and make some choices for your own on this.
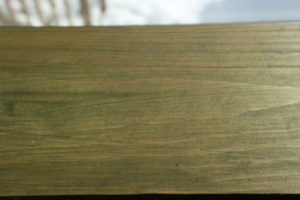
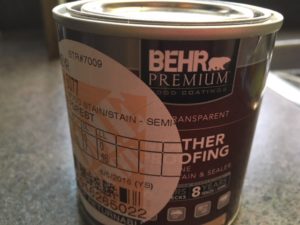
I have wanted to use a green stain on bigger projects but chickened out so I happy to try it on this project and love the results. I used Behr Premium Semi Transparent Wood Stain in the color Forest. http://www.behr.com/consumer_ca/products/wood-stains-finishes-cleaners-and-strippers/behr-deckplus-semi-transparent-waterproofing-wood-stain
The stain instructions say to do 2 thin coats and you can do the second coat within 1 to 2 hours of the first one.
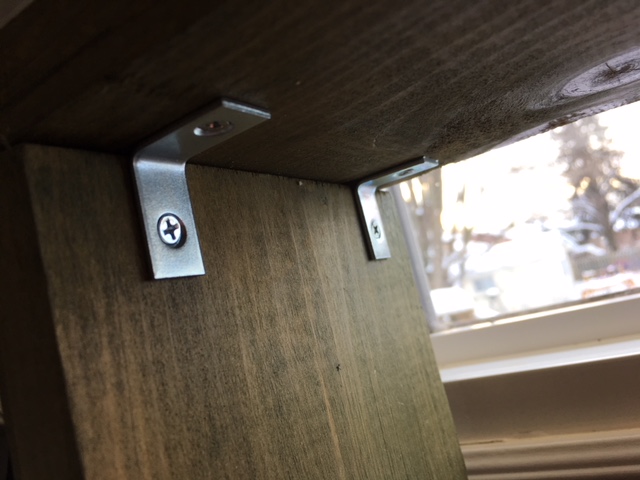
Once the boards were dry I used 4″ L” shaped brackets to hold them in place. You could also predrill and use wood screws if you prefer.
When its all done its just time to decide if you want a collection of herbs in terracotta pots or clear glass bottles or pretty white nic nacs or all of the above.

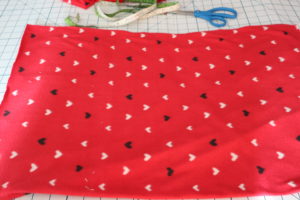
Sew a Super Easy Fleece Poncho-Simple Starter Sewing Project

This fleece poncho type body warmer will take the chill off! Its so simple my 7 year old Miss M. did the sewing!

First step. Measure the approximate width over the shoulders for where you would like it to sit. Then measure the body length from the shoulder to around the waist. This is the kind of not very specific measuring I find myself doing all the time. A fitted dress with darts and zippers is not my kind of sewing.
We decided to go 25 inches wide and 20 inches from the shoulder to waist hips area (so double that).
This means you will need to cut a piece of fleece 40 inches by 25 inches.
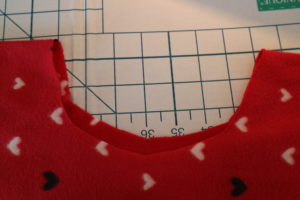
For the neck hole: find the middle and use a t-shirt to show how big the neck hole is and copy that onto the middle of the fleece. I like to fold the fleece in half so the neck will be easier to cut.


I went a bit bigger than the tshirt and wished I had gone a bit smaller instead. As long as it goes over the person’s head its great. If you make a cut that it too small you can try it on and then cut a bit more off.
You could leave all the seams unfinished if you would like because they won’t fray like cotton would. However, this was Miss M’s first time at the machine so we wanted some easy sewing. We folded the fabric over once and did a Zig Zag all around the straight edges.
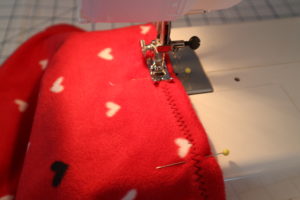
Around the neck we folded over the fabric once and did a straight stitch.
Then we laid it out flat folded in half. We measured 7 inches from the shoulder and put a pin to mark it. Then 3 inches down add another pin. Sew between the 2 pins. We used a straight stitch-this part will be under the arms.

Miss M. pretended that it was a huge inconvenience to come over and take a few photos but she seems to have enjoyed herself.


The fancy hairband will be in this blog: http://mybrightideasblog.com/sew-easy-fleece-hairband/
My First DIY Project-Door Window Insert
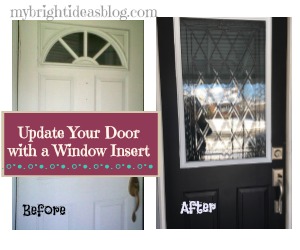
Renew your ugly old door with a window insert and a fresh coat of paint and door handle.
My first home improvement project involving proper tools was to change the window on the front door. Our home was built in the 1950’s and although this door wasn’t the original it was ugly-with a sort of half moon towards the top and didn’t shed light in the front of the house.
At the time I had a home daycare and families were coming to the front door every day several times and the noisy munchkins often made it difficult to tell if someone had knocked and was waiting at the front door. I was constantly running to the front room and peering out the windows to see if anyone was there…and usually there wasn’t.
I went to Home Depot to see what a new door would cost me. It was not too bad but add on the installation costs-eek! I had the side door replaced so I know from watching that done it was well out of my skill level. The staff asked if it was a decent quality door…if yes it might just need an update with an insert. Say what?!?!
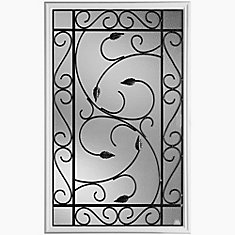
https://www.homedepot.ca/en/home/p.pergola-22-inch-x-36-inch-iron-glass-insert.1000784903.html
https://www.homedepot.ca/en/home/p.pergola-22-inch-x-36-inch-iron-glass-insert.1000784903.html
https://www.homedepot.ca/en/home/search.html?q=door%20insert&page=0
This will be helpful to know if you have a newish door but its the plain standard look. You can upgrade to ones with blinds between the panes of glass, or a window with a screen for a breeze or like me, a decretive pane to let the light in.
It was very hard to find how exactly to install the insert. I copied a blog I found about adding a dog door insert. I drew the cutting lines where I wanted the window to go by tracing the cardboard that comes with the insert. Then I got my largest drill bit and drilled a hole through the metal door an inch inside my cutting line. The drilled hole (or holes if you drill a few next to each other) is big enough to get a jigsaw blade in. Then start cutting lines through the door until you are able to cut out the entire rectangle of the insert.
A few reminders…jig saws have speed gauges which I didn’t realize until after the project was done. It was pretty fast and I could easily have cut the door right in half. It was literally my first time using a jig saw and I should probably have tested it out on something else first!
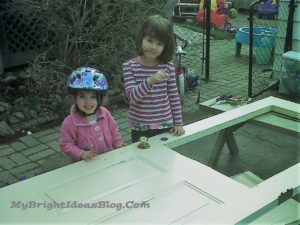
Move your small children far away and don’t be put off by their fears that their mom is about to ruin the front door.
And of course wear safety glasses. Now find a hubby to help you carry that heavy door back to the front of the house and pop the pins back in the hinges.
The insert literally just pops in and is secured by some push in plugs and your done! So easy and what an improvement. The inserts range from about $90 to $500 depending if you like fancy stained glass. There are really nice choices in the lower range too. I think mine was around $150.
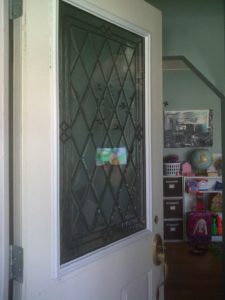
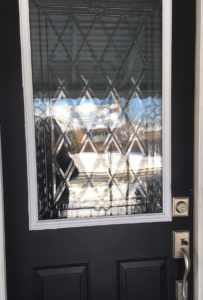
Shortly after we painted the front of the door black and put on a gorgeous handle and had a front door to be proud of!

Charging Station-Where to put tablets, phones, cables?
 How to organize your electronics and create a charging station so the cords are all in one place. Also, how do we put limits on how much screen time the kids have….and does anyone know what they are watching….and when….
A new problem for this generation is the numerous technology we have scattered around the house. We have several tablets, a Kobo e-reader and my hubby and I have our cell phones. Finding a cord to match was getting frustrating. Someone would unplug it and move it to their bedroom or the kitchen to keep using it even though the low battery signal has popped up. Well fear not! I have the solution.

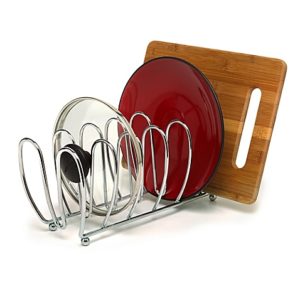
I went to the store Solutions and was not able to find an actual charging station. I did find a lot of things that could be used to tidy up the devices and give them a place to tuck in at night.
http://www.solutions-stores.ca/kitchen/
This is a simple Kitchen Organizer meant for pot lids. You can find it in a houseware department in a variety of stores.
 The next question is should they have the screens in the bedroom? My kids are still rather young not to be supervised. If they were watching a Meghan Trainer video or you tube https://www.youtube.com/watch?v=pkCyfBibIbI(instant kitchen dance party) I would want to be able to see if another video pops up-since music videos come in all varieties.
Should we put a limit on screen time? Homework must be done of course. Is 2 hours too much? Too little? Have they spent enough time interacting with family members before they dive into an episode of Fuller House? Its very hard to pull them away after they get into a show or two. If we say yes to one episode…can I get a pinky promise you will actually turn it off?
Technology is really becoming a problem. Games are becoming a rising concern as an addiction. Cyber bullying is so detrimental to everyone involved. There is so much to think about and personal decisions we need to make to keep our kids safe and cyber-smart.

A good first step is getting the gadgets back to my charging station by 8pm for recharging. Let me know in the blog comments if you have any suggestions on how to keep the technology in your family with a healthy balance. I’d love to hear your suggestions.