
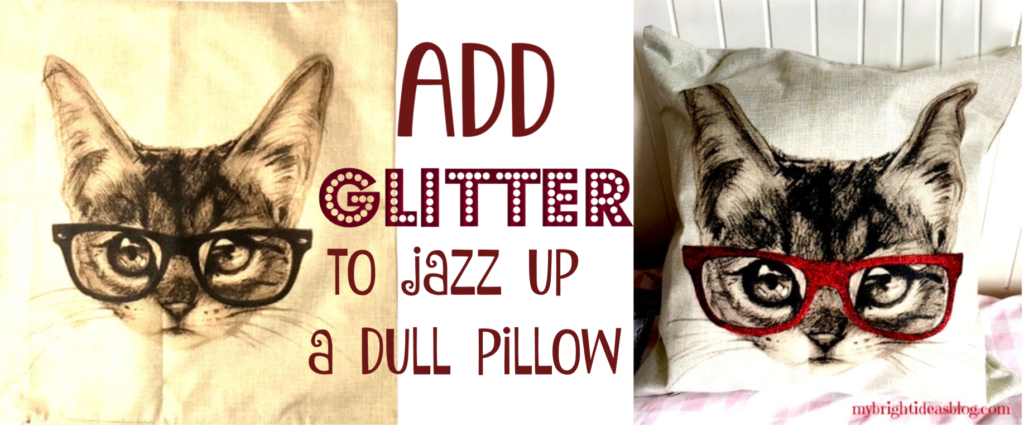
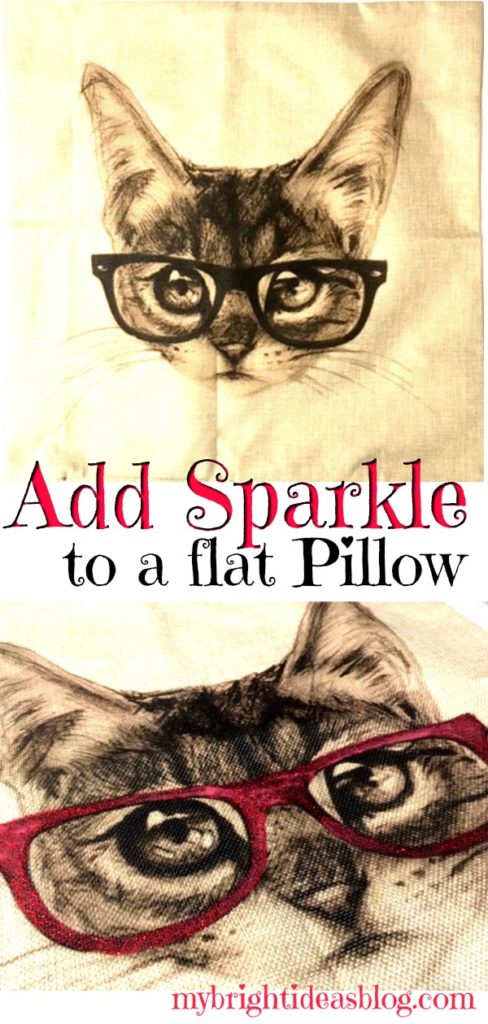
Have you ever seen a black and white print on a pillow or t-shirt and thought…this is a bit dull…how can I jazz this up? Maybe a bit of glitter paint is needed.
A while ago, I purchased a lot of pillows from Ebay for super cheap…Like $4 each. The price was ridiculous…and so was the quantity I bought! Now I had lots and lots of gifts to give to cat and dog lovers. and housewarming presents.
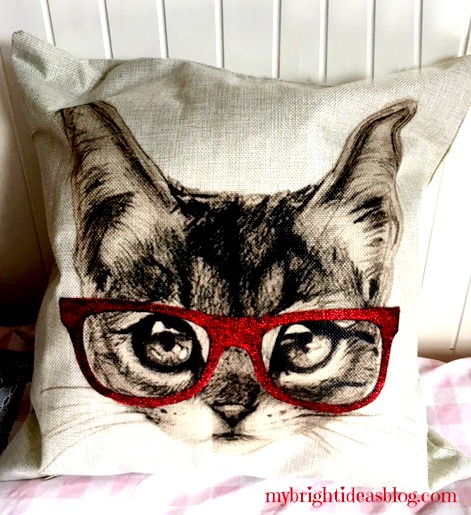
I really like these two pillows but…. Boring…zzzzz
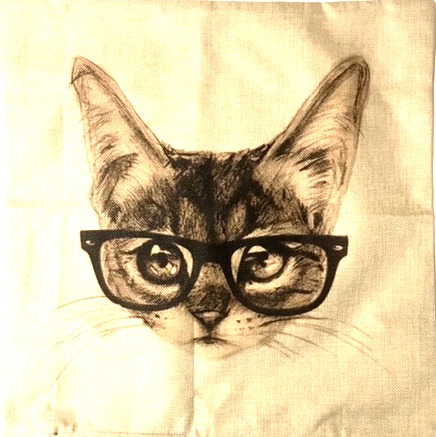
I love this black and white cat but after a while I thought it was a bit flat. So out came a paint brush and the sparkle paint.
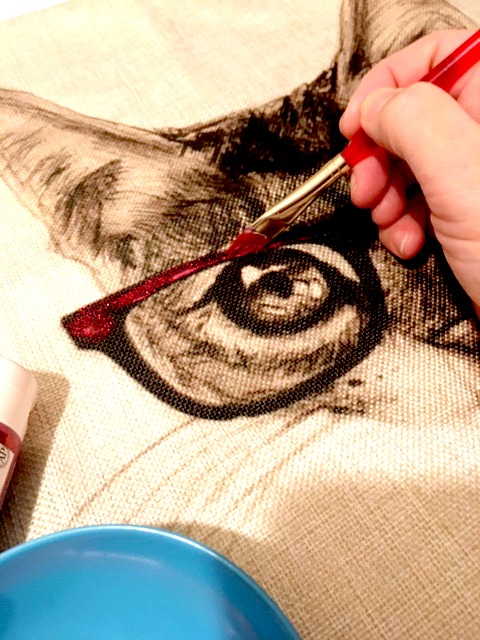
I tested the glitter paint I had on hand before I put it on the pillow. I don’t like having a trail of glitter after a craft. So I tested the Martha Stewart Multi-surface Glitter paint.
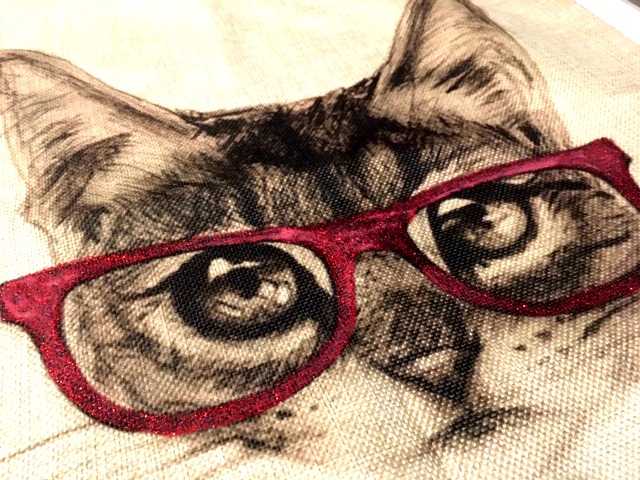
Now that makes it pop!
Here is another one…
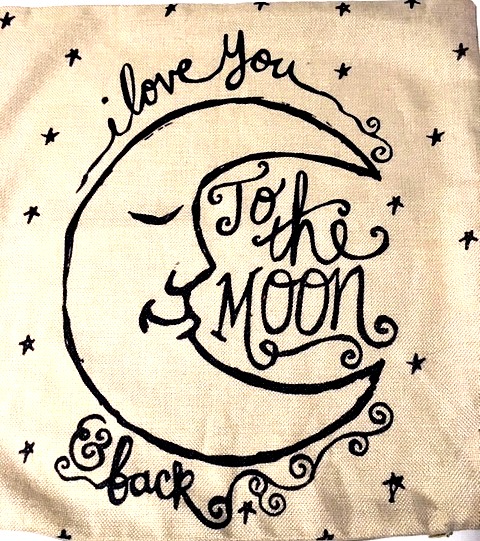
I must confess, I will buy just about anything that says “I love you to the moon and back”. It’s something my youngest and I have said for years especially when I tuck her in at night. This pillow is sweet but also a bit plain Jane.
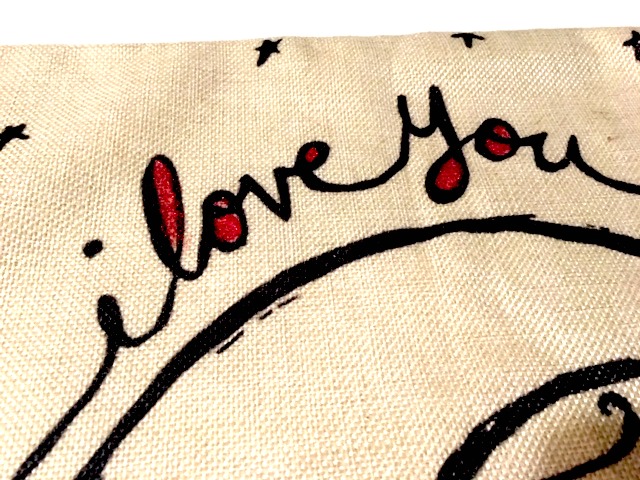
At the moment I only have gold, red and blue sparkle paint. So I used all three.
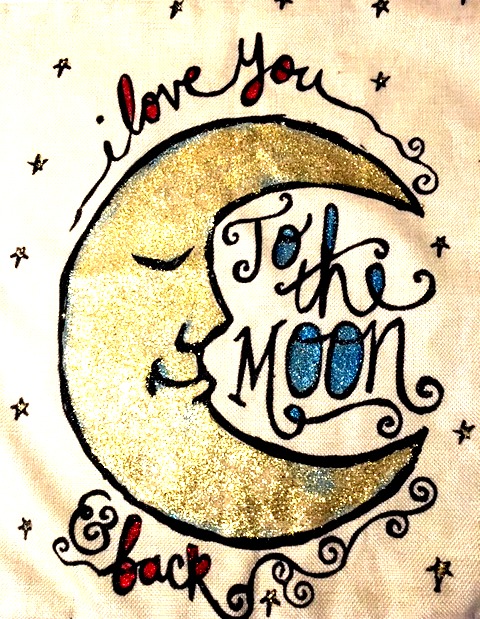
Wowie zowie this turned out great too!

Thanks for checking out this post. I hope you can find something to add some sparkle to also.
Remember to Pin this to Pinterest or share it with your favorite social media!
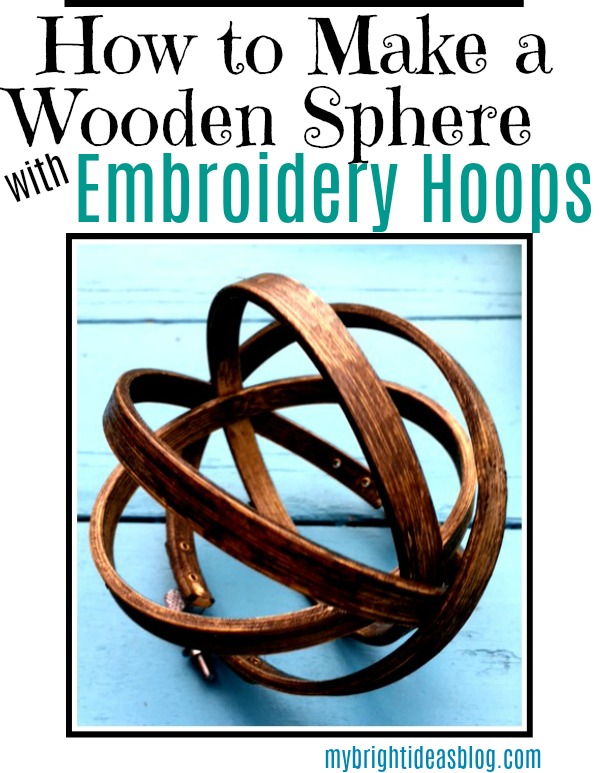
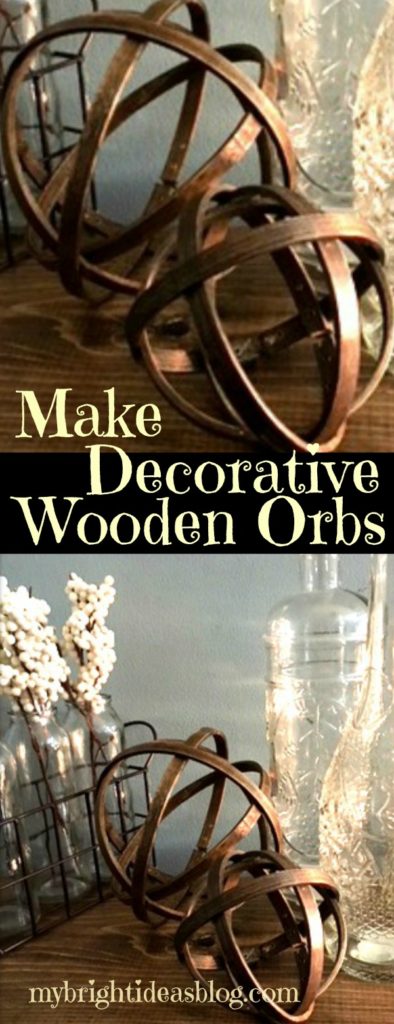
How to Make a Decorative Sphere – From Embroidery Hoops
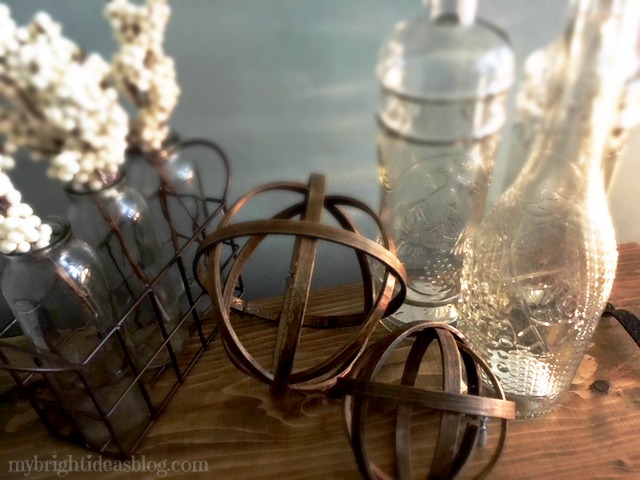
I’ve been wanting to make decorative spheres for a few months. After much pinning and pondering I’ve decided to go for it!
This has to be the easiest way and most clever idea for doing just that! All you need is 2 embroidery hoops per sphere.
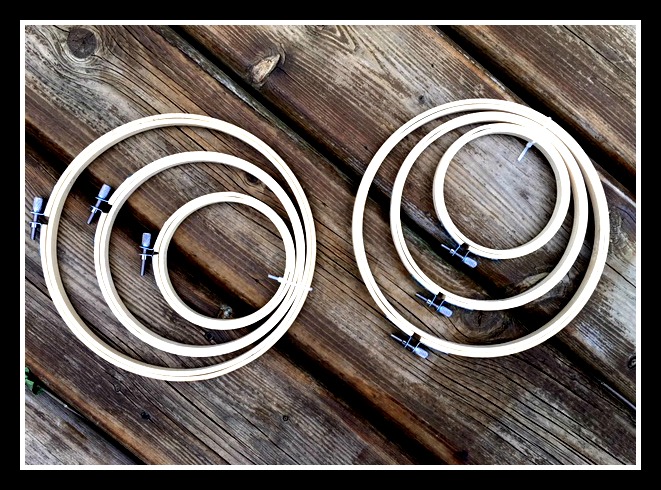
You will need:
- 2 embroidery hoops (the same size) per sphere
- paint or stain
- paint brush or rag
- (optional) varnish or polyeurothene
That’s it! If you use spray paint you can get that list even shorter.
You can buy embroidery hoops at the craft store, Walmart maybe even the dollar store. They vary in price depending on size. Expect to pay around $2.50 each-purchase 2. I wanted to make three sizes so when I saw Michaels had 3 packs for 5.98. I thought that is a better value. When you buy these wooden hoops they will come with one smooth hoop inside of another one with tightening clamp screw.
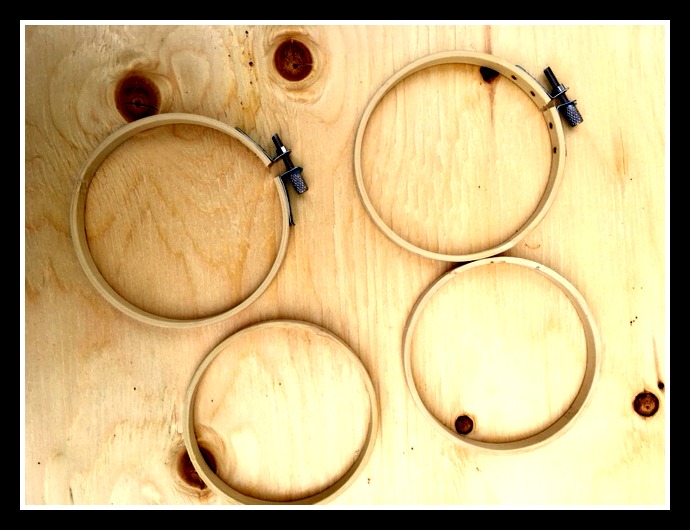
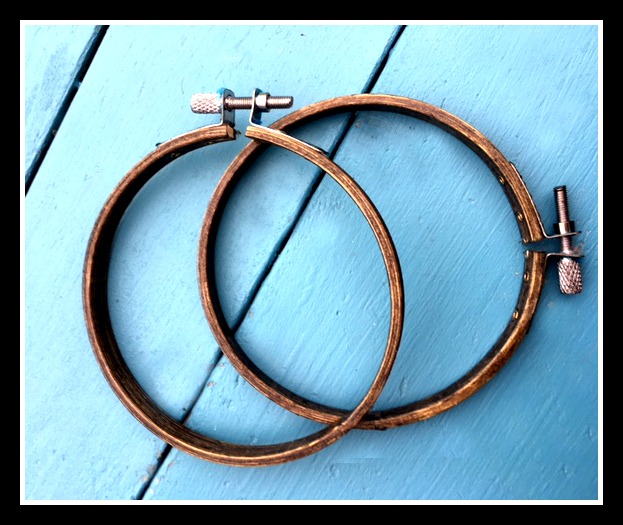
The first step is to get 2 embroidery hoops the same size and take them apart so there is 4 hoops.
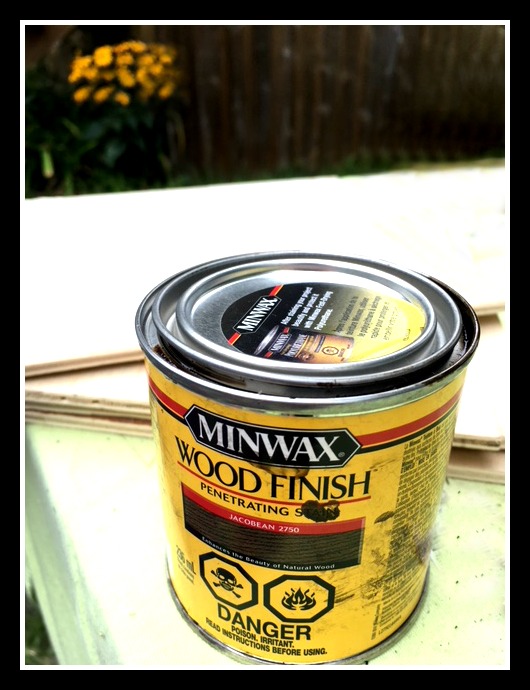
Next I got a cloth rag and my favorite stain. Miniwax Jacobean #2750. If you can’t get this kind you can get a similar effect with a Dark Walnut….It would look great if it was spray painted black or white too….Whatever matches your décor.
Dip the rag in the pot of stain and rub it on the wooden hoop.
Allow the stain to dry. Adding a clear coat of varnish is optional. It would give a bit of a sheen and make it more durable if you put it outside. I have seen some posts where folks put these on their porch in a planter. In the great outdoors, I imagine they will age quickly and only last a few seasons of sun and rain. Putting a clear coat will help it to last longer.
I plan to make something similar out of wire for outdoors and I’ll let you know if its a success.
Now lets put it all together!
Gather your 4 hoops and get ready to be impressed!
Insert one of the smooth hoops into the other smooth hoop.
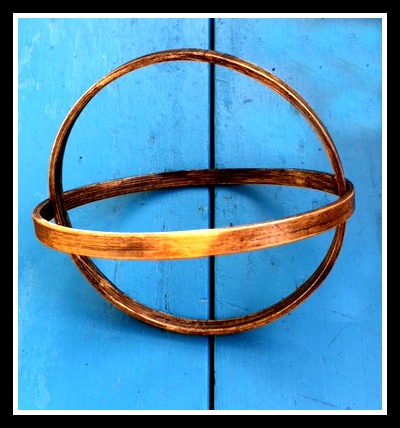
Next, slide a third hoop with the screw tightener over top of the other 2 hoops. Tighten the screw a few twists.
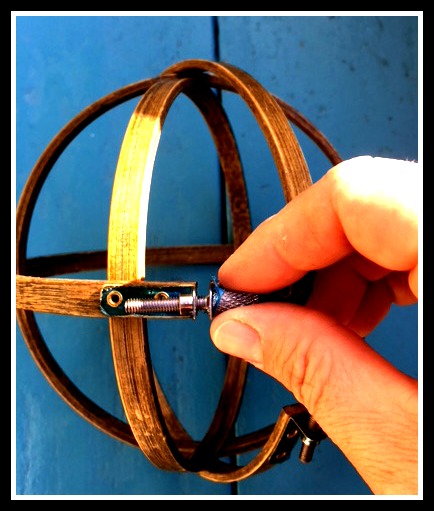
Lastly, put the 4th hoop with the tightener on the outside of all of the other hoops but this one place crosswise.
I prefer to put both of the tighteners close together so that when its on display they will both be on the bottom. It might show a little but it helps the sphere to not roll away.
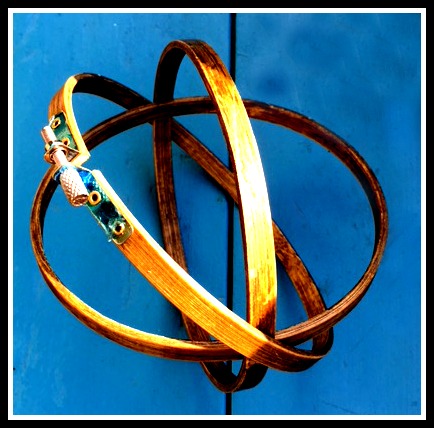
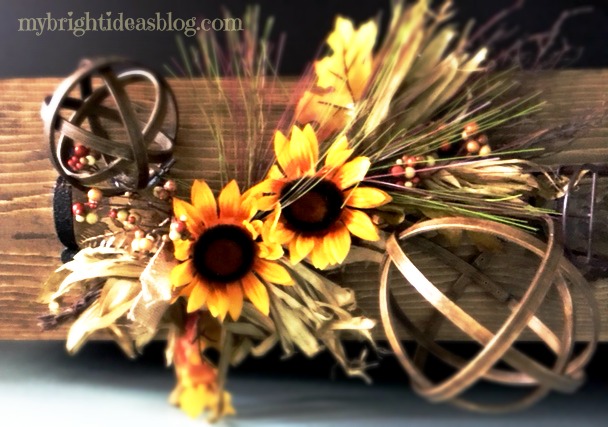
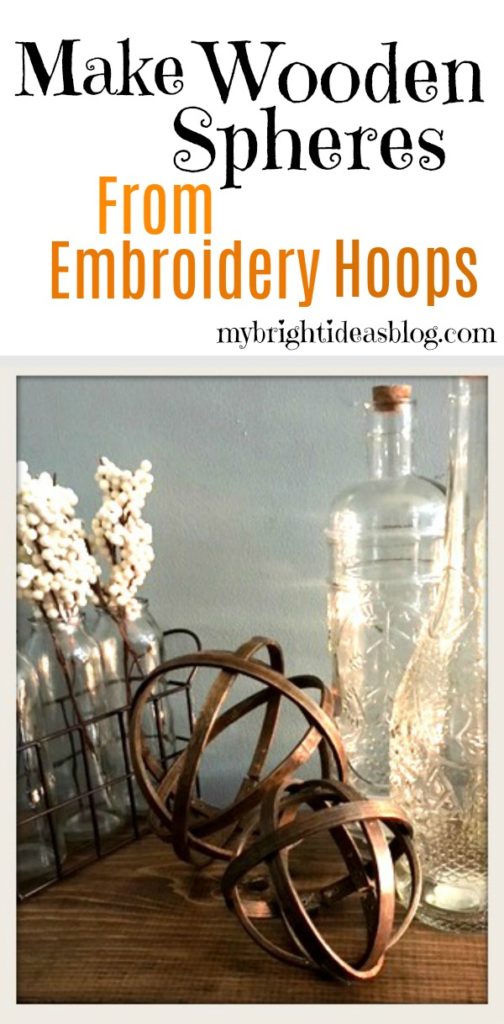
Here it is on display.
Thanks for stopping by to check out this post. I have a lot more rustic wood projects drying on my workbench. Subscribe to my email list so you don’t miss out when they are ready share!

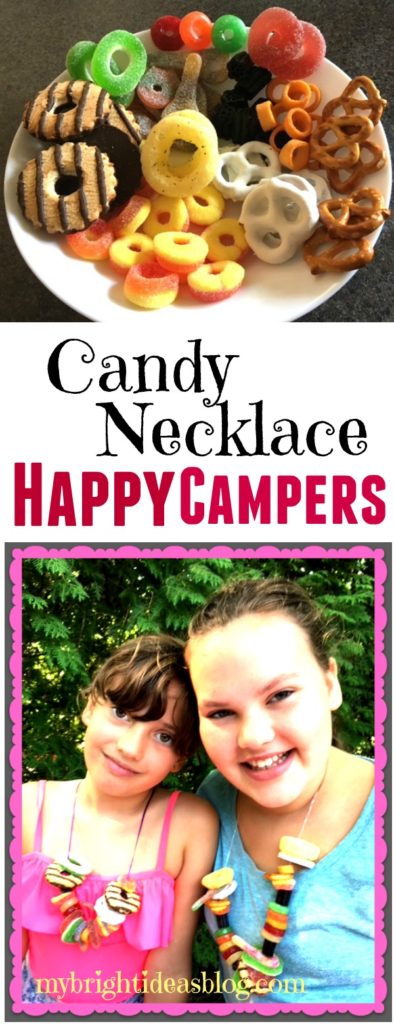
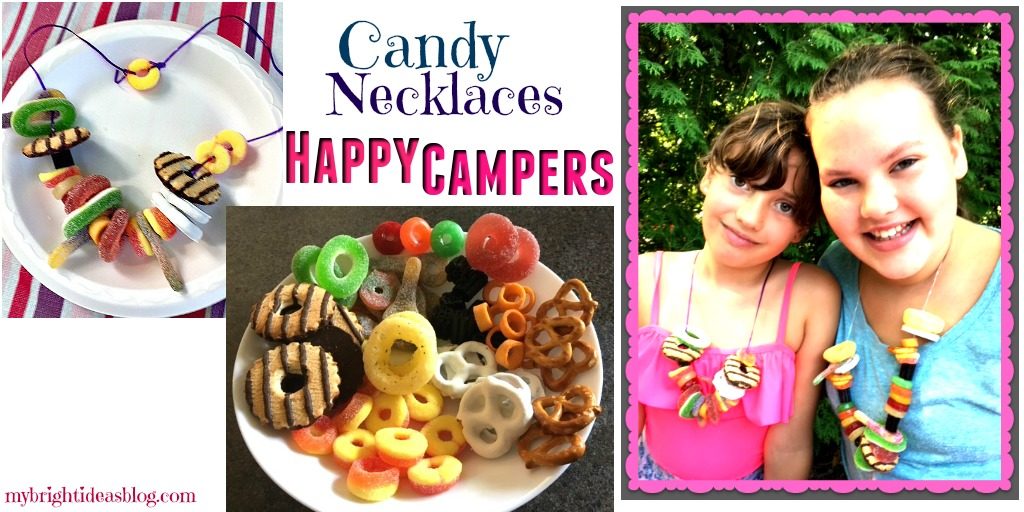
Make a Candy Necklace = Happy Campers!
Have you got some grumpy kids today? A lull in the summer getting them bored? Looking to jazz up a camping trip…Here is how to turn that frown upside down. Candy!
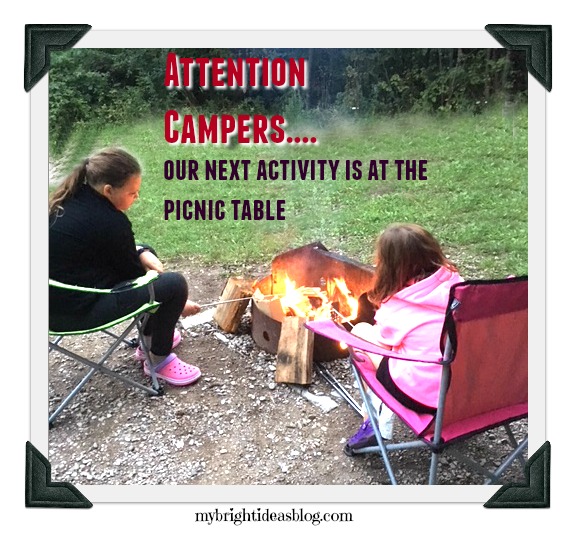
This is a true tale of 2 girls and a mom on a camping trip……. the kids were all “mom…what is taking so long…I thought you said we were going to the beach…..” whine, whine, etc, etc.
Daddy had to stay home and work so it was just me and my girls, and lets face it they are not very helpful. So after-breakfast clean up was taking a bit of time.
So when I said, “Who wants to help me with a blog post?” They immediately perked up! They knew there was a bag of candy bags from the bulk store that they were not allowed to touch.
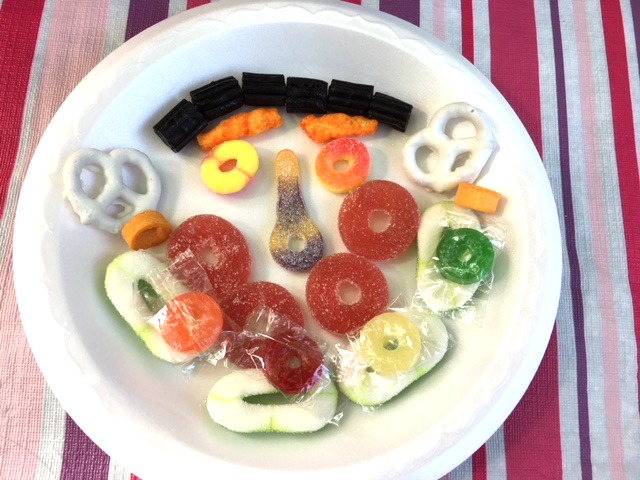
All the treats for this project have holes in the middle so there is no need for mom to poke it with a sewing needle.
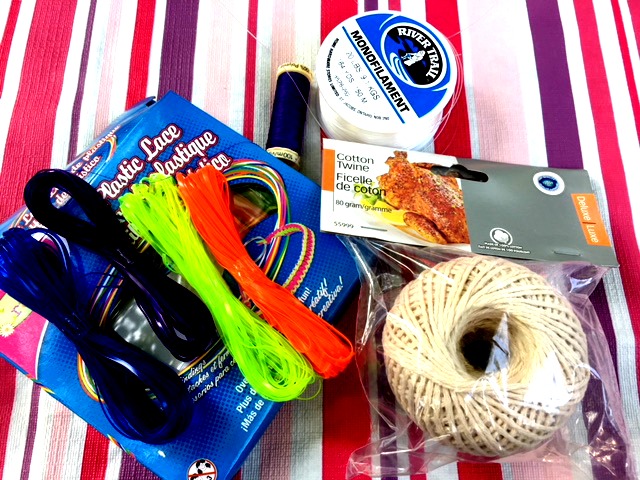
Here is what you need:
- treats with a hole in the middle
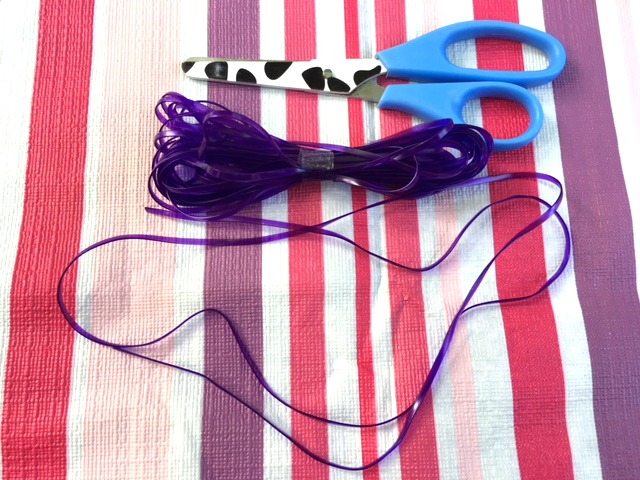
- cotton string or something to put the treats on (plastic lace was easiest)
- scissors
Shopping for Treats
The first step, is to hit the bulk store and purchase any cookies, candies or cereal or candy that has a hole in it. I’ve got 2 kids so I bought 5 or 6 of each item-assuming that they will eat or break a few in the jewelry making process. I had lots of little baggies with just a few items in each.
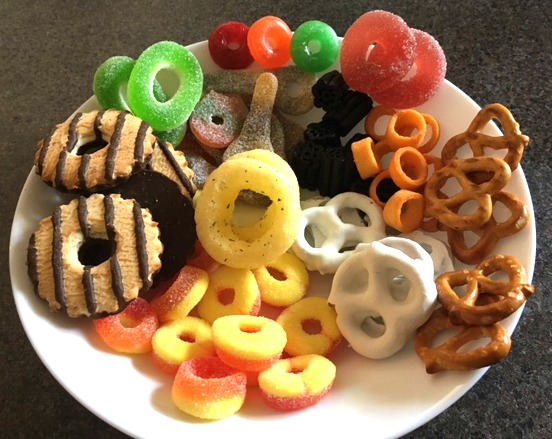
I picked all of these tidbits from our local Bulk Barn. Licorice, cookies, pretzels, sour keys, sour cream hoops, life savers, etc.
Choosing a String
Next you will need something to string your candy beads onto. You can use yarn or fine elastic or string or thread or plastic lace. We found that the easiest for the kids is the plastic lace. This is a rigid plastic that is often woven into bracelets. I picked up a variety of colours in a package from the craft section of the dollar store.
I like the idea of the cotton used in preparing turkey dinners, because you know it is intended for food handling. These will be your in the kids mouth after all. But it is a bit more frustrating for the kids to use. It unravels a bit so you need to twist it with your fingers or trim the ends a few times.
Now measure the length of string you’ll need. Make it long enough so your child can just pull it over their head when they want it off. If on second thought, you don’t want them to have access to quite so much candy-make it into a bracelet instead.
A Word Of Caution
This craft is meant for older kids rather than young toddlers. Please watch your child for choking and strangulation hazards. Be safe and have fun!
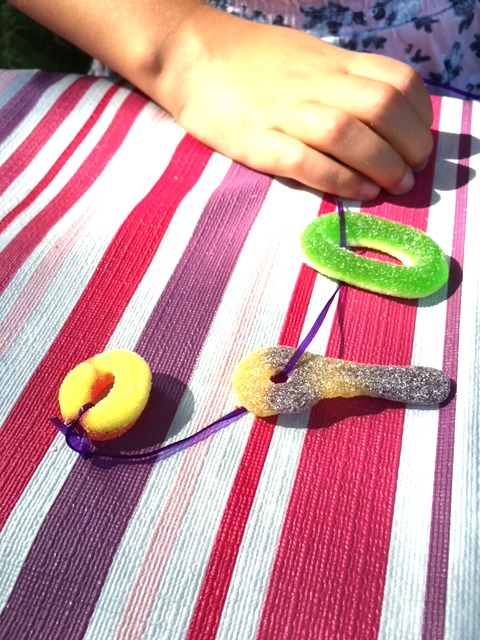
I didn’t think of this, the girls came up with the idea to tie the first candy as an anchor so the treats would not just fall off the other end as they string more treats on.
While you have them settled into this project its a fine time to give them a little speech about how thoroughly they should brush their teeth later. Or how you would like to increase their household chores…Groan….
Why not? It’s not like they are going to storm off….they have a candy craft in their hands…they have to listen!
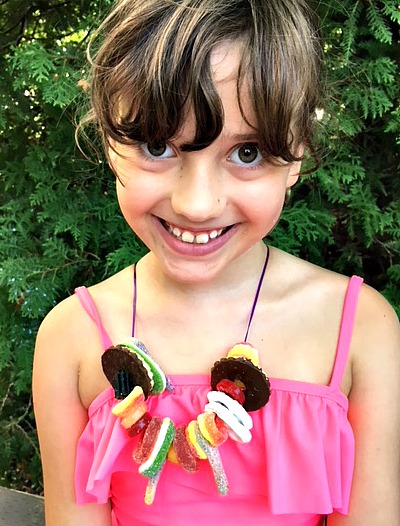
Keep on stringing on the treats and when you are happy with it, tie a knot. Now try on your delicious necklace or bracelet.

That is enough candy to last a week long camping trip. Do not eat all of it at once or your belly will hurt!
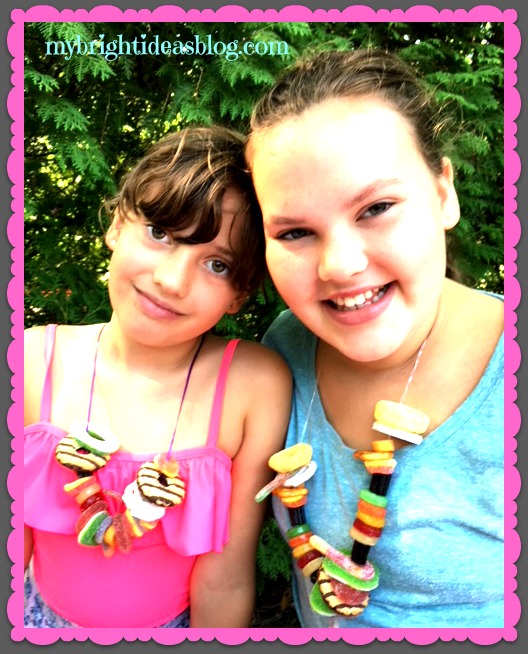
Now they are happy campers!
Besides camping trips, this is a great idea for a kids party, before a road trip or to pull out on movie night!
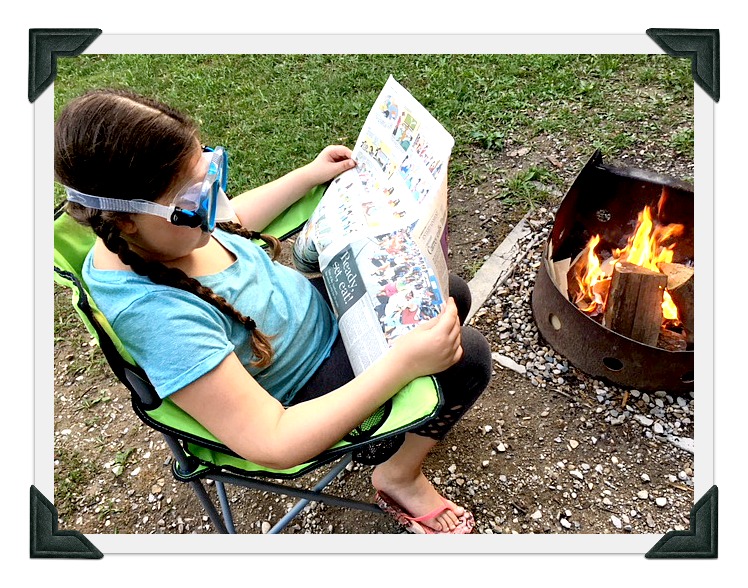 Don’t you hate it when your campfire gets smoke in your eyes? Not my girls! They grabbed their swimming goggles! Smart! Carry on reading the comics with happy eyes…
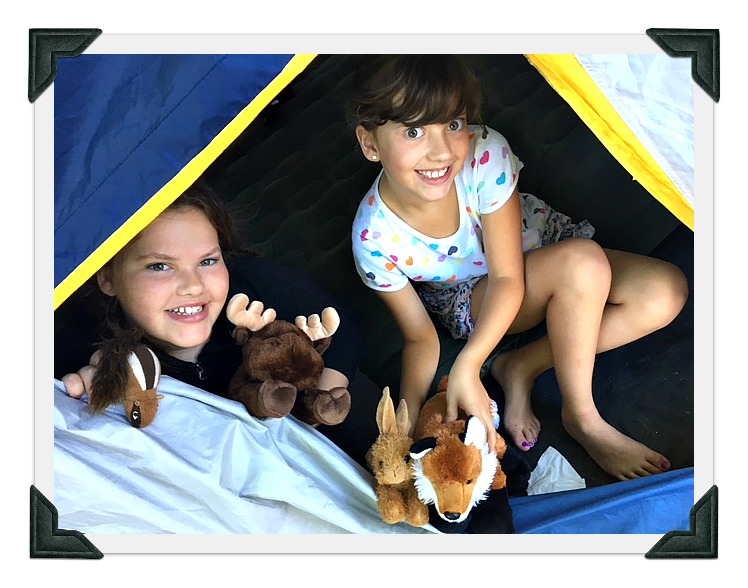 Miss B and Miss M made new acquaintances with some friends in the forest. A chipmunk, a moose a bunny and a fox. Are we the only family who needs a back pack full of stuffed animals on a camping trip?
Have a great summer and get out camping!

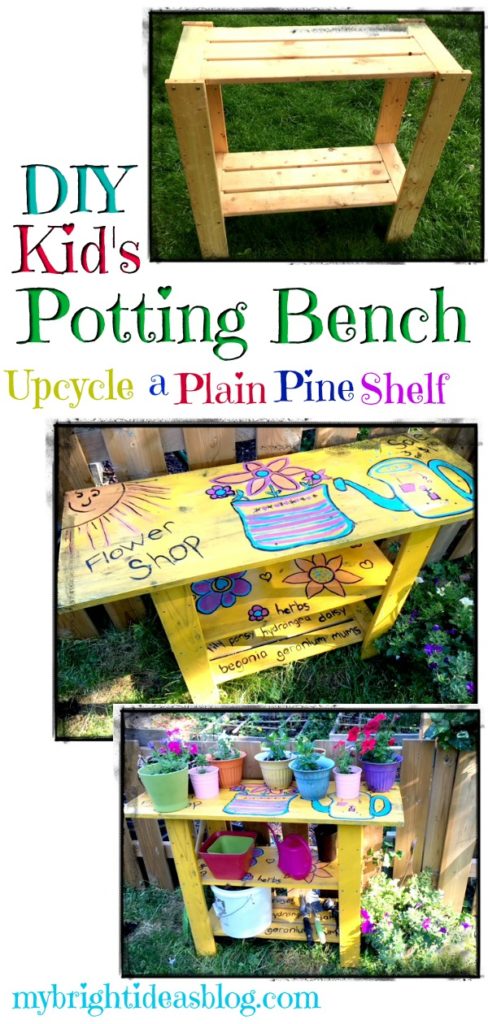
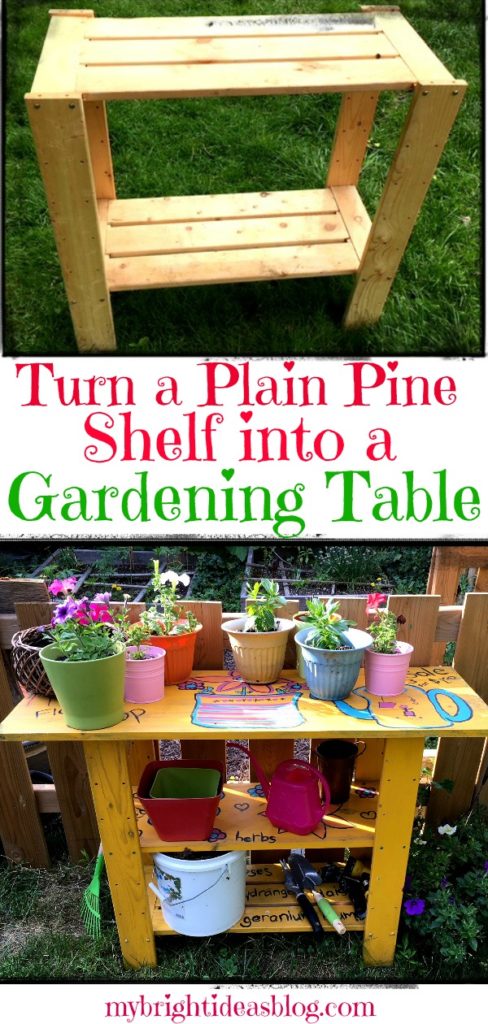
Make a Garden Work Bench / Potting Table

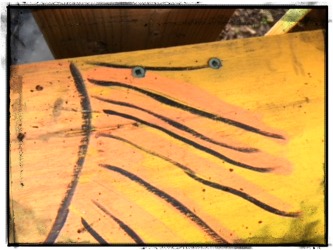
This is an easy DIY project for the inexpensive wooden pine shelves in the back of your closet that you’ve had for years. I was staring at mine thinking about getting rid of this plain old shelf and then I thought what if I added another shelf, made the top bigger and painted it a bright color and turn it into a garden potting station for the kids.
I have another one that I could turn into a lemonade stand using the same idea. I’ll let you know if that turns out!
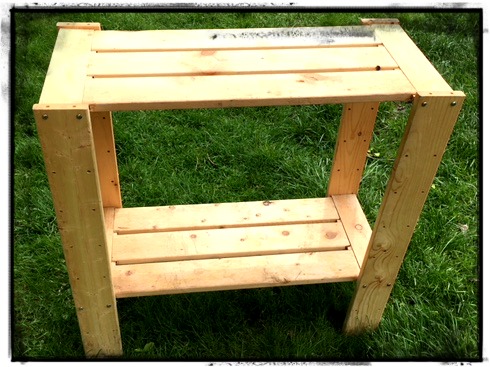
This is actually an old project I made years ago so some of the details are a bit foggy. This shelf was holding our camping gear. Its really only good to hold very large things on the bottom shelf because it doesn’t have a middle shelf. It turns out that its pretty easy to add a shelf by having a board cut to size.
You will need:
- a bare wood pine shelf
- pine cut down to 12 x 30 and 16 x 42
- 16 x 1 inch deck screws and a drill
- sandpaper
- outdoor paint
- paint brushes
As I said this project was done 3 years ago so I’m going by memory on the details.
The middle shelf on mine measured 12 by 30 inches (30 by 76 cm’s) …. Your shelf may not be exactly the same so measure yours before having the shelf piece cut.
The piece on top is 16 by 42 inches (40 by 107 cm’s). Hopefully you have some wood scraps you can use in your garage left over from another project. If not they will cut the boards for you at the hardware/lumber store.
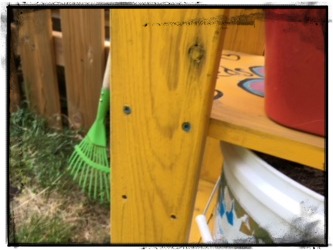
The boards will need to be drilled in place. I used the pre-drilled holes and attached the middle shelf with 2 deck screws on each corner. I put 8 deck screws in the top of the table to attach it to the vertical boards of the shelf. The nice thing about a work bench is it can be a bit rough-so I didn’t sink the screws and fill the holes.
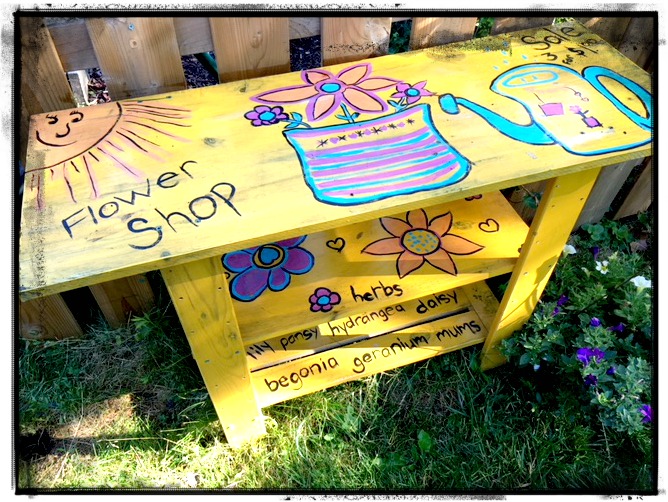
Next the entire shelf will need to be painted. Our shelf is outdoors all summer and is stored in the garage for the winter. I used left over paints in my basement that were meant for other projects. The bright yellow paint was a miss-tint that I bought for $8.00, several years ago. It needed a lot of stirring before I could get started. Follow the instructions on the paint tin.
After I had done 2 coats of paint we were able to decorate it. The girls love to spend time playing flower store! When I purchase new flowers and vegetable plants at the garden centre they gather all the hand tools, seeds and the new plants and play at shop keepers for hours. I finally bought them some fake flowers from the dollarstore for their play store so I could get mine into the garden!
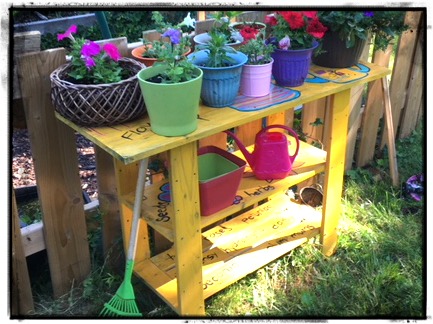
This year they were really involved in the planting of the newly purchased plants and not just pretending to sell them. Their planters are doing really well! We have to keep an eye on our potted plants since a few squirrels that are digging around
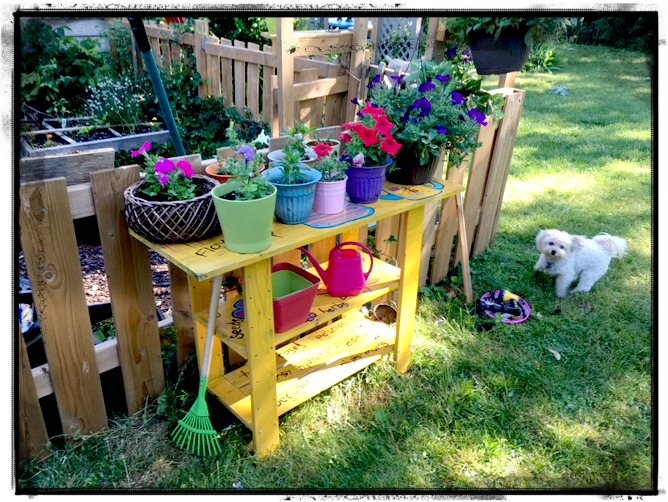
Gemma our Yorkie-Poo snuck into this photo. This photo shows the fence around our vegetable garden. This keeps the dogs from digging in the dirt. There are also some nice bunnies in there who nibble on the lettuce in the square foot gardens.

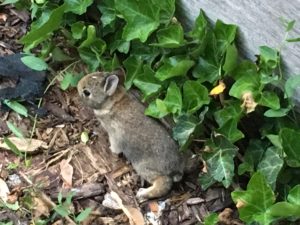
We have our own Floppsy, Mopsy and Cottontail!
Enjoy making yourselves a work bench. Come to think of there is lots we can do with these bare bones shelves. Next on my to do list might be a lemonade stand….
Enjoy your projects, til next time!
…
Plant Puns on Painted Potted Flower Pots – Adorable Gift Idea to Make Them Smile!

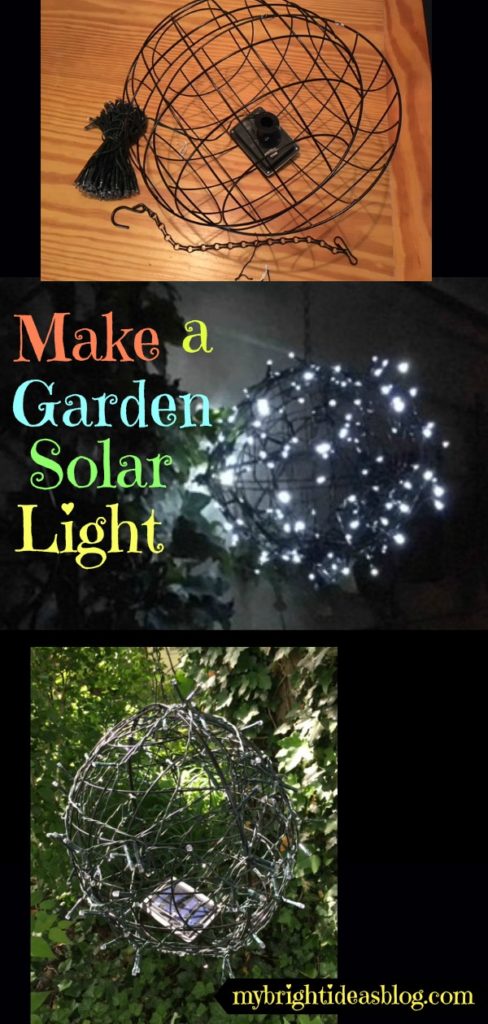
DIY Garden Solar Lights Using 2 Wire Planters
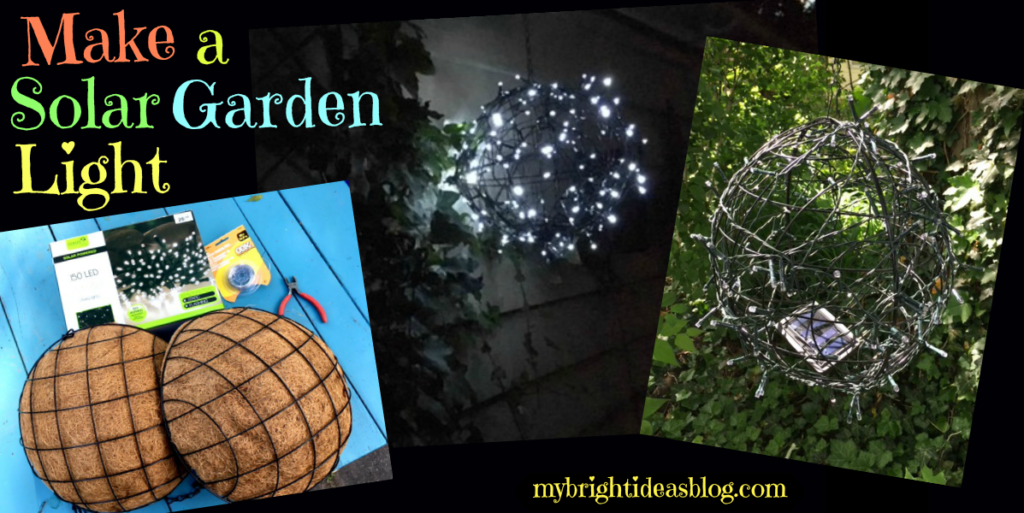
For this project I’m going to show you how to take 2 wire planters, attach them together and wrap LED solar twinkle lights around them to make a gorgeous night time garden light.
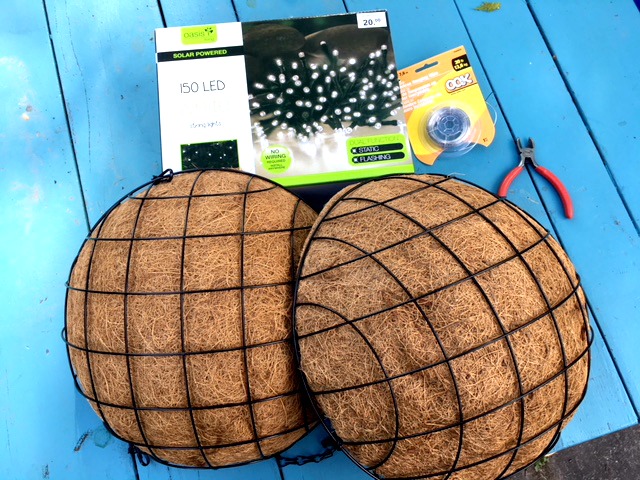
You will need:
- 2 wire plant baskets (dollar store $1-$4 each)
- pliers/wire cutters
- 10-15 black twist ties or fine wire cut to 3 inches long
- package of solar twinkle lights (I paid $20 but if I can find these cheaper I will let you know!)
 Before you start your project I would recommend that you test to make sure your solar lights are working as they should. My first project, I put all together and waited for the sun to set and then realized the light was defective and needed to go back to the store. Grrr…On my second go at the project I put them in a dark cupboard and peeked in. It worked perfectly so I started again.
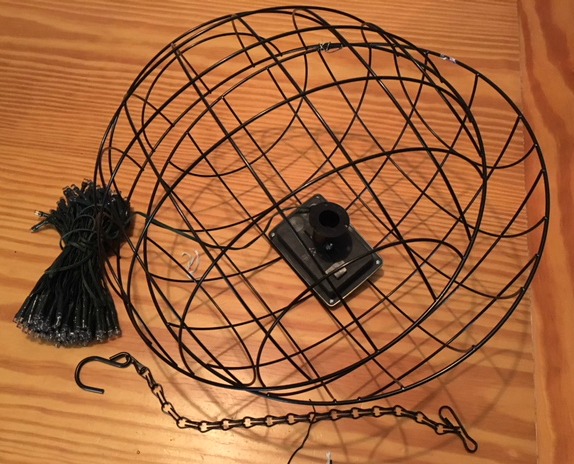
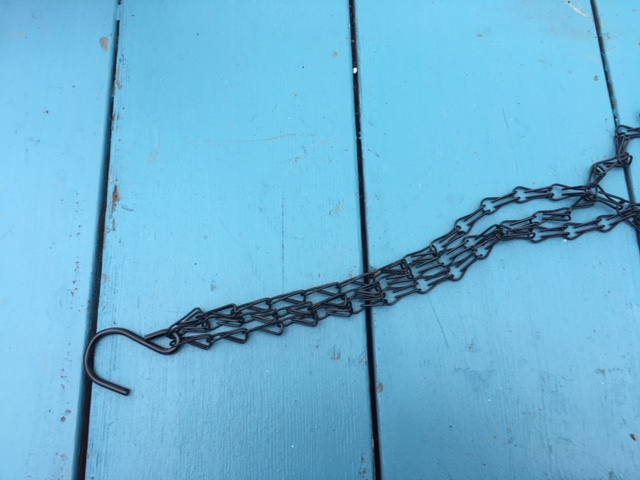 To easily remove the hook and chains, there is usually a clip on the wire hanger. Using your pliers remove two of the chains leaving just one hook and one strand of chains.
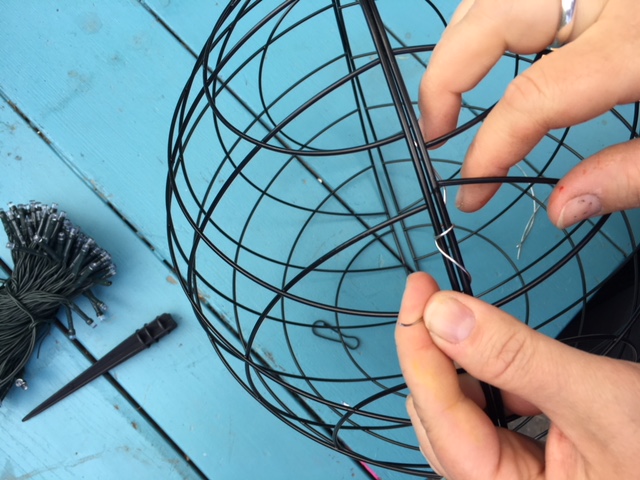 Match up the pattern of the wire basket and wrap a bit of wire around it. The above picture was my first try. I forgot to match up the wire basket and the wire punctured my skin. In the first 10 seconds I was bleeding. So my next try I used just twist ties. Black twist ties preferably so it isn’t obvious. If you are going to use wire, put on some work gloves.
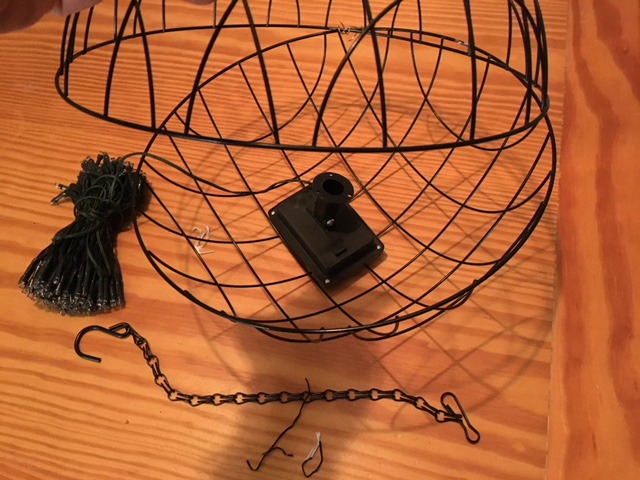 With one side secured-open it looks like a clam shell. Put the solar lamp inside the two planters and secured the other side closed.
 Starting from the other end of the twinkle lights, begin wrapping the lights around the sphere. Wrap the light with a twist tie to secure the lights snuggly around the ball. As you go around and around you can open up previously used twist ties and secure the newly wrapped lights into it.. Continue until the lights are completely attached.
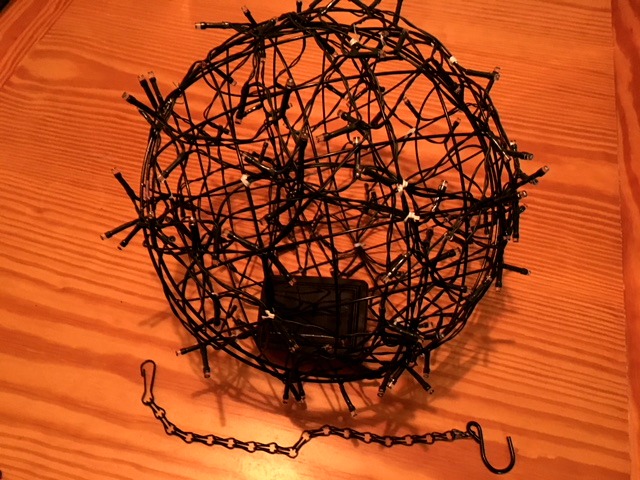
Attached the hook to the top of the sphere and its ready to hang up! As you can see I needed to use some white twist ties. If it bothers me to see those I could replace them later when I get more black twist ties.
 Next I need to decide where I should put it.
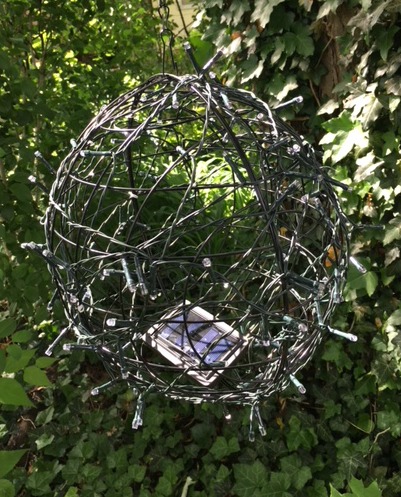 If I can find the solar lights a bit cheaper I would like to make 3 of these and hang it from a huge old tree in the backyard.
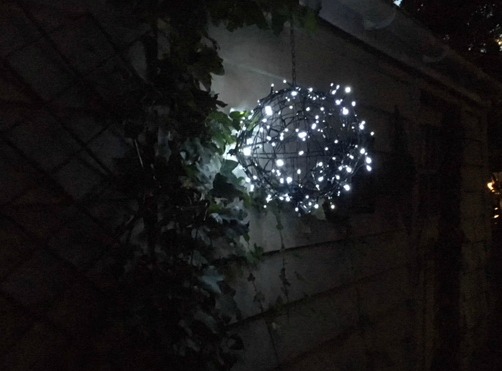
For now it is hanging on the side of the garage. I’m very pleased with the results!
…

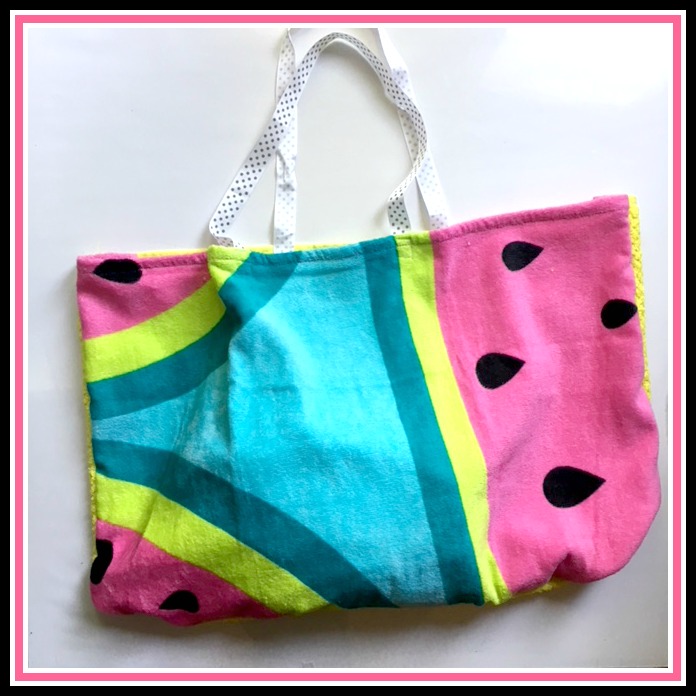
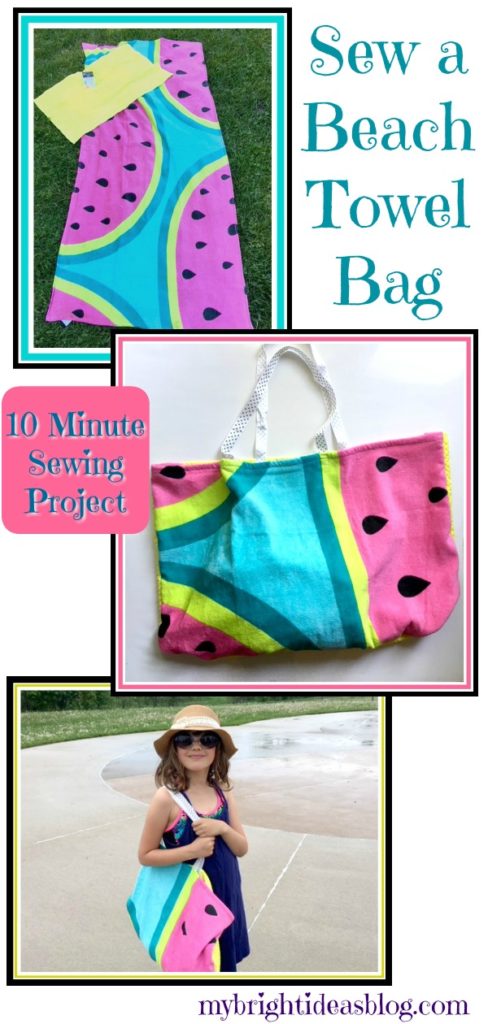
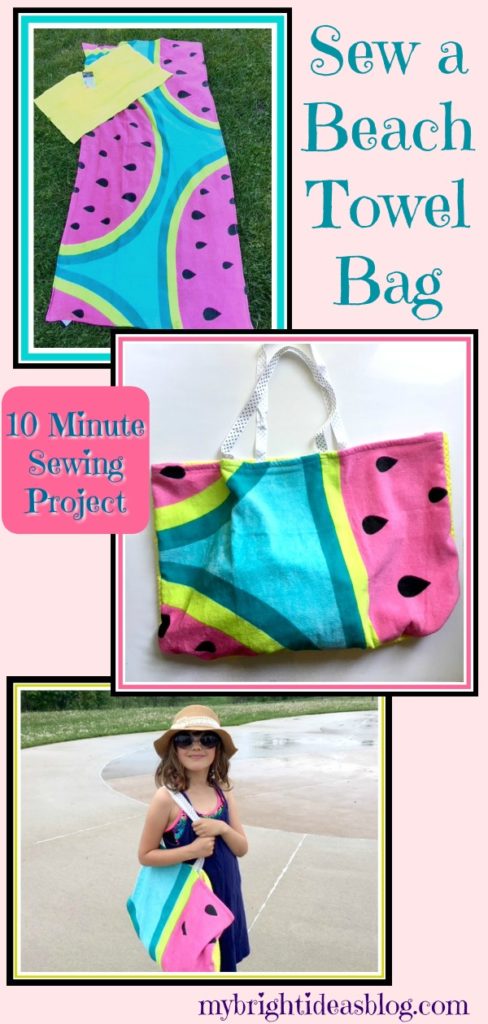
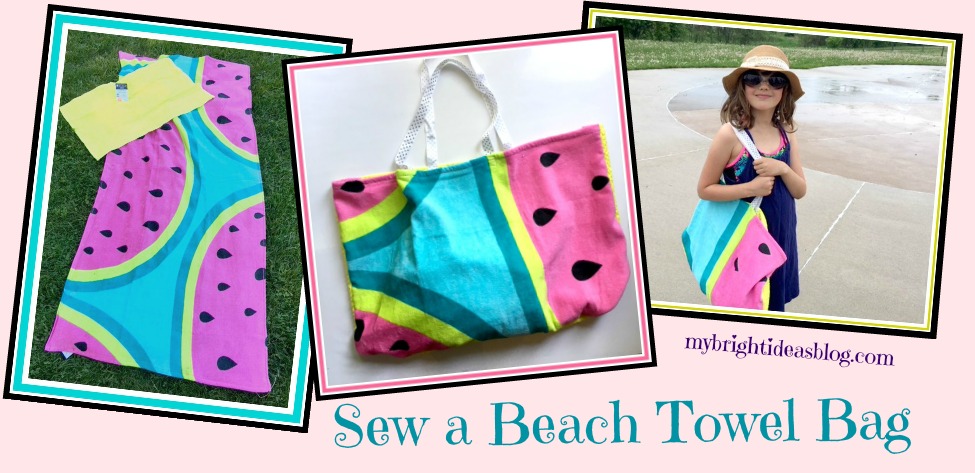
Make a Beach Bag from a Beach Towel and Hand Towel in 10 minutes
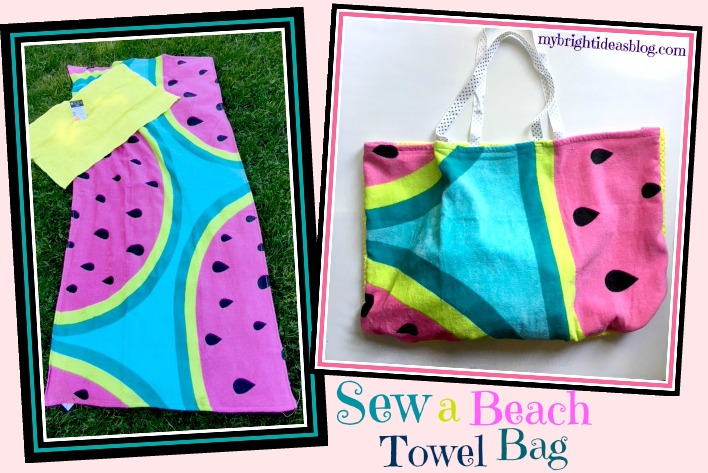
The weather is hot and trips to the beach or swimming pool or splash pad are about to become a nearly daily part of our keeping cool routine. So why not turn your big beach towel into your beach bag! Its such an easy project too. If you have a sewing machine you could have this sewn up in 10 minutes.
You will need:
- a beach towel
- a hand towel
- 4 feet length of ribbon/strapping/cord/shoe lace
- basic sewing materials (sewing machine, thread, pins, scissors)
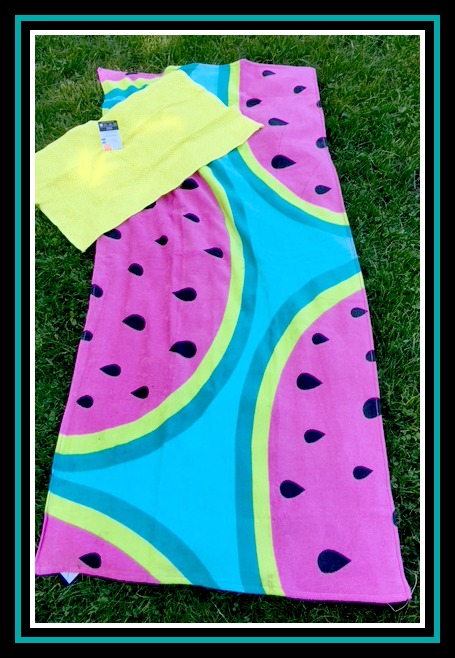
This vibrant beach towel is from Walmart for $8.00.
Happy Childhood Memory Moment…
When I was a youngster my grandma took me and 2 of my sisters and 2 of my cousins on a camping trip. What was she thinking taking 5 girls aged around 10 to 13 year old, on a trip like this. At a family gathering when they announced the trip was being planned, they produced beach towels and toiletries bags for each of us. My towel had hot air balloons on it and she had sewn in a bit of fabric and written my name on it. As much as I loved that trip-I cherished my bag and towel all my own. Sigh…I love my grandma memories…someday I should tell you about when we made horseradish for my big sister’s wedding reception….hilarious!
Back to the project at hand….
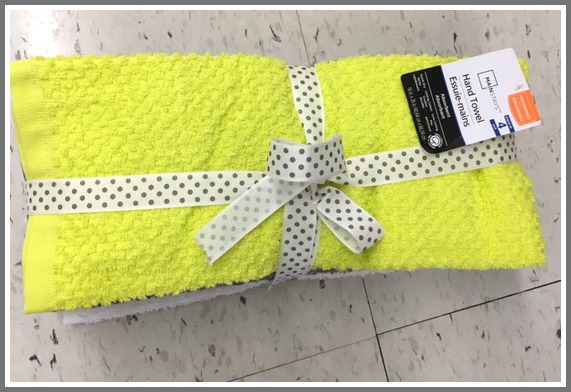
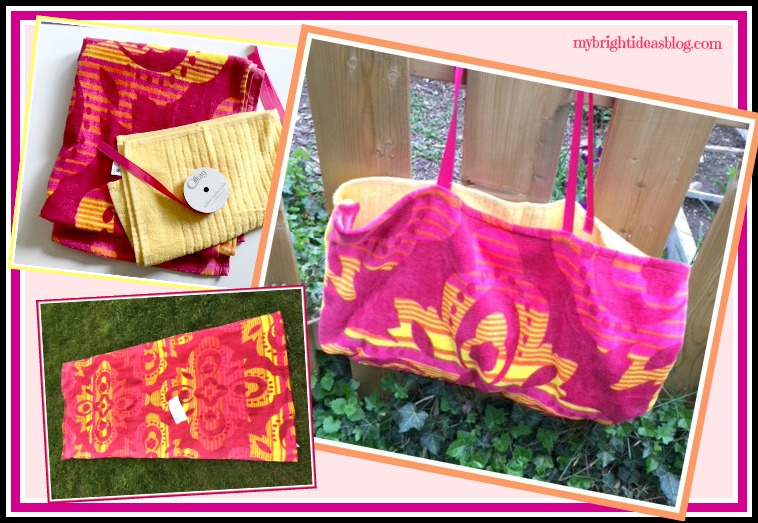
So this week I pick up two lovely bright beach towels for my girls. I also spotted some hand towels and bought those too-just simply because our hand towels keep disappearing.
So I’m unloading the newly purchased summertime items. Beach towels, hand towels with a nice ribbon on it, sunscreen, bug spray…and I think, wait a second! Drop everything and get out the sewing machine! LOL
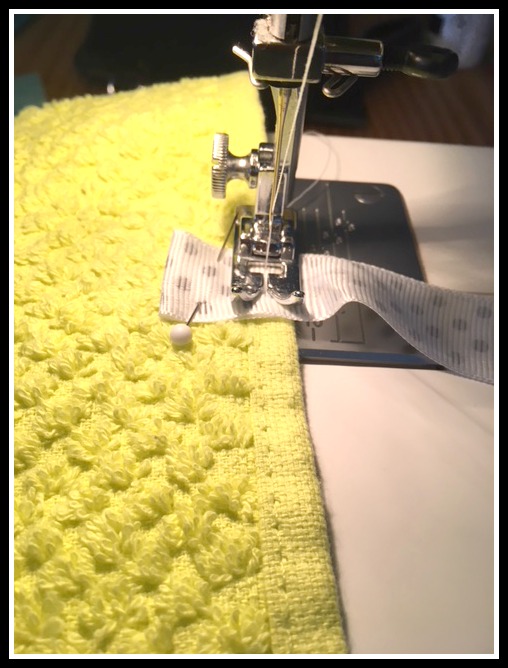
First of all we need to see if that gorgeous yellow hand towel will fit width wise on my beach towel. Take two bag handles from it…yes we can!
So with a big and little towel and the ribbon ready here is what you do…..
Place the hand towel on top of the beach towel right sides facing each other.
Cut the strapping materials into two pieces 2 feet long each (24 inches or 60 cms). Look around to see what you have…shoe laces, webbing, braded trims.
Starting with the beach towel fold in half and mark the middle with a pin. Make a semi-circle with the straps and pin them to the towel.
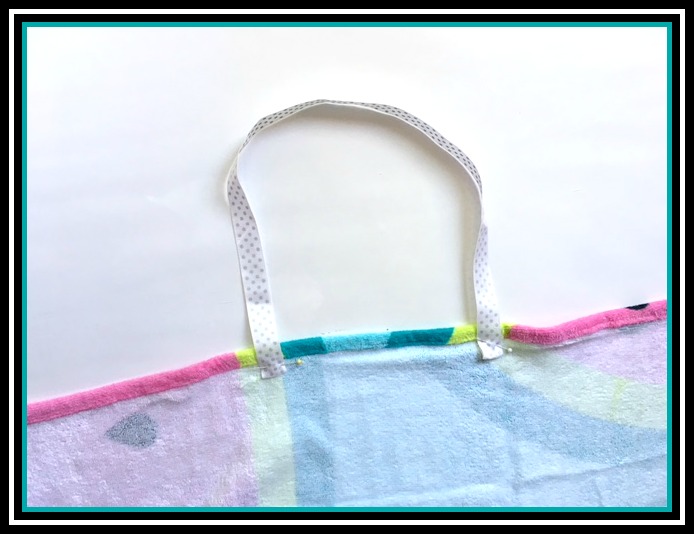
Since my ribbon has the print on only one side I made sure this was showing on the good side of the towel. Also I tucked the ribbon ends under so they look finished and secure when sewn.
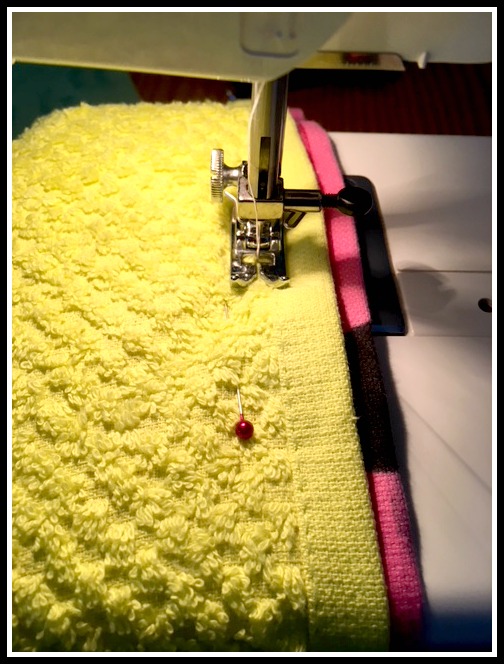
Next lay the hand towel on top of the beach towel and match up the location of the handles on the beach towel. Pin in place. I left the tag on the hand towel to remind me which side was my good side and which was the back. I did cut it off later. As you can see the towels don’t match up exactly the same width-one was 1/2 inch wider on both sides. It doesn’t matter!
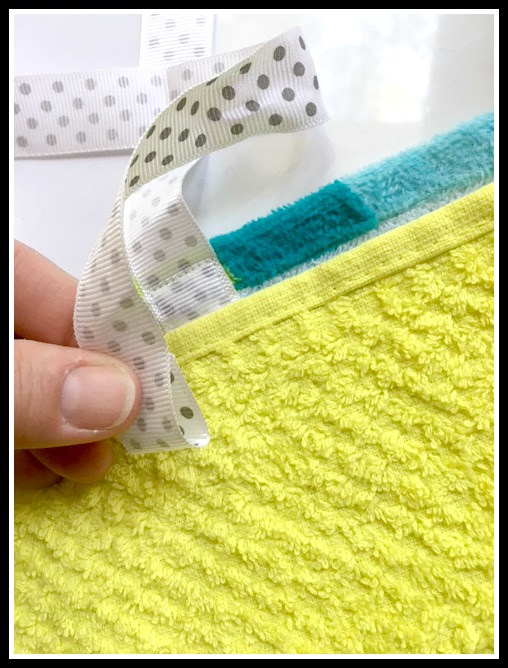
Tuck the ends over so there won’t be fraying from the ribbon or strapping materials.
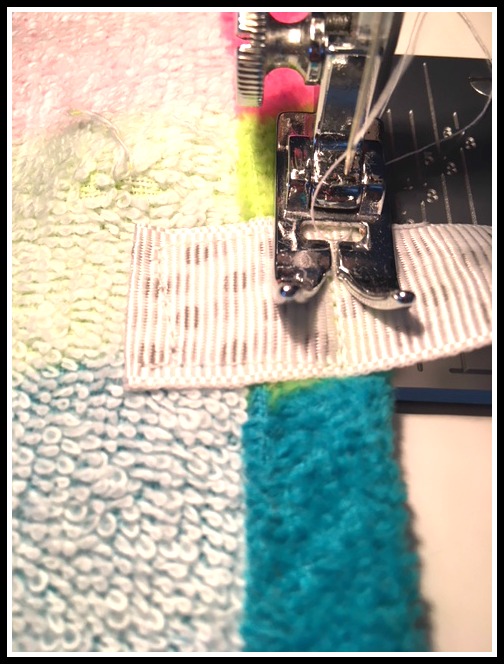
Sew it in place. I usually go around in a square for my stitching on straps to bags. If this was my own bag I would likely put on proper tote bag webbing straps and use a square of fabric or a face cloth to add a pocket or two. That is because I carry everything but the kitchen sink. I would also consider putting a hidden pocket somewhere on it to hide my keys and cell phone.
But since these towel bags are for the kids, the ribbon handles I used will be fine.
Next we will put the hand towel on the beach towel and pin them in place-Right sides facing in!
Sew down the side of the hand towel, then turn to sew the length and up to the top. See photo below. Now you have a bag!
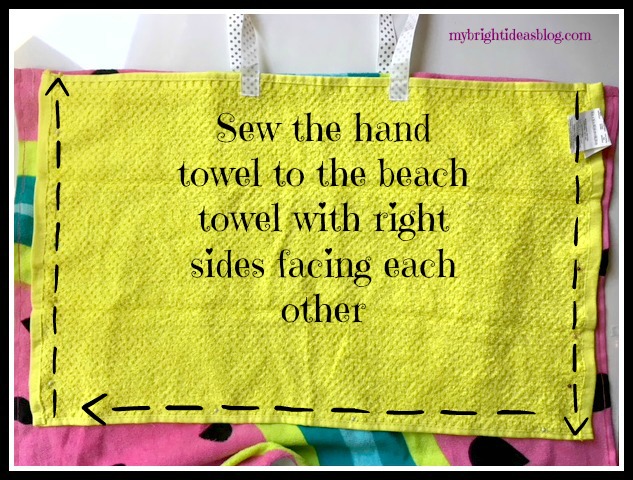
Now you have a bag!
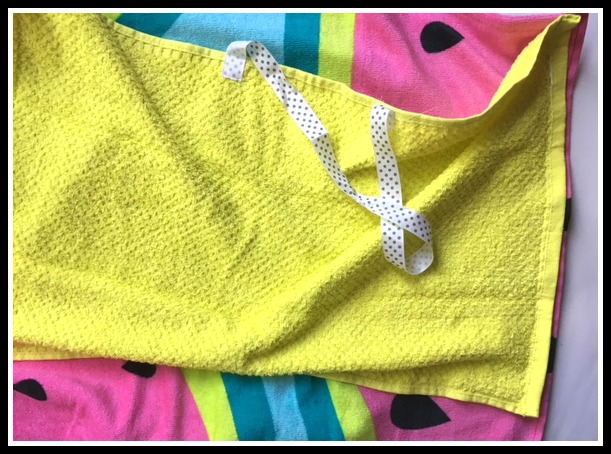
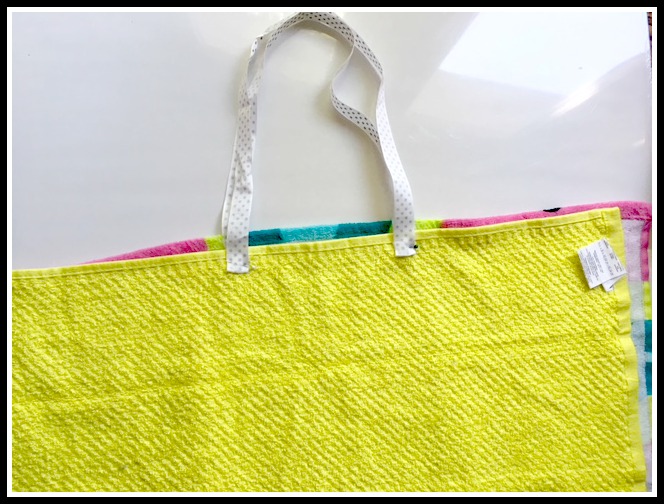
It might look wrong at first. I made 2 of these and at this point I think…uh oh did I do this right? But alas it is fine. Just turn the whole thing inside out and put the tail of the beach towel inside the bag. Add your sunscreen, hat, water bottle, snacks and goggles and off you go!
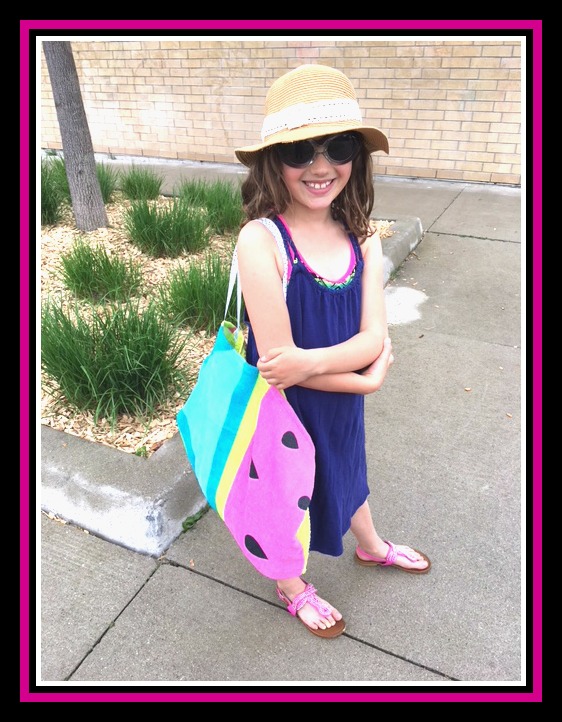
Here is a picture of the second bag. It’s going to be hot day and sunny day here. Perfect beach day!

…
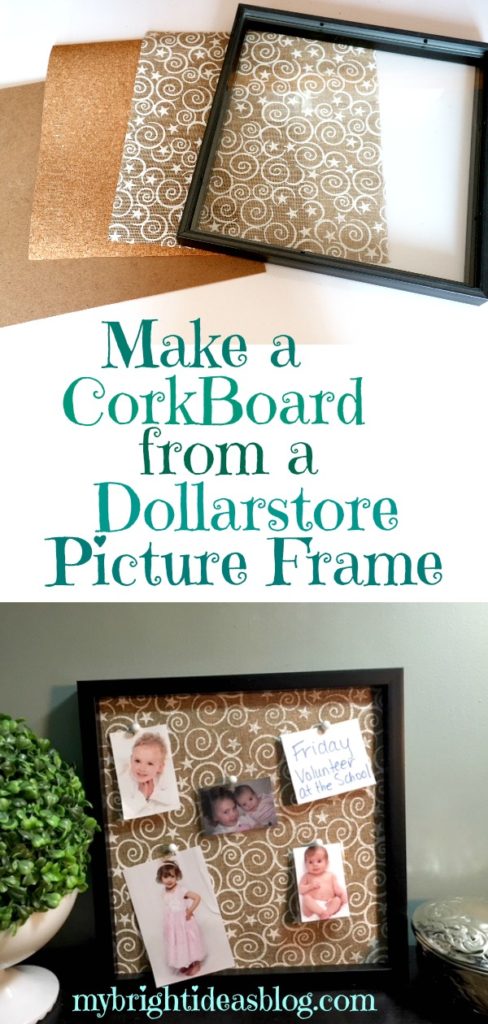
How to make a DollarStore Picture Frame into a Cork Board! Easy Project!

Hello again! Today’s project is all made from Dollarstore items! Its a bulletin board or corkboard-covered in fabric! The Dollarama Stores near me are getting great craft items. They are no longer everything in the store is $1 but they are getting better quality items and still much cheaper and closer than going to my local craft store.
For this project I purchased a very modern photo frame for $4, a roll of cork $3, a roll of jute (this one had a white painted design) you could use fabric for this instead. Additionally, you will need your scissors, ruler and hot glue gun and some cute tacks to post pictures or notes to it.
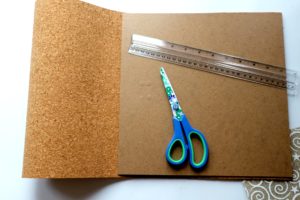
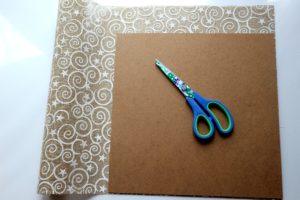
The frame I used was square 12×12. Take off the backing and remove the glass from the frame. Use the backing to trace and cut the cork to exactly the same size. Next cut the fabric larger than the backing. Make it an inch wider all the way around so you can wrap it around the cork and board and secure it on the back.
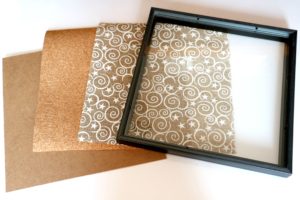
Now stack the layers-the board on the bottom, then the cork, then the fabric-and push it into the frame. Pull the fabric in tight. Everything should be snug.
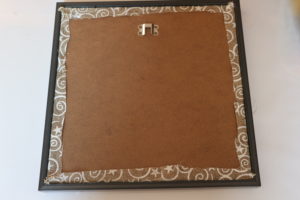


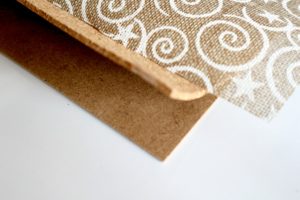
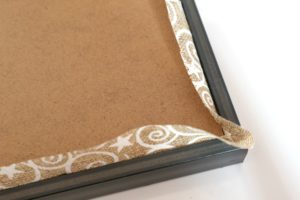
Hot glue the fabric flat-close to the edge and trim off extra fabric. Fold the corners so it is tidy with a mitred look. Find some little pictures and cute push pins. At the moment I have it leaned against a wall on a side table but it could be hung up on the wall….in fact-there is plenty of supplies left over to make more frames and put a collection of 2 or 3 on a wall! I just took down some shelves and know just the place!
All in all this is a 10 minute project with a cost of about $10 with left overs to make more projects. It was a success!

…
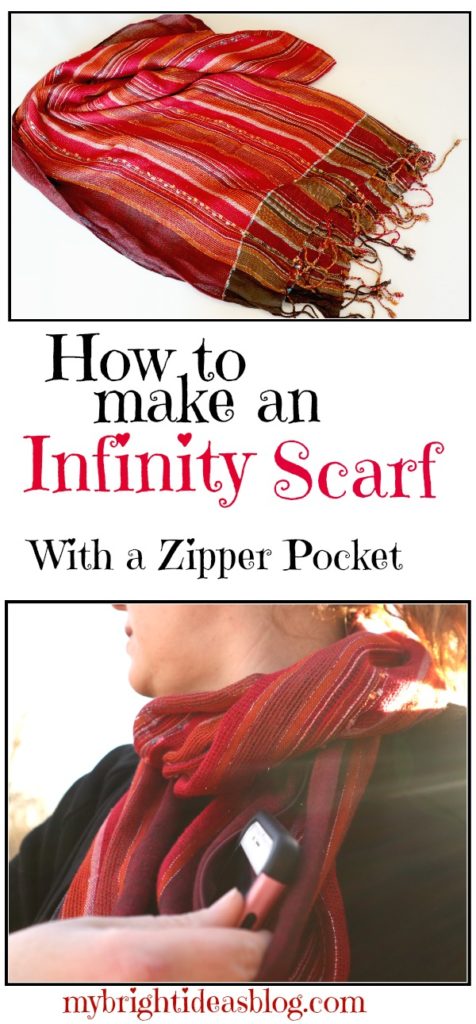
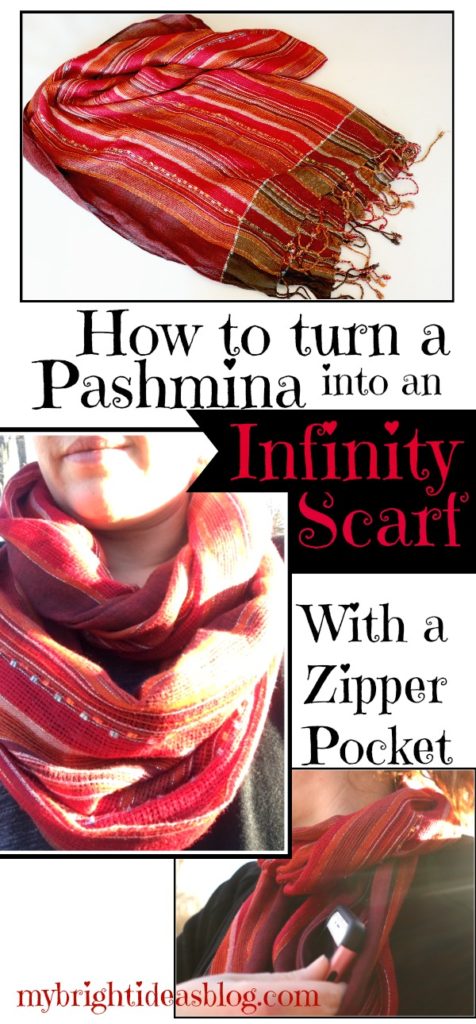
How to Make an Easy Infinity Scarf with Zipper Hidden Pocket
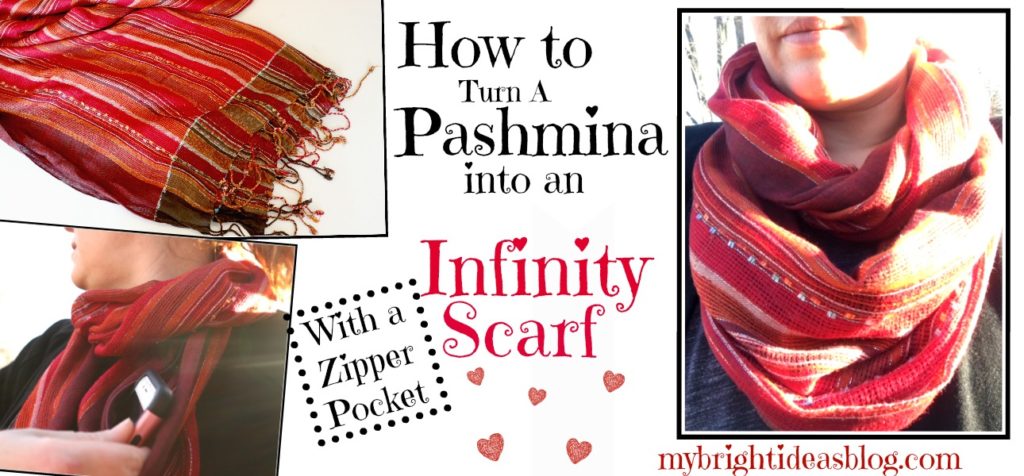
I love scarves! I find a cute pattern or fabulous colored scarf on sale and I can’t help myself! Then I hoard them. So I had an idea to make a scarf with a hidden pocket and thought, instead of using new fabric why not make it with an older scarf I had not used in a long time.
The hidden pocket scarf idea I stumbled upon the last time I was travelling abroad and wanted to be able to keep my passport handy-but hidden while on the journey. Now I am thinking about how handy it would be to walk the dogs with keys, ID and phone hidden in a zipper section of the scarf. Maybe it would be a gift idea for a tween or teenager who isn’t into purses and needs to carry her personal items.
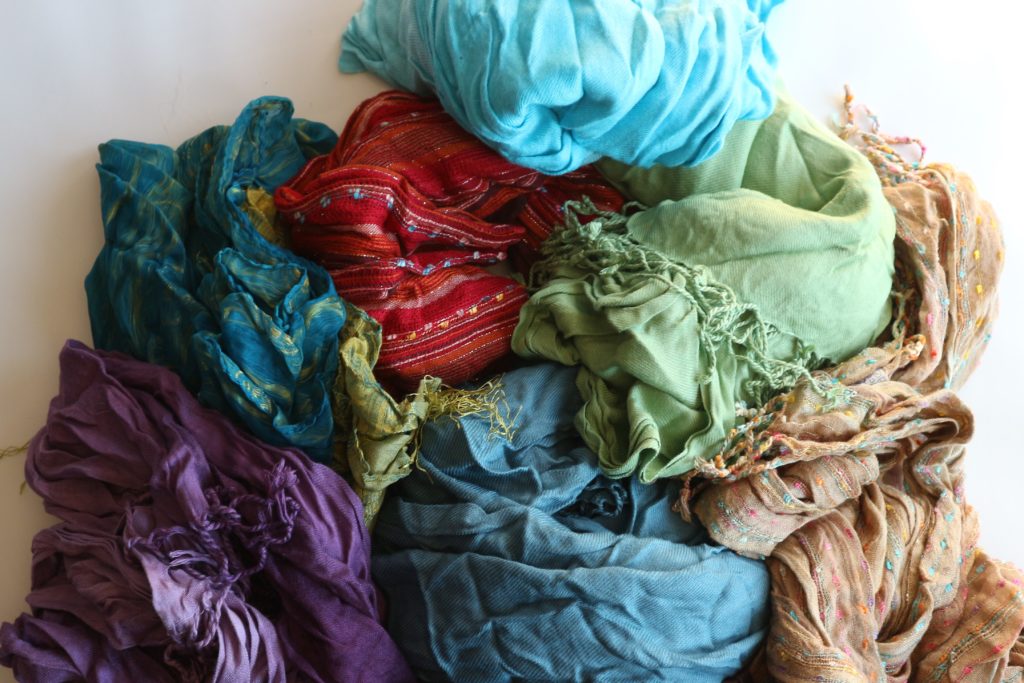
Here are just a few of my older pashmina scarves. I have bins and bins of them.
For this project you will need:
- Scarf or Fabric
- Short Zipper (7 inches or 18 cm long)
- Sewing Machine
- Pins
- Scissors
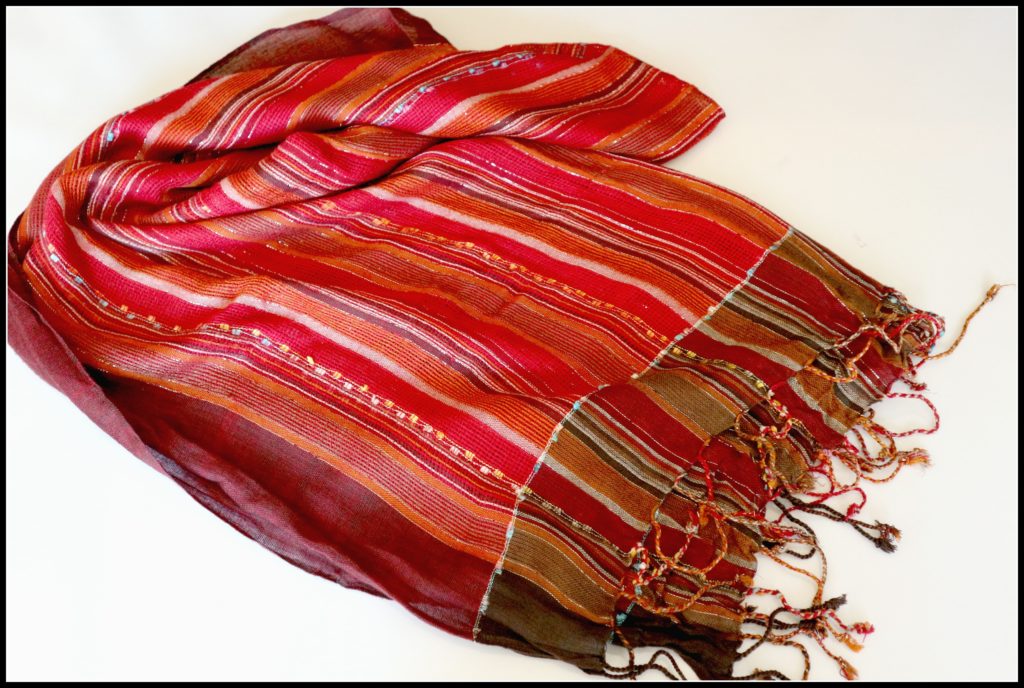
I happened to have a small RED zipper so I chose the red scarf. I love it when a project uses old things I have around rather than buying new supplies!
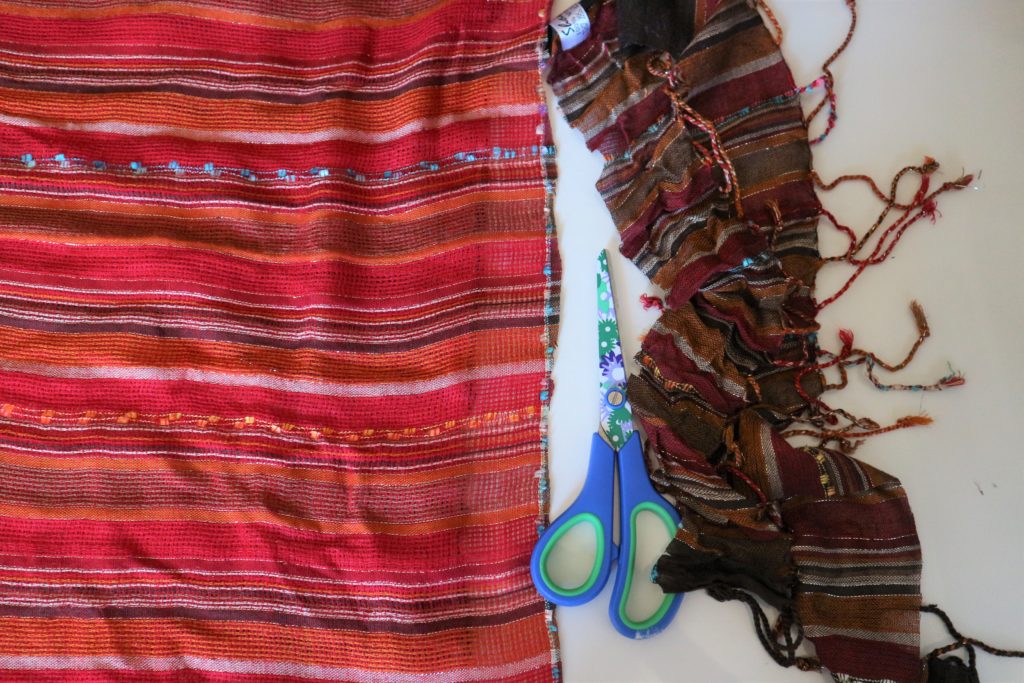
If you are using a pashmina trim off the fringe.
You can also make the zippered infinity scarves out of old clothes, a soft blanket or scarves or new fresh fabric.
For this project I would find a bit of fabric that measures at least 18 x 70 inches (45cms x 177cms).
My scarf was 26 x 69 inches (66 cms x 175 cms). It was even shorter after I trimmed off the fringe and I think it’s a great length-finished its 66 inches long. I prefer it to be extra wide too.
You will need a zipper approx. 7 inches or 18cms long.

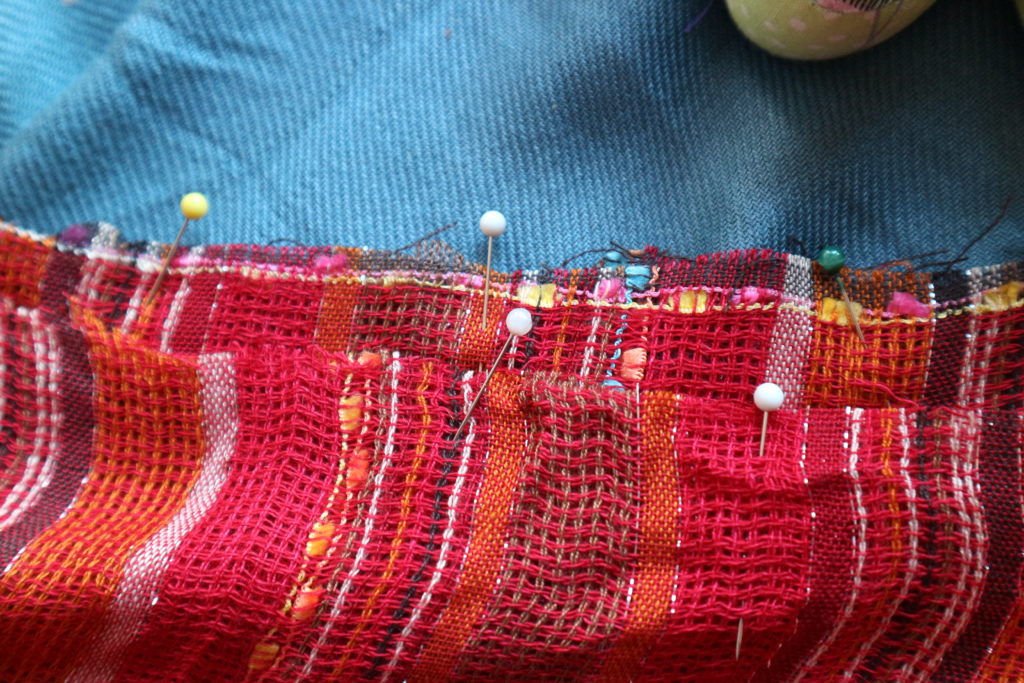
Fold the scarf in half, so its long and skinny with right sides facing together. Decide where you would like the zipper to sit. I put mine a few inches from the end. Using pins, mark the ends of where the zipper will go.
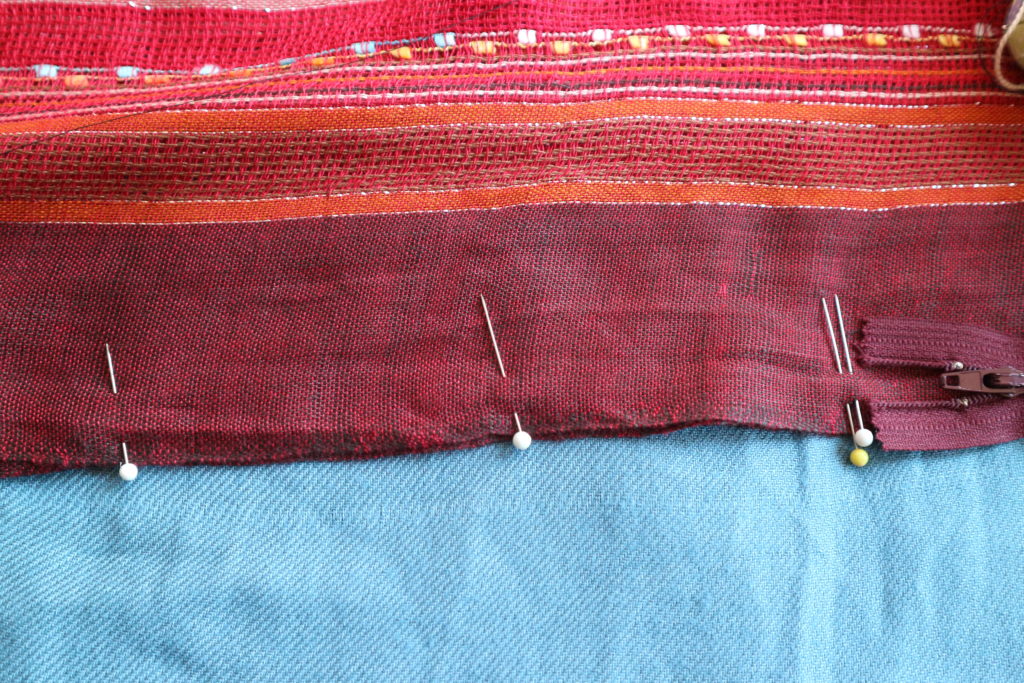
Pin along the rest of edge.
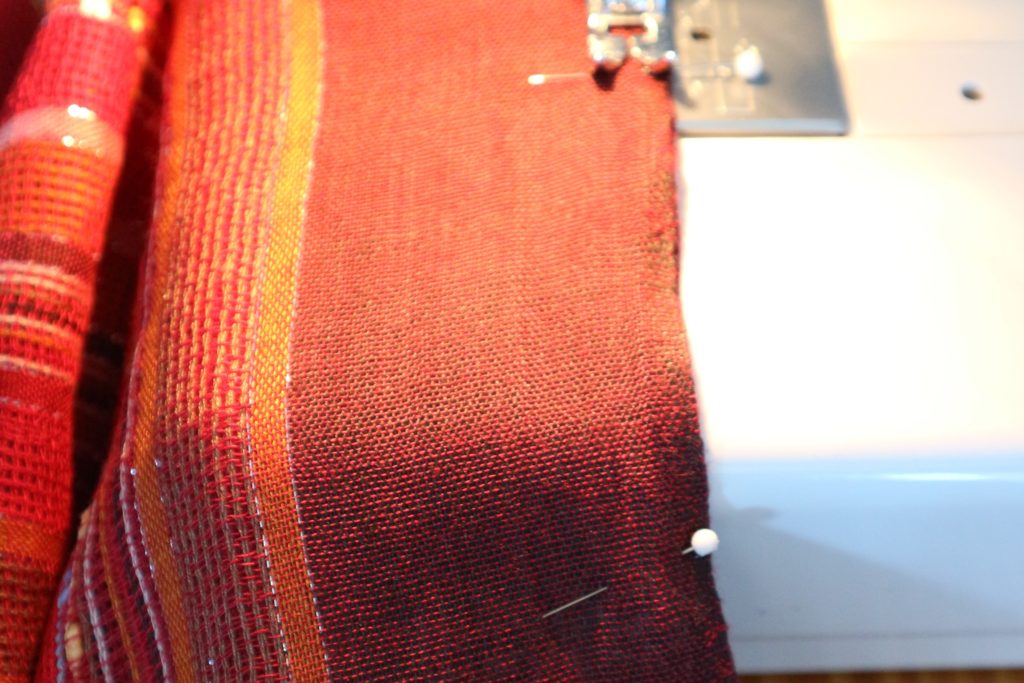
Sew along the long edge. Stop sewing where you marked the zipper will be.
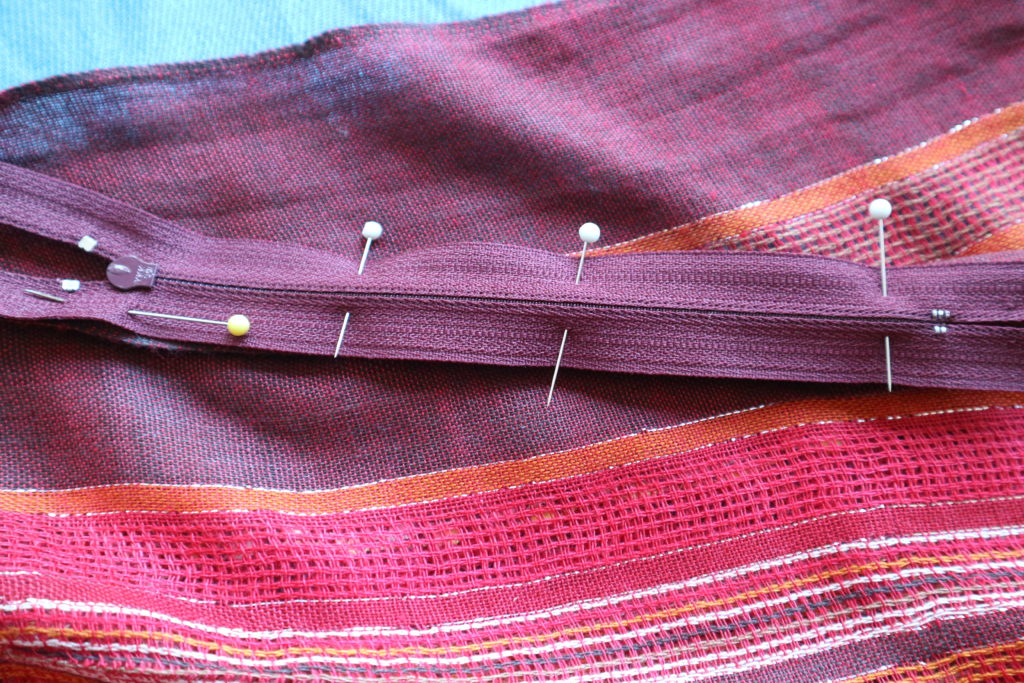
Open the gap you left for the zipper and pin one side of the zipper in place. The right side of the zipper should be down facing the right side of the fabric.
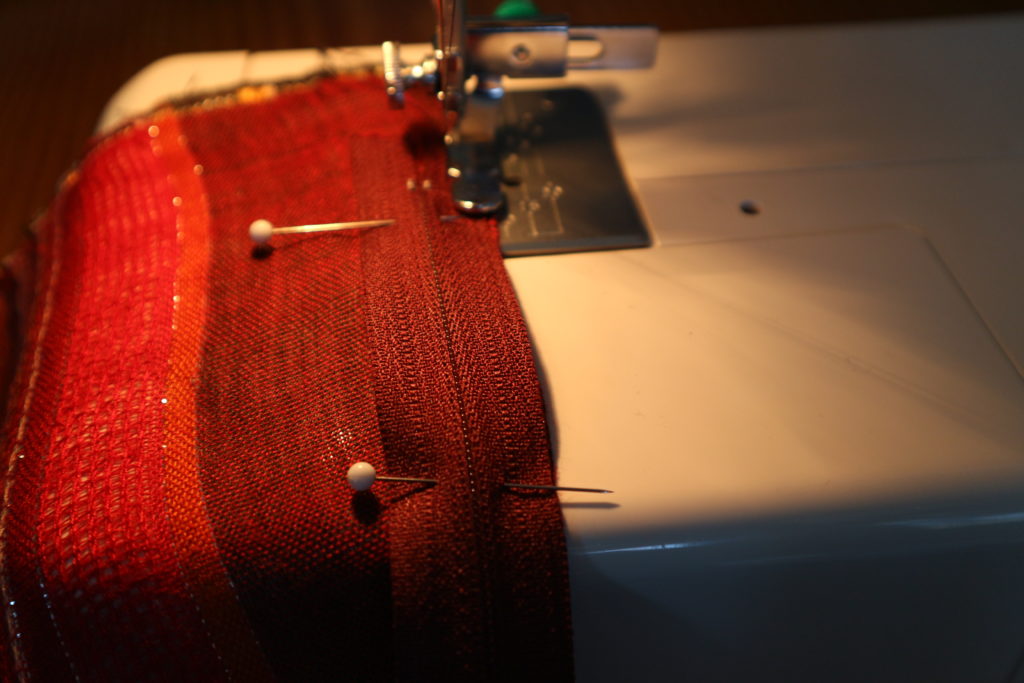
Sew the zipper into place on the first side. Flip it over and pin and sew the other side in place.
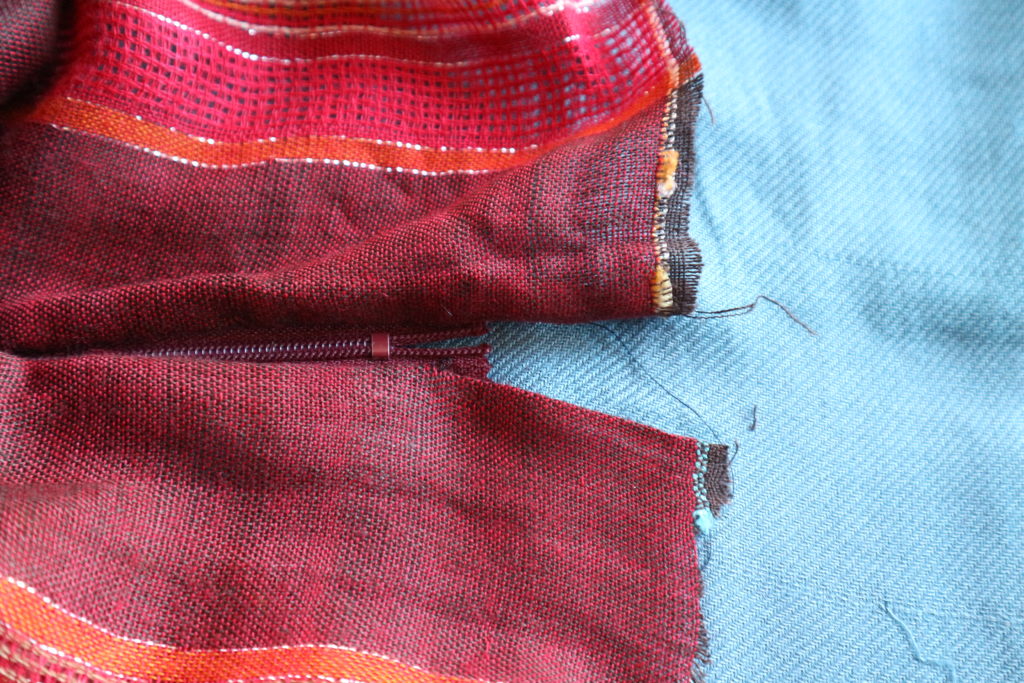
Close the gap at the end of the scarf by sewing the seam together.
Now test the zipper. It’s opening smoothly. Yeah! Leave the zipper open.
Pull one end of the tube through to meet the other end. Match up the seams and pin all the way around the tube.
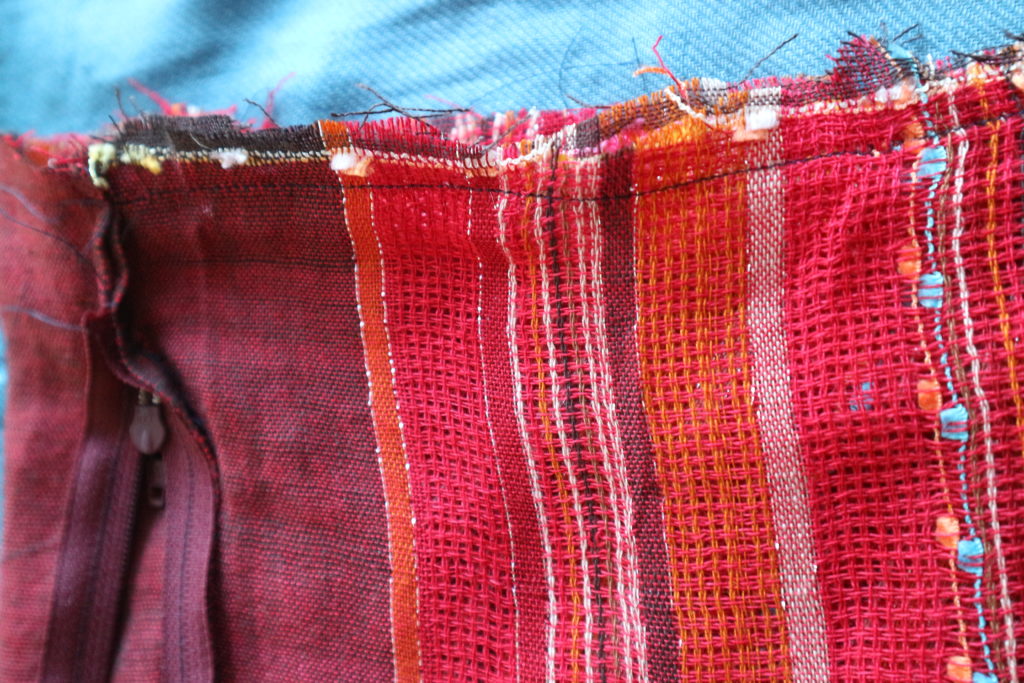
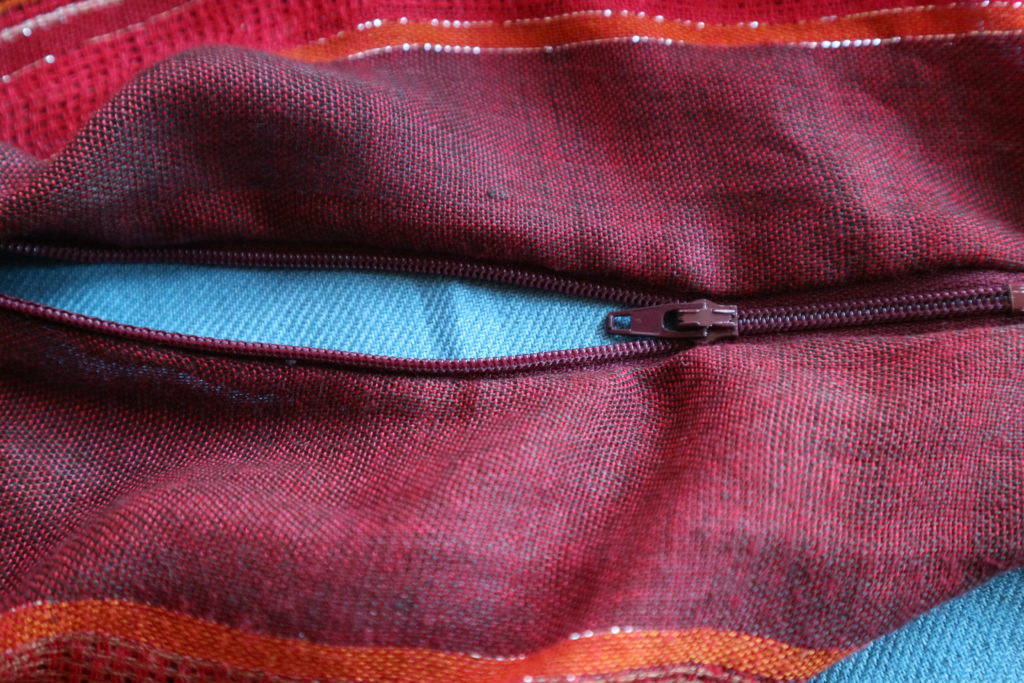
Sew all the way around the edge. Be sure to only sew through two layers – we’re making the tube into a circle. Sew the two layers together all the way around.
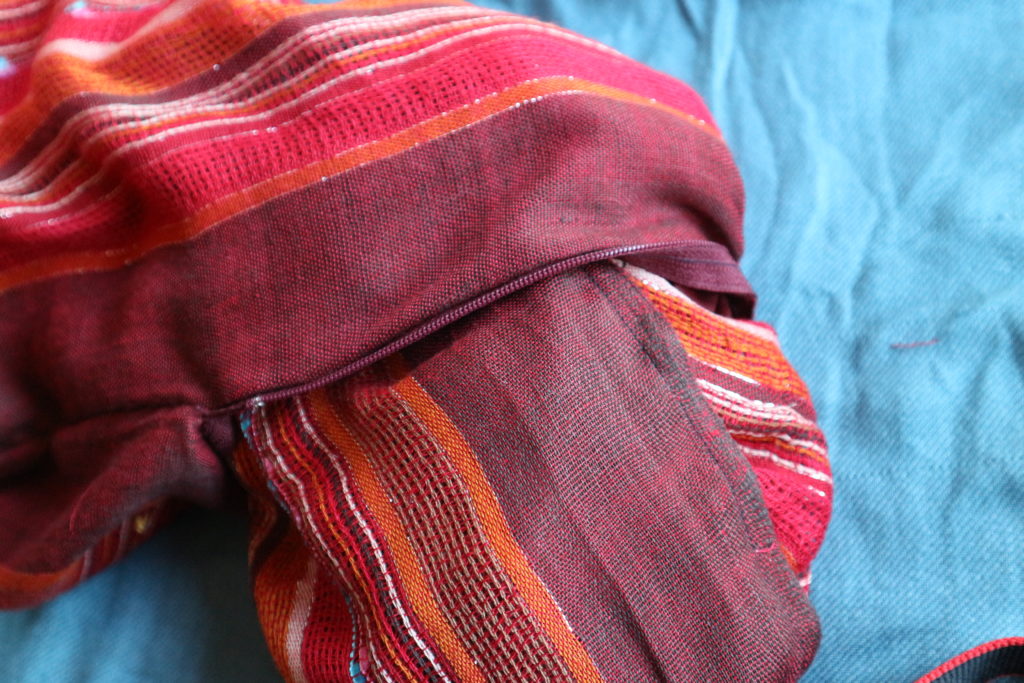
Pull the scarf out through the open zipper hole.

Great Job! Now try it on!
Use the zipper pocket to hide your phone or passport or other lightweight items. Your belongings will fall down toward the bottom of the scarf. That is cool with me since its easy to grab.

Tuck the zipper towards your body so its not noticeable.
This is a great solution for where to put your things when wearing leggings that have no pockets. Or travelling in an area where you are concerned about pickpockets. Or dog walking….It’s just plain convenient too.
I really enjoyed reinventing my scarf! Thanks for reading this post, feel free to comment if you need more details!
…


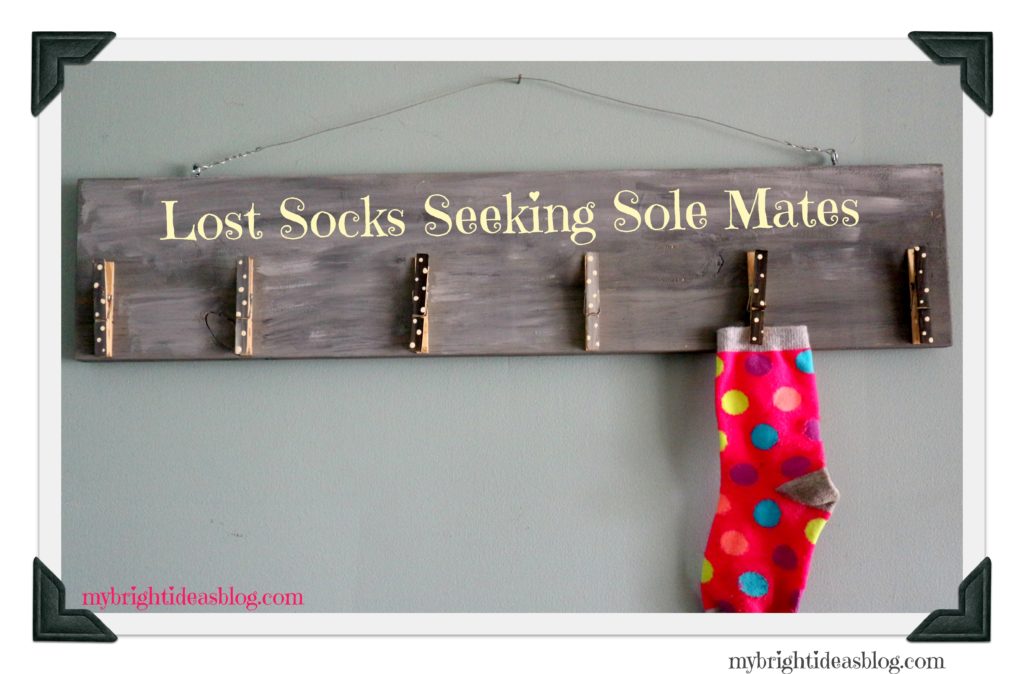
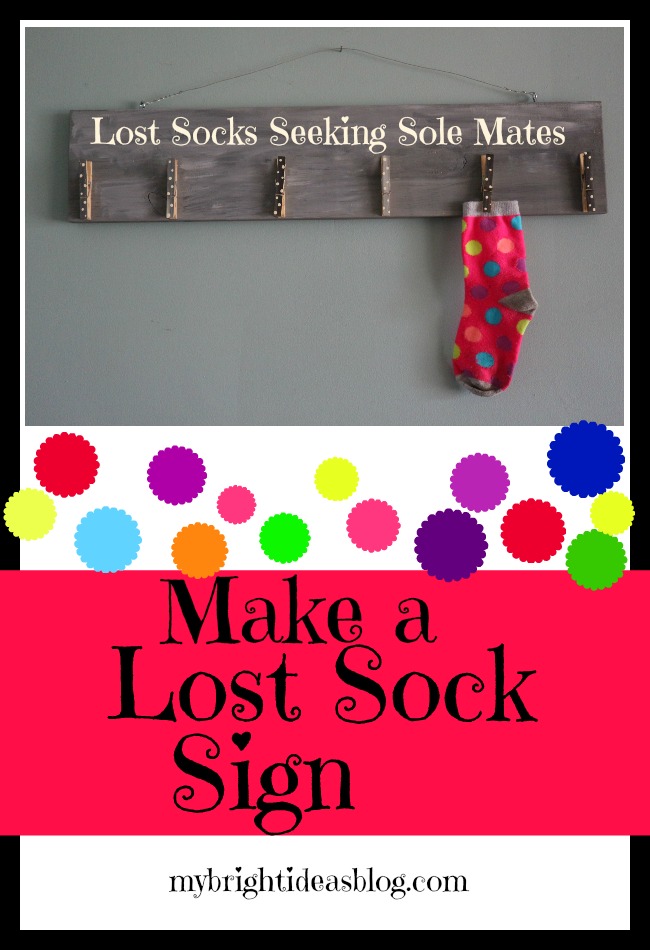
Lost Sock Seeking Sole Mate-Laundry Room Sign
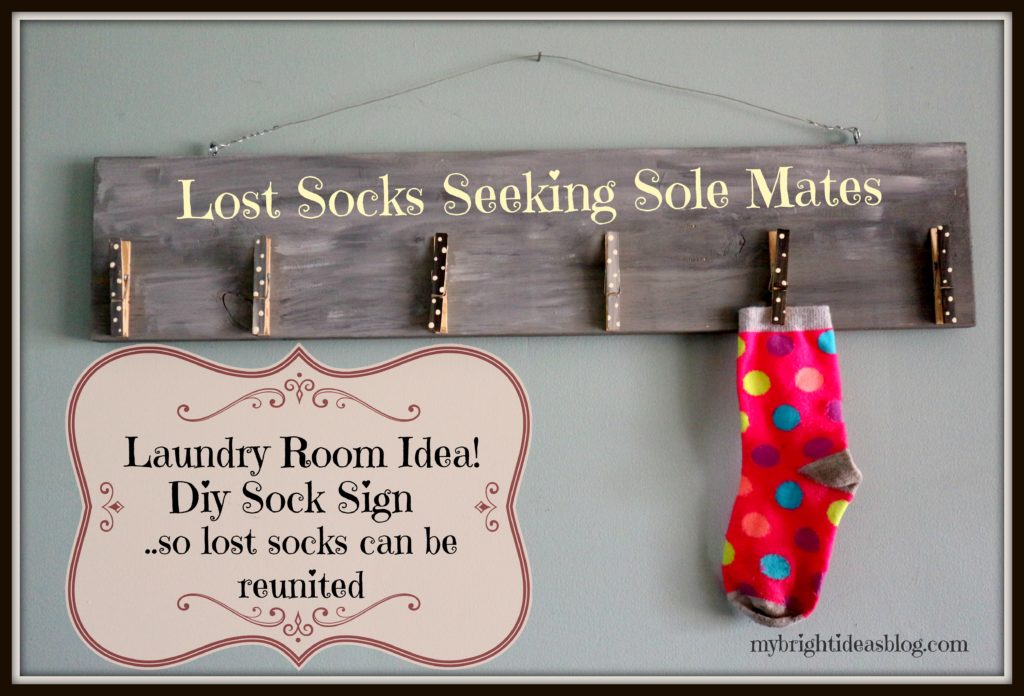
I saw this idea on pinterest and immediately went in search of a left over scrap of wood. I found this 1×6 partial board that happened to be 26 inches long. Perfect no need to cut any pieces because my saw is in the garage and there is a ton of snow in the driveway. More wood diy projects to come when spring arrives in Canada.
So here we are with a cute idea for a laundry room sign to help lost socks make their way back to their mate.
You will need:
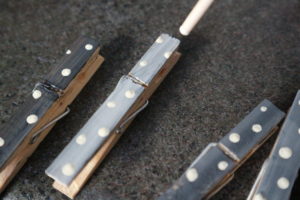
A scrap of wood, sand paper, paint or stain, a stencil for the letters, clothes pins, paint brushes, glue, hooks and wire.
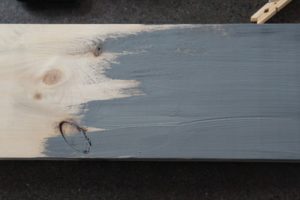

Before you get started smooth the front of the board with fine sand paper. This will make the writing a lot easier. Find some sort of paint or stain to start the back ground of the sign. I had my regular craft paint already out and just mixed the white and black and make a nice gray. I liked how streaky it turned out. Once this is dry test out where you would like to put the clothes pins. Be sure to write the message on the board before you glue the clothes pins on. You could use a letter stencil or free hand.
I painted the clothes pins gray and black and then put white polka-dots on them. I love painting polka-dots by using the tip of the paintbrush and dipping it in the paint.

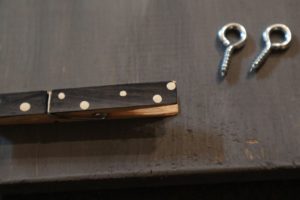
This was my first time using E6000 glue. It is slow to dry compared to my usual hot glue gun but so far its proving to be strong. I left it over night to be sure it was dry. In the tool box I found a little frame kit with wire and these screw in hooks. It was very easy to screw it into the soft wood. Then put the wire through the eye of the hook and wrap it around. That was all there was to it. I had everything for this lying around the house. If you don’t have the hook and wire you could also use picture frame hooks nailed into the back. Instead of wire you could use twine or ribbon.
You could write Lost Sock Seeking Sole Mate or Lost Socks in Search of Sole Mates. However, I was making up one to put on the craft sale table at my work and I wrote Lost Socks Seeking Soul Mates. I’m not sure how hard it will be to fix it since I wrote it in black paint. It will be hard to cover up. Grrrr. It’s not a funny play on words if you spell the pun wrong. Whoops-a-daisy!

Laundry Room Hack – Use Dry Erase Markers on the Washing Machine
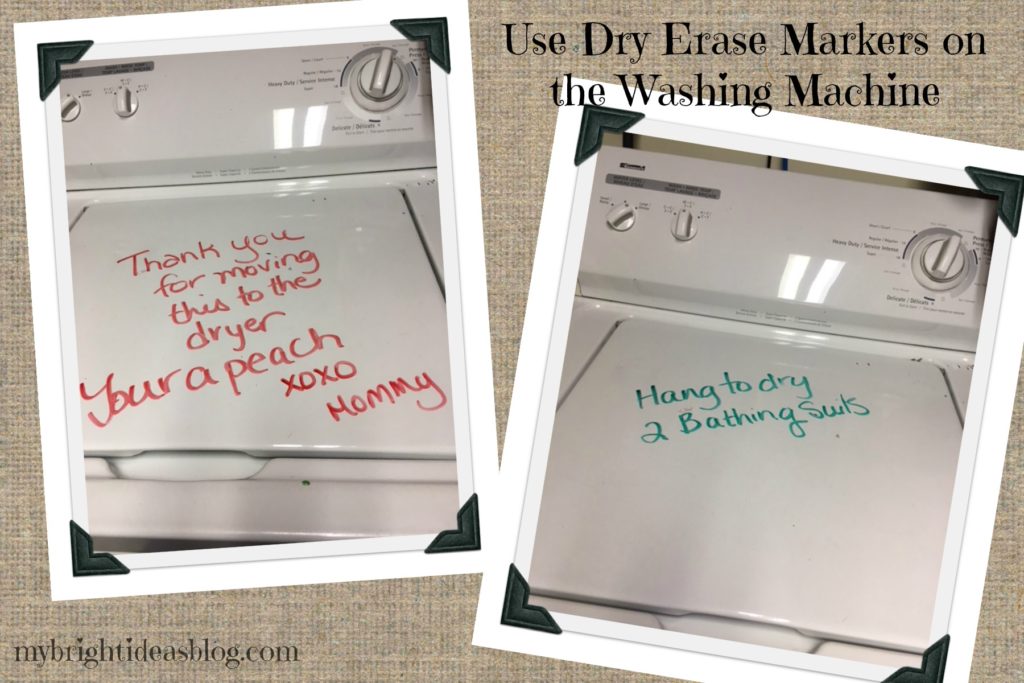
Using Dry Erase Markers in the Laundry Room!
All of my bright ideas aren’t turning into much to show you this week. So I am writing this one in 15 minutes or less!
Leave a message to your family or to yourself on the washer. This way you won’t forget that you have items that shouldn’t be dried.
If your washer isn’t white or it’s too new and gorgeous to use as a message board just have a dry erase board above the washer or have one you can set nearby as a reminder to yourself.
Have a super day!