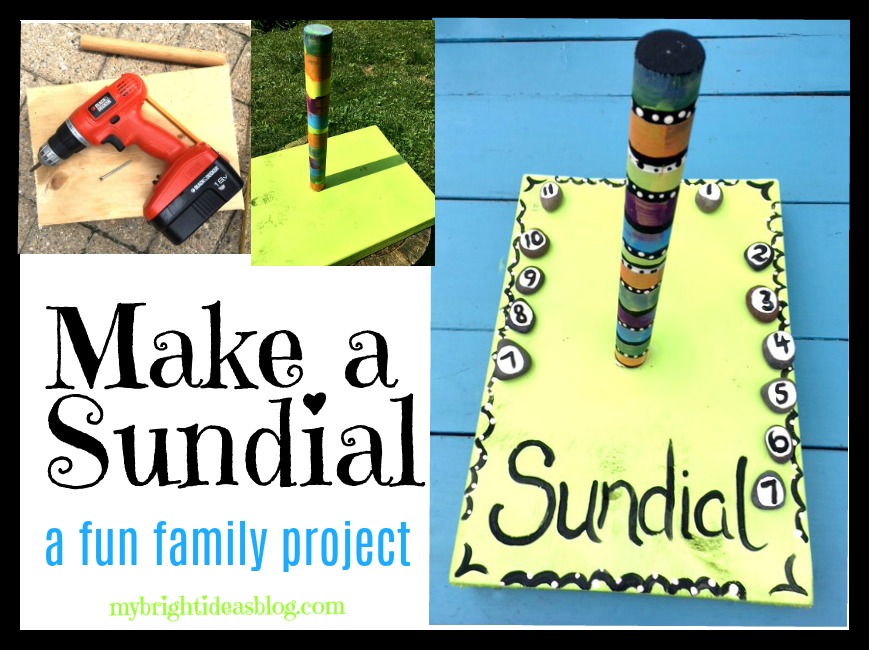
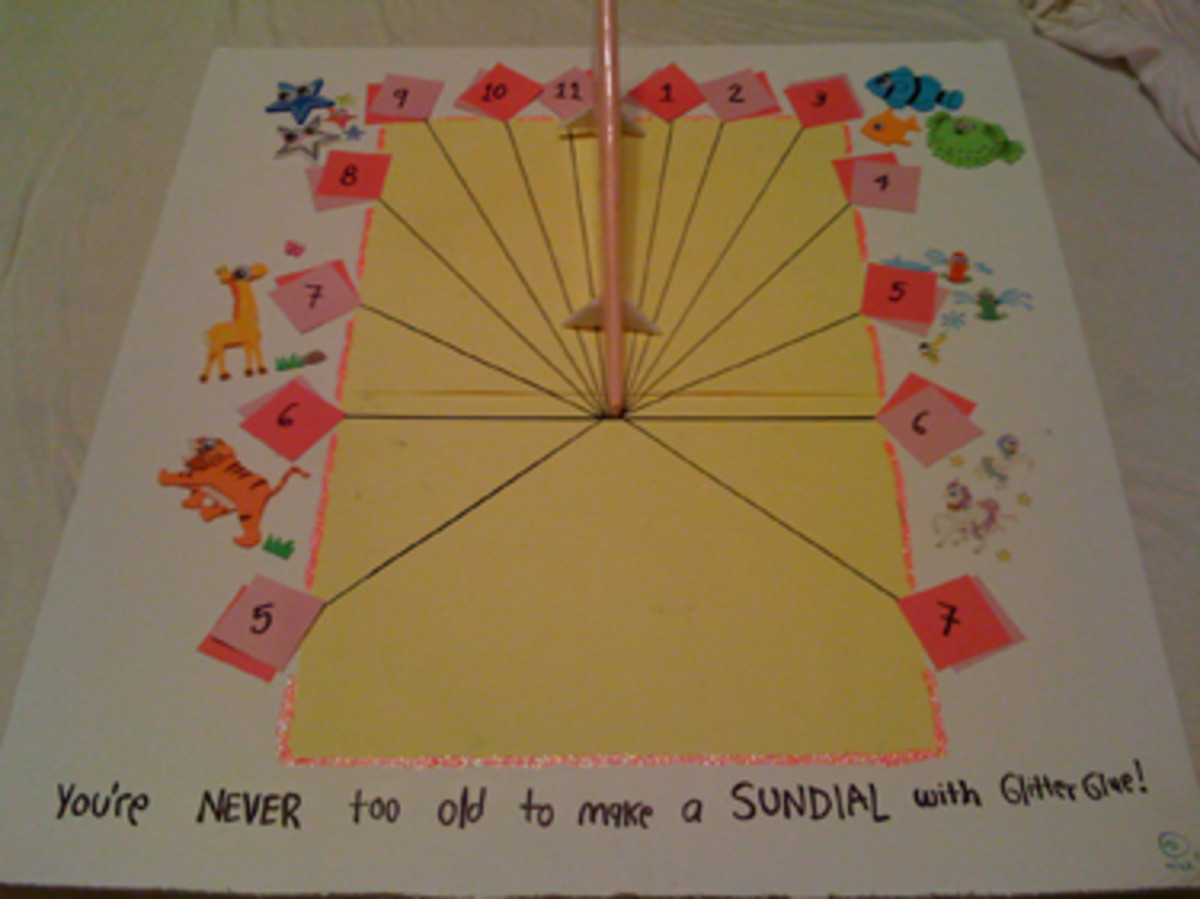
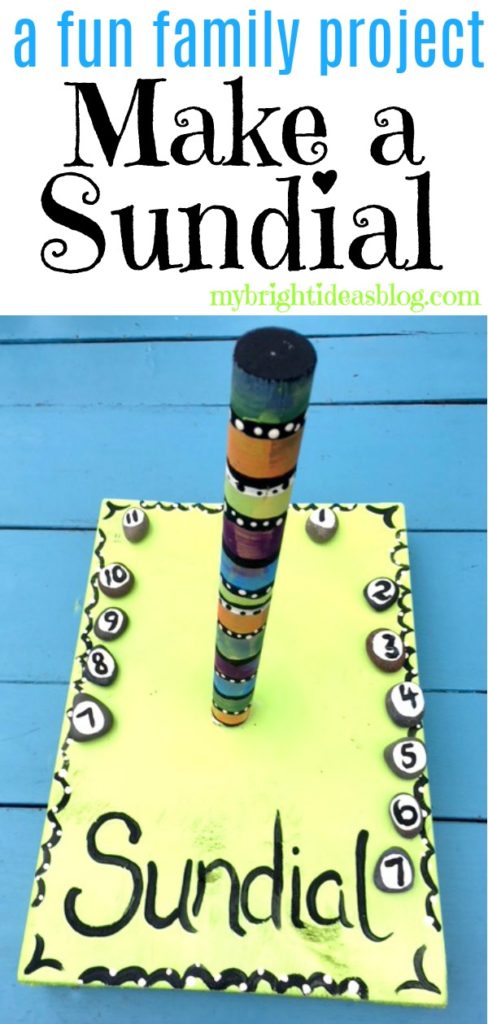
Are you looking for an outdoor family nature project? Here is a cool idea for a sunny day. Make a SUNDIAL.
A sundial is a device that uses the position of the sun to cast a shadow to tell the time. As the sun moves across the sky the shadow moves. According to Wikipedia the oldest sundial found by archeologists is dated around 1500 BCE. https://en.wikipedia.org/wiki/Sundial
When I started my project it was very cloudy so it got more decoration than I intended. It was going to be bare wood with a light clear coat. Our weather was cloudy and rainy for several days so I had to postpone it repeatedly. Grrr.
Technically you could make a quick sundial using a stick in the ground. Or you could use paper and a pencil stuck in playdough to make a sundial in a pinch. But if you want to make one like mine, here is the scoop.
You will need:
- a scrap of wood (mine was 9 x 13 inches)
- dowel (mine was 10 inches)
- drill
- tape measure or ruler
- 12 rocks or gems
- 1 screw 2 1/2 inches long
- hot glue gun or other glue (optional)
- watch or clock with an alarm
- pencil
- spray paint or varnish
- craft paints and brush
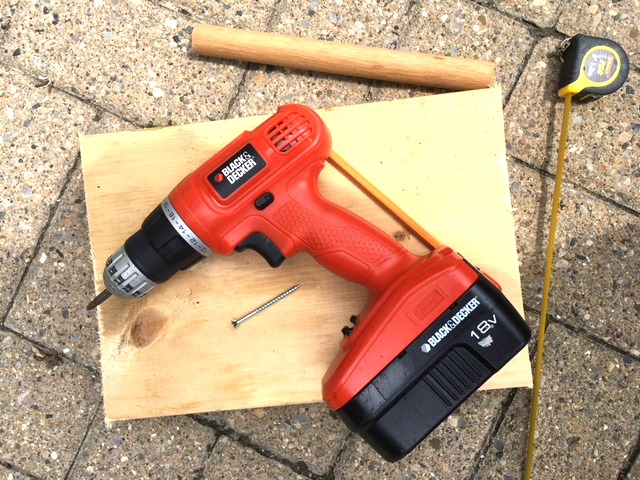
Cut the wood to a size you choose. I would have preferred a 12 x12 square but I had this scrap 9 x 13 left over so we used it. I also had this dowel that was a leftover and already 10 inches long.
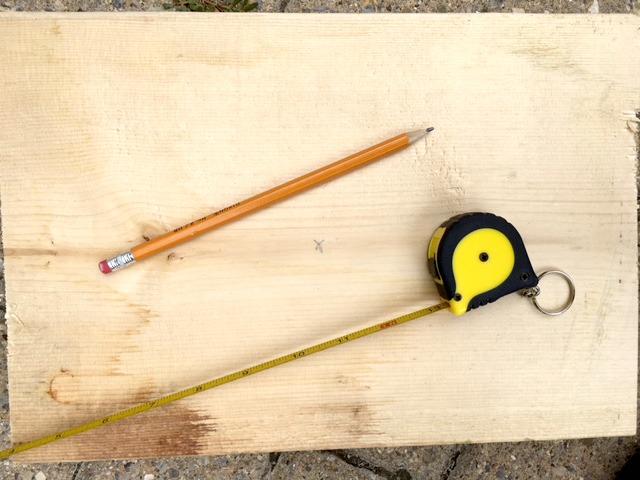
Measure and mark the centre of your board.
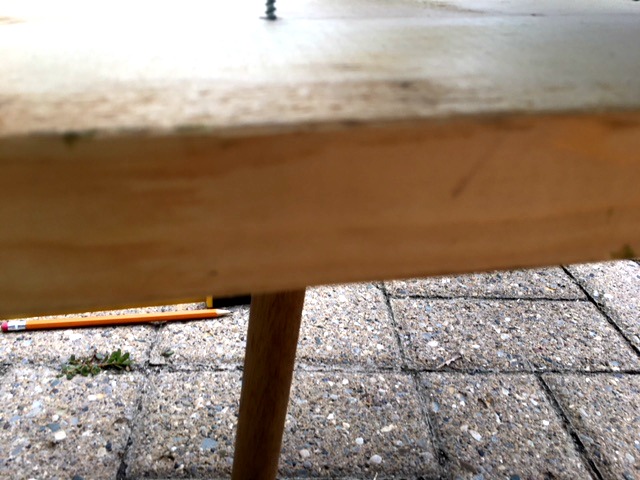
Screw the dowel into the centre of the wood. This was hard to take a photo of. Put the dowel on the ground, place the block of wood on top. Ensure the x marking the centre on the wood is right over top of the dowel. Drill the screw through both pieces.
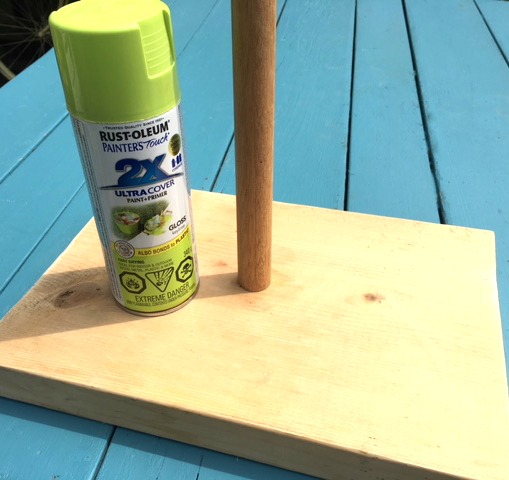
We could see the clouds coming, so we decided to start the time markings the next day and for now paint the sundial to help it last longer outdoors. If you have a partial can of spray paint or wood protector…this project won’t take much.
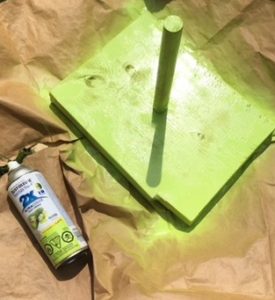

Spray the board and allow to dry. Tip over to paint the bottom and allow the bottom side to dry.
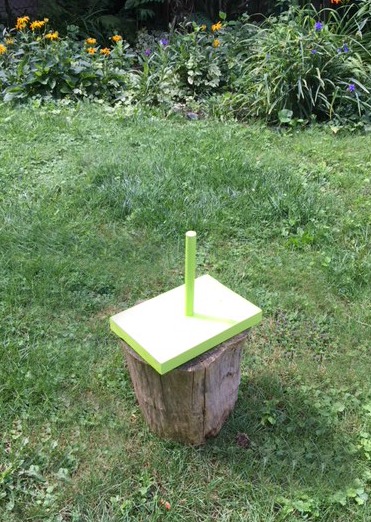
Once it is dry you can decide where you will have the most sun in your day. You could raise it up with bricks or a tree stump. We have a lot of shade in our backyard which normally we appreciate. But for this project it made things difficult.
Now seeing the giant rain clouds moving in. We decided to post pone and begin again tomorrow. In the meantime, we could jazz it up a bit.
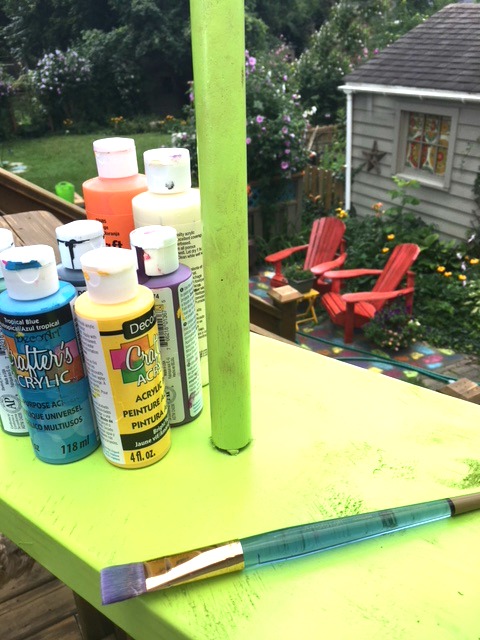
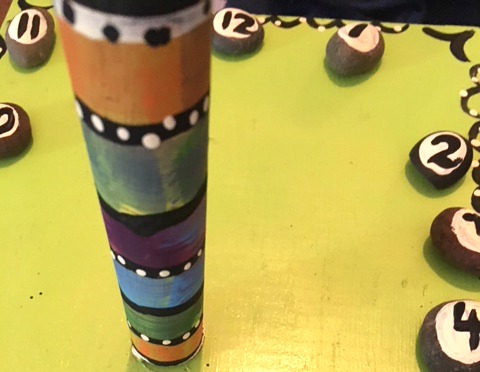
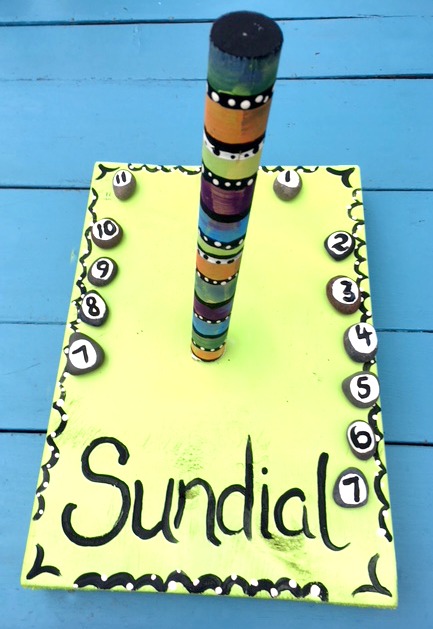
Using craft paint we put wide stripes on the dowel part of the sundial.
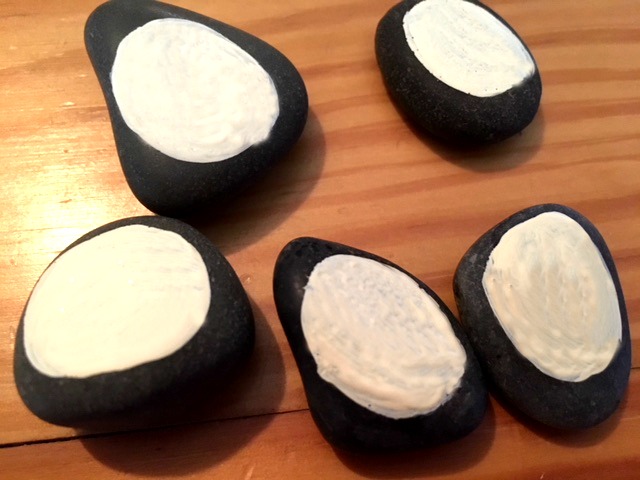
We had a package of dollar store polished rocks so we painted a white circle on each one. This will be our pretty markers for hours. Print the numbers: 7, 8, 9, 10, 11, 12, 1, 2, 3, 4, 5, 6, 7.
A SUNNY DAY FINALLY ARRIVES
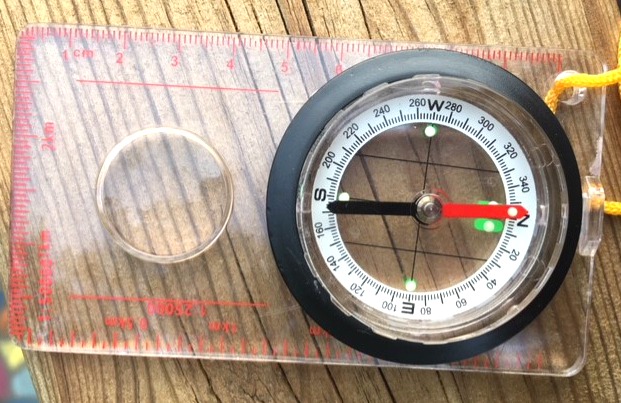
We did follow some of rules for making a sundial. Such as the pole needs to tilt slightly to the north. Use a compass to determine the north pole. I twisted the dowel to loosen it and put a tiny rock in that space to tilt it. If you are in the southern hemisphere you will need to use the compass to find the south pole and tilt the dowel to the south.
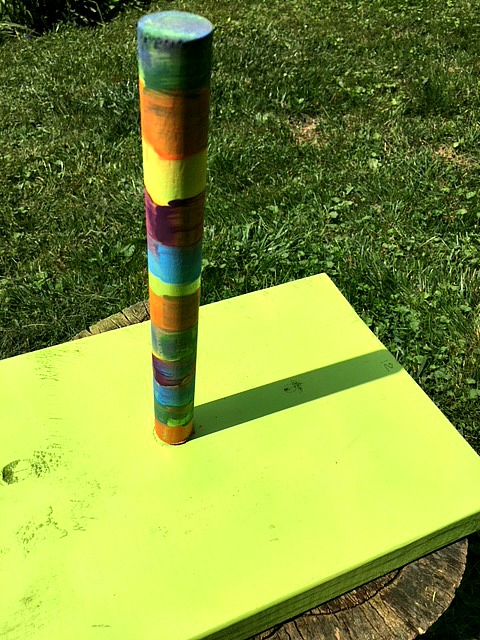
Just before noon put your sundial in a sunny place. The shadow of the dowel will be your first mark to write in the number “12”. I wanted that to be right at the top like a regular clock.
This is going to take more than one day to complete so make sure that no one moves it. Maybe add a note that says “do not touch” so it doesn’t move.
Next, set the alarm for 1’oclock and come back to write on the number where the shadow hits for 1pm. Write “1”. Set the alarm for 2pm and then 3pm and continue to repeat every hour until the sun sets.
After sundown, set the alarm for 7am so you can begin recording the morning time marks.
If you are going to leave your sundial outside and you haven’t already painted or varnished the sundial you should do that next to water proof it. A clear coat on the rocks is a good idea too. You don’t want the paint to shift off the stones. That can happen on polished stones.
After the times are all marked, you might want to secure the rocks so they don’t get carried away. You can use a hot glue gun (fast and easy) or E6000 glue (slow, stinky but stronger).
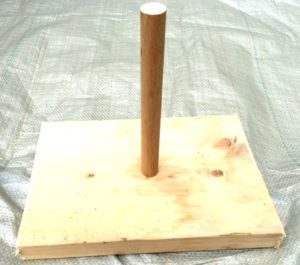
Our finished project does not look like a clock like other sundials. Maybe it was moved. If your kids are older you might want to do more research and see how the impact of the tilt of the earth’s access. It’s August now, will the shadows still line up in September? This project has the potential to be quite educational. Telling time, shadows, the earths axis, the solar system, using a compass,
This picture is linked to a nice pencil and paper sundial blog.
Children who spend time outdoors are more likely to be happier, healthier, problems solvers and more creative. Check out this blog post about a paper sundial. https://hubpages.com/education/Reconnecting-Children-With–Nature

https://otherwiseeducating.blogspot.com.au/2010/12/sundial.html

https://www.kcedventures.com/blog/how-to-make-a-sundial-for-kids
Here are some other posts of my projects you might enjoy!
Nature Craft – Perfect for Earth Day Activity – Clay Imprints with Plants and Flowers
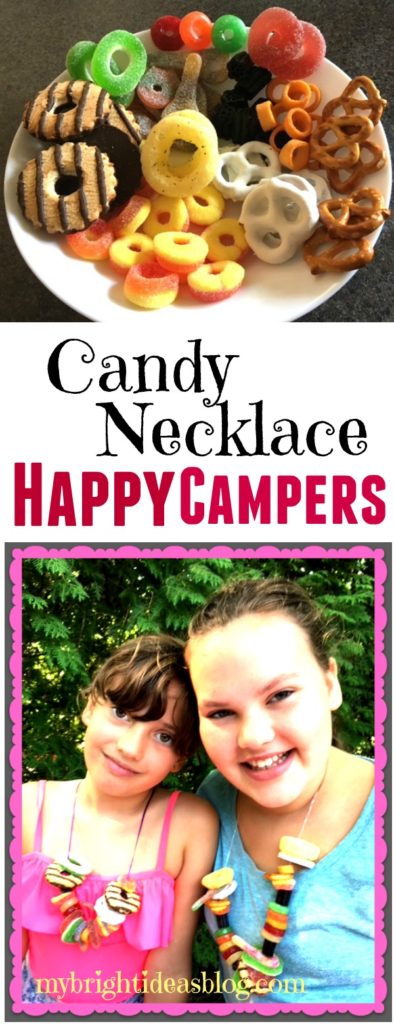
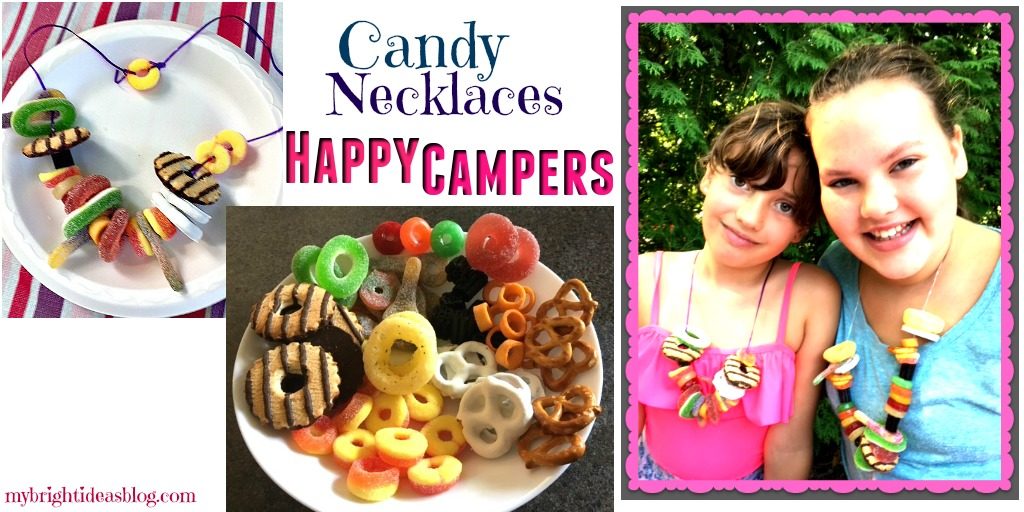
Make a Candy Necklace = Happy Campers!
Have you got some grumpy kids today? A lull in the summer getting them bored? Looking to jazz up a camping trip…Here is how to turn that frown upside down. Candy!
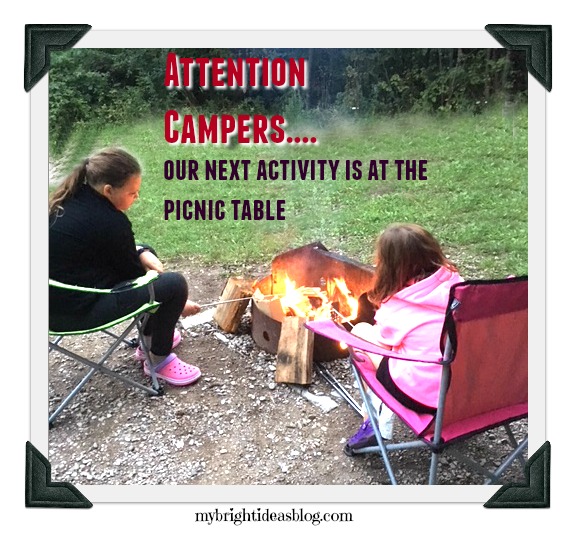
This is a true tale of 2 girls and a mom on a camping trip……. the kids were all “mom…what is taking so long…I thought you said we were going to the beach…..” whine, whine, etc, etc.
Daddy had to stay home and work so it was just me and my girls, and lets face it they are not very helpful. So after-breakfast clean up was taking a bit of time.
So when I said, “Who wants to help me with a blog post?” They immediately perked up! They knew there was a bag of candy bags from the bulk store that they were not allowed to touch.
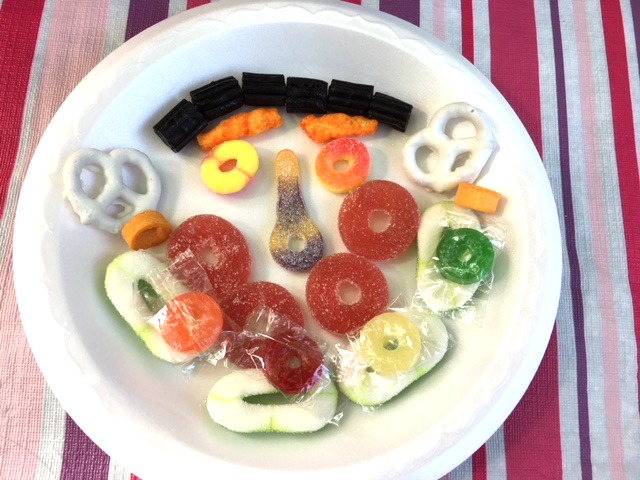
All the treats for this project have holes in the middle so there is no need for mom to poke it with a sewing needle.
Here is what you need:
- treats with a hole in the middle
- cotton string or something to put the treats on (plastic lace was easiest)
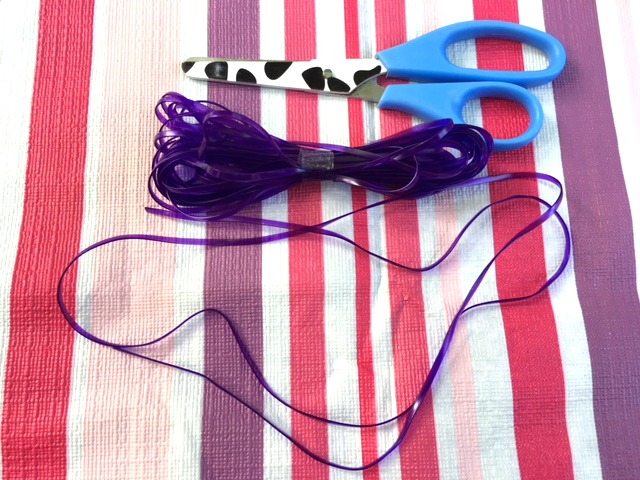
- scissors
Shopping for Treats
The first step, is to hit the bulk store and purchase any cookies, candies or cereal or candy that has a hole in it. I’ve got 2 kids so I bought 5 or 6 of each item-assuming that they will eat or break a few in the jewelry making process. I had lots of little baggies with just a few items in each.
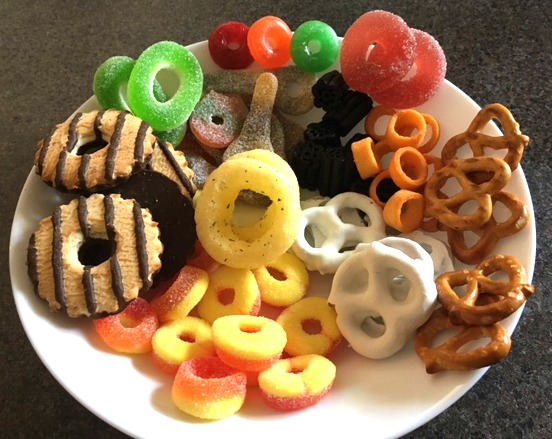
I picked all of these tidbits from our local Bulk Barn. Licorice, cookies, pretzels, sour keys, sour cream hoops, life savers, etc.
Choosing a String
Next you will need something to string your candy beads onto. You can use yarn or fine elastic or string or thread or plastic lace. We found that the easiest for the kids is the plastic lace. This is a rigid plastic that is often woven into bracelets. I picked up a variety of colours in a package from the craft section of the dollar store.
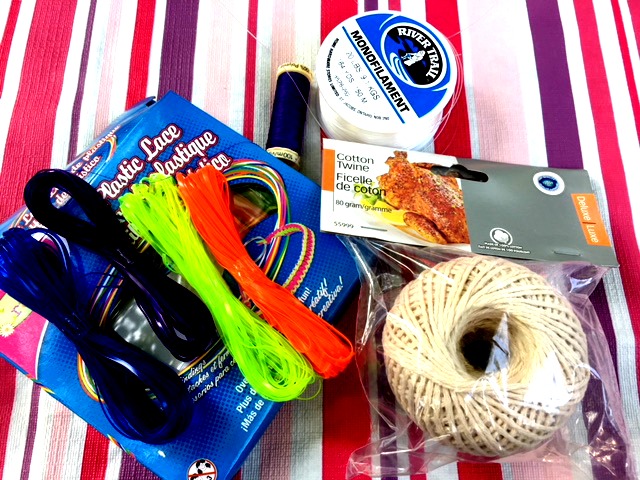
I like the idea of the cotton used in preparing turkey dinners, because you know it is intended for food handling. These will be your in the kids mouth after all. But it is a bit more frustrating for the kids to use. It unravels a bit so you need to twist it with your fingers or trim the ends a few times.
Now measure the length of string you’ll need. Make it long enough so your child can just pull it over their head when they want it off. If on second thought, you don’t want them to have access to quite so much candy-make it into a bracelet instead.
A Word Of Caution
This craft is meant for older kids rather than young toddlers. Please watch your child for choking and strangulation hazards. Be safe and have fun!
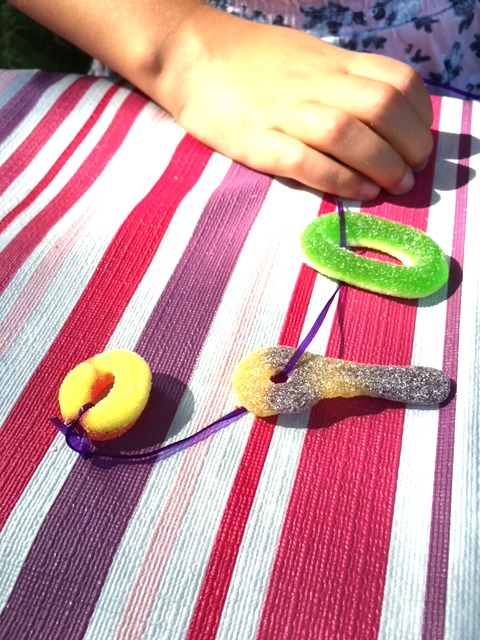
I didn’t think of this, the girls came up with the idea to tie the first candy as an anchor so the treats would not just fall off the other end as they string more treats on.
While you have them settled into this project its a fine time to give them a little speech about how thoroughly they should brush their teeth later. Or how you would like to increase their household chores…Groan….
Why not? It’s not like they are going to storm off….they have a candy craft in their hands…they have to listen!
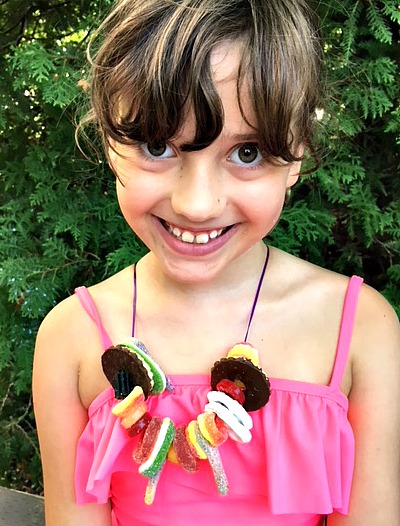
Keep on stringing on the treats and when you are happy with it, tie a knot. Now try on your delicious necklace or bracelet.

That is enough candy to last a week long camping trip. Do not eat all of it at once or your belly will hurt!
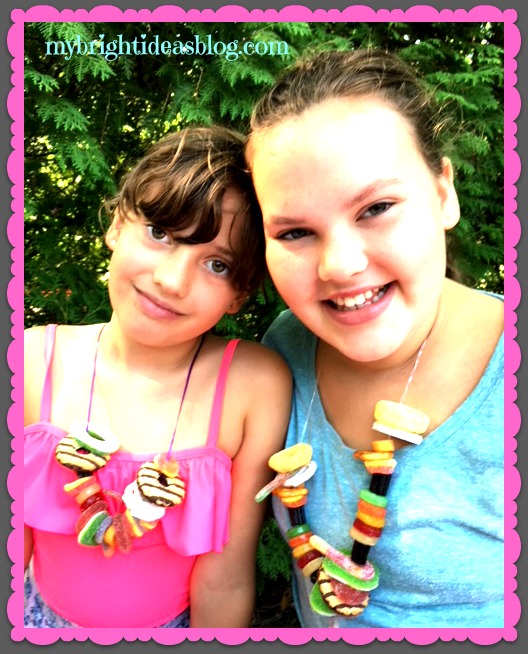
Now they are happy campers!
Besides camping trips, this is a great idea for a kids party, before a road trip or to pull out on movie night!
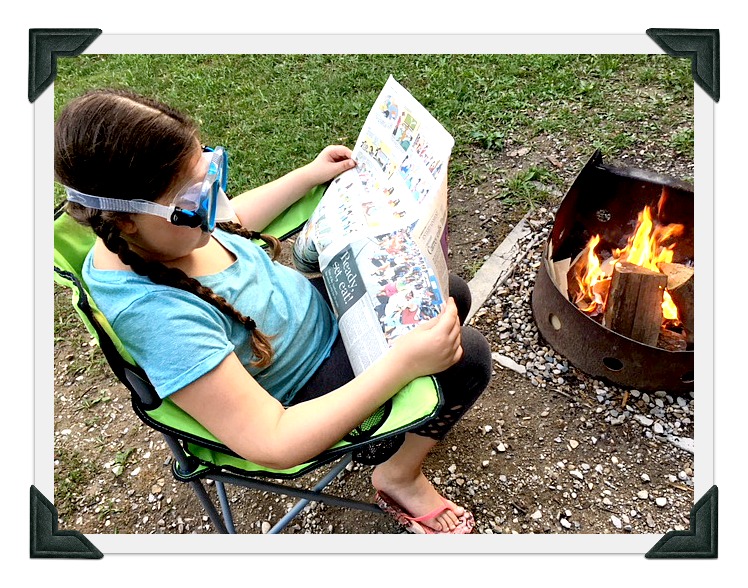 Don’t you hate it when your campfire gets smoke in your eyes? Not my girls! They grabbed their swimming goggles! Smart! Carry on reading the comics with happy eyes…
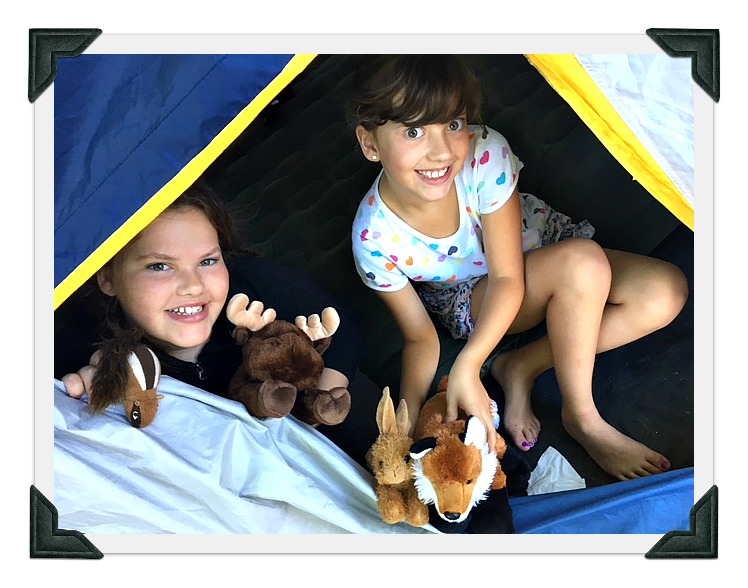 Miss B and Miss M made new acquaintances with some friends in the forest. A chipmunk, a moose a bunny and a fox. Are we the only family who needs a back pack full of stuffed animals on a camping trip?
Have a great summer and get out camping!

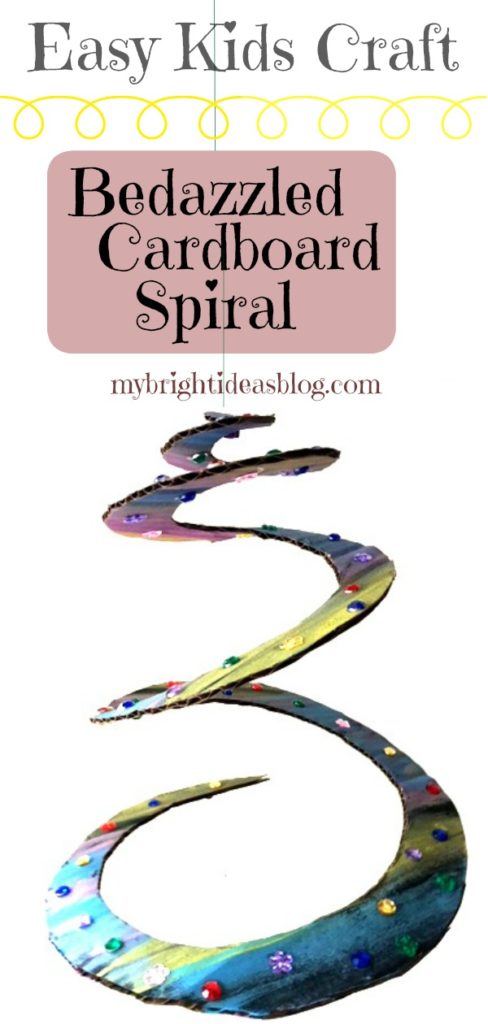
Cardboard Spiral Craft – Easy Kids Project
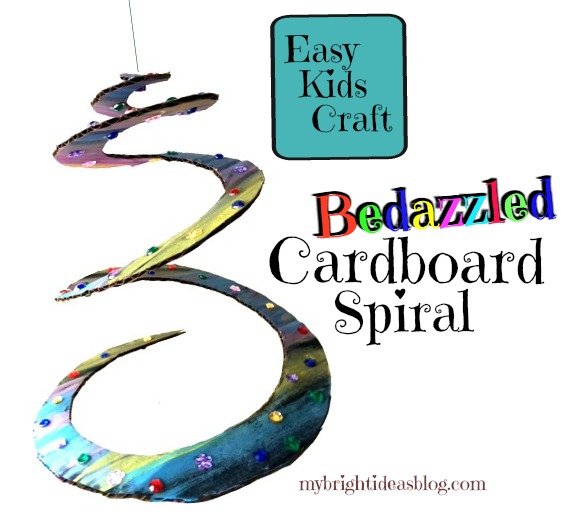
How to Make a Spinning Cardboard Spiral-Easy Craft!
This idea will be a hit with kids as young as toddlers to pre-teen. It’s likely you already have all the craft supplies in your cupboard which makes it the perfect anytime craft.
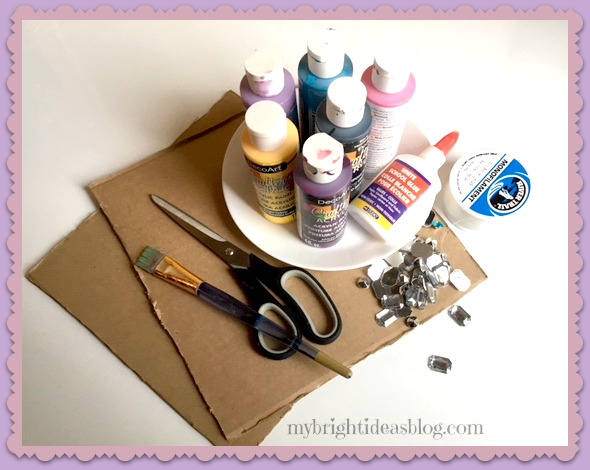 You will need:
- cardboard
- scissors
- glue
- paint
- paintbrush
- gems or stickers
- yarn or fishing line
- one pony bead or small bell
- pencil
- plate to trace the circle
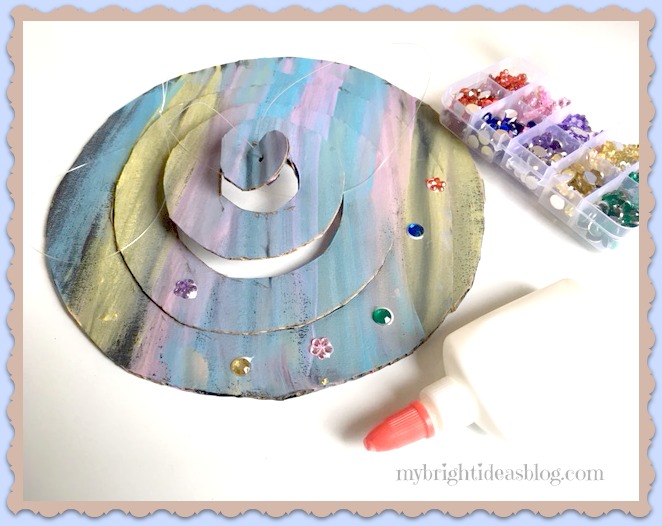
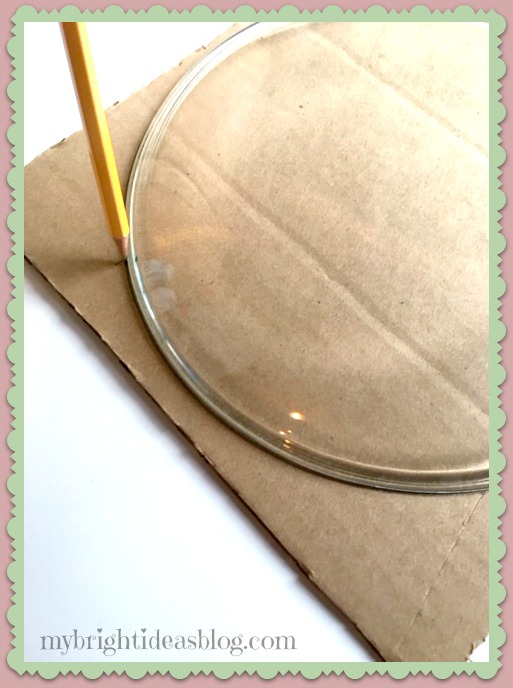 I started with a square piece of cardboard about 11 inches x 11 inches (27cm x 27cm) wide. Trace a 9 or 10 inch plate (20cm wide plate) on the cardboard for a perfect circle.
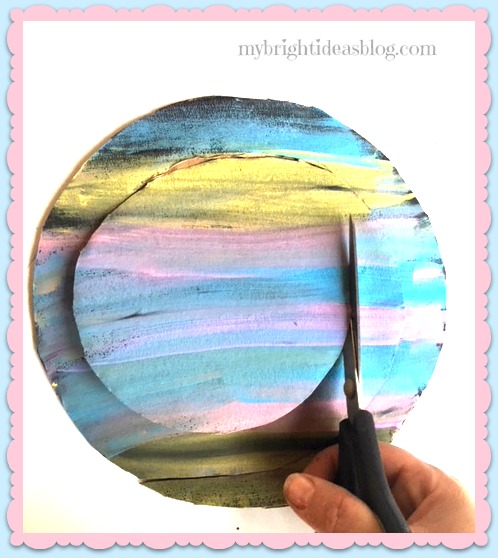
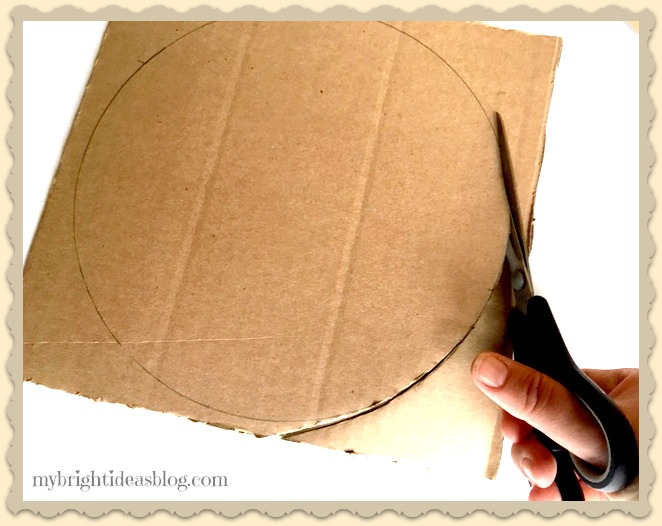 Cut the circle from the cardboard. This is not a job for the little kids. Big scissors and strong hands are needed for this part of the project.
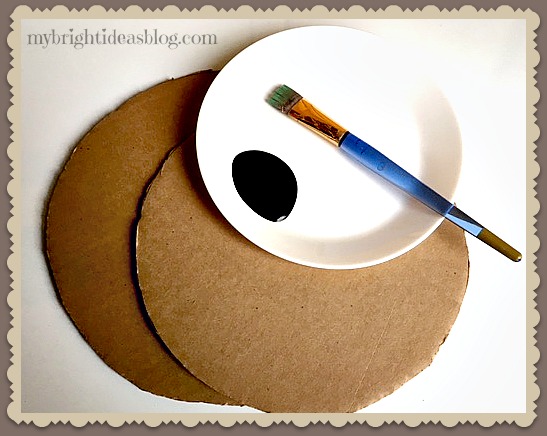 So that the brown cardboard doesn’t show through the I painted a black base coat.
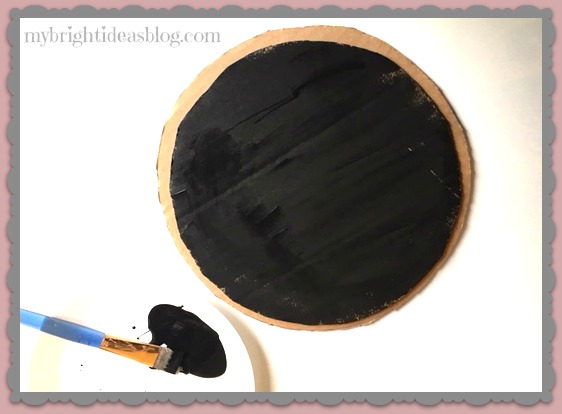
Paint both sides of cardboard and allow a few minutes for this to dry.
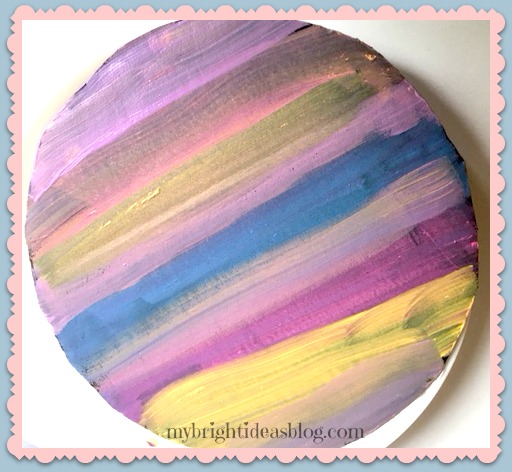
Now paint over the base coat with what ever design or colors you want. You will need to paint both sides again. Allow a good 10 minutes for this paint to dry before moving on to the next step.
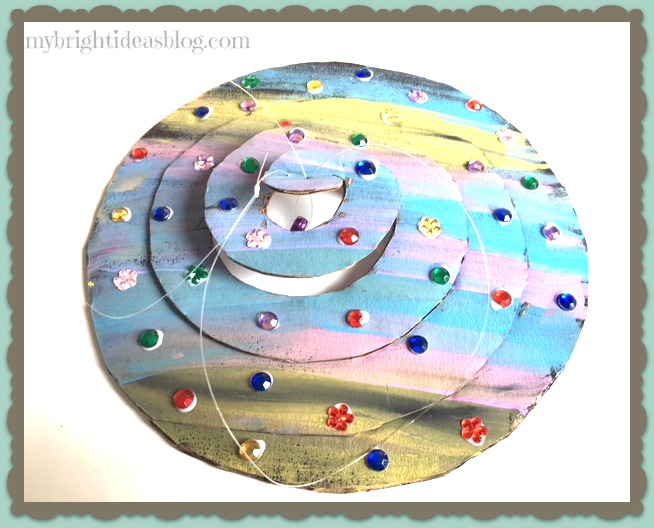
 Again, the strong hands and big scissors are needed to cut a consistent spiral in the cardboard. Begin cutting around the circle 1/2 inch (1 cm) wide.
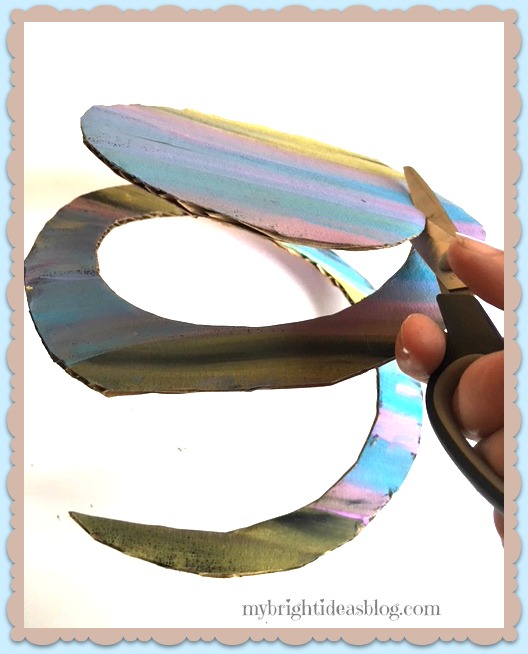
Keep on cutting in a circle until you get to the middle.
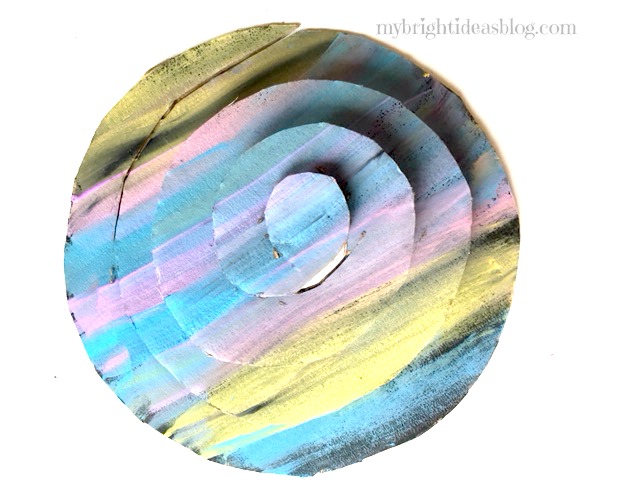 Voila! The spiral is complete.
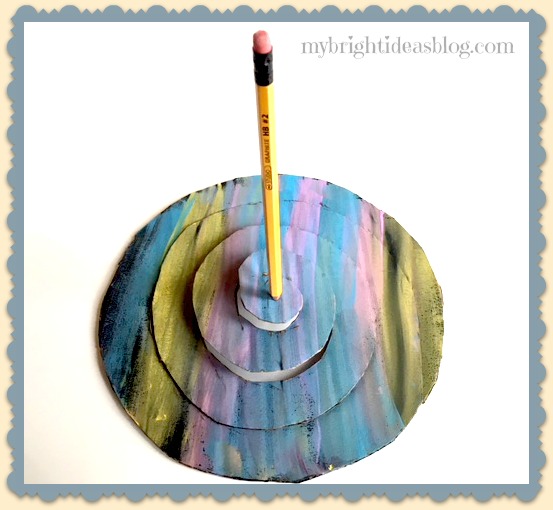 Use a pencil to poke a hole in the centre of the cardboard.
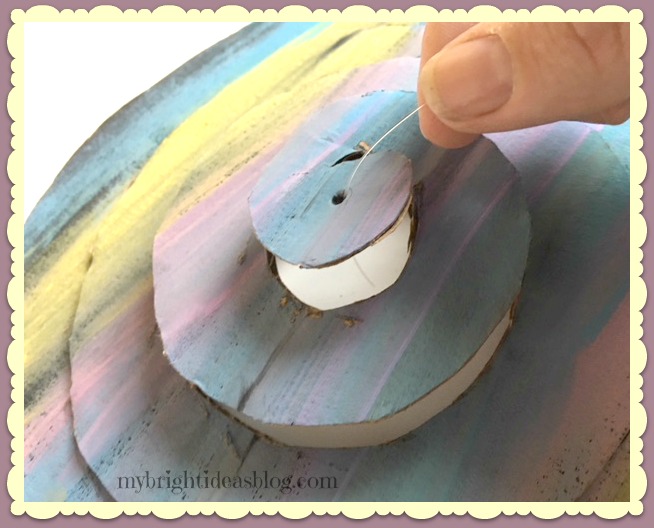
Loop some yarn or fishing line through the end. To make it spin the key is to loop a pony bead or a tiny bell under the hole and then pull the line back up through the hole.
I didn’t take a photo of this step so here it is afterward to show the pony bead. The fishing line is simply looped through the cardboard and then the bead and back out through the hole again.
This step allows for it to spin better than if you just tied a knot in the cardboard.
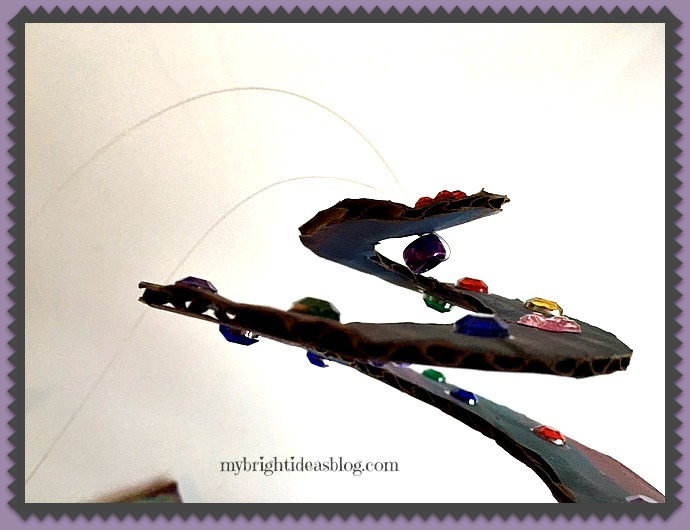
BEDAZZLE TIME!
Bedazzle: (verb) The art of taking ordinary things and making them EXTRAORDINARY by adding sparkles, rhinestones, glitter, stars, beads, etc.
This is the fun part!
Gather your gems, rhinestones and glue to decorate the spiral. The little box of gems in the photo above is from Dollar Tree for $1.25 – it looks small but there is enough to last a lot more projects! I love a cheap craft!
For toddlers you could use shiny stickers instead. Glitter glue would also jazz this up and hide some of the unintentional globs of glue that may end up drying on the project.
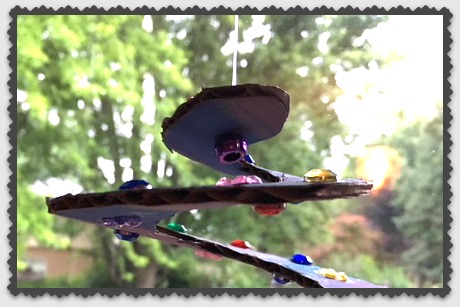
After the first side is dry, flip it over and repeat on the bottom side. This spiral is going to look great no matter what angle you are looking at it.
Allow it to fully dry.
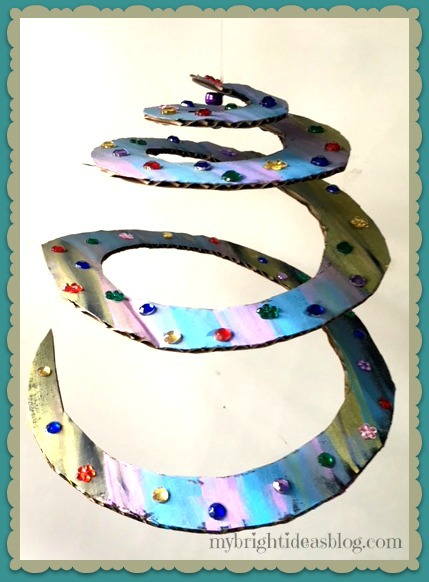
And you are done! Hang the spiral by taping the end of the string or line to the ceiling so it can spin. I used an S hook to hang it from a curtain rod.
Remember to Pin this on Pinterest!
Toilet Paper Roll Crafts-Use your loo roll tube for easy Crafts!
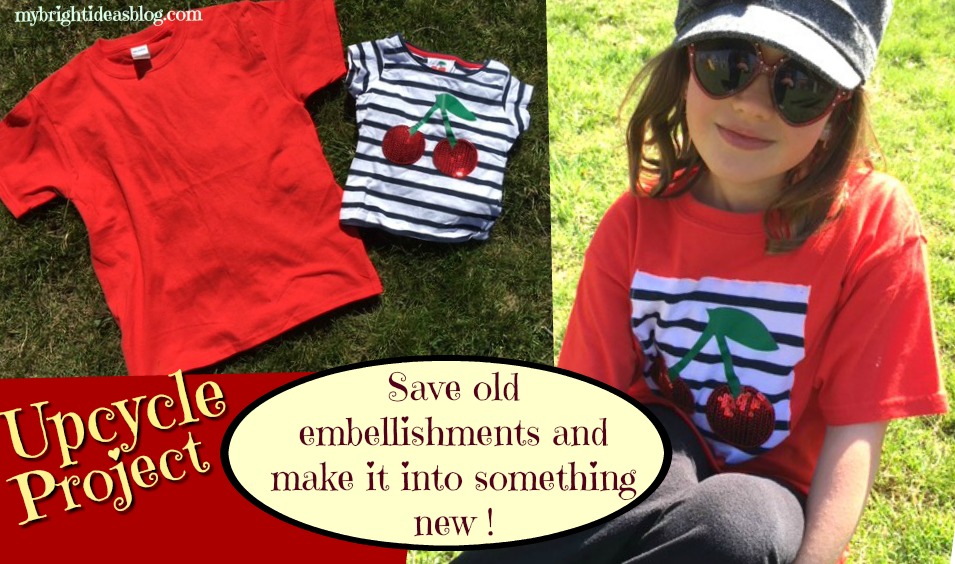
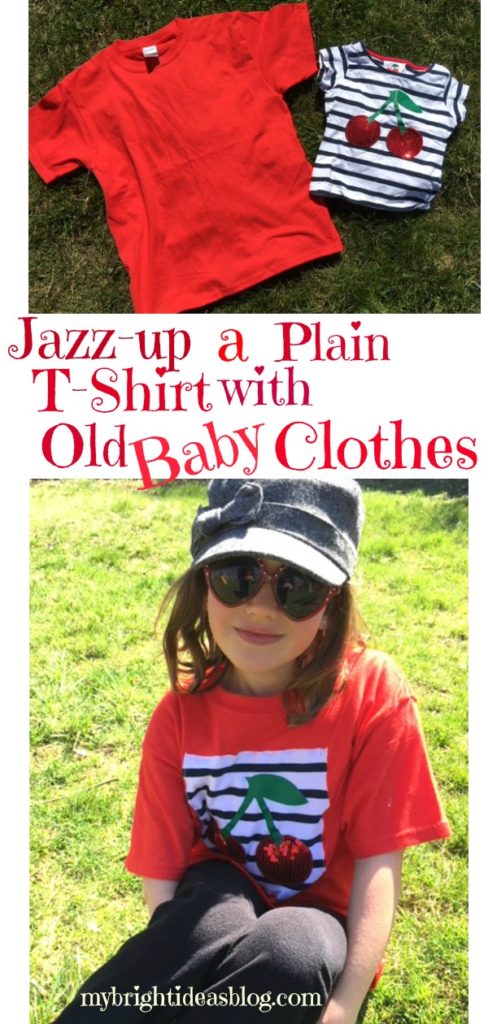
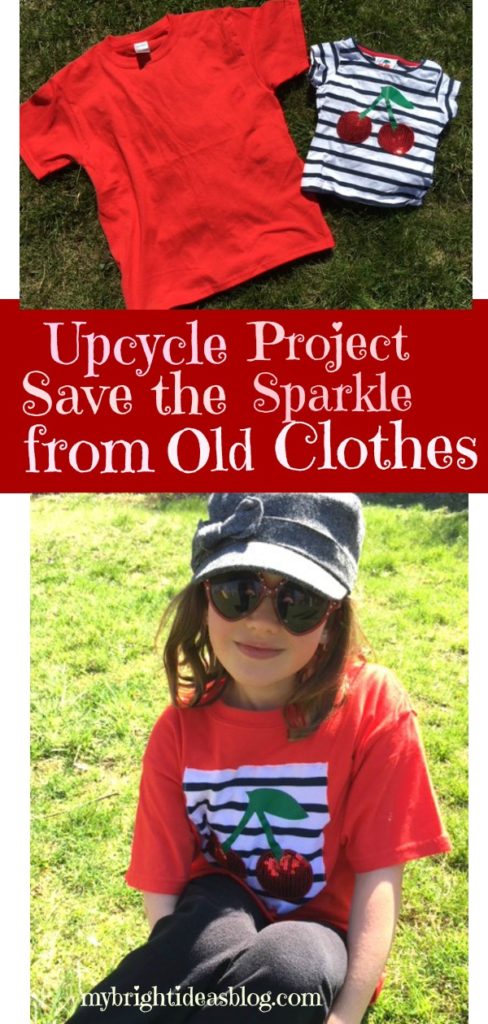
T-Shirt Refashion – Add details from baby clothes to jazz up plain clothes!
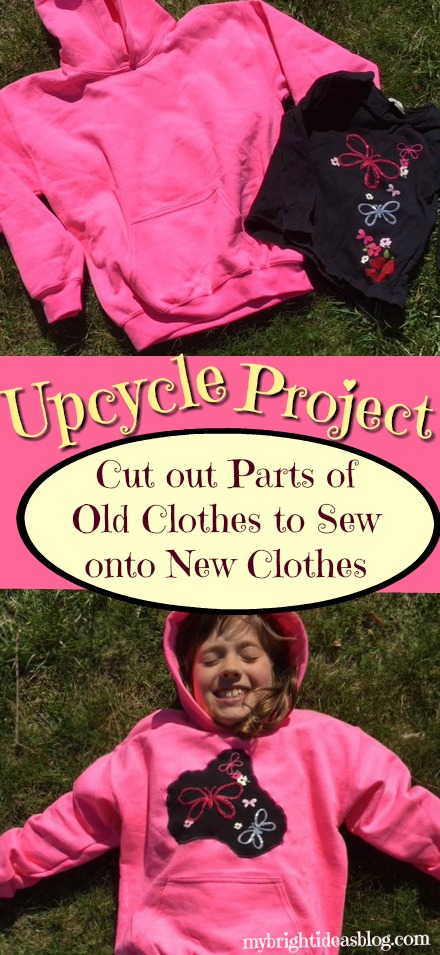
Upcycle your favourite baby clothes by sewing them on as appliques onto new clothes!
My girls had some super cute baby and toddler clothes. Not too eager to move away from the preschooler stage – I had a really hard time passing on certain items. I just loved them so much! Some of my favourite tops had sequins and buttons and adorable little features. Here are two examples of this that I saved for a few years so that someday I could re-invent and re-use it. At long last….today was the day!
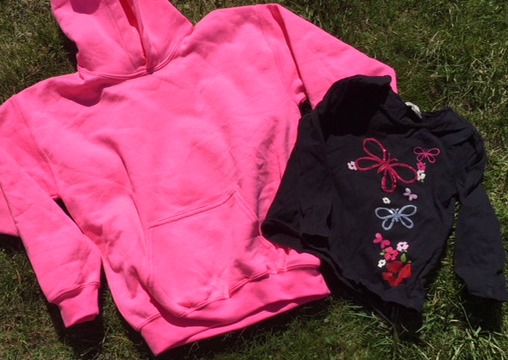 Yesterday I found this plain pink hoodie for $8.50. Good quality but very plain. Meanwhile, this tiny top from the toddler years, was in my stash of things I could imagine getting a second chance.
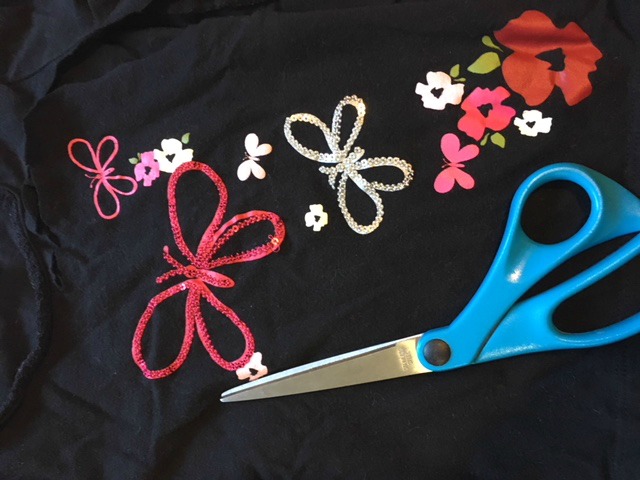
Cut out the part of the t-shirt that you want to save. I knew this would end up an odd shape because of the printed flowers at the bottom so I didn’t include all of it. Trim it into the shape that you like and lay it on the shirt to see how it looks.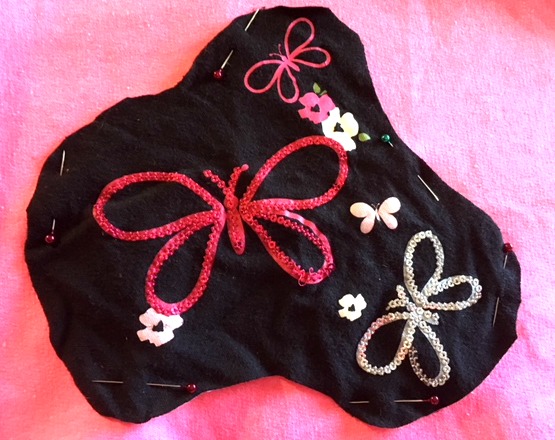 Next we attach it! I pinned the black butterfly part of the t-shirt like an applique and got ready to sew it to the pink hoodie. Notice the direction of the pins is actually the wrong way. I should have them facing the other direction because I want to sew clockwise around this. Pinning correctly helps your project go smoothly and saves you getting jabbed by a pin. Ouchie!
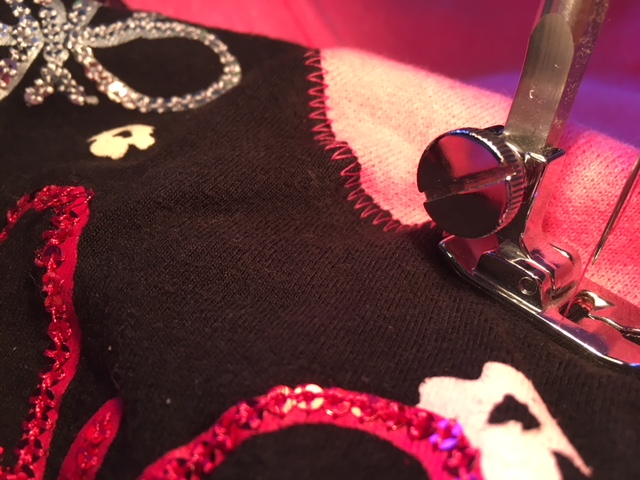 Be very careful to only sew one layer of the shirt. Knowing that this is possible I still managed to do it twice!
Zig zag stitch around the applique going in a clockwise direction. Use a matching or complimentary thread color. On this project I chose pink thread to match the hoodie. It was a beautiful spring day but it was chilly. Perfect for a hoodie! My model loves it and even got a puppy kiss!
I love to recycle, repurpose and reinvent new things. This sort of project I could do over and over. It’s so easy! Don’t think that this is just for kids. If a garment has a great picture or embellishment on it-why not salvage it by sewing it onto something else.
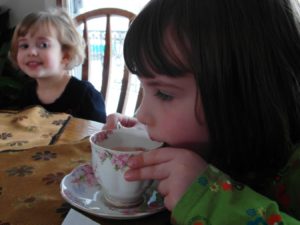 I searched high and low to find a good picture of one of the girls wearing the shirts used in this post but there always seemed to be something blocking the embellishment. Here they are at Grandma and Grampa’s having a tea party and using the good china. M is wearing the little black top but you can’t see it. When I look at the photos of them it makes me so nostalgic for their younger days. It’s probably why I save their shirts…happy memories of years gone by.
Thanks for taking the time to read to the end. I hope you enjoy your day!
…
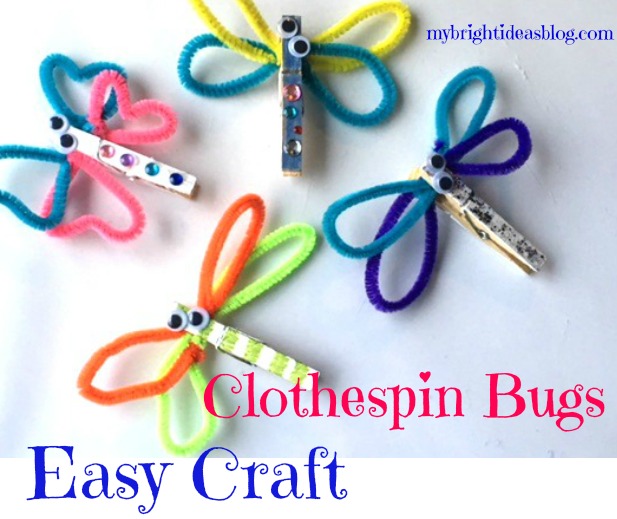
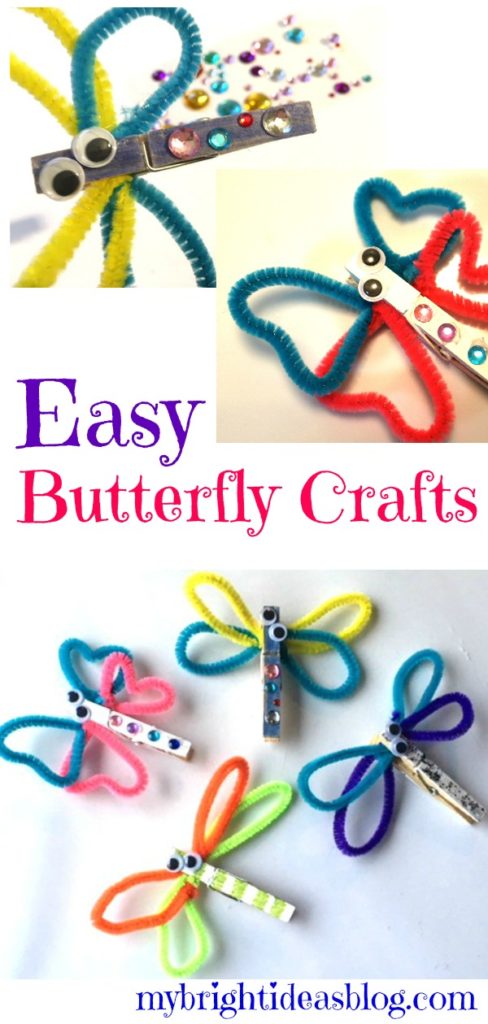
Make a Clothespin Butterfly and Dragonfly
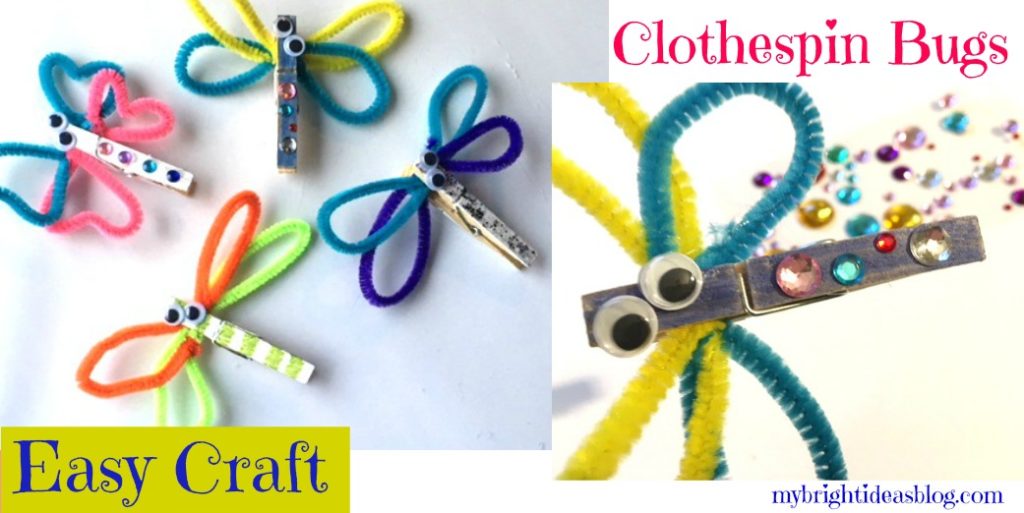
Butterfly and Dragonfly Clothespin Craft
I’m longing to dazzle you with a blog post that has homemade jewelry or reinvent something with scrap wood or a wonderful garment made from a curtain and an old pair of jeans…sigh. But alas, between work and volunteering at the kids school there is no time for more than making a pipe cleaner butterfly and dragonfly. Oh well, its good to take a few minutes out of this busy, busy week for some crafting.
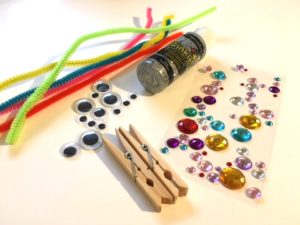
For this super cute project you will need:
- 2 pipe cleaners
- a clothes pin
- 2 small googly eyes
- paint, sparkly glue, gems to decorate it
- hot glue gun or white craft glue
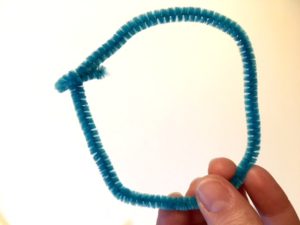
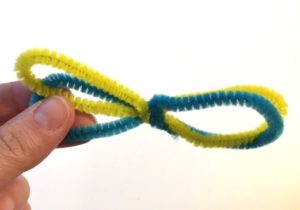
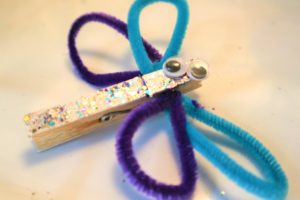
To get started take a pipe cleaner and shape it into a circle. Bend and twist the ends to close the circle. Repeat this step with a second pipe cleaner.
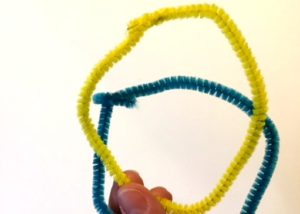
Pinch the circles in the middle and twist the pipe cleaners. Twist again to form the middle of the butterflies wings. As you can see I arranged the pipe cleaners so the yellow made the upper wings and the blue made the bottom wings.
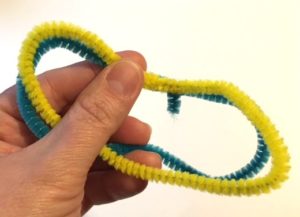
This middle of the wings will be pinched by the clothes pin when opened. You can do that now or wait until after you finish gluing everything on.
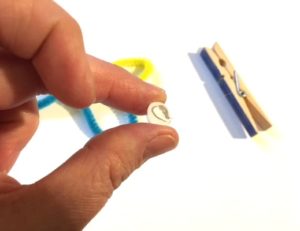

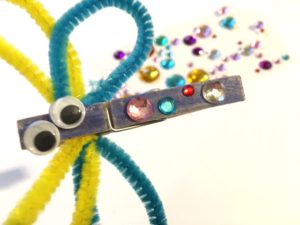
Add a dab of hot glue to the small googly eyes and secure them on the clothes peg. I added some gems from a sheet of stickers. This is a pretty easy project even for youngsters. They should use regular white glue and not hot glue guns.
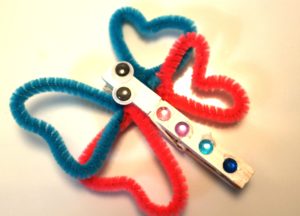
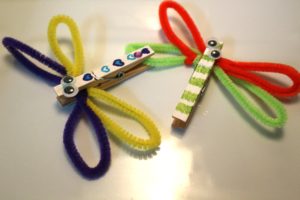
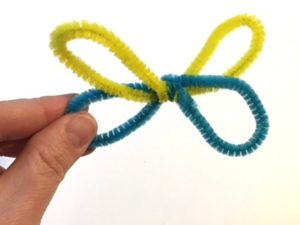
One option to change the wings, is pinch it in so its heart shaped. This way it’s a bit more butterfly-like. Narrow wings look more like dragonflies. Add what you like to decorate the critters. We could easily turn this into a fridge magnet by gluing on a magnet to the back.
Have fun with this easy project and have a super day!
…
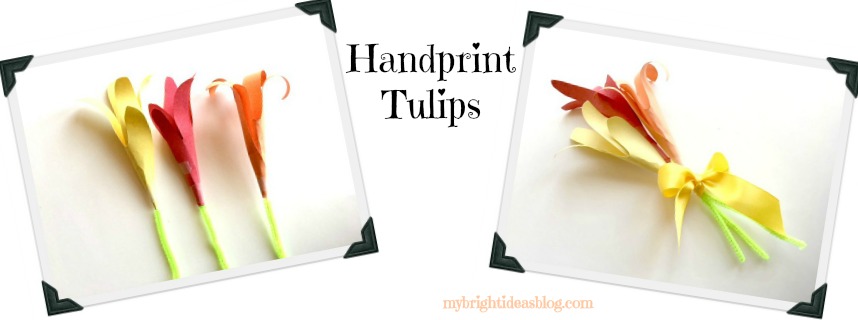
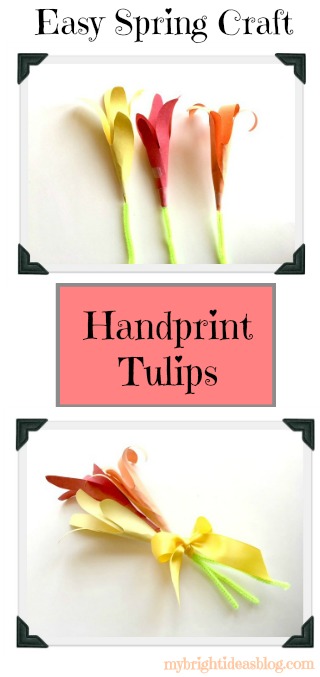
How to Make a Paper Tulip Flower with Your Hand-Easy Spring Craft!
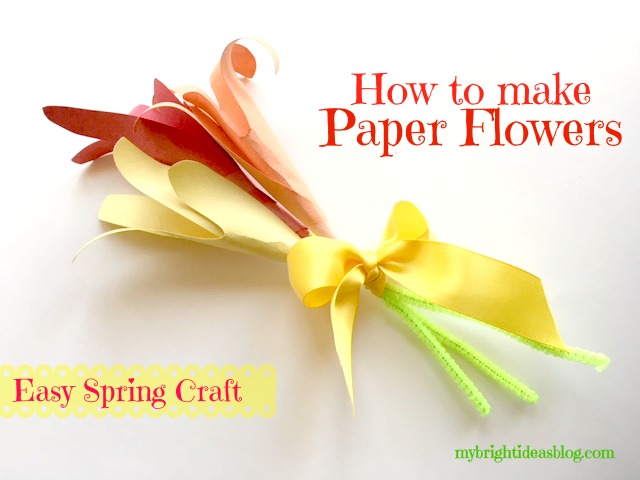
Here is an easy spring craft! TULIP FLOWER made with your child’s hand print, paper, pipe cleaners. It’s so simple!
In a few days our school has a Spring Party where we like to have several stations for the youngsters to work on. Each year we need a craft table with a an easy project. To make it easy for the children to do and take with the project home immediately we avoid things that have white craft glue or paint. I’m happy to say I have found an idea that will be Spring themed, with just a few supplies and no drying time. Whoohoo!
This is what you will need:
- Colored paper (red, yellow, pink, orange, purple)
- Green and yellow (or orange) pipe cleaners
- Pencil, tape, scissors
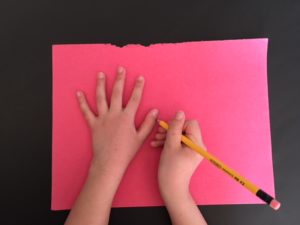
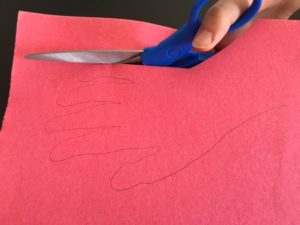
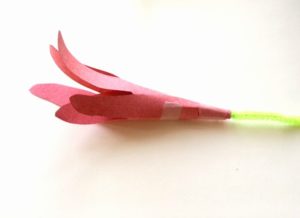
Trace the child’s hand on colored construction paper. Cut the hand shape out.

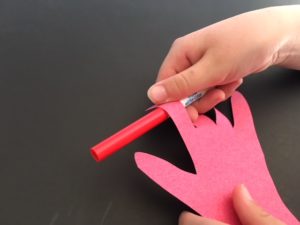
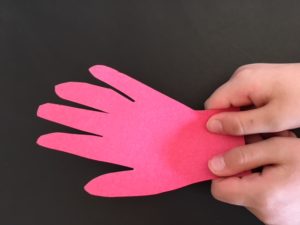
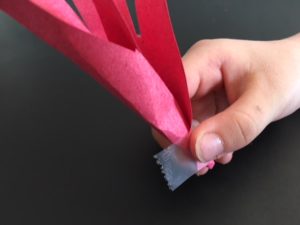
Use a round pencil to form a curl each finger outwards. Wrap the bottom of the hand around itself so you have a tiny hole at the bottom. Add a piece of clear tape to hold it in place.
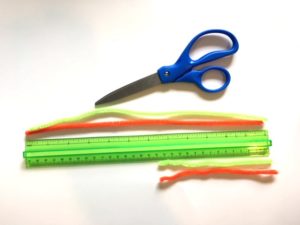

Pipe cleaners usually come 12 inches long (30 cms), so cut the pipe cleaners in half.
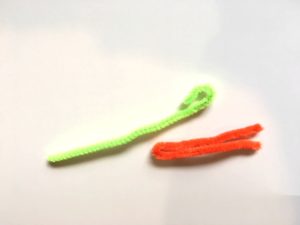
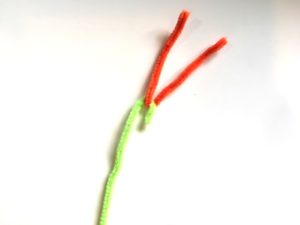
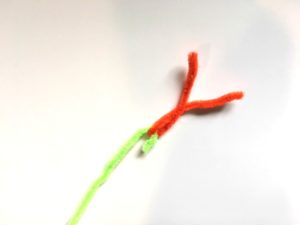
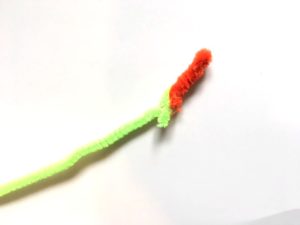
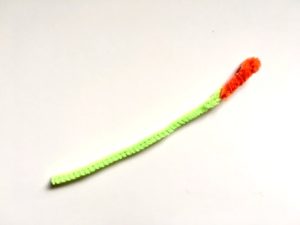
Bend the end of the 6 inch (15 cms) green pipe cleaner so you have a hook shape. Bend your orange or yellow 6 inch pipe cleaner in half to make a V shape. Twist the orange pieces together, then bend in half and twist again. Then twist 4 or 5 more times so the orange piece is tight. Next we need to twist the green hook end to secure it.
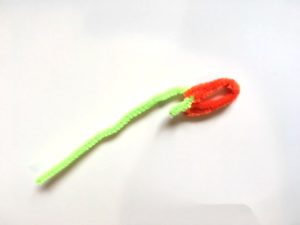
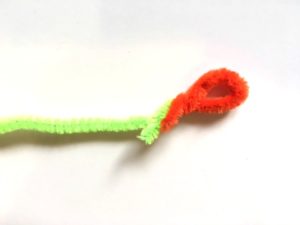
Slide the pipe cleaner stem in through the gap at the bottom of the flower so the green part is below the flower and the orange part is sticking up through the centre of the flower.
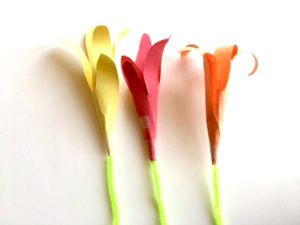
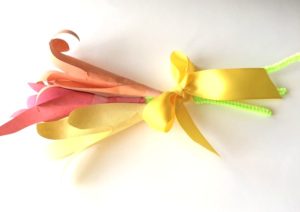
Add a ribbon if you make a few for a bouquet of flowers. That is all there is to it.
…
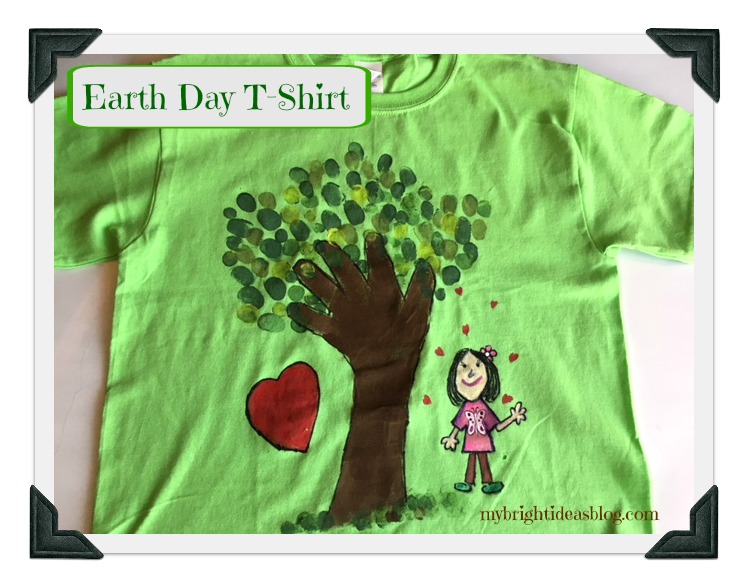
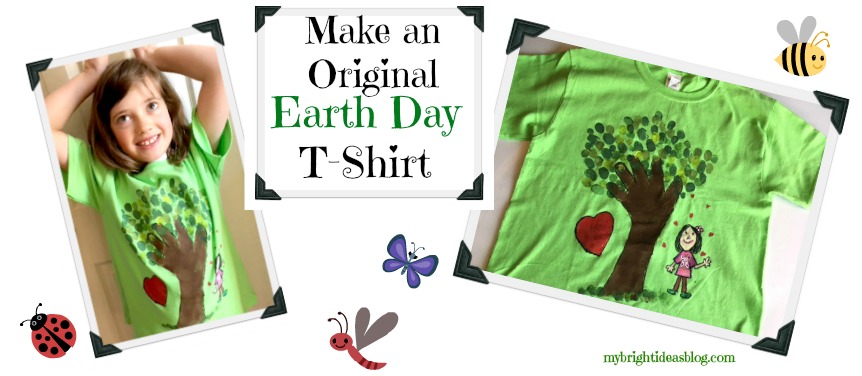
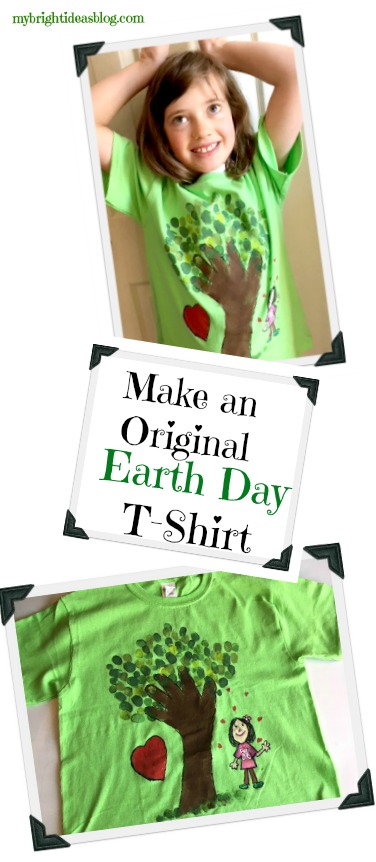
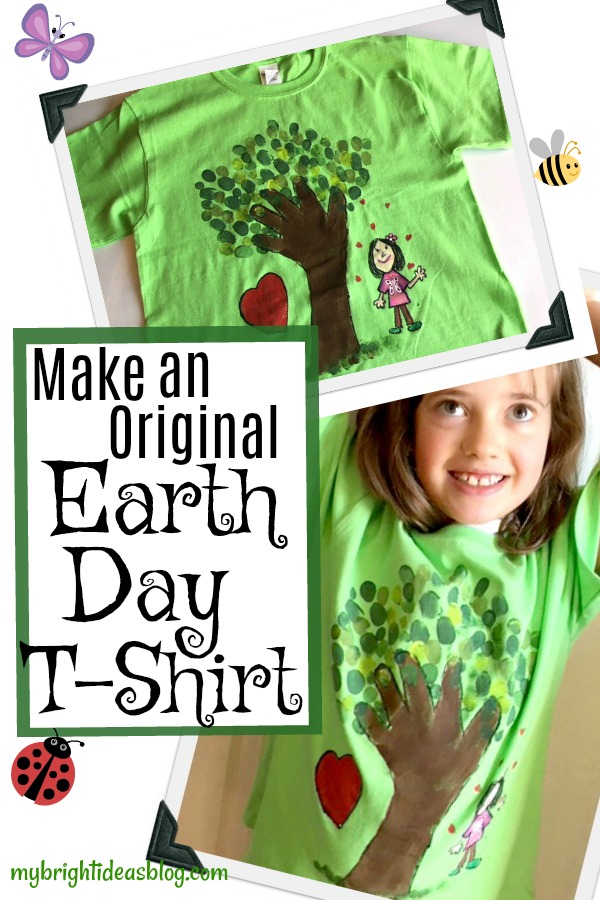
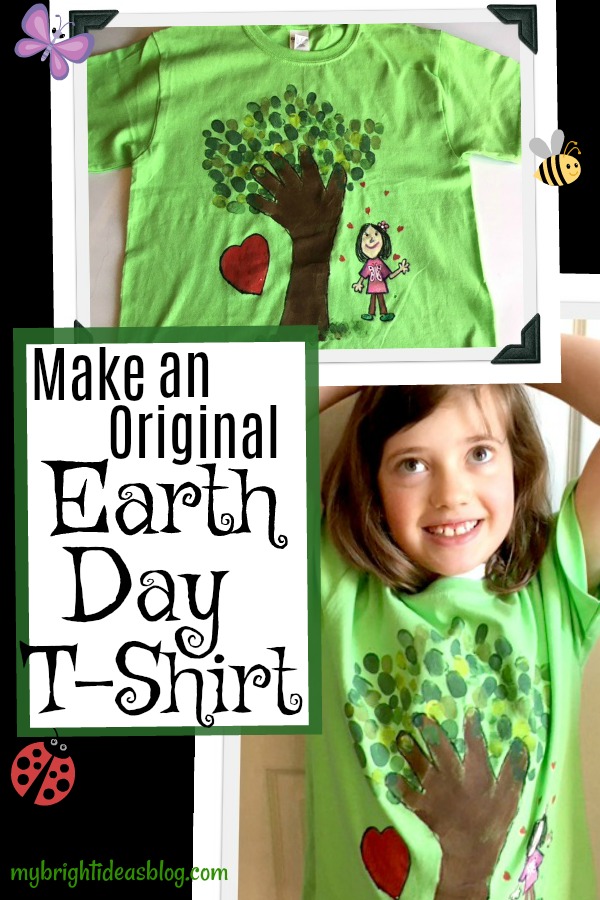
Make an Earth Day T-Shirt – Green Tree Hugger Easy Project

Another Earth Day T-Shirt Post!
For a while I have been eyeing making this Tree T-Shirt idea-you simply trace your child’s hand and a bit of their arm to make a tree and branches. Thumbprint in a few shades of green paint for the leaves. You could leave it there or keep going by drawing a picture or writing a “green” Earth Day message next to it.
For this one you just need:
- a sharpie (red and black)
- craft paint -browns and greens (optional more if you paint more on the shirt)
- paint brush
- your kids arm, hand and thumb!
I know this is easy enough to follow with just the photos but I’m not a woman of few words. :o)
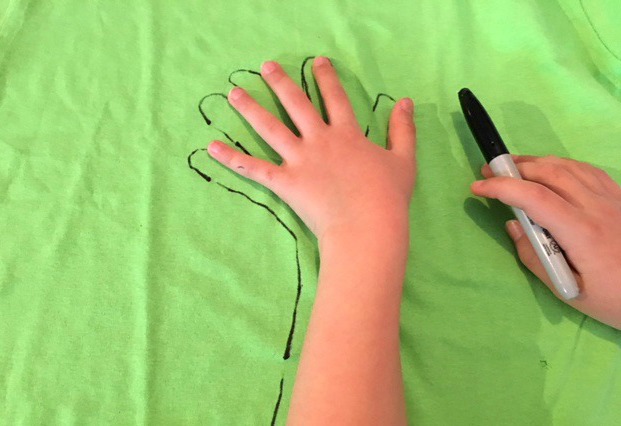
Trace your child’s hand.
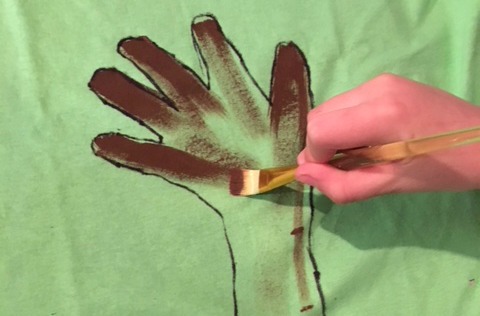
This is the tree trunk and branches so paint it brown.
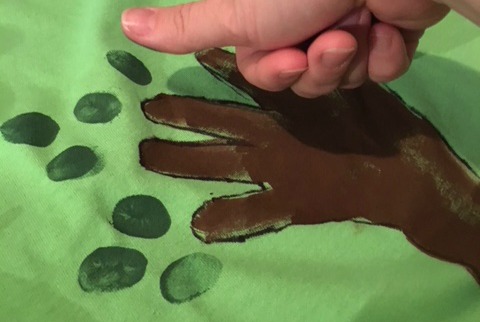
Use your thumb and dip it in green paint to make leaves.
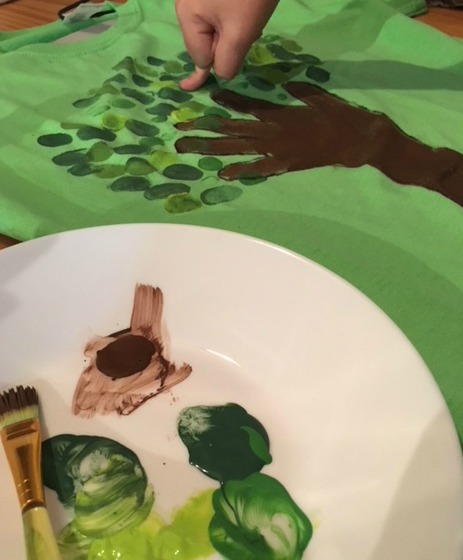
Next put a few shades of craft paint on a plate and dip your child’s thumb into it to make thumbprint leaves. I must admit I did a lot of this part as this darling kiddo didn’t want to get too messy. Of course, I didn’t mind, finger painting is good fun!
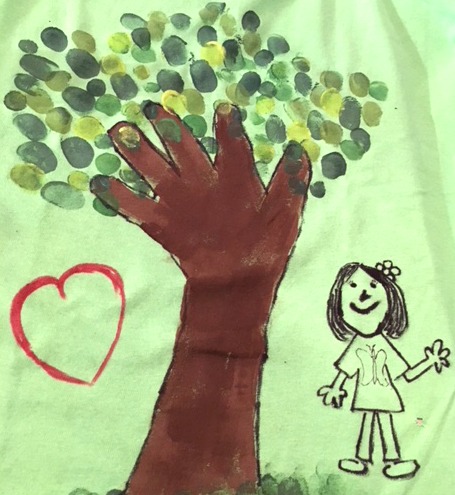
Add a few thumb prints at the base of the tree for grass. Miss M decided not to have words on this T-shirt but a self portrait and love hearts. We drew it on with a sharpie and then found the craft paints were best to color in the clothes and hair and heart etc.
 She was very pleased with the results and wore it to school the next day. The entire week was full of earth day activities so she was really into it. We love nature, we love the earth, we love hugging trees.
This shirt is big enough to wear again another year.
Below are some more nature crafts or earth day ideas! Have a look!
Did you see the earlier earth day shirt we made? It’s the planet earth made with blue and green sharpies-and it says “I care”. Check it out!
Nature Craft – Perfect for Earth Day Activity – Clay Imprints with Plants and Flowers
Easy Vermicomposting! How to start an indoor Worm Compost Bin!
…
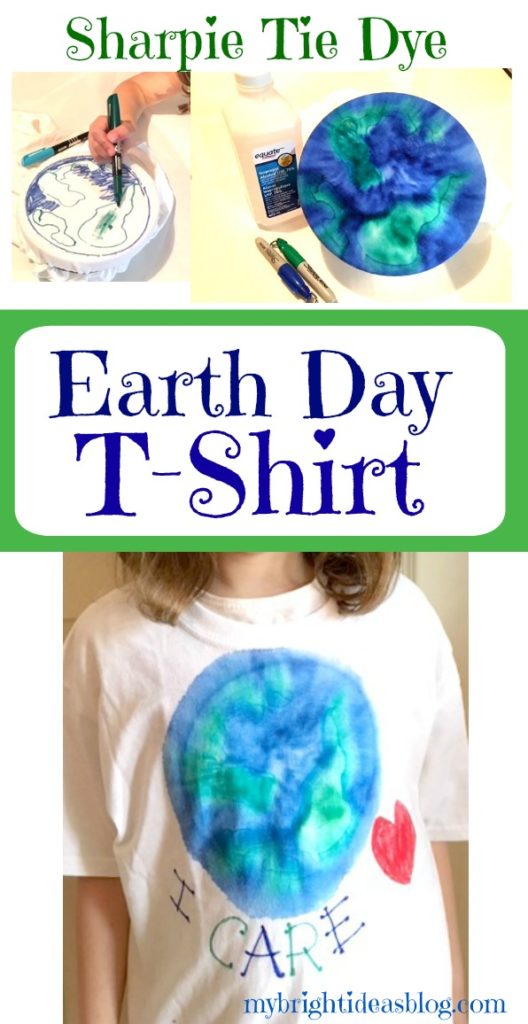
Make an Easy Earth Day T-Shirt

Earth Day is nearly here and a certain little lady in my house is really into it this year. She is throwing interesting facts about what happens to a recycled bottle and other tidbits into breakfast conversation. I love it!
So we whipped up a T-shirt project in just 10 minutes and let it dry overnight and she is wearing it today. Bam! It’s that fast!
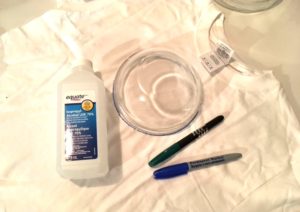
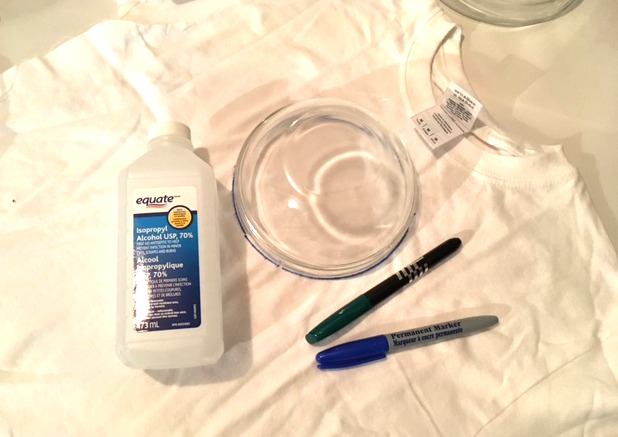
You will need:
- T-shirt
- Rubbing Alcohol
- 2 Bowls
- Elastic Bands
- Sharpies or Permanent Markers (Green, Blue and Red)
- An old Medicine Dropper that you don’t need back after the project

First of all, we should have ironed the t-shirt but it was already after bedtime so its crumpled.
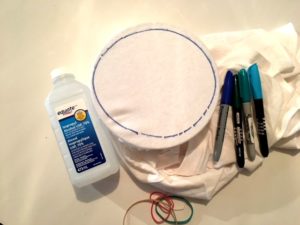
 Trace a circle with a medium sized bowl or plate. Be careful, you are using a permanent marker.

Next we used a slightly bigger mixing bowl and put an elastic around the t-shirt to help lay it flat and keep the project from bleeding out of control.
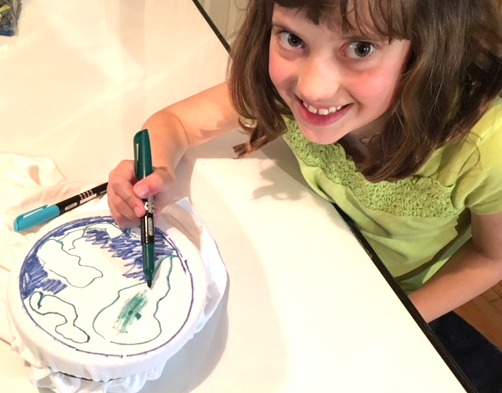
This is where the kids can really have a part! We have the earth-loving-tree-huggin child draw the earth within the circle with blue and green permanent markers. Color in the area as best you can, so there isn’t much white.
Do you recall this project where we watched the sharpie’s cool effect when we add rubbing alcohol? Have a look if you missed it.
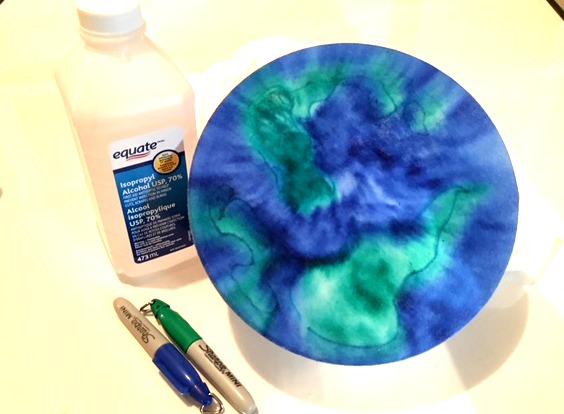
This next step involves rubbing alcohol so this should be done by grown ups in a well ventilated area.
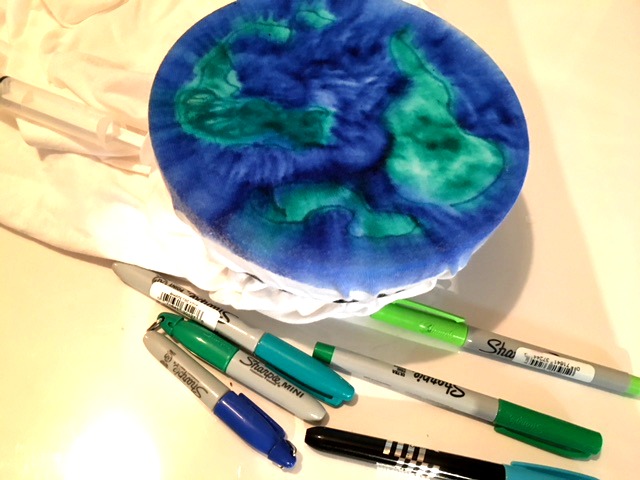
Using a dropper to control how much rubbing alcohol comes out-slowly add the alcohol and watch it blend the colors.
Watch the colors blend for a super cool effect.
Remove the bowl and hang on a hanger for 20 mins while it dries. Better yet put it outside so you don’t smell the alcohol.
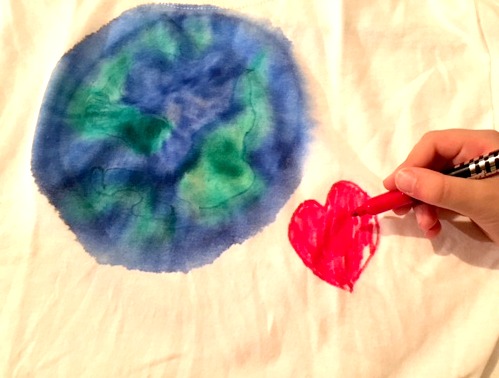
Lay it flat with a piece of cardboard in the middle so they color doesn’t bleed thru to the back.
Add a love heart with red permanent marker.
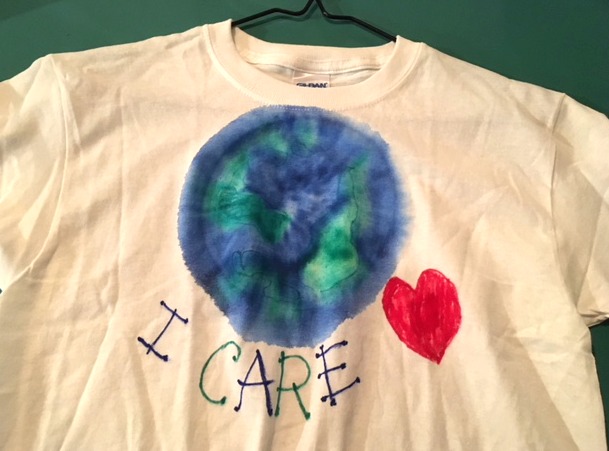
Add your message. We decided to write. “I care”.
It doesn’t take long for the rubbing alcohol to evaporate to be nearly dry.
Here are a few more recent projects for Earth Day you might enjoy!
Nature Craft – Perfect for Earth Day Activity – Clay Imprints with Plants and Flowers
http://mybrightideasblog.com/easy-vermicomposting-how-to-start-an-indoor-worm-compost-bin/
…

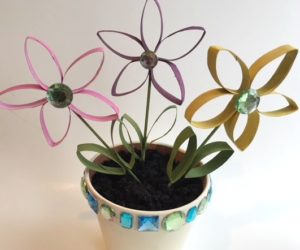
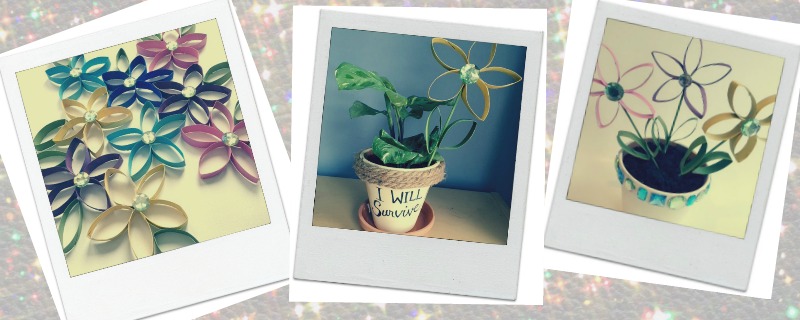
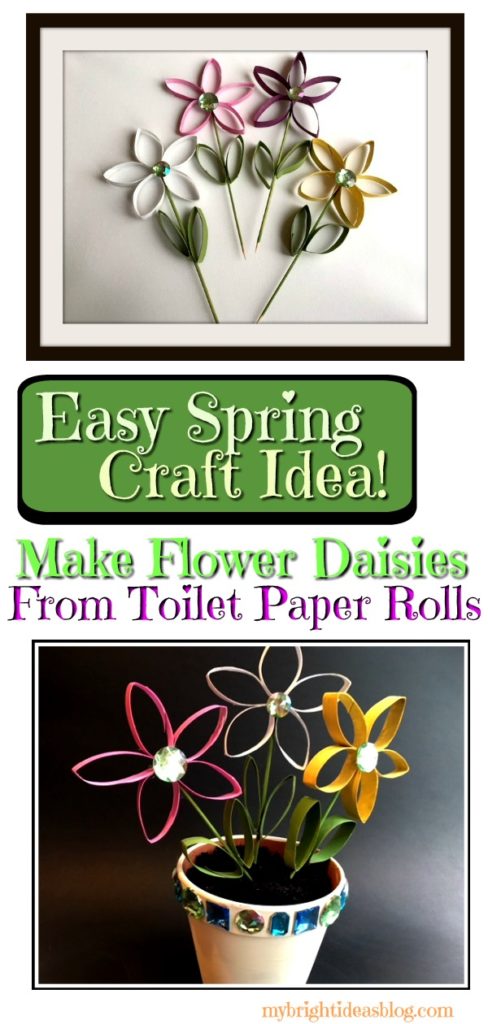
How to Make Spring Flowers Craft From Painted Toilet Paper Rolls
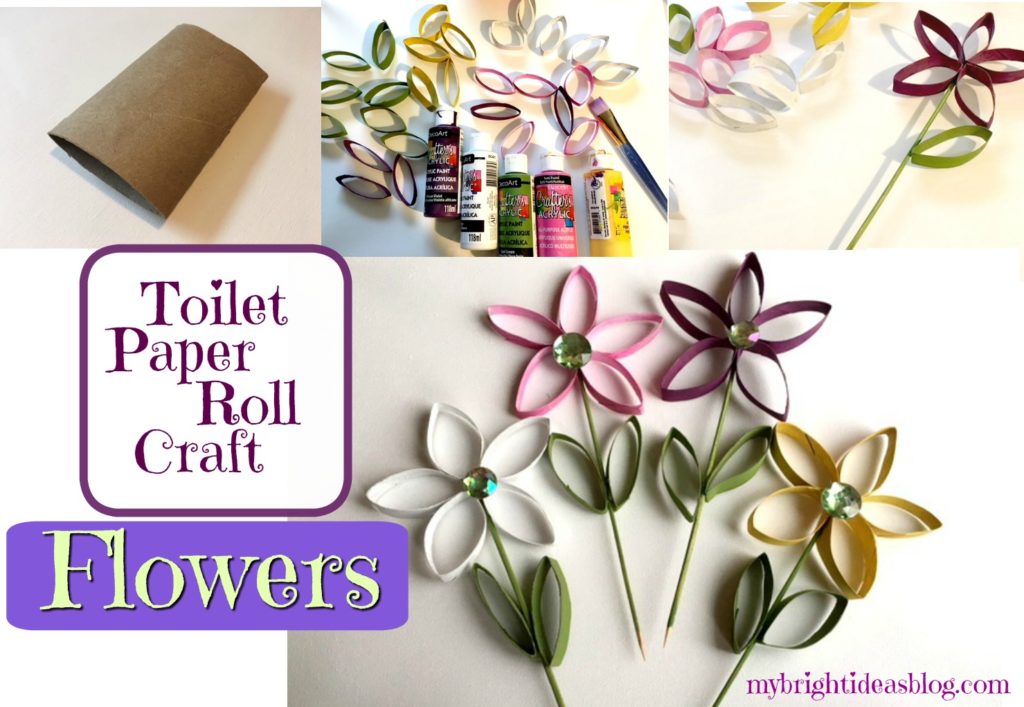
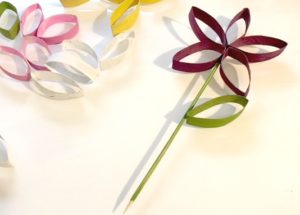
Looking for something to do with all those toilet paper rolls that your hoarding? Or am I the only one who doesn’t toss them directly into the recycle bin? Well all it takes is one toilet paper roll to make 5 flower petals and 2 leaves.
What a nice idea as we welcome Spring…ignore the fact that I’m posting this in mid April and we are shut in from an ice storm. Not to worry, Springtime will be back tomorrow.
For each flower you will need: 1 toilet paper roll, ruler, scissors, glue gun, craft paint and paint brush. For the stem I used a wooden skewer but for safety sake you could use a popsicle stick. For the flower centre I used a big shiny gem but you could use a pom pom or button.
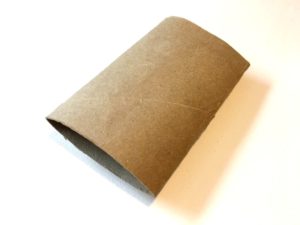
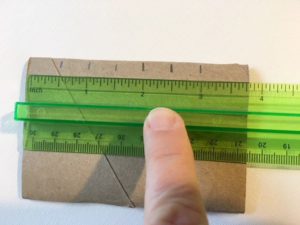
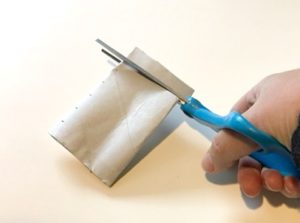
To begin you need to flatten your cardboard roll. Next measure and mark approximately 1 cm or 1/2 inch. It doesn’t have to be exact but we want to end up with it cut into 7 equal pieces.
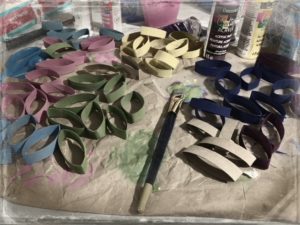
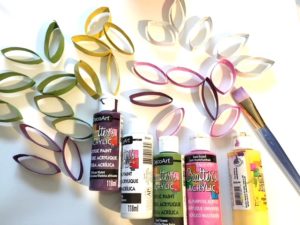
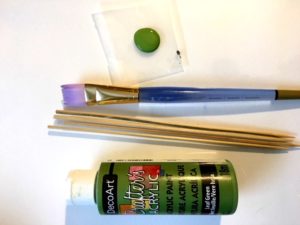
Take 5 pieces of the cardboard tube and paint them all the same color. This will be the flower petals. Paint the remaining 2 pieces green for leaves. I was surprised at how messy you can get trying to paint this. Paint the inside first then the outside. Then paint the stem skewers or popsicle sticks green. As I mentioned I did use skewers but my 8 year old was poking her big sister with it reminding me how dangerous this would be in a toddlers hands. So as a safer option I would choose a popsicle stick. They come in a few sizes-if you can get the long skinny type like they have at Starbucks that’s what I would choose but any kind would work. Now allow everything to dry thoroughly.
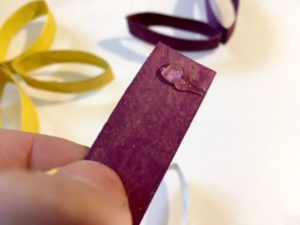
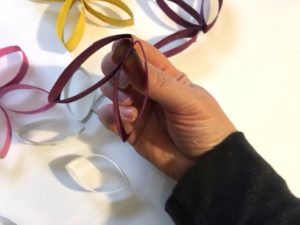
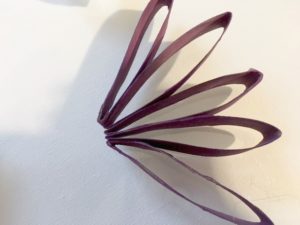
After the petals have had a chance to dry we begin to glue the first two together. Put a dab of glue on the end of one and pinch it with another while it dries. Add a dab of glue to the next one and pinch them together. Add on each one the same way until all 5 petals are glued together.
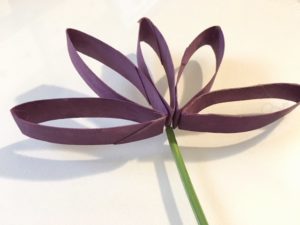
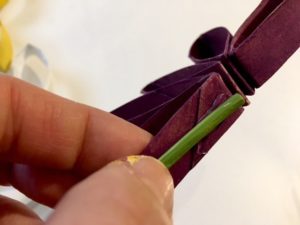
Place the stem in the middle of the petals and add a dab of glue to it. Pinch the daisy petal to the stem. Add a dab of glue on the other side of the stem and pinch the other petal to stem. This will complete the daisy shape. Put a dab of glue on the stem and place on the leaves-one at a time.
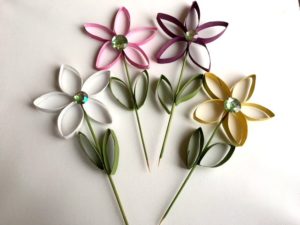
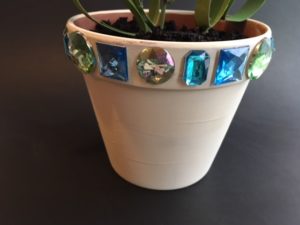
To finish it off glue the gem (or button or pom pom). Now you can pop it into a plant and give it away as a gift. I had extra gems and a flower pot handy so I hot glued the gems all around the flower pot too. It was so easy that I am in the process of making a bit of wall art out of the daisies.
Here is another post using toilet paper rolls.
Toilet Paper Roll Crafts-Use your loo roll tube for easy Crafts!
…

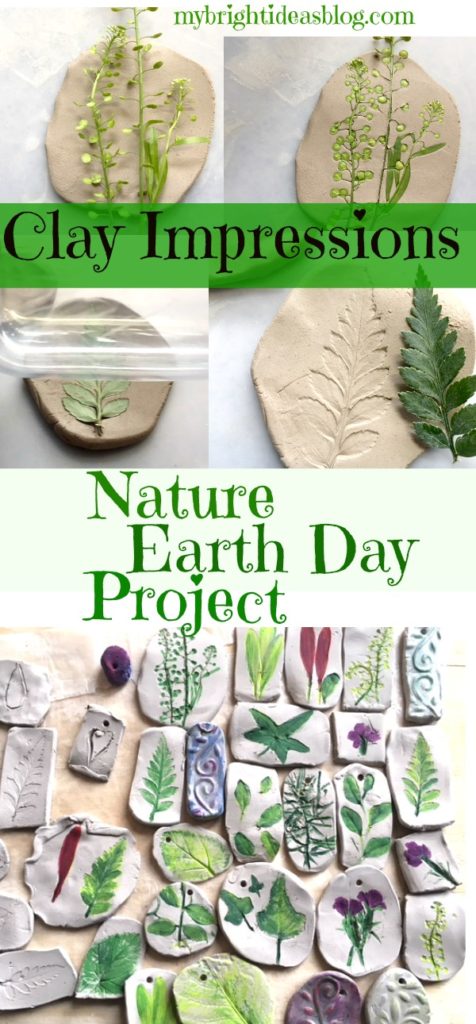
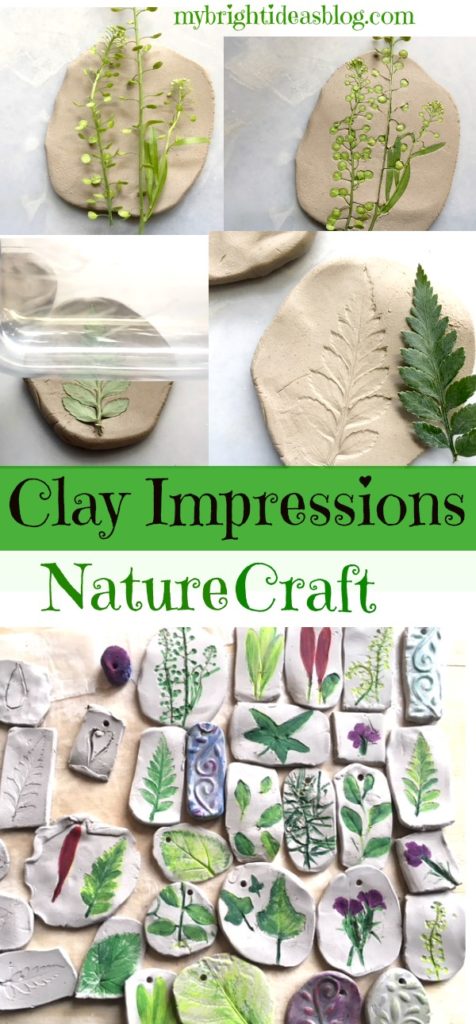
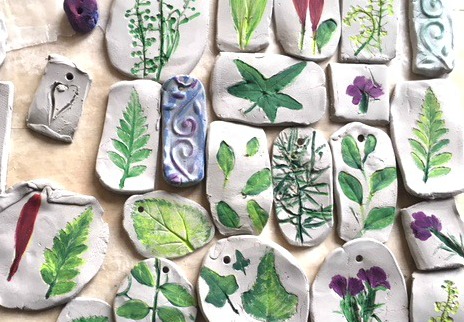
Nature Craft – Perfect for Earth Day Activity – Clay Imprints with Plants and Flowers
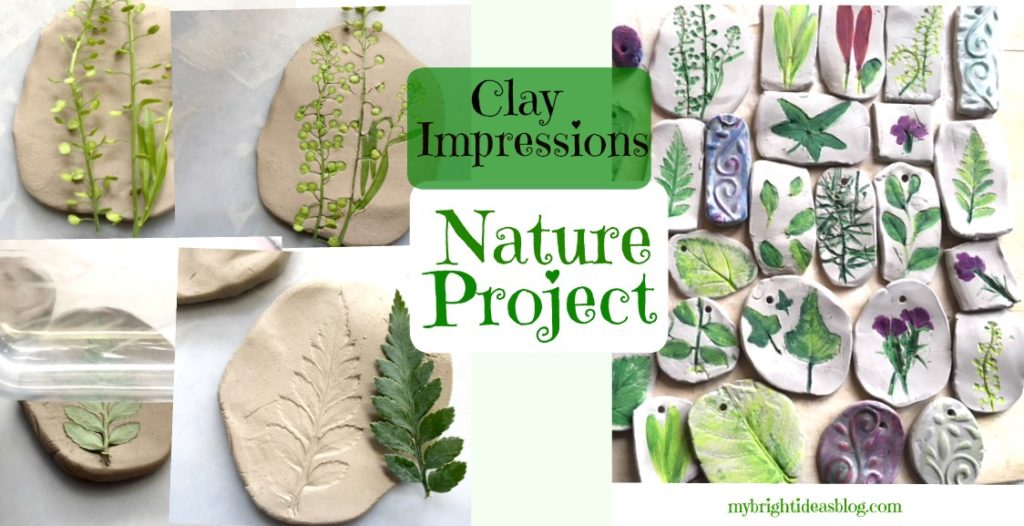
I wanted to blog about a natural craft for earth day and discovered clay impressions of plants and leaves and flowers. What a great idea! The only problem is that its just the very beginning of spring and the garden is ugly. Except for a few crocuses there is nothing nice around my home. I popped into the florist shop (Regency Florists) nearby and asked if they had any flower scraps like a bit of fern that we could use for this craft project. The lovely young lady made a little bouquet of scraps for free! How lovely is that! We are going to take her one of these lovely creations as a thank you gift.

Supplies
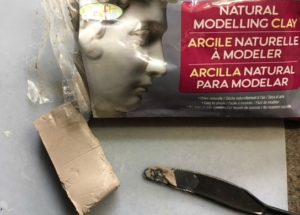
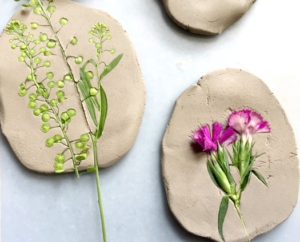
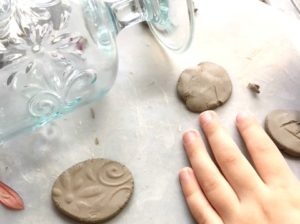
So you will need CLAY and a very smooth surface to work on. If you have a clear bit of plastic table cloth or a very smooth kitchen cutting board-either will work. You also need some flowers or plants, a rolling pin or water bottle that has smooth sides. Later when the clay is dry you may want to use some craft paint to add the green or flower color. Also if you want to turn it into a mobile or wind chimes you might need a chopstick or skewer to poke a hole in it.
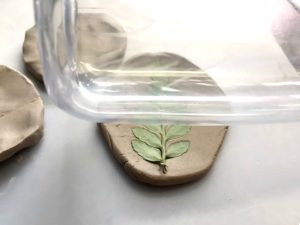
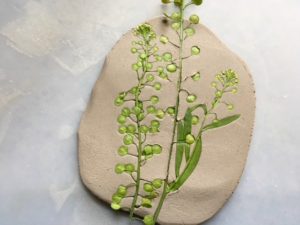
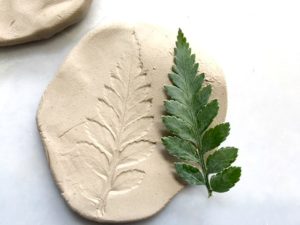
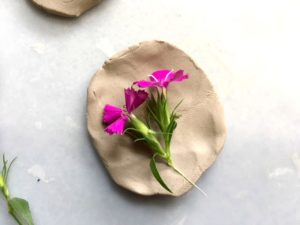
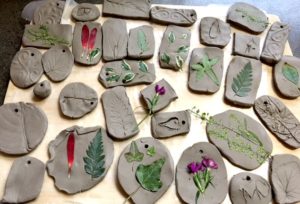
Our clay is from the dollar store craft aisle. We just slice off chunks and made different shapes with it. Then we rolled it flat. Next we place a bit of plant or flower onto the clay and rolled over it gently with a smooth water bottle. Pull the plant off the clay and admire the details now imprinted in the clay. If you want to add a hole-this is the time to grab your kebab skewer or chopstick.
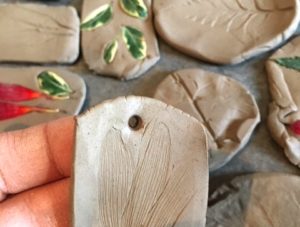
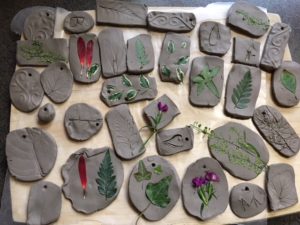
Allow the clay to dry overnight. It should feel completely dry before you paint it. I just used regular craft paint.
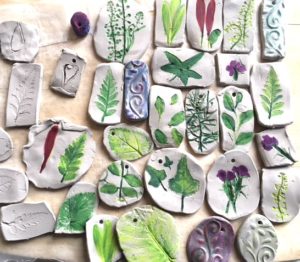
This would be a lovely gift from a child to a teacher or grandparent. Its a great craft for all ages though. I highly recommend for adults to give it a try. Its very therapeutic! This project has a lot of possibilities so let your imagine go wild. Find things around the house with interesting textures to imprint the clay.
Have fun!
…